stop start BMW M ROADSTER COUPE 2001 Owners Manual
[x] Cancel search | Manufacturer: BMW, Model Year: 2001, Model line: M ROADSTER COUPE, Model: BMW M ROADSTER COUPE 2001Pages: 171, PDF Size: 1.98 MB
Page 20 of 171
20n
Indicator and warning lamps
Technology that monitors itself
Many of the systems of your BMW
monitor themselves automatically, both
during engine starts and while you are
driving. Indicator and warning lamps
that are identified by "
l
" are tested for
proper functioning whenever the igni-
tion key is turned. They each light up
once for different periods of time.
If a fault should occur in one of these
systems, the corresponding lamp does
not go out after the engine is started or
it lights up while the vehicle is moving.
You will see how to react to this below.
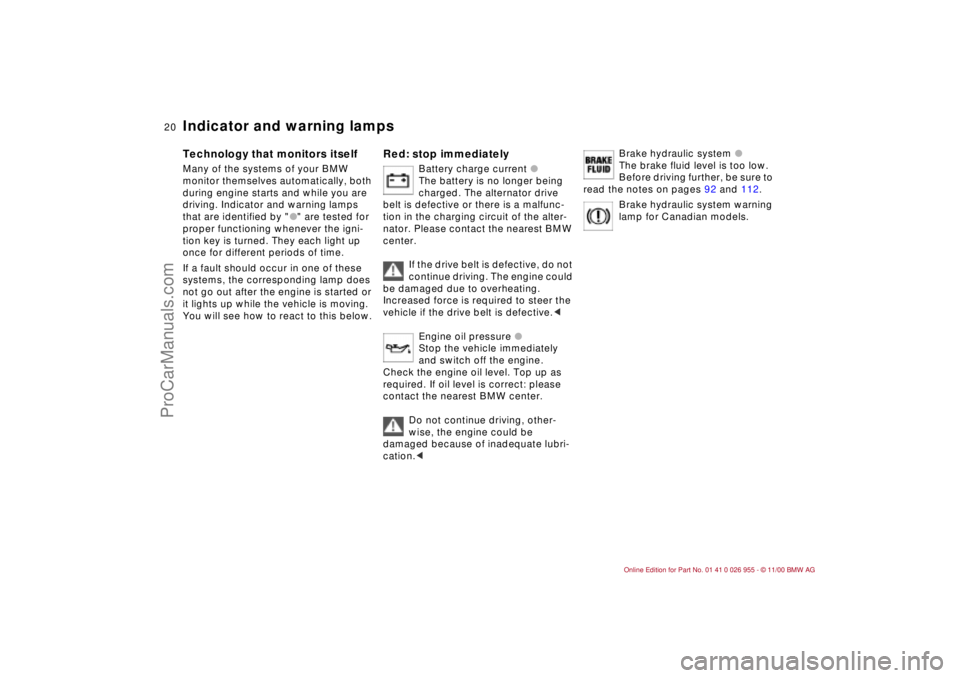
Red: stop immediately
Battery charge current
l
The battery is no longer being
charged. The alternator drive
belt is defective or there is a malfunc-
tion in the charging circuit of the alter-
nator. Please contact the nearest BMW
center.
If the drive belt is defective, do not
continue driving. The engine could
be damaged due to overheating.
Increased force is required to steer the
vehicle if the drive belt is defective.
<
Engine oil pressure
l
Stop the vehicle immediately
and switch off the engine.
Check the engine oil level. Top up as
required. If oil level is correct: please
contact the nearest BMW center.
Do not continue driving, other-
wise, the engine could be
damaged because of inadequate lubri-
cation.
<
Brake hydraulic system
l
The brake fluid level is too low.
Before driving further, be sure to
read the notes on pages 92 and 112.
Brake hydraulic system warning
lamp for Canadian models.
ProCarManuals.com
Page 22 of 171
22n
Indicator and warning lamps
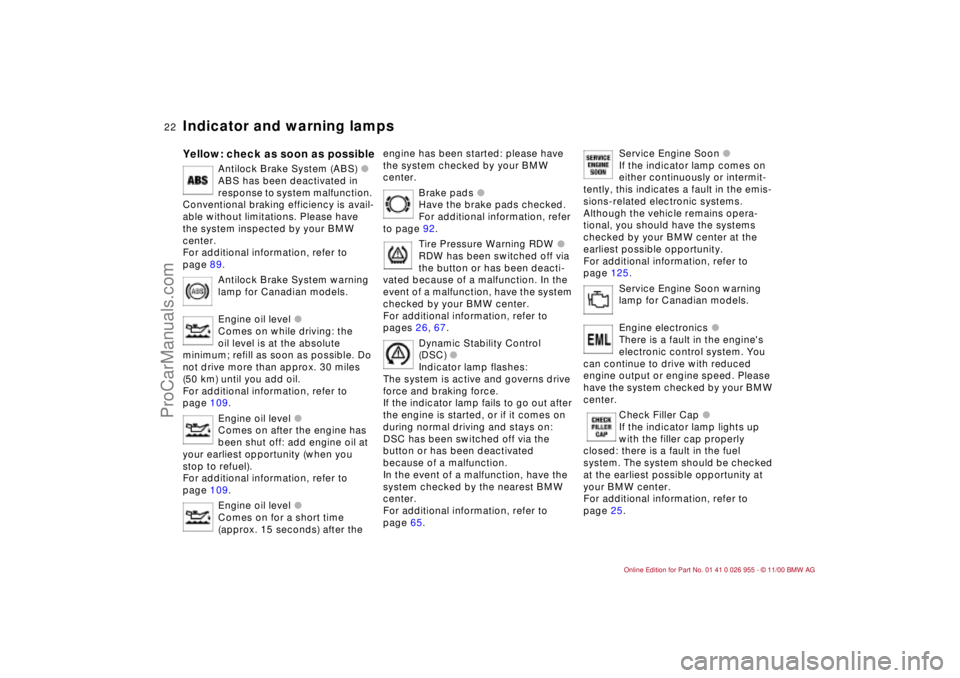
Yellow: check as soon as possible
Antilock Brake System (ABS)
l
ABS has been deactivated in
response to system malfunction.
Conventional braking efficiency is avail-
able without limitations. Please have
the system inspected by your BMW
center.
For additional information, refer to
page 89.
Antilock Brake System warning
lamp for Canadian models.
Engine oil level
l
Comes on while driving: the
oil level is at the absolute
minimum; refill as soon as possible. Do
not drive more than approx. 30 miles
(50 km) until you add oil.
For additional information, refer to
page 109.
Engine oil level
l
Comes on after the engine has
been shut off: add engine oil at
your earliest opportunity (when you
stop to refuel).
For additional information, refer to
page 109.
Engine oil level
l
Comes on for a short time
(approx. 15 seconds) after the
engine has been started: please have
the system checked by your BMW
center.
Brake pads
l
Have the brake pads checked.
For additional information, refer
to page 92.
Tire Pressure Warning RDW
l
RDW has been switched off via
the button or has been deacti-
vated because of a malfunction. In the
event of a malfunction, have the system
checked by your BMW center.
For additional information, refer to
pages 26, 67.
Dynamic Stability Control
(DSC)
l
Indicator lamp flashes:
The system is active and governs drive
force and braking force.
If the indicator lamp fails to go out after
the engine is started, or if it comes on
during normal driving and stays on:
DSC has been switched off via the
button or has been deactivated
because of a malfunction.
In the event of a malfunction, have the
system checked by the nearest BMW
center.
For additional information, refer to
page 65.
Service Engine Soon
l
If the indicator lamp comes on
either continuously or intermit-
tently, this indicates a fault in the emis-
sions-related electronic systems.
Although the vehicle remains opera-
tional, you should have the systems
checked by your BMW center at the
earliest possible opportunity.
For additional information, refer to
page 125.
Service Engine Soon warning
lamp for Canadian models.
Engine electronics
l
There is a fault in the engine's
electronic control system. You
can continue to drive with reduced
engine output or engine speed. Please
have the system checked by your BMW
center.
Check Filler Cap
l
If the indicator lamp lights up
with the filler cap properly
closed: there is a fault in the fuel
system. The system should be checked
at the earliest possible opportunity at
your BMW center.
For additional information, refer to
page 25.
ProCarManuals.com
Page 64 of 171
64n
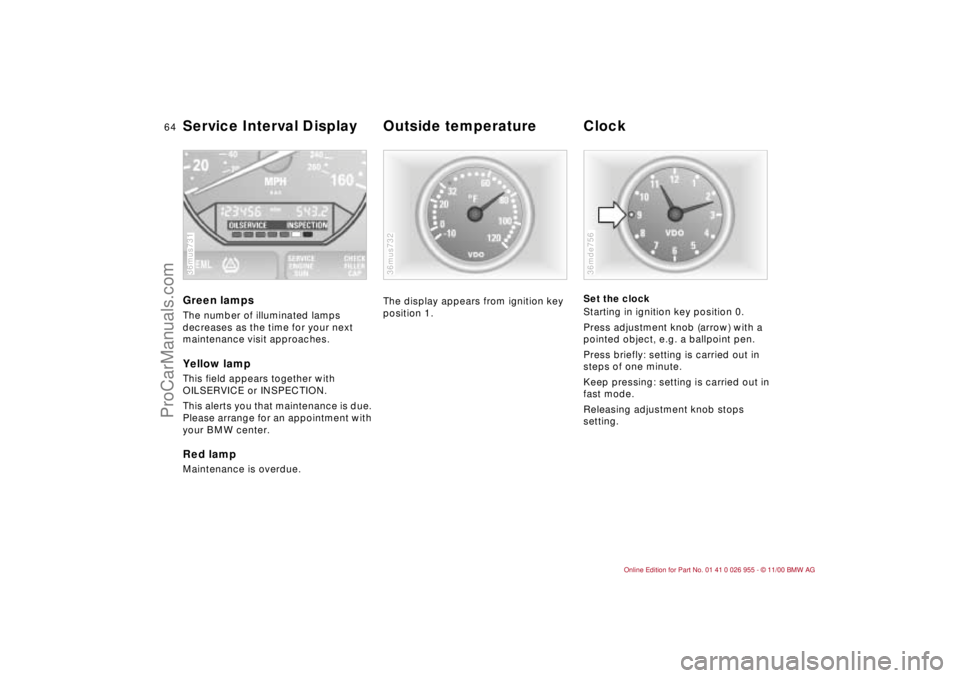
Service Interval Display Outside temperature ClockGreen lamps The number of illuminated lamps
decreases as the time for your next
maintenance visit approaches.Yellow lamp This field appears together with
OILSERVICE or INSPECTION.
This alerts you that maintenance is due.
Please arrange for an appointment with
your BMW center.Red lamp Maintenance is overdue.36mus731
The display appears from ignition key
position 1.36mus732
Set the clock
Starting in ignition key position 0.
Press adjustment knob (arrow) with a
pointed object, e.g. a ballpoint pen.
Press briefly: setting is carried out in
steps of one minute.
Keep pressing: setting is carried out in
fast mode.
Releasing adjustment knob stops
setting.36mde756
ProCarManuals.com
Page 65 of 171
65n
IndexDataTechnologyRepairsCar careControlsOverview
The conceptDSC helps maintain vehicle stability,
even in critical driving situations.
The system optimizes vehicle stability
during acceleration and when starting
from a full stop, as well as optimizing
traction. In addition, it recognizes
unstable vehicle conditions, such as
understeering or oversteering, and, as
far as is possible within the laws of
physics, helps keep the vehicle on a
steady course by reducing the engine
speed and brake applications to the
individual wheels.
The DSC is operational every time you
start the engine.
Indicator lamp
The indicator lamp in the instru-
ment cluster goes out shortly
after you switch on the ignition.
Refer to page 22.
The indicator lamp flashes:
DSC is active and controls the drive
and braking forces.
If the indicator lamp fails to go out after
the engine has been started, or if it
comes on during normal driving and
stays on: the DSC has been switched
off via the button or there is a malfunc-
tion. You can continue to drive the
vehicle normally, but without DSC.
In the event of a malfunction, please
consult your BMW center.
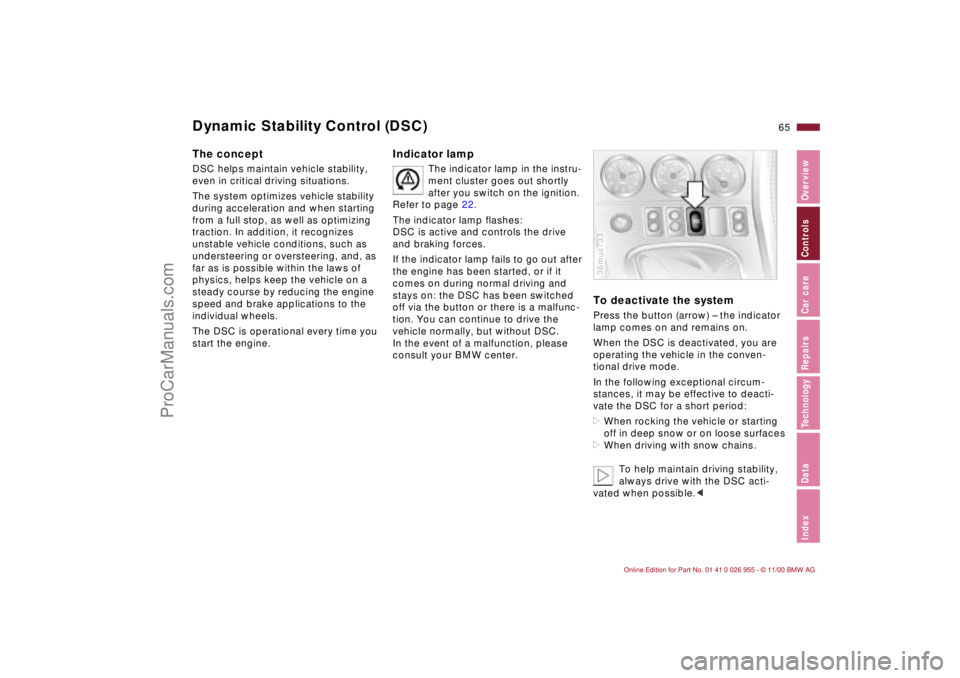
To deactivate the systemPress the button (arrow) – the indicator
lamp comes on and remains on.
When the DSC is deactivated, you are
operating the vehicle in the conven-
tional drive mode.
In the following exceptional circum-
stances, it may be effective to deacti-
vate the DSC for a short period:
>When rocking the vehicle or starting
off in deep snow or on loose surfaces
>When driving with snow chains.
To help maintain driving stability,
always drive with the DSC acti-
vated when possible.< 36mus733
Dynamic Stability Control (DSC)
ProCarManuals.com
Page 93 of 171
93n
IndexDataTechnologyRepairsCar careControlsOverview
Winter operationThe onset of winter is often accompa-
nied by rapid changes in weather.
Adaptations in driving style should be
accompanied by preparations on the
vehicle itself to ensure that your vehicle
operation through the winter remains
safe and trouble-free.CoolantEnsure that the coolant contains the
year-round 50 : 50 ratio of water and
antifreeze with corrosion inhibitor.
This mixture provides protection
against freezing down to approx.
– 34 7 (– 37 6). Replace the coolant
every three years.LocksBMW door lock deicer can be used to
free the doors if they are frozen. This
deicer also contains lubricant.
After using deicer, treatment with BMW
lock cylinder grease is recommended.
Rubber seals and components In order to prevent freezing, apply BMW
rubber treatment or silicone spray to
weather-stripping on the doors, hood,
luggage compartment and to convert-
ible top seals.
A full range of car-care products is
available from your BMW center.< Snow chainsMount the BMW snow chains
* only in
pairs on the rear wheels only. Comply
with the manufacturer's safety precau-
tions. Do not exceed a speed limit of
30 mph (50 km/h) when driving with
chains. As an exception in this situa-
tion, we recommend that you deacti-
vate the DSC and RDW when snow
chains are mounted. Refer to page 65
or page 67.
Starting offWhen starting from a full stop or
"rocking" free in deep snow, we recom-
mend that you deactivate the DSC
system. Refer to page 65.Driving on low-traction road
surfacesUse smooth, gentle pressure to control
the accelerator pedal. Avoid excessive
engine speeds and shift to the next
higher gear at an early point. Shift down
into the next lowest gear when
approaching uphill or downhill grades.
Maintain an adequate distance between
yourself and the vehicle ahead.Braking Winter road conditions substantially
reduce the traction available between
the tires and the road surface.
Remember that – in every situation –
braking distances will be significantly
longer as a result of this.
ABS is intended to prevent the wheels
from locking during brake applications,
thus helping to maintain vehicle stability
and steering response.
ProCarManuals.com
Page 94 of 171
94n
Winter operation Power steeringIf it should occur that the ABS does not
respond in a critical braking situation
and the wheels lock: reduce the pres-
sure on the brake pedal until the wheels
just start to roll again while still main-
taining enough force to continue
braking. Following that, increase pedal
pressure again. Reduce the pressure as
the wheels lock, then reapply pressure.
Repeat this process.
This type of staggered braking will
lower the braking distance, and the
vehicle still remains responsive to
steering.
You can still attempt to steer around
hazards once you have reduced the
pressure on the brake pedal.
Do not shift down on slick road
surfaces. Doing so could cause
the rear wheels to lose traction and
skid, which could result in the loss of
vehicle control.<
Depress the clutch pedal during
hard braking on road surfaces
which provide only poor or uneven trac-
tion.<
Skid controlDepress the clutch pedal and release
the accelerator pedal. Countersteer
carefully and attempt to regain control
of the vehicle.ParkingEngage 1st or reverse gear. Depending
on the steepness of the incline, you can
apply the parking brake as well. In order
to prevent the parking brake pads from
locking due to frost or corrosion, dry
them by gently applying the parking
brake as the vehicle is coming to a stop.
Make sure that following traffic is not
endangered.
The brake lamps do not light
up when the parking brake is
applied.<
Changes in steering response
(high steering effort, for example):
Consult a BMW center to have the
system checked.
If the power steering fails,
increased effort will be required
to steer the vehicle.<
ProCarManuals.com
Page 119 of 171
119n
IndexDataTechnologyRepairsCar careControlsOverview
Caring for your vehicleCaring for the vehicle finishRegular washing is a preventive
measure against long-term effects from
substances which are harmful to the
vehicle's finish, especially if you drive
your vehicle in areas with high levels of
air pollution or aggressive natural
substances (tree resins, pollen).
Nevertheless, you should immediately
remove especially aggressive
substances. Failure to do so can lead to
changes in the paint's chemical struc-
ture or to discoloration. Gasoline spilled
during refueling, oil, grease and brake
fluid should always be cleaned away
immediately, as should bird droppings
(finish damage).
Any contamination remaining on the
surface of the vehicle will be especially
conspicuous after washing. Use
cleaning fluid or alcohol with a clean
cloth or cotton pad to remove. Remove
tar spots with tar remover. After
cleaning, the affected areas should be
waxed to ensure continued protection.
Use the cleaning and car-care
products that you can obtain at
your BMW center.<
Waxing your vehicleProtect the finish using carnauba or
synthetic-based waxes only.
The best way to determine when the
finish needs to be waxed is by noting
when water stops beading on the
surface.
You can use a glass cleaner to remove
any wax or silicone that may have been
left on the windows during waxing.
Use the cleaning and car-care
products that you can obtain at
your BMW center.<
Paint damageYou can touch up minor paint flaws with
BMW spray paint or a BMW touchup
stick.
The color code for your vehicle is
provided on a tag located near the
vehicle data plate and on the first page
of the Service and Warranty Information
Booklet (US models) or the Warranty
and Service Guide Booklet (Canadian
models).
Damage caused by flying stones,
scratches, etc., must be touched up
without delay to prevent rust from
forming.
If corrosion has started to form in an
area with paint damage, remove all rust
and clean the area. Finally, apply the
finish coat. Wait a few days, then polish
the repaired area. Finish by applying a
wax preservative.
More extensive paint damage should
be repaired professionally in accor-
dance with the manufacturer's instruc-
tions. Your BMW center uses original
BMW finish materials in accordance
with approved repair procedures.
Use the cleaning and car-care
products that you can obtain at
your BMW center.<
ProCarManuals.com
Page 145 of 171
145n
IndexDataTechnologyRepairsCar careControlsOverview
Jump-starting Towing the vehicle6 Start the support vehicle's engine
and let it run.
7 Start the engine on the vehicle
needing the jump-start, and allow it
to run as usual. If the first start
attempt is not successful, wait a few
minutes before another attempt in
order to allow the discharged battery
to recharge.
8 Before disconnecting the jumper
cables from your BMW, turn on the
lamps, set the blower at the highest
speed and run the engine for at least
10 seconds. This will prevent a
voltage surge at the voltage regulator
to the electrical accessories.
9 Then disconnect the jumper cables in
reverse sequence.
If necessary recharge the battery.
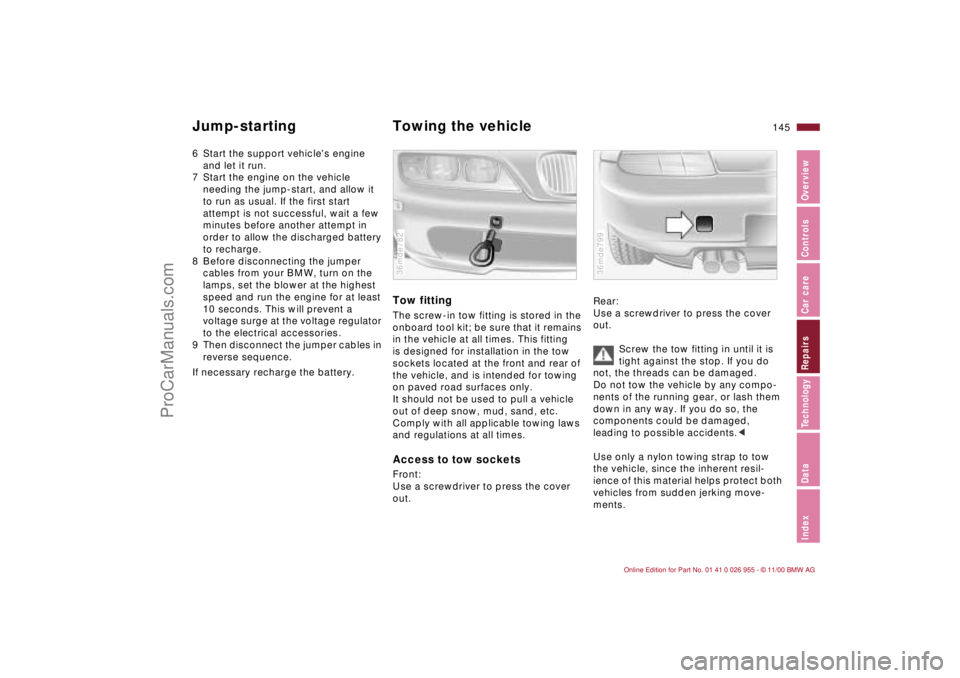
Tow fittingThe screw-in tow fitting is stored in the
onboard tool kit; be sure that it remains
in the vehicle at all times. This fitting
is designed for installation in the tow
sockets located at the front and rear of
the vehicle, and is intended for towing
on paved road surfaces only.
It should not be used to pull a vehicle
out of deep snow, mud, sand, etc.
Comply with all applicable towing laws
and regulations at all times.Access to tow socketsFront:
Use a screwdriver to press the cover
out.36mde782
Rear:
Use a screwdriver to press the cover
out.
Screw the tow fitting in until it is
tight against the stop. If you do
not, the threads can be damaged.
Do not tow the vehicle by any compo-
nents of the running gear, or lash them
down in any way. If you do so, the
components could be damaged,
leading to possible accidents.<
Use only a nylon towing strap to tow
the vehicle, since the inherent resil-
ience of this material helps protect both
vehicles from sudden jerking move-
ments.36mde799
ProCarManuals.com