buttons BMW M2 2016 Owners Manual
[x] Cancel search | Manufacturer: BMW, Model Year: 2016, Model line: M2, Model: BMW M2 2016Pages: 220, PDF Size: 4.71 MB
Page 13 of 220
At a glance
These overviews of buttons, switches and
displays are intended to familiarize you with your vehicle. Moreover, you will become familiar with the available control concepts and options quickly.Online Edition for Part no. 01 40 2 970 518 - II/16
Page 15 of 220
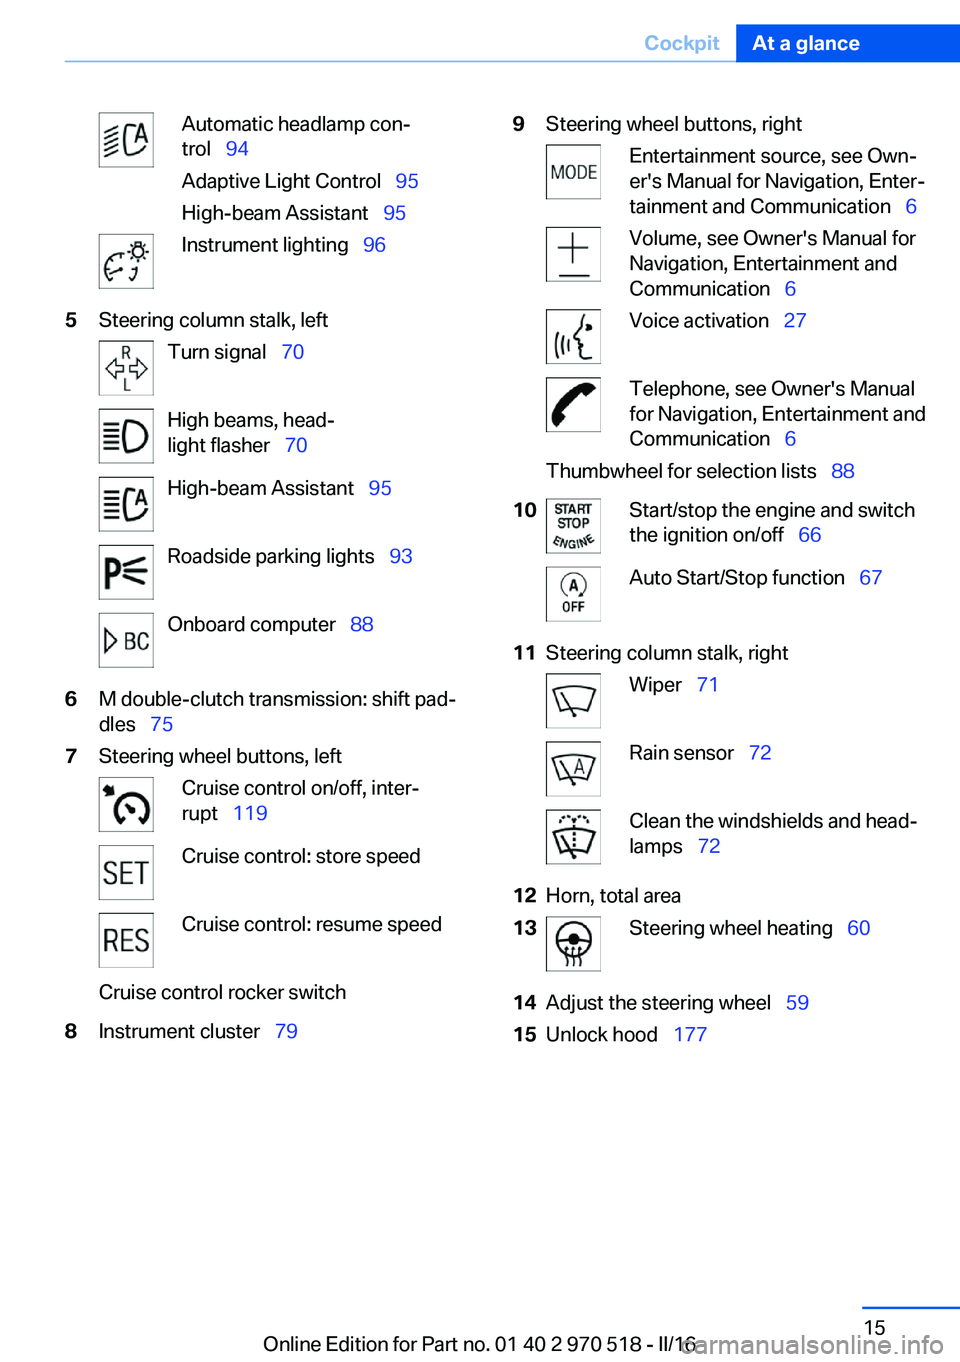
Automatic headlamp con‐
trol 94
Adaptive Light Control 95
High-beam Assistant 95Instrument lighting 965Steering column stalk, leftTurn signal 70High beams, head‐
light flasher 70High-beam Assistant 95Roadside parking lights 93Onboard computer 886M double-clutch transmission: shift pad‐
dles 757Steering wheel buttons, leftCruise control on/off, inter‐
rupt 119Cruise control: store speedCruise control: resume speedCruise control rocker switch8Instrument cluster 799Steering wheel buttons, rightEntertainment source, see Own‐
er's Manual for Navigation, Enter‐
tainment and Communication 6Volume, see Owner's Manual for
Navigation, Entertainment and
Communication 6Voice activation 27Telephone, see Owner's Manual
for Navigation, Entertainment and
Communication 6Thumbwheel for selection lists 8810Start/stop the engine and switch
the ignition on/off 66Auto Start/Stop function 6711Steering column stalk, rightWiper 71Rain sensor 72Clean the windshields and head‐
lamps 7212Horn, total area13Steering wheel heating 6014Adjust the steering wheel 5915Unlock hood 177Seite 15CockpitAt a glance15
Online Edition for Part no. 01 40 2 970 518 - II/16
Page 16 of 220
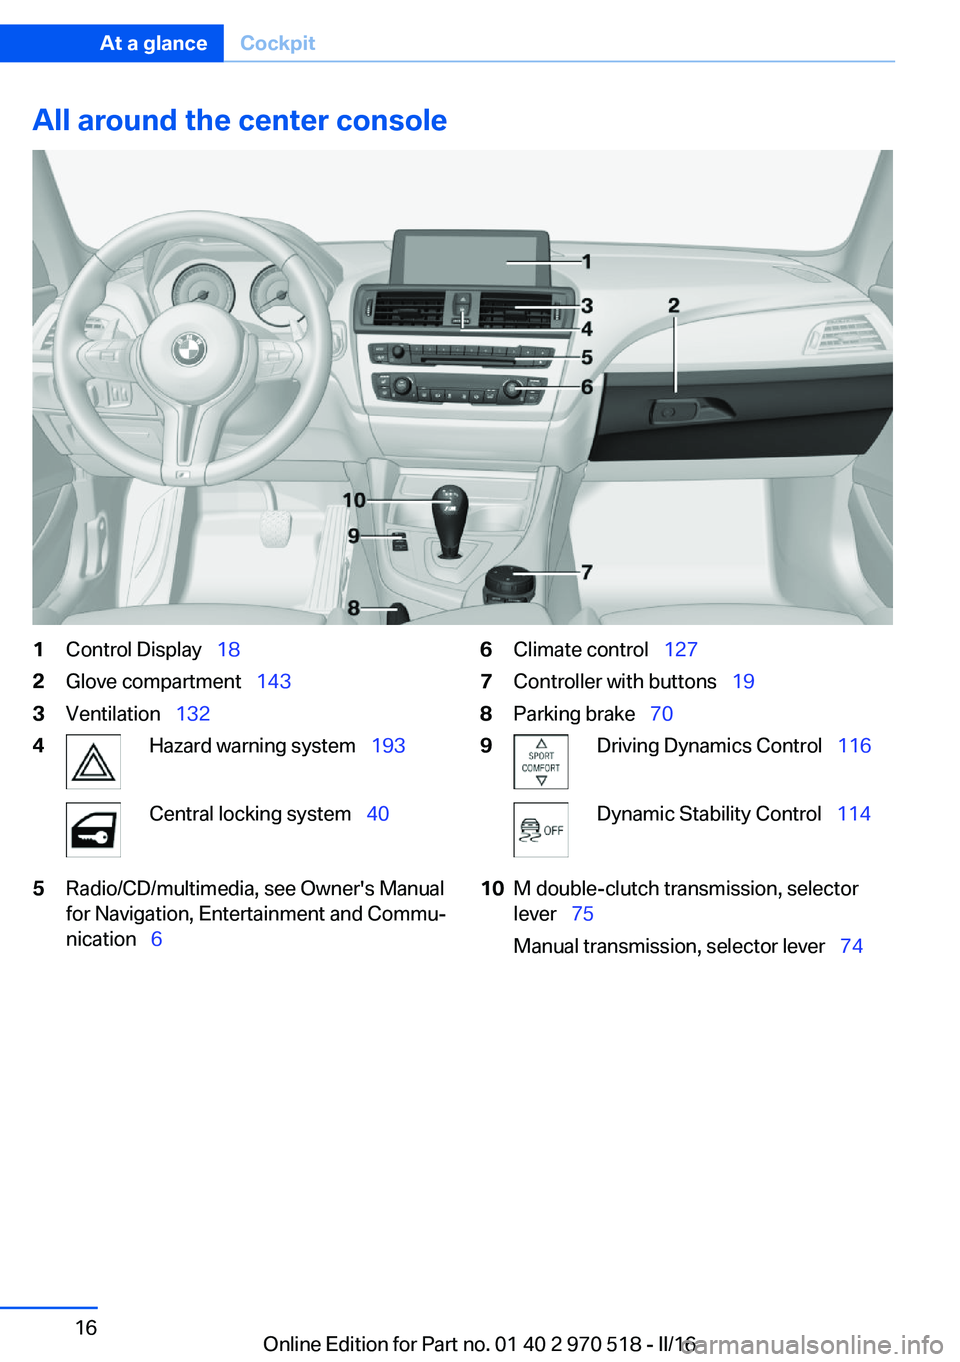
All around the center console1Control Display 182Glove compartment 1433Ventilation 1324Hazard warning system 193Central locking system 405Radio/CD/multimedia, see Owner's Manual
for Navigation, Entertainment and Commu‐
nication 66Climate control 1277Controller with buttons 198Parking brake 709Driving Dynamics Control 116Dynamic Stability Control 11410M double-clutch transmission, selector
lever 75
Manual transmission, selector lever 74Seite 16At a glanceCockpit16
Online Edition for Part no. 01 40 2 970 518 - II/16
Page 18 of 220
iDriveVehicle features and options
This chapter describes all standard, country-
specific and optional features offered with the
series. It also describes features that are not
necessarily available in your car, e. g., due to
the selected options or country versions. This
also applies to safety-related functions and
systems. The respectively applicable country
provisions must be observed when using the
respective features and systems.
The concept
The iDrive combines the functions of many
switches. Thus, these functions can be oper‐
ated from a central location.
WARNING
Operating the integrated information
systems and communication devices while
driving can distract from traffic. It is possible to lose control of the vehicle. There is risk of an
accident. Only use the systems or devices
when the traffic situation allows. If necessary,
stop and use the systems and devices while
the vehicle is stationary.◀Overview of control elements
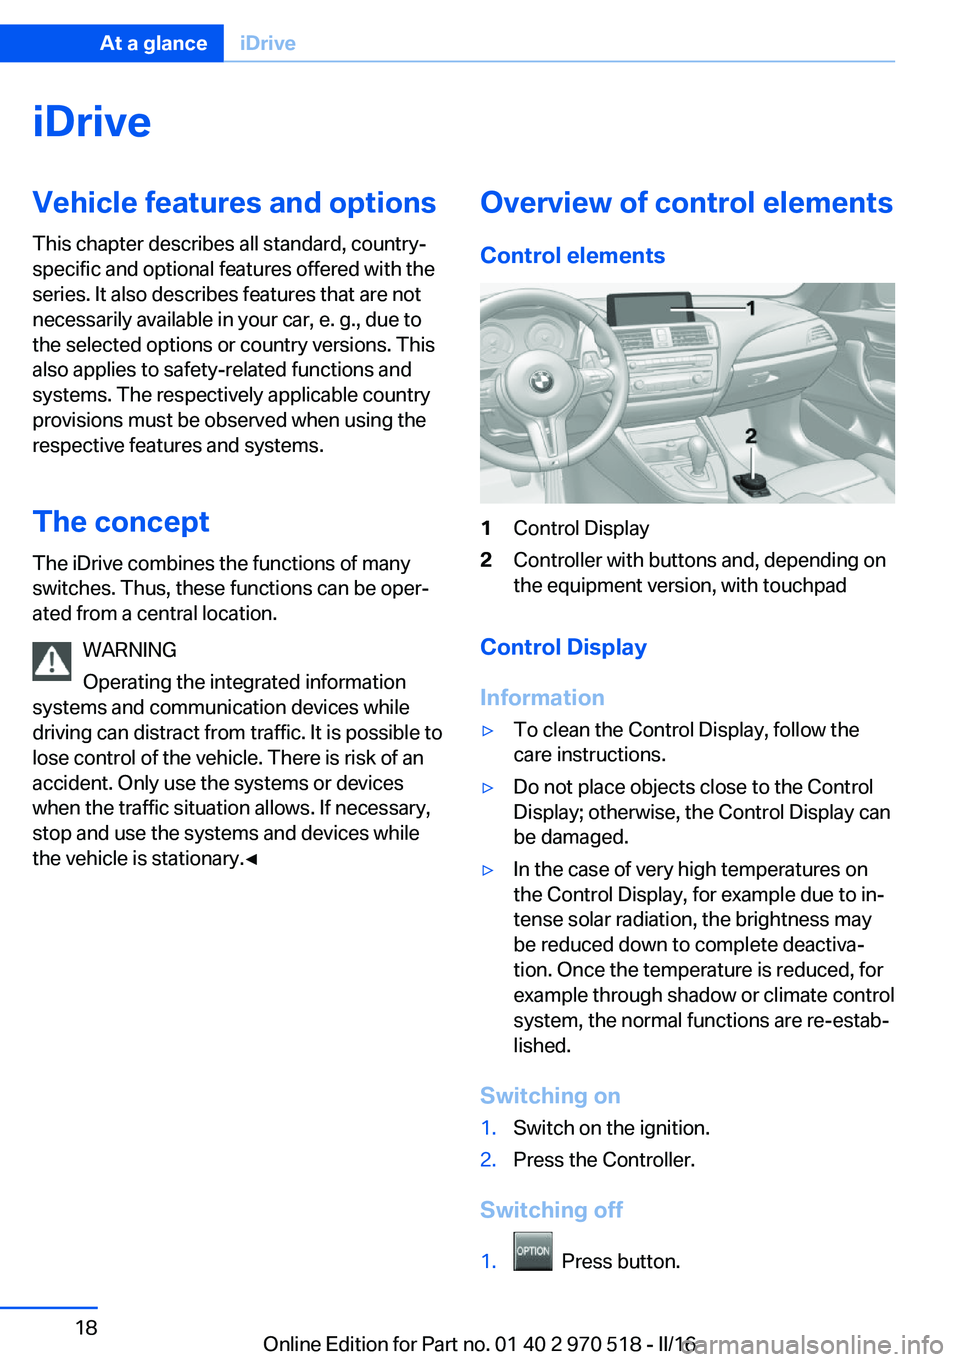
Control elements1Control Display2Controller with buttons and, depending on
the equipment version, with touchpad
Control Display
Information
▷To clean the Control Display, follow the
care instructions.▷Do not place objects close to the Control
Display; otherwise, the Control Display can
be damaged.▷In the case of very high temperatures on
the Control Display, for example due to in‐
tense solar radiation, the brightness may
be reduced down to complete deactiva‐
tion. Once the temperature is reduced, for
example through shadow or climate control
system, the normal functions are re-estab‐
lished.
Switching on
1.Switch on the ignition.2.Press the Controller.
Switching off
1. Press button.
Seite 18At a glanceiDrive18
Online Edition for Part no. 01 40 2 970 518 - II/16
Page 19 of 220
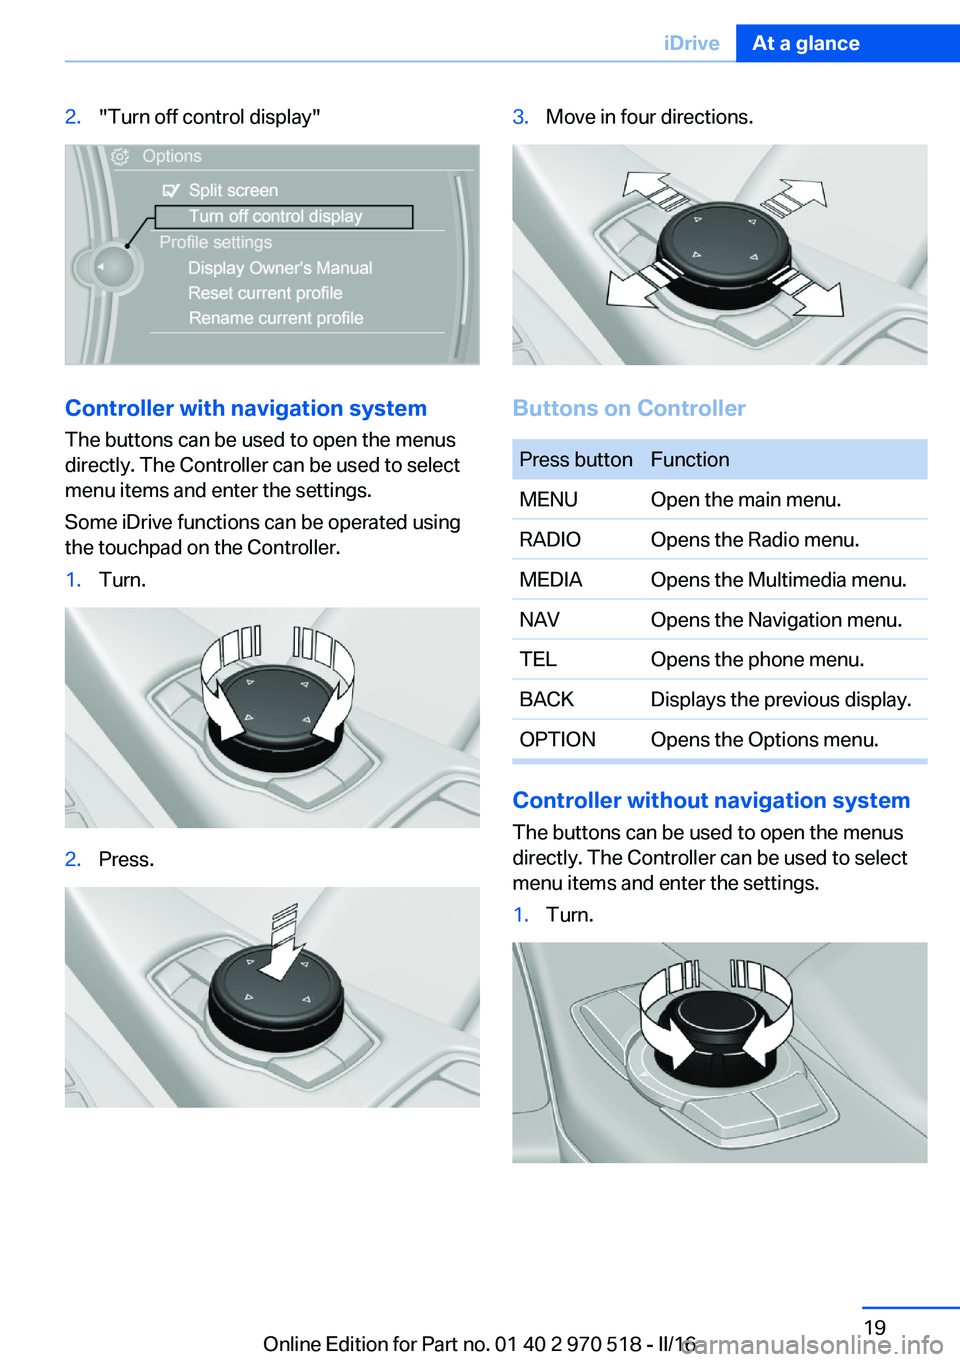
2."Turn off control display"
Controller with navigation systemThe buttons can be used to open the menus
directly. The Controller can be used to select menu items and enter the settings.
Some iDrive functions can be operated using
the touchpad on the Controller.
1.Turn.2.Press.3.Move in four directions.
Buttons on Controller
Press buttonFunctionMENUOpen the main menu.RADIOOpens the Radio menu.MEDIAOpens the Multimedia menu.NAVOpens the Navigation menu.TELOpens the phone menu.BACKDisplays the previous display.OPTIONOpens the Options menu.
Controller without navigation system
The buttons can be used to open the menus
directly. The Controller can be used to select
menu items and enter the settings.
1.Turn.Seite 19iDriveAt a glance19
Online Edition for Part no. 01 40 2 970 518 - II/16
Page 20 of 220
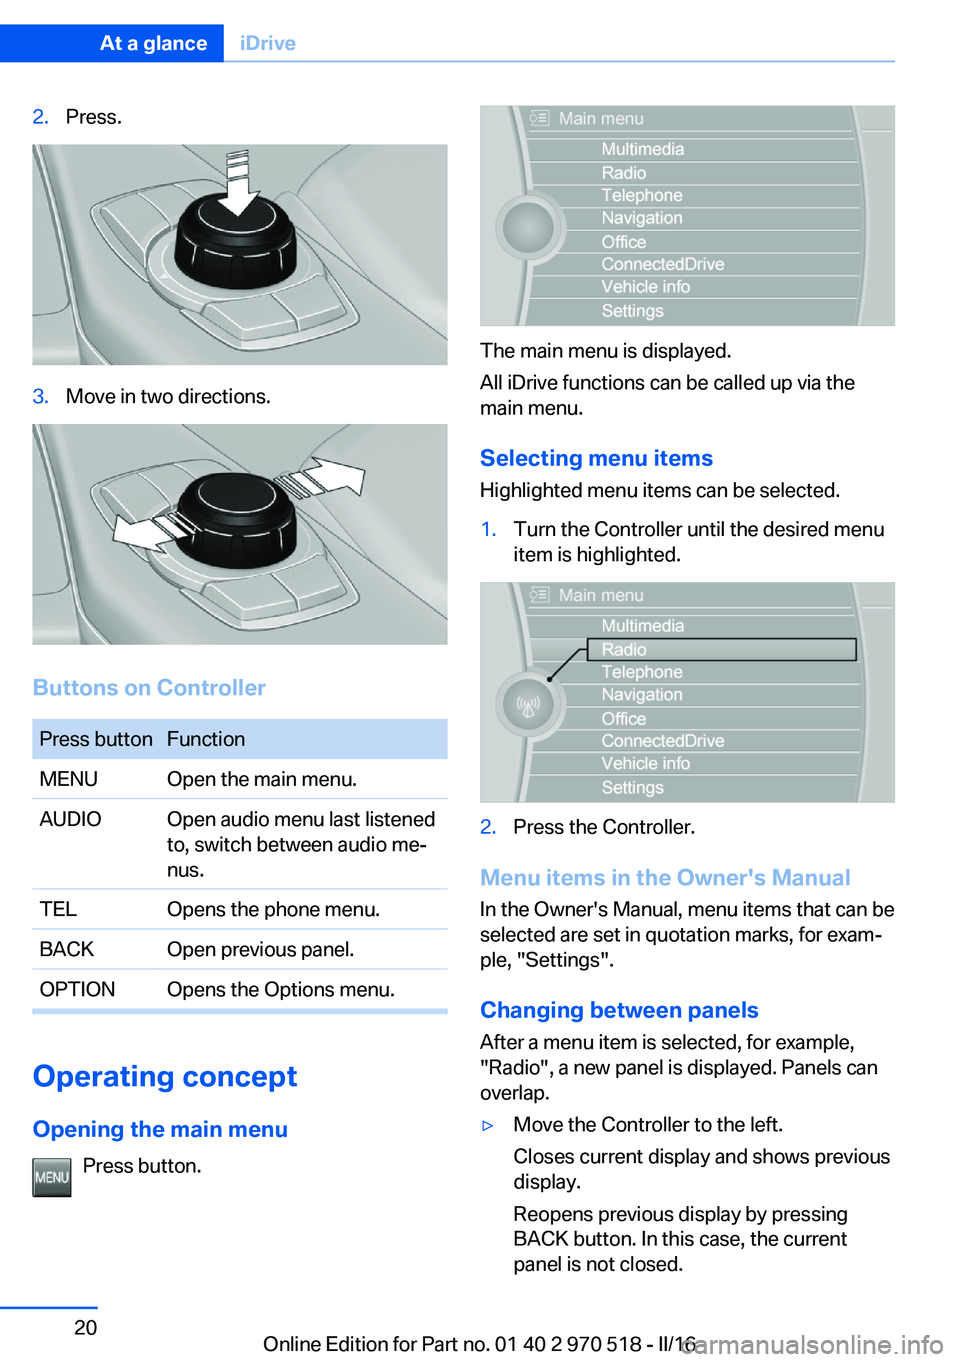
2.Press.3.Move in two directions.
Buttons on Controller
Press buttonFunctionMENUOpen the main menu.AUDIOOpen audio menu last listened
to, switch between audio me‐
nus.TELOpens the phone menu.BACKOpen previous panel.OPTIONOpens the Options menu.
Operating concept
Opening the main menu Press button.
The main menu is displayed.
All iDrive functions can be called up via the
main menu.
Selecting menu items
Highlighted menu items can be selected.
1.Turn the Controller until the desired menu
item is highlighted.2.Press the Controller.
Menu items in the Owner's Manual
In the Owner's Manual, menu items that can be
selected are set in quotation marks, for exam‐
ple, "Settings".
Changing between panels
After a menu item is selected, for example,
"Radio", a new panel is displayed. Panels can
overlap.
▷Move the Controller to the left.
Closes current display and shows previous
display.
Reopens previous display by pressing
BACK button. In this case, the current
panel is not closed.Seite 20At a glanceiDrive20
Online Edition for Part no. 01 40 2 970 518 - II/16
Page 24 of 220
Split screen
General information Additional information can be displayed on the
right side of the split screen, for example, infor‐
mation from the onboard computer.
In the divided screen view, the so-called split
screen, this information remains visible even when you change to another menu.
Switching the split screen on/off
On the Control Display:1. Press button.2."Split screen"
Selecting the display
On the Control Display:
1. Press button.2."Split screen"3.Move the Controller until the split screen is
selected.4.Press the Controller or select "Split screen
content".5.Select the desired menu item.Programmable memory
buttons
General information
The iDrive functions can be stored on the pro‐
grammable memory buttons and called up di‐
rectly, for example, radio stations, navigation
destinations, phone numbers and menu en‐
tries.
Settings are stored for the profile currently
used.
Without navigation system and
telephone
On the buttons, only radio stations can be
stored.
Saving a function1.Highlight the function via the iDrive.2. Press and hold the desired button,
until a signal sounds.
Running a function
Press button.
The function will work immediately.
This means, for example, that the number is di‐
aled when a phone number is selected.
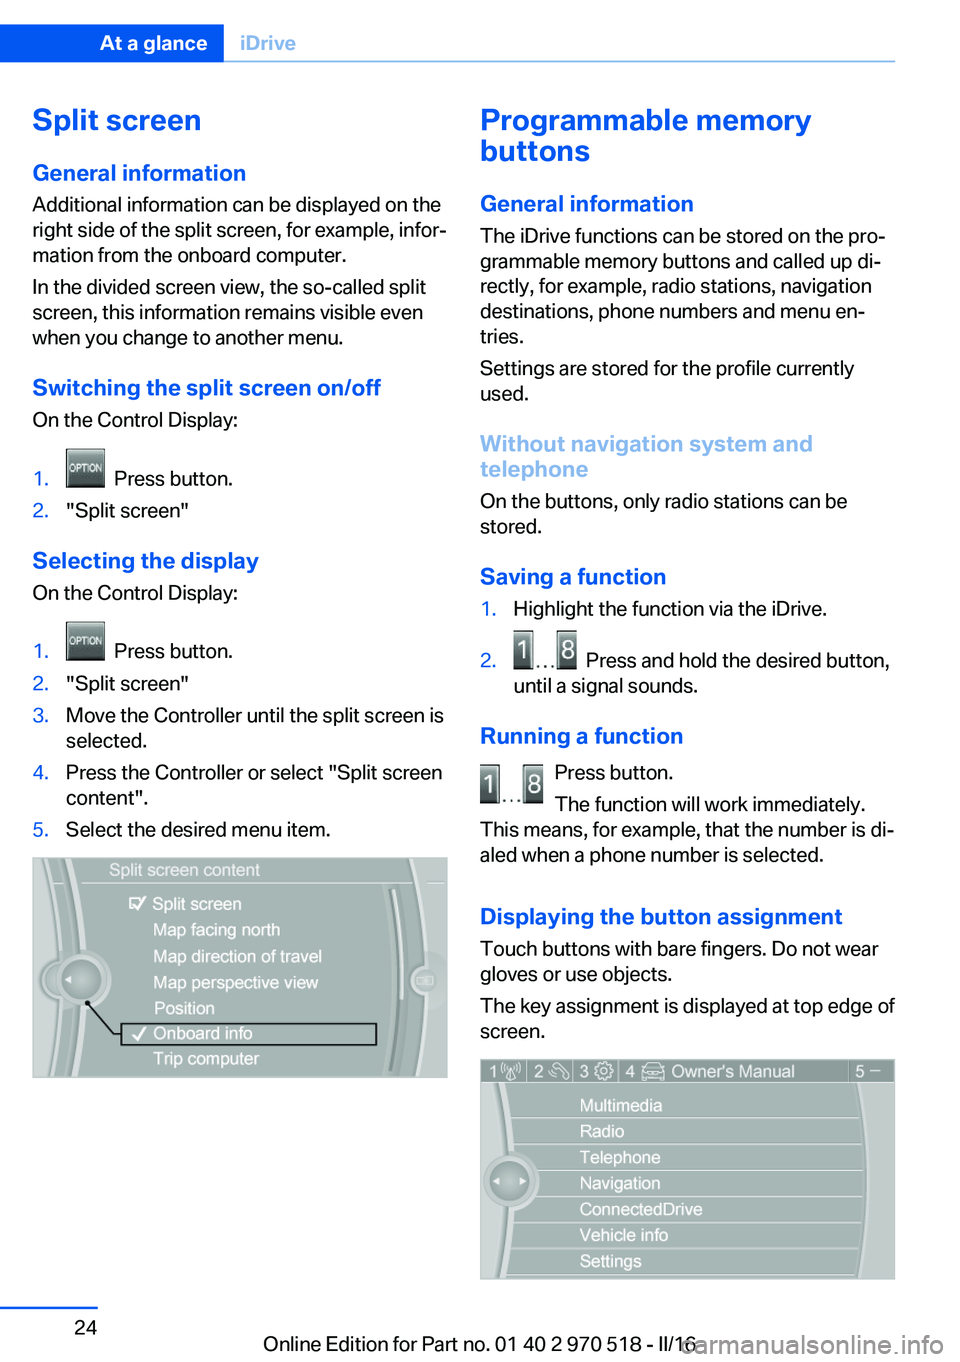
Displaying the button assignment
Touch buttons with bare fingers. Do not wear
gloves or use objects.
The key assignment is displayed at top edge of
screen.
Seite 24At a glanceiDrive24
Online Edition for Part no. 01 40 2 970 518 - II/16
Page 25 of 220
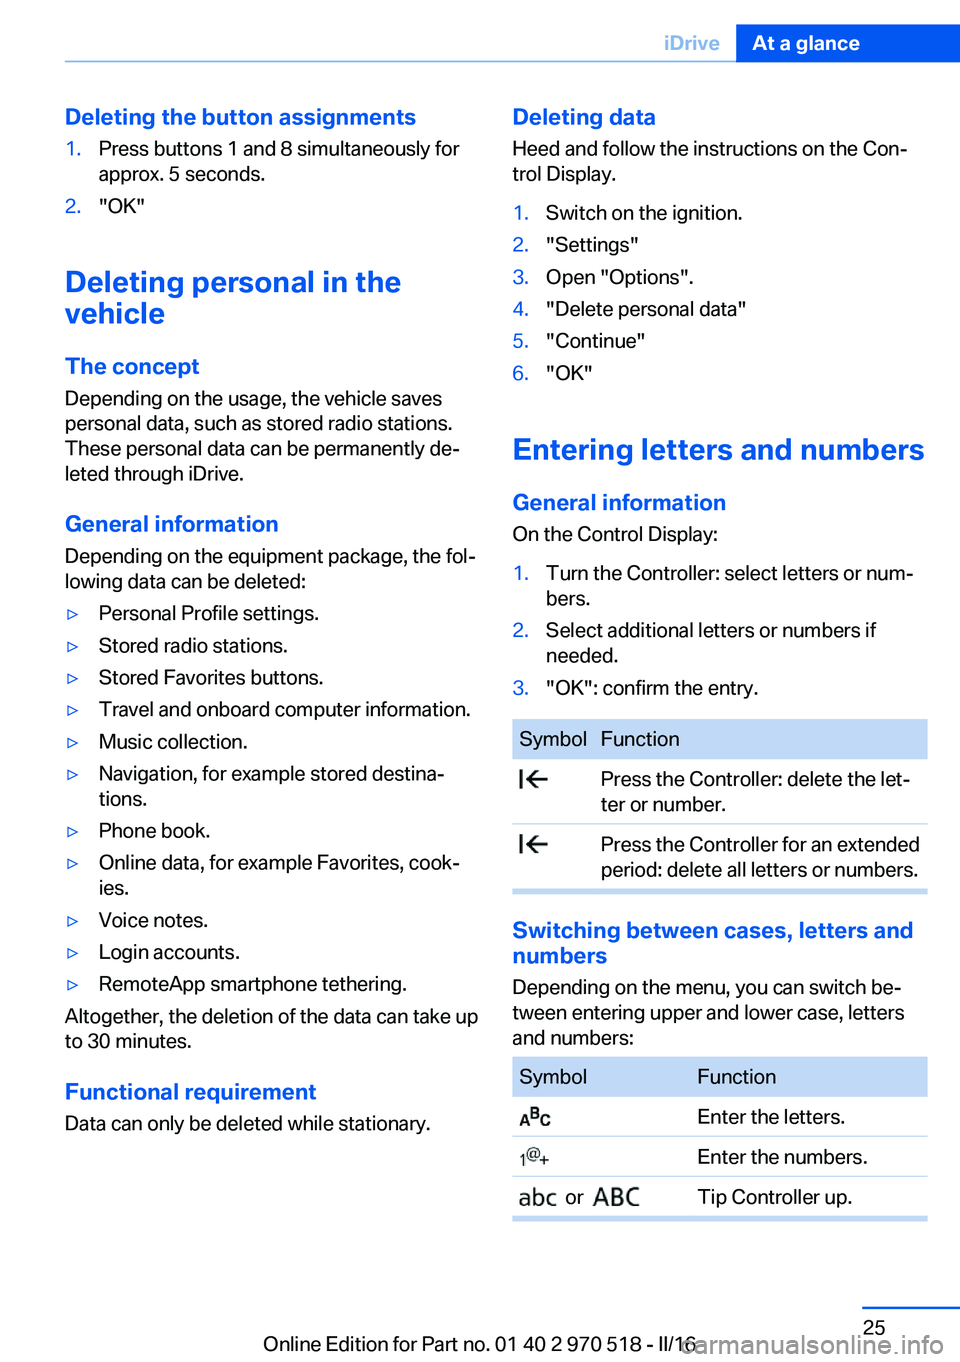
Deleting the button assignments1.Press buttons 1 and 8 simultaneously for
approx. 5 seconds.2."OK"
Deleting personal in the
vehicle
The concept
Depending on the usage, the vehicle saves
personal data, such as stored radio stations.
These personal data can be permanently de‐
leted through iDrive.
General information
Depending on the equipment package, the fol‐
lowing data can be deleted:
▷Personal Profile settings.▷Stored radio stations.▷Stored Favorites buttons.▷Travel and onboard computer information.▷Music collection.▷Navigation, for example stored destina‐
tions.▷Phone book.▷Online data, for example Favorites, cook‐
ies.▷Voice notes.▷Login accounts.▷RemoteApp smartphone tethering.
Altogether, the deletion of the data can take up
to 30 minutes.
Functional requirement Data can only be deleted while stationary.
Deleting data
Heed and follow the instructions on the Con‐
trol Display.1.Switch on the ignition.2."Settings"3.Open "Options".4."Delete personal data"5."Continue"6."OK"
Entering letters and numbers
General information
On the Control Display:
1.Turn the Controller: select letters or num‐
bers.2.Select additional letters or numbers if
needed.3."OK": confirm the entry.SymbolFunction Press the Controller: delete the let‐
ter or number. Press the Controller for an extended
period: delete all letters or numbers.
Switching between cases, letters and
numbers
Depending on the menu, you can switch be‐
tween entering upper and lower case, letters
and numbers:
SymbolFunction Enter the letters. Enter the numbers. or Tip Controller up.Seite 25iDriveAt a glance25
Online Edition for Part no. 01 40 2 970 518 - II/16
Page 31 of 220
Context help - Owner's Manual to the
temporarily selected function
The relevant information can be displayed di‐
rectly.
Opening via the iDrive
To move directly from the application on the
Control Display to the Options menu:1. Press button or move the Controller
to the right repeatedly until the "Options"
menu is displayed.2."Display Owner's Manual"
Opening when a Check Control
message is displayed
Directly from the Check Control message on
the Control Display:
"Display Owner's Manual"
Changing between a function and the
Owner's Manual
To switch from a function, e.g., radio, to the
Owner's Manual on the Control Display and to
alternate between the two displays:
1. Press button or move the Controller
to the right repeatedly until the "Options"
menu is displayed.2."Display Owner's Manual"3.Select the desired page in the Owner's
Manual.4. Press button again to return to last
displayed function.5. Press button to return to the page of
the Owner's Manual displayed last.
To alternate permanently between the last dis‐
played function and the last displayed page of
the Owner's Manual repeat steps 4 & 5. Opens
a new display every time.
Programmable memory buttons
General information
The Owner's Manual can be stored on the Pro‐
grammable memory buttons and called up di‐
rectly.
Storing1."Owner's Manual" Select via the iDrive.2. Press selected button for more
than 2 seconds.
Executing
Press button.
The Owner's Manual is displayed im‐
mediately.
Seite 31Integrated Owner's Manual in the vehicleAt a glance31
Online Edition for Part no. 01 40 2 970 518 - II/16
Page 36 of 220
Personal Profile
The concept Using Personal Profile, individual settings for
several drivers can be saved and called up
again at a later time.
General information There are three profiles with which personal
vehicle settings can be stored. Every remote
control has one of these profiles assigned.
If the vehicle is unlocked using a remote con‐
trol, the assigned personal profile will be acti‐
vated. All settings stored in the profile are au‐
tomatically applied.
If several drivers use their own remote control,
the vehicle will adjust the personal settings
during unlocking. These settings are also re‐
stored, if the vehicle has been used in the
meantime by a person with a different remote
control.
Changes to the settings are automatically
saved in the profile currently activated.
If another profile is selected via iDrive, the set‐
tings saved in it will be applied automatically.
The new profile is assigned to the remote con‐
trol currently used.
There is an additional guest profile available
that is not assigned to any remote control: It
can be used to apply settings in the vehicle
without changing the personal profiles.
Adjusting
The settings for the following systems and
functions are saved in the active profile. The
scope of storable settings is country- and
equipment-dependable.▷Unlocking and locking.▷Lights.▷Climate control.▷Radio.▷Instrument cluster.▷Programmable memory buttons.▷Volumes, tone.▷Control Display.▷Navigation.▷Park Distance Control PDC.▷Rearview camera.▷Driving Dynamics Control.▷Driver's seat position, exterior mirror posi‐
tion, steering wheel position.▷Intelligent Safety.
Profile management
Opening profiles Regardless of the remote control in use a dif‐
ferent profile may be activated.
About iDrive:
1."Settings"2."Profiles"3.Select a profile.▷All settings stored in the called-up profile
are automatically applied.▷The called-up profile is assigned to the re‐
mote control being used at the time.▷If the profile is already assigned to a differ‐
ent remote control, this profile will apply to
both remote controls. It cannot be differen‐
tiated anymore between the settings for
the two remote controls.
Renaming profiles
A personal name can be assigned to every pro‐
file to avoid confusion between the profiles.
On the Control Display:
1."Settings"2."Profiles"3.Open "Options".4."Rename current profile"Seite 36ControlsOpening and closing36
Online Edition for Part no. 01 40 2 970 518 - II/16