check engine light BMW M3 1995 E36 Repair Manual
[x] Cancel search | Manufacturer: BMW, Model Year: 1995, Model line: M3, Model: BMW M3 1995 E36Pages: 759
Page 438 of 759
620-2
INSTRUMENTS
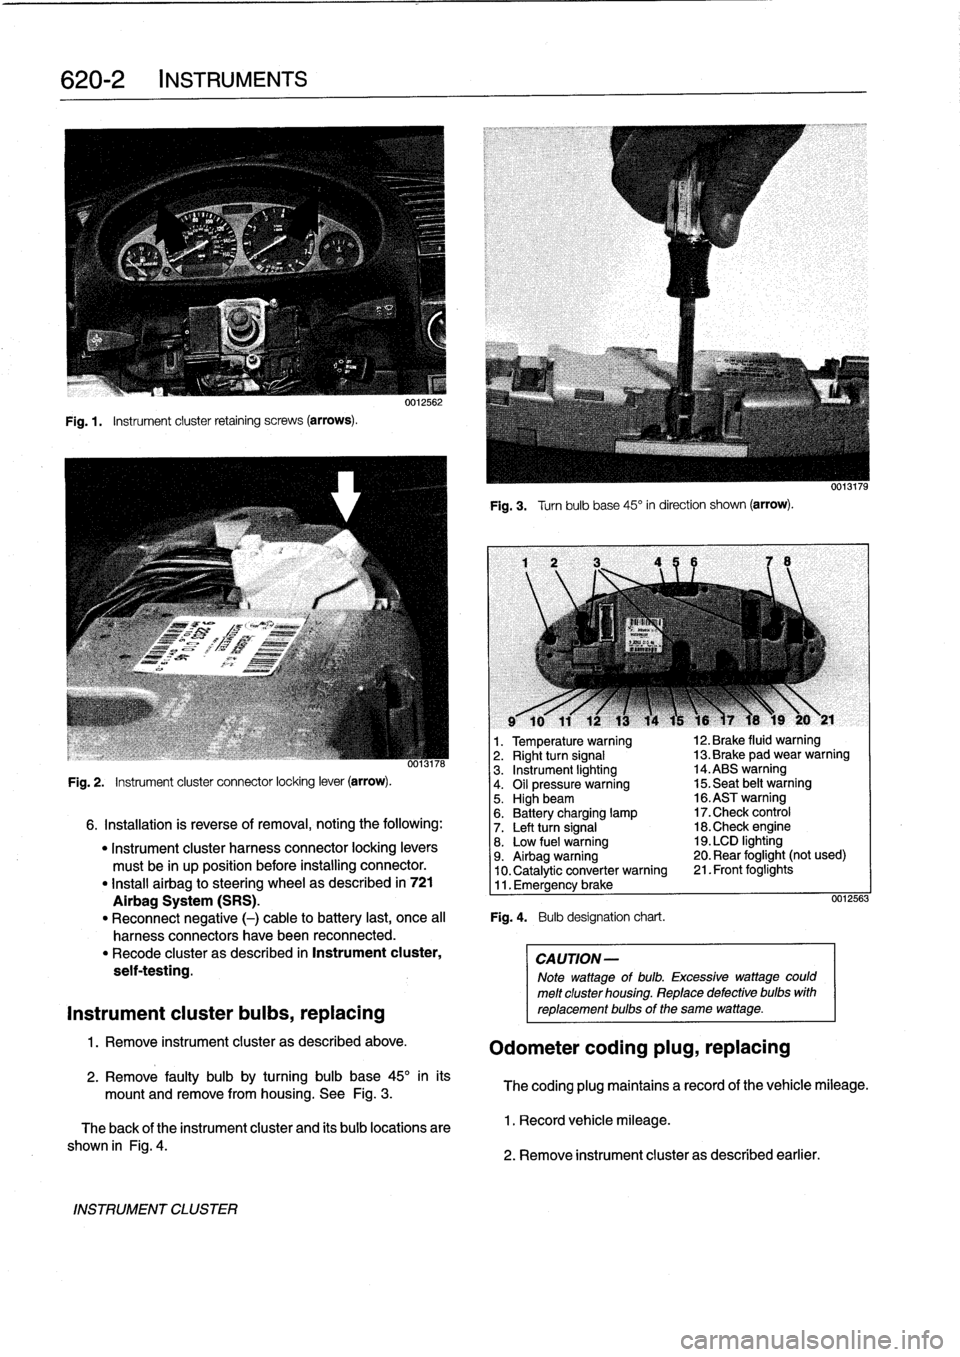
Fig
.1.
Instrument
cluster
retaining
screws
(arrows)
.
INSTRUMENT
CLUSTER
0012562
Fig
.
3
.
Turnbulb
base
45°
in
direction
shown
(arrow)
.
l
v
w
r
v
9
10
11
12
13
14
15
16
)7
18
19
20
y
21
1
.
Temperature
warning
12
.
Brake
fluid
warning
oo13n6
2
.
Right
turn
signal
13
.
Brake
pad
wear
warning
3
.
Instrument
lighting
14
.ABS
warning
Fig
.
2
.
Instrument
cluster
connector
locking
lever
(arrow)
.
4
.
Oil
pressure
warning
15
.
Seat
belt
warning5
.
Highbeam
16
.ASTwarning
6
.
Battery
charging
lamp
17
.Check
control
6
.
Installation
is
reverse
of
removal,
noting
the
following
:
7
.
Left
turn
signal
18
.Check
engine
"
Instrument
cluster
harness
connector
locking
levers
8
.
Low
fuel
warning
19
.
LCD
lighting
must
be
in
up
position
before
installing
connector
.
9
.
Airbag
warning
20
.
Rear
foglight
(not
used)
10
.
Catalytic
converter
warning
21
.
Front
foglights
"
Install
airbag
to
steering
wheel
as
described
in
721
11
.
Emergency
brake
Airbag
System
(SRS)
.
0012563
"
Reconnect
negative
(-)
cable
to
battery
last,
once
al¡
Fig
.
4
.
Bulb
designation
chart
.
harness
connectors
have
been
reconnected
.
"
Recode
cluster
as
described
in
Instrument
cluster,
CAUTION-
seif-testing
.
Note
wattage
of
bulb
.
Excessive
wattage
could
melt
cluster
housing
.
Replace
defective
bulbs
with
Instrument
cluster
bulbs,
replacing
reptacementbulbs
of
the
same
wattage
.
1
.
Remove
instrument
cluster
as
described
above
.
Odometer
coding
plug,
replacing
2
.
Remove
faulty
bulb
by
turning
bulb
base
45°
inits
mount
and
remove
from
housing
.
See
Fig
.
3
.
The
coding
plug
maintains
a
record
of
thevehicle
mileage
.
The
back
of
the
instrument
cluster
and
its
bulb
locations
are
1
.
Record
vehicle
mileage
.
shown
in
Fig
.
4
.
2
.
Remove
instrument
cluster
as
described
earlier
.
Page 441 of 759
FRONT
LIGHTING
.
...........
.
....
.
.
.
.
630-1
Headlight
buib,
replacing
............
.
.
.
.
630-1
Headlight
assembly,
removing
and
installing
.......
.
....
.
.
.
.
630-2
Foglight
assembly,
removing
and
installing
..
630-3
Front
turn
signal
assembly,
removing
and
installing
.....
.
.
.
........
630-4
GENERAL
The
headlight
and
foglight
assemblies
usehalogen
bulbs
.
To
ensure
the
longevity
of
halogen
bulbs,
the
bulb
glass
should
not
be
handied
.
Dirt
and
skin
oíls
may
cause
a
bulbto
fail
prematurely
.
If
necessarywipe
bulb
using
a
clean
cloth
dampened
with
rubbing
alcohol
.
NOTE-
Use
only
original
equipment
replacement
bulbs
.
Non-
original
equipment
bulbs
may
cause
false
failure
read-
ings
on
the
check
control
display
(where
applicable)
.
WARNING
-
INhenworking
on
electrical
systems,
remove
the
fuse
protecting
the
circuit
under
repair
.
See
610
Electrical
Component
Locations
.
FRONT
LIGHTING
Headlight
bulb,
replacing
1
.
Open
engine
hood
.
2
.
Working
in
back
of
headlight
assembly,grasp
rear
of
bulbsocket
(harnessconnector)
and
turn
counterclock-
wise
90°
.
Pull
bulb
out
of
headlight
assembly
.
See
Fig
.
1
.
3
.
Disconnect
harness
connector
from
bulb
.
CA
UTION-
Do
not
touch
halogen
bubs
with
yourbare
hands
.
If
necessary
wipe
bulb
using
a
clean
cloth
damp-
ened
with
rubbing
alcohol
.
630
Exterior
Lighting
EXTERIOR
LIGHTING
630-1
GENERAL
.
.
.
.
...
.
................
.
.
.
.
630-1
Side
Marker
Lights
.......
.
.
.
.
.
.......
.
..
630-4
REAR
LIGHTING
.
......
.
.
.
.
.
.
.
...
.
.
.
..
630-4
Taillight
Bulbs
..........
.
.
.
.
.
.....
.
.
.
.
.
630-4
Taillight
assembly,
removing
and
installing
.
.
.
630-5
CenterBrake
Light
.......
.
.
.
.
.
.
.
.
.
.
.
.
.
.
.
630-5
Center
brake
light
housing,
replacing
(4-door
and
coupe
models)
.
.
.
.
.......
.
.
.630-5
License
plate
light,
removingand
installing
.
.630-6
0012567
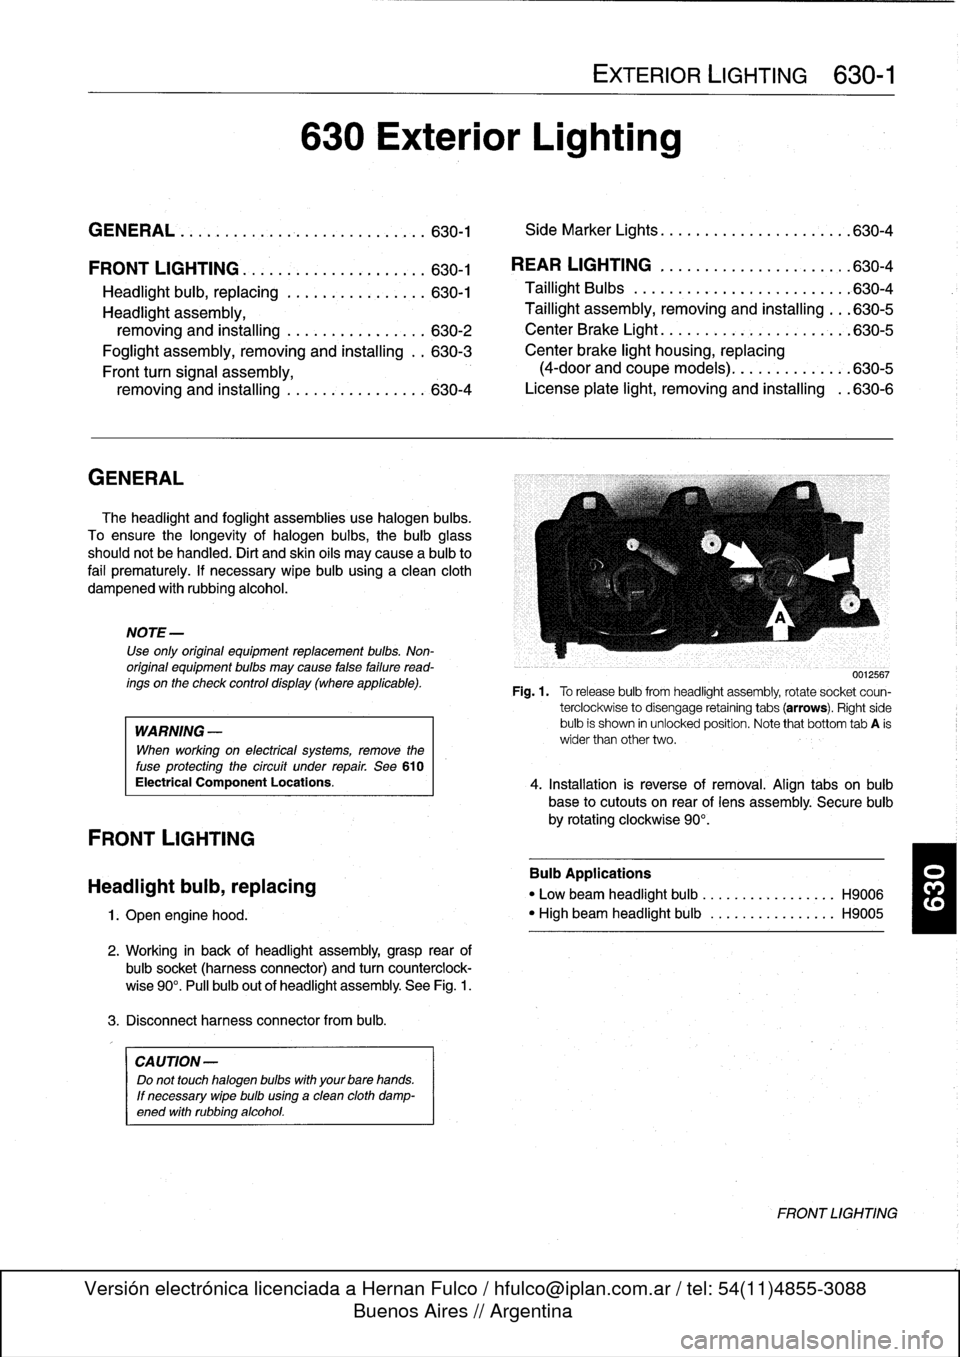
Fig
.1.
Torelease
bulbfrom
headlight
assembly,
rotate
socket
coun-
terclockwise
to
disengage
retaining
tabs
(arrows)
.
Right
side
bulb
is
shown
in
unlocked
position
.
Note
that
bottom
tab
A
is
wider
than
other
two
.
4
.
Installation
is
reverse
of
removal
.
Align
tabs
on
bulb
base
to
cutouts
on
rear
of
lens
assembly
.
Secure
bulb
by
rotating
clockwise
90°
.
Bulb
Applications
"
Low
beam
headlight
bulb
...
.
..
..
.........
H9006
"
High
beam
headlight
bulb
..
.
..
..
.........
H9005
FRONT
LIGHTING
Page 480 of 759
721-
4
AIRBAG
SYSTEM
(SRS)
CAUTION-
A
new
contact
ring
is
held
in
center
position
with
a
screw
.
This
locking
device
must
be
removed
after
contact
ring
is
installed
on
steering
wheel
.
See
Fig
.
4
.
Latercars
(1994
on)
:
"
Connect
ground
lead
at
contact
ring
.
"
When
installing
a
new
contact
ring
from
BMW,
remove
locking
pin
after
installing
contact
ring
to
steering
wheel
.
See
Fig
.
5
.
Airbag
crash
sensor,
replacing
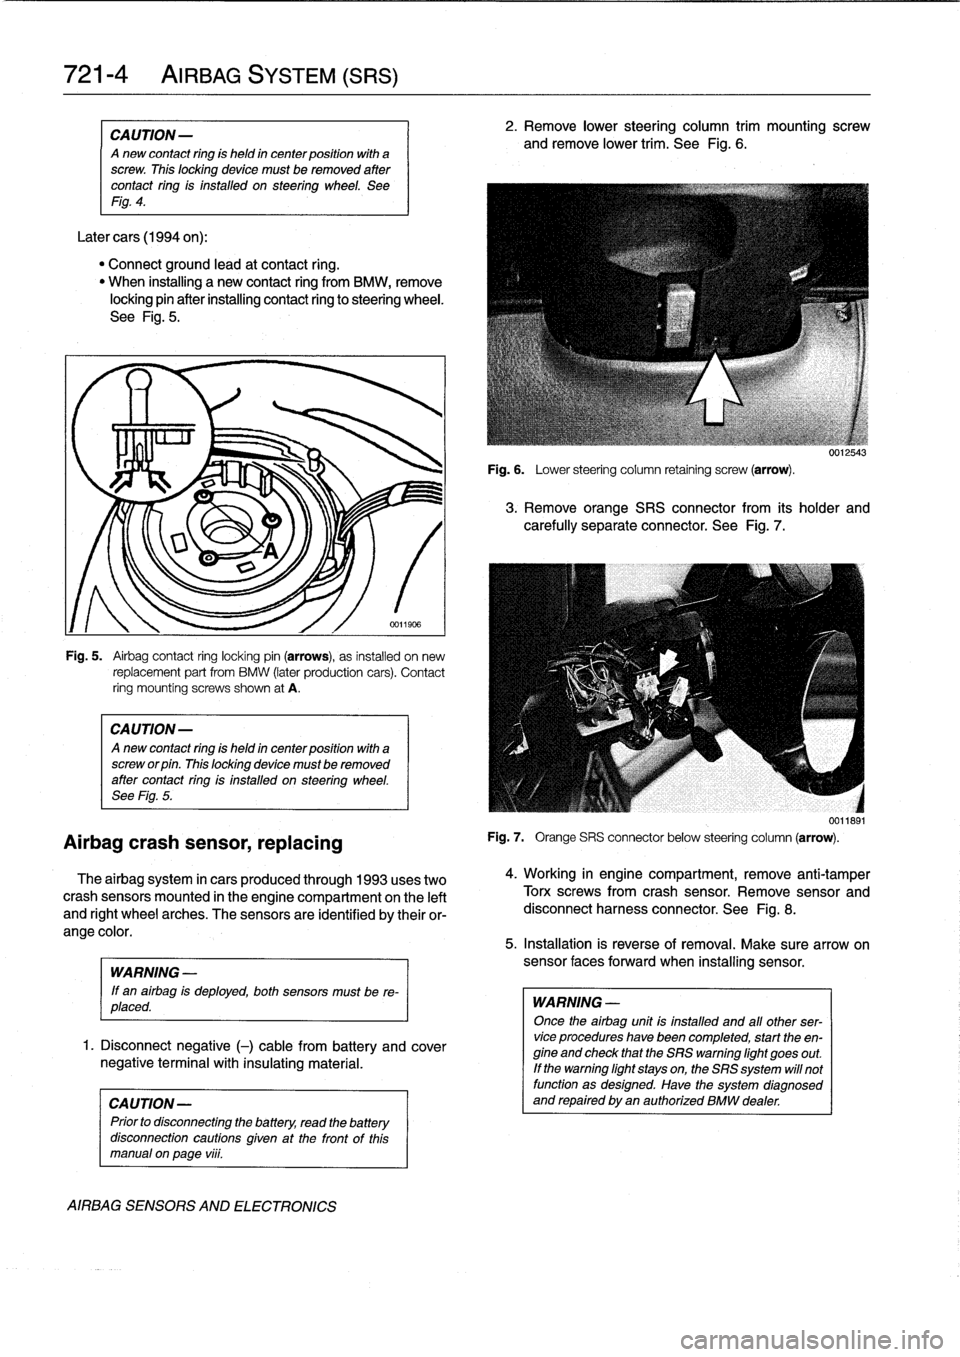
Fig
.
5
.
Airbag
contact
ring
locking
pin
(arrows),
as
installed
on
new
replacement
part
from
BMW
(later
production
cars)
.
Contact
ring
mountíng
screws
shown
at
A
.
CAUTION-
Anew
contact
ring
is
held
in
center
position
with
a
screw
or
pin
.
This
locking
device
mustbe
removed
after
contact
ring
is
installed
on
steering
wheel
.
See
Fig
.
5
.
The
airbag
system
in
cars
produced
through
1993
uses
two
crash
sensors
mounted
in
the
engine
compartment
on
the
left
and
right
wheel
arches
.
The
sensors
are
identified
by
their
or-
ange
color
.
WARNING
-
If
en
airbag
is
deployed,
both
sensors
must
be
re-
placed
.
1
.
Disconnect
negative
(-)
cable
from
battery
and
cover
negative
terminal
with
insulating
material
.
CAUTION-
Prior
to
disconnectiog
the
battery,
read
the
battery
disconnection
cautíons
given
at
the
front
of
thls
manual
on
page
viii
.
AIRBAG
SENSORS
AND
ELECTRONICS
2
.
Remove
lower
steering
column
trim
mounting
screw
and
remove
lower
trim
.
See
Fig
.
6
.
Fig
.
6
.
Lower
steering
column
retaining
screw
(arrow)
.
3
.
Remove
orange
SRS
connector
from
its
holder
and
carefully
separate
connector
.
See
Fig
.
7
.
Fig
.
7
.
Orange
SRS
connector
below
steering
column
(arrow)
.
4
.
Working
in
engine
compartment,
remove
anti-tamper
Torx
screwsfrom
crash
sensor
.
Remove
sensor
and
disconnect
harness
connector
.
See
Fig
.
8
.
5
.
Installation
is
reverse
of
removal
.
Make
sure
arrow
on
sensor
faces
forward
when
installing
sensor
.
WARNING
-
Once
the
airbag
unit
is
installed
and
all
other
ser-vice
procedures
have
been
completed,
start
the
en-
gine
and
check
that
the
SRS
warning
light
goes
out
.
If
the
warning
light
stays
on,the
SRS
system
will
not
function
as
designed
.
Have
the
system
diagnosed
and
repaired
byen
authorized
BMW
dealer
.
0012543
0011891
Page 482 of 759
721-
6
AIRBAG
SYSTEM
(SRS)
5
.
Carefully
lift
airbag
unit
off
steering
wheel
and
discon-
6
.
Installation
is
reverse
of
removal
.
Tighten
right
side
nect
orange
harness
connector
from
rear
of
airbag
unit
.
screw
on
airbag
first
(as
viewedfrom
driver's
seat),
See
Fig
.
10
.
then
left
side
screw
.
NOTE-
NOTE-
In
some
models,
theairbag
electrical
connection
to
the
If
there
is
no
electrical
harness
connector
between
the
steering
wheel
isvia
aplug
in
back
of
the
airbag
unit
.
airbag
and
the
steering
wheel,
be
sure
to
fit
the
push
There
is
no
wire
harness
to
disconnect
.
in
electrical
plug
in
back
of
the
airbag
finto
the
proper
re-
ceptacle
in
the
steering
wheel
.
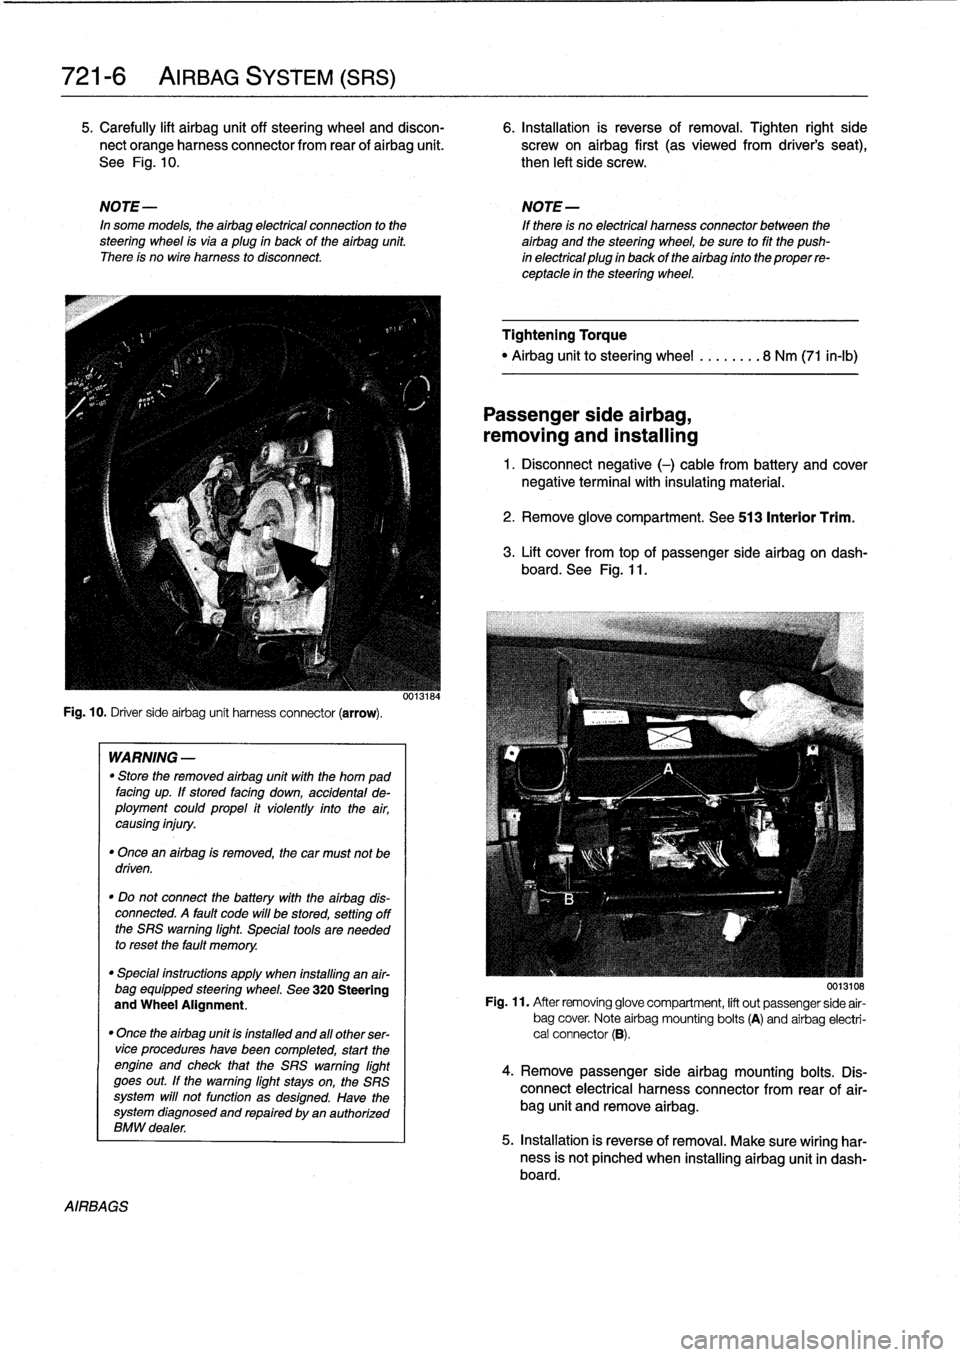
Fig
.
10
.
Driver
sideairbag
unit
harness
connector
(arrow)
.
AIRBAGS
WARNING
-
"
Store
the
removed
airbag
unit
with
the
horn
pad
facing
up
.
If
stored
facing
down,
accidental
de-
ployment
couldpropel
it
violently
into
the
air,
causing
injury
.
"
Once
an
airbag
is
removed,
the
car
must
not
be
driven
.
"
Do
not
connect
the
battery
with
the
airbag
dis-
connected
.
A
fault
code
will
be
stored,
setting
off
the
SRS
warning
light
.
Special
tools
are
needed
to
reset
the
fault
memory
.
"
Special
instructions
apply
when
installing
an
air-
bag
equipped
steering
wheel
.
See
320
Steering
and
Wheel
Alignment
.
"
Once
the
airbag
unit
is
installnd
and
all
other
ser-vice
procedureshave
been
completed,
start
the
engíne
and
check
that
the
SRS
warning
light
goes
out
.
If
the
warning
light
stays
on,
the
SRS
system
will
not
function
as
designed
.
Have
the
system
diagnosed
and
repaired
by
an
authorized
BMW
dealer
.
0013184
Tightening
Torque
"
Airbag
unitto
steering
wheel
........
8
Nm
(71
in-lb)
Passenger
side
airbag,
removing
and
installing
1
.
Disconnect
negative
(-)
cable
from
battery
and
cover
negative
terminal
with
insulating
material
.
2
.
Remove
glove
compartment
.
See
513
Interior
Trim
.
3
.
Lift
cover
from
topof
passenger
sideairbag
on
dash-
board
.
See
Fig
.
11
.
0013108
Fig
.
11
.
After
removing
glove
compartment,
lift
out
passenger
side
air-
bag
cover
.
Note
airbag
mounting
bolts
(A)
and
airbag
electri-
cal
connector
(B)
.
4
.
Remove
passenger
sideairbag
mounting
bolts
.
Dis-
connect
electrical
harness
connector
from
rear
of
air-
bag
unit
and
remove
airbag
.
5
.
Installation
is
reverse
of
removal
.
Make
sure
wiring
har-
ness
is
not
pínched
when
installing
airbag
unit
in
dash-board
.
Page 500 of 759
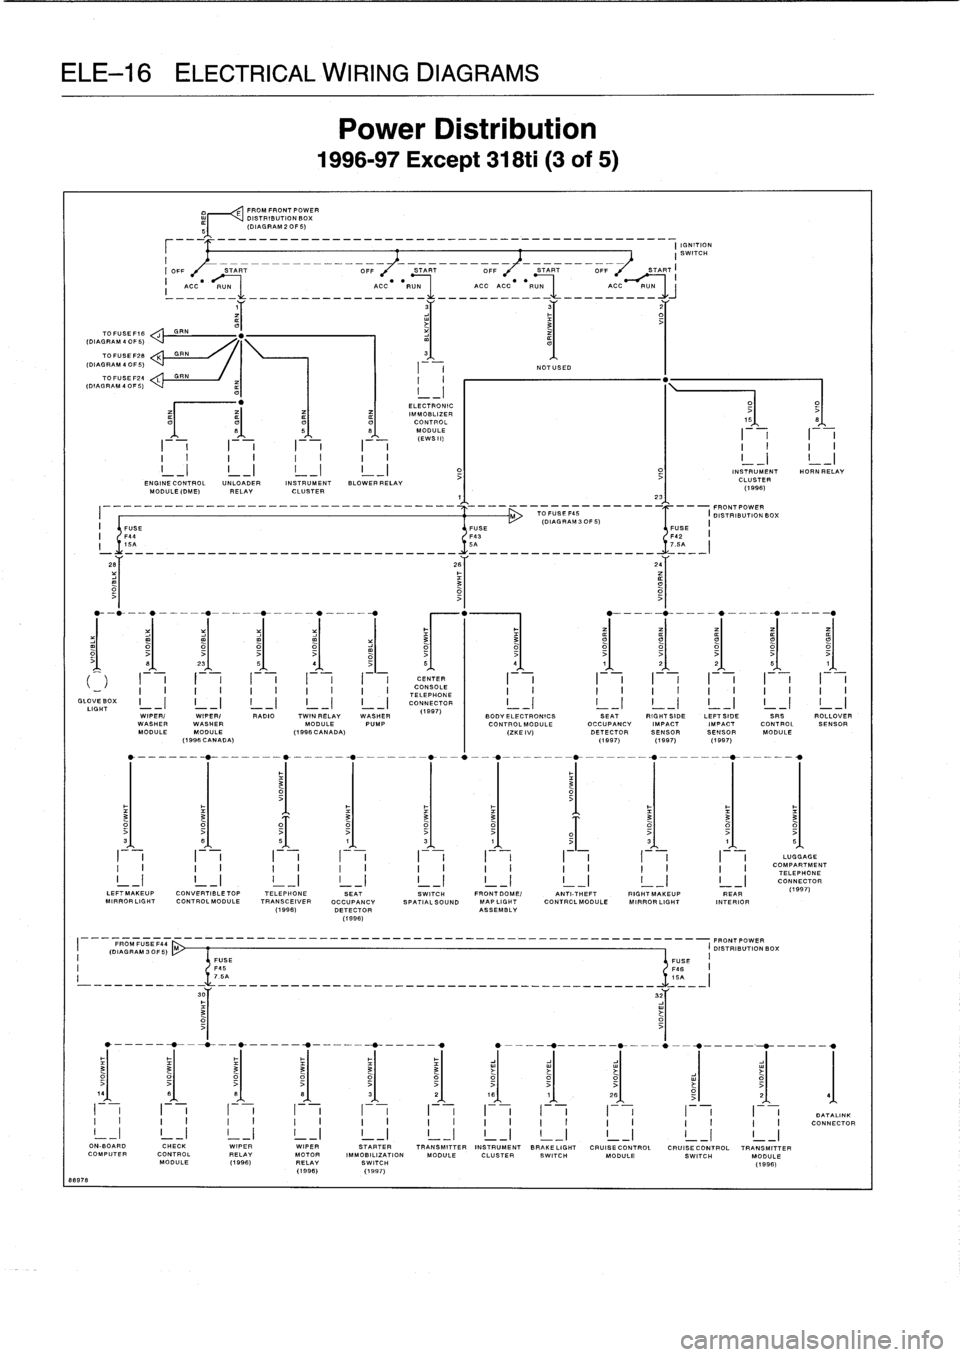
ELE-16
ELECTRICAL
WIRING
DIAGRAMS
88978
TO
FUSE
F16
yDIAGRAM
4
OF
5)
70FU
SEF28
K
GRN
(DIAGRAM
4OF5)
___
--------
_---------------------
______________
I
IGNITION
I
SWITCH
I
_
_
_-_-__-
-----------
I
OFF
START
OFF
START
OFF
START
F,
START
FROM
FRONT
POWER
r
<
DISTRIBUTION
BOX
(DIAGRAM
2OF5)
=OC---U-
-_-_---_-__-ACC--RU=
____CC_CC--R=N-
CC-PUN
Power
Distribution
1996-97
Except
318ti
(3
of
5)
ELECTRONICIMMOBLIZER
CONTROL
MODULE
(EWS11)
NOTUSED
2_
.
15
t
I
I
II
II
F-,
II
II
I
I
II
I
I
I
I
I
-I
L-1
INSTRUMENT
HORN
RELAY
ENGINECONTROL
UN
LOADER
INSTRUMENT
BLOWERRELAY
CLUSTER
No
DULE(DME)
RELAY
CLUSTER
°_
(1996)
-----
-------
1
1'
--
FRONTPOWER
I
M
TO
1111111
IDISDISTRIBUTION
BOX
(DIAGRAM
3
OF5)
II
FUSE
FUSE
USE
I
1'44
F43
42
I
!
'________________________________
5A
~
_________________
5=
el
231
51
41
51
51
41
1
J
1
2
J
1
2
J
1
5~
1),
1
I
.+
.
1
1
1
CE
.N+
TER
I
I
.+
.
i
I
.
1
I
.
1
I
.
1
1
1
1
1
I
I
II
II
I
I
I
I
CONSOLE
TELEPHONE
GLOVE
BOX
I
-
.
I
I
-
I
I
-)
I
-
I
I
-
I
CONNECTOR
LIGHT
(1987)
WIPER/
WIPER/
RADIO
TWIN
RELAY
WASHERWASHER
WASHER
MODULE
PUMPMODULE
MODULE
(1996
CANADA)
(1996
CANADA)
SEAT
RIGHTSIDE
LEFT
SIDE
SRS
ROLLOVER
OCCUPANCY
IMPACTIMPACT
CONTROLSENSOR
DETECTOR
SENSORSENSOR
MODULE
(1997)(1997)(1997)
O~
31
1~
~
1
31
11
51
I
I
I
I
I
I
I
I
I
I
I
I
I
I
I
I
I
I
LUG
AGE
I
I
II
II
I
I
II
I
I
II
II
I
I
COMPARTMENT
TELEPHONE
CONNECTOR
LEF7MAKEUP
CONVERTIBLETOP
TELEPHONE
SEAT
SWITCH
FRONTDOME/
ANTI-THEFT
RIGHTMAKEUP
REAR
(1997)
MI
PROFLIGHT
CONTROLMODULE
TRANSCEIVER
OCCUPANCY
SPATIALSOUND
MAPLIGHT
CONTROLMODULE
MIRROR
LIGHT
INTERIOR
(1996)
DETECTOR
ASSEMBLY
(199fi)
FROMFISE
141
---
(DIAGRAM
30F5)
M
________--_--_________________-_----------------
FRONTPOWER
DISTRIBUTIONBOX
(
FUSE
FUSE
1I
F45
F4fi
I
'S
7
.5A--______________-________________-______
___
30Y
32Y
I
i
F-
,I
iF-
,I
i
I
-
F
-
,
I-
ON-BOAR
CHECK
WIPER
WIPER
STARTER
TRANSMITTER
INSTRUMENT
BRAKELIGHT
CRUISECONTROL
CRUISECONTROL
TRANSMITTER
COMPUTER
CONTROL
RELAY
MOTOR
IMMOBILIZATION
MODULE
CLUSTER
SWITCH
MODULE
SWITCH
MODULE
MODULE
(1996)
RELAY
SWITCH
(1996)
(1998)
(1997)
0
TALINK
CONNECTOR
Page 505 of 759
TOFUSEF16
GGRN
(DIAGRAM
4
OF
5)
TOFUSEF28
HGRN
(DIAL
RAM
4
OF
5)
TOFUSEF24
GRN
(DIAGRAM
4
OF
5)
10437
2
F
-
1I
I
I
I
I
I
I
I
I
I
>
I
I
I
_I
L-1
L
I
D
I
_I
ENGINECONTROL
UNLOADER
INSTRUMENTUNCOUPLING
BLOWERNo
DULE(DME)
RELAY
CLUSTER
DIODE
RELAY
1
I
FUSE
I
F44
I
154
v__-----__---------
a--
_
---____--aaa-r
====
=---~,
.
I--1
I-
I
I,\
I
CONSOLE
I
I
_'
II
I
III
TELEPHONE
I1
GLOVEBOX
I
I
I
CONNECTOR
I
LIGHT
LEFT
RIGHT
SEAT
FIGHT
LEFT
ROLLOVER
SUPPLEMENTAL
FRONTFRONT
OCCUPANCY
SIDESIDE
SENSOR
RESTRAINT
SEATBELT
SEATBELTDETECTOR
IMPACTIMPACT
SYSTEM
SWITCH
SWITCH
SENSOR
SENSOR
CONTROL
MODULE
I
IGNITION
SWITCH
I
OFF
START
OFF
START
OFF
START
OFF
/
START
ACC-__U-
_____________
_
ACC
"
__U_
_____
AC
_-
_____
A
C
____
,
a
FROMFRONTPOWER
DISTRIBUTION
BOX
(DIAGRAM
2
OF
5)
56
ELECTRONICIMMOBLIZER
((
1
.
2
.8
L
(
L)
8
5O
1
8
~
CONTROL
9
MODULE
I
_
_
IF-")
I
1
I
I
I
I
I
I
WIPERI
RADIO
WASHER
BODYELECTRONICS
WASHER
Pump
CONTROL
MODULEMODULE
(ZKE
IV)
61
31
5'
I
I
I
I
I
I
I
II
I
I
I
I
I
I
I
LEFT
MAKEUP
CONVERTIBLETOP
TOP
SPATIAL
FRONTDOME/
ANTITHEFT
T
RIGHT
MAKEUP
LEFT
RIGHT
MIPROFLIGHT
CONTROLMODULEH
I
FI
SOUND
MAPLIGHT
CONTROLMODULE
MIRRORLIGHT
REAR
FEAR
SWTCH
RELAY
ASSEMBLY
INTERIOR
INTERIOR
______
-
-
-
-
-
_____________________________
-_
FRONTPOWER
FROMFUSE
F43
---
I
DISTRIBUTION
BOX
(OIAGRAM30F5)
J
II
FUSE
FUSE
I
F45
146
7
.5
-_
_
_
_
_
_
_
_
_
_
_
_
_
_
_
_
_
_
_
_
_
_
_
_
_
_
_
_
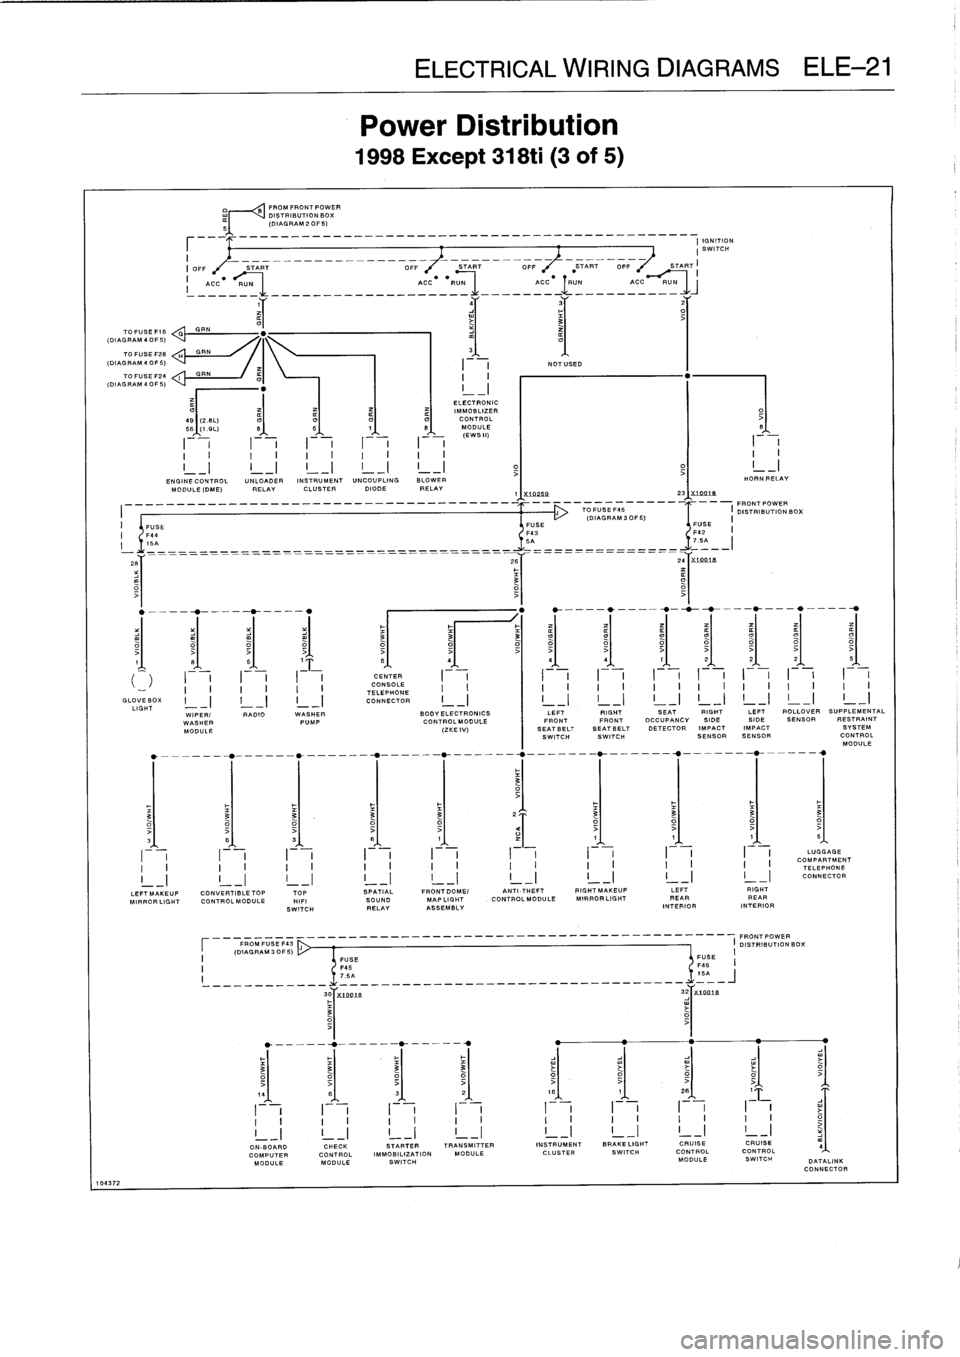
ELECTRICAL
WIRING
DIAGRAMS
ELE-21
Power
Distribution
1998Except
318ti
(3
of
5)
2B
NOTUSED
0259
231X
7Oat8
5I
4151
51
5
;
4
4
1
2
O
16
I
I
I
I
I
I
I
I
I
II
I
I
I
I
I
f
I
I
I
ON-BOARD
CHECK
STARTER
TRANSMITTER
INSTRUMENT
BRAKE
LISHT
COMPUTERCONTROL
IMMOBILIZATION
MODULE
CLUSTER
SWITCH
MODULE
MODULE
SWITCH
---
-
-
------
--
FRONT
POWER
TOFUSEF45
I
DISTRIBUTION
BOX
'DIAGRAM
S
CPS)
FUSE
"
FUSE
HORN
RELAY
CRUISECRUISE
CONTROLCONTROL
MODULE
SWITCH
I
I
I
I
I
II
I
I
I
I
I
I
I
I
I
I
I
I
I
I
I
I
I
I
I
I
II
II
II
LUGGAGECOMPARTMENT
II
II
II
TELEPHONE
CONNECTOR
DATALINK
CONNECTOR
Page 648 of 759
8299
1
/~
EXCEPT
BRAKE
~J
1997
FLUID
IND
A23
~
.
A16
I
I
SRS
IND
A17
81
18
B
B24
J,
CHARGE
PARK
IND
BRAKE
IND
CHECK
ENGINE
IN.
LEFT
TURN
IND
RIGHT
TURN
IND
1997
ONLY
FUEL
CONSUMPTION
METER
CHECK
IND
SEAT
FRONT
BELT
10
.
LT
INDIND
HIGH
BEAM
IND
FUEL
RESERVE
IND
FUEL
GAUGE
ILL
UM
A22
25
~
(3
USED)
EXCEPT
y
28
7992
TEMPGAUGE
INSTRUMENT
CLUSTER
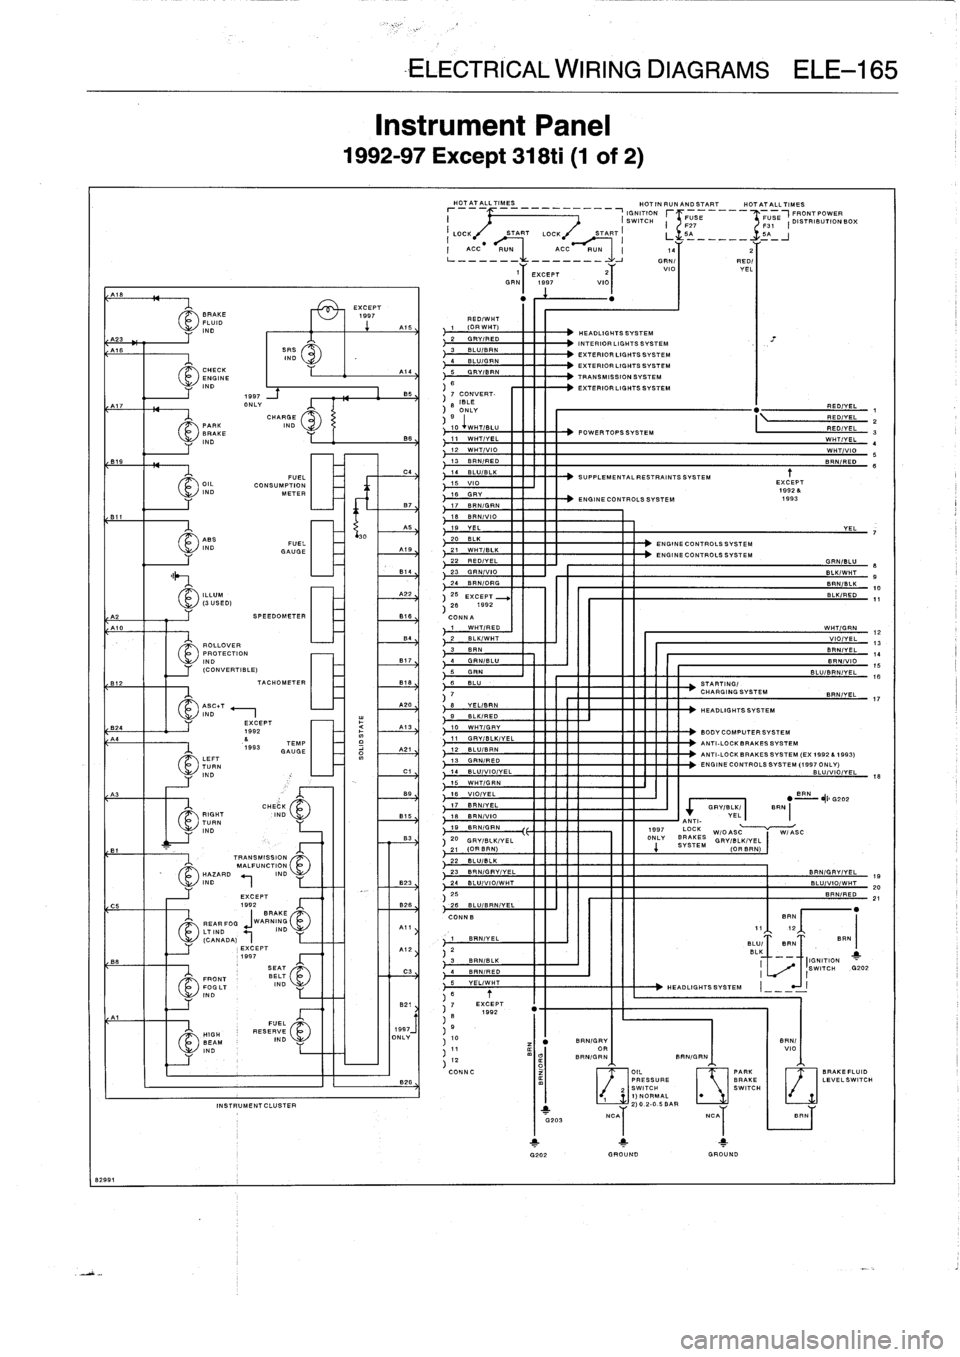
InstrumentPanel
1992-97
Except
318ti
(1
of
2)
B
-ELECTRICAL
WIRING
DIAGRAMS
ELE-165
HOTATALLTIMES
________
HOT
IN
RUNAND
START
HOTATALLTIMES
IGNITION
r
FUSE
FUSE
I
FRONT
UTION
I
(SWITCH
F21
~F31
DISTRIB1000%
LOCK
START
LOCK
START
LL
I
5
_A
_-__-
ACC
RUN
ACC
RUN
14
2
L---
-------
-
-
OR
N1
RED/
T
V
YEL
11
EXCEPT
2
lo
GRN
1997
VIO
RED/WHT
1
(ORWHT)
2
GRYIRED
3
BLU/BRN
4
BLU/GRN
5
GRVIBRN
BS
7
CONVERT-
8
ISLE
ONLY
HEADLIGHTS
SYSTEM
INTERIOR
LIGHTS
SYSTEM
EXTERIOR
LIGHTS
SYSTEM
EXTERIOR
LIGHTS
SYSTEM
TRANSMISSION
SYSTEM
EXTERIOR
LIGHTS
SYSTEM
9
I
iw
.TIBLU
POWERTOPSSYSTEM
11
WHT/YEL
12
WHT/VIO
13
BRN/RED
14
BLU/BLK
15
VIO
16
GRY
-
ENGINE
CONTROLS
SYSTEM
17
BRN/GRN
18
BAN
/Vlo19
YEL
20
BLK
ENGINE
CONTROLS
SYSTEM
A79
21
WHT/BLK
22
RED/YEL
814
23
GRNIVIO
24
BRNIORG
SUPPLEMENTAL
RESTRAINTS
SYSTEM
SPEEDOMETER
816
CONNA
1
WHTIRED
B4
~2
BLK/WHT
ROLLOVER
33
8R~N
PROTECTION
IND
B17
4
GRN/BLU
(CONVERTIBLE)
5
GRIN
TACHOMETER
B18
6
BLU
STARTING/
7
CHARGINGSYSTEM
A20
8
YELIBRN
B
-K/FED
10
WHTIGRY
11
GRYIBLK/YEL
12
BL
LISP
N13
GRN/PED
14
BLU/VIO/YEL
15
WHT/GRN
89
16
VIO/YEL
BRN
"
~I
G202
17
BRNIYEL
GRY/BLK,
BFN
15
18
BN/VIO
VEL
B
ANT
19
BRNIGRN
1997
LOCK
~`r~i
j
W/OASCW/ASO
83
20
GRYIBLK/VEL
ONLY
SYES
4
STEM
GRV/BLK/VEL
21
(ORBRN)
(ORBRN)
22
BLU/BLK
23
BRN/GRV/VEL
BRNIGRVIVEL
19
BRN/GRV
OR
BRN/GRN
HEADLIGHTS
SYSTEM
BODYCOMPUTER
SYSTEM
ANTI-LOCK
BRAKESSYSTEM
ANTI-LOCK
BRAKESSYSTEM
(EX
1992
A1993)
ENGINE
CONTROLS
SYSTEM
(1997
ONLY)
BLU/VIO/YEL
J
EXCEPT
1
.92
.
1993
BIN/
VIO
BRN/GRN
11
OIL
[
._~]
PARK
RA11FL11
AL.^
SWITCH
I
PRESSURE
BRAKE
LEVELSW
U
ITCH
SWITCH
111
G202
GROUND
GROUND
REDIYELRED/YELRED/YEL
WHTIYEL
WHT/VIO
BRN/RED
YEL
GRN/BLU
BLKIWHTBRN/BLK
BLK/RED
WHTIGRN
VIO/YEL
BRNIYELBRN/VIO
BLU/BRNIYEL
BRN/YEL
e9
0
11
1213
141516
Page 649 of 759
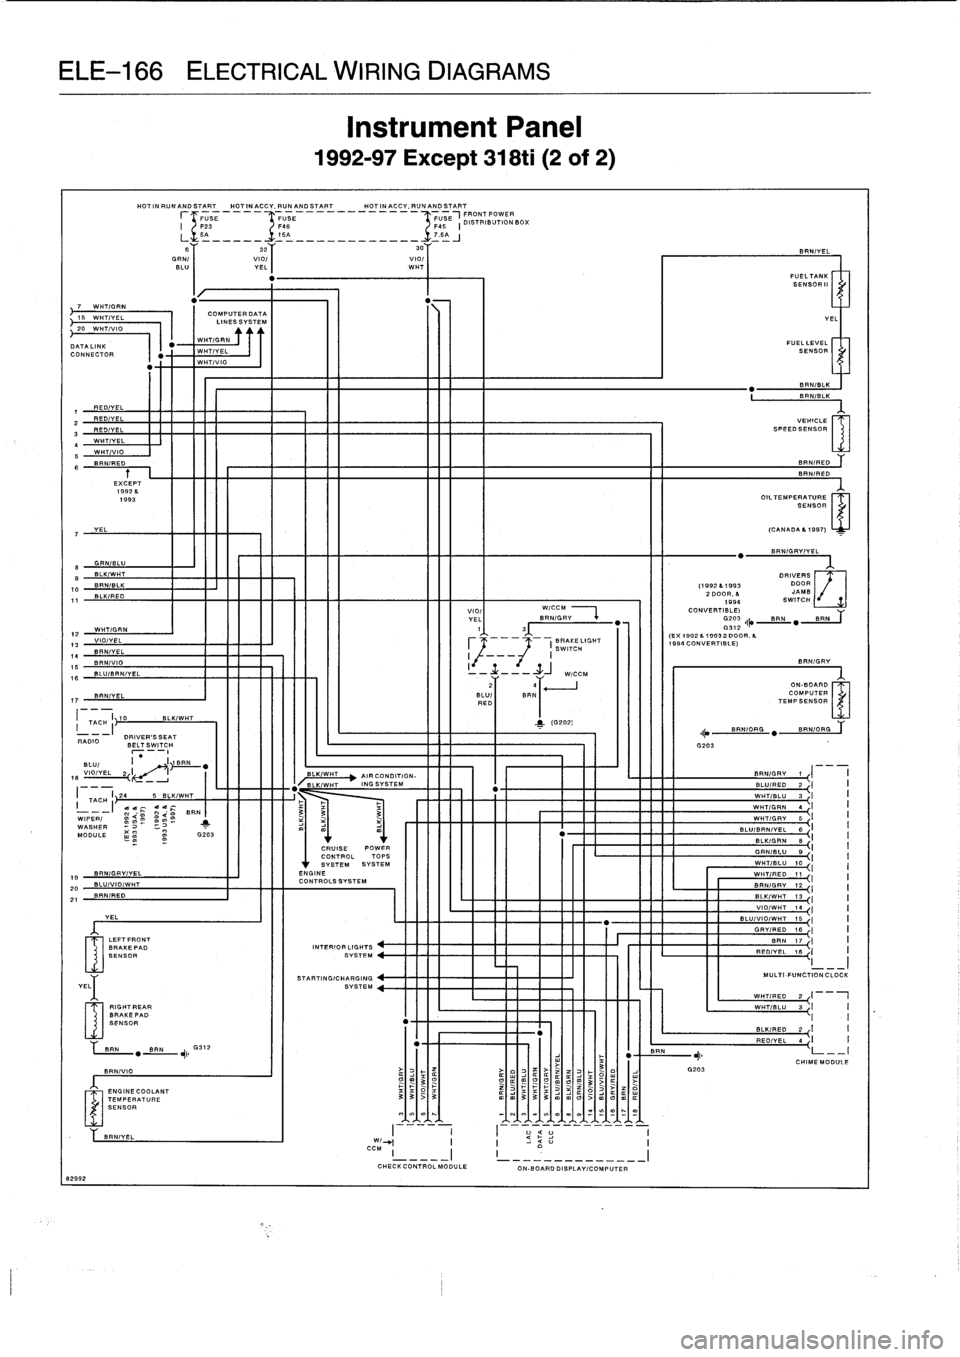
ELE-166
ELECTRICAL
WIRING
DIAGRAMS
"
-
N15
WH7/VA
I
COLIESSSVSTEM
20
WHT/VIO
DATALINK
WHT/GRN
CONNECTOR
WHT/YEL
1
WHT/VIO
REDIVEL
FF"
2
REDIVELREDIVEL
17
BRNIYEL
170
I
TAC-I~
RADIO
DRIVER'SSEAT
BELT
SWITCH
BLUI
I
_
I1
BRN
VIO/YEL
2
I
-
18
19
BRN/GFY/YEL
20
BLU/VIOIWHT
21
BRN/RED
YEL
8299
2
YEL
LEFTFRONT
BRAKEPAD
SENSOR
RIGHT
EAR
BRAKEPAD
SENSOR
HOTINRUNANDSTART
HOTINACCY,PUNANDSTART
HOTINACCY,RUNANDSTART
r
F23
E___
USE
__________-IFFUSE
USE
IDSOTRIBUTIONBOX
BLK/WHT
BRN
"BAN
,I
G312
BRNIVIO
ENGINECOOLANT
TEMPERATURESENSOR
InstrumentPanel
1992-97
Except
318ti
(2
of
2)
5A_____-TISA
____________
.T7
.5AJ
B
32
30Y
GRN/
viol
I
viol
BLU
I
YEL
WHT
WHT/VEL
WHT/VIO
BRNIRED
EXCEPT
1992
&
1993
OIL7EMPESENSOR
7
YEL
(CANADA61997)
.
BRNIGRVIYEL
e
GRNIBLU
9
BLKIWHT
DRIVERS
DOOR
0
JAMB
1994
SWITCH
1
BIN/ILK
(19926
1
993
BLK/RED
2
DOOR,
6
VIOI
WICCM
CONVERT
BR
WHTIGRN
YE'
I
3
N/GRY
~
(EX
1992
6
7993
200
V"'
0R
6
VIO/YEL
I
BRAKELIGHT
.
1990
CONVERTIBLE)
BRNIYEL
SWITCH
BRN/VIO
I
I
8RN/GRV
BLUIBRN/VEL
-
----+-j
W/CCM
.LU/
COMPUTER
REDI
BRN1
~
TEMPSENSOR
MMONE
-
.
INNER
BRNIYEL
I----
I
I--
-
-----
--
W/_I
I
I
CC
M
CHECK
CONTROLMODULE
ON-BOARD
DISPLAYICOMPUTER
BRN
G203
BRNIYEL
FUELTANKI
SENSOR"
FUELLEVEL
SENSORI
8RN/BLK
BRN/BLK
VEHICLE
SPEEDSENSOR
BF
RED
an
RED
YEL
GRN/BLU
9
I
WIT/
WHT/RED
11-I
I
BRNI
.P
Y12
I
I
BLK/WHT
13
I
VIO/WHT
10
I
BLU/VIO/WHT
75
I
GRV/RED
18`
I
I
BRN
17
~I
PEDIYEL
18
I
I
MULTI
FUNCTION
CLOCK
WHTwHTRG1
-
I
WHT/BLU
3
I
II
I
BLKIRED
2
{
I
I
REOIVE
L4
I
I
CHIMEMODULE
Page 750 of 759
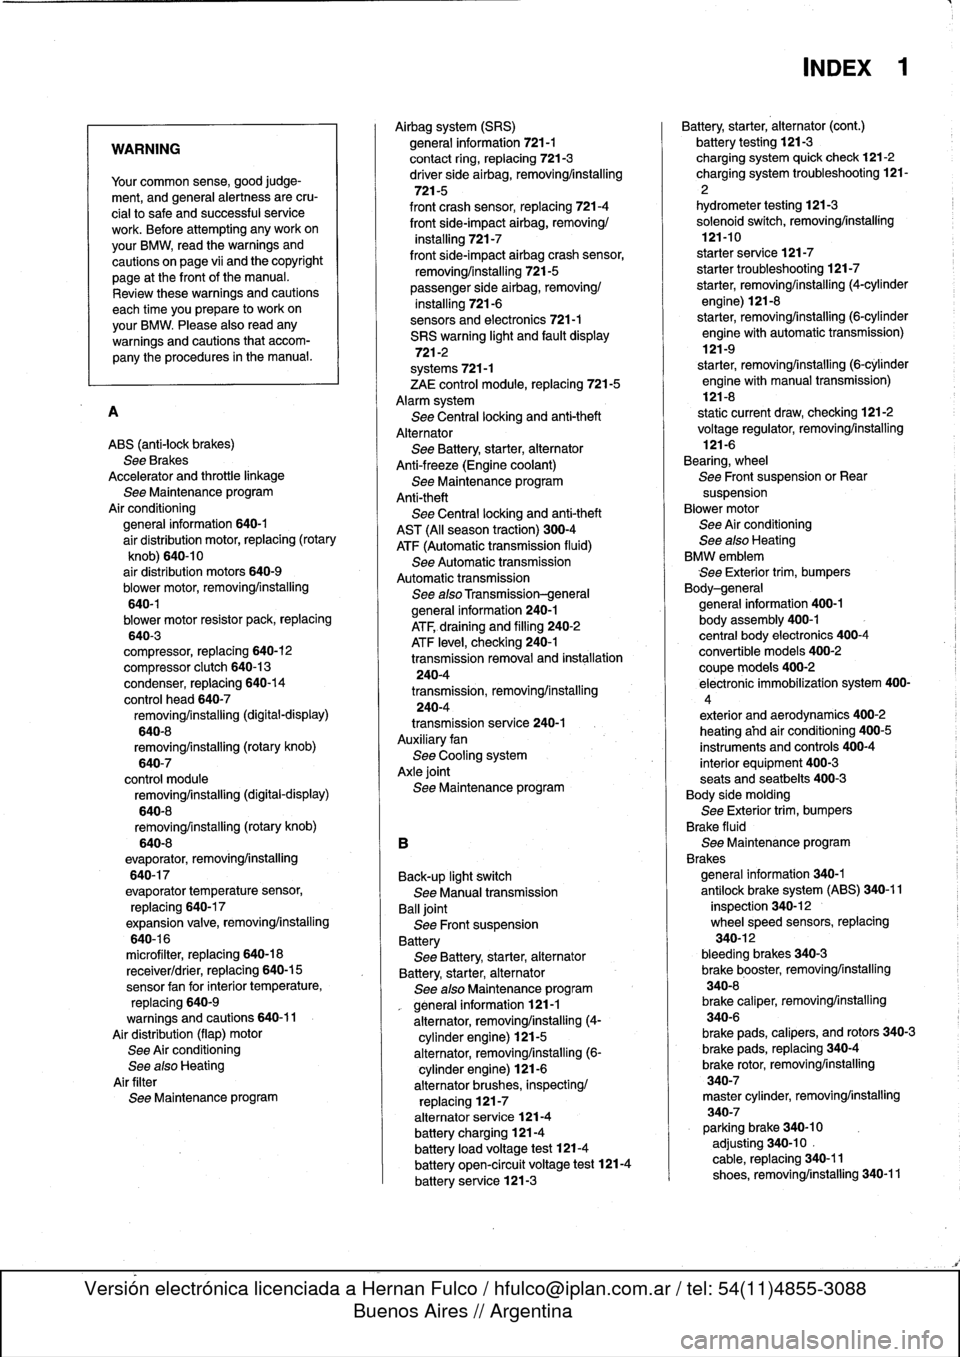
WARNING
Your
common
sense,
good
judge-
ment,
and
general
alertness
are
cru-
cial
to
safe
and
successful
service
work
.
Before
attempting
any
work
on
your
BMW,
read
the
warnings
and
cautions
on
page
vi¡
and
the
copyright
page
at
the
front
of
the
manual
.
Review
these
warnings
and
cautions
each
time
youprepare
to
work
on
your
BMW
.
Please
also
read
any
warnings
and
cautions
that
accom-
pany
the
procedures
in
the
manual
.
A
ABS
(anti-lock
brakes)
See
Brakes
Accelerator
and
throttle
linkage
See
Maintenance
program
Air
conditioning
general
information
640-1
air
distribution
motor,
replacing
(rotary
knob)
640-10
air
distribution
motors
640-9
blower
motor,
removing/installing
640-1blower
motor
resistor
pack,
replacing
640-3
compressor,
replacing
640-12
compressor
clutch
640-13
condenser,
replacing
640-14
control
head
640-7
removing/installing
(digital
-display)
640-8
removing/installing
(rotary
knob)
640-7
control
module
removing/installing
(digital-display)
640-8
removing/installing
(rotary
knob)
640-8
evaporator,
removinglinstalling
640-17
evaporator
temperature
sensor,
replacing
640-17
expansion
valve,
removing/installing
640-16
microfilter,
replacing
640-18
receiverldrier,
replacing
640-15
sensor
fan
forinterior
temperature,
replacing
640-9
warnings
and
cautions
640-11
Air
distribution
(flap)
motor
See
Air
conditioning
See
also
Heating
Air
filter
See
Maintenanceprogram
Airbag
system
(SRS)
general
information
721-1
contact
ring,
replacing
721-3
driver
side
airbag,removing/installing
721-5
front
crash
sensor,
replacing
721-4
front
side-impact
airbag,
removing/
installing
721-7
front
side-impact
airbag
crash
sensor,
removing/installing
721-5
passenger
side
airbag,
removing/
installing
721-6
sensors
and
electronics
721-1
SRS
warning
light
and
fault
display
721-2
systems
721-1
ZAE
control
module,
replacing
721-5
Alarm
system
See
Central
locking
and
anti-theft
Alternator
See
Battery,
starter,
alternator
Anti-freeze
(Engine
coolant)
See
Maintenance
program
Anti-theft
See
Central
lockíng
and
anti-theft
AST
(Al¡
season
traction)
300-4
ATF
(Automatic
transmission
fluid)
See
Automatic
transmission
Automatic
transmission
See
alsoTransmission-general
general
information
240-1
ATF,draining
and
filling
240-2
ATF
leve¡,
checking
240-1
transmission
removaland
ínstallation
240-4
transmission,
removinglinstalling
240-4
transmission
service
240-1
Auxiliary
fan
See
Cooling
system
Axle
joint
See
Maintenance
program
B
Back-up
light
switch
See
Manual
transmission
Balljoint
See
Front
suspension
Battery
See
Battery,
starter,
alternator
Battery,
starter,
alternator
See
also
Maintenance
program
general
information
121-1
alternator,
removing/installing
(4-
cylinder
engine)
121-5
alternator,
removinglinstalling
(6-
cylinder
engine)
121-6
alternator
brushes,
inspecting/
replacing
121-7
alternator
service
121-4
batterycharging
121-4
battery
load
voltage
test
121-4
batteryopen-circuit
voltage
test
121-4
battery
service
121-3
INDEX
1
Battery,
starter,
alternator
(cont
.)
battery
testing
121-3
charging
system
quick
check121-2
charging
system
troubleshooting
121-
2
hydrometer
testing
121-3
solenoid
switch,
removinglinstalling
121-10
starter
service
121-7
starter
troubleshooting
121-7
starter,
removing/installing(4-cylinder
engine)
121-8
starter,
removing/installing(6-cylinder
engine
with
automatic
transmission)
121-9
starter,
removing/installing
(6-cylinder
engine
with
manual
transmission)
121-8
static
current
draw,
checking
121-2
voltage
regulator,
removing/installing
121-6
Bearing,
wheel
See
Front
suspension
or
Rear
suspension
Blowermotor
See
Air
conditioning
See
also
Heatíng
BMW
emblem
See
Exterior
trim,
bumpers
Body-general
general
information
400-1
body
assembly
400-1
central
body
electronics
400-4
convertible
models
400-2
coupe
models
400-2
electronic
immobilizatíon
system
400-
4
exterior
and
aerodynamics
400-2
heating
afhdair
conditioning
400-5
instruments
and
controls
400-4
interior
equipment
400-3
seats
and
seatbelts
400-3
Body
side
molding
See
Exterior
trim,
bumpers
Brake
fluid
See
Maintenance
program
Brakes
general
information
340-1
antilock
brake
system
(ABS)
340-11
inspection
340-12
wheelspeed
sensors,
replacing
340-12
bleeding
brakes
340-3
brake
booster,
removinglinstalling
340-8
brake
caliper,
removing/installing
340-6
brake
pads,
calipers,
and
rotors
340-3
brake
pads,
replacing
340-4
brake
rotor,
removing/installing
340-7
master
cylinder,
removing/installing
340-7
parking
brake
340-10
adjusting
340-10
.
cable,
replacing
340-11
shoes,
removinglinstalling
340-11
Page 751 of 759
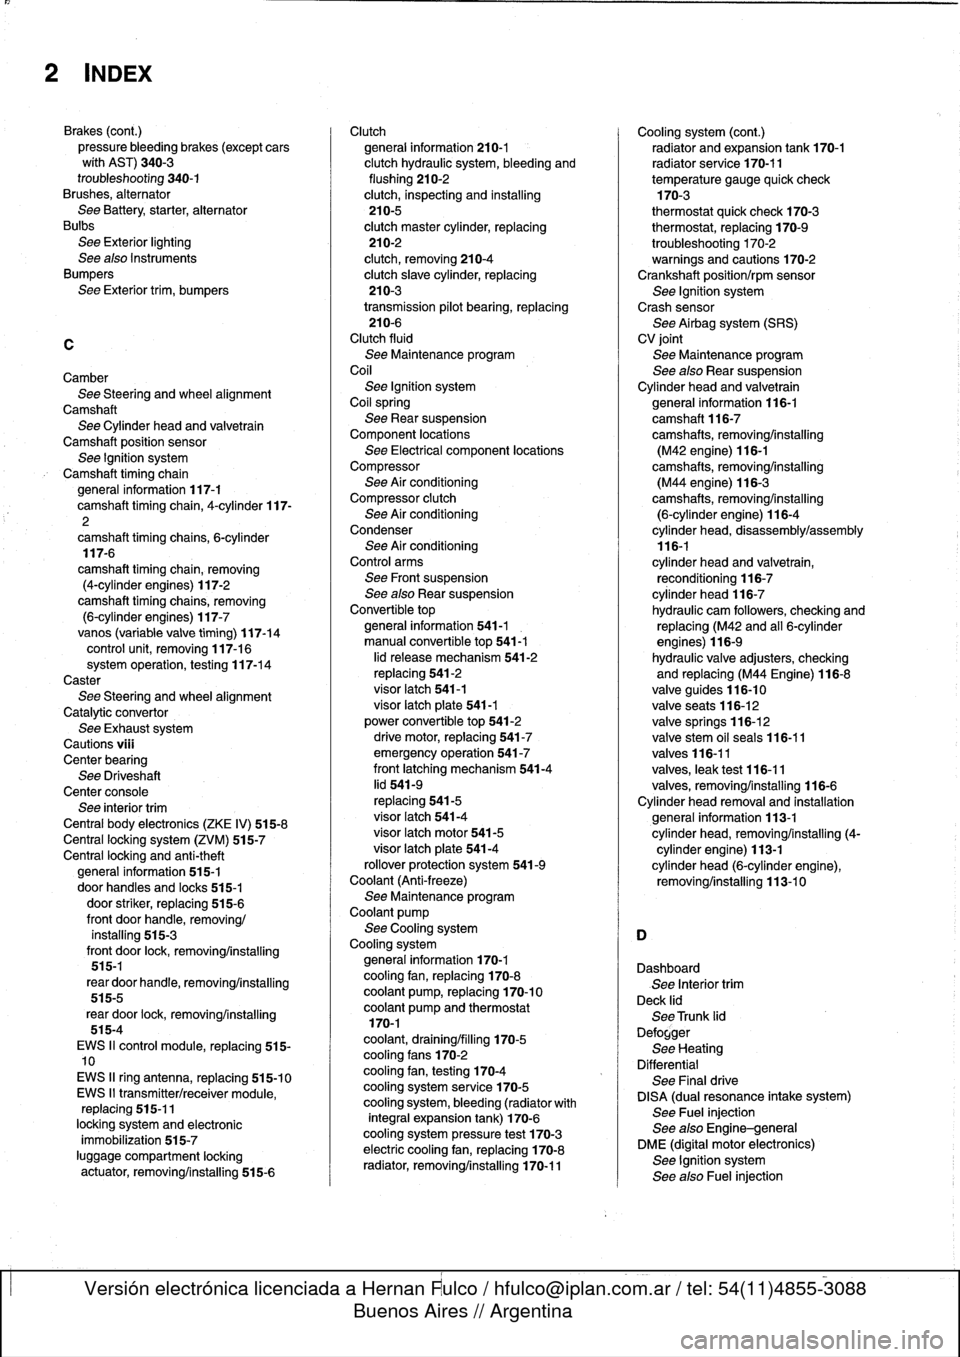
2
INDEX
Brakes
(cont
.)
pressure
bleeding
brakes
(except
cars
wíth
AST)
340-3
troubleshooting
340-1
Brushes,
alternator
See
Battery,
starter,
alternator
Bulbs
See
Exterior
lighting
See
also
Instruments
Bumpers
See
Exterior
trim,
bumpers
C
CamberSee
Steering
and
wheel
alignment
Camshaft
See
Cylinder
head
and
valvetrain
Camshaft
position
sensor
See
Ignition
system
Camshaft
timing
chain
general
information
117-1
camshaft
timingchain,
4-cylinder
117-
2
camshaft
timing
chains,6-cylinder
117-6
camshaft
timing
chain,
removing
(4-cylinder
engines)
117-2
camshaft
timing
chains,
removing
(6-cylinder
engines)
117-7vanos
(variable
valve
timing)
117-14
control
unit,
removing
117-16system
operation,
testing
117-14
Caster
See
Steering
andwheel
alignment
Catalytic
convertor
See
Exhaustsystem
Cautions
viü
Center
bearing
See
Driveshaft
Center
console
See
interior
trim
Central
body
electronics
(ZKE
IV)
515-8
Central
locking
system
(ZVM)
515-7
Centrallocking
and
anti-theft
general
information
515-1
door
handles
and
Iocks
515-1
door
striker,
replacing
515-6
front
door
handle,
removing/
installing
515-3
front
door
lock,
removing/installing
515-1
rear
door
handle,
removing/installing
515-5
rear
door
lock,
removing/installing
515-4
EWS
II
control
module,
replacing
515-10
EWS
II
ring
antenna,
replacing
515-10
EWS
II
transmitter/receiver
module,
replacing
515-11
locking
system
and
electronic
immobilization
515-7
luggage
compartment
locking
actuator,
removing/installing
515-6
Clutch
general
information210-1
clutch
hydraulic
system,
bleeding
and
flushing
210-2
clutch,
inspecting
and
installing
210-5
clutch
master
cylinder,
replacing
210-2
clutch,
removing
210-4
clutch
slave
cylinder,
replacing
210-3
transmission
pilot
bearing,
replacing
210-6
Clutch
fluid
See
Maintenance
program
Coil
See
Ignition
system
Coilspring
See
Rear
suspension
Component
locations
See
Electrical
component
locations
Compressor
See
Air
conditioning
Compressor
clutch
See
Air
conditioning
Condenser
See
Air
conditioningControl
arms
See
Front
suspension
See
also
Rear
suspension
Convertible
top
general
information
541-1
manual
convertible
top
541-1
lid
release
mechanism
541-2
replacing
541-2
visor
latch
541-1
visor
latch
píate
541-1
power
convertible
top
541-2
drive
motor,
replacing
541-7
emergency
operation
541-7
front
latching
mechanism
541-4
lid
541-9
replacing
541-5
visor
latch
541-4
visor
latch
motor541-5
visor
latch
plate
541-4
rollover
protection
system
541-9
Coolant
(Anti-freeze)
See
Maintenance
program
Coolant
pump
See
Cooling
system
Cooling
system
general
information
170-1
cooling
fan,
replacing
170-8
coolant
pump,
replacing
170-10
coolant
pump
and
thermostat170-1
coolant,
draining/filling
170-5
cooling
fans
170-2
cooling
fan,
testing
170-4
cooling
system
service
170-5
cooling
system,
bleeding
(radiator
with
integral
expansion
tank)
170-6
cooling
system
pressure
test
170-3
electric
cooling
fan,
replacing
170-8
radiator,
removing/installing
170-11
Cooling
system
(cont
.)
radiator
and
expansion
tank
170-1
radiator
service
170-11
temperature
gauge
quick
check170-3
thermostat
quick
check
170-3
thermostat,
replacing
170-9
troubleshooting
170-2
warnings
and
cautions
170-2Crankshaft
position/rpm
sensor
See
Ignition
system
Crash
sensor
See
Airbag
system
(SRS)
CV
joint
See
Maintenance
program
See
also
Rear
suspension
Cylinder
head
and
valvetrain
general
information
116-1
camshaft116-7
camshafts,
removing/installing
(M42
engine)
116-1camshafts,
removing/installing
(M44
engine)
116-3
camshafts,
removing/installing
(6-cylinder
engine)
116-4
cylinder
head,
disassembly/assembly
116-1
cylinder
head
and
valvetrain,
reconditioning
116-7
cylinder
head
116-7
hydraulic
cam
followers,
checking
and
replacing
(M42
and
al]
6-cylinder
engines)
116-9
hydraulic
valve
adjusters,
checking
and
replacing
(M44
Engine)
116-8
valve
guides
116-10
valveseats
116-12
valve
springs
116-12
valve
stem
oil
seals
116-11
valves
116-11
valves,
leak
test
116-11
valves,removing/installing
116-6
Cylinder
head
removal
and
installation
general
information
113-1
cylinder
head,
removing/installing
(4-
cylinder
engine)
113-1
cylinder
head
(6-cylinder
engine),
removing/installing
113-10
Dashboard
See
Interior
trim
Deck
lid
See
Trunk
lid
Defogger
See
Heating
Differential
See
Final
drive
DISA
(dual
resonance
intake
system)
See
Fuel
injection
See
also
Engine-general
DME
(digital
motor
electronics)
See
Ignition
system
See
alsoFuel
injection