warning BMW M3 1998 E36 Workshop Manual
[x] Cancel search | Manufacturer: BMW, Model Year: 1998, Model line: M3, Model: BMW M3 1998 E36Pages: 759
Page 429 of 759
612
Switches
and
Electrical
Accessories
GENERAL
.
.
.
.
.
.
.
.
.
...
.
.
.
.
.
...
.
......
.612-1
Headlight
switch,
replacing
..
.
...
.
.
.
.
.
.
.
.
.
612-5
Foglight
switch,
replacing
....
.
.
.
.
.
.
.
.
.
.
.
.
.
612-5
INTERIOR
SWITCHES
.
.
...
.
.
.
.
.
.
.
.....
612-1
Hazard
warning
switch,
replacing
.
.
.
.
.
.
.
.
.
.612-5
Turn
signal
switch
and
wiper
switch,
Powerwindow
switch,
replacing
.
.
.
...
.
.
.
.
.
612-5
replacing
.
.
.
.
.
.
.
...
.
.
.
.....
.
....
.
.
.
.
612-1
Outside
mirrorswitch,
replacing
.
.
.
.
.....
.
.
.612-6
Ignition
Switch
Assembly
.
.
.
.
.
.
.
.
....
.
...
612-3
Ignition
electrical
switch,
replacing
.
...
.
....
612-3
INTERIOR
LIGHTS
.
.
................
.
..
612-6
Ignition
lock
cylinder,
replacing
.
.
.
.
.....
.
..
612-4
Dome
light,
rear
map
lights,
trunk
light,
Headlight
and
Foglight
Switch
Assembly
.
.
.
.
612-5
replacing
bulbs
.
......
.
.
.
.
.
.
.
.
.
.....
.
.612-7
GENERAL
Turn
signal
switch
and
wiper
switch,
replacing
Thissection
covers
replacement
of
interior
switches
and
accessories
.
The
procedures
for
removing
the
turn
signal
stalk
switch
and
the
wiper
system
stalk
switchare
similar
.
When
working
on
electrical
switches,
always
disconnect
the
negative
(-)
cable
from
the
battery
and
insulate
the
cable
end
to
prevent
accidental
re-connection
.
CAUTION-
Prior
to
disconnectiog
the
battery,
read
the
battery
disconnection
cautions
given
at
the
front
of
this
manual
on
page
viii
.
WARNING
-
The
cars
covered
by
this
manual
are
equipped
with
a
Supplemental
Restraint
System
(SRS)
that
auto-'
matically
deploys
one
or
more
airbags
.
Each
airbag
unit
houses
an
explosive
powerful
charge
.
Any
work
involving
the
SRS
system
should
only
be
per-
formed
byan
authorized
BMW
dealer
.
Making
re-
pairs
without
the
proper
knowledge
and
special
test
equipment
may
cause
serious
personal
injury
.
See
721
Airbag
System
(SRS)
3
.
With
front
wheels
pointed
straight
ahead,
remove
steer-
"
Testing
and
replacement
information
for
the
oil
ores-
¡ng
wheel
.
See
320
Steering
and
Wheel
Alignment
.
sure
switch
is
covered
in
119
Lubrication
System
.
NOTE-
"
Wirfng
diagramscan
be
found
in
Electrical
Wiring
Diagrams
.
"
Fuse,
relay
and
electrical
component
locations
can
be
found
in
610
Electrical
Component
Locations
.
"
Replacement
information
for
thetransmission
gear
position/neutral
safety
switch
is
covered
in
250
Gear-
shift
Unkage
.
INTERIOR
SWITCHES
NOTE
-
To
preventmarring
interior
trim,
wrap
the
tips
of
screw-
drivers
and
pliers
with
tape
beforeprying
out
switches
or
electrical
accessories
.
SWITCHES
AND
ELECTRICAL
ACCESSORIES
612-1
1
.
Disconnect
negative
(-)
cable
from
battery
and
cover
terminal
with
insulating
material
.
2
.
Remove
airbag
unit
from
steering
wheel
.
See
721
Air-
bag
System
(SRS)
.
Store
airbag
unit
in
a
safe
placew¡th
pad
facing
up
.
NOTE
-
To
helo
with
reassembly,
mark
steering
wheel
and
col-
umn
before
disassembly
.
4
.
Remove
trim
panel
from
lower
left
side
of
instrument
panel
.
See513
Interior
Trim
.
INTERIOR
SWITCHES
Page 430 of 759
612-2
SWITCHES
AND
ELECTRICAL
ACCESSORIES
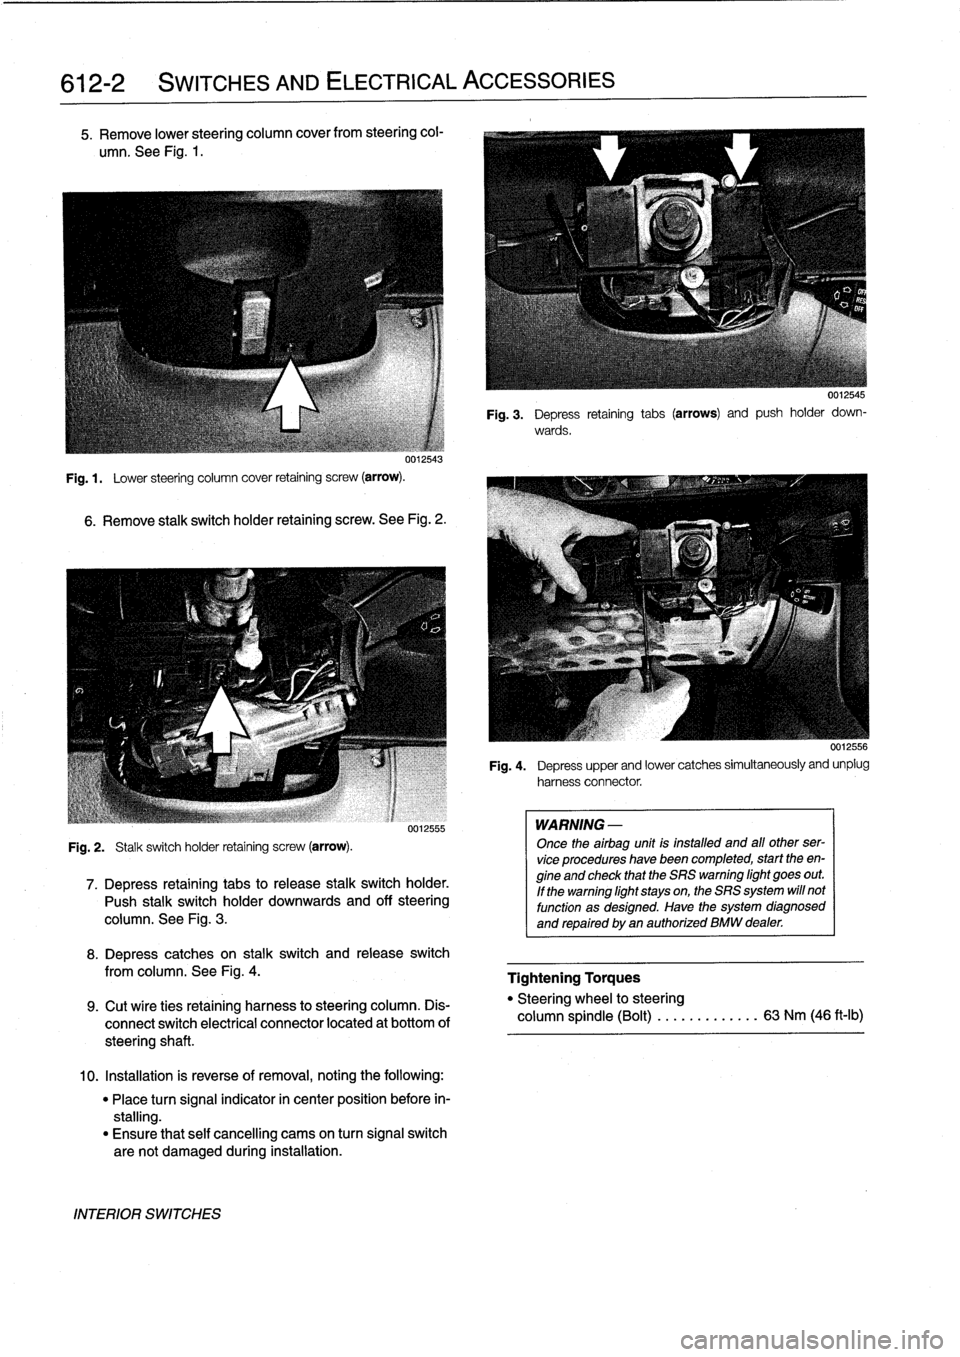
5
.
Remove
lower
steering
column
cover
from
steering
col-
umn
.
See
Fig
.
1
.
uu12543
Fig
.
1
.
Lower
steering
column
cover
retaining
screw
(arrow)
.
6
.
Remove
stalk
switch
holder
retaining
screw
.
See
Fig
.
2
.
Fig
.
2
.
Stalk
switch
holder
retaining
screw
(arrow)
.
0012555
7
.
Depress
retaining
tabs
to
release
stalk
switchholder
.
Push
stalk
switchholder
downwards
and
off
steering
column
.
See
Fig
.
3
.
8
.
Depress
catches
on
stalk
switch
and
release
switch
from
columna
See
Fig
.
4
.
9
.
Cut
wíre
ties
retaining
harness
to
steering
column
.
Dis-
connect
switch
electrical
connector
located
at
bottom
of
steeringshaft
.
10
.
Installation
is
reverse
of
removal,
noting
the
following
:
"
Place
turn
signal
indicator
in
center
position
before
in-
stalling
.
"
Ensure
that
self
cancelling
cams
on
turn
signal
switch
are
not
damaged
during
installation
.
INTERIOR
SWITCHES
WARNING
-
Once
theairbag
unit
is
installed
and
all
other
ser-
vice
procedures
havebeen
completed,
start
theen-
gine
and
check
that
the
SRS
warning
light
goes
out
.
If
the
warning
light
stays
on,
the
SRS
system
will
not
function
as
designed
.
Have
the
system
diagnosed
and
repaired
by
an
authorized
BMW
dealer
.
0012545
Fig
.
3
.
Depress
retaining
tabs
(arrows)
and
push
holder
down-
wards
.
0012556
Fig
.
4
.
Depress
upper
and
lower
catches
simultaneously
and
unplug
harnessconnector
.
Tightening
Torques
"
Steering
wheel
to
steering
column
spindle
(Bolt)
...
.
.
.
..
.....
63
Nm
(46
ft-lb)
Page 433 of 759
Headlight
switch,
replacing
1
.
Remove
left
side
dash
insert
and
disconnect
harness
connector
to
headlight
switch
.
See
Fig
.
10
.
3
.
Remove
nut
mounting
switch
to
dash
insert
.
See
Fig
.
11
.
Fig
.
11
.
Headlight
switch
mounting
nut
(arrow)
.
4
.
Pull
switch
out
from
housing
.
SWITCHES
AND
ELECTRICAL
ACCESSORIES
612-5
0012558
5
.
Installation
is
reverse
of
removal
.
Align
new
switch
to
dash
insert
.
See
Fig
.
12
.
Tightening
Torque
"
Headlight
switch
retaining
nut
.
......
2
Nm
(18
in-lb)
Foglight
switch,
replacing
0012559
Fig
.
10
.
Removing
headlightswitch
electrical
harness
connector
1
.
Remove
left
side
dash
insert,
as
described
earlier,
and
(arrow)
.
remove
foglight
switch
harness
connector
.
2
.
PA
off
headlight
switch
knob
.
Wrapping
adhesive
tape
aroundknob
facilitates
removal
.
spring
tabs
together
.
0012560
Fig
.
12
.
Fit
groove
on
headlightswitch
into
switch
bezel
ondash
insert
(arrows)
.
2
.
Slide
foglight
switch
out
of
dash
insert
by
sqúeezing
3
.
Installation
is
reverse
of
removal
.
Hazard
warning
switch,
replacing
1
.
Unclip
shift
boot
and
lift
up
from
shift
lever
console
.
Carefully
remove
insulation
pad
.
See
250
Gearshift
Linkage
.
2
.
Working
underneath
center
console,
push
hazard
warning
switch
up
and
out
of
console
with
your
fingers
.
3
.
Disconnect
harness
connector
from
switch
.
4
.
Installation
is
reverse
of
removal
.
Power
window
switch,
replacing
1
.
Unclip
shift
boot
and
lift
up
from
shift
lever
console
.
Carefully
remove
insulation
pad
.
See250
Gearshift
Linkage
.
2
.
Working
underneath
center
console,
push
window
switch
up
out
of
console
with
your
fingers
.
See
Fig
.
13
.
3
.
Disconnect
harness
connector
from
switch
.
4
.
Installation
is
reverse
of
removal
.
INTERIOR
SWITCHES
Page 437 of 759
INSTRUMENT
CLUSTER
....
.
.
.
.
.
...
.
..
620-1
Instrument
cluster,
seif-testing
.
.
.......
.
..
620-1
Instrument
cluster,
removing
and
installing
...
620-1
Instrument
cluster
bulbs,
replacing
.
.
.
.
.
.
...
620-2
GENERAL
This
repair
group
covers
removal
and
installation
of
the
in-
strument
cluster
and
the
Multi-information
Display
(MID)
mod-
ule
.
Bulb
replacement
information
for
these
units
is
also
included
here
.
NOTE
-
A
quick
check
of
the
temperature
gauge
and
its
electri-
cal
circuitis
given
in
170
Radiator
and
Cooling
Sys-
tem
.
Use
this
procedure
to
diagnosea
faulty
temperature
gauge
INSTRUMENT
CLUSTER
When
servicing
the
instrument
cluster,
always
disconnect
the
negative
(-)
cable
from
the
battery
and
insulate
the
cable
end
to
prevent
accidental
re-connection
.
Instrument
cluster,
seif-testing
Severa¡
different
versions
of
the
basic
instrument
cluster
havebeen
fitted
in
E36
cars
.
It
is
possibleto
perform
an
instru-
ment
cluster
test
and
display
system
test
information
.
Some
of
the
information
displayed
by
the
instrument
cluster
during
seif-testing
is
used
for
interna¡
BMW
organizationpur-
poses,
suchasmatching
the
correct
instrument
cluster
com-
ponents
during
parts
replacement
.
Other
functions
test
the
various
instrument
modules
.
Self-test
is
also
used
to
recode
the
instrument
cluster
after
removal
.
In
later
production
vehicles
(1996
and
later)
the
test
results
canbe
downioaded,
via
the
diagnostic
plug,
byan
authorized
BMW
dealertechnician
.
1
.
Turn
ignition
to
"radio"position
.
2
.
Press
and
hold
reset
button
on
trip-odometer
untiltrip-
odometer
display
shows
numerical
codes
.
620
Instruments
4
.
Turn
off
ignition
.
Instrument
cluster,
removing
and
installing
INSTRUMENTS
620-1
GENERAL
.....
.
.
.
.
.
.
.
.
.
.........
.
....
620-1
Odometer
coding
plug,
replacing
.....
.
.
.
.
.
.
620-2
Vehicle
speed
sender,
replacing
...
.
.
.
.
.
.
.
.
620-3
MULTI-INFORMATION
DISPLAY
(MID)
.
.
.
620-4
Multi-Information
Display,
removing
and
installing
..
.
....
.
.........
620-4
3
.
With
each
subsequent
press
of
the
button,
a
different
function
is
tested
.
Some
functions
will
activate
need1e
gauges
.
1
.
Disconnect
negative
(-)
cable
from
battery
and
cover
terminal
with
insulating
material
.
CAUTION-
Prior
to
disconnectiog
the
battery,
read
the
battery
disconnection
cautionsgiven
at
the
front
of
this
manual
on
page
vi¡¡
.
2
.
Remove
airbag
unit
from
steering
wheel
.
See
721
Air-
bag
System
(SRS)
.
Store
unit
in
a
safe
place
.
WARNING
-
The
airbag
is
an
explosive
devfce
and
should
be
treated
with
extreme
caution
.
Improper
handling
of
the
airbag
could
cause
serious
injury
or
death
.
Store
the
airbag
with
the
horn
pad
facing
up
.
If
stored
facing
down,
accidental
deployment
couldpropel
it
vfolently
into
the
air,
causing
injury
.
3
.
With
front
wheels
pointed
straight
ahead,
remove
steer-
ing
wheel
.
See
320
Steering
and
Wheel
Alignment
.
4
.
Remove
instrument
cluster
retaining
screws
.
See
Fig
.
1
.
5
.
Place
a
towel
over
steering
column
.
Carefully
tilt
top
of
cluster
out
of
dash
panel
.
Unlock
and
disconnect
har-
ness
connectors
from
back
of
cluster
.
See
Fig
.
2
.
INSTRUMENT
CLUSTER
Page 438 of 759
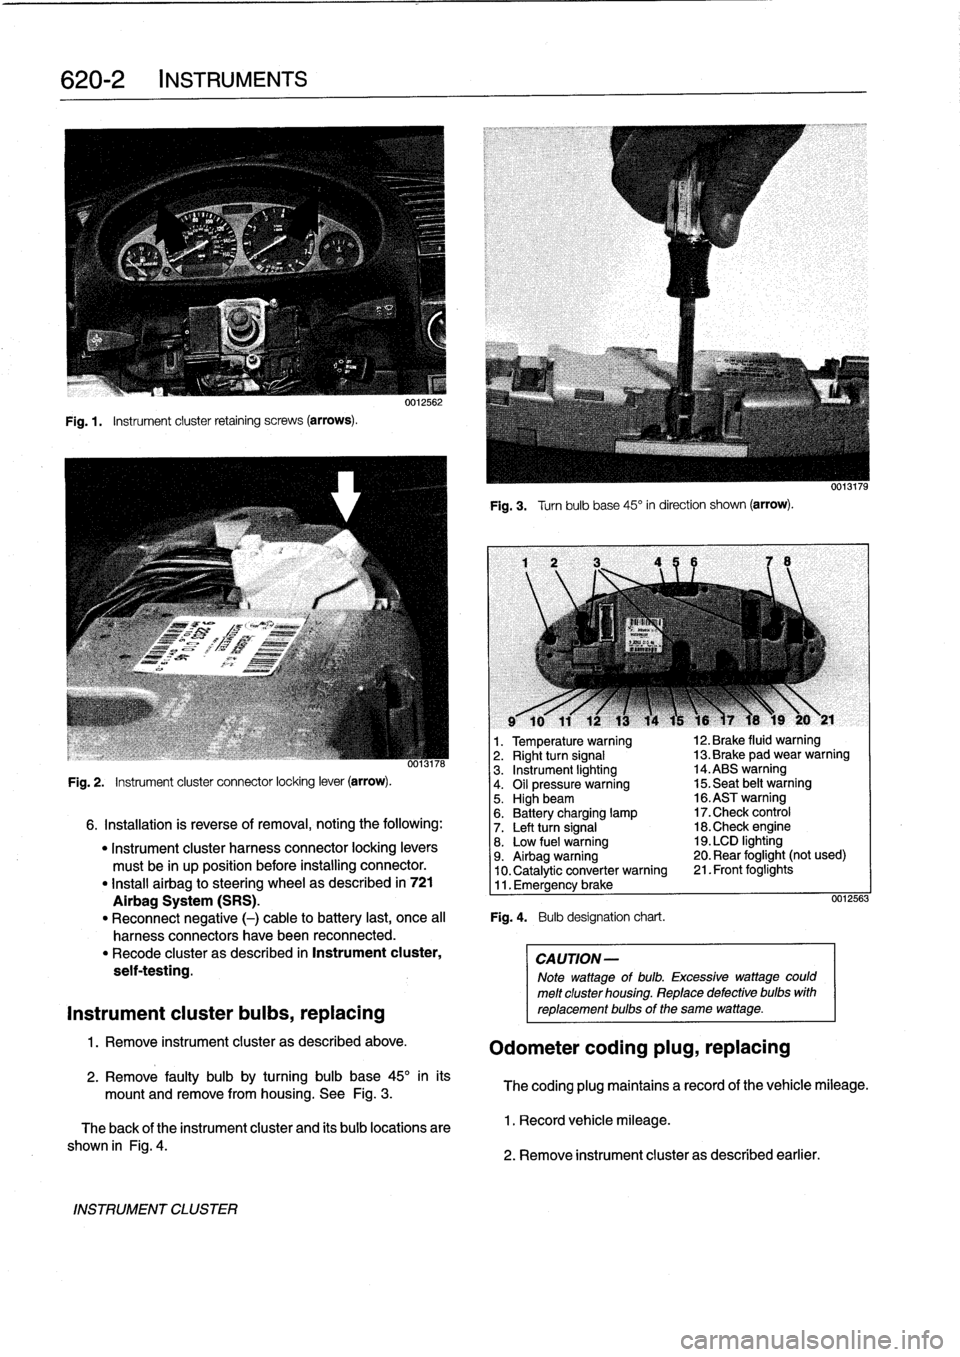
620-2
INSTRUMENTS
Fig
.1.
Instrument
cluster
retaining
screws
(arrows)
.
INSTRUMENT
CLUSTER
0012562
Fig
.
3
.
Turnbulb
base
45°
in
direction
shown
(arrow)
.
l
v
w
r
v
9
10
11
12
13
14
15
16
)7
18
19
20
y
21
1
.
Temperature
warning
12
.
Brake
fluid
warning
oo13n6
2
.
Right
turn
signal
13
.
Brake
pad
wear
warning
3
.
Instrument
lighting
14
.ABS
warning
Fig
.
2
.
Instrument
cluster
connector
locking
lever
(arrow)
.
4
.
Oil
pressure
warning
15
.
Seat
belt
warning5
.
Highbeam
16
.ASTwarning
6
.
Battery
charging
lamp
17
.Check
control
6
.
Installation
is
reverse
of
removal,
noting
the
following
:
7
.
Left
turn
signal
18
.Check
engine
"
Instrument
cluster
harness
connector
locking
levers
8
.
Low
fuel
warning
19
.
LCD
lighting
must
be
in
up
position
before
installing
connector
.
9
.
Airbag
warning
20
.
Rear
foglight
(not
used)
10
.
Catalytic
converter
warning
21
.
Front
foglights
"
Install
airbag
to
steering
wheel
as
described
in
721
11
.
Emergency
brake
Airbag
System
(SRS)
.
0012563
"
Reconnect
negative
(-)
cable
to
battery
last,
once
al¡
Fig
.
4
.
Bulb
designation
chart
.
harness
connectors
have
been
reconnected
.
"
Recode
cluster
as
described
in
Instrument
cluster,
CAUTION-
seif-testing
.
Note
wattage
of
bulb
.
Excessive
wattage
could
melt
cluster
housing
.
Replace
defective
bulbs
with
Instrument
cluster
bulbs,
replacing
reptacementbulbs
of
the
same
wattage
.
1
.
Remove
instrument
cluster
as
described
above
.
Odometer
coding
plug,
replacing
2
.
Remove
faulty
bulb
by
turning
bulb
base
45°
inits
mount
and
remove
from
housing
.
See
Fig
.
3
.
The
coding
plug
maintains
a
record
of
thevehicle
mileage
.
The
back
of
the
instrument
cluster
and
its
bulb
locations
are
1
.
Record
vehicle
mileage
.
shown
in
Fig
.
4
.
2
.
Remove
instrument
cluster
as
described
earlier
.
Page 441 of 759
FRONT
LIGHTING
.
...........
.
....
.
.
.
.
630-1
Headlight
buib,
replacing
............
.
.
.
.
630-1
Headlight
assembly,
removing
and
installing
.......
.
....
.
.
.
.
630-2
Foglight
assembly,
removing
and
installing
..
630-3
Front
turn
signal
assembly,
removing
and
installing
.....
.
.
.
........
630-4
GENERAL
The
headlight
and
foglight
assemblies
usehalogen
bulbs
.
To
ensure
the
longevity
of
halogen
bulbs,
the
bulb
glass
should
not
be
handied
.
Dirt
and
skin
oíls
may
cause
a
bulbto
fail
prematurely
.
If
necessarywipe
bulb
using
a
clean
cloth
dampened
with
rubbing
alcohol
.
NOTE-
Use
only
original
equipment
replacement
bulbs
.
Non-
original
equipment
bulbs
may
cause
false
failure
read-
ings
on
the
check
control
display
(where
applicable)
.
WARNING
-
INhenworking
on
electrical
systems,
remove
the
fuse
protecting
the
circuit
under
repair
.
See
610
Electrical
Component
Locations
.
FRONT
LIGHTING
Headlight
bulb,
replacing
1
.
Open
engine
hood
.
2
.
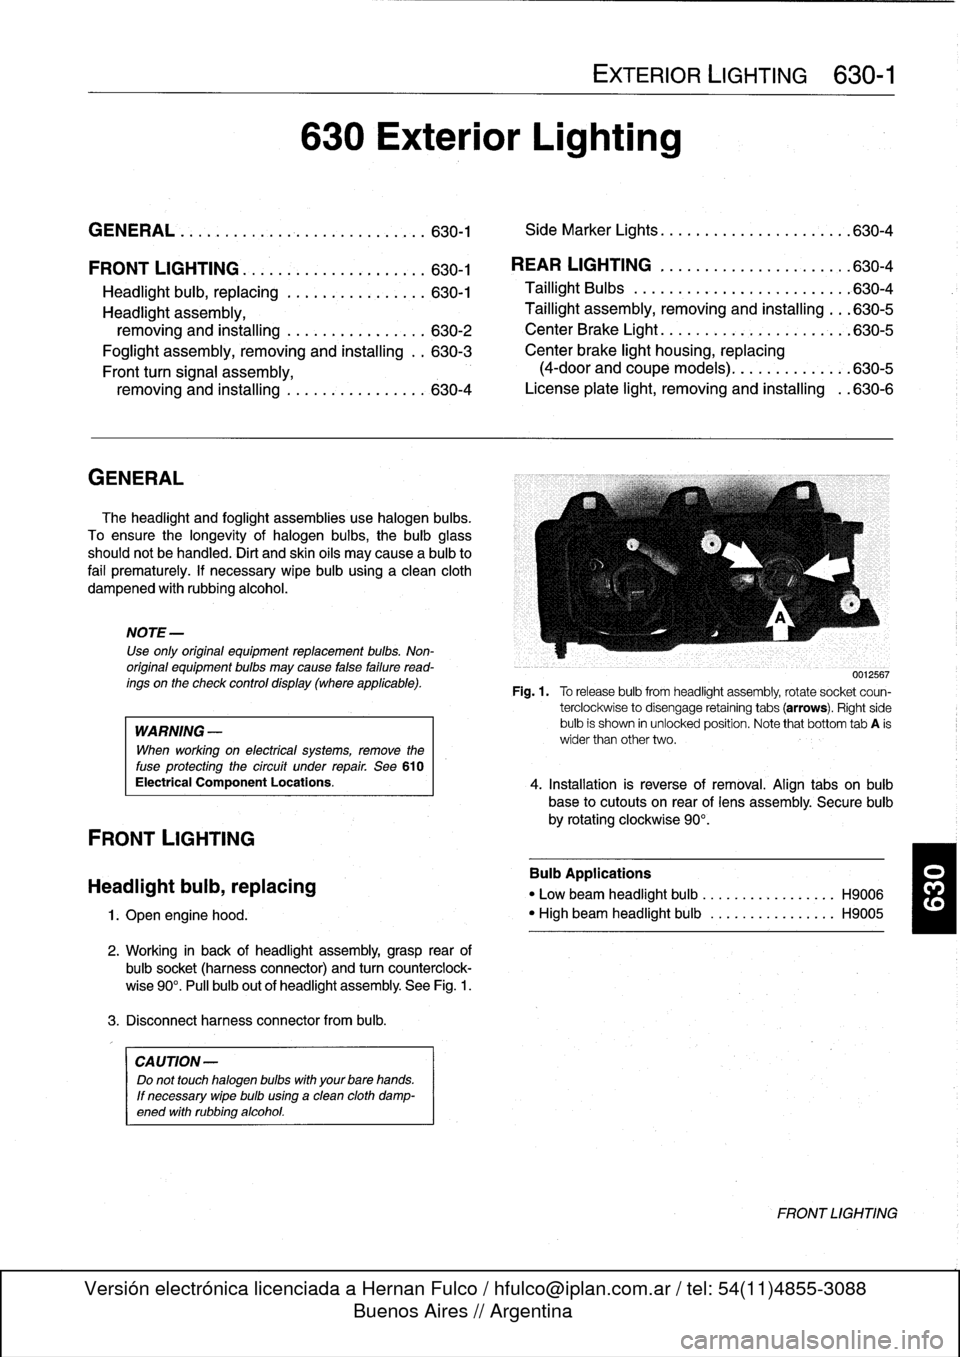
Working
in
back
of
headlight
assembly,grasp
rear
of
bulbsocket
(harnessconnector)
and
turn
counterclock-
wise
90°
.
Pull
bulb
out
of
headlight
assembly
.
See
Fig
.
1
.
3
.
Disconnect
harness
connector
from
bulb
.
CA
UTION-
Do
not
touch
halogen
bubs
with
yourbare
hands
.
If
necessary
wipe
bulb
using
a
clean
cloth
damp-
ened
with
rubbing
alcohol
.
630
Exterior
Lighting
EXTERIOR
LIGHTING
630-1
GENERAL
.
.
.
.
...
.
................
.
.
.
.
630-1
Side
Marker
Lights
.......
.
.
.
.
.
.......
.
..
630-4
REAR
LIGHTING
.
......
.
.
.
.
.
.
.
...
.
.
.
..
630-4
Taillight
Bulbs
..........
.
.
.
.
.
.....
.
.
.
.
.
630-4
Taillight
assembly,
removing
and
installing
.
.
.
630-5
CenterBrake
Light
.......
.
.
.
.
.
.
.
.
.
.
.
.
.
.
.
630-5
Center
brake
light
housing,
replacing
(4-door
and
coupe
models)
.
.
.
.
.......
.
.
.630-5
License
plate
light,
removingand
installing
.
.630-6
0012567
Fig
.1.
Torelease
bulbfrom
headlight
assembly,
rotate
socket
coun-
terclockwise
to
disengage
retaining
tabs
(arrows)
.
Right
side
bulb
is
shown
in
unlocked
position
.
Note
that
bottom
tab
A
is
wider
than
other
two
.
4
.
Installation
is
reverse
of
removal
.
Align
tabs
on
bulb
base
to
cutouts
on
rear
of
lens
assembly
.
Secure
bulb
by
rotating
clockwise
90°
.
Bulb
Applications
"
Low
beam
headlight
bulb
...
.
..
..
.........
H9006
"
High
beam
headlight
bulb
..
.
..
..
.........
H9005
FRONT
LIGHTING
Page 447 of 759
GENERAL
E36
cars
are
equipped
with
integrated
automatic
heating
and
air
conditioning
systems
.
Many
of
the
procedures
given
in
this
repair
group
require
that
the
A/C
refrigerant
charge
be
evacuated
using
specialized
equipment
.
See
A/C
System
Warningsand
Cautions
later
in
this
repair
group
.
HEATER
AND
CONTROLS
Blower
motor,
removing
and
installing
NOTE-
On
6-cylinder
cars,
the
plastic
top
enginecover
and
fuel
rail
covermustbe
removed
.
The
fuel
injectorhamess
re-
taining
screws
must
be
removed
and
the
harness
set
aside
.
The
engine
control
module
(ECM)
cover
must
be
removed,
the
control
unit
connectors
unplugged
and
the
harness
pulled
out
of
the
way
.
See
130
Fuel
Injection
.
1
.
Disconnect
negative
(-)
cable
from
battery
.
2
.
Open
hood
.
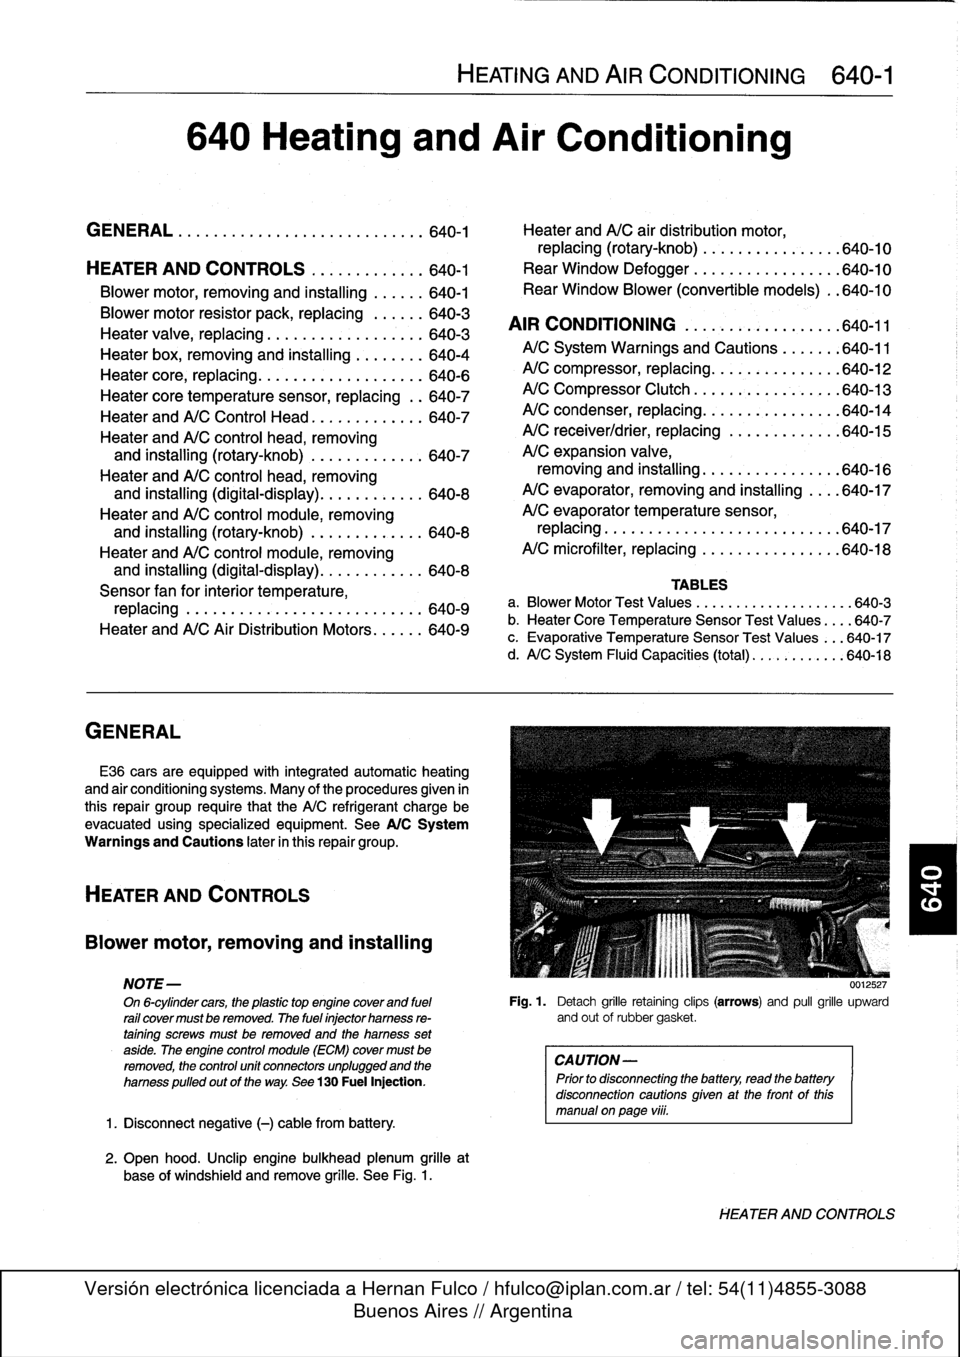
Unclip
engine
bulkhead
plenum
grille
at
base
of
windshíeld
and
remove
grille
.
See
Fig
.
1
.
HEATING
AND
AIR
CONDITIONING
640-1
640
Heating
and
Air
Conditioning
GENERAL
.
...
.
....
.
.
.
.
.
.
.
.
.
.......
.
.
.
640-1
Heater
andA/C
air
distribution
motor,
replacing(rotary-knob)
.
.
...
.
.
.
.......
.
640-10
HEATER
AND
CONTROLS
.
.....
.
.
.
.
.
.
.640-1
Rear
Window
Defogger
.
.
.
.
.
.
.
.
.
.
...
.
.
.
640-10
Blower
motor,
removing
and
installing
.
.
.
.
.
.
640-1
Rear
Window
Blower
(convertible
models)
.
.640-10
Blowermotor
resistor
pack,
replacing
.
.
.
.
.
.
640-3
AIR
CONDITIONING
.
.
.
.
.
.
.
.
.
.
.
.
.
.
.
.
.
.
640-11
Heater
valve,
replacing
...........
.
.
.
.
.
.
.
640-3
Heater
box,
removing
and
installing
.
.
.
.
.
.
.
.
640-4
A/CSystem
Warnings
and
Cautions
.
.
.
.
.
.
:640-11
Heater
core,
replacing
.....
.
.
:
....
.
.
.
.
.
.
.
640-6
A/C
compressor,
replacing
.
.
::.
:
:
.
.
.
.
.
.
.
.640-12
Heater
core
temperature
sensor,
replacing
.
.
640-7
A/C
Compressor
Clutch
.
.
.
.
.
.
.
:
.
.
.
.
.
.
.
.
.
640-13
Heater
andA/C
Control
Head
.
.
....
.
.....
.
640-7
A/C
condenser,
replacing
.
.
.
.
.
.
.
.
.
.
.
.
.
.
.
.
640-14
Heater
andA/C
control
head,
removing
A/C
receiver/drier,
replacing
.
.
.
.
.
.
.
.
.
.
.
.
.
640-15
and
installing
(rotary-knob)
.
.
....
.
......
640-7
A/C
expansion
valve,
Heater
andA/C
control
head,
removing
removing
and
installing
...
.
.....
.
.
.
.
.
.
.
640-16
and
installing
(digital-display)
.
.....
.
.....
640-8
A/C
evaporator,
removing
and
installing
.
.
..
640-17
Heater
andA/C
control
module,removing
A/C
evaporator
temperature
sensor,
and
installing
(rotary-knob)
.
.
...
.
.
.
.
.
.
.
.
640-8
replacing
.
.
.
.
.
.
..............
.
.
.
.
.
..
640-17
Heater
andA/C
control
module,removing
A/C
microfilter,
replacing
......
.
....
.
.
.
..
640-18
and
installing
(digital-display)
.
...
.
.
.
.
.
...
640-8
Sensor
fan
for
interior
temperature,
TABLES
replacing
.
.
.
....
.
.
.
.
.
.
.
.
.
.
.
.
.
.
.
.
.
.
.
.
640-9
a
.
Blower
Motor
Test
Values
.........
...
.
.
......
640-3
Heater
andA/C
AirDistribution
Motors
.
.
.
.
.
.
640-9
b
.
Heater
Core
Temperature
Sensor
Test
Values
...
.640-7
c
.
Evaporative
Temperature
Sensor
Test
Values
...
640-17
d
.
A/C
System
Fluid
Capacities
(total)
..
..........
640-18
0012527
Fig
.
1
.
Detach
grille
retaining
clips
(arrows)
and
pull
grille
upward
and
out
of
rubbergasket
.
CAUTION-
Prior
to
disconnectiog
the
battery,
read
the
battery
disconnection
cautionsgiven
at
the
front
of
this
manual
onpage
viii
.
HEATER
AND
CONTROLS
Page 449 of 759
9
.
Release
blower
motor
retaining
strap
andremove
blow-
er
motor
and
fans
fromcowl
opening
.
NOTE-
Twist
and
rotate
blowermotor
assembly
to
facilítate
re-
moval
from
opening
.
If
the
blower
motor
is
to
be
rein-stafled,
use
care
not
to
damage
fan
wheels
during
removal
.
ff
the
blower
motor
fs
to
be
replaced,
cut
offfan
wheels
at
center
to
aid
in
removal
.
10
.
Installation
is
reverse
of
removal
.
When
installing
a
re-
placement
blower
motor,
instan
motor
into
cowlarea
before
installing
fan
wheels
.
Blower
motor
test
specifi-
cations
are
listed
in
Table
a
.
NOTE
-
On
replacementblowermotors
from
BMW,
thefan
wheels
come
unattached
to
aid
in
installation
.
Locatearrow
on
blower
motor
and
instan
fan
wheels
atthis
po-
sition
.
Be
sure
color
coolng
matches
.
Retain
fan
wheels
using
the
new
clips
.
See
an
authorized
BMW
parts
de-
partment
for
the
latest
parts
information
.
Table
a
.
Blower
Motor
Test
Values
Testingvoltage
13
VDC
Operating
voltage
9-15
VDC
Max
.
current
consumption
(approx
.)
12
amps
Maximum
speed
3,600-4,000rpm
Axialplay
(max
.
allowable)
1
.0
mm
(0
.04
in
.)
Blower
motor
resistor
pack,
replacing
The
blower
resistor
pack
is
clipped
into
the
upper
left
side
of
theheater
box
.
1
.
Remove
lower
left
dash
trim
panel
.
See513
Interior
Trim
.
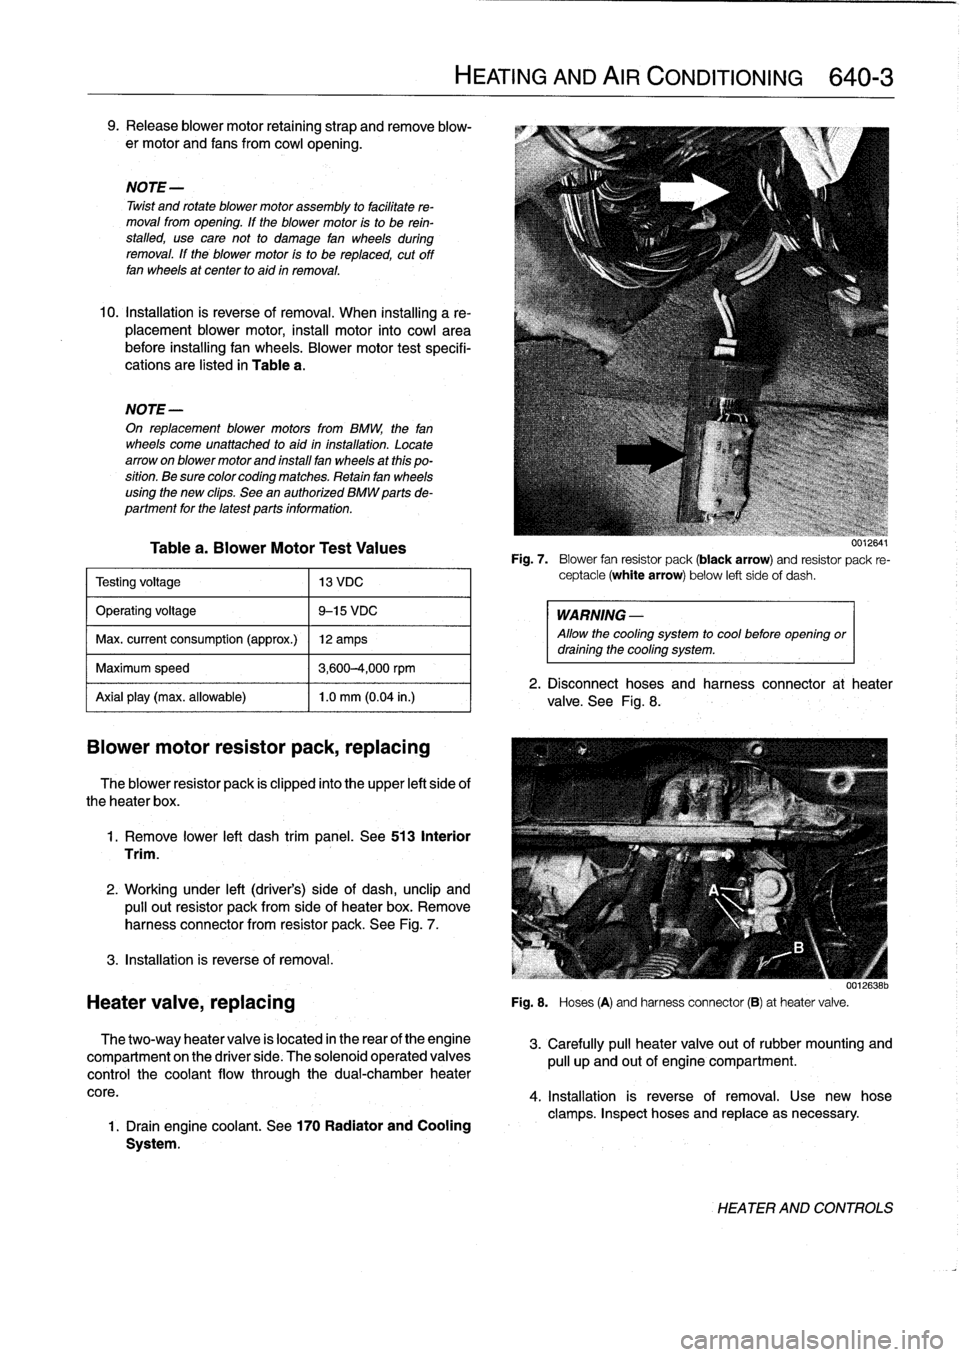
2
.
Working
under
left
(driver's)
side
of
dash,
unclip
and
pulí
out
resistor
pack
from
sideof
heater
box
.
Remove
harness
connector
from
resistor
pack
.
See
Fig
.
7
.
3
.
Installation
is
reverse
of
removal
.
Heater
valve,
replacing
The
two-way
heater
valve
is
located
in
the
rear
of
the
engine
compartment
on
the
driver
side
.
The
solenoid
operated
valves
control
the
coolant
flow
through
the
dual-chamber
heater
core
.
1
.
Drain
engine
coolant
.
See
170
Radiator
and
Cooling
System
.
HEATING
AND
AIR
CONDITIONING
640-
3
uuiGO4I
Fig
.
7
.
Blower
fan
resistor
pack
(black
arrow)
and
resistor
pack
re-
ceptacle
(white
arrow)
below
left
sideof
dash
.
WARNING
-
Allow
the
cooling
system
to
cool
before
opening
ordraining
the
cooling
system
.
2
.
Disconnect
hoses
and
harness
connector
at
heater
valve
.
See
Fig
.
8
.
001[ó38b
Fig
.
S
.
Hoses
(A)
and
harnessconnector
(B)
at
heatervalve
.
3
.
Carefully
pull
heater
valve
out
of
rubber
mounting
and
pull
up
and
out
of
engine
compartment
.
4
.
Installation
is
reverse
of
removal
.
Use
new
hose
clamps
.
Inspect
hoses
and
replace
asnecessary
.
HEATER
AND
CONTROLS
Page 452 of 759
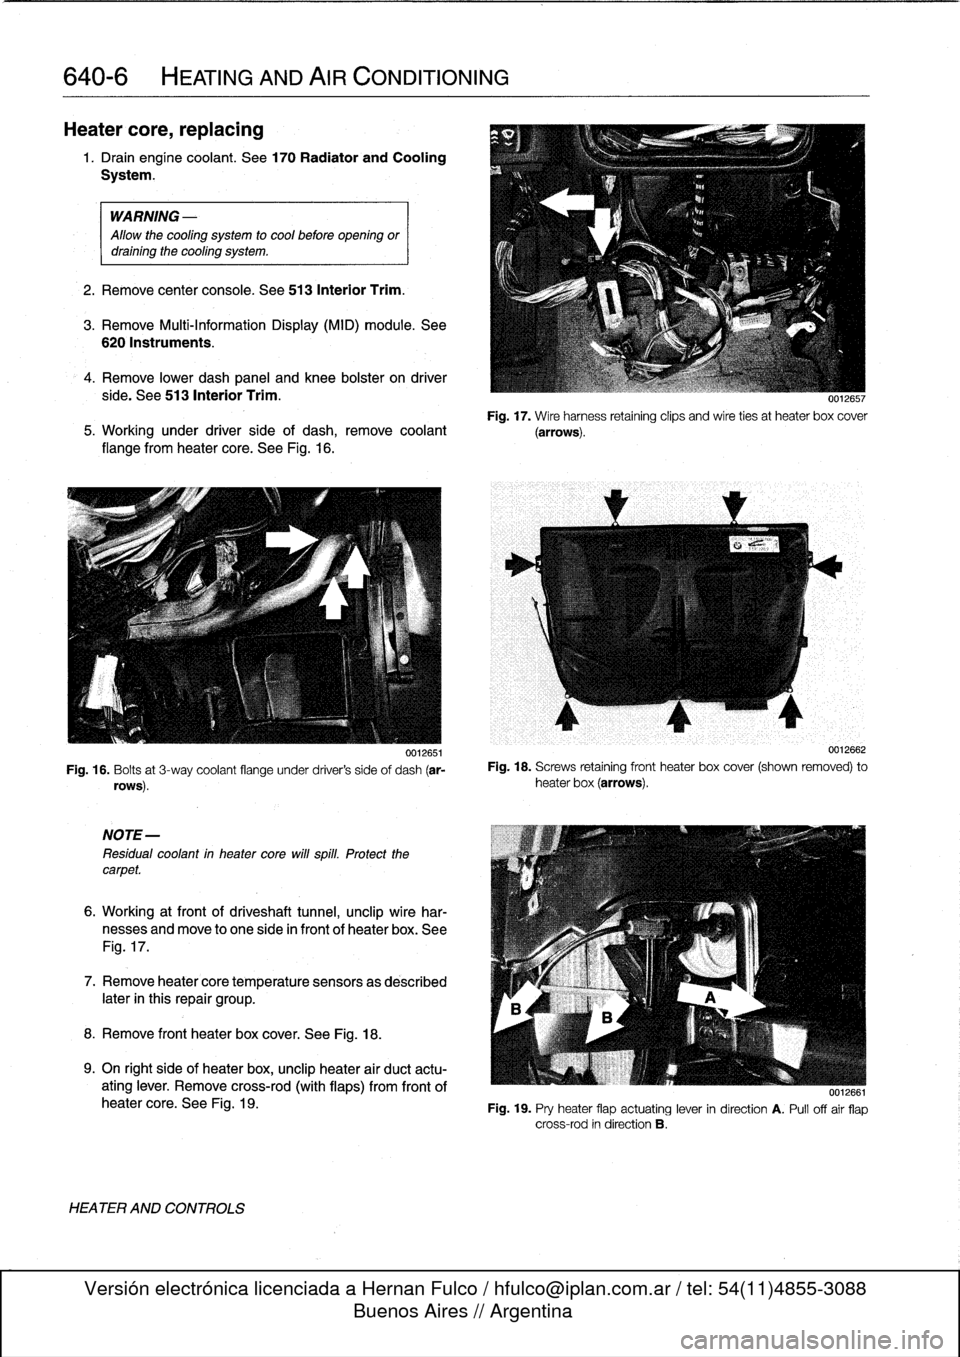
640-6
HEATING
AND
AIRCONDITIONING
Heater
core,replacing
1.
Drain
engíne
coolant
.
See170
Radiator
and
Cooling
System
.
WARNING
-
Allow
the
cooling
system
to
cool
before
opening
or
drainíng
the
cooling
system
.
2
.
Remove
center
console
.
See
513
Interior
Trim
.
3
.
Remove
Multi-Information
Display
(MID)
module
.
See
620
Instruments
.
4
.
Remove
lower
dash
panel
and
knee
bolster
on
driver
side
.
See
513
Interior
Trim
.
Fig
.
17
.
Wire
harness
retaining
clips
and
wire
ties
at
heater
box
cover
5
.
Working
under
driver
side
of
dash,
remove
coolant
(arrows)
.
flange
from
heater
core
.
See
Fig
.
16
.
0012651
Fig
.
16
.
Bolts
at
3-way
coolant
flange
under
driver's
side
of
dash
(ar-
rows)
.
NOTE-
Residual
coolant
in
heater
core
will
spill
.
Protect
thecarpet
.
6
.
Working
at
front
of
driveshaft
tunnel,
unclip
wire
har-
nesses
and
move
to
one
side
in
front
of
heater
box
.
See
Fig
.
17
.
7
.
Remove
heatercore
temperature
sensorsas
described
later
in
this
repair
group
.
8
.
Remove
front
heater
box
cover
.
See
Fig
.
18
.
9
.
On
right
side
of
heater
box,
unclip
heater
air
duct
actu-
ating
lever
.
Remove
cross-rod
(with
flaps)
from
frontof
heater
core
.
See
Fig
.
19
.
HEATER
AND
CONTROLS
0012662
Fig
.
18
.
Screws
retaining
front
heater
box
cover
(shown
removed)
to
heater
box
(arrows)
.
0012661
Fig
.
19
.
Pry
heater
flap
actuating
lever
in
direction
A
.
Pull
offair
flap
cross-rod
in
direction
B
.
Page 457 of 759
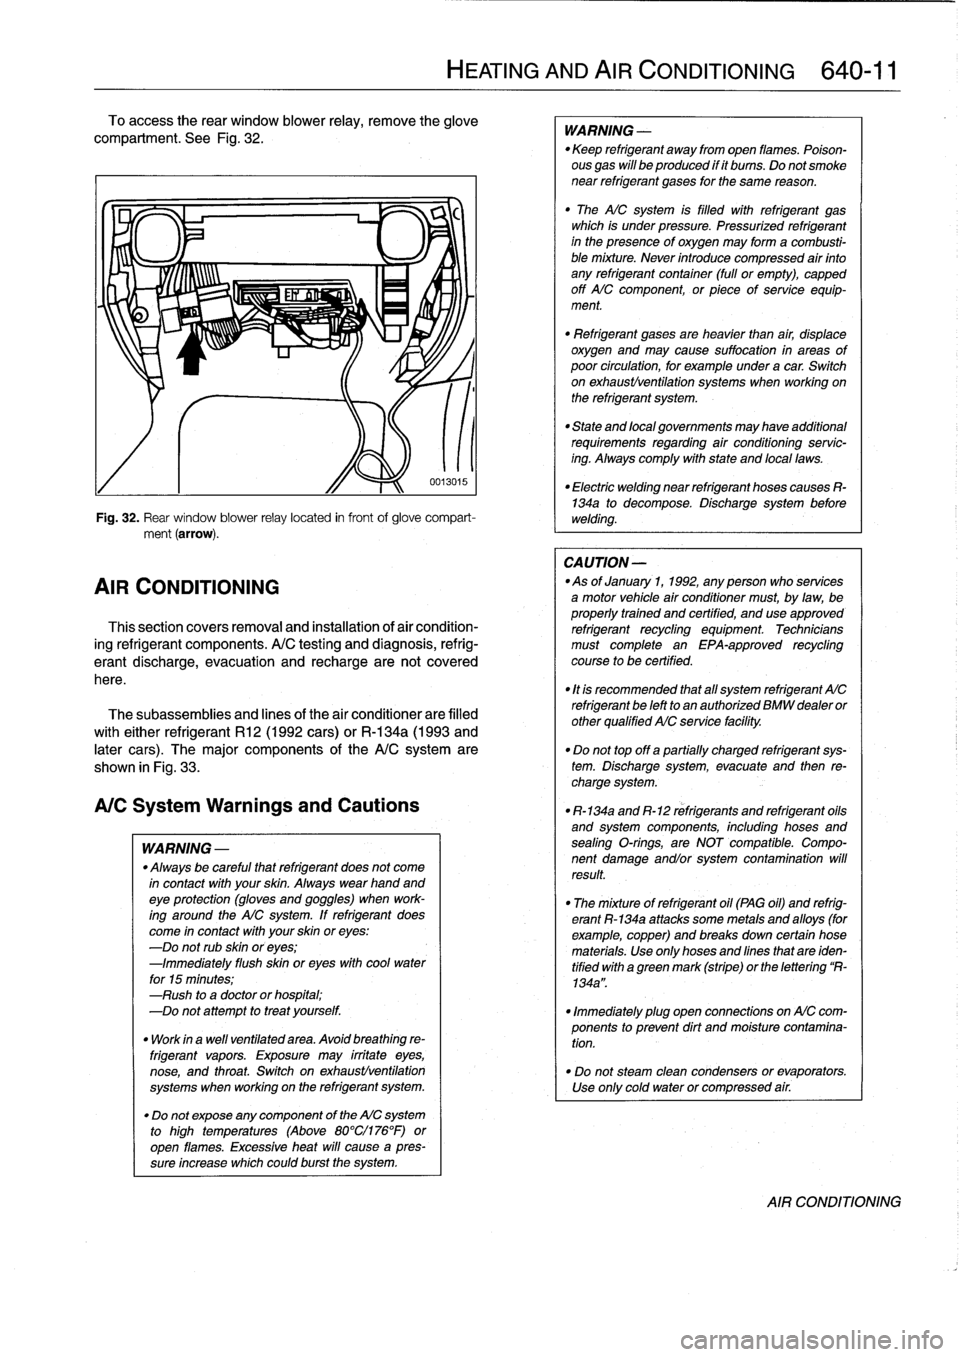
To
access
the
rear
window
blower
relay,
remove
the
glove
compariment
.
See
Fig
.
32
.
Fig
.
32
.
Rear
window
blower
relay
located
in
frontof
glove
compart-
ment
(arrow)
.
AIR
CONDITIONING
Thissection
covers
removal
and
installation
of
air
condition-
ing
refrigerant
components
.
A/C
testing
and
diagnosis,
refrig-
erantdischarge,
evacuatíon
and
recharge
are
not
covered
here
.
The
subassemblies
and
lines
of
the
air
conditionerare
filled
with
either
refrigerant
R12
(1992
cars)
or
R-134a
(1993
and
later
cars)
.
The
major
components
of
the
A/Csystem
are
shown
in
Fig
.
33
.
A/CSystem
Warnings
and
Cautions
WARNING
-
"
Always
be
careful
that
refrigerant
does
not
come
in
contact
with
your
skin
.
Always
wearhand
andeye
protection
(gloves
and
goggles)
when
work-
ing
around
the
AIC
system
.
If
refrigerant
does
come
in
contact
with
your
skin
oreyes
:
-Do
not
rub
skin
oreyes
;
-Immediately
flush
skin
oreyes
withcool
water
for
15
minutes
;
-Rush
to
a
doctor
orhospital
;
-Do
not
attempt
to
treat
yourself
.
"
Work
in
a
wefl
ventilated
area
.
Avoid
breathing
re-
frigerant
vapors
.
Exposure
may
irrítate
eyes,
nose,
and
throat
.
Switch
on
exhaustlventilation
systems
when
working
on
the
refrigerant
system
.
"
Do
not
expose
any
component
of
the
AIC
system
to
high
temperatures
(Above
80°Cl176°F)or
open
flames
.
Excessive
heat
will
cause
a
pres-
sureincrease
whichcould
burst
the
system
.
HEATING
AND
AIR
CONDITIONING
640-
1
1
0013015
WARNING
-
"
Keep
refrigerant
away
from
open
llames
.
Poison-
ous
gas
will
be
produced
if
it
bums
.
Do
not
smoke
near
refrigerant
gases
for
the
same
reason
.
"
The
AICsystem
is
filled
with
refrigerant
gas
which
is
under
pressure
.
Pressurized
refrigerant
in
the
presenceof
oxygen
may
forma
combusti-
ble
mixture
.
Never
introduce
compressed
air
finto
any
refrigerant
container
(full
or
empty),
capped
off
AIC
component,
or
piece
of
service
equip-
ment
.
"
Refrígerant
gases
are
heavier
than
air,
displace
oxygen
and
may
cause
suffocation
in
areas
of
poor
círculation,
for
example
under
a
car
.
Switch
on
exhaustlventilation
systems
when
working
on
the
refrigerant
system
.
"
State
and
local
governments
may
have
additional
requirements
regarding
air
conditioning
servic-
ing
.
Alwayscomply
with
state
and
local
laws
.
"
Electric
welding
near
refrigerant
hoses
causes
R-134a
to
decompose
.
Discharge
system
before
welding
.
CA
UTION
-
-As
of
January
1,
1992,
any
person
who
services
a
motor
vehicle
air
conditioner
must,
by
law,
be
properly
trained
and
certified,
and
use
approved
refrigerant
recycling
equipment
.
Technicians
must
complete
an
EPA-approved
recycling
course
to
be
certified
.
"
It
is
recommended
that
al¡
system
refrigerant
AIC
refrigerant
be
left
to
an
authorized
BMW
dealer
or
other
qualified
AIC
service
facility
.
"
Do
not
top
off
a
partially
charged
refrigerant
sys-
tem
.
Dischargesystem,evacuate
and
then
re-
charge
system
.
"
R-134a
and
R-12
refrigerants
and
refrigerant
oils
and
system
components,
including
hoses
and
sealing
O-rings,
are
NOT
compatible
.
Compo-
nent
damage
andlor
system
contamination
will
result
.
"
The
mixture
of
refrigerant
oil
(PAG
oil)
and
refrig-
erant
R-134a
attacks
some
metals
and
alloys
(for
example,copper)
and
breaks
down
certain
hose
materials
.
Use
only
hoses
and
lines
that
are
iden-
tified
with
a
green
mark
(stripe)
or
the
lettering
R-
134a"
.
"
Immediately
plug
open
connections
on
AIC
com-
ponents
to
prevent
dirt
and
moisture
contamina-
tion
.
"
Do
not
steam
clean
condensers
or
evaporators
.
Use
only
cold
water
or
compressed
air
.
AIR
CONDITIONING