inflation pressure BMW M3 2008 Owners Manual
[x] Cancel search | Manufacturer: BMW, Model Year: 2008, Model line: M3, Model: BMW M3 2008Pages: 266, PDF Size: 8.85 MB
Page 86 of 266
Technology for driving comfort and safety
84
For better control
If the indicator lamp flashes:
DSC is regulating the drive and brak-
ing forces.
If the indicator lamps are on:
DSC is deactivated.
Electronic Damper Control
EDC*
The concept
Whenever there is a change in any significant
parameter such as road surface quality or in an
operating condition such as steering, braking,
etc., the damping automatically adjusts to the
new conditions in fractions of a second.
You can select between three programs.
"Comfort" program
Select the "Comfort" program if you want com-
fort-oriented control of the shock absorbers.
"Normal" program
The "Normal" program offers control that is bal-
anced between comfort and sportiness.
"Sport" program
Select the "Sport" program if you want consis-
tently sporty control of the shock absorbers.
Selecting a program
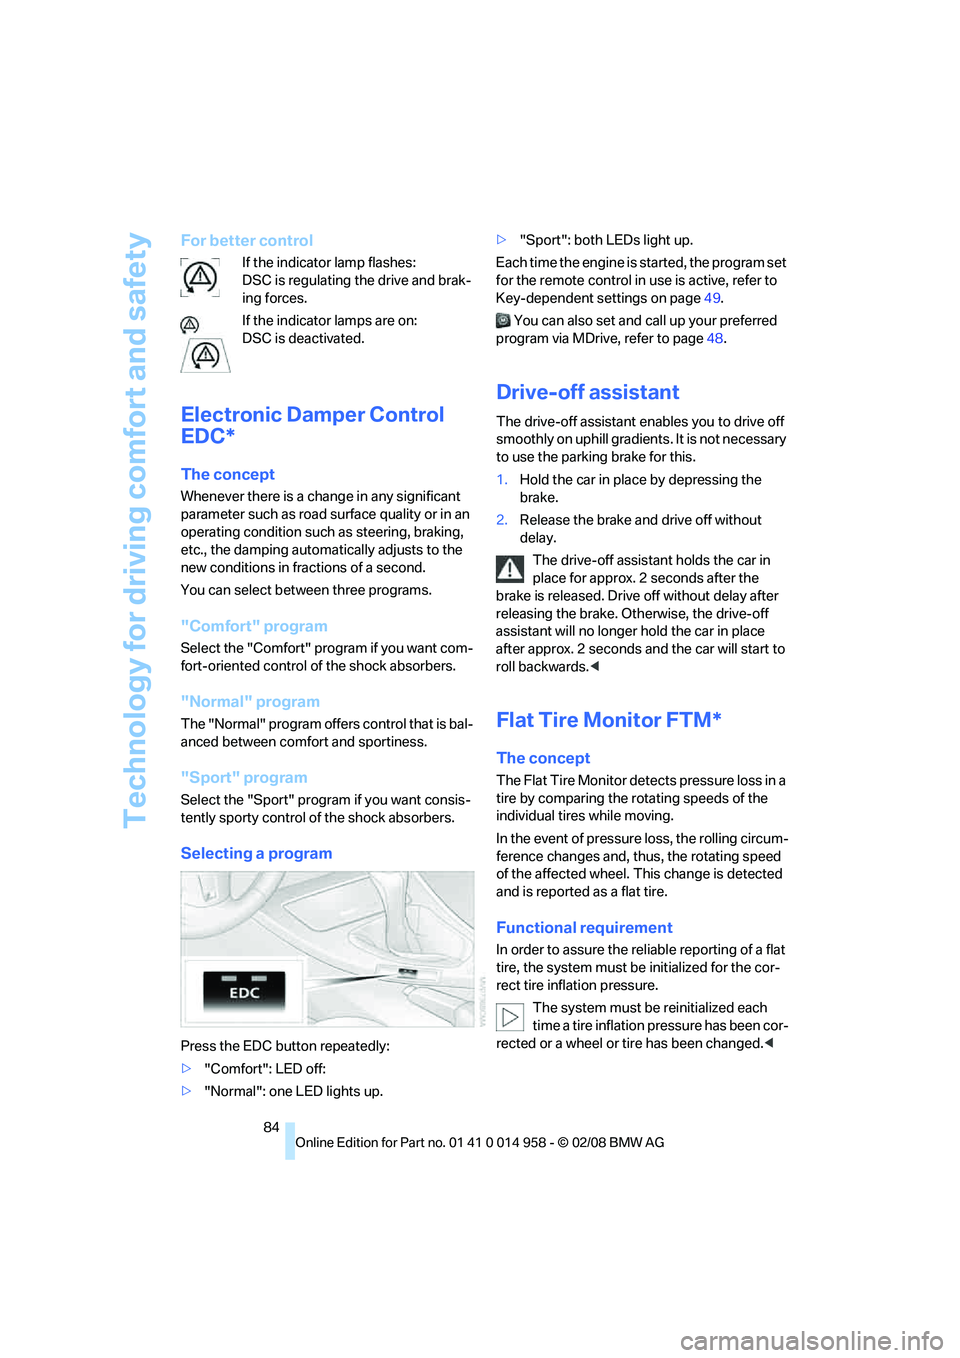
Press the EDC button repeatedly:
>"Comfort": LED off:
>"Normal": one LED lights up.>"Sport": both LEDs light up.
Each time the engine is started, the program set
for the remote control in use is active, refer to
Key-dependent settings on page49.
You can also set and call up your preferred
program via MDrive, refer to page48.
Drive-off assistant
The drive-off assistant enables you to drive off
smoothly on uphill gradients. It is not necessary
to use the parking brake for this.
1.Hold the car in place by depressing the
brake.
2.Release the brake and drive off without
delay.
The drive-off assistant holds the car in
place for approx. 2 seconds after the
brake is released. Drive off without delay after
releasing the brake. Otherwise, the drive-off
assistant will no longer hold the car in place
after approx. 2 seconds and the car will start to
roll backwards.<
Flat Tire Monitor FTM*
The concept
The Flat Tire Monitor detects pressure loss in a
tire by comparing the rotating speeds of the
individual tires while moving.
In the event of pressure loss, the rolling circum-
ference changes and, thus, the rotating speed
of the affected wheel. This change is detected
and is reported as a flat tire.
Functional requirement
In order to assure the reliable reporting of a flat
tire, the system must be initialized for the cor-
rect tire inflation pressure.
The system must be reinitialized each
time a tire inflation pressure has been cor-
rected or a wheel or tire has been changed.<
Page 88 of 266
Technology for driving comfort and safety
86 9.Start to drive.
Initialization is completed while the car is
moving, without any feedback.
Indication of a flat tire
The warning lamps come on in yellow
and red. A message appears on the
Control Display. In addition, an
acoustic signal sounds. There is a flat
tire or substantial loss of tire pressure.
1.Reduce your speed and carefully stop the
car. Avoid sudden braking and steering
maneuvers.
2.Identify the damaged tire. To do so, check
the tire pressure using the M Mobility Sys-
tem, refer to Producing the tire inflation
pressure on page227.
3.Repair the flat tire with the M Mobility Sys-
tem, refer to page227.
Malfunction
The warning lamps come on in yel-
low. A message appears on the Con-
trol Display. The Flat Tire Monitor has
a malfunction or has failed. Have the
system checked as soon as possible.
Tire Pressure Monitor TPM*
The concept
TPM checks the inflation pressures of the four
mounted tires. The system notifies you if there
is a significant loss of pressure in one or more
tires.
Functional requirement
In order to assure the reliable reporting of a flat
tire, the system must be reset while all tire infla-
tion pressures are correct.
Always use wheels with TPM electronics. Oth-
erwise, the system may malfunction.
Each time a tire inflation pressure has
been corrected or a wheel or tire has been
changed, reset the system.<
System limitations
TPM cannot warn you in advance of sud-
den severe tire damage caused by out-
side influences.<
The system does not work correctly if it has not
been reset; for example, a flat tire may be indi-
cated even though the tire inflation pressures
are correct.
The system is inactive and cannot indicate a flat
tire if a wheel without TPM electronics has been
mounted, or if TPM is temporarily malfunction-
ing due to other systems or devices using the
same radio frequency.
Status indicator on the Control Display
The color of the wheels represents the status of
the tires and the system.
TPM takes into account that tire pressures
change while the vehicle is being driven. The
tire pressures do not need to be corrected
unless the TPM instructs you to do so by means
of color indicators.
Green
The tire inflation pressure corresponds to the
established target value.
"TPM active" appears on the Control Display.
One wheel yellow
There is a flat tire or substantial loss of tire pres-
sure in the indicated tire. A message appears on
the Control Display.
All wheels yellow
There is a flat tire or substantial loss of tire pres-
sure in several tires. A message appears on the
Control Display.
Gray
The system cannot detect a puncture.
Possible reasons for this:
>TPM is being reset
>Temporary malfunction caused by systems
or devices using the same radio frequency
>Malfunction
Page 89 of 266
Controls
87Reference
At a glance
Driving tips
Communications
Navigation
Entertainment
Mobility
Resetting the system
Each time a tire inflation pressure has
been corrected or a wheel or tire has been
changed, reset the system.<
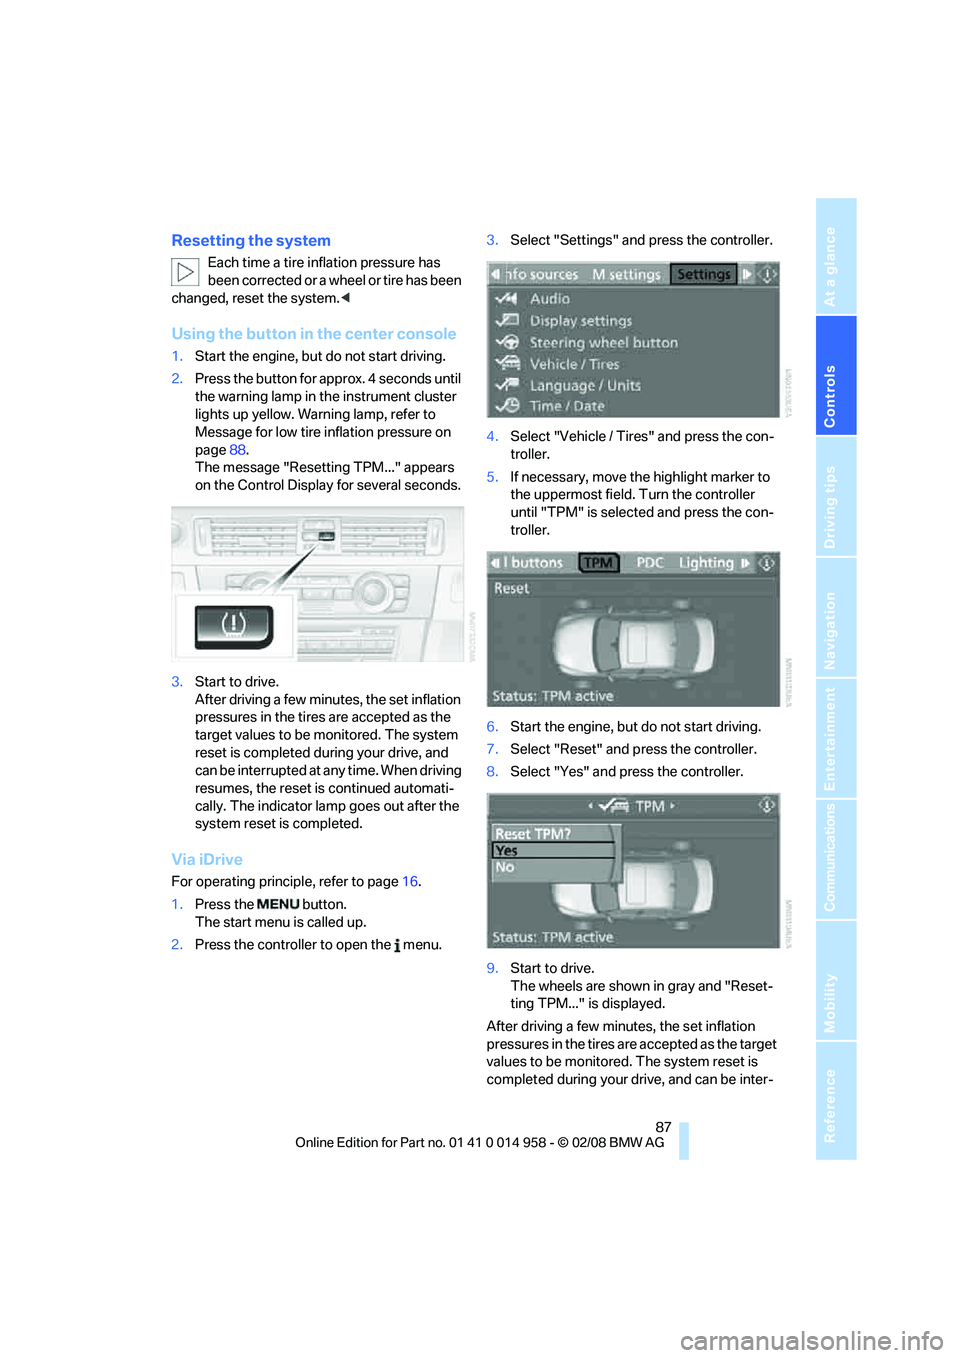
Using the button in the center console
1.Start the engine, but do not start driving.
2.Press the button for approx. 4 seconds until
the warning lamp in the instrument cluster
lights up yellow. Warning lamp, refer to
Message for low tire inflation pressure on
page88.
The message "Resetting TPM..." appears
on the Control Display for several seconds.
3.Start to drive.
After driving a few minutes, the set inflation
pressures in the tires are accepted as the
target values to be monitored. The system
reset is completed during your drive, and
can be interrupted at any time. When driving
resumes, the reset is continued automati-
cally. The indicator lamp goes out after the
system reset is completed.
Via iDrive
For operating principle, refer to page16.
1.Press the button.
The start menu is called up.
2.Press the controller to open the menu.3.Select "Settings" and press the controller.
4.Select "Vehicle / Tires" and press the con-
troller.
5.If necessary, move the highlight marker to
the uppermost field. Turn the controller
until "TPM" is selected and press the con-
troller.
6.Start the engine, but do not start driving.
7.Select "Reset" and press the controller.
8.Select "Yes" and press the controller.
9.Start to drive.
The wheels are shown in gray and "Reset-
ting TPM..." is displayed.
After driving a few minutes, the set inflation
pressures in the tires are accepted as the target
values to be monitored. The system reset is
completed during your drive, and can be inter-
Page 90 of 266
Technology for driving comfort and safety
88 rupted at any time. When driving resumes, the
reset is continued automatically. On the Control
Display, the wheels are shown in green and
"Status: TPM active" is displayed again.
If a flat tire is detected while the system is
resetting and determining the inflation
pressures, all wheels on the Control Display are
displayed in yellow. The message "Tire low!" is
shown.<
Message for low tire inflation pressure
The warning lamps come on in yellow
and red. A message appears on the
Control Display. In addition, a signal
sounds. There is a flat tire or substan-
tial loss of tire pressure.
1.Reduce your speed and carefully stop the
car. Avoid sudden braking and steering
maneuvers.
2.If all four wheels are shown in yellow, iden-
tify the damaged wheel on the vehicle.
3.Repair the flat tire with the M Mobility Sys-
tem, refer to page226.
Have the tire replaced by a BMW center or a
workshop that is informed in the handling of
TPM and that works according to BMW repair
procedures with correspondingly trained per-
sonnel.
Malfunction
The small warning lamp flashes in
yellow and then lights up continu-
ously; the larger warning lamp comes
on in yellow. On the Control Display,
the wheels are shown in gray and a message
appears. No punctures can be detected.
This type of message is shown in the following
situations:
>If there is a malfunction
Have the system checked.
>If a wheel without TPM electronics has
been mounted
>If TPM is temporarily malfunctioning due to
other systems or devices using the same
radio frequency.
Message for unsuccessful system
reset
The warning lamp lights up yellow. A
message appears on the Control Dis-
play. The system is not reset after a
tire has been changed, for example.
Check the tire inflation pressure and reset the
system, refer to page87.
Declaration according to NHTSA/
FMVSS 138
Tire Pressure Monitoring Systems
Each tire should be checked monthly when cold
and inflated to the inflation pressure recom-
mended by the vehicle manufacturer on the
vehicle placard or tire inflation pressure label. If
your vehicle has tires of a different size than the
size indicated on the vehicle placard or tire infla-
tion pressure label, you should determine the
proper tire inflation pressure for those tires. As
an added safety feature, your vehicle has been
equipped with a tire pressure monitoring sys-
tem, TPMS, that illuminates a low tire pressure
telltale when one or more of your tires are signif-
icantly under-inflated. Accordingly, when the
low tire pressure telltale illuminates, you should
stop and check your tires as soon as possible,
and inflate them to the proper pressure. Driving
on a significantly underinflated tire causes the
tire to overheat and can lead to tire failure.
Underinflation also reduces fuel efficiency and
tire tread life, and may affect the vehicle’s han-
dling and stopping ability. Please note that the
TPMS is not a substitute for proper tire mainte-
nance, and it is the driver’s responsibility to
maintain correct tire pressure, even if underin-
flation has not reached the level at which the
TPMS low tire pressure telltale illuminates.
The TPMS malfunction indicator is combined
with the low tire pressure telltale. When the sys-
tem detects a malfunction, the telltale will flash
for approximately one minute and then remain
continuously lit. This sequence will continue
upon subsequent vehicle startups as long as
the malfunction exists. When the malfunction
indicator is illuminated, the system may not be
able to detect or signal low tire pressure as
intended. TPMS malfunctions may occur for a
Page 208 of 266

Wheels and tires
206
Wheels and tires
Tire inflation pressures
Information for your safety
It is not merely the tires' service life, but also
driving comfort and, to a great extent, driving
safety that depend on the condition of the tires
and the maintenance of the specified tire pres-
sure.
Checking pressure
Only check tire inflation pressure when the
tires are cold. This means after a maximum of
1.25 miles/2 km driving or when the vehicle has
been parked for at least 2 hours. When tires are
warm, the tire inflation pressure is higher.
Check the tire inflation pressure regularly
and correct it, if necessary: at least twice a
month and before starting long trips. If you fail
to observe this precaution you may be driving
on tires with incorrect tire pressures, a condi-
tion that can not only compromise your vehi-
cle's driving stability, but also lead to tire dam-
age and the risk of an accident. Do not drive on
a flat tire. A flat tire will seriously impair your
vehicle's handling and braking response.
Attempts to drive on a flat tire can lead to loss of
control over the vehicle.<
After correcting the tire inflation pressure,
reinitialize the Flat Tire Monitor, refer to
page85, or reset the Tire Pressure Monitor,
refer to page86.<
Inflation pressure specifications
The table below provides all the correct inflation
pressures for the specified tire sizes at ambient
temperature.
The inflation pressures apply to the tire
sizes approved and tire brands recom-
mended by BMW; a list of these is available
from your BMW center.<
For correct identification of the right tire infla-
tion pressures, observe the following:
>Tire sizes for your vehicle>Load conditions
>Maximum allowable driving speed
Tire inflation pressures for driving up to
100 mph or 160 km/h
For normal driving up to 100 mph or 160 km/h
and to achieve optimum driving comfort, adjust
pressures to the respective tire inflation pres-
sures listed on the following page in the col-
umns for traveling speeds up to a maximum of
100mph or 160km/h.
These tire inflation pressures can also be found
on the driver's-side door post when the driver's
door is open.
The maximum permissible speed for
these tire pressures is 100 mph or
160 km/h. Do not exceed this speed, otherwise
tire damage and accidents could occur.<
Tire inflation pressures for driving
above 100 mph or 160 km/h
In order to drive at maximum speeds in
excess of 100 mph or 160 km/h, adjust
pressures to the respective tire inflation pres-
sures listed on the following page in the col-
umns for traveling speeds including those
exceeding 100 mph or 160 km/h. Otherwise tire
damage and accidents could occur.<
Observe all national and local maximum speed
limits, otherwise violations of the laws could
occur.
Page 212 of 266
Wheels and tires
210 work is not carried out properly, there is a dan-
ger of subsequent damage and related safety
h a z a r d s . M a k e s u re t h a t t h e n e w w h ee l s a r e b a l-
anced.<
Retreaded tires
BMW recommends that you do not use
retreaded tires, since driving safety may
be impaired. The causes for this include poten-
tially different tire casing structures and often
wide variations in tire age, which can result in a
limited service life.<
Correct wheels and tires
BMW recommends that you use only
wheel and tire combinations that BMW
has tested and approved for your particular
vehicle. Variations in factors such as manufac-
turing tolerances mean that even wheels and
tires with identical official size ratings could
actually have different dimensions, which could
lead to body contact and thus to severe acci-
dents. When selecting tires, also take their load
capacity into account. If non-approved wheels
and tires are used, BMW cannot evaluate their
suitability, and therefore cannot guarantee their
driving safety.<
You can inquire about the right wheel/tire com-
bination at your BMW center.
The correct combination of wheels and tires is
also necessary to ensure reliable operation of
various vehicle systems such as ABS or DSC.
To maintain good handling and vehicle
response, use only tires of a single brand and
tread configuration. After a tire has been dam-
aged, mount the previous wheel and tire combi-
nation again as soon as possible.
Wheels with Tire Pressure Monitor
TPM electronics
When mounting new tires or changing over
from summer to winter tires, or vice versa, only
use wheels with TPM electronics; otherwise the
Tire Pressure Monitor may not be able to detect
a puncture, refer to page86. Your BMW center
will be glad to advise you.
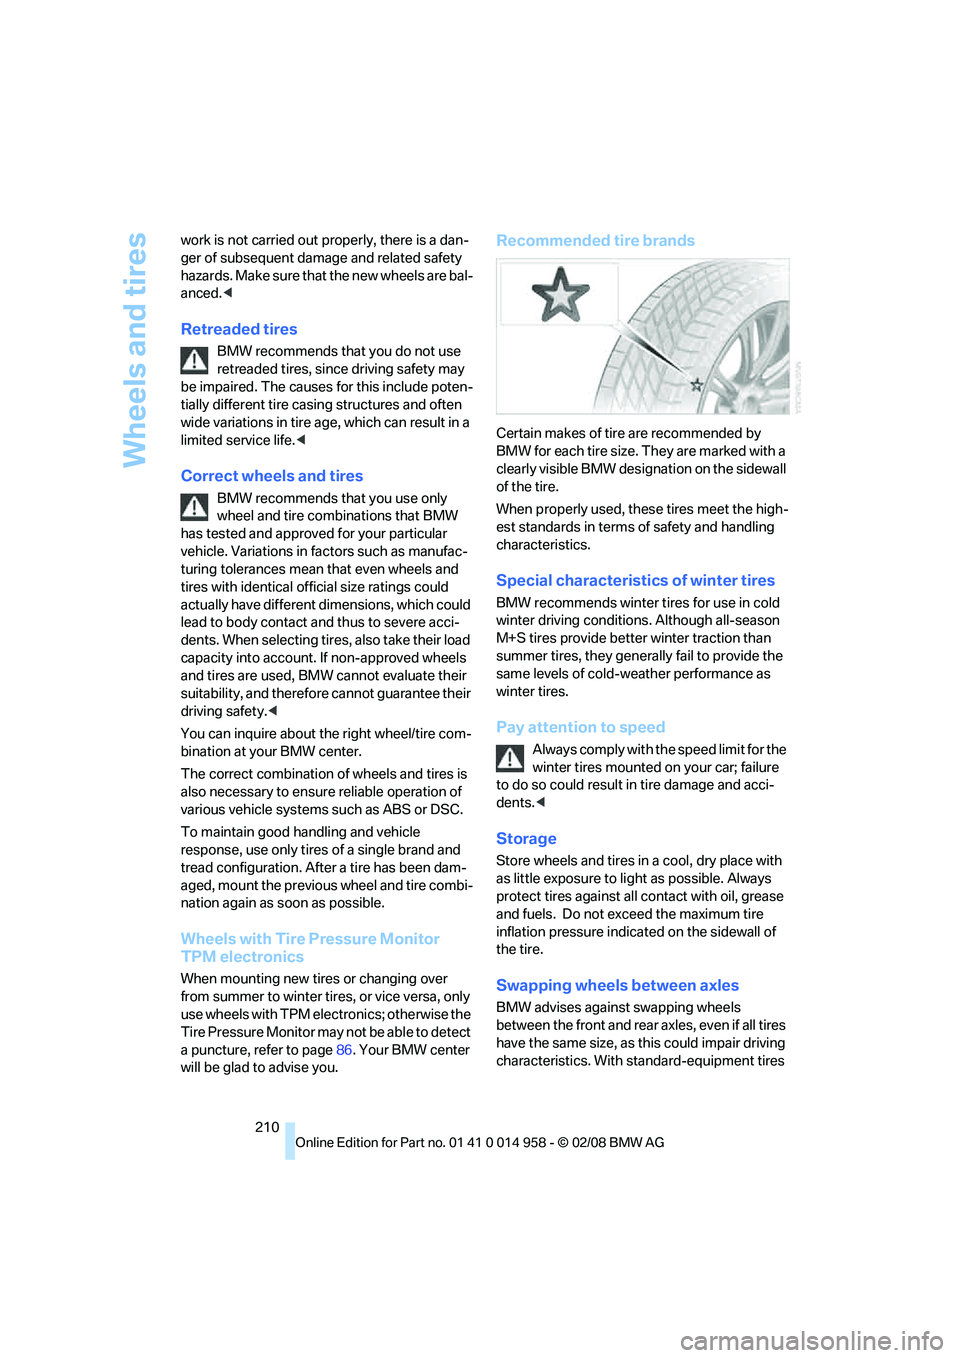
Recommended tire brands
Certain makes of tire are recommended by
BMW for each tire size. They are marked with a
clearly visible BMW designation on the sidewall
of the tire.
When properly used, these tires meet the high-
est standards in terms of safety and handling
characteristics.
Special characteristics of winter tires
BMW recommends winter tires for use in cold
winter driving conditions. Although all-season
M+S tires provide better winter traction than
summer tires, they generally fail to provide the
same levels of cold-weather performance as
winter tires.
Pay attention to speed
Always comply with the speed limit for the
winter tires mounted on your car; failure
to do so could result in tire damage and acci-
dents.<
Storage
Store wheels and tires in a cool, dry place with
as little exposure to light as possible. Always
protect tires against all contact with oil, grease
and fuels. Do not exceed the maximum tire
inflation pressure indicated on the sidewall of
the tire.
Swapping wheels between axles
BMW advises against swapping wheels
between the front and rear axles, even if all tires
have the same size, as this could impair driving
characteristics. With standard-equipment tires
Page 228 of 266
Replacing components
226
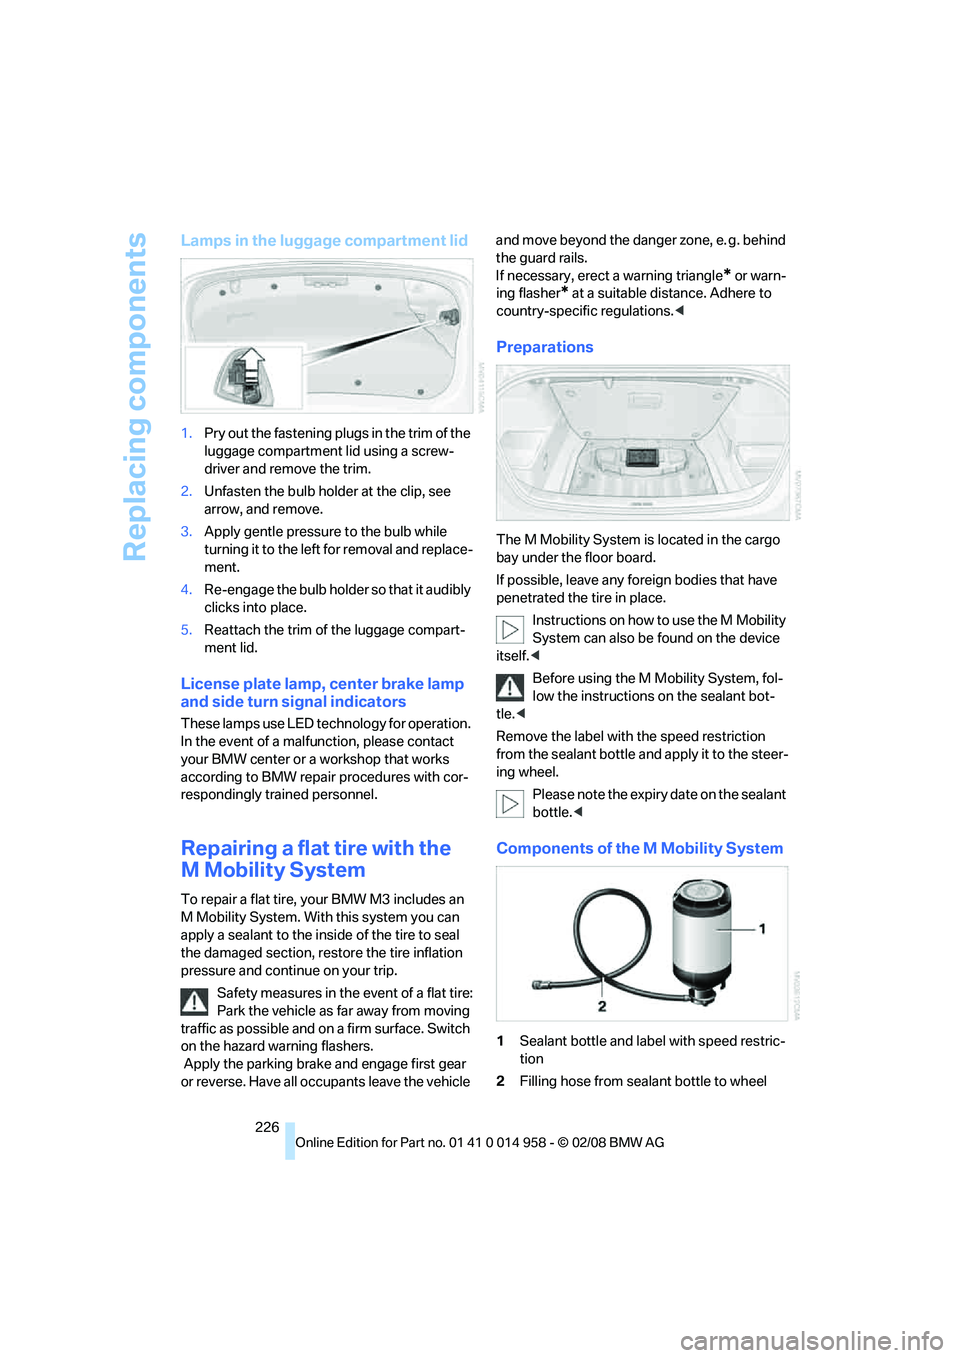
Lamps in the luggage compartment lid
1.Pry out the fastening plugs in the trim of the
luggage compartment lid using a screw-
driver and remove the trim.
2.Unfasten the bulb holder at the clip, see
arrow, and remove.
3.Apply gentle pressure to the bulb while
turning it to the left for removal and replace-
ment.
4.Re-engage the bulb holder so that it audibly
clicks into place.
5.Reattach the trim of the luggage compart-
ment lid.
License plate lamp, center brake lamp
and side turn signal indicators
These lamps use LED technology for operation.
In the event of a malfunction, please contact
your BMW center or a workshop that works
according to BMW repair procedures with cor-
respondingly trained personnel.
Repairing a flat tire with the
M Mobility System
To repair a flat tire, your BMW M3 includes an
M Mobility System. With this system you can
apply a sealant to the inside of the tire to seal
the damaged section, restore the tire inflation
pressure and continue on your trip.
Safety measures in the event of a flat tire:
Park the vehicle as far away from moving
traffic as possible and on a firm surface. Switch
on the hazard warning flashers.
Apply the parking brake and engage first gear
or reverse. Have all occupants leave the vehicle and move beyond the danger zone, e. g. behind
the guard rails.
If necessary, erect a warning triangle
* or warn-
ing flasher
* at a suitable distance. Adhere to
country-specific regulations.<
Preparations
The M Mobility System is located in the cargo
bay under the floor board.
If possible, leave any foreign bodies that have
penetrated the tire in place.
Instructions on how to use the M Mobility
System can also be found on the device
itself.<
Before using the M Mobility System, fol-
low the instructions on the sealant bot-
tle.<
Remove the label with the speed restriction
from the sealant bottle and apply it to the steer-
ing wheel.
Please note the expiry date on the sealant
bottle.<
Components of the M Mobility System
1Sealant bottle and label with speed restric-
tion
2Filling hose from sealant bottle to wheel
Page 229 of 266
Mobility
227Reference
At a glance
Controls
Driving tips
Communications
Navigation
Entertainment
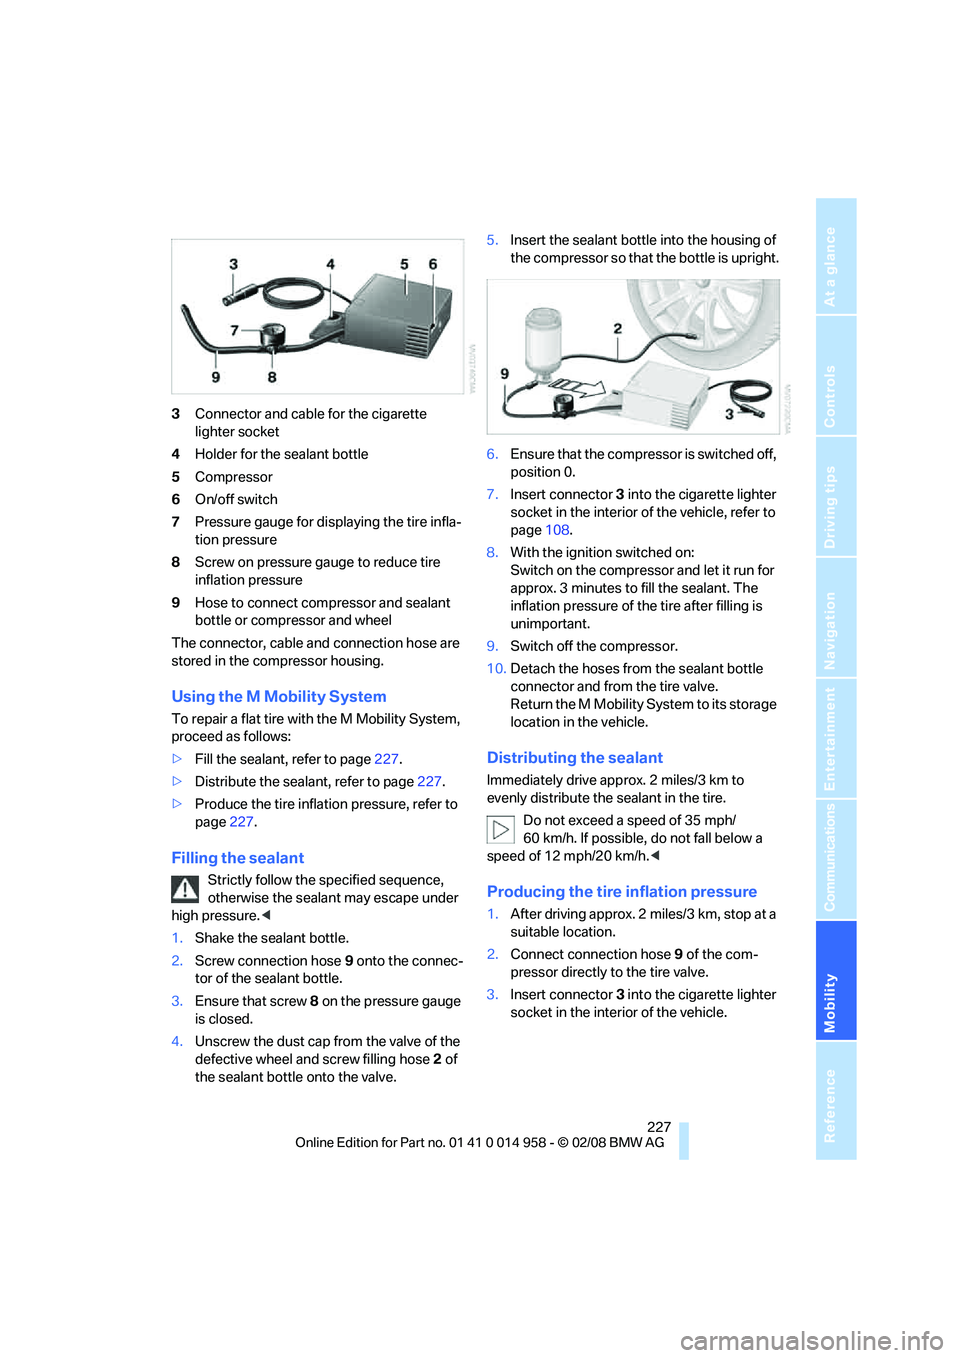
3Connector and cable for the cigarette
lighter socket
4Holder for the sealant bottle
5Compressor
6On/off switch
7Pressure gauge for displaying the tire infla-
tion pressure
8Screw on pressure gauge to reduce tire
inflation pressure
9Hose to connect compressor and sealant
bottle or compressor and wheel
The connector, cable and connection hose are
stored in the compressor housing.
Using the M Mobility System
To repair a flat tire with the M Mobility System,
proceed as follows:
>Fill the sealant, refer to page227.
>Distribute the sealant, refer to page227.
>Produce the tire inflation pressure, refer to
page227.
Filling the sealant
Strictly follow the specified sequence,
otherwise the sealant may escape under
high pressure.<
1.Shake the sealant bottle.
2.Screw connection hose 9 onto the connec-
tor of the sealant bottle.
3.Ensure that screw 8 on the pressure gauge
is closed.
4.Unscrew the dust cap from the valve of the
defective wheel and screw filling hose 2 of
the sealant bottle onto the valve.5.Insert the sealant bottle into the housing of
the compressor so that the bottle is upright.
6.Ensure that the compressor is switched off,
position 0.
7.Insert connector 3 into the cigarette lighter
socket in the interior of the vehicle, refer to
page108.
8.With the ignition switched on:
Switch on the compressor and let it run for
approx. 3 minutes to fill the sealant. The
inflation pressure of the tire after filling is
unimportant.
9.Switch off the compressor.
10.Detach the hoses from the sealant bottle
connector and from the tire valve.
Return the M Mobility System to its storage
location in the vehicle.
Distributing the sealant
Immediately drive approx. 2 miles/3 km to
evenly distribute the sealant in the tire.
Do not exceed a speed of 35 mph/
60 km/h. If possible, do not fall below a
speed of 12 mph/20 km/h.<
Producing the tire inflation pressure
1.After driving approx. 2 miles/3 km, stop at a
suitable location.
2.Connect connection hose9 of the com-
pressor directly to the tire valve.
3.Insert connector 3 into the cigarette lighter
socket in the interior of the vehicle.
Page 230 of 266
Replacing components
228 4.Adjust the tire inflation pressure to 29 psi/
200 kPa. With the ignition switched on, pro-
ceed as follows:
>To increase the inflation pressure:
Switch on the compressor, position I. To
check the current inflation pressure set-
ting, briefly switch off the compressor.
Do not let the compressor run for
more than 10 minutes, otherwise the
device will overheat and may be dam-
aged.<
>To reduce the inflation pressure: turn
screw 8 on the pressure gauge.
If the inflation pressure is not maintained,
drive the vehicle a second time, refer to
Distributing the sealant. Then repeat steps 1 to
4.
Use of the M Mobility System may be ineffec-
tual for tire damage larger than approx. 0.16 in/
4 mm. Please contact the nearest BMW center,
refer to page230, or a workshop that works
according to BMW repair procedures with cor-
respondingly trained personnel if the tire can-
not be made roadworthy with the M Mobility
System.<
The tire inflation pressure must be at least
29 psi/200 kPa. If it is not, do not continue
driving.<
Continuing your trip
Do not exceed the maximum allowable
speed of 50 mph/80 km/h to avoid the risk
of an accident.<
Reinitialize the Flat Tire Monitor, refer to
page85 for more information.
Have the faulty tire and the sealant bottle of the
M Mobility System replaced as soon as possi-
ble.<
Changing wheels
The tools for changing wheels are avail-
able as optional accessories from your
BMW center.<
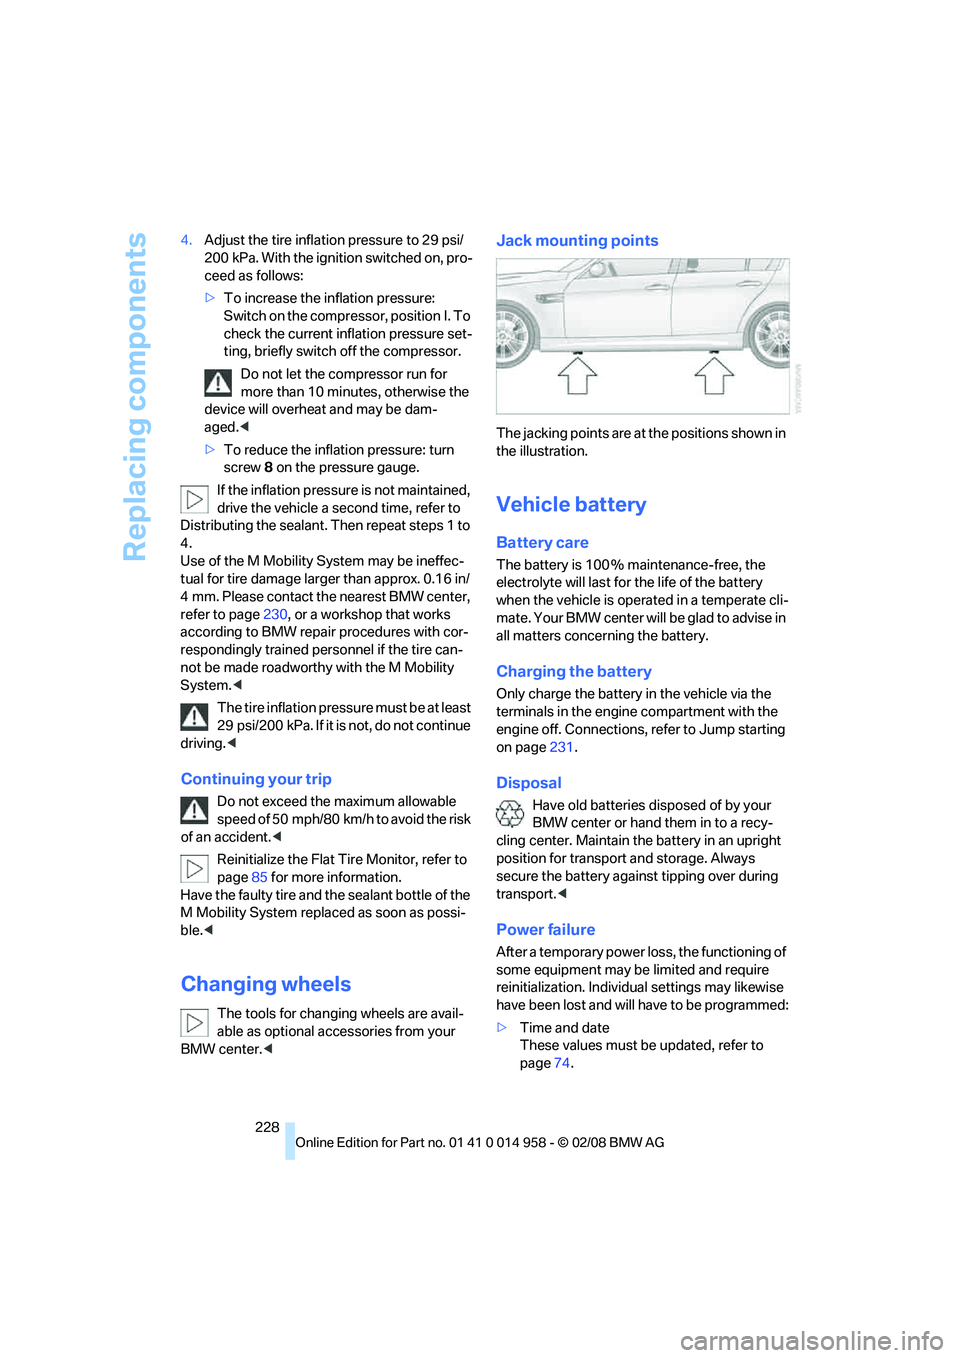
Jack mounting points
The jacking points are at the positions shown in
the illustration.
Vehicle battery
Battery care
The battery is 100 % maintenance-free, the
electrolyte will last for the life of the battery
when the vehicle is operated in a temperate cli-
ma te. Your BM W center will be glad to advise in
all matters concerning the battery.
Charging the battery
Only charge the battery in the vehicle via the
terminals in the engine compartment with the
engine off. Connections, refer to Jump starting
on page231.
Disposal
Have old batteries disposed of by your
BMW center or hand them in to a recy-
cling center. Maintain the battery in an upright
position for transport and storage. Always
secure the battery against tipping over during
transport.<
Power failure
After a temporary power loss, the functioning of
some equipment may be limited and require
reinitialization. Individual settings may likewise
have been lost and will have to be programmed:
>Time and date
These values must be updated, refer to
page74.
Page 248 of 266
Everything from A - Z
246
Everything from A - Z
Index
"..." Identifies Control Display
texts used to select
individual functions and
refers you to the page where
these texts can be found.
A
ABS Antilock Brake
System82
Acceleration assistant, refer to
Launch Control62
Accident, refer to Sending an
Emergency Request230
Activated-charcoal filter for
automatic climate
control100
"Activation time"100
Adaptive Head Light94
"Add digits" on the mobile
phone186
Additives
– coolant222
"Address book" in
navigation134
Address for navigation
– deleting136
– entering126,134
– selecting135
– storing134
– storing current position135
"Add to destination list"129
Adjusting temperature inside
the car, refer to Automatic
climate control97
Adjusting the thigh support41
Adjusting the tone during
audio operation, refer to
Tone control153
Airbags89
– indicator/warning lamp91
– sitting safely40Air conditioning mode
– automatic climate control97
– ventilation99
Air distribution
– automatic98
– individual97
Air flow rate98
Airing, refer to Ventilation99
Air pressure, refer to Tire
inflation pressure206
Air recirculation, refer to
Recirculated-air mode98
"Air recirculation on / off"47
Air supply
– automatic climate control97
– ventilation99
Air vents96
AKI, refer to Fuel
specifications204
Alarm system34
– avoiding unintentional
alarms35
– interior motion sensor35
– switching off an alarm34
– tilt alarm sensor35
"All channels" for satellite
radio163
All-season tires, refer to
Winter tires
210
"All stations", displaying with
the radio156
"AM", waveband152,156
Ambient air, refer to
Recirculated-air mode98
Antenna for mobile phone178
Antifreeze
– coolant222
– washer fluid65
Antilock Brake System
ABS82
Anti-theft alarm system, refer
to Alarm system34
Anti-theft system29Approved axle loads, refer to
Weights240
Approved gross vehicle
weight, refer to Weights240
Armrest, refer to Center
armrest106
Arrival time, refer to
Computer69
Arrival time, refer to Starting
destination guidance139
Arrow display for
navigation140
"Arrow display" in
navigation140
Ashtray
– front107
– rear108
Assist193
Assistance systems, refer to
Driving stability control
systems82
Assistance window20
– refer to iDrive20
"Assist profile"199
AUC Automatic recirculated-
air control98
"Audio"155,159
Audio152
– controls152
– switching on/off152
– tone control153
– volume153
"Audio", refer to Tone
control153
Audio device, external106
Automatic
– air distribution98
– air flow rate98
– BMW Teleservice Call195
– cruise control65
– headlamp control92
– storing of stations157
Automatic car washes214