airbag BMW M3 2010 Owners Manual
[x] Cancel search | Manufacturer: BMW, Model Year: 2010, Model line: M3, Model: BMW M3 2010Pages: 196, PDF Size: 5.78 MB
Page 17 of 196
At a glance
Controls
Driving tips
Mobility Reference
15
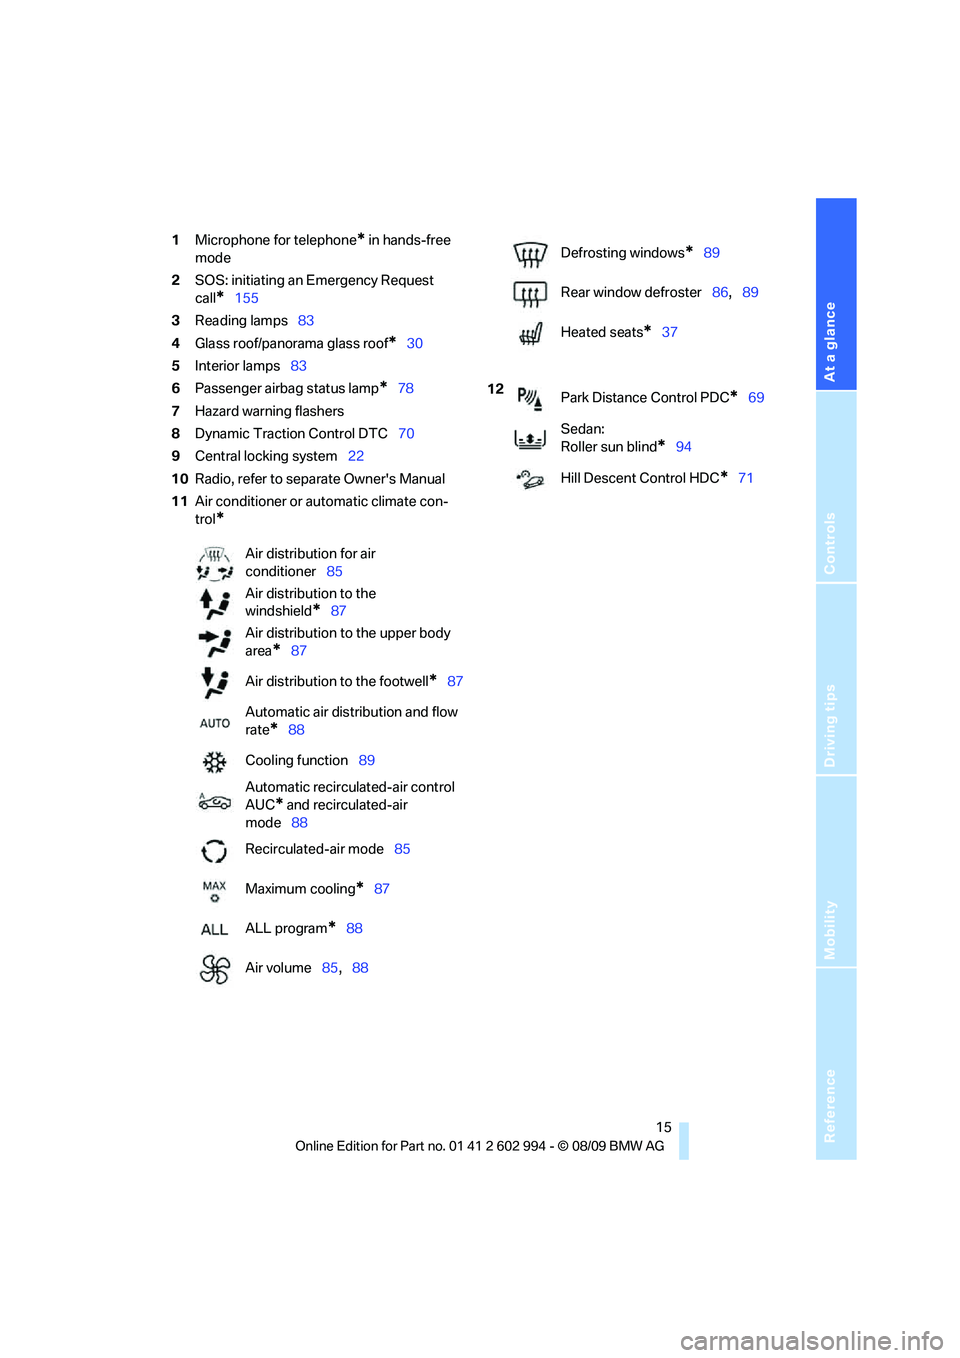
1Microphone for telephone* in hands-free
mode
2SOS: initiating an Emergency Request
call
*155
3Reading lamps83
4Glass roof/panorama glass roof
*30
5Interior lamps83
6Passenger airbag status lamp
*78
7Hazard warning flashers
8Dynamic Traction Control DTC70
9Central locking system22
10Radio, refer to separate Owner's Manual
11Air conditioner or automatic climate con-
trol
*
Air distribution for air
conditioner85
Air distribution to the
windshield
*87
Air distribution to the upper body
area
*87
Air distribution to the footwell
*87
Automatic air distribution and flow
rate
*88
Cooling function89
Automatic recirculated-air control
AUC
* and recirculated-air
mode88
Recirculated-air mode85
Maximum cooling
*87
ALL program
*88
Air volume85,88
Defrosting windows*89
Rear window defroster86,89
Heated seats
*37
12
Park Distance Control PDC
*69
Sedan:
Roller sun blind
*94
Hill Descent Control HDC
*71
Page 35 of 196
Reference
At a glance
Controls
Driving tips
Mobility
33
Adjustments
Sitting safely
The ideal sitting position can make a vital con-
tribution to relaxed, fatigue-free driving. In con-
junction with the safety belts, the head
restraints and the airbags, the seated position
has a major influence on your safety in the event
of an accident. To ensure that the safety sys-
tems operate with optimal efficiency, we
strongly urge you to observe the instructions
contained in the following section.
For additional information on transporting chil-
dren safely, refer to page42.
Airbags
Always maintain an adequate distance
between yourself and the airbags. Always
grip the steering wheel on the rim, with your
hands in the 3 o'clock and 9 o'clock positions,
to minimize the risk of injury to the hands or
arms in the event of the airbag being triggered
off.
No one and nothing should come between the
airbags and the seat occupant.
Do not use the cover of the front airbag on the
front passenger side as a storage area. Make
sure that the front passenger is sitting correctly,
e.g. not resting feet or legs on the dashboard;
otherwise, leg injuries can occur if the front air-
bag deploys.
Make sure that passengers keep their heads
away from the side airbag and do not lean
against the cover of the head airbag; otherwise,
serious injuries can result if the airbag
deploys.<
Even if you follow all the instructions, injuries
resulting from contact with airbags cannot be
fully excluded, depending on the circum-
stances. The ignition and inflation noise may
provoke a mild hearing loss in extremely sensi-
tive individuals. This effect is usually only tem-
porary.
For airbag locations and additional information
on airbags, refer to page77.
Head restraint
A correctly adjusted head restraint reduces the
risk of neck injury in the event of an accident.
Adjust the head restraint in such a way
that its center is at approx. ear level. Oth-
erwise, there is an increased risk of injury in the
event of an accident.<
Head restraints, refer to page35.
Safety belt
Before every drive, make sure that all occupants
wear their safety belts. Airbags complement the
safety belt as an additional safety device, but
they do not represent a substitute.
Your vehicle has five seats, each of which is
equipped with a safety belt.
Never allow more than one person to
wear a single safety belt. Never allow
infants or small children to ride in a passenger's
lap. Make sure that the belt in the lap area sits
low across the hips and does not press against
the abdomen.
The safety belt must not rest against the throat,
run across sharp edges, pass over hard or frag-
ile objects or be pinched. Fasten the safety belt
so that it sits as snugly as possible against the
lap and shoulder without being twisted. Other-
wise, the belt could slide over your hips and
injure your abdomen in the event of a frontal
collision.
Avoid wearing bulky clothing and regularly pull
the belt in the upper-body area taut; otherwise,
its restraining effect could be impaired.
Sports Wagon: if the rear center safety belt is
used, the wider backrest must be locked in
place, refer to page99. Otherwise, the safety
belt will have no restraining effect.<
Safety belts, refer to page38.
Page 38 of 196
Adjustments
36
Front active head restraints
In a rear collision of a sufficient strength, the
active head restraint reduces the distance to
the head.
Do not use seat or head restraint covers
that could impair the function of the active
head restraint. Otherwise, the protective func-
tion of the active head restraint will not be
ensured and its full potential in reducing the risk
of injury in the event of a rear collision may not
be realized.
In the event of malfunctions, deactivation or
triggering of the active head restraints, have the
testing, repair and removal executed only by a
BMW center or a workshop that works accord-
ing to repair procedures of BMW with corre-
spondingly trained personnel and that has the
required explosives licenses. Unprofessional
attempts to work on the system could lead to
failure in an emergency or to undesired airbag
activation, either of which could result in per-
sonal injury.<
For technical reasons, the head restraint
cannot be removed.<
Front seats
Height adjustment
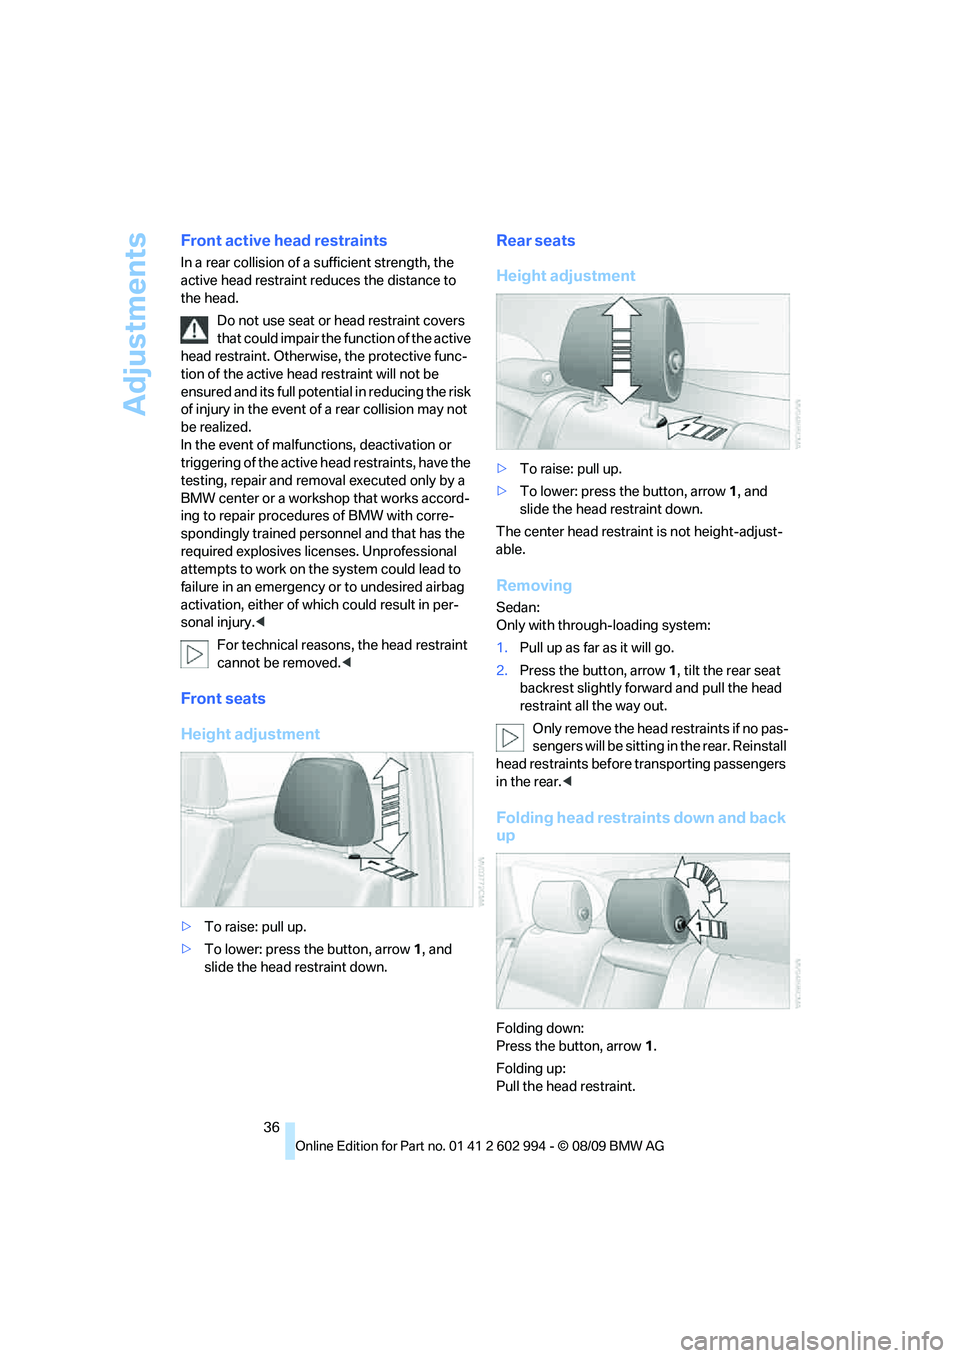
>To raise: pull up.
>To lower: press the button, arrow1, and
slide the head restraint down.
Rear seats
Height adjustment
>To raise: pull up.
>To lower: press the button, arrow1, and
slide the head restraint down.
The center head restraint is not height-adjust-
able.
Removing
Sedan:
Only with through-loading system:
1.Pull up as far as it will go.
2.Press the button, arrow 1, tilt the rear seat
backrest slightly forward and pull the head
restraint all the way out.
O nly remove the head restraints if no pas-
sengers will be sitting in the rear. Reinstall
head restraints before transporting passengers
in the rear.<
Folding head restraints down and back
up
Folding down:
Press the button, arrow1.
Folding up:
Pull the head restraint.
Page 40 of 196
Adjustments
38
Call-up with the remote control
The driver's seat position last set is stored for
the remote control currently in use.
You can select whether or not the seat is reset
to that position automatically.
When this Personal Profile function is
used, first make sure that the footwell
behind the driver's seat is free of obstacles.
Failure to do so could cause injury to persons or
damage to objects as a result of a rearward
movement of the seat.<
The adjusting procedure is halted immediately
when you touch a seat adjustment switch or
one of the memory buttons.
Activating/deactivating automatic call-
up
For operating principle refer to page64.
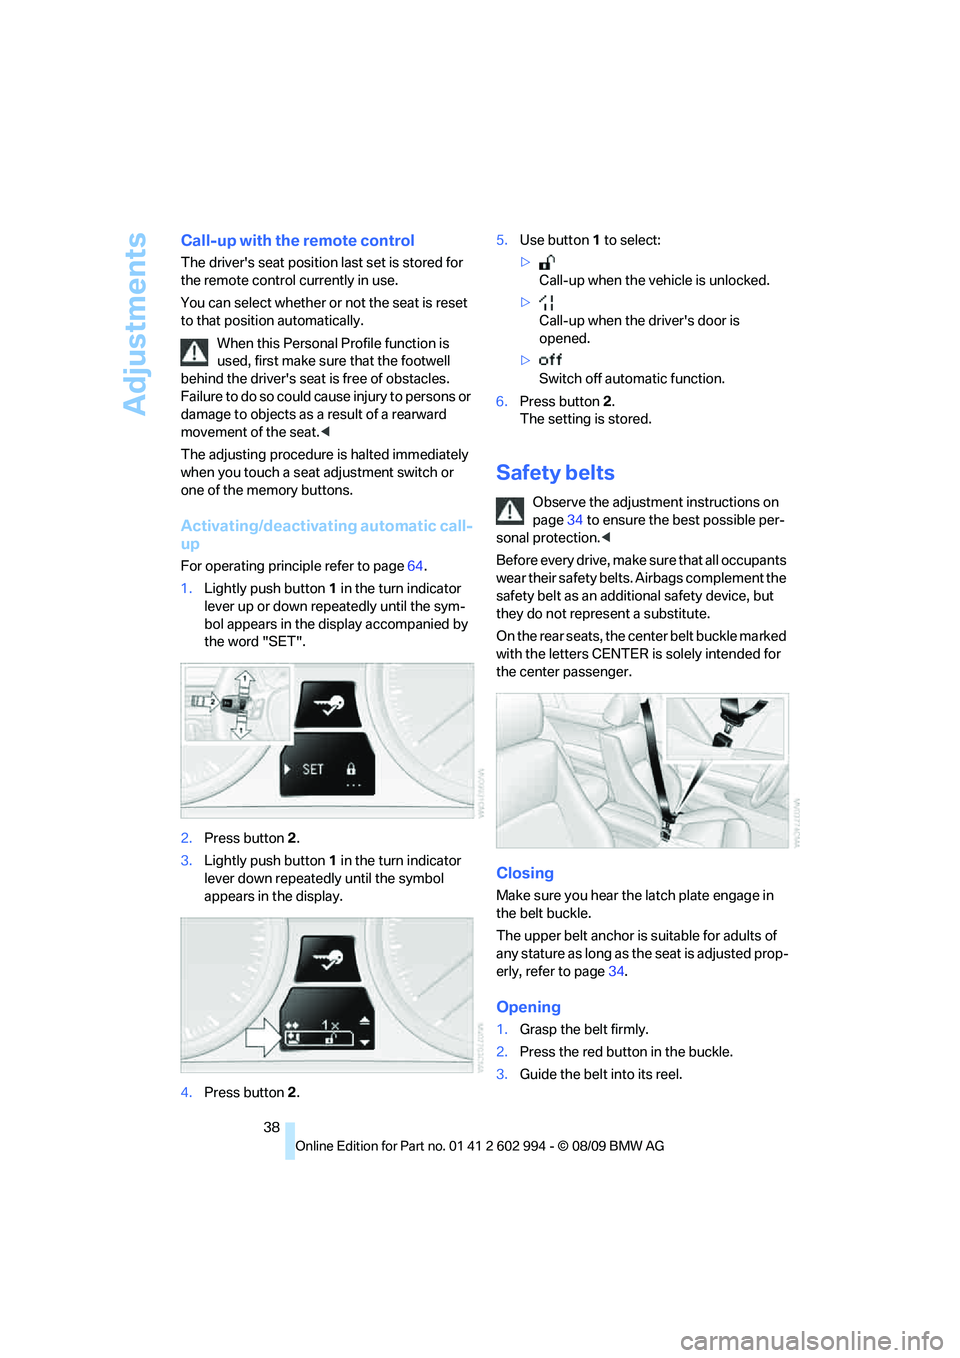
1.Lightly push button1 in the turn indicator
lever up or down repeatedly until the sym-
bol appears in the display accompanied by
the word "SET".
2.Press button 2.
3.Lightly push button1 in the turn indicator
lever down repeatedly until the symbol
appears in the display.
4.Press button 2.5.Use button 1 to select:
>
Call-up when the vehicle is unlocked.
>
Call-up when the driver's door is
opened.
>
Switch off automatic function.
6.Press button 2.
The setting is stored.
Safety belts
Observe the adjustment instructions on
page34 to ensure the best possible per-
sonal protection.<
Before every drive, make sure that all occupants
wear their safety belts. Airbags complement the
safety belt as an additional safety device, but
they do not represent a substitute.
On the rear seats, the center belt buckle marked
with the letters CENTER is solely intended for
the center passenger.
Closing
Make sure you hear the latch plate engage in
the belt buckle.
The upper belt anchor is suitable for adults of
any stature as long as the seat is adjusted prop-
erly, refer to page34.
Opening
1.Grasp the belt firmly.
2.Press the red button in the buckle.
3.Guide the belt into its reel.
Page 44 of 196
Transporting children safely
42
Transporting children safely
The right place for children
Do not leave children unattended in the
vehicle; otherwise, they could endanger
themselves and/or other persons by opening
the doors, for example.<
The rear center seat is not suitable for installing
child restraint systems for all age groups,
approved for the age group in question.
Children always in the rear
Accident research has shown that the safest
place for children is on the rear seat.
Children under the age of 13 or smaller
than 5 ft/150 cm may be transported only
in the rear in suitable child restraint systems
appropriate for their age, weight and size. Oth-
erwise, there is an increased risk of injury in the
event of an accident.<
Children 13 years of age or older must be buck-
led in with a safety belt as soon as there no
longer is any child restraint system that is
appropriate for their age, size and weight.
Exception for front passenger seat
Should it be necessary to use a child
restraint system on the front passenger
seat, the front and side airbags for the front pas-
senger must be deactivated. Otherwise, a child
traveling on that seat will face a significant risk
of injury if the airbags are triggered off, even
with a child restraint system.<
For more information on automatic deactivation
of the front passenger airbags refer to page77.
Installing child restraint
systems
Observe the child restraint system manu-
facturer's instructions when selecting,
installing and using child restraint systems.
Otherwise, the protective effect may be dimin-
ished.
section of a lap-and-shoulder belt. Incorrectly
or improperly installed child restraint systems
can increase the risk of injury to children.
Always follow the installation instructions for
the system with the greatest care.
On the front passenger seat
After installing a child restraint system on
the front passenger seat, make sure that
the front and side airbags for the front passen-
ger are deactivated; otherwise, there is an
increased risk of injury if the airbags deploy.<
Seat position
Before installing a child restraint system, move
the front passenger seat as far back and up as
possible to obtain the best possible position for
the belt. Do not change the seat position after
this.
Backrest width*
The backrest width of the front passenger
seat must be at its widest possible set-
ting. Do not change the setting after installing
the child seat. Otherwise, the child seat's stabil-
ity on the front passenger seat is limited.<
1.Adjust the backrest width to its widest set-
ting, refer to page35.
2.Install the child seat.
Page 79 of 196
Reference
At a glance
Controls
Driving tips
Mobility
77
Airbags
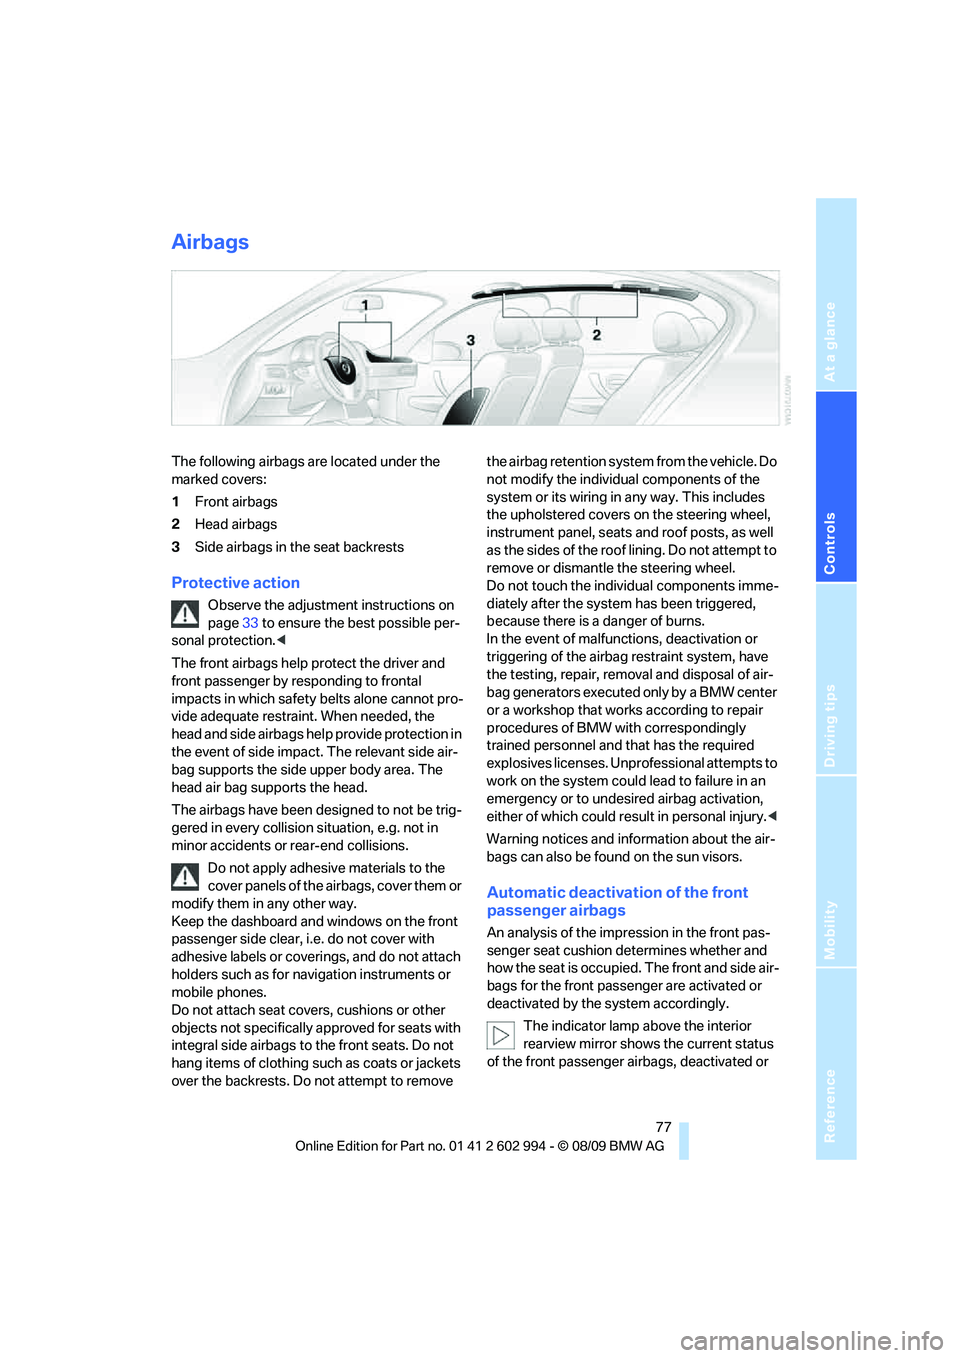
The following airbags are located under the
marked covers:
1Front airbags
2Head airbags
3Side airbags in the seat backrests
Protective action
Observe the adjustment instructions on
page33 to ensure the best possible per-
sonal protection.<
The front airbags help protect the driver and
front passenger by responding to frontal
impacts in which safety belts alone cannot pro-
vide adequate restraint. When needed, the
head and side airbags help provide protection in
the event of side impact. The relevant side air-
bag supports the side upper body area. The
head air bag supports the head.
The airbags have been designed to not be trig-
gered in every collision situation, e.g. not in
minor accidents or rear-end collisions.
Do not apply adhesive materials to the
cover panels of the airbags, cover them or
modify them in any other way.
Keep the dashboard and windows on the front
passenger side clear, i.e. do not cover with
adhesive labels or coverings, and do not attach
holders such as for navigation instruments or
mobile phones.
Do not attach seat covers, cushions or other
objects not specifically approved for seats with
integral side airbags to the front seats. Do not
hang items of clothing such as coats or jackets
over the backrests. Do not attempt to remove the airbag retention system from the vehicle. Do
not modify the individual components of the
system or its wiring in any way. This includes
the upholstered covers on the steering wheel,
instrument panel, seats and roof posts, as well
as the sides of the roof lining. Do not attempt to
remove or dismantle the steering wheel.
Do not touch the individual components imme-
diately after the system has been triggered,
because there is a danger of burns.
In the event of malfunctions, deactivation or
triggering of the airbag restraint system, have
the testing, repair, removal and disposal of air-
bag generators executed only by a BMW center
or a workshop that works according to repair
procedures of BMW with correspondingly
trained personnel and that has the required
explosives licenses. Unprofessional attempts to
work on the system could lead to failure in an
emergency or to undesired airbag activation,
either of which could result in personal injury.<
Warning notices and information about the air-
bags can also be found on the sun visors.
Automatic deactivation of the front
passenger airbags
An analysis of the impression in the front pas-
senger seat cushion determines whether and
how the seat is occupied. The front and side air-
bags for the front passenger are activated or
deactivated by the system accordingly.
The indicator lamp above the interior
rearview mirror shows the current status
of the front passenger airbags, deactivated or
Page 80 of 196
Technology for driving comfort and safety
78 activated, refer to Status of front passenger air-
bags below.<
Before transporting a child on the front
passenger seat, read the safety precau-
tions and handling instructions under Trans-
porting children safely, refer to page42.
The front and side airbags can also be deacti-
vated by adolescents and adults sitting in cer-
tain positions; the indicator lamp for the front
passenger airbags comes on. In such cases, the
passenger should change his or her sitting
position so that the front passenger airbags are
activated and the indicator lamp goes out. If the
desired airbag status cannot be achieved by
changing the sitting position, transport the rele-
vant passenger on a rear seat. Do not attach
seat covers, seat cushion padding, ball mats or
other items to the front passenger seat unless
they are specifically recommended by BMW.
Do not place any items under the seat which
could press against the seat from below. Other-
wise, a correct analysis of the seat cushion is
not ensured.<
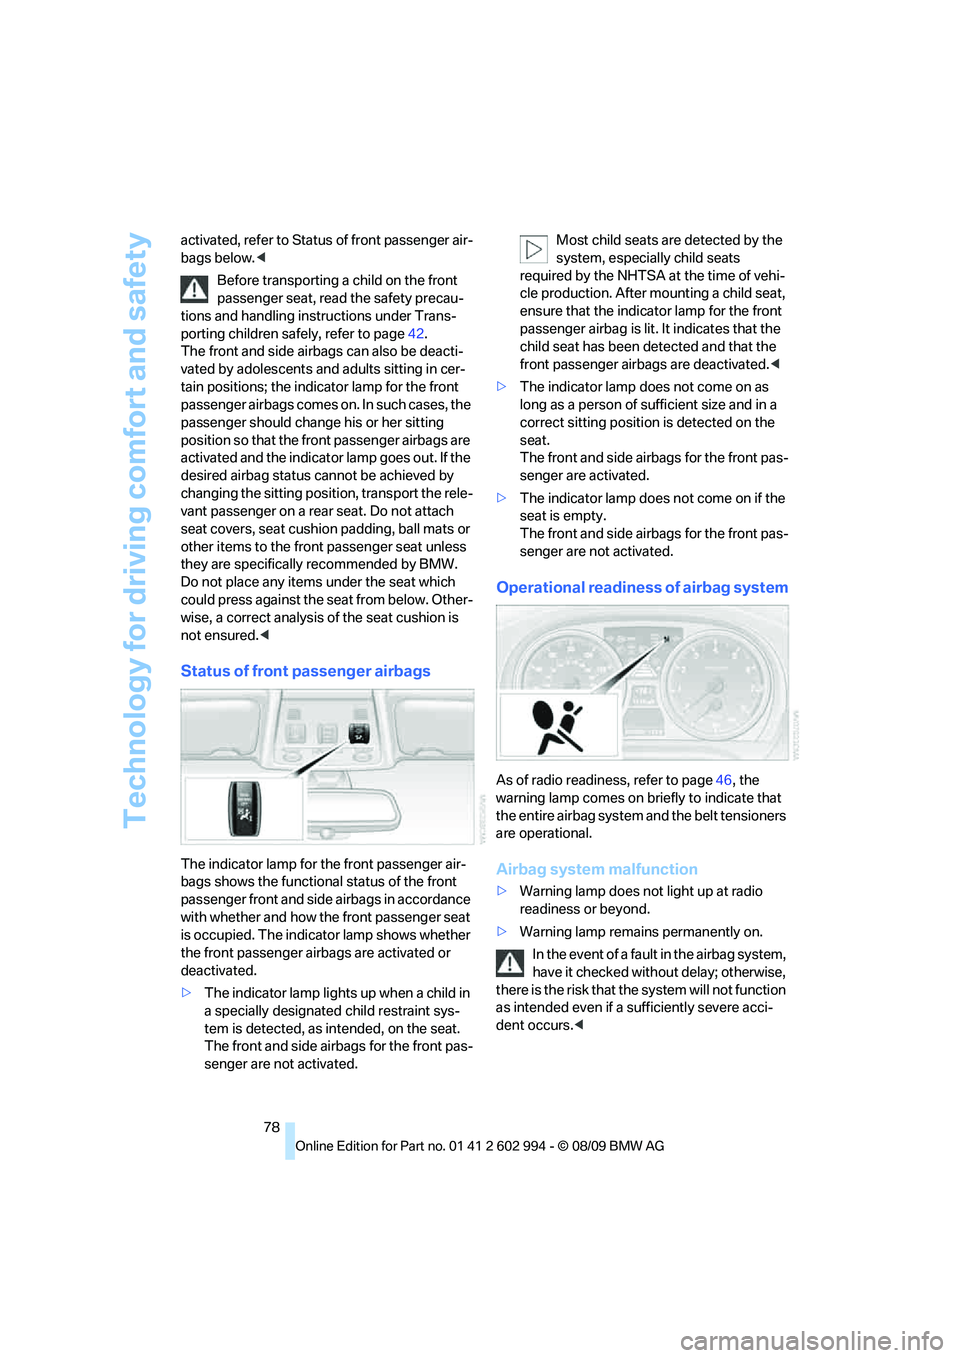
Status of front passenger airbags
The indicator lamp for the front passenger air-
bags shows the functional status of the front
passenger front and side airbags in accordance
with whether and how the front passenger seat
is occupied. The indicator lamp shows whether
the front passenger airbags are activated or
deactivated.
>The indicator lamp lights up when a child in
a specially designated child restraint sys-
tem is detected, as intended, on the seat.
The front and side airbags for the front pas-
senger are not activated.Most child seats are detected by the
system, especially child seats
required by the NHTSA at the time of vehi-
cle production. After mounting a child seat,
ensure that the indicator lamp for the front
passenger airbag is lit. It indicates that the
child seat has been detected and that the
front passenger airbags are deactivated.<
>The indicator lamp does not come on as
long as a person of sufficient size and in a
correct sitting position is detected on the
seat.
The front and side airbags for the front pas-
senger are activated.
>The indicator lamp does not come on if the
seat is empty.
The front and side airbags for the front pas-
senger are not activated.
Operational readiness of airbag system
As of radio readiness, refer to page46, the
warning lamp comes on briefly to indicate that
the entire airbag system and the belt tensioners
are operational.
Airbag system malfunction
>Warning lamp does not light up at radio
readiness or beyond.
>Warning lamp remains permanently on.
In the event of a fault in the airbag system,
have it checked without delay; otherwise,
there is the risk that the system will not function
as intended even if a sufficiently severe acci-
dent occurs.<
Page 163 of 196
Reference
At a glance
Controls
Driving tips
Mobility
161
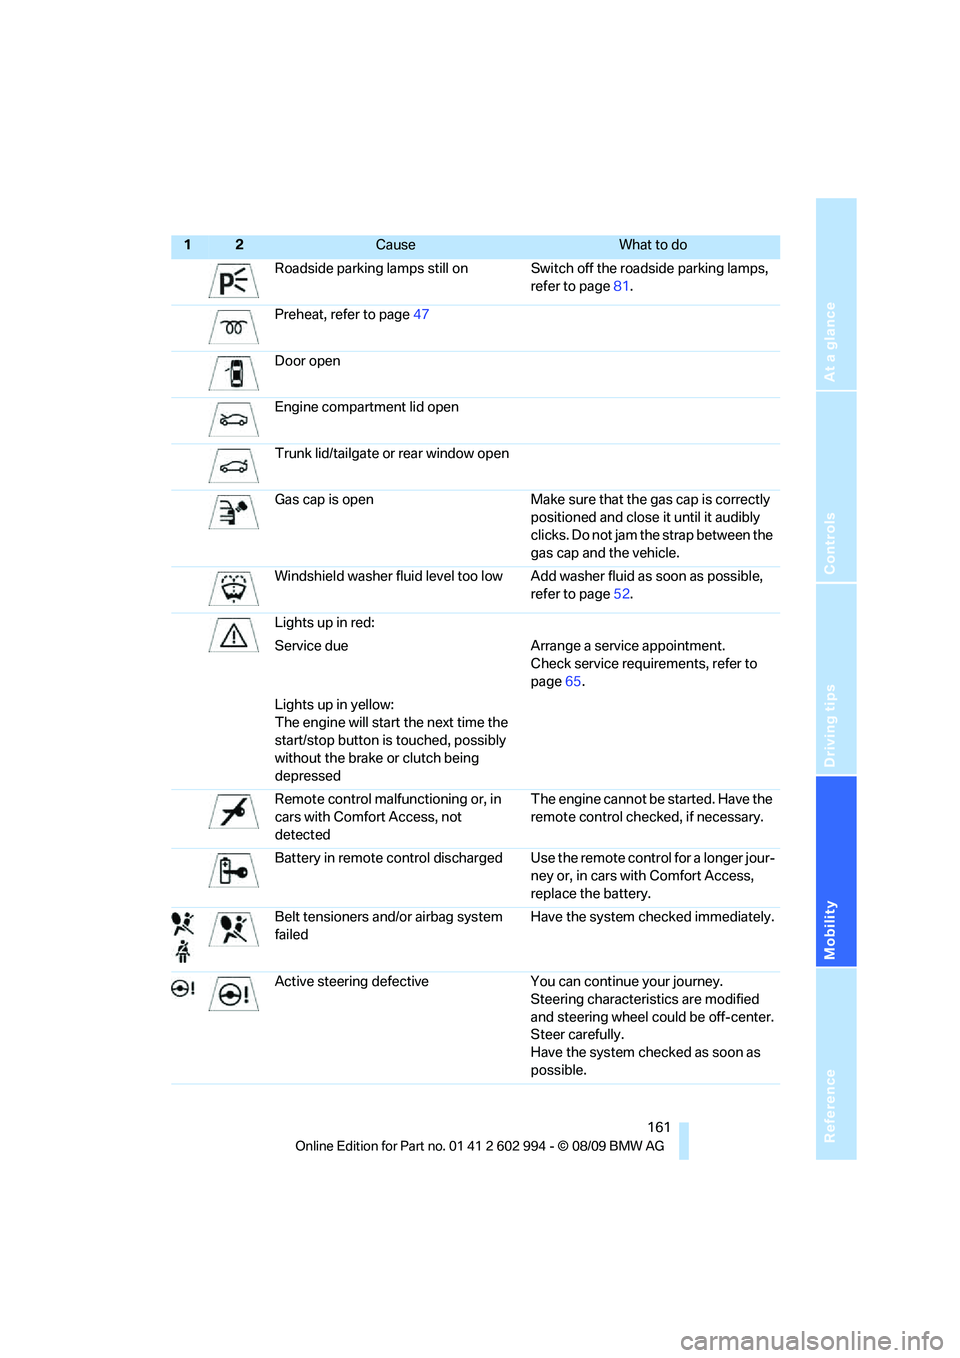
Roadside parking lamps still on Switch off the roadside parking lamps,
refer to page81.
Preheat, refer to page47
Door open
Engine compartment lid open
Trunk lid/tailgate or rear window open
Gas cap is open Make sure that the gas cap is correctly
positioned and close it until it audibly
clicks. Do not jam the strap between the
gas cap and the vehicle.
Windshield washer fluid level too low Add washer fluid as soon as possible,
refer to page52.
Lights up in red:
Service due Arrange a service appointment.
Check service requirements, refer to
page65.
Lights up in yellow:
The engine will start the next time the
start/stop button is touched, possibly
without the brake or clutch being
depressed
Remote control malfunctioning or, in
cars with Comfort Access, not
detectedThe engine cannot be started. Have the
remote control checked, if necessary.
Battery in remote control discharged Use the remote control for a longer jour-
ney or, in cars with Comfort Access,
replace the battery.
Belt tensioners and/or airbag system
failedHave the system checked immediately.
Active steering defective You can continue your journey.
Steering characteristics are modified
and steering wheel could be off-center.
Steer carefully.
Have the system checked as soon as
possible.
12Cause What to do
Page 182 of 196
Everything from A to Z
180
Everything from A to Z
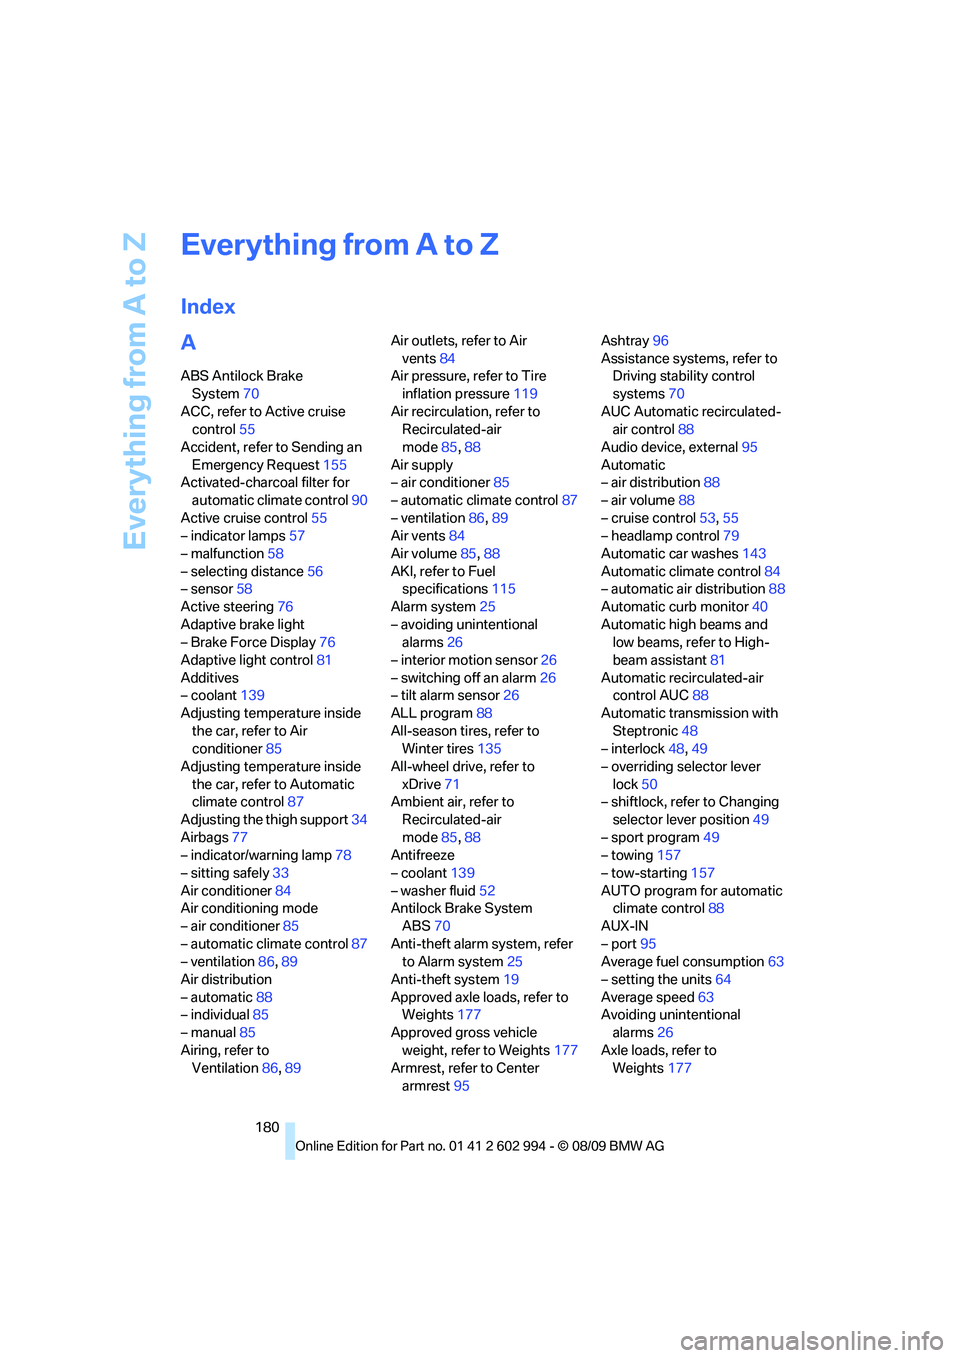
Index
A
ABS Antilock Brake
System70
ACC, refer to Active cruise
control55
Accident, refer to Sending an
Emergency Request155
Activated-charcoal filter for
automatic climate control90
Active cruise control55
– indicator lamps57
– malfunction58
– selecting distance56
– sensor58
Active steering76
Adaptive brake light
– Brake Force Display76
Adaptive light control81
Additives
– coolant139
Adjusting temperature inside
the car, refer to Air
conditioner85
Adjusting temperature inside
the car, refer to Automatic
climate control87
Adjusting the thigh support34
Airbags77
– indicator/warning lamp78
– sitting safely33
Air conditioner84
Air conditioning mode
– air conditioner85
– automatic climate control87
– ventilation86,89
Air distribution
– automatic88
– individual85
– manual85
Airing, refer to
Ventilation86,89Air outlets, refer to Air
vents84
Air pressure, refer to Tire
inflation pressure119
Air recirculation, refer to
Recirculated-air
mode85,88
Air supply
– air conditioner85
– automatic climate control87
– ventilation86,89
Air vents84
Air volume85,88
AKI, refer to Fuel
specifications115
Alarm system
25
– avoiding unintentional
alarms26
– interior motion sensor26
– switching off an alarm26
– tilt alarm sensor26
ALL program88
All-season tires, refer to
Winter tires135
All-wheel drive, refer to
xDrive71
Ambient air, refer to
Recirculated-air
mode85,88
Antifreeze
– coolant139
– washer fluid52
Antilock Brake System
ABS70
Anti-theft alarm system, refer
to Alarm system25
Anti-theft system19
Approved axle loads, refer to
Weights177
Approved gross vehicle
weight, refer to Weights177
Armrest, refer to Center
armrest95Ashtray96
Assistance systems, refer to
Driving stability control
systems70
AUC Automatic recirculated-
air control88
Audio device, external95
Automatic
– air distribution88
– air volume88
– cruise control53,55
– headlamp control79
Automatic car washes143
Automatic climate control84
– automatic air distribution88
Automatic curb monitor40
Automatic high beams and
low beams, refer to High-
beam assistant81
Automatic recirculated-air
control AUC88
Automatic transmission with
Steptronic48
– interlock48,49
– overriding selector lever
lock50
– shiftlock, refer to Changing
selector lever position49
– sport program49
– towing157
– tow-starting157
AUTO program for automatic
climate control88
AUX-IN
– port95
Average fuel consumption63
– setting the units64
Average speed63
Avoiding unintentional
alarms26
Axle loads, refer to
Weights177
Page 184 of 196
Everything from A to Z
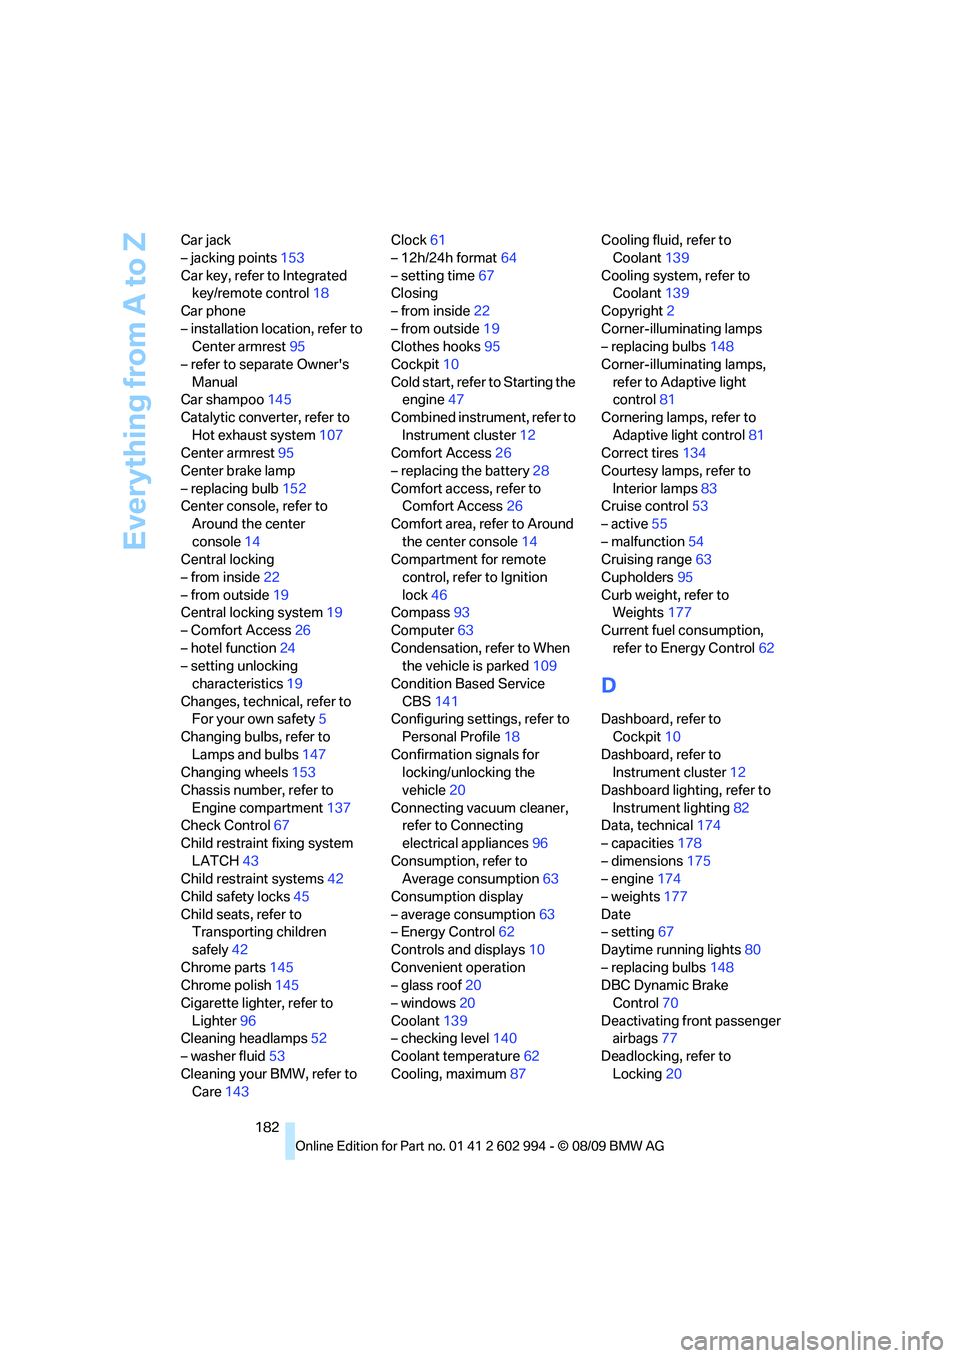
182 Car jack
– jacking points153
Car key, refer to Integrated
key/remote control18
Car phone
– installation location, refer to
Center armrest95
– refer to separate Owner's
Manual
Car shampoo145
Catalytic converter, refer to
Hot exhaust system107
Center armrest95
Center brake lamp
– replacing bulb152
Center console, refer to
Around the center
console14
Central locking
– from inside22
– from outside19
Central locking system19
– Comfort Access26
– hotel function24
– setting unlocking
characteristics19
Changes, technical, refer to
For your own safety5
Changing bulbs, refer to
Lamps and bulbs147
Changing wheels153
Chassis number, refer to
Engine compartment137
Check Control67
Child restraint fixing system
LATCH43
Child restraint systems42
Child safety locks45
Child seats, refer to
Transporting children
safely42
Chrome parts145
Chrome polish145
Cigarette lighter, refer to
Lighter96
Cleaning headlamps52
– washer fluid53
Cleaning your BMW, refer to
Care143Clock61
– 12h/24h format64
– setting time67
Closing
– from inside22
– from outside19
Clothes hooks95
Cockpit10
Cold start, refer to Starting the
engine47
Combined instrument, refer to
Instrument cluster12
Comfort Access26
– replacing the battery28
Comfort access, refer to
Comfort Access26
Comfort area, refer to Around
the center console14
Compartment for remote
control, refer to Ignition
lock46
Compass93
Computer63
Condensation, refer to When
the vehicle is parked109
Condition Based Service
CBS141
Configuring settings, refer to
Personal Profile18
Confirmation signals for
locking/unlocking the
vehicle20
Connecting vacuum cleaner,
refer to Connecting
electrical appliances96
Consumption, refer to
Average consumption63
Consumption display
– average consumption63
– Energy Control62
Controls and displays10
Convenient operation
– glass roof20
– windows20
Coolant139
– checking level140
Coolant temperature62
Cooling, maximum87Cooling fluid, refer to
Coolant139
Cooling system, refer to
Coolant139
Copyright2
Corner-illuminating lamps
– replacing bulbs148
Corner-illuminating lamps,
refer to Adaptive light
control81
Cornering lamps, refer to
Adaptive light control81
Correct tires134
Courtesy lamps, refer to
Interior lamps83
Cruise control53
– active55
– malfunction54
Cruising range63
Cupholders95
Curb weight, refer to
Weights177
Current fuel consumption,
refer to Energy Control62
D
Dashboard, refer to
Cockpit10
Dashboard, refer to
Instrument cluster12
Dashboard lighting, refer to
Instrument lighting82
Data, technical174
– capacities178
– dimensions175
– engine174
– weights177
Date
– setting67
Daytime running lights80
– replacing bulbs148
DBC Dynamic Brake
Control70
Deactivating front passenger
airbags77
Deadlocking, refer to
Locking20