ignition BMW M3 CONVERTIBLE 2003 E46 Owner's Manual
[x] Cancel search | Manufacturer: BMW, Model Year: 2003, Model line: M3 CONVERTIBLE, Model: BMW M3 CONVERTIBLE 2003 E46Pages: 166, PDF Size: 4.29 MB
Page 9 of 166
Contents
9
Passenger safety systems:
Airbags57
Transporting children safely59
Rollover protection system63
Vehicle Memory, Key
Memory65
Driving:
Ignition lock66
Starting engine and driving
off67
Switching off the engine69
Parking brake69
Manual transmission70
Sequential M gearbox
SMG II*71
Turn signal indicator/Headlamp
flasher76
Washer/wiper system/Rain
sensor*77
Cruise control78
Everything under control:
Odometer80
Tachometer80
Temperature gauge80
Fuel gauge81
Engine coolant temperature
gauge81
Service interval display82
Check Control82
Clock83
Computer84
Technology for safety and
driving convenience:
Park Distance Control (PDC)*86
Dynamic Stability Control
(DSC)87
Flat Tire Monitor88
M Engine dynamics control91
Lamps:
Parking lamps/Low beams92
Instrument lighting93
High beams/Standing lamps93
Fog lamps94
Interior lamps94
Reading lamps94
Controlling the climate for
pleasant driving:
Automatic climate control96
Interior conveniences:
Glove compartment101
Storage compartments101
Cellular phone*102
Ashtray, front*102
Ashtray, rear*103
Loading and transporting:
Ski bag*104
Cargo loading106
Roof-mounted luggage rack for
the hardtop*107
Operation, maintenance
Special operating instructions:
Break-in procedures110
Driving notes111
Antilock Brake System
(ABS)111
Brake system112
Hardtop*113
Wheels and tires:
Tire inflation pressure115
Tire condition115
Tire replacement116
Wheel and tire
combinations118
Winter tires118
Snow chains*119
In the engine compartment:
Hood120
Engine compartment
essentials122
Washer fluids124
Engine oil124
Coolant126
Brake fluid127
Maintenance:
The BMW Maintenance
System128
Laws and regulations:
California Proposition 65
warning130
OBD interface socket130
Controls and features
handbook.book Page 9 Tuesday, July 30, 2002 9:28 AM
Page 18 of 166
18
Indicator and warning lamps
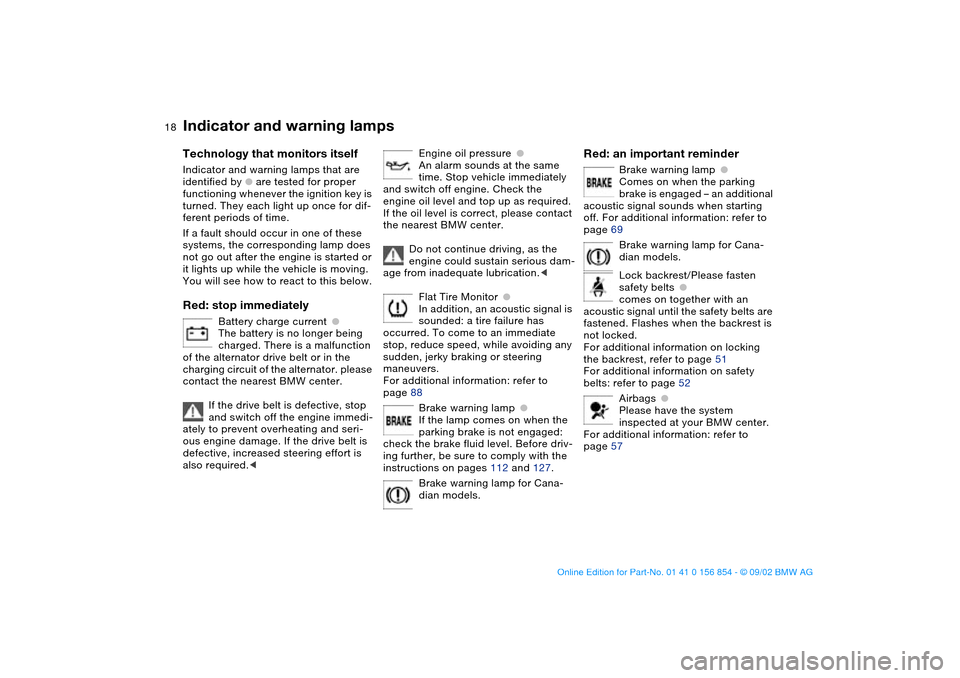
Technology that monitors itself
Indicator and warning lamps that are
identified by
●
are tested for proper
functioning whenever the ignition key is
turned. They each light up once for dif-
ferent periods of time.
If a fault should occur in one of these
systems, the corresponding lamp does
not go out after the engine is started or
it lights up while the vehicle is moving.
You will see how to react to this below.
Red: stop immediately
Battery charge current
●
The battery is no longer being
charged. There is a malfunction
of the alternator drive belt or in the
charging circuit of the alternator. please
contact the nearest BMW center.
If the drive belt is defective, stop
and switch off the engine immedi-
ately to prevent overheating and seri-
ous engine damage. If the drive belt is
defective, increased steering effort is
also required.
<
Engine oil pressure
●
An alarm sounds at the same
time. Stop vehicle immediately
and switch off engine. Check the
engine oil level and top up as required.
If the oil level is correct, please contact
the nearest BMW center.
Do not continue driving, as the
engine could sustain serious dam-
age from inadequate lubrication.
<
Flat Tire Monitor
●
In addition, an acoustic signal is
sounded: a tire failure has
occurred. To come to an immediate
stop, reduce speed, while avoiding any
sudden, jerky braking or steering
maneuvers.
For additional information: refer to
page 88
Brake warning lamp
●
If the lamp comes on when the
parking brake is not engaged:
check the brake fluid level. Before driv-
ing further, be sure to comply with the
instructions on pages 112 and 127.
Brake warning lamp for Cana-
dian models.
Red: an important reminder
Brake warning lamp
●
Comes on when the parking
brake is engaged – an additional
acoustic signal sounds when starting
off. For additional information: refer to
page 69
Brake warning lamp for Cana-
dian models.
Lock backrest/Please fasten
safety belts
●
comes on together with an
acoustic signal until the safety belts are
fastened. Flashes when the backrest is
not locked.
For additional information on locking
the backrest, refer to page 51
For additional information on safety
belts: refer to page 52
Airbags
●
Please have the system
inspected at your BMW center.
For additional information: refer to
page 57
handbook.book Page 18 Tuesday, July 30, 2002 9:28 AM
Page 30 of 166
30Opening and closing
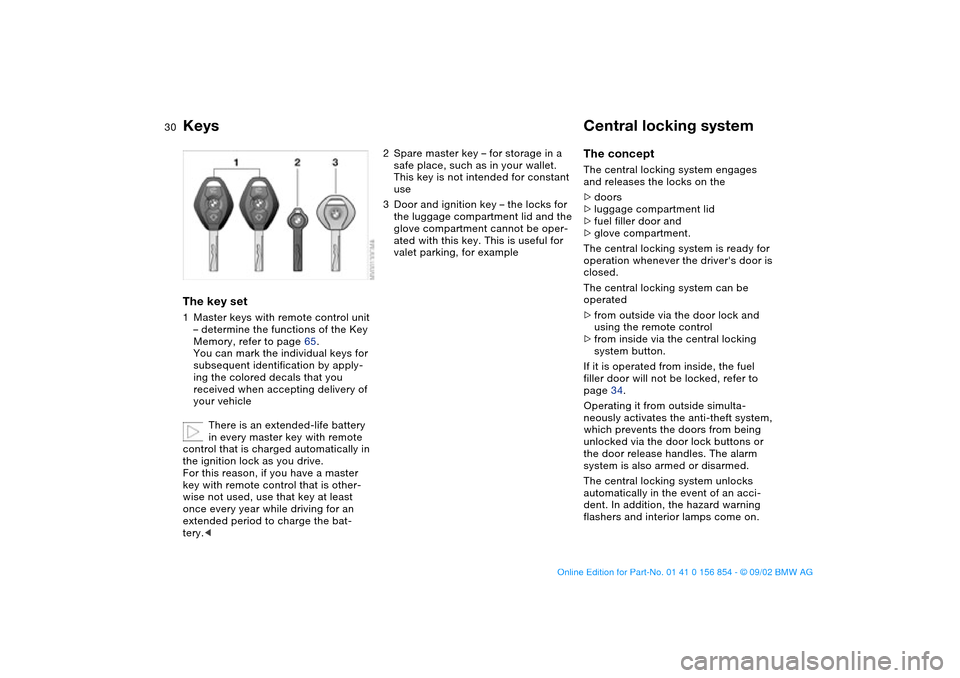
KeysThe key set1Master keys with remote control unit
– determine the functions of the Key
Memory, refer to page 65.
You can mark the individual keys for
subsequent identification by apply-
ing the colored decals that you
received when accepting delivery of
your vehicle
There is an extended-life battery
in every master key with remote
control that is charged automatically in
the ignition lock as you drive.
For this reason, if you have a master
key with remote control that is other-
wise not used, use that key at least
once every year while driving for an
extended period to charge the bat-
tery.<
2Spare master key – for storage in a
safe place, such as in your wallet.
This key is not intended for constant
use
3Door and ignition key – the locks for
the luggage compartment lid and the
glove compartment cannot be oper-
ated with this key. This is useful for
valet parking, for example
Central locking systemThe conceptThe central locking system engages
and releases the locks on the
>doors
>luggage compartment lid
>fuel filler door and
>glove compartment.
The central locking system is ready for
operation whenever the driver's door is
closed.
The central locking system can be
operated
>from outside via the door lock and
using the remote control
>from inside via the central locking
system button.
If it is operated from inside, the fuel
filler door will not be locked, refer to
page 34.
Operating it from outside simulta-
neously activates the anti-theft system,
which prevents the doors from being
unlocked via the door lock buttons or
the door release handles. The alarm
system is also armed or disarmed.
The central locking system unlocks
automatically in the event of an acci-
dent. In addition, the hazard warning
flashers and interior lamps come on.
handbook.book Page 30 Tuesday, July 30, 2002 9:28 AM
Page 31 of 166
31
Opening and closing – via the remote controlThe conceptThe remote control gives you an excep-
tionally convenient method for unlock-
ing and locking your vehicle. Further-
more, it provides two additional
functions:
>Switch on the interior lamps, refer to
page 32.
With this function you can also
search for your vehicle – when
parked in an underground garage, for
instance
>Open the luggage compartment lid,
refer to page 32.
The luggage compartment lid will
open slightly, regardless of whether it
was locked or unlocked.
The anti-theft system is also deacti-
vated/activated simultaneously with the
unlocking or locking of the vehicle, and
the alarm system is disarmed/armed,
and the interior lamps are switched
on/off.
You can have a signal set to con-
firm that the vehicle's locks have
engaged securely.<
Master keys with remote control
Since passengers or animals
remaining in the vehicle might be
able to lock the doors from the inside,
always take the vehicle's keys with you
so that the vehicle can be opened again
from the outside at any time.<
If it is no longer possible to lock
the vehicle via the remote control,
the battery is discharged. Use this key
while driving for an extended period in
order to recharge the battery. Guard
the remote control against unauthorized
use by only surrendering the spare key
or the door and ignition key, e.g. for
valet parking.
In the event of a system malfunction,
please contact your BMW center. You
can also obtain replacement keys
there.<
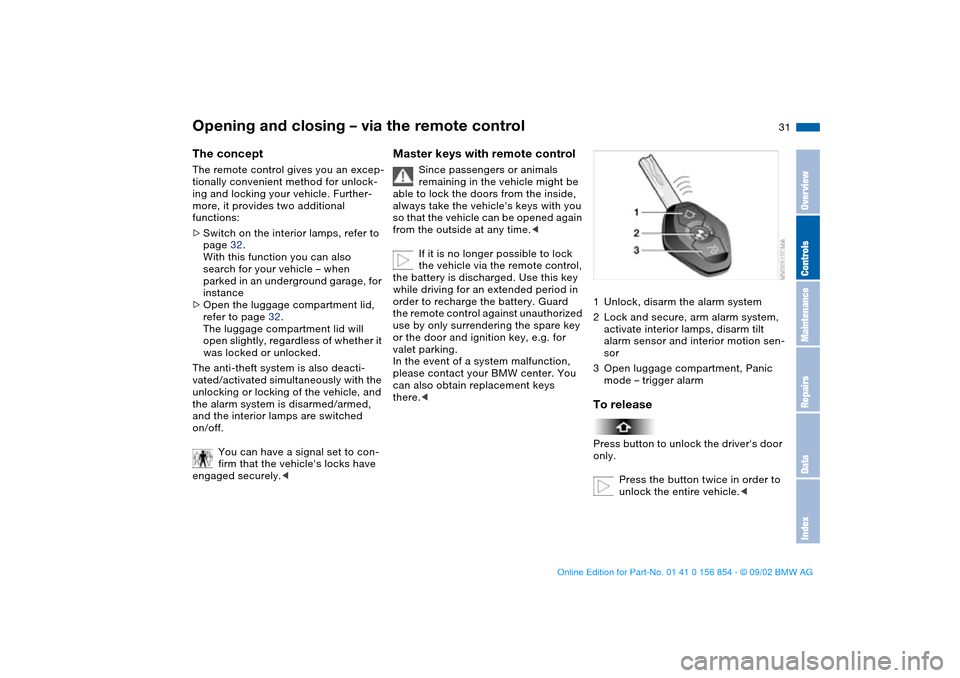
1Unlock, disarm the alarm system
2Lock and secure, arm alarm system,
activate interior lamps, disarm tilt
alarm sensor and interior motion sen-
sor
3Open luggage compartment, Panic
mode – trigger alarmTo releasePress button to unlock the driver's door
only.
Press the button twice in order to
unlock the entire vehicle.<
OverviewControlsMaintenanceRepairsDataIndex
handbook.book Page 31 Tuesday, July 30, 2002 9:28 AM
Page 35 of 166
35
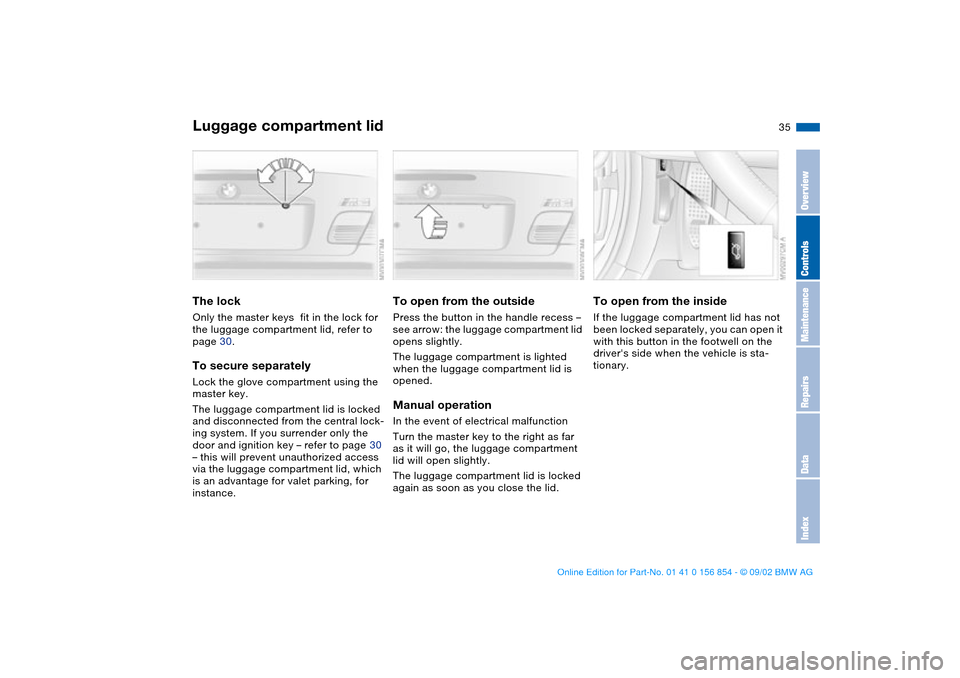
Luggage compartment lidThe lockOnly the master keys fit in the lock for
the luggage compartment lid, refer to
page 30.To secure separatelyLock the glove compartment using the
master key.
The luggage compartment lid is locked
and disconnected from the central lock-
ing system. If you surrender only the
door and ignition key – refer to page 30
– this will prevent unauthorized access
via the luggage compartment lid, which
is an advantage for valet parking, for
instance.
To open from the outsidePress the button in the handle recess –
see arrow: the luggage compartment lid
opens slightly.
The luggage compartment is lighted
when the luggage compartment lid is
opened.Manual operationIn the event of electrical malfunction
Turn the master key to the right as far
as it will go, the luggage compartment
lid will open slightly.
The luggage compartment lid is locked
again as soon as you close the lid.
To open from the insideIf the luggage compartment lid has not
been locked separately, you can open it
with this button in the footwell on the
driver's side when the vehicle is sta-
tionary.
OverviewControlsMaintenanceRepairsDataIndex
handbook.book Page 35 Tuesday, July 30, 2002 9:28 AM
Page 40 of 166
40
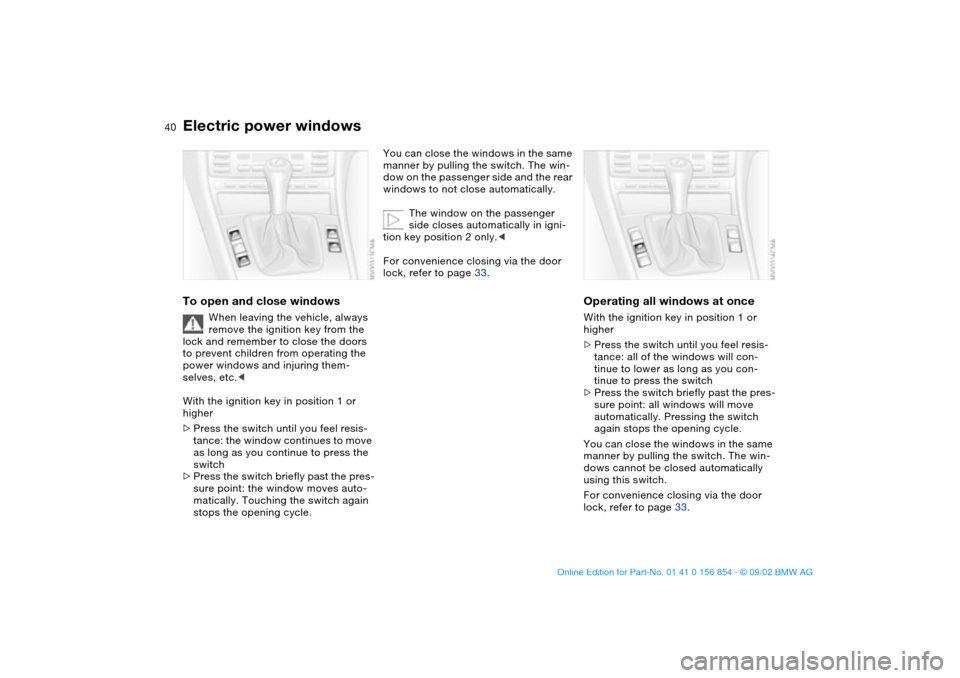
Electric power windowsTo open and close windows
When leaving the vehicle, always
remove the ignition key from the
lock and remember to close the doors
to prevent children from operating the
power windows and injuring them-
selves, etc.<
With the ignition key in position 1 or
higher
>Press the switch until you feel resis-
tance: the window continues to move
as long as you continue to press the
switch
>Press the switch briefly past the pres-
sure point: the window moves auto-
matically. Touching the switch again
stops the opening cycle.
You can close the windows in the same
manner by pulling the switch. The win-
dow on the passenger side and the rear
windows to not close automatically.
The window on the passenger
side closes automatically in igni-
tion key position 2 only.<
For convenience closing via the door
lock, refer to page 33.
Operating all windows at onceWith the ignition key in position 1 or
higher
>Press the switch until you feel resis-
tance: all of the windows will con-
tinue to lower as long as you con-
tinue to press the switch
>Press the switch briefly past the pres-
sure point: all windows will move
automatically. Pressing the switch
again stops the opening cycle.
You can close the windows in the same
manner by pulling the switch. The win-
dows cannot be closed automatically
using this switch.
For convenience closing via the door
lock, refer to page 33.
handbook.book Page 40 Tuesday, July 30, 2002 9:28 AM
Page 41 of 166
41
After the ignition has been
switched offAfter the ignition has been switched off:
You can still use the electric power win-
dows for up to 15 minutes, as long as
no one opens any of the doors.
Convertible topThe completely automatically operated
convertible top combines assured pro-
tection against the elements together
with simple and easy handling.
So that you will get the most out of
enjoying your convertible, here are a
few tips:
>It is advisable to close the convertible
top when the vehicle is being parked.
The closed convertible top not only
protects the passenger compartment
from unforeseeable damage from the
weather, it also provides a certain
degree of theft protection. In addi-
tion, keep valuables only in the
locked luggage compartment, even
with the convertible top closed
>Never mount a roof-mounted luggage
rack on the convertible top
>At temperatures below 147/–106
do not operate the convertible top to
prevent damage.
Never store the convertible top
while it is wet to avoid permanent
damage from moisture.<
Electric power windows
OverviewControlsMaintenanceRepairsDataIndex
handbook.book Page 41 Tuesday, July 30, 2002 9:28 AM
Page 42 of 166
42
Driving with the opening or clos-
ing operation not completely
ended can lead to damage and/or inju-
ries.
Traffic laws applicable in your area take
precedence when you operate the con-
vertible top, otherwise you may be
breaking the law.
Do not lay objects on the convertible
top, since they would fall off when the
convertible top is operated and cause
damage or injuries.
Do not reach into the convertible top
mechanism during opening and closing.
Keep children away from the moving
parts of the convertible top during
operation.<
If possible, only operate the con-
vertible top with the vehicle
stopped, as otherwise the process may
be interrupted.
If you set the convertible top in motion
with the vehicle stationary and then
have to start suddenly – for instance, at
a traffic light – you can still complete
the operation by driving as slowly as
possible and again pressing and main-
taining pressure on the button.
Before closing the convertible top,
remove any objects from the windshield
frame that could keep the convertible
top from closing properly.<
To close the electric power win-
dows while driving, always be
sure to first close either the rear win-
dows, or all 4 windows at the same
time, otherwise, at high speed, the win-
dows may not close tightly.<
At higher speeds, the ensuing
vacuum in the passenger com-
partment can cause the convertible top
to begin fluttering. Increase the air sup-
ply via the ventilation controls so that a
vacuum does not occur in the vehicle.<
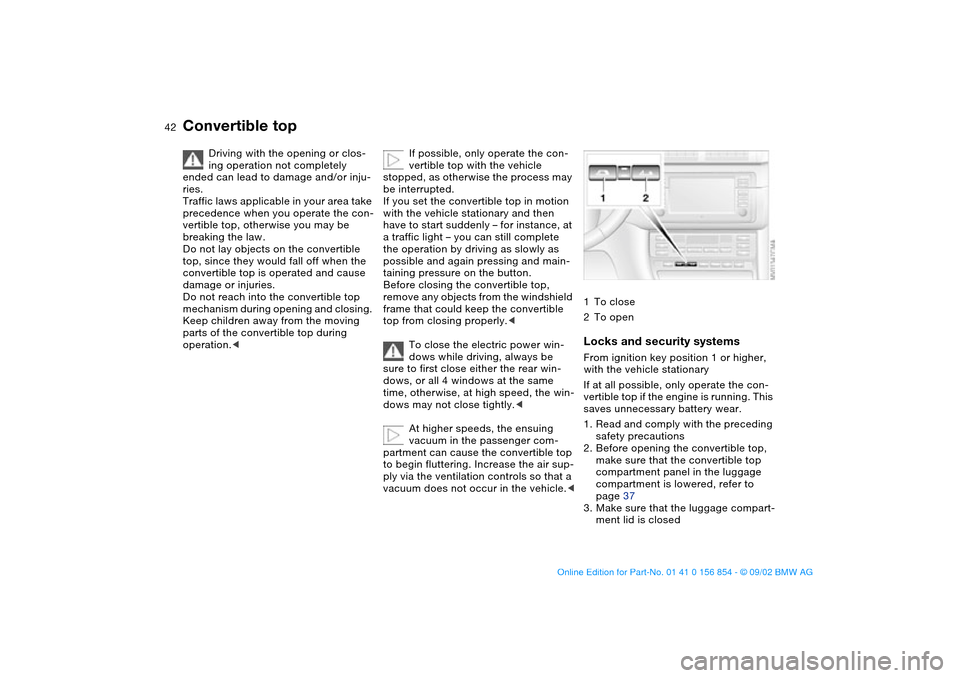
1To close
2To openLocks and security systemsFrom ignition key position 1 or higher,
with the vehicle stationary
If at all possible, only operate the con-
vertible top if the engine is running. This
saves unnecessary battery wear.
1. Read and comply with the preceding
safety precautions
2. Before opening the convertible top,
make sure that the convertible top
compartment panel in the luggage
compartment is lowered, refer to
page 37
3. Make sure that the luggage compart-
ment lid is closed
Convertible top
handbook.book Page 42 Tuesday, July 30, 2002 9:28 AM
Page 43 of 166
43
4. Press and hold the corresponding
button for convertible top operation.
The red indicator lamp will light up
while the convertible top is in motion.
It goes out as soon as the opening or
closing operation has been com-
pleted.
If the red indicator lamp flashes after
the button is released, then the
opening or closing operation is not
yet completed. The sequence can be
continued in the desired direction by
pressing this button.
If the yellow indicator lamp lights up
continuously with the button
pressed, then the convertible top
compartment panel is raised and the
convertible top cannot be moved,
refer to step 2.
The automatic sequence will be
interrupted immediately if you
release the button that operates the
top. The sequence can be continued in
the desired direction by pressing this
button.<
During convertible top operation
the rear window moves toward the
passenger compartment. To prevent
injuries, make sure that the closing path
of the convertible top is unobstructed.<
When operating the convertible top, the
windows will lower slightly when you
press the button, and after the opening
or closing operation has finished, they
will go back up, if you keep holding the
button down for more than 2 seconds
after the indicator lamp has gone out.
The luggage compartment lid cannot be
opened while the convertible top is in
motion.
Do not close the side power win-
dows using the buttons if the con-
vertible top operation has been inter-
rupted.<
If the convertible top has been
stored in the convertible top com-
partment for longer periods, e.g. during
the winter months while the hardtop is
being used, it may be necessary to
manually support the first automatic
closing operation: if the convertible top
should halt right before the closing
phase is completed, press against the
front part of the convertible top frame
from the outside to help the closing
process along. Keep pressing the but-
ton while doing so until the top starts
up again on its own.<
Operate the convertible top manu-
ally in emergency situations only
to avoid causing damage due to incor-
rect operation.<
If the opening or closing operation
is interrupted, the convertible top
remains in the respective position for
15 minutes, and the sequence can be
continued in the desired direction with
the button. After that, the convertible
top can be moved again and, if it is an
emergency situation, you may have to
help the top along manually. This can
also be done in ignition key position 0.
In certain cases, the luggage compart-
ment lid cannot be opened if the open-
ing or closing operation has been inter-
rupted.<
Convenience operation from the
driver's door lockRefer to page 33.
Convertible top
OverviewControlsMaintenanceRepairsDataIndex
handbook.book Page 43 Tuesday, July 30, 2002 9:28 AM
Page 53 of 166
53
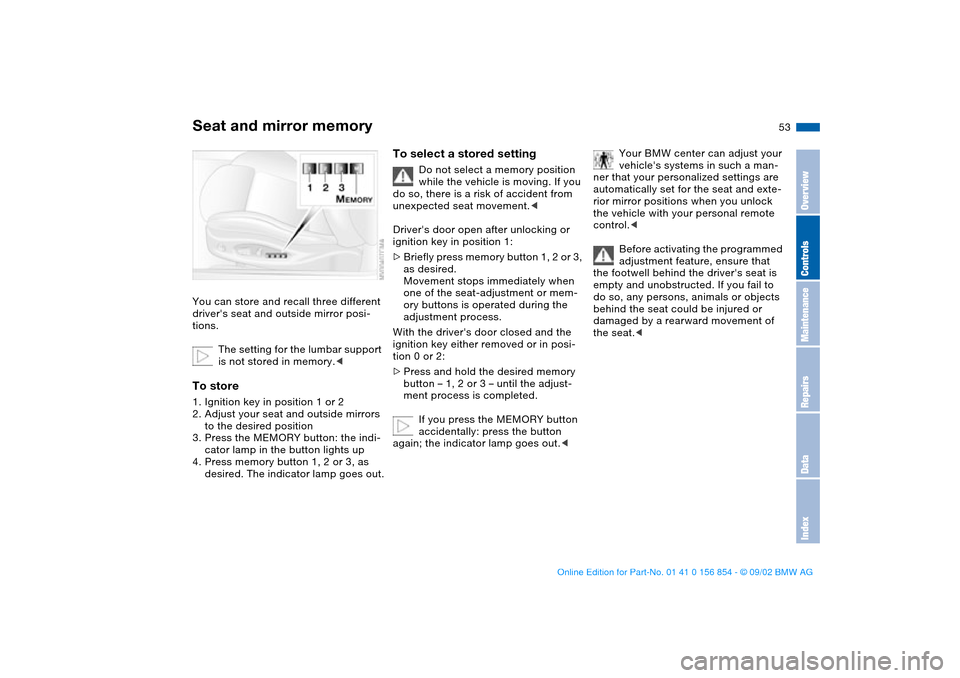
Seat and mirror memory You can store and recall three different
driver's seat and outside mirror posi-
tions.
The setting for the lumbar support
is not stored in memory.
to the desired position
3. Press the MEMORY button: the indi-
cator lamp in the button lights up
4. Press memory button 1, 2 or 3, as
desired. The indicator lamp goes out.
To select a stored setting
Do not select a memory position
while the vehicle is moving. If you
do so, there is a risk of accident from
unexpected seat movement.<
Driver's door open after unlocking or
ignition key in position 1:
>Briefly press memory button 1, 2 or 3,
as desired.
Movement stops immediately when
one of the seat-adjustment or mem-
ory buttons is operated during the
adjustment process.
With the driver's door closed and the
ignition key either removed or in posi-
tion 0 or 2:
>Press and hold the desired memory
button – 1, 2 or 3 – until the adjust-
ment process is completed.
If you press the MEMORY button
accidentally: press the button
again; the indicator lamp goes out.<
Your BMW center can adjust your
vehicle's systems in such a man-
ner that your personalized settings are
automatically set for the seat and exte-
rior mirror positions when you unlock
the vehicle with your personal remote
control.<
Before activating the programmed
adjustment feature, ensure that
the footwell behind the driver's seat is
empty and unobstructed. If you fail to
do so, any persons, animals or objects
behind the seat could be injured or
damaged by a rearward movement of
the seat.<
OverviewControlsMaintenanceRepairsDataIndex
handbook.book Page 53 Tuesday, July 30, 2002 9:28 AM