ignition BMW M3 CONVERTIBLE 2011 Owners Manual
[x] Cancel search | Manufacturer: BMW, Model Year: 2011, Model line: M3 CONVERTIBLE, Model: BMW M3 CONVERTIBLE 2011Pages: 174, PDF Size: 2.68 MB
Page 9 of 174
Contents
9
Passenger safety systems:
Airbags55
Transporting children safely58
Rollover protection system62
Vehicle Memory, Key
Memory64
Driving:
Ignition lock65
Starting the engine and driving
off66
Switching off the engine68
Parking brake68
Manual transmission69
Sequential M gearbox with
Drivelogic*70
Turn signal indicator/Headlamp
flasher75
Washer/wiper system/Rain
sensor*76
Cruise control77
Everything under control:
Odometer79
Tachometer79
Engine oil temperature79
Fuel gauge80
Engine coolant temperature
gauge80
Service interval display81
Check Control81
Clock82
Computer83
Technology for safety and
driving convenience:
Park Distance Control (PDC)*85
Dynamic Stability Control
DSC86
Flat Tire Monitor87
M Engine dynamics control89
Brake force display89
Lamps:
Parking lamps/Low beams90
Instrument lighting91
High beams/Standing lamps91
Front fog lamps92
Interior lamps92
Reading lamps92
Controlling the climate for
pleasant driving:
Automatic climate control94
Interior conveniences:
Glove compartment99
Storage compartments99
Microphone*100
Ashtray, front*100
Ashtray, rear*101
Loading and transporting:
Ski bag*102
Cargo loading104
Roof-mounted luggage rack for
the hardtop*107
Operation, maintenance
Special operating instructions:
Break-in procedures110
General driving notes111
Antilock Brake System
(ABS)113
Hardtop*113
Wheels and tires:
Tire inflation pressure116
Tire code118
Tire condition119
New wheels and tires120
Snow chains*122
In the engine compartment:
Hood123
Engine compartment
essentials124
Washer fluids126
Engine oil126
Coolant128
Brake fluid129
Maintenance:
BMW Maintenance System130
OBD interface socket132
Controls and features
Page 18 of 174
18
Indicator and warning lamps
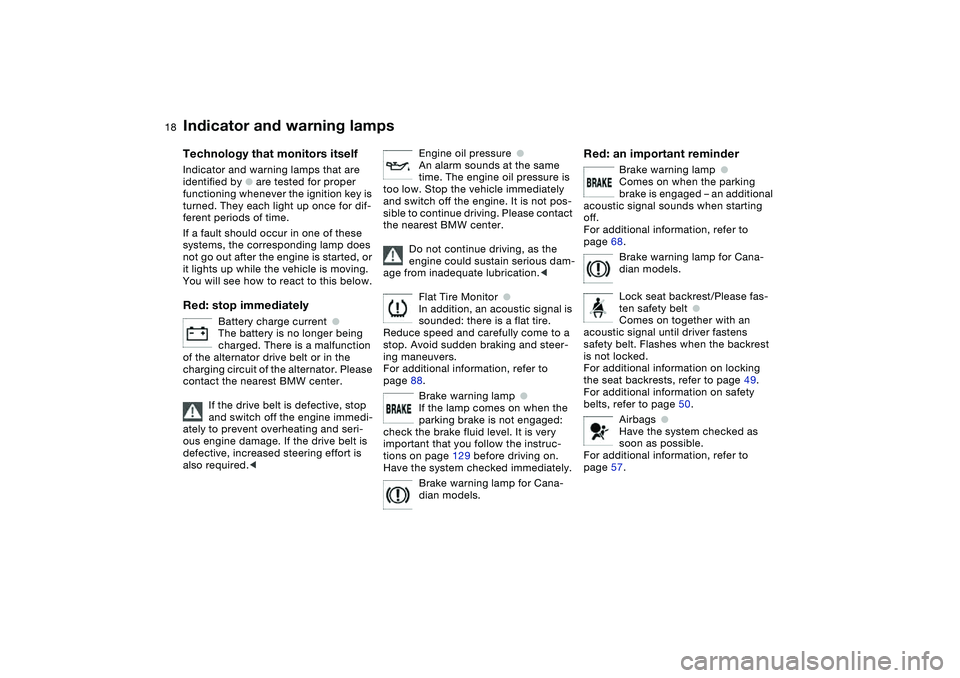
Technology that monitors itself
Indicator and warning lamps that are
identified by
●
are tested for proper
functioning whenever the ignition key is
turned. They each light up once for dif-
ferent periods of time.
If a fault should occur in one of these
systems, the corresponding lamp does
not go out after the engine is started, or
it lights up while the vehicle is moving.
You will see how to react to this below.
Red: stop immediately
Battery charge current
●
The battery is no longer being
charged. There is a malfunction
of the alternator drive belt or in the
charging circuit of the alternator. Please
contact the nearest BMW center.
If the drive belt is defective, stop
and switch off the engine immedi-
ately to prevent overheating and seri-
ous engine damage. If the drive belt is
defective, increased steering effort is
also required.
<
Engine oil pressure
●
An alarm sounds at the same
time. The engine oil pressure is
too low. Stop the vehicle immediately
and switch off the engine. It is not pos-
sible to continue driving. Please contact
the nearest BMW center.
Do not continue driving, as the
engine could sustain serious dam-
age from inadequate lubrication.
<
Flat Tire Monitor
●
In addition, an acoustic signal is
sounded: there is a flat tire.
Reduce speed and carefully come to a
stop. Avoid sudden braking and steer-
ing maneuvers.
For additional information, refer to
page 88.
Brake warning lamp
●
If the lamp comes on when the
parking brake is not engaged:
check the brake fluid level. It is very
important that you follow the instruc-
tions on page 129 before driving on.
Have the system checked immediately.
Brake warning lamp for Cana-
dian models.
Red: an important reminder
Brake warning lamp
●
Comes on when the parking
brake is engaged – an additional
acoustic signal sounds when starting
off.
For additional information, refer to
page 68.
Brake warning lamp for Cana-
dian models.
Lock seat backrest/Please fas-
ten safety belt
●
Comes on together with an
acoustic signal until driver fastens
safety belt. Flashes when the backrest
is not locked.
For additional information on locking
the seat backrests, refer to page 49.
For additional information on safety
belts, refer to page 50.
Airbags
●
Have the system checked as
soon as possible.
For additional information, refer to
page 57.
Page 28 of 174
28Opening and closing
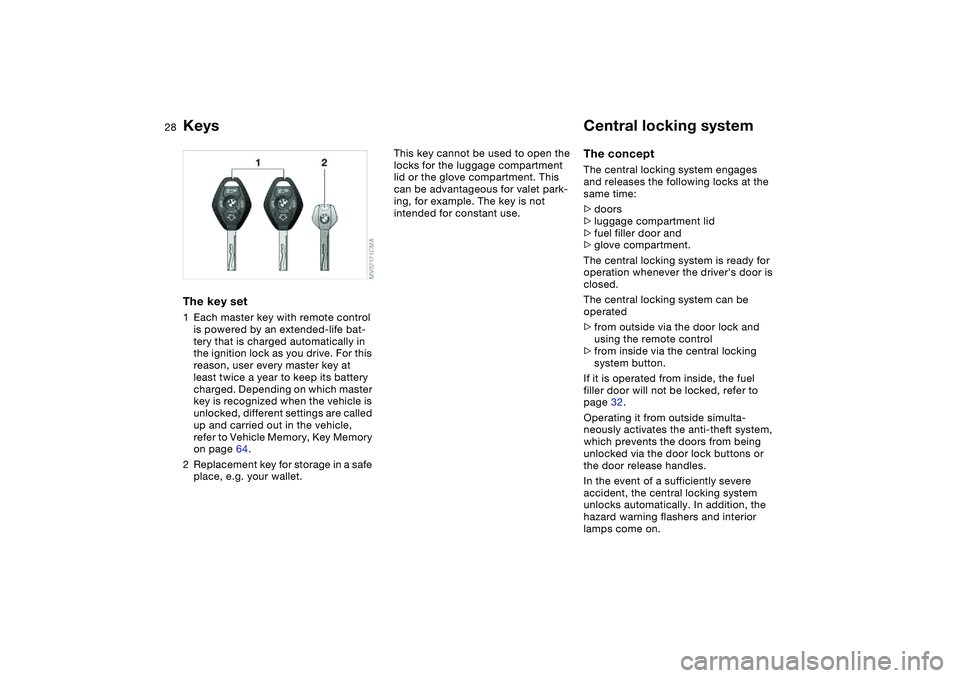
KeysThe key set1Each master key with remote control
is powered by an extended-life bat-
tery that is charged automatically in
the ignition lock as you drive. For this
reason, user every master key at
least twice a year to keep its battery
charged. Depending on which master
key is recognized when the vehicle is
unlocked, different settings are called
up and carried out in the vehicle,
refer to Vehicle Memory, Key Memory
on page 64.
2Replacement key for storage in a safe
place, e.g. your wallet.
This key cannot be used to open the
locks for the luggage compartment
lid or the glove compartment. This
can be advantageous for valet park-
ing, for example. The key is not
intended for constant use.
Central locking systemThe conceptThe central locking system engages
and releases the following locks at the
same time:
>doors
>luggage compartment lid
>fuel filler door and
>glove compartment.
The central locking system is ready for
operation whenever the driver's door is
closed.
The central locking system can be
operated
>from outside via the door lock and
using the remote control
>from inside via the central locking
system button.
If it is operated from inside, the fuel
filler door will not be locked, refer to
page 32.
Operating it from outside simulta-
neously activates the anti-theft system,
which prevents the doors from being
unlocked via the door lock buttons or
the door release handles.
In the event of a sufficiently severe
accident, the central locking system
unlocks automatically. In addition, the
hazard warning flashers and interior
lamps come on.
Page 38 of 174
38
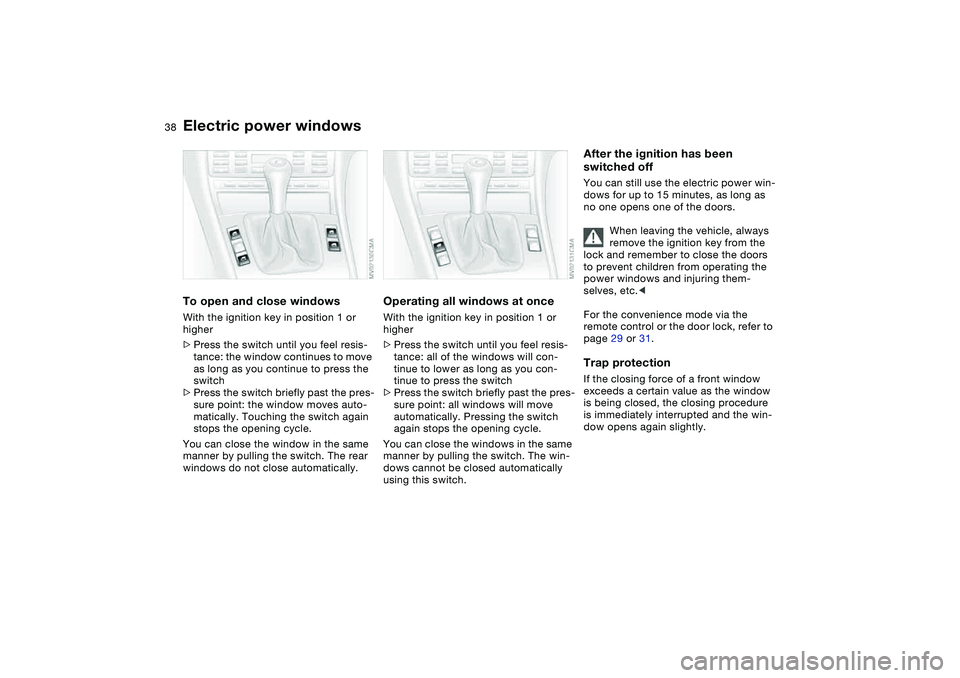
Electric power windowsTo open and close windowsWith the ignition key in position 1 or
higher
>Press the switch until you feel resis-
tance: the window continues to move
as long as you continue to press the
switch
>Press the switch briefly past the pres-
sure point: the window moves auto-
matically. Touching the switch again
stops the opening cycle.
You can close the window in the same
manner by pulling the switch. The rear
windows do not close automatically.
Operating all windows at onceWith the ignition key in position 1 or
higher
>Press the switch until you feel resis-
tance: all of the windows will con-
tinue to lower as long as you con-
tinue to press the switch
>Press the switch briefly past the pres-
sure point: all windows will move
automatically. Pressing the switch
again stops the opening cycle.
You can close the windows in the same
manner by pulling the switch. The win-
dows cannot be closed automatically
using this switch.
After the ignition has been
switched offYou can still use the electric power win-
dows for up to 15 minutes, as long as
no one opens one of the doors.
When leaving the vehicle, always
remove the ignition key from the
lock and remember to close the doors
to prevent children from operating the
power windows and injuring them-
selves, etc.<
For the convenience mode via the
remote control or the door lock, refer to
page 29 or 31.Trap protectionIf the closing force of a front window
exceeds a certain value as the window
is being closed, the closing procedure
is immediately interrupted and the win-
dow opens again slightly.
Page 40 of 174
40
Driving when the opening or clos-
ing process has not been com-
pleted can cause vehicle damage or
personal injuries.
Do not reach into the convertible top
mechanism during opening and closing.
Keep children away from the moving
parts of the convertible top during
operation.<
If possible, only operate the con-
vertible top with the vehicle
stopped, as otherwise the process may
be interrupted.
If you set the convertible top in motion
with the vehicle stationary and then
have to start suddenly – for instance, at
a traffic light – you can still complete
the operation by driving as slowly as
possible and again pressing and main-
taining pressure on the button.<
To close the electric power win-
dows while driving, always be
sure to first close either the rear win-
dows, or all 4 windows at the same
time, otherwise, at high speed, the win-
dows may not close tightly.<
At higher speeds, the ensuing
vacuum in the passenger com-
partment can cause the convertible top
to begin fluttering. Increase the air sup-
ply via the ventilation controls so that a
vacuum does not occur in the vehicle.<
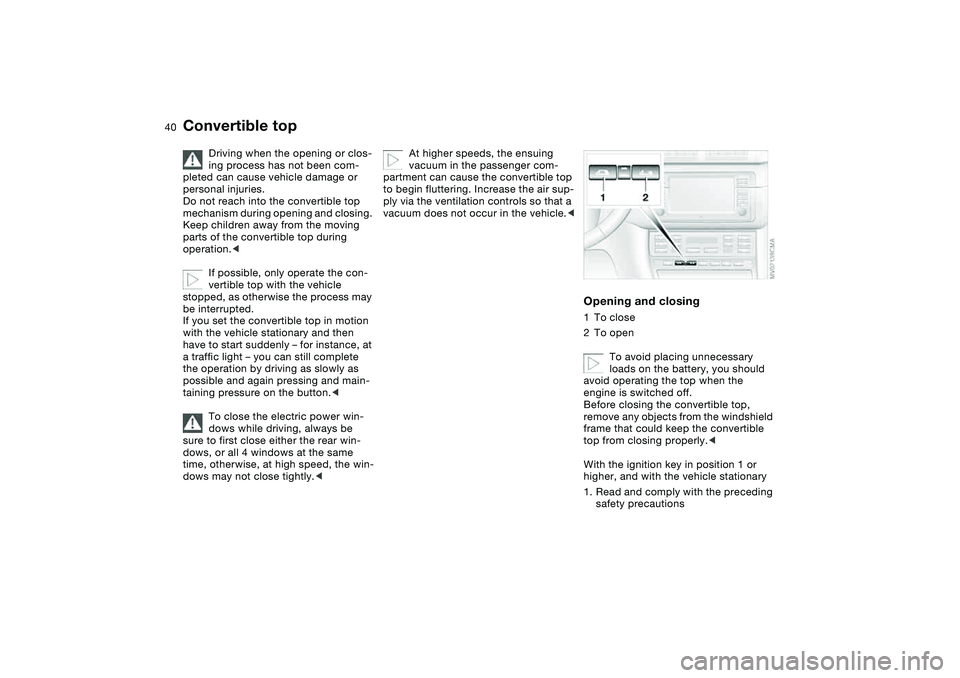
Opening and closing1To close
2To open
To avoid placing unnecessary
loads on the battery, you should
avoid operating the top when the
engine is switched off.
Before closing the convertible top,
remove any objects from the windshield
frame that could keep the convertible
top from closing properly.<
With the ignition key in position 1 or
higher, and with the vehicle stationary
1. Read and comply with the preceding
safety precautions
Convertible top
Page 51 of 174
51
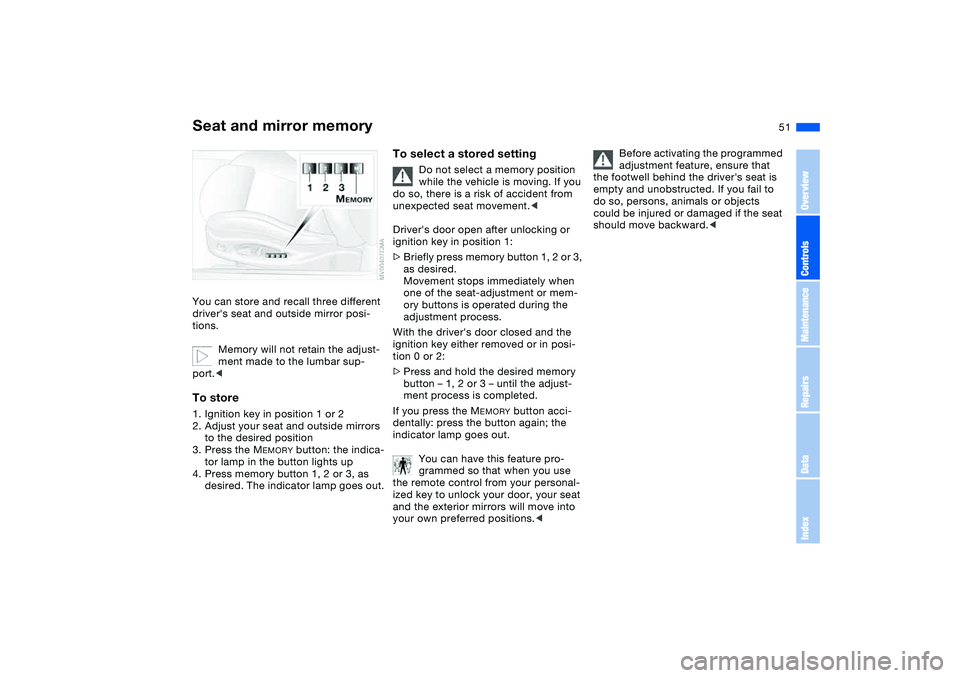
Seat and mirror memoryYou can store and recall three different
driver's seat and outside mirror posi-
tions.
Memory will not retain the adjust-
ment made to the lumbar sup-
port.
to the desired position
3. Press the M
EMORY
button: the indica-
tor lamp in the button lights up
4. Press memory button 1, 2 or 3, as
desired. The indicator lamp goes out.
To select a stored setting
Do not select a memory position
while the vehicle is moving. If you
do so, there is a risk of accident from
unexpected seat movement.<
Driver's door open after unlocking or
ignition key in position 1:
>Briefly press memory button 1, 2 or 3,
as desired.
Movement stops immediately when
one of the seat-adjustment or mem-
ory buttons is operated during the
adjustment process.
With the driver's door closed and the
ignition key either removed or in posi-
tion 0 or 2:
>Press and hold the desired memory
button – 1, 2 or 3 – until the adjust-
ment process is completed.
If you press the M
EMORY
button acci-
dentally: press the button again; the
indicator lamp goes out.
You can have this feature pro-
grammed so that when you use
the remote control from your personal-
ized key to unlock your door, your seat
and the exterior mirrors will move into
your own preferred positions.<
Before activating the programmed
adjustment feature, ensure that
the footwell behind the driver's seat is
empty and unobstructed. If you fail to
do so, persons, animals or objects
could be injured or damaged if the seat
should move backward.<
OverviewControlsMaintenanceRepairsDataIndex
Page 52 of 174
52
Passenger-side exterior mirror tilt
functionAutomatic curb monitor*
To activate:
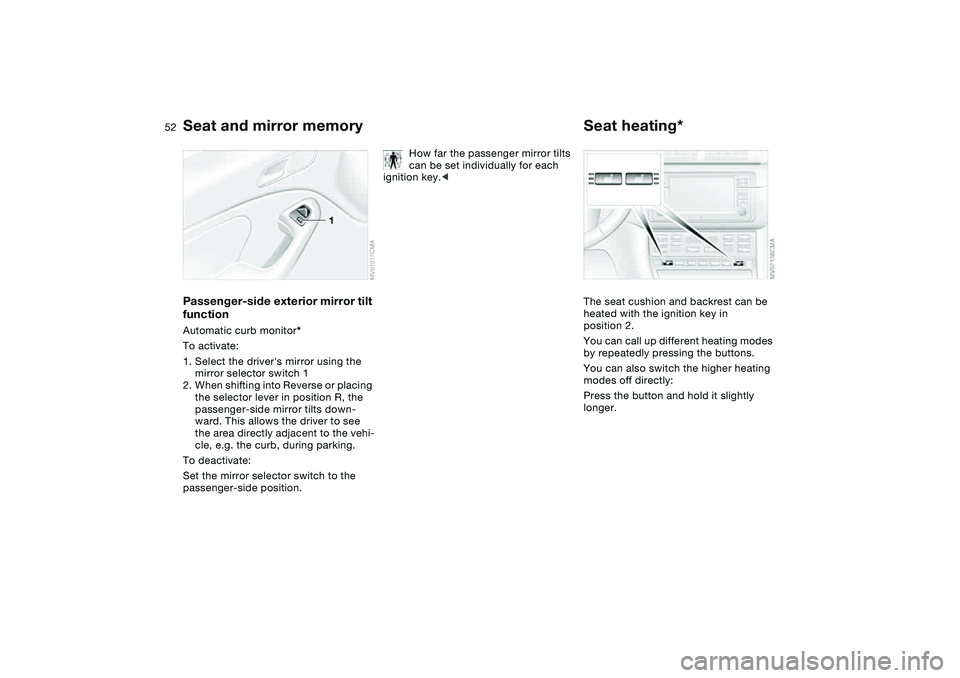
1. Select the driver's mirror using the
mirror selector switch 1
2. When shifting into Reverse or placing
the selector lever in position R, the
passenger-side mirror tilts down-
ward. This allows the driver to see
the area directly adjacent to the vehi-
cle, e.g. the curb, during parking.
To deactivate:
Set the mirror selector switch to the
passenger-side position.
How far the passenger mirror tilts
can be set individually for each
ignition key.<
Seat heating*The seat cushion and backrest can be
heated with the ignition key in
position 2.
You can call up different heating modes
by repeatedly pressing the buttons.
You can also switch the higher heating
modes off directly:
Press the button and hold it slightly
longer.
Seat and mirror memory
Page 53 of 174
53
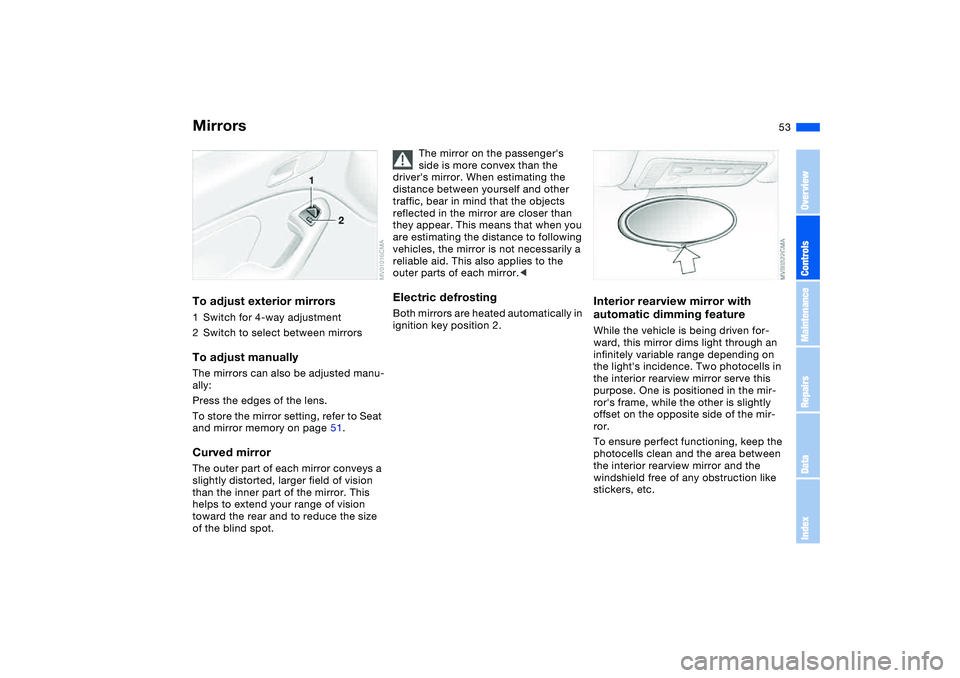
MirrorsTo adjust exterior mirrors1Switch for 4-way adjustment
2Switch to select between mirrorsTo adjust manuallyThe mirrors can also be adjusted manu-
ally:
Press the edges of the lens.
To store the mirror setting, refer to Seat
and mirror memory on page 51.Curved mirrorThe outer part of each mirror conveys a
slightly distorted, larger field of vision
than the inner part of the mirror. This
helps to extend your range of vision
toward the rear and to reduce the size
of the blind spot.
The mirror on the passenger's
side is more convex than the
driver's mirror. When estimating the
distance between yourself and other
traffic, bear in mind that the objects
reflected in the mirror are closer than
they appear. This means that when you
are estimating the distance to following
vehicles, the mirror is not necessarily a
reliable aid. This also applies to the
outer parts of each mirror.<
Electric defrostingBoth mirrors are heated automatically in
ignition key position 2.
Interior rearview mirror with
automatic dimming featureWhile the vehicle is being driven for-
ward, this mirror dims light through an
infinitely variable range depending on
the light's incidence. Two photocells in
the interior rearview mirror serve this
purpose. One is positioned in the mir-
ror's frame, while the other is slightly
offset on the opposite side of the mir-
ror.
To ensure perfect functioning, keep the
photocells clean and the area between
the interior rearview mirror and the
windshield free of any obstruction like
stickers, etc.
OverviewControlsMaintenanceRepairsDataIndex
Page 56 of 174
56
At all times, occupants should sit
upright and be properly restrained
– infants and small children in appropri-
ate child-restraint systems; larger chil-
dren and adults using the safety belts.
Never let an occupant's head rest near
or on a side airbag because the inflating
airbag could cause a serious or fatal
injury. Please note that the word Airbag
imprinted on the door trim panel indi-
cates the airbag's location.
Accident research shows that the saf-
est place for children in an automobile
is in the rear seat. However, a child sit-
ting in the rear seat and not properly
restrained may place his or her head on
or near the side airbag, if so equipped.
For example, a child – even though
belted – may fall asleep with his or her
head against the side airbag. It may be
difficult for a driver to ensure that chil-
dren in the rear seat will remain prop-
erly positioned at all times and not
place their heads on or near the side
airbag. Therefore, we recommend that
the rear seat side airbags, if provided,
be deactivated if you plan to transport
children in the rear seat.
The rear seat side airbags may already
have been deactivated by a BMW cen-
ter. If you are uncertain of their status,
or wish to have the airbags activated or
deactivated, please contact your BMW
center.<
Even when all these guidelines are
observed, there is still a small residual
risk of injuries to the face, hands and
arms occurring from airbag deployment
in isolated instances.
In sensitive individuals, the ignition and
inflation noise may induce a mild hear-
ing loss that is temporary in most
cases.
Airbag warning information is also pro-
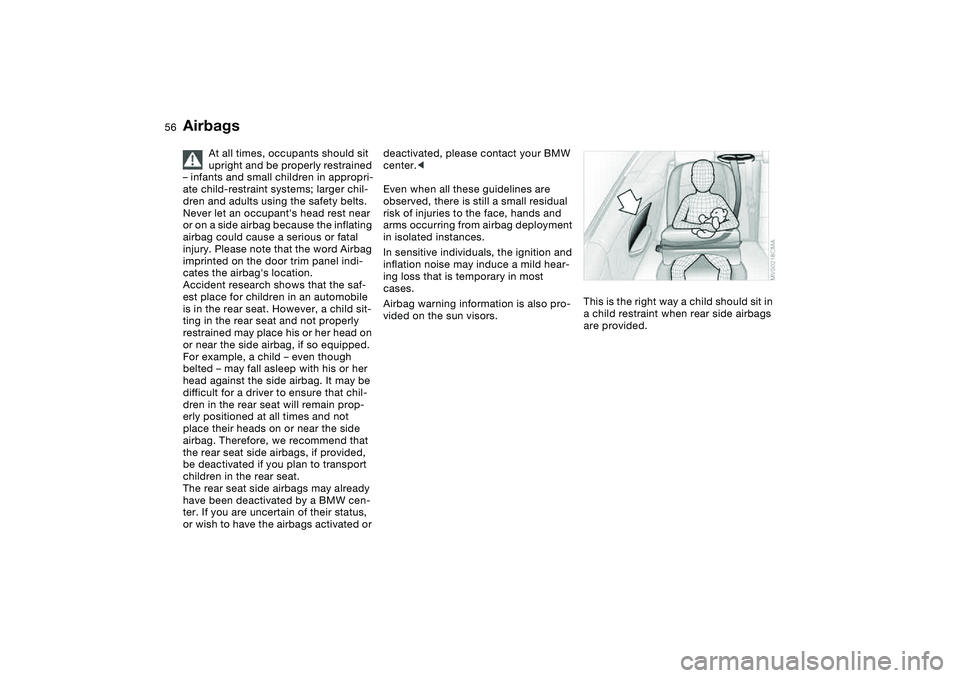
vided on the sun visors.This is the right way a child should sit in
a child restraint when rear side airbags
are provided.
Airbags
Page 57 of 174
57
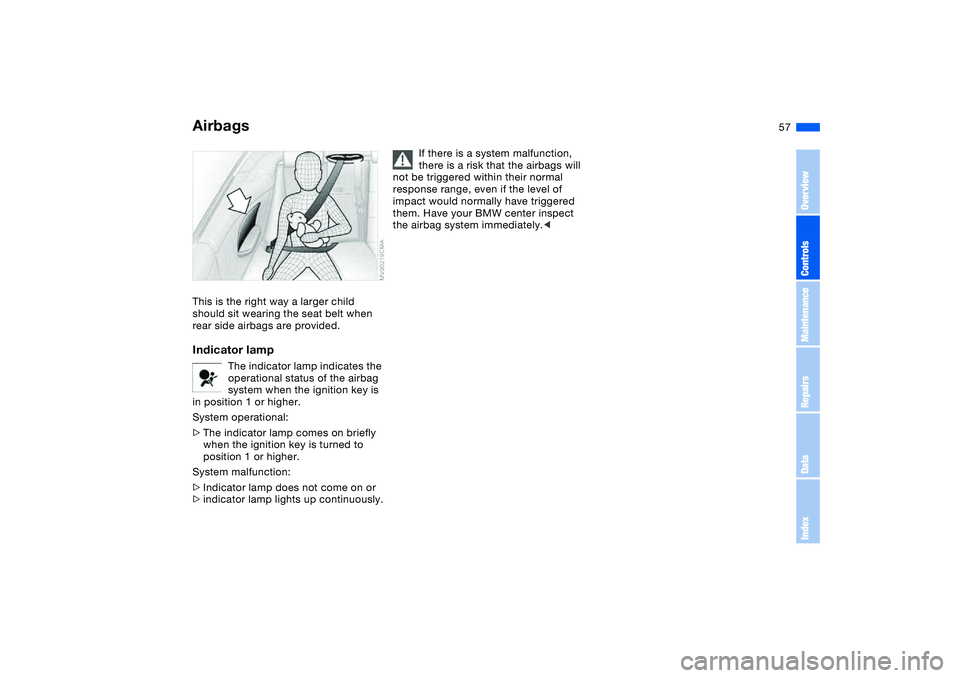
This is the right way a larger child
should sit wearing the seat belt when
rear side airbags are provided.Indicator lamp
The indicator lamp indicates the
operational status of the airbag
system when the ignition key is
in position 1 or higher.
System operational:
>The indicator lamp comes on briefly
when the ignition key is turned to
position 1 or higher.
System malfunction:
>Indicator lamp does not come on or
>indicator lamp lights up continuously.
If there is a system malfunction,
there is a risk that the airbags will
not be triggered within their normal
response range, even if the level of
impact would normally have triggered
them. Have your BMW center inspect
the airbag system immediately.<
Airbags
OverviewControlsMaintenanceRepairsDataIndex