child BMW M3 CONVERTIBLE 2013 E93 Owner's Manual
[x] Cancel search | Manufacturer: BMW, Model Year: 2013, Model line: M3 CONVERTIBLE, Model: BMW M3 CONVERTIBLE 2013 E93Pages: 311, PDF Size: 6.89 MB
Page 8 of 311
Contents
The quickest way to find special topics is to
consult the index, refer to page290.
4 Notes
7 Reporting safety defects
At a glance
12Dashboard
20 iDrive
27 Voice activation system
Controls
32Opening and closing
48 Adjustments
58 Transporting children safely
62 Driving
83 Controls overview
96 Technology for driving comfort and
safety
110 Lamps
115 Climate
120 Practical interior accessories
Driving tips
136Things to remember when driving
Navigation
144Navigation system
146 Destination entry
155 Destination guidance
163 What to do if …
Entertainment
166On/off and tone
169 Radio
173 Satellite radio
178 CD/DVD player
184 Music collection
189 External devices
Communications
200Telephone
213 Office
222 Contacts
224 ConnectedDrive
Mobility
232Refueling
235 Wheels and tires
255 Engine compartment
260 Maintenance
262 Care
262 Washing the vehicle
266 Replacing components
272 Giving and receiving assistance
Reference
280Technical data
283 Short commands for the voice activation
system
290 Everything from A to Z
00320051004F004C00510048000300280047004C0057004C005200510003
Page 46 of 311
41
Opening and closing
Controls
Unlocking the trunk lid separately
Press the button on the ou
tside of the trunk lid.
This corresponds to pressing the button.
If the vehicle detects that a remote
control has been accide ntally left inside
the locked vehicle's trunk after the trunk lid is
closed, the lid will reopen. The hazard warning
flashers flash and a signal sounds. <
Switching on radio readiness
Pressing the Start/Stop button switches on
radio readiness.
Do not depress the brake or the clutch; other-
wise, the engine will start immediately.
Starting the engine
The engine can be started or the ignition can be
switched on when a remote control is inside the
vehicle. It is not necessa ry to insert a remote
control into the ignition lock, refer to page 62.
Switching off the engine in cars with
automatic transmission
The engine can only be switched off when the
selector lever is in po sition P, refer to page 64.
To switch the engine off when the selector lever
is in position N, the remote control must be in
the ignition lock.
Malfunction
Local radio waves can in terfere with the func-
tion of Comfort Access, for example when a
mobile phone is in the immediate vicinity of the
remote control or by when a mobile phone is
being charged in the vehicle.
If this happens, open or close the vehicle via the
buttons on the remote co ntrol or using the inte-
grated key. To start the engine afterward, insert
the remote control into the ignition lock.
Warning lamps
The warning lamp in the instrument
cluster lights up when you attempt to
start the engine: the engine cannot
be started. The remote co ntrol is not inside the
vehicle or is malfunctioning. Take the remote contro
l with you inside the
vehicle or have it checked. If necessary, insert
another remote control in to the ignition lock.
The warning lamp in the instrument
cluster lights up wh ile the engine is
running: the remote control is no
longer inside the vehicle. After the engine is
switched off, the engine can only be restarted
within approx. 10 seconds.
The indicator lamp in the instrument
cluster lights up and a message
appears on the Control Display:
replace the battery in the remote control.
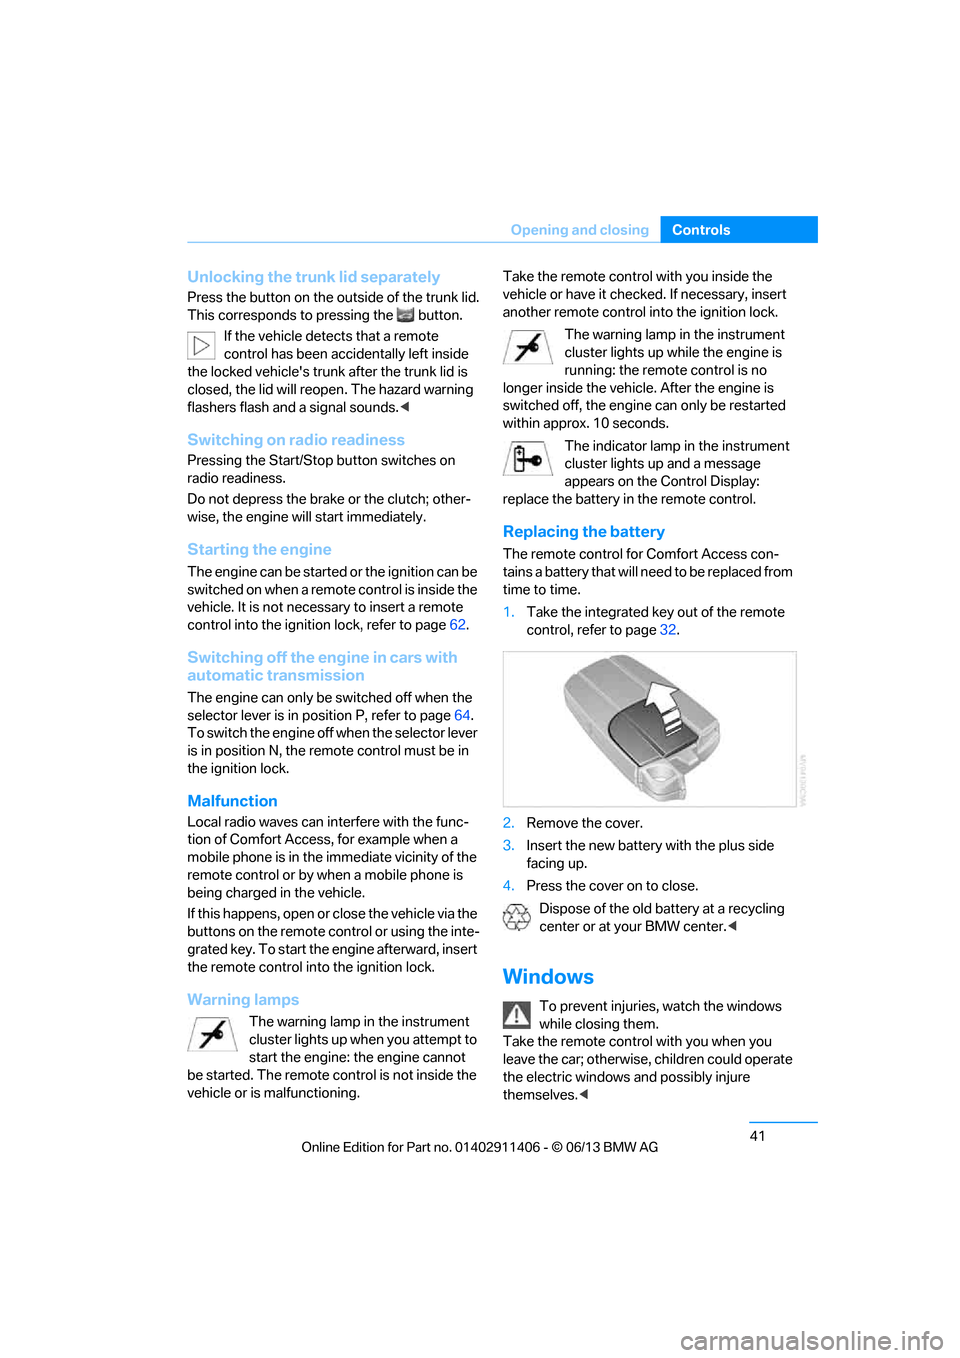
Replacing the battery
The remote control for Comfort Access con-
tains a battery that will need to be replaced from
time to time.
1. Take the integrated ke y out of the remote
control, refer to page 32.
2. Remove the cover.
3. Insert the new battery with the plus side
facing up.
4. Press the cover on to close.
Dispose of the old battery at a recycling
center or at your BMW center. <
Windows
To prevent injuries, watch the windows
while closing them.
Take the remote contro l with you when you
leave the car; otherwise, children could operate
the electric windows and possibly injure
themselves. <
00320051004F004C00510048000300280047004C0057004C005200510003
Page 48 of 311
43
Opening and closing
Controls
Do not install any accessories that might inter-
fere with window movement. Otherwise, the
pinch protection system could be impaired.
Convertible: the rear windows are not equipped
with pinch protection. Therefore, watch them
closely when closing to avoid personal injury.
<
Closing without pinch protection
If there is an external danger, or if ice on the
windows, etc., prevents you from closing the
windows normally, proceed as follows:
1.Pull the switch past the resistance point and
hold it there. Pinch protection is limited and
the window reopens slightly if the closing
force exceeds a certain value.
2. Pull the switch again past the resistance
point within approx. 4 seconds and hold it
there. The window closes without pinch
protection.
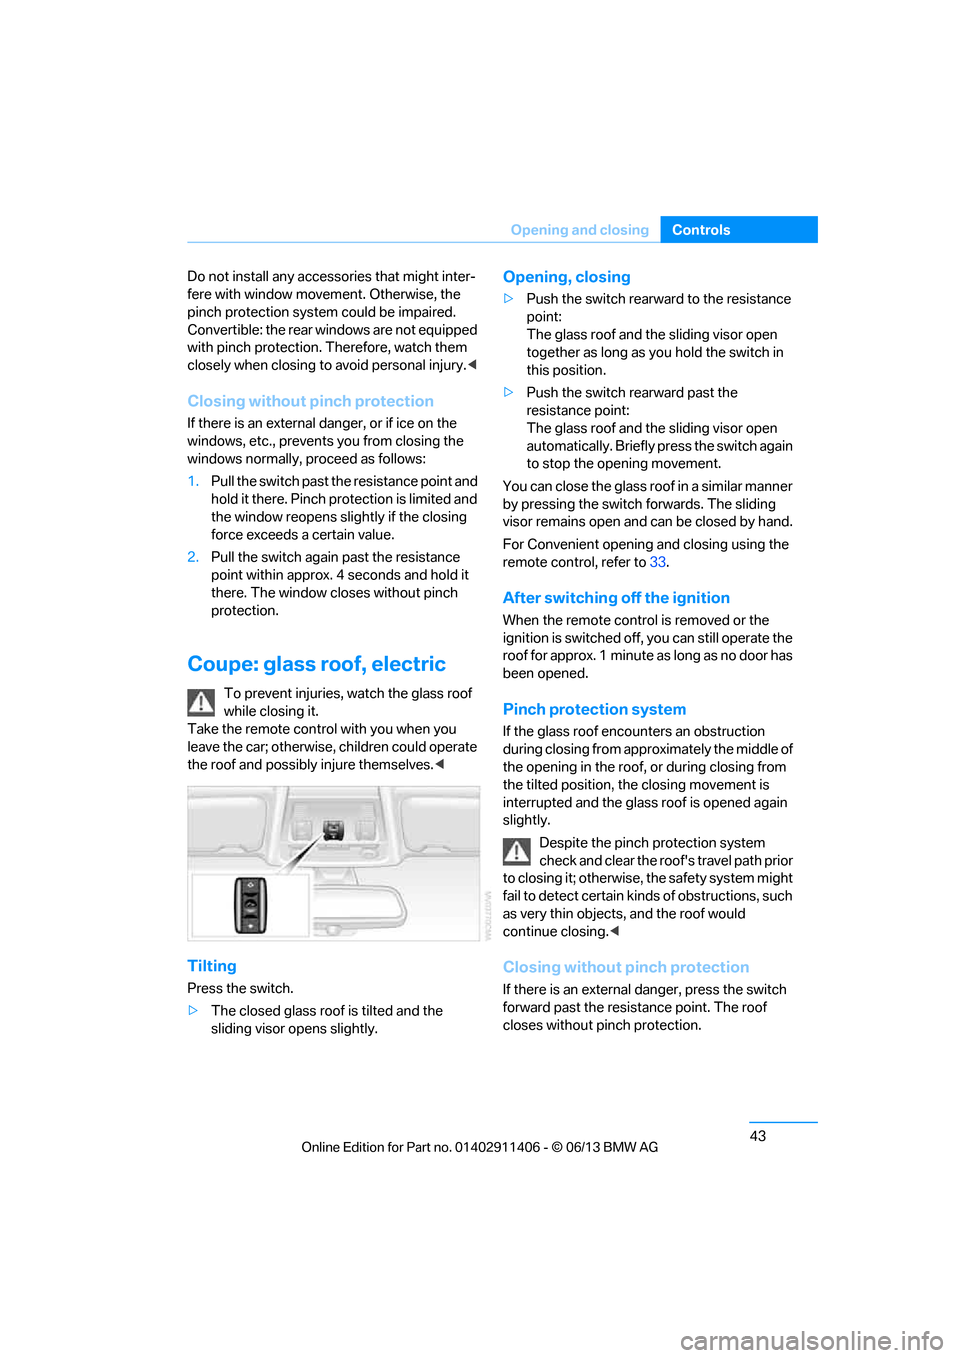
Coupe: glass roof, electric
To prevent injuries, watch the glass roof
while closing it.
Take the remote contro l with you when you
leave the car; otherwise, children could operate
the roof and possibly injure themselves. <
Tilting
Press the switch.
>The closed glass roof is tilted and the
sliding visor opens slightly.
Opening, closing
>Push the switch rearward to the resistance
point:
The glass roof and the sliding visor open
together as long as you hold the switch in
this position.
> Push the switch rearward past the
resistance point:
The glass roof and the sliding visor open
automatically. Briefly press the switch again
to stop the opening movement.
You can close the glass roof in a similar manner
by pressing the switch forwards. The sliding
visor remains open and can be closed by hand.
For Convenient opening and closing using the
remote control, refer to 33.
After switching off the ignition
When the remote contro l is removed or the
ignition is switched off, you can still operate the
roof for approx. 1 minute as long as no door has
been opened.
Pinch protection system
If the glass roof encounters an obstruction
during closing from approximately the middle of
the opening in the roof, or during closing from
the tilted position, the closing movement is
interrupted and the glass roof is opened again
slightly.
Despite the pinch protection system
check and clear the roof's travel path prior
to closing it; otherwise, the safety system might
fail to detect certain kinds of obstructions, such
as very thin objects, and the roof would
continue closing. <
Closing without pinch protection
If there is an external danger, press the switch
forward past the resistance point. The roof
closes without pinch protection.
00320051004F004C00510048000300280047004C0057004C005200510003
Page 49 of 311
44
ControlsOpening and closing
Following interruptions in electrical
power supply
After a power failure, there is a possibility that
the glass roof can only be tilted. The system
must be initialized. BMW recommends having
this work performed by your BMW center.
Convertible: retractable
hardtop
The retractable hardto p combines reliable
weather protection with simple and convenient
operation.
The following tips will enhance your driving
pleasure in your Convertible:
> It is advisable that you close the retractable
hardtop when you park the vehicle. Not only
does the closed hardtop protect the vehicle
interior against unanticipated weather dam-
age, it also offers theft protection. However,
even when the hardtop is closed, valuables
should only be stored in the locked trunk.
> Do not attach roof rack systems to the
retractable hardtop, and in particular do not
attach magnetic racks.
> Do not attach rack sy stems to the trunk lid,
and in particular do not attach magnetic
racks.
> When the retractable hardtop is operated,
the trunk lid swings back and up. Before
operating the retracta ble hardtop, ensure
that there is enough clearance, e.g. when
parked in front of a wall.
> If you open the hardtop while it is wet, e.g.
after driving in the rain, water may drip into
the trunk. If necessary, remove items from
the trunk beforehand to avoid water stains
or soiling. Do not place any objects on the retract-
able hardtop or on
the trunk lid; other-
wise, they could fall du ring movements of the
retractable hardtop and cause damage or injury.
Never move the retractable hardtop when the
rollover protection system is in the activated
position.
Driving when the hardtop is not fully opened or
closed may result in damage or injury.
Do not reach into the mechanism during the
opening or closing procedure. Keep children
away from the swiveling area of the retractable
hardtop. <
The retractabl e hardtop cannot be moved
at temperatures below + 14 7/–10 6.
A message appears on the Control Display. <
The retractable hard top can only be
opened and closed when the vehicle is
stationary. To avoid causing damage, do not
drive off until the hardtop has stopped
moving. <
Before opening and closing
>Comply with the safety precautions
described above.
> Ensure that the trunk partition is folded
down and engaged on both sides, refer to
page 128; otherwise, it will not be possible
to open the retractable hardtop.
> Do not place any objects near or on the
trunk partition, refer to page 128.
> Close the storage compartment on the left
side of the trunk.
> Observe the maximum loading height under
the trunk partition.
> Ensure that the trunk lid is closed.
> The vehicle should be pa rked on fairly level
ground. Excessive angle is indicated by a
lamp.
00320051004F004C00510048000300280047004C0057004C005200510003
Page 53 of 311
48
ControlsAdjustments
Adjustments
Vehicle equipment
In this chapter, all pr oduction, country, and
optional equipment that is offered in the model
range is described. As a result, some equip-
ment described may not be available in a partic-
ular vehicle, for example due to the options or
national-market version selected. This also
applies to safety related functions and systems.
Sitting safely
The ideal sitting position can make a vital
contribution to relaxed, fatigue-free driving. In
conjunction with the safety belts, the head
restraints and the airbags, the seated position
has a major influence on your safety in the event
of an accident. To ensure that the safety sys-
tems operate with optimal efficiency, we
strongly urge you to observe the instructions
contained in the following section.
For additional information on transporting
children safely, refer to page 58.
Airbags
Always maintain an adequate distance
between yourself and the airbags. Always
grip the steering wheel on the rim, with your
hands in the 3 o'clock and 9 o'clock positions,
to minimize the risk of injury to the hands or
arms in the event of the airbag being triggered
off.
No one and nothing shou ld come between the
airbags and the seat occupant.
Do not use the cover of the front airbag on the
front passenger side as a storage area. Make
sure that the front passeng er is sitting correctly,
e.g. not resting feet or legs on the dashboard;
otherwise, leg injuries can occur if the front
airbag deploys.
Make sure that passengers keep their heads
away from the side airbag and do not lean against the cover of the head airbag; otherwise,
serious injuries can result if the airbag
deploys.
<
Even if you follow all the instructions, injuries
resulting from contact with airbags cannot be
fully excluded, depending on the circum-
stances. The ignition and inflation noise may
provoke a mild hearing loss in extremely sensi-
tive individuals. This effect is usually only
temporary.
For airbag locations and additional information
on airbags, refer to page 107.
Head restraint
A correctly adjusted head restraint reduces the
risk of neck injury in the event of an accident.
Adjust the head restraint in such a way
that its center is at approx. ear level.
Otherwise, there is an increased risk of injury in
the event of an accident. <
Head restraints, refer to page 51.
Safety belt
Before every drive, make sure that all occupants
wear their safety belts. Airbags complement the
safety belt as an additi onal safety device, but
they do not repres ent a substitute.
Your vehicle has four seats, each of which is
equipped with a safety belt.
Never allow more than one person to
wear a single safety belt. Never allow
infants or small children to ride in a passenger's
lap. Make sure that the be lt in the lap area sits
low across the hips and does not press against
the abdomen.
The safety belt must not rest against the throat,
run across sharp edges, pass over hard or frag-
ile objects or be pinched. Fasten the safety belt
so that it sits as snugly as possible against the
lap and shoulder without being twisted. Other-
wise, the belt could slide over your hips and
00320051004F004C00510048000300280047004C0057004C005200510003
Page 59 of 311
54
ControlsAdjustments
Safety feature
1.Close the driver's door and switch the
ignition on or off, refer to page 62.
2. Press the desired memory button 1 or 2
and keep it pressed until the adjustment
process has been completed.
If the button was pr essed accidentally:
Press the button again; the LED goes out.
Safety belts
Observe the adjustment instructions on
page 49 to ensure the best possible
personal protection. <
Before every drive, make sure that all occupants
wear their safety belts. Airbags complement the
safety belt as an additi onal safety device, but
they do not repres ent a substitute.
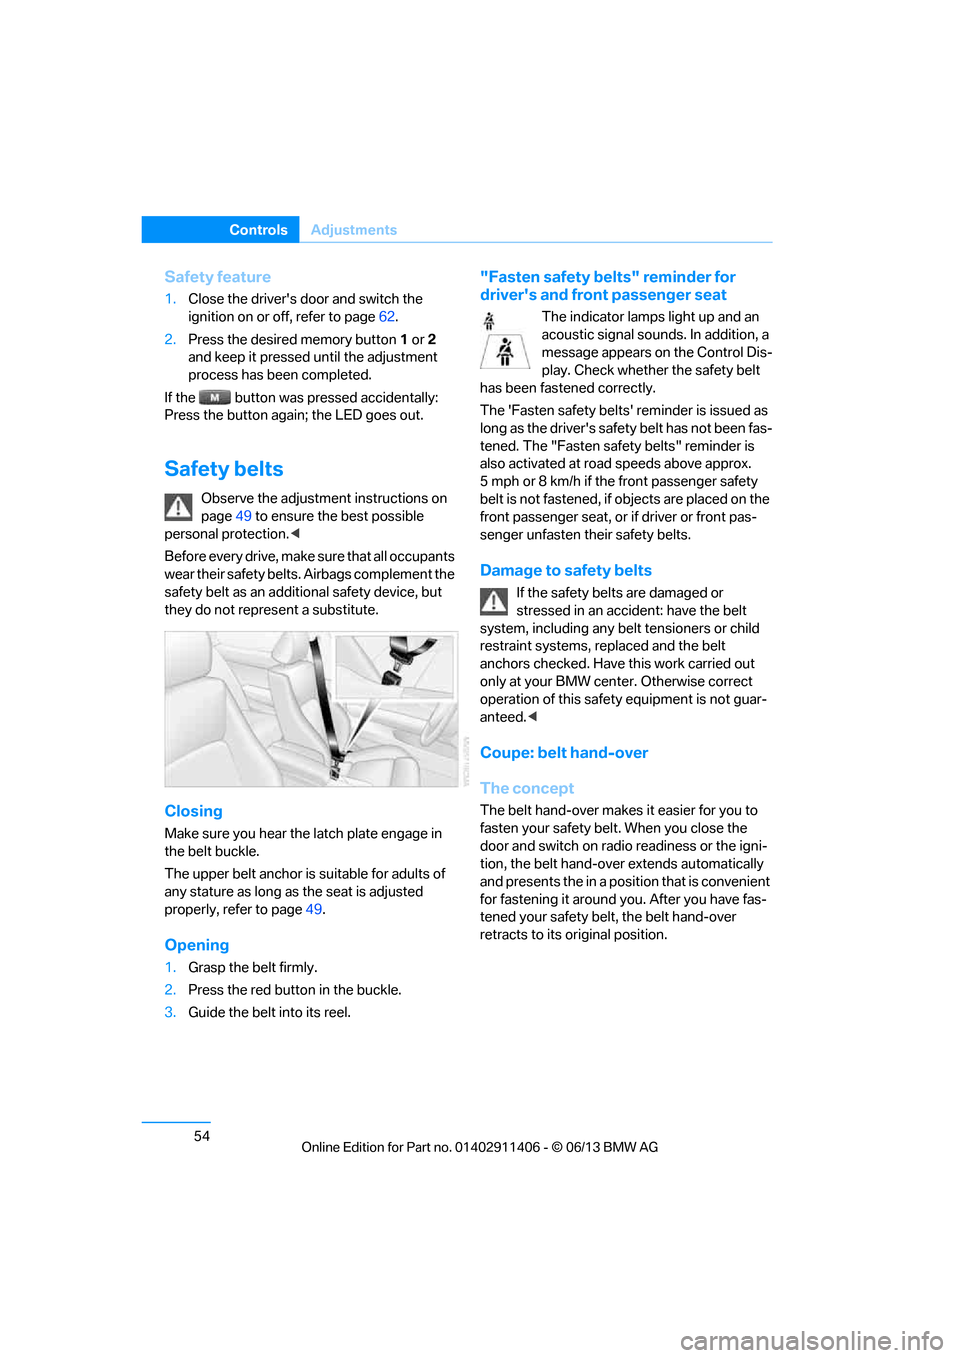
Closing
Make sure you hear the latch plate engage in
the belt buckle.
The upper belt anchor is suitable for adults of
any stature as long as the seat is adjusted
properly, refer to page 49.
Opening
1.Grasp the belt firmly.
2. Press the red button in the buckle.
3. Guide the belt into its reel.
"Fasten safety belts" reminder for
driver's and front passenger seat
The indicator lamps light up and an
acoustic signal sounds. In addition, a
message appears on the Control Dis-
play. Check whether the safety belt
has been fastened correctly.
The 'Fasten safety belts' reminder is issued as
long as the driver's safety belt has not been fas-
tened. The "Fasten safety belts" reminder is
also activated at road speeds above approx.
5 mph or 8 km/h if the front passenger safety
belt is not fastened, if objects are placed on the
front passenger seat, or if driver or front pas-
senger unfasten their safety belts.
Damage to safety belts
If the safety belts are damaged or
stressed in an accident: have the belt
system, including any belt tensioners or child
restraint systems, replaced and the belt
anchors checked. Have this work carried out
only at your BMW center. Otherwise correct
operation of this safety equipment is not guar-
anteed. <
Coupe: belt hand-over
The concept
The belt hand-over makes it easier for you to
fasten your safety belt. When you close the
door and switch on radio readiness or the igni-
tion, the belt hand-ove r extends automatically
and presents the in a position that is convenient
for fastening it around you. After you have fas-
tened your safety belt , the belt hand-over
retracts to its original position.
00320051004F004C00510048000300280047004C0057004C005200510003
Page 63 of 311
58
ControlsTransporting children safely
Transporting children safely
Vehicle equipment
In this chapter, all pr oduction, country, and
optional equipment that is offered in the model
range is described. As a result, some equip-
ment described may not be available in a partic-
ular vehicle, for example due to the options or
national-market version selected. This also
applies to safety related functions and systems.
The right place for children
Do not leave children unattended in the
vehicle; otherwise, they could endanger
themselves and/or other persons by opening
the doors, for example. <
Children should always sit in the rear
Accident research has shown that the safest
place for children is on the rear seat.
Children under the age of 13 or smaller
than 5 ft/150 cm may be transported only
in the rear in suitable child restraint systems
appropriate for their age, weight and size. Oth-
erwise, there is an increase d risk of injury in the
event of an accident. <
Children 13 years of age or older must be buck-
led in with a safety belt as soon as there no
longer is any child rest raint system that is
appropriate for their age, size and weight.
Children in the front passenger seat
Should it be necessa ry to use a child
restraint system on the front passenger
seat, the front and side airbags for the front pas-
senger must be deactivated. Otherwise, a child
traveling on that seat will face a significant risk
of injury if the airbags are triggered off, even
with a child restraint system.
of the front passenger airbags refer to
page 107.
Convertible: key switch for
passenger belt
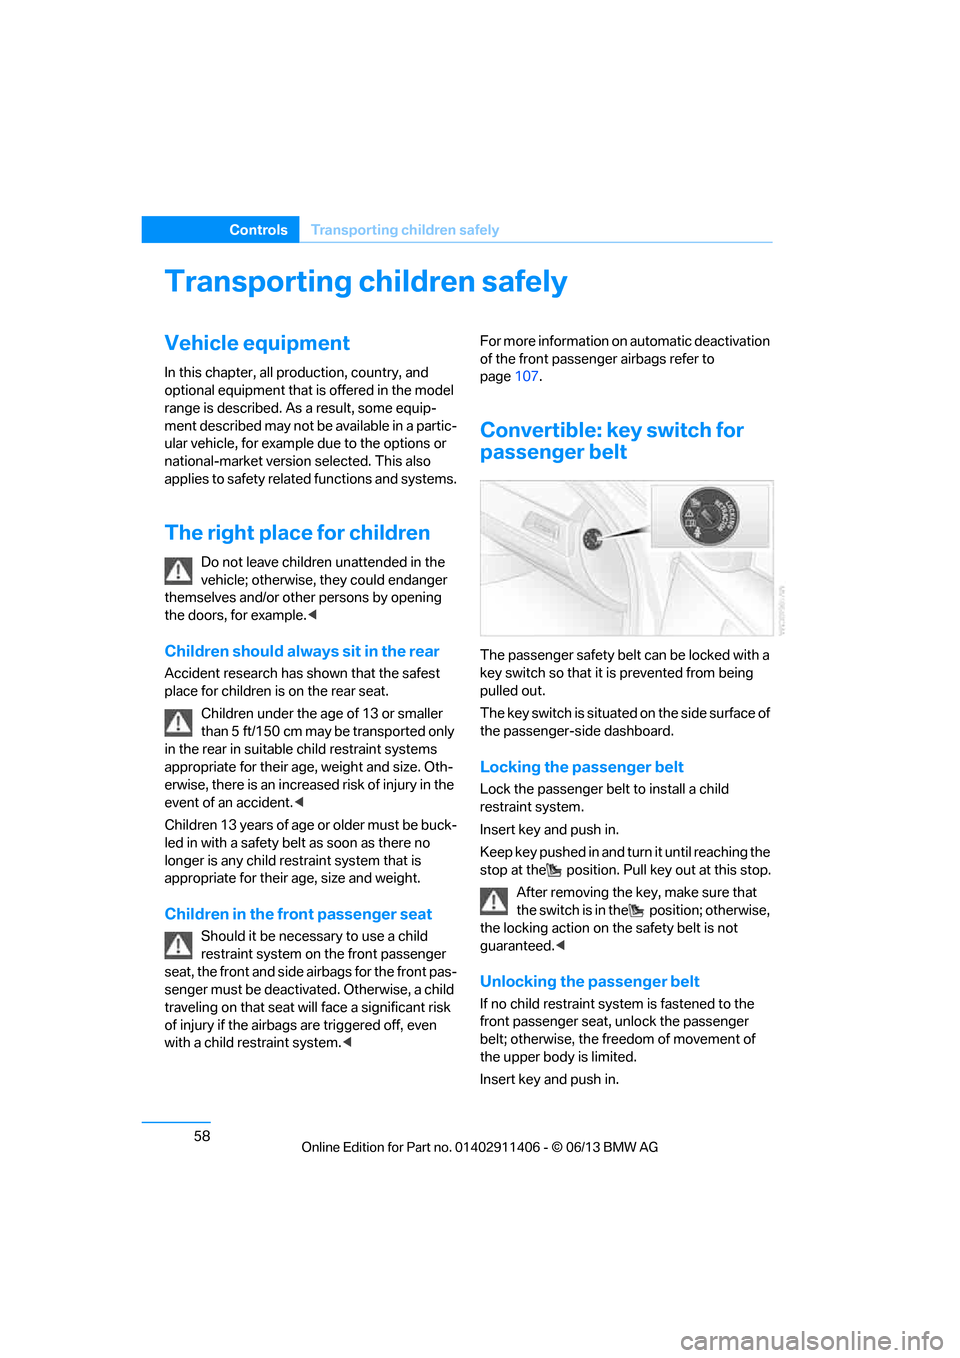
The passenger safety belt can be locked with a
key switch so that it is prevented from being
pulled out.
The key switch is situated on the side surface of
the passenger-side dashboard.
Locking the passenger belt
Lock the passenger belt to install a child
restraint system.
Insert key and push in.
Keep key pushed in and turn it until reaching the
stop at the position. Pull key out at this stop.
After removing the key, make sure that
the switch is in the position; otherwise,
the locking action on th e safety belt is not
guaranteed. <
Unlocking the passenger belt
If no child restraint syst em is fastened to the
front passenger seat, unlock the passenger
belt; otherwise, the freedom of movement of
the upper body is limited.
Insert key and push in.
00320051004F004C00510048000300280047004C0057004C005200510003
Page 64 of 311
59
Transporting children safely
Controls
Keep key pushed in and tu
rn it until reaching the
stop at the position. Pull key out at this stop.
Make sure that the passenger belt is
unlocked; otherwise, the front passenger
may become trapped by the safety belt.<
Installing child restraint
systems
Observe the child restraint system manu-
facturer's instructions when selecting,
installing and using child restraint systems.
Otherwise, the protective effect may be
diminished. <
Standard child restraint systems are designed
to be secured with a lap be lt or with the lap-belt
section of a lap-and-shoulder belt. Incorrectly
or improperly installed child restraint systems
can increase the risk of injury to children.
Always follow the installation instructions for
the system with the greatest care.
On the front passenger seat
After installing a child restraint system on
the front passenger seat, make sure that
the front and side airbags for the front passen-
ger are deactivated; otherwise, there is an
increased risk of injury if the airbags deploy. <
Seat position
Before installing a child restraint system, move
the front passenger seat as far back and up as
possible to obtain the be st possible position for
the belt. Do not change the seat position after
this.
Backrest width
The backrest width of the front passenger
seat must be at its widest possible set-
ting. Do not change the setting after installing
the child seat; otherwise, the child seat's stabil-
ity on the front passenger seat is limited. <1.
Adjust the backrest width to its widest
setting, refer to page 50.
2. Install the child seat.
Child seat security
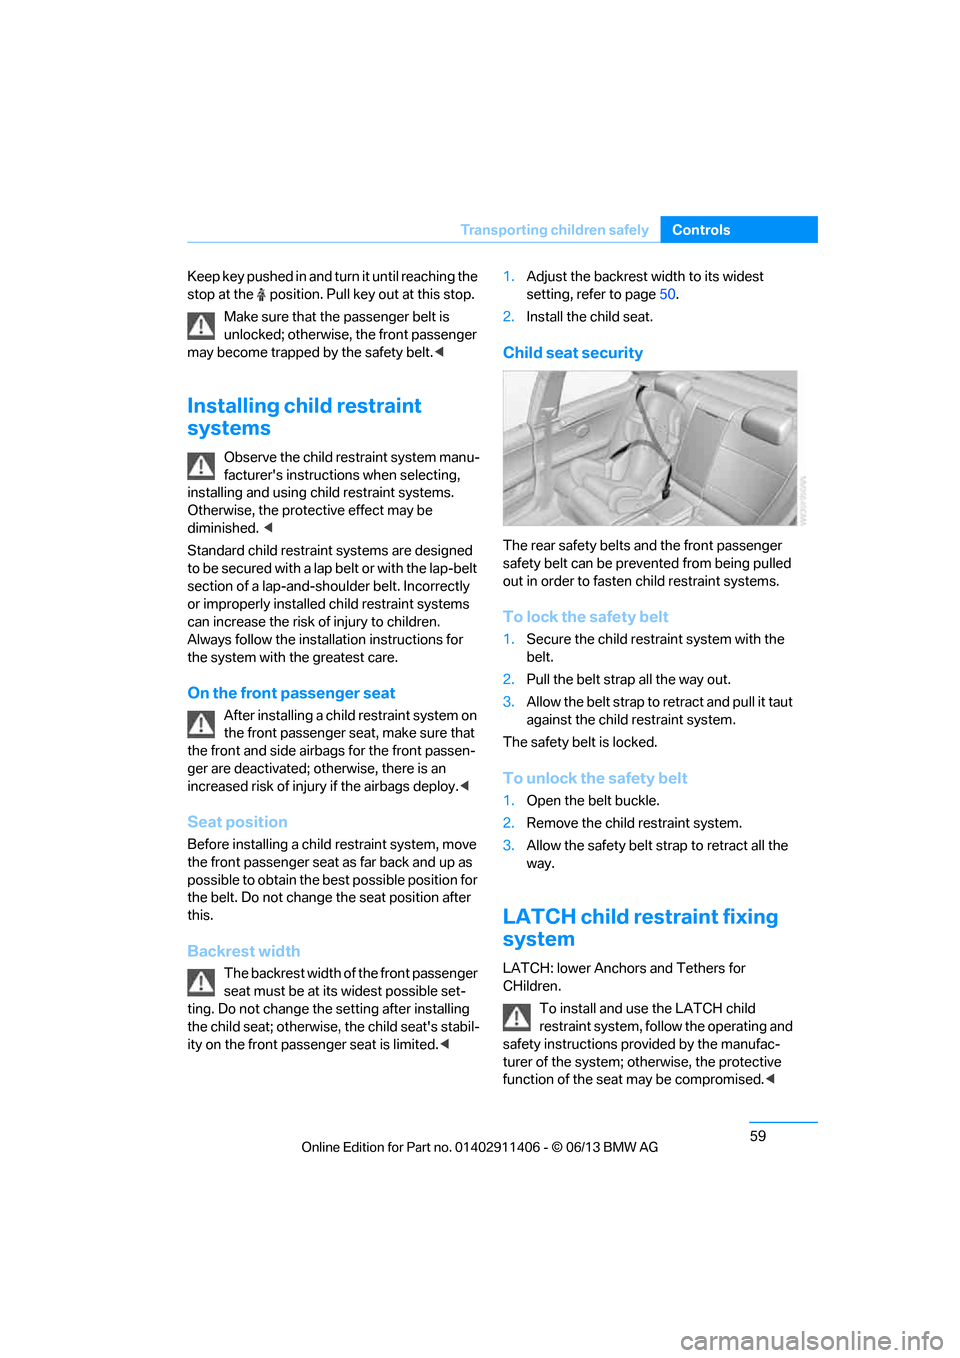
The rear safety belts and the front passenger
safety belt can be prevented from being pulled
out in order to fasten child restraint systems.
To lock the safety belt
1.Secure the child restra int system with the
belt.
2. Pull the belt stra p all the way out.
3. Allow the belt strap to retract and pull it taut
against the child restraint system.
The safety belt is locked.
To unlock the safety belt
1. Open the belt buckle.
2. Remove the child restraint system.
3. Allow the safety belt st rap to retract all the
way.
LATCH child restraint fixing
system
LATCH: lower Anchors and Tethers for
CHildren.
To install and use the LATCH child
restraint system, follo w the operating and
safety instructions pr ovided by the manufac-
turer of the system; othe rwise, the protective
function of the seat may be compromised. <
00320051004F004C00510048000300280047004C0057004C005200510003
Page 65 of 311
60
ControlsTransporting children safely
Mounts for lower LATCH anchors
Before installing the child seat, pull the belt out
of the area for the child restraint fixing system.
The lower anchors may be used to attach the
CRS to the vehicle seat up to a combined child
and CRS weight of 65 lb/30 kg when the child is
restrained by the internal harnesses.
Ensure that both lower LATCH anchors
are correctly engaged and that the child
restraint system is resting firmly against the
backrest; otherwise, the protective function of
the seat may be compromised. <
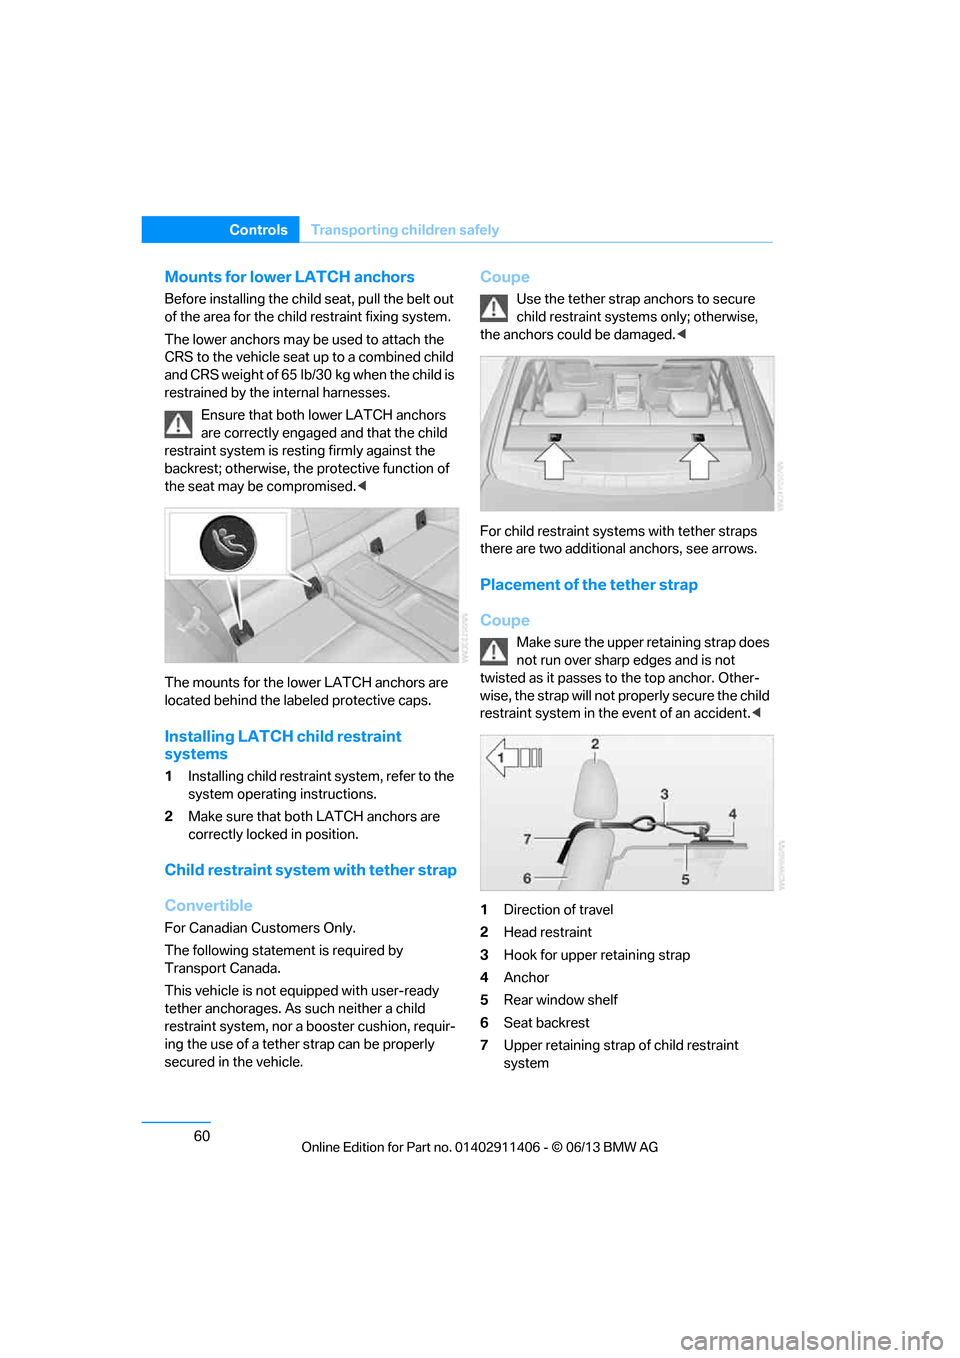
The mounts for the lower LATCH anchors are
located behind the labe led protective caps.
Installing LATCH child restraint
systems
1Installing child restraint system, refer to the
system operating instructions.
2 Make sure that both LATCH anchors are
correctly locked in position.
Child restraint system with tether strap
Convertible
For Canadian Customers Only.
The following statement is required by
Transport Canada.
This vehicle is not equipped with user-ready
tether anchorages. As such neither a child
restraint system, nor a booster cushion, requir-
ing the use of a tether strap can be properly
secured in the vehicle.
Coupe
Use the tether strap anchors to secure
child restraint systems only; otherwise,
the anchors could be damaged. <
For child restraint systems with tether straps
there are two additional anchors, see arrows.
Placement of the tether strap
Coupe
Make sure the upper retaining strap does
not run over sharp edges and is not
twisted as it passes to the top anchor. Other-
wise, the strap will not pr operly secure the child
restraint system in the event of an accident. <
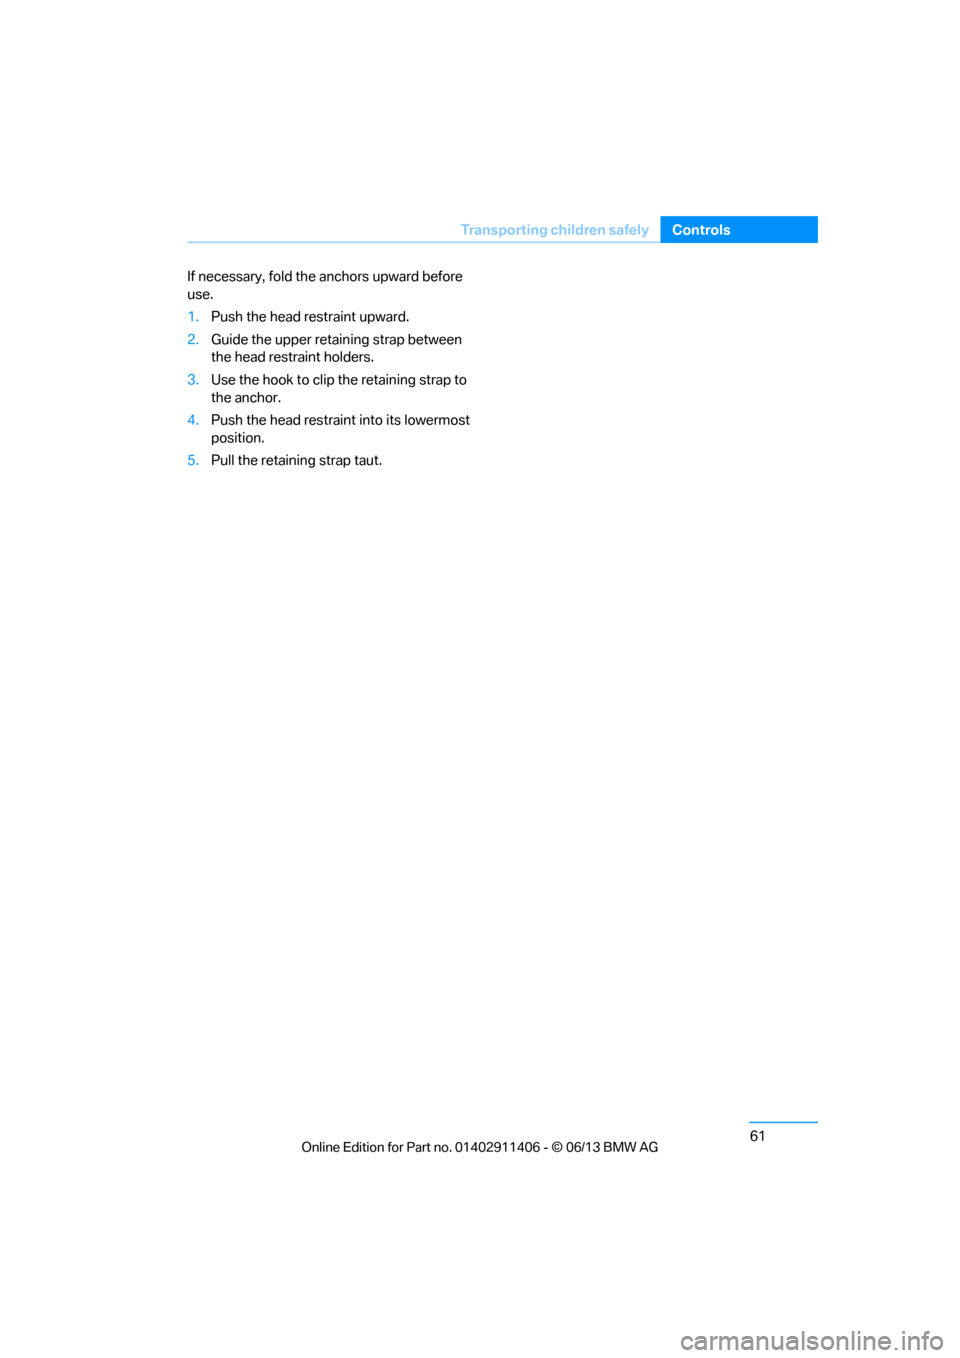
1 Direction of travel
2 Head restraint
3 Hook for upper retaining strap
4 Anchor
5 Rear window shelf
6 Seat backrest
7 Upper retaining strap of child restraint
system
00320051004F004C00510048000300280047004C0057004C005200510003
Page 66 of 311
61
Transporting children safely
Controls
If necessary, fold the anchors upward before
use.
1.
Push the head restraint upward.
2. Guide the upper retaining strap between
the head restraint holders.
3. Use the hook to clip the retaining strap to
the anchor.
4. Push the head restrain t into its lowermost
position.
5. Pull the retaining strap taut.
00320051004F004C00510048000300280047004C0057004C005200510003