window BMW M3 COUPE 2002 E46 Owner's Manual
[x] Cancel search | Manufacturer: BMW, Model Year: 2002, Model line: M3 COUPE, Model: BMW M3 COUPE 2002 E46Pages: 151, PDF Size: 2.14 MB
Page 4 of 151

Contents
© 2001 BMW M GmbH
Munich, Germany
Reprinting, including excerpts, only with the
written consent of BMW M GmbH, Munich.
Order No. 01 41 0 156 237
US English VIII/01
Printed in Germany
Printed on environmentally friendly paper
(bleached without chlorine, suitable for recycling).
Overview
Controls and features
Cockpit14
Instrument cluster15
Indicator and warning lamps17
Steering wheel with multifunction
buttons21
Warning triangle22
First-aid kit22
Refueling22
Fuel specifications24
Tire inflation pressures24
Opening and closing:
Keys28
Central locking system28
Opening and closing Ð via the
door lock29
Opening and closing Ð via the
remote control30
Opening and closing Ð from the
inside33
Luggage compartment lid34
Luggage compartment36
Alarm system37
Electric power windows39
Sliding/tilt sunroof40
Adjustments:
Correct sitting position42
Seats43
Head restraints44
Entering the rear45
Safety belts45
Seat and mirror memory46
Seat heating47
Steering wheel47
Mirrors48
Passenger safety systems:
Airbags49
Transporting children safely52
Vehicle Memory, Key
Memory55
Driving:
Ignition lock56
Starting the engine56
Switching off the engine57
Parking brake58
Manual transmission58
Sequential M gearbox SMG II59
Indicator/Headlamp flasher65
Washer/Wiper system/Rain
sensor66
Cruise control68
Everything under control:
Odometer70
Tachometer70
Temperature gauge70
Fuel gauge71
Temperature gauge71
Service Interval Display71
Check Control72
Computer72
Technology for driving comfort
and safety:
Park Distance Control (PDC)75
Dynamic Stability Control
(DSC)76
Flat Tire Monitor77
M Engine dynamics control79
Contents
Page 14 of 151
14n
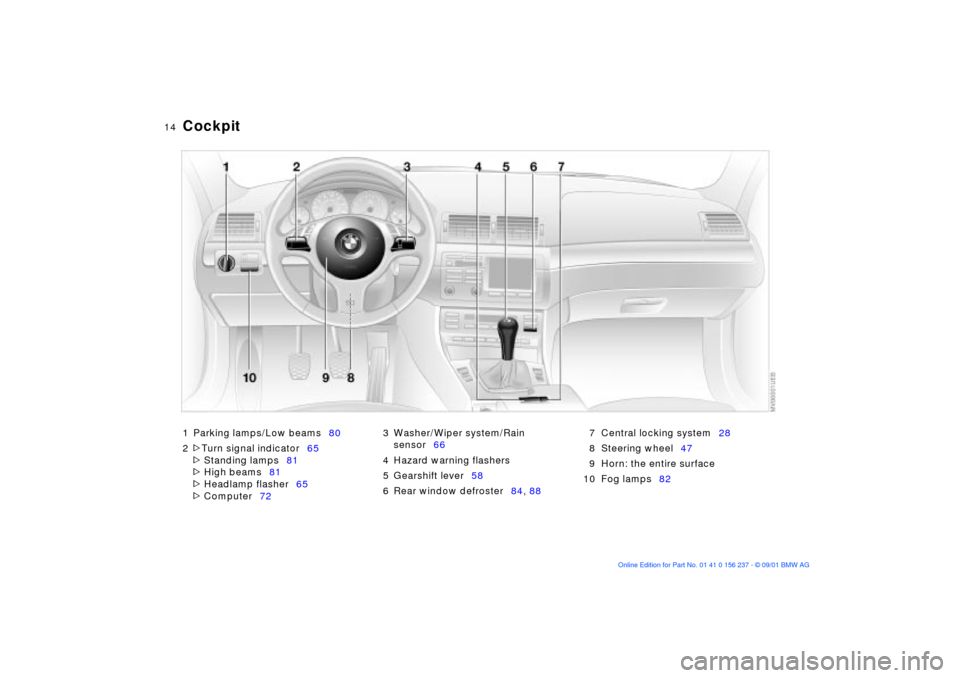
1 Parking lamps/Low beams80
2
>
Turn signal indicator65
>
Standing lamps81
>
High beams81
>
Headlamp flasher65
>
Computer723 Washer/Wiper system/Rain
sensor66
4 Hazard warning flashers
5 Gearshift lever58
6 Rear window defroster84, 887 Central locking system28
8 Steering wheel47
9 Horn: the entire surface
10 Fog lamps82
Cockpit
Page 29 of 151
29n
OverviewControlsMaintenanceRepairsDataIndex
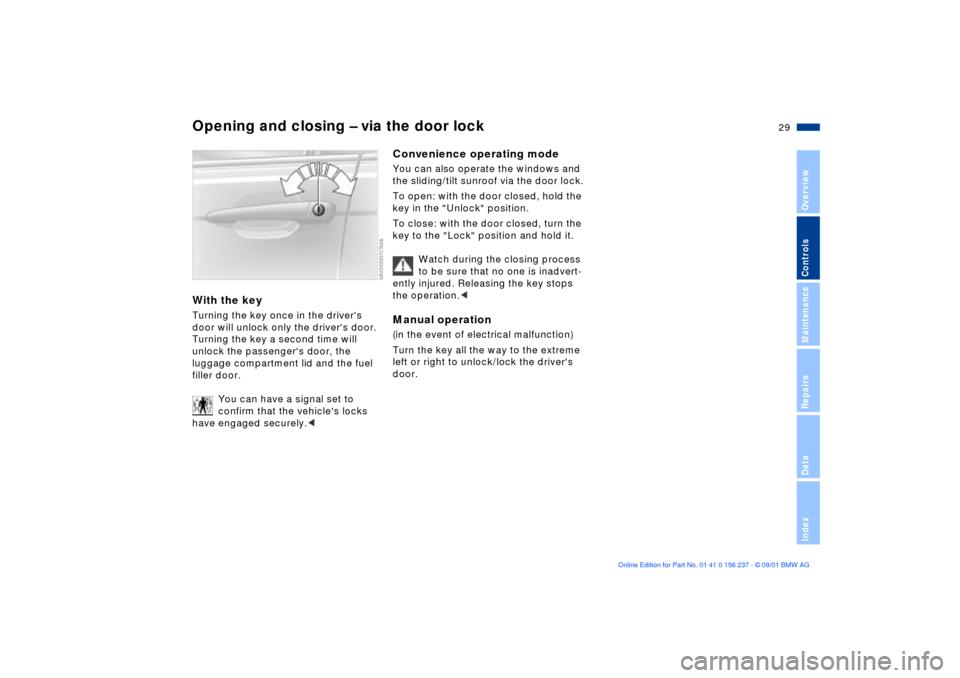
Opening and closing Ð via the door lockWith the keyTurning the key once in the driver's
door will unlock only the driver's door.
Turning the key a second time will
unlock the passenger's door, the
luggage compartment lid and the fuel
filler door.
You can have a signal set to
confirm that the vehicle's locks
have engaged securely.<
Convenience operating modeYou can also operate the windows and
the sliding/tilt sunroof via the door lock.
To open: with the door closed, hold the
key in the "Unlock" position.
To close: with the door closed, turn the
key to the "Lock" position and hold it.
Watch during the closing process
to be sure that no one is inadvert-
ently injured. Releasing the key stops
the operation.
left or right to unlock/lock the driver's
door.
Page 31 of 151
31n
OverviewControlsMaintenanceRepairsDataIndex
Opening and closing Ð via the remote controlTo releasePress button.
After unlocking the driver's door, press
button twice to unlock the entire
vehicle.Convenience opening modePress and hold button. The windows
and the sliding/tilt sunroof are then
opened.To lock and securePress button.
To switch on the interior lampsAfter locking the vehicle, press button
again.To deactivate the tilt alarm
sensor
* and interior motion
sensor*
Press button a second time immedi-
ately after locking.
For additional information, refer to
page 38.
To open the luggage
compartment lidPress button.
The lid will open slightly, no matter
whether it was locked or unlocked.
Before and after a trip, be sure
that the luggage compartment lid
has not been opened unintentionally.
in the event of danger, if it is armed.
To switch off the alarm:
Press button.
Page 35 of 151
35n
OverviewControlsMaintenanceRepairsDataIndex
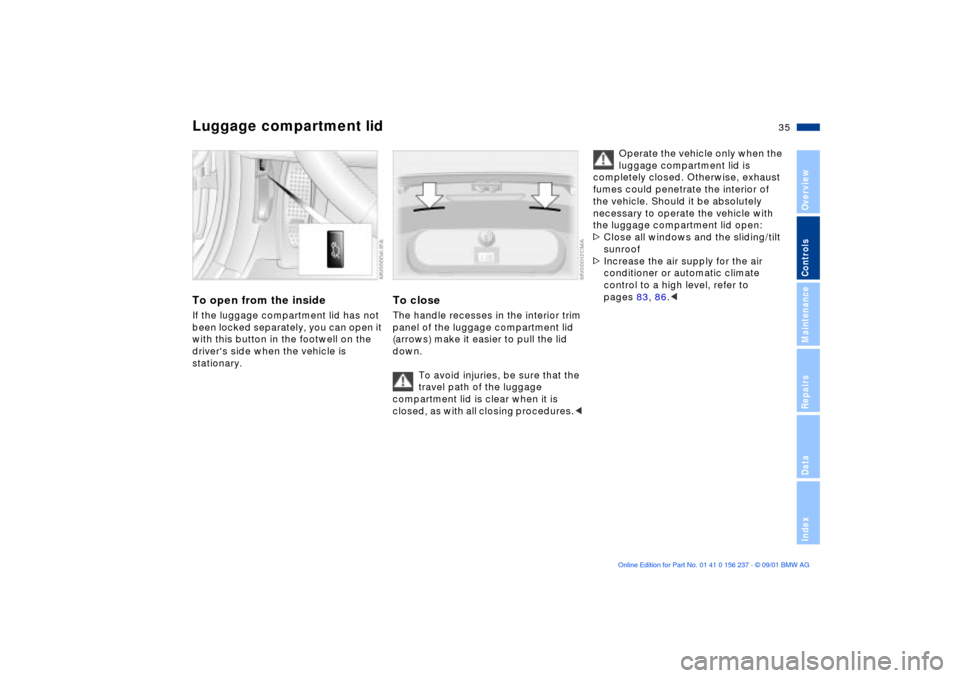
Luggage compartment lidTo open from the insideIf the luggage compartment lid has not
been locked separately, you can open it
with this button in the footwell on the
driver's side when the vehicle is
stationary.
To closeThe handle recesses in the interior trim
panel of the luggage compartment lid
(arrows) make it easier to pull the lid
down.
To avoid injuries, be sure that the
travel path of the luggage
compartment lid is clear when it is
closed, as with all closing procedures.<
Operate the vehicle only when the
luggage compartment lid is
completely closed. Otherwise, exhaust
fumes could penetrate the interior of
the vehicle. Should it be absolutely
necessary to operate the vehicle with
the luggage compartment lid open:
>Close all windows and the sliding/tilt
sunroof
>Increase the air supply for the air
conditioner or automatic climate
control to a high level, refer to
pages 83, 86.<
Page 38 of 151

38n
Alarm system
*
>If the indicator lamp flashes for
10 seconds when the system is
disarmed: an attempted entry has
been detected in the period since the
system was armed.
Following triggering of an alarm, the
indicator lamp will flash continuously.Avoiding unintentional alarms The tilt alarm sensor and interior motion
sensor can be deactivated together.
Doing this prevents a false alarm from
being triggered, e.g. in garages with
elevator ramps or when the vehicle is
being transported on a car train:
Lock the vehicle twice (= arm the
system). Press button 2 on the remote
control twice in succession or lock the
vehicle twice with the key, refer to
page 31.
The indicator lamp lights up briefly and
then flashes continuously. The tilt alarm
sensor and the interior motion sensor
are deactivated as long as the system is
armed.
Arm the alarm system again to reacti-
vate the tilt alarm sensor and the inte-
rior motion sensor.
Interior motion sensorIn order for the interior motion sensor to
function properly, the windows and
sliding/tilt sunroof must be completely
closed.
Nevertheless, you should deactivate
the interior motion sensor (refer to
"Avoiding unintentional alarms") if you
>leave children or animals in the
vehicle
>the windows or sliding/tilt sunroof
should be left open.
Page 39 of 151
39n
OverviewControlsMaintenanceRepairsDataIndex
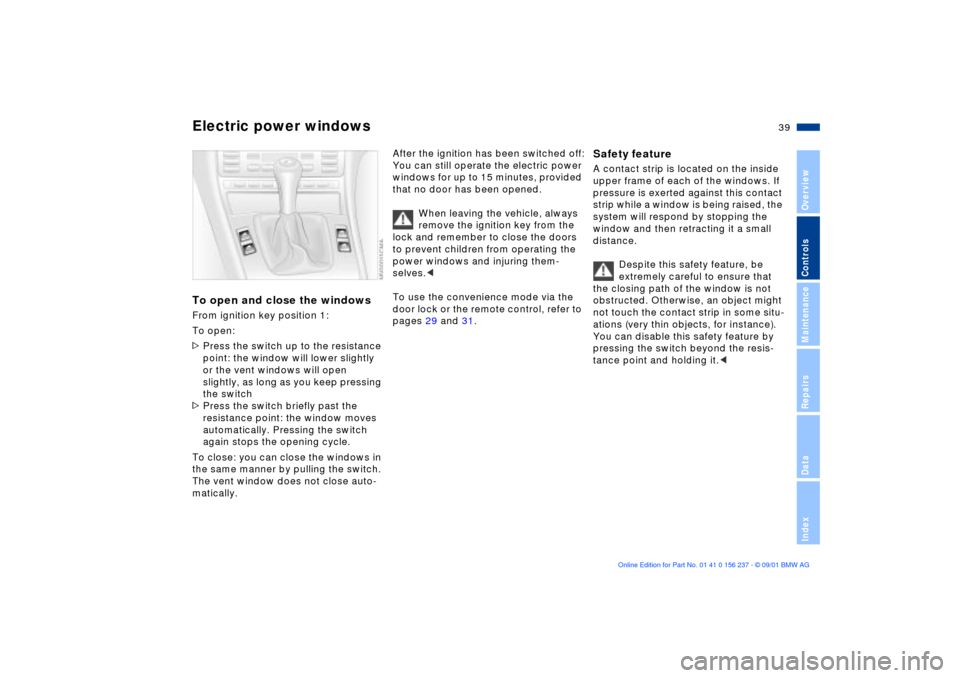
Electric power windowsTo open and close the windowsFrom ignition key position 1:
To open:
>Press the switch up to the resistance
point: the window will lower slightly
or the vent windows will open
slightly, as long as you keep pressing
the switch
>Press the switch briefly past the
resistance point: the window moves
automatically. Pressing the switch
again stops the opening cycle.
To close: you can close the windows in
the same manner by pulling the switch.
The vent window does not close auto-
matically.
After the ignition has been switched off:
You can still operate the electric power
windows for up to 15 minutes, provided
that no door has been opened.
When leaving the vehicle, always
remove the ignition key from the
lock and remember to close the doors
to prevent children from operating the
power windows and injuring them-
selves.<
To use the convenience mode via the
door lock or the remote control, refer to
pages 29 and 31.
Safety feature A contact strip is located on the inside
upper frame of each of the windows. If
pressure is exerted against this contact
strip while a window is being raised, the
system will respond by stopping the
window and then retracting it a small
distance.
Despite this safety feature, be
extremely careful to ensure that
the closing path of the window is not
obstructed. Otherwise, an object might
not touch the contact strip in some situ-
ations (very thin objects, for instance).
You can disable this safety feature by
pressing the switch beyond the resis-
tance point and holding it.<
Page 83 of 151
83n
OverviewControlsMaintenanceRepairsDataIndex
Air conditioner
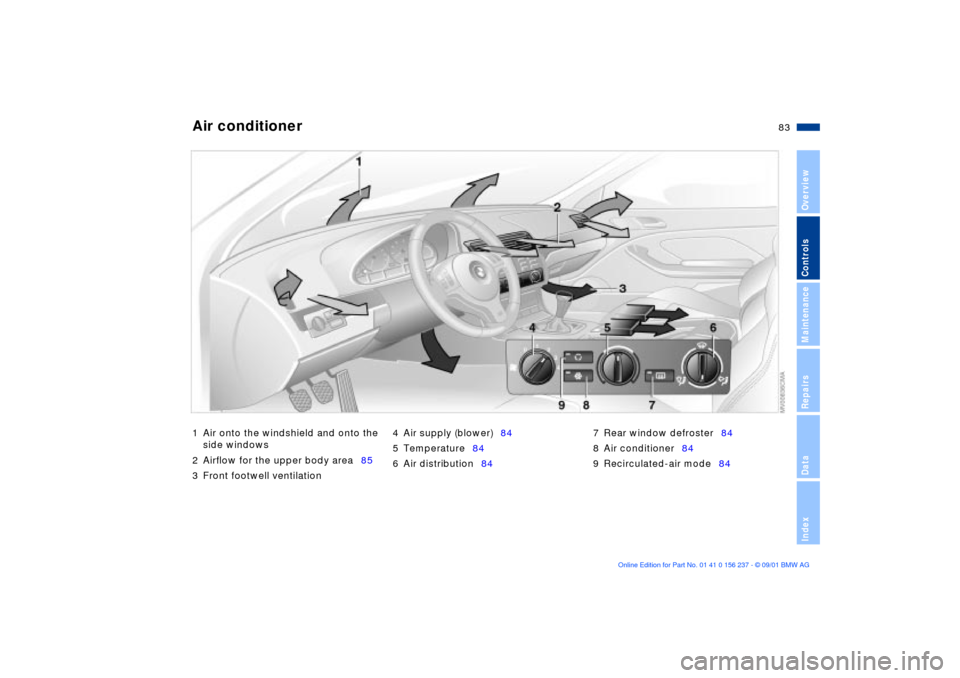
1 Air onto the windshield and onto the
side windows
2 Airflow for the upper body area85
3 Front footwell ventilation4 Air supply (blower)84
5 Temperature84
6 Air distribution847 Rear window defroster84
8 Air conditioner84
9 Recirculated-air mode84
Page 84 of 151
84n
Air conditionerAir supply (blower)
You can select blower speeds
from 1 to 4. The heating and
ventilation become more and
more effective as the air
supply settings are increased. In posi-
tion 0, the blower and the heater are
switched off. By using position 0, you
can totally block the air supply by
pressing the button for the recirculated-
air mode.
Temperature
In order to increase the
temperature of the passenger
compartment, turn it to the
right (red). Temperature regu-
lation will keep the interior temperature
you have selected constant.
Air distribution
You can direct air to flow onto
the windows , toward the
upper body and into the
footwell . All intermediate
settings are possible. In the setting,
there is a low flow of air onto the
windows to keep them free of conden-
sation.
Rear window defroster
When the rear window defroster
is activated, the indicator lamp
comes on. The rear window defroster
switches off automatically.
The rear window defroster auto-
matically assumes operation
within 5 minutes after the engine is
started at outside temperatures below
40 7 (4 6).<
Air conditioner
The air is cooled and dehumidi-
fied and Ð depending on the
temperature setting Ð warmed again
when the air conditioner system is
switched on.
Depending on the weather, the wind-
shield may fog over briefly when the
engine is started.
Condensation forms in the air
conditioner system during opera-
tion, which then exits under the vehicle.
Traces of condensed water of this kind
are thus normal.<
Recirculated-air mode
You can respond to unpleasant
external odors by temporarily
excluding the supply of outside air. The
system then recirculates the air
currently within the vehicle.
If the windows fog over in the
recirculated-air mode, switch the
recirculated-air mode off and increase
the air supply as required.<
Page 85 of 151
85n
OverviewControlsMaintenanceRepairsDataIndex
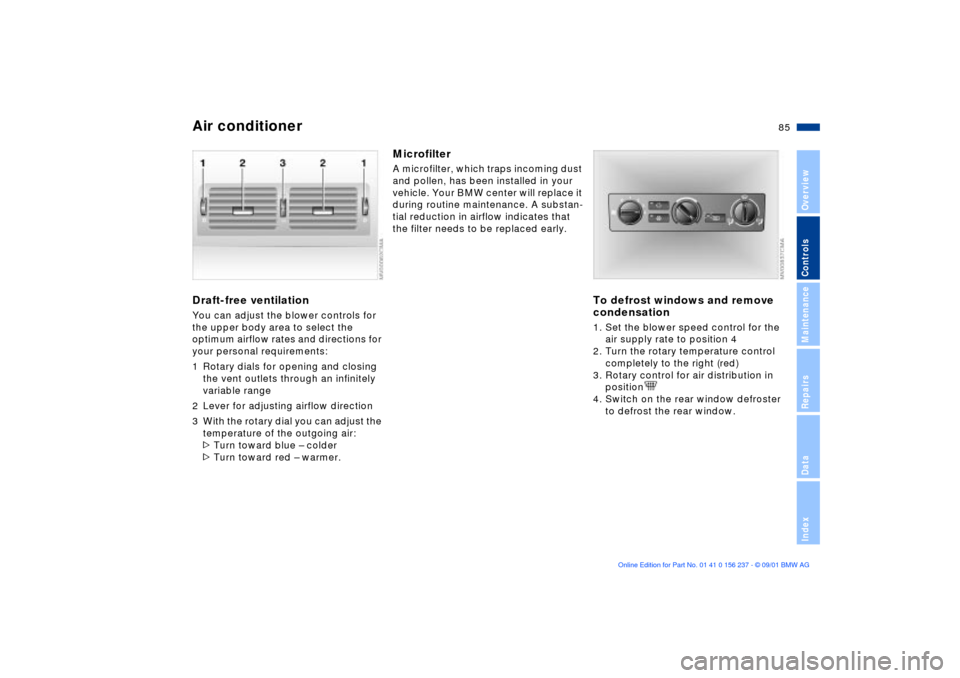
Air conditionerDraft-free ventilation You can adjust the blower controls for
the upper body area to select the
optimum airflow rates and directions for
your personal requirements:
1 Rotary dials for opening and closing
the vent outlets through an infinitely
variable range
2 Lever for adjusting airflow direction
3 With the rotary dial you can adjust the
temperature of the outgoing air:
>Turn toward blue Ð colder
>Turn toward red Ð warmer.
MicrofilterA microfilter, which traps incoming dust
and pollen, has been installed in your
vehicle. Your BMW center will replace it
during routine maintenance. A substan-
tial reduction in airflow indicates that
the filter needs to be replaced early.
To defrost windows and remove
condensation1. Set the blower speed control for the
air supply rate to position 4
2. Turn the rotary temperature control
completely to the right (red)
3. Rotary control for air distribution in
position
4. Switch on the rear window defroster
to defrost the rear window.