turn signal BMW M3 COUPE 2003 E46 User Guide
[x] Cancel search | Manufacturer: BMW, Model Year: 2003, Model line: M3 COUPE, Model: BMW M3 COUPE 2003 E46Pages: 158, PDF Size: 4.18 MB
Page 76 of 158
76
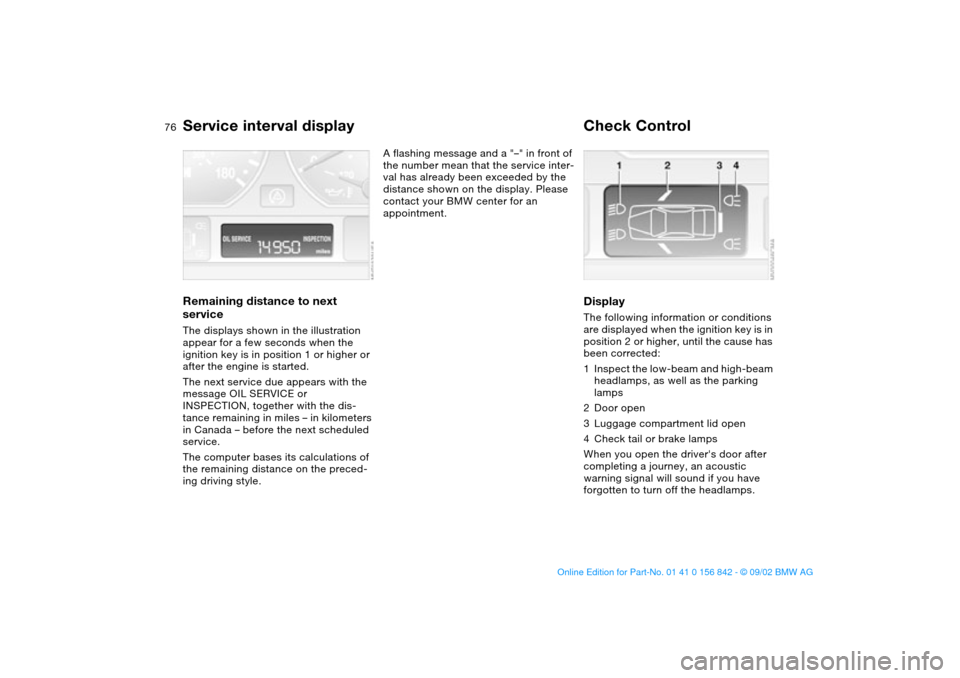
Service interval displayRemaining distance to next
serviceThe displays shown in the illustration
appear for a few seconds when the
ignition key is in position 1 or higher or
after the engine is started.
The next service due appears with the
message OIL SERVICE or
INSPECTION, together with the dis-
tance remaining in miles – in kilometers
in Canada – before the next scheduled
service.
The computer bases its calculations of
the remaining distance on the preced-
ing driving style.
A flashing message and a "–" in front of
the number mean that the service inter-
val has already been exceeded by the
distance shown on the display. Please
contact your BMW center for an
appointment.
Check ControlDisplayThe following information or conditions
are displayed when the ignition key is in
position 2 or higher, until the cause has
been corrected:
1Inspect the low-beam and high-beam
headlamps, as well as the parking
lamps
2Door open
3Luggage compartment lid open
4Check tail or brake lamps
When you open the driver's door after
completing a journey, an acoustic
warning signal will sound if you have
forgotten to turn off the headlamps.
handbook.book Page 76 Saturday, July 27, 2002 1:12 PM
Page 78 of 158
78
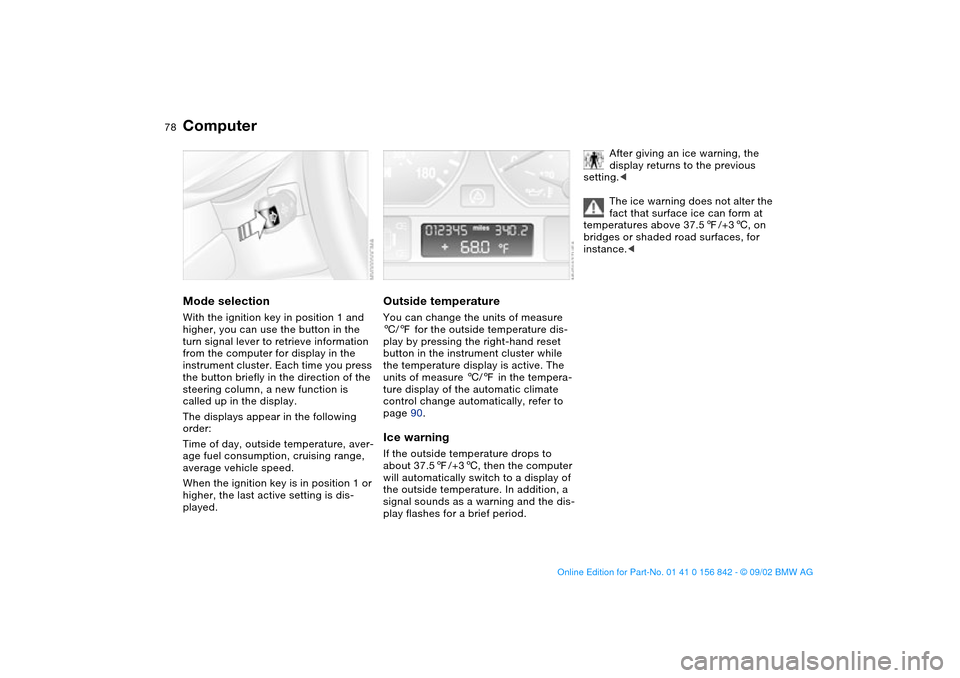
ComputerMode selectionWith the ignition key in position 1 and
higher, you can use the button in the
turn signal lever to retrieve information
from the computer for display in the
instrument cluster. Each time you press
the button briefly in the direction of the
steering column, a new function is
called up in the display.
The displays appear in the following
order:
Time of day, outside temperature, aver-
age fuel consumption, cruising range,
average vehicle speed.
When the ignition key is in position 1 or
higher, the last active setting is dis-
played.
Outside temperatureYou can change the units of measure
6/7 for the outside temperature dis-
play by pressing the right-hand reset
button in the instrument cluster while
the temperature display is active. The
units of measure 6/7 in the tempera-
ture display of the automatic climate
control change automatically, refer to
page 90.Ice warningIf the outside temperature drops to
about 37.57/+36, then the computer
will automatically switch to a display of
the outside temperature. In addition, a
signal sounds as a warning and the dis-
play flashes for a brief period.
After giving an ice warning, the
display returns to the previous
setting.<
The ice warning does not alter the
fact that surface ice can form at
temperatures above 37.57/+36, on
bridges or shaded road surfaces, for
instance.<
handbook.book Page 78 Saturday, July 27, 2002 1:12 PM
Page 79 of 158
79
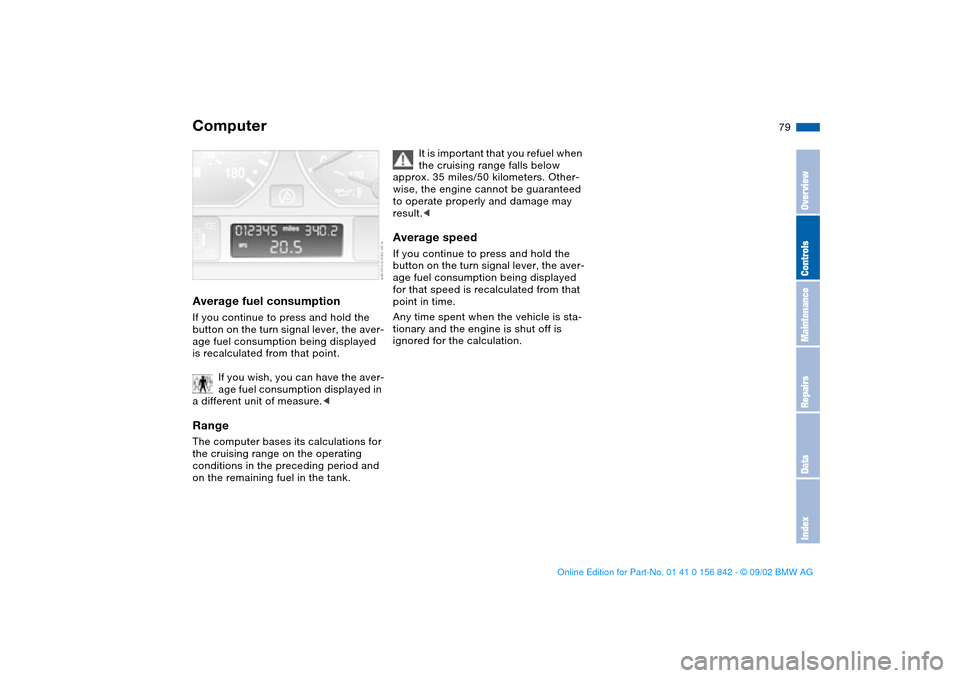
Average fuel consumptionIf you continue to press and hold the
button on the turn signal lever, the aver-
age fuel consumption being displayed
is recalculated from that point.
If you wish, you can have the aver-
age fuel consumption displayed in
a different unit of measure.
conditions in the preceding period and
on the remaining fuel in the tank.
It is important that you refuel when
the cruising range falls below
approx. 35 miles/50 kilometers. Other-
wise, the engine cannot be guaranteed
to operate properly and damage may
result.<
Average speedIf you continue to press and hold the
button on the turn signal lever, the aver-
age fuel consumption being displayed
for that speed is recalculated from that
point in time.
Any time spent when the vehicle is sta-
tionary and the engine is shut off is
ignored for the calculation.
Computer
OverviewControlsMaintenanceRepairsDataIndex
handbook.book Page 79 Saturday, July 27, 2002 1:12 PM
Page 86 of 158
86Lamps
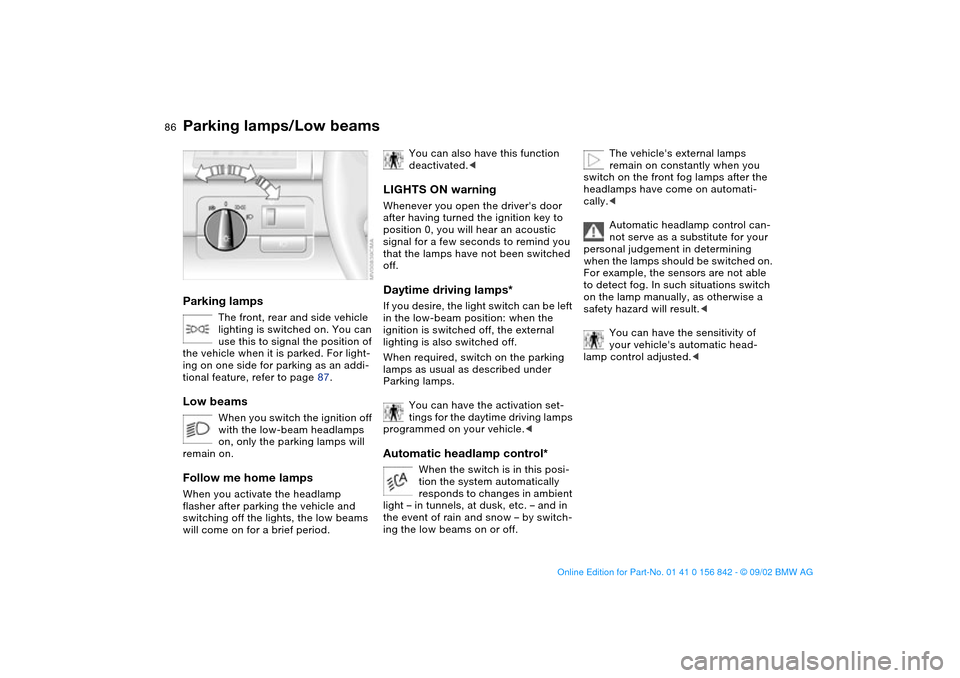
Parking lamps/Low beamsParking lamps
The front, rear and side vehicle
lighting is switched on. You can
use this to signal the position of
the vehicle when it is parked. For light-
ing on one side for parking as an addi-
tional feature, refer to page 87.
Low beams
When you switch the ignition off
with the low-beam headlamps
on, only the parking lamps will
remain on.
Follow me home lampsWhen you activate the headlamp
flasher after parking the vehicle and
switching off the lights, the low beams
will come on for a brief period.
You can also have this function
deactivated.<
LIGHTS ON warningWhenever you open the driver's door
after having turned the ignition key to
position 0, you will hear an acoustic
signal for a few seconds to remind you
that the lamps have not been switched
off.Daytime driving lamps*If you desire, the light switch can be left
in the low-beam position: when the
ignition is switched off, the external
lighting is also switched off.
When required, switch on the parking
lamps as usual as described under
Parking lamps.
You can have the activation set-
tings for the daytime driving lamps
programmed on your vehicle.
tion the system automatically
responds to changes in ambient
light – in tunnels, at dusk, etc. – and in
the event of rain and snow – by switch-
ing the low beams on or off.
The vehicle's external lamps
remain on constantly when you
switch on the front fog lamps after the
headlamps have come on automati-
cally.<
Automatic headlamp control can-
not serve as a substitute for your
personal judgement in determining
when the lamps should be switched on.
For example, the sensors are not able
to detect fog. In such situations switch
on the lamp manually, as otherwise a
safety hazard will result.<
You can have the sensitivity of
your vehicle's automatic head-
lamp control adjusted.<
handbook.book Page 86 Saturday, July 27, 2002 1:12 PM
Page 87 of 158
87
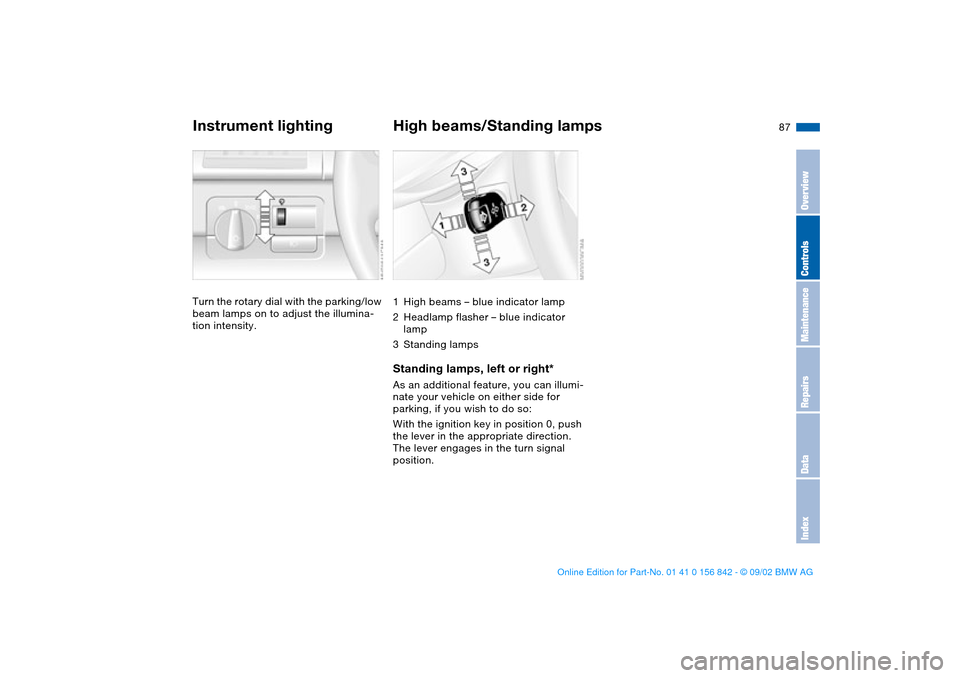
Instrument lightingTurn the rotary dial with the parking/low
beam lamps on to adjust the illumina-
tion intensity.
High beams/Standing lamps1High beams – blue indicator lamp
2Headlamp flasher – blue indicator
lamp
3Standing lampsStanding lamps, left or right*As an additional feature, you can illumi-
nate your vehicle on either side for
parking, if you wish to do so:
With the ignition key in position 0, push
the lever in the appropriate direction.
The lever engages in the turn signal
position.
OverviewControlsMaintenanceRepairsDataIndex
handbook.book Page 87 Saturday, July 27, 2002 1:12 PM
Page 130 of 158
130
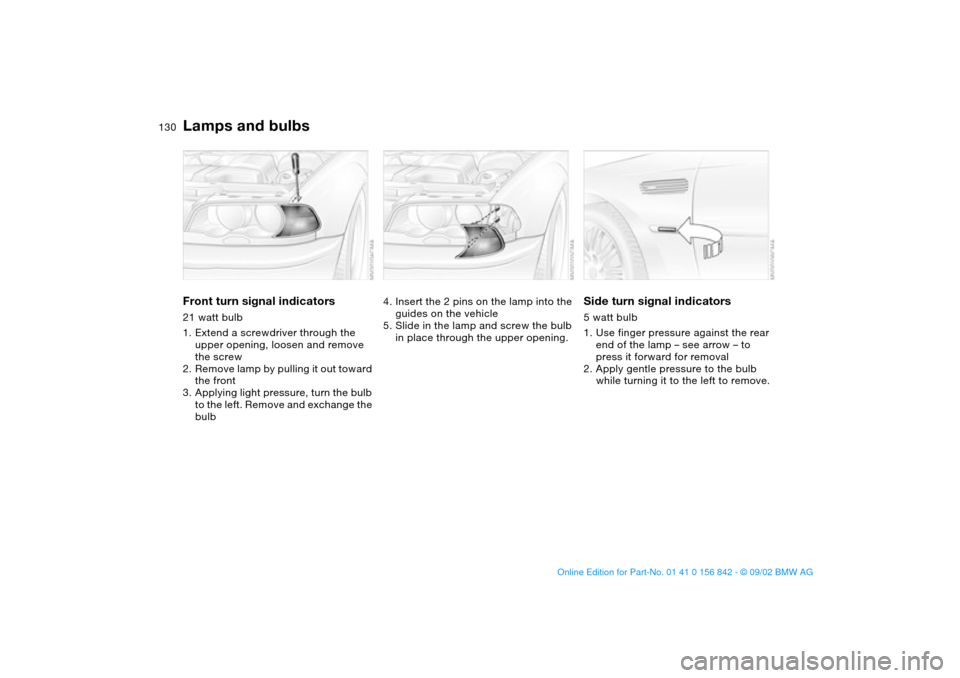
Front turn signal indicators21 watt bulb
1. Extend a screwdriver through the
upper opening, loosen and remove
the screw
2. Remove lamp by pulling it out toward
the front
3. Applying light pressure, turn the bulb
to the left. Remove and exchange the
bulb
4. Insert the 2 pins on the lamp into the
guides on the vehicle
5. Slide in the lamp and screw the bulb
in place through the upper opening.
Side turn signal indicators5 watt bulb
1. Use finger pressure against the rear
end of the lamp – see arrow – to
press it forward for removal
2. Apply gentle pressure to the bulb
while turning it to the left to remove.
Lamps and bulbs
handbook.book Page 130 Saturday, July 27, 2002 1:12 PM
Page 131 of 158
131
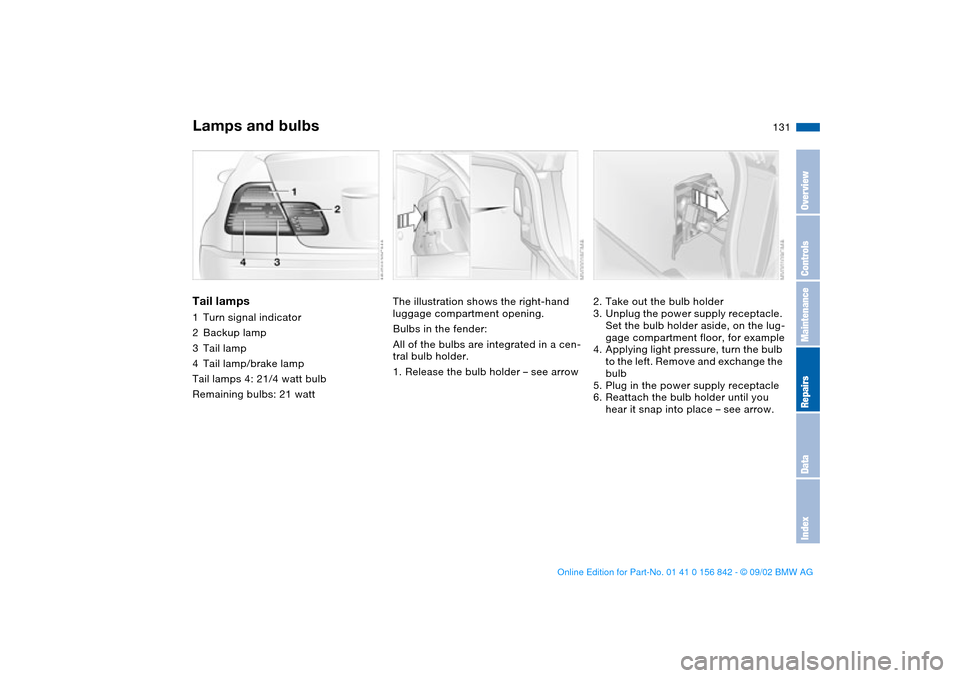
Tail lamps1Turn signal indicator
2Backup lamp
3Tail lamp
4Tail lamp/brake lamp
Tail lamps 4: 21/4 watt bulb
Remaining bulbs: 21 watt
The illustration shows the right-hand
luggage compartment opening.
Bulbs in the fender:
All of the bulbs are integrated in a cen-
tral bulb holder.
1. Release the bulb holder – see arrow
2. Take out the bulb holder
3. Unplug the power supply receptacle.
Set the bulb holder aside, on the lug-
gage compartment floor, for example
4. Applying light pressure, turn the bulb
to the left. Remove and exchange the
bulb
5. Plug in the power supply receptacle
6. Reattach the bulb holder until you
hear it snap into place – see arrow.
Lamps and bulbs
OverviewControlsMaintenanceRepairsDataIndex
handbook.book Page 131 Saturday, July 27, 2002 1:12 PM
Page 154 of 158
Everything from A to ZRadio, refer to the Owner's
Manual for Radio
Rain sensor 71
Range 79
Reading lamps
front 88
rear 88
Rear backrest, folding 100
Rear lamps 131
Rear window defroster 93
Rear-entry assist 47
Rearview mirror 51
Recirculated-air mode 93
Refueling 24
Remote control 31
Remote key 30
Replacement key 30, 31
Reporting safety defects 6
Reserve indicator lamp 75
Restraint system 55
Reverse 64
Rims 112
Roof load capacity 146
Roof-mounted luggage
rack 103
S
Safe seating position 43
Safety belts 47
3-point safety belt 100
height adjustment 48Safety feature
power windows 40
sliding/tilt sunroof 41
Seat adjustment 43, 44
adjusting the lumbar sup-
port 45
backrest width adjust-
ment 46
lumbar support 45
manual 44
power 45
Seat heating 50
Seat height adjustment 44
Seat memory 49
Securing cargo 102
Securing child-restraint sys-
tem 57
Securing devices 103
Sequential M gearbox
SMG II 65
indicator lamp 19, 69
Service and Warranty Infor-
mation Booklet 122
SERVICE ENGINE SOON
warning lamp 19
Service interval display
76, 122
Set clock 77
Shift lights 69
Side airbags 53
Side turn signals
bulb replacement 130Size 145
Ski bag 101
Sliding/tilt sunroof 40
closing following an elec-
trical malfunction 42
convenience operation
31, 33
manual operation 42
remote control 31
SMG gearbox 65
Snow chains 113
Socket 98
Spare key 30
Speedometer 16
Sport mode 85
Standing lamps 87
bulb replacement 129
Starting 61
Starting problems 61
Steering wheel lock 60
Steering wheel with multi-
function buttons 22
Steering wheel, adjusting 51
Storage compartments 96
Stroke 144
Summer tires 112
Sun blind 94
Surface ice warning 78
Switching off the engine 63
Symbols used 4T
Tachometer 16, 74
Tail lamps 131
replacing bulb 131
Tank capacity 147
Technical data 144
Technical modifications 5
Telephone hookup 97
Telephone, refer to the sep-
arate Owner's Manual
Temperature adjustment 92
Temperature display
engine coolant 75
ice warning 78
interior temperature 92
outside temperature 78
Temperature gauge 74
Temperature layering 93
Thigh support area, adjust-
ing 45
Third brake lamp 132
Through-loading system 100
Tilt alarm sensor
remote control 32
switching off 32, 39
Time 77
Tire code 112
Tire damage 109
Tire inflation pressure
25, 109
checking 25
Tire replacement 110
handbook.book Page 154 Saturday, July 27, 2002 1:12 PM
Page 155 of 158
Everything from A to Z
155
Tire tread 109
Tools 128
Torque 144
Towing eyelet 140
Towing the vehicle 140
Track 145
Transmission 64
Transporting children
safely 55
Tread depth, tires 109
Tread wear indicator 109
Trip odometer 74
Trunk, see Luggage com-
partment 35
capacity 146
Trunk lid, see Luggage com-
partment lid 35
Turn signal indicator 70
indicator lamps 20
replacing bulb 130
Turning circle 145
U
Uniform Tire Quality
Grading 111
Upholstery care, refer to the
Caring for your vehicle
brochure
Used batteries 137V
Vacuum cleaner, connect-
ing 98
Variable pre-warning
zone 74
Vehicle
break-in procedures 106
starting 61
switching off 63
Vehicle battery 137
Vehicle Memory 59
Vehicle weight 146
Ventilation 90
draft-free 93
Viscosity 119
Voice Control System, refer
to the separate Owner's
Manual
Voice recognition 22
W
Warning lamp "Please fasten
safety belts" 18
Warning lamps 18
Warning messages 76
Warranty and Service Guide
Booklet 122
Warranty, refer also to sepa-
rate booklet 6
Washer fluid
adding 118, 147
Washer/wiper system 71Washing fluid
indicator lamp 19
Washing vehicle, refer to the
Caring for your vehicle
brochure
Water on roadways
deep water 107
Wear indicator for tires 109
Weights 146
Wheelbase 145
Wheels and tires 112
Wheelslip control, see
DSC 81
Width 145
Window condensation,
removing 92
Windows
convenience operation
31, 33
defrosting 92
remote control 31
Windshield washer reservoir
filling 118, 147
Windshield wiper blades,
replacing 128
Windshield wipers 71
Winter tires 112
Wiper blades, replacing 128
Work in the engine compart-
ment 114X
Xenon lamps 129
OverviewControlsMaintenanceRepairsDataIndex
handbook.book Page 155 Saturday, July 27, 2002 1:12 PM