change wheel BMW M3 COUPE 2004 E46 Owner's Manual
[x] Cancel search | Manufacturer: BMW, Model Year: 2004, Model line: M3 COUPE, Model: BMW M3 COUPE 2004 E46Pages: 170, PDF Size: 2.62 MB
Page 38 of 170
38
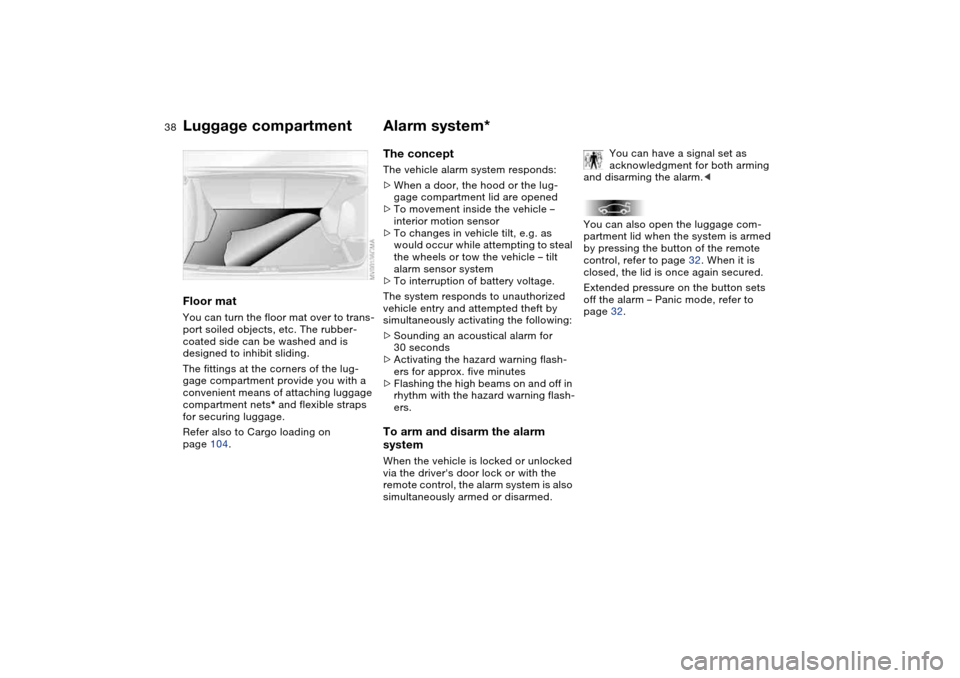
Floor matYou can turn the floor mat over to trans-
port soiled objects, etc. The rubber-
coated side can be washed and is
designed to inhibit sliding.
The fittings at the corners of the lug-
gage compartment provide you with a
convenient means of attaching luggage
compartment nets* and flexible straps
for securing luggage.
Refer also to Cargo loading on
page 104.
Alarm system*The conceptThe vehicle alarm system responds:
>When a door, the hood or the lug-
gage compartment lid are opened
>To movement inside the vehicle –
interior motion sensor
>To changes in vehicle tilt, e.g. as
would occur while attempting to steal
the wheels or tow the vehicle – tilt
alarm sensor system
>To interruption of battery voltage.
The system responds to unauthorized
vehicle entry and attempted theft by
simultaneously activating the following:
>Sounding an acoustical alarm for
30 seconds
>Activating the hazard warning flash-
ers for approx. five minutes
>Flashing the high beams on and off in
rhythm with the hazard warning flash-
ers.To arm and disarm the alarm
systemWhen the vehicle is locked or unlocked
via the driver's door lock or with the
remote control, the alarm system is also
simultaneously armed or disarmed.You can have a signal set as
acknowledgment for both arming
and disarming the alarm.<
You can also open the luggage com-
partment lid when the system is armed
by pressing the button of the remote
control, refer to page 32. When it is
closed, the lid is once again secured.
Extended pressure on the button sets
off the alarm – Panic mode, refer to
page 32.
Luggage compartment
Page 68 of 170
68
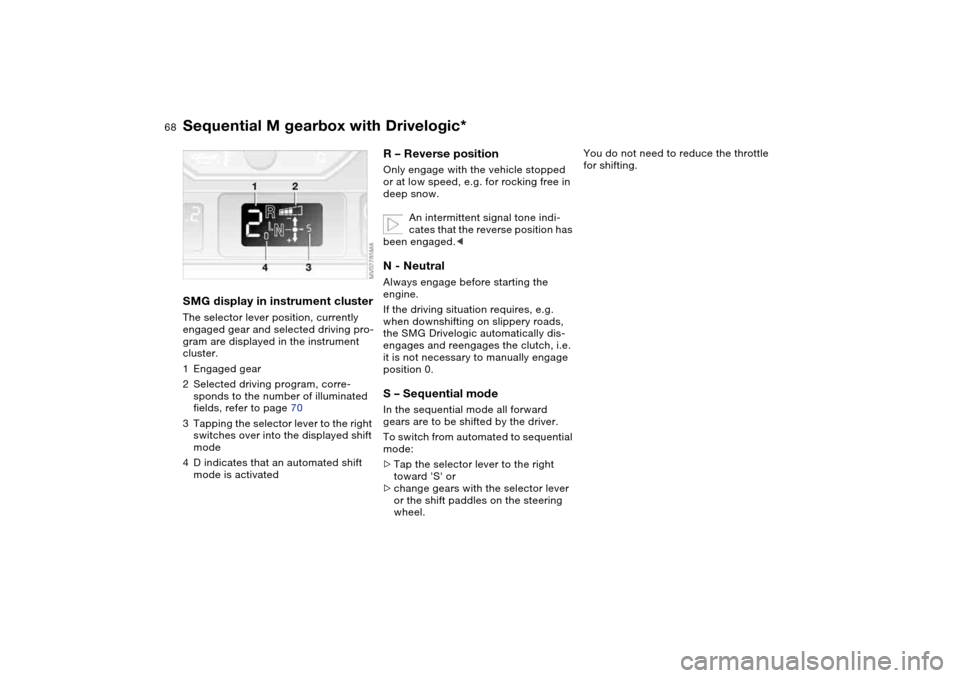
SMG display in instrument clusterThe selector lever position, currently
engaged gear and selected driving pro-
gram are displayed in the instrument
cluster.
1Engaged gear
2Selected driving program, corre-
sponds to the number of illuminated
fields, refer to page 70
3Tapping the selector lever to the right
switches over into the displayed shift
mode
4D indicates that an automated shift
mode is activated
R – Reverse position Only engage with the vehicle stopped
or at low speed, e.g. for rocking free in
deep snow.
An intermittent signal tone indi-
cates that the reverse position has
been engaged.
If the driving situation requires, e.g.
when downshifting on slippery roads,
the SMG Drivelogic automatically dis-
engages and reengages the clutch, i.e.
it is not necessary to manually engage
position 0.S – Sequential modeIn the sequential mode all forward
gears are to be shifted by the driver.
To switch from automated to sequential
mode:
>Tap the selector lever to the right
toward 'S' or
>change gears with the selector lever
or the shift paddles on the steering
wheel.
You do not need to reduce the throttle
for shifting.
Sequential M gearbox with Drivelogic*
Page 71 of 170
71
Indicator lamp
The gearbox indicator lamp in
the instrument cluster goes out
after the engine is started.
>If it does not go out, or if it lights up
during driving, a malfunction has
occurred. The available functions
may be limited under certain circum-
stances.
Drive carefully and with the Dynamic
Stability Control (DSC) activated.
Have the system checked by the
nearest BMW center
>If the indicator lamp flashes while
driving, the system is overloaded.
Avoid high loads until the indicator
lamp goes out again permanently.
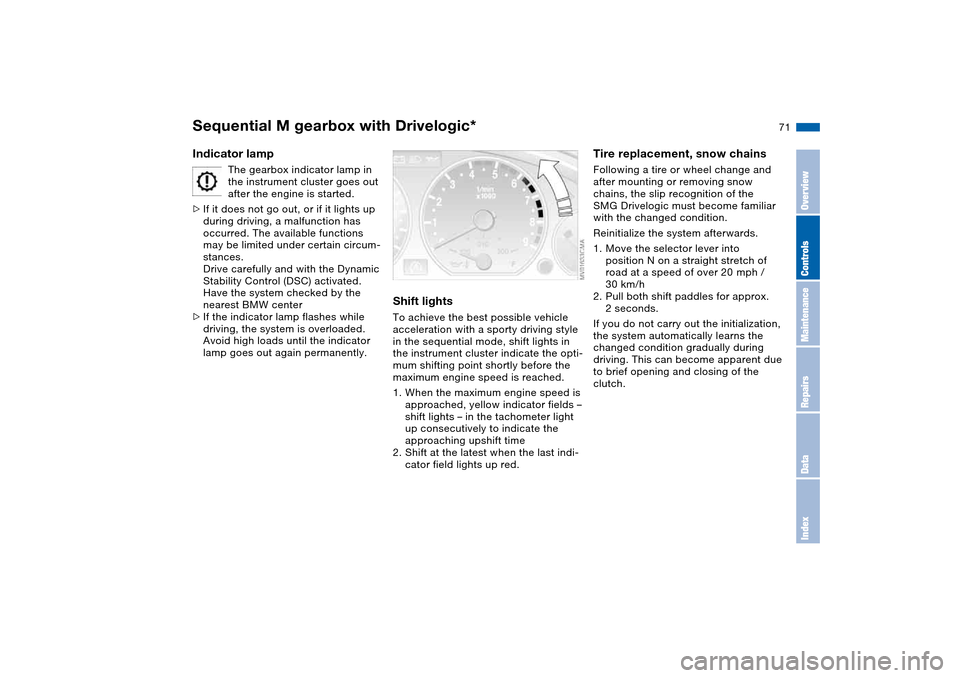
Shift lightsTo achieve the best possible vehicle
acceleration with a sporty driving style
in the sequential mode, shift lights in
the instrument cluster indicate the opti-
mum shifting point shortly before the
maximum engine speed is reached.
1. When the maximum engine speed is
approached, yellow indicator fields –
shift lights – in the tachometer light
up consecutively to indicate the
approaching upshift time
2. Shift at the latest when the last indi-
cator field lights up red.
Tire replacement, snow chainsFollowing a tire or wheel change and
after mounting or removing snow
chains, the slip recognition of the
SMG Drivelogic must become familiar
with the changed condition.
Reinitialize the system afterwards.
1. Move the selector lever into
position N on a straight stretch of
road at a speed of over 20 mph /
30 km/h
2. Pull both shift paddles for approx.
2 seconds.
If you do not carry out the initialization,
the system automatically learns the
changed condition gradually during
driving. This can become apparent due
to brief opening and closing of the
clutch.
Sequential M gearbox with Drivelogic*
OverviewControlsMaintenanceRepairsDataIndex
Page 85 of 170
85
System limitations
The Flat Tire Monitor cannot pro-
vide you with advance warning of
sudden and severe tire damage caused
by external factors and does not detect
the balanced and very gradual pressure
loss that takes place in all four tires
over an extended period of time.<
On the other hand, the following situa-
tions can lead to a delayed detection of
pressure loss and even to the system
not functioning:
>Driving on snow-covered or slippery
roads
>Performance-oriented driving: slip at
the drive wheels, high levels of lateral
acceleration
>When driving with snow chains, false
warnings and undetected pressure
losses may occur.
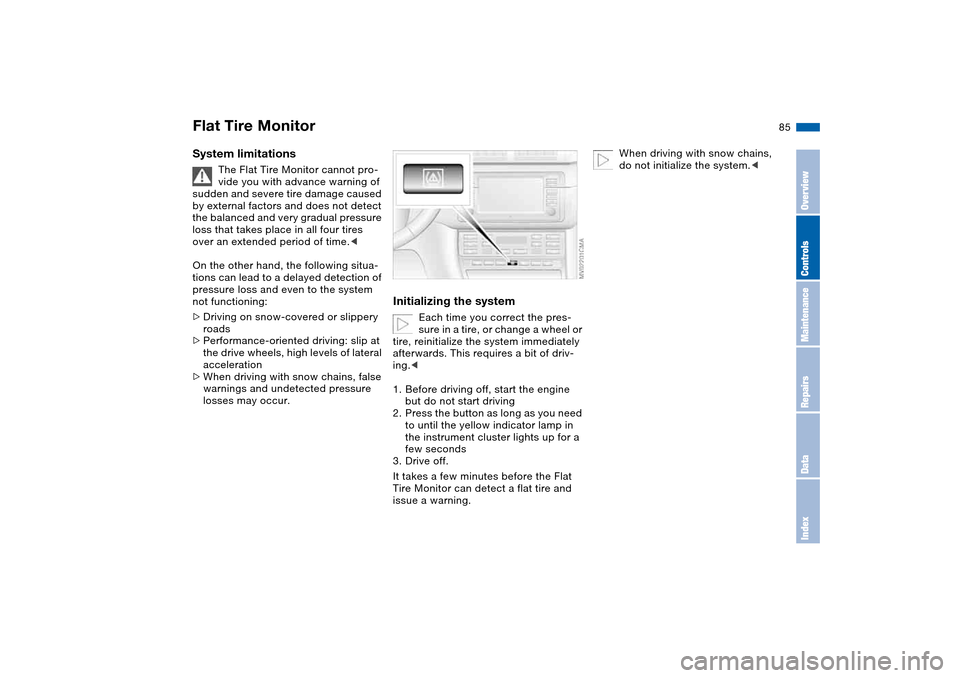
Initializing the system
Each time you correct the pres-
sure in a tire, or change a wheel or
tire, reinitialize the system immediately
afterwards. This requires a bit of driv-
ing.<
1. Before driving off, start the engine
but do not start driving
2. Press the button as long as you need
to until the yellow indicator lamp in
the instrument cluster lights up for a
few seconds
3. Drive off.
It takes a few minutes before the Flat
Tire Monitor can detect a flat tire and
issue a warning.
When driving with snow chains,
do not initialize the system.<
Flat Tire Monitor
OverviewControlsMaintenanceRepairsDataIndex
Page 112 of 170
112
Antilock Brake System (ABS)The conceptABS keeps the wheels from locking
during braking, thereby enhancing
active driving safety.Braking with ABSIf you are in a situation that requires full
braking, you will exploit the full benefits
of the ABS system if you apply maxi-
mum pedal pressure – panic stop.
Since the vehicle maintains steering
responsiveness, you can avoid possible
obstacles with a minimum of steering
effort, despite the full brake application.
Pulsation at the brake pedal combines
with sounds from the hydraulic circuits
to indicate to the driver that ABS is in
its active mode.Dynamic Brake Control (DBC)DBC is included in the DSC, refer to
page 83.
If you apply the brakes rapidly, this sys-
tem automatically generates maximum
braking force boost and thus helps to
achieve the shortest possible braking
distance in panic braking situations. All
of the benefits of the ABS are exploited
under these circumstances.Do not reduce the pressure on the
brake pedal for the duration of the
brake application. When the brake
pedal is released, the DBC is deacti-
vated.
Cornering Brake Control (CBC)CBC is an advanced engineering
design of the ABS. When braking while
cornering at high speed or braking dur-
ing high lateral acceleration, or when
braking during a lane change, vehicle
stability is improved and steering
response is enhanced.
Brake systemBrake fluid levelLow brake fluid level in the reservoir
combined with longer than usual pedal
travel may indicate a defect in one of
the brake system's hydraulic circuits.
Proceed to the nearest BMW cen-
ter. Higher brake application pres-
sure may be necessary when stopping,
and the vehicle may exhibit a slight ten-
dency to pull to one side. Brake dis-
tances may even be longer. Please
remember to adapt your driving style
accordingly.
the vehicle is not used at all, and in
operating conditions where brake appli-
cations are less frequent, there is an
increased tendency for corrosion of the
rotors and accumulation of contamina-
tion on the brake pads. This occurs
because the minimal pressure that must
be exerted by the pads to clean the
rotors by brake applications is not
reached.
Page 115 of 170
115
Do not drive on a deflated – flat –
tire. A flat tire greatly impairs
steering and braking response, and can
lead to complete loss of control over
the vehicle.
Avoid overloading the vehicle so that
the permitted load on the tires is not
exceeded. Overloading can lead to
overheating and internal tire damage.
This can result in a sudden loss of tire
inflation pressure.
Unusual vibrations encountered during
normal vehicle operation can indicate
tire failure or some other vehicle defect.
This type of problem can be caused by
contact with curbs, etc. This is also true
for irregularities in the vehicle's han-
dling characteristics, such as a pro-
nounced tendency to pull to the left or
right. Should this occur, respond by
immediately reducing your speed. Pro-
ceed carefully to the nearest BMW cen-
ter or professional tire center, or have
the vehicle towed in to have it, its
wheels or its tires inspected.
Tire damage, up to and including blow-
outs, can endanger the lives of both the
vehicle occupants and other road
users.<
Tire replacementTo maintain good handling and vehicle
response, use only tires of a single
tread configuration from a single manu-
facturer.
Comply with the specified tire inflation
pressures – and be sure to have the
wheel and tire assembly balanced
every time you change a tire or wheel.DOT quality gradesTreadwear
Traction AA A B C
Temperature A B C
All passenger car tires must con-
form to Federal Safety Require-
ments in addition to these grades.
when tested under controlled condi-
tions on a specified government test
course.
For example, a tire graded 150 would
wear one and one-half – 1
1/2 – times as
well on the government course as a tire
graded 100. The relative performance
of tires depends upon the actual condi-
tions of their use, however, and may
depart significantly from the norm due
to variations in driving habits, service
practices and differences in road char-
acteristics and climate.TractionThe traction grades, from highest to
lowest, are AA, A, B and C.
Those grades represent the tire's ability
to stop on wet pavement as measured
under controlled conditions on speci-
fied government test surfaces of
asphalt and concrete. A tire marked C
may have poor traction performance.
The traction grade assigned to
this tire is based on straight-
ahead braking traction tests, and does
not include acceleration, cornering,
hydroplaning, or peak traction charac-
teristics.
tire's resistance to the generation of
heat and its ability to dissipate heat
when tested under controlled condi-
tions on a specified indoor laboratory
test wheel.
Tire condition
OverviewControlsMaintenanceRepairsDataIndex
Page 116 of 170
116
Sustained high temperature can cause
the material of the tire to degenerate
and reduce tire life, and excessive tem-
perature can lead to sudden tire failure.
The grade C corresponds to a level of
performance which all passenger car
tires must meet under the Federal
Motor Vehicle Safety Standard No. 109.
Grades B and A represent higher levels
of performance on the laboratory test
wheel than the minimum required by
law.
The temperature grade for this tire
is established for a tire that is
properly inflated and not overloaded.
Excessive speed, under-inflation, or
excessive loading, either separately or
in combination, can cause heat buildup
and possible tire failure.
tread shoulder and maximum section
width. For example:
Treadwear 200 Traction AA
Temperature A
Tire ageBMW recommends the replacement of
all tires when the tires are no more than
6 years old, even if a tire life of 10 years
is possible.
The date on which the tire was manu-
factured is indicated by the code on the
sidewall:
DOT ... 3603 indicates that the tire was
manufactured in week 36 of the year
2003.Following wheel/tire changesComply with the specified tire inflation
pressures – and be sure to have the
wheel and tire assembly balanced
every time you change a tire or wheel.
Following wheel and/or tire changes
you will need to reinitialize both the Flat
Tire Monitor and the sequential M gear-
box with Drivelogic, refer to pages 71,
85.
Tire replacement
Page 118 of 170
118
Winter tiresChoosing the right tireBMW recommends the use of winter
tires for operation under winter road
conditions. While all-season tires – with
M+S designation – provide better winter
traction than the corresponding sum-
mer tires, they generally do not achieve
the performance of winter tires.
In the interest of safe tracking and
steering response, install radial tires
made by the same manufacturer and
with the same tread configuration on all
four wheels if you elect to mount winter
tires.
When mounting winter wheels,
observe the different recesses of
the front and rear wheels, as otherwise
damage may result.<
Do not exceed specified
maximum speeds
Never exceed the maximum
speed for which the winter tires
are rated.
Unprofessional attempts by laymen to
service tires can lead to damage and
accidents.
Have this work performed by skilled
professionals only. Your BMW center
will be glad to assist you with both their
expertise and the proper equipment for
your vehicle.<
Tire condition, tire pressureAt tread depths below approx. 3/16 in /
4 mm, tire performance under winter
driving conditions deteriorates notice-
ably. Worn tires should therefore be
replaced for safety considerations.
Comply with the specified tire inflation
pressures – and be sure to have the
wheel and tire assembly balanced
every time you change a tire or wheel.
Snow chains*Only certain snow chains have been
tested by BMW and determined and
approved as roadworthy. Consult your
BMW center for more information.
BMW recommends using only these
approved fine-link snow chains. Use
them in pairs on winter tires, but only on
both rear wheels.
Comply with all manufacturer's safety
precautions when mounting the chains.
Do not exceed a maximum speed of
30 mph / 50 km/h when using snow
chains.
After mounting or removing snow
chains, always reinitialize the sequential
M gearbox with Drivelogic, refer to
page 71.
It is not possible to mount snow
chains on tires with 18-inch and
19-inch wheels.
Deactivate the Flat Tire Monitor when
using snow chains. Malfunction warn-
ings and undetected losses in pressure
are a possibility when driving with snow
chains.
For additional information, refer to
page 84.<
Page 137 of 170
137
Using the M Mobility systemTo repair a flat tire using the M Mobility
system, proceed as follows:
>Preparing the M Mobility system for
use, refer to the next column
>Components of the M Mobility sys-
tem, refer to page 138
>Filling with sealant, refer to page 138
>Distributing sealant, refer to
page 139
>Inflating tire to correct pressure, refer
to page 139.
Preparing the M Mobility system
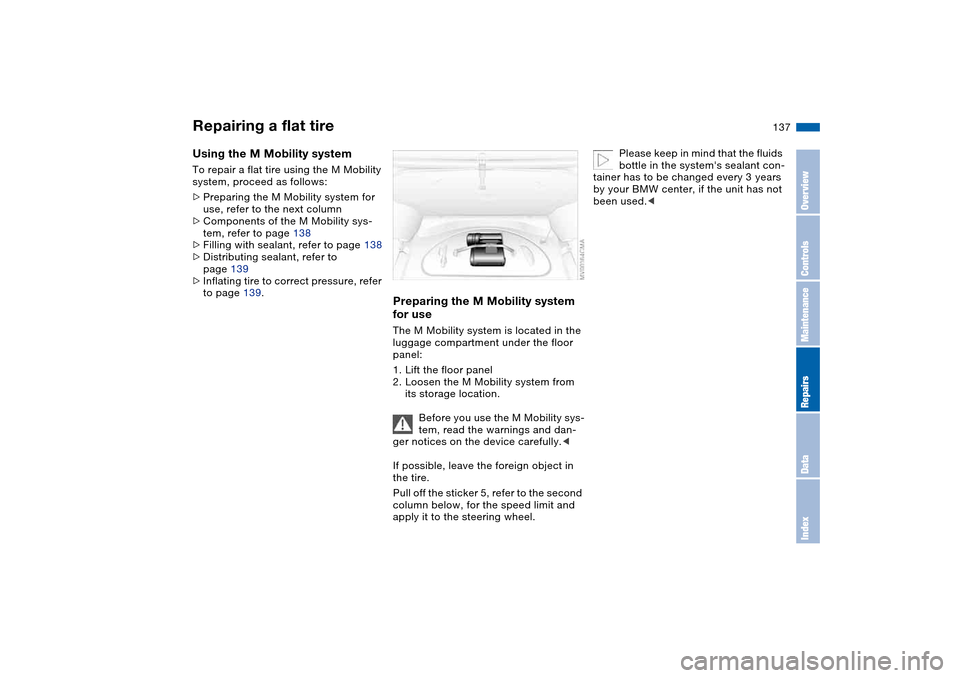
for useThe M Mobility system is located in the
luggage compartment under the floor
panel:
1. Lift the floor panel
2. Loosen the M Mobility system from
its storage location.
Before you use the M Mobility sys-
tem, read the warnings and dan-
ger notices on the device carefully.<
If possible, leave the foreign object in
the tire.
Pull off the sticker 5, refer to the second
column below, for the speed limit and
apply it to the steering wheel.
Please keep in mind that the fluids
bottle in the system's sealant con-
tainer has to be changed every 3 years
by your BMW center, if the unit has not
been used.<
Repairing a flat tire
OverviewControlsMaintenanceRepairsDataIndex
Page 157 of 170
Everything from A to Z
157
Blower
automatic climate
control 94
BMW Maintenance
System 126
BMW sports seat 45
Bore, refer to Engine
data 150
Bottle holders, see Bever-
age holders 98, 99
Brake fluid 125
indicator lamp 18, 125
level 125
Brake force display 87
Brake hydraulic system 112
Brake lamps
bulb replacement 135
indicator lamp, defective
lamp 78
Brake lights
brake force display 87
Brake pads 113
brake fluid level
18, 112, 125
breaking in 110
disc brakes 112
Brake rotors
brake system 112
breaking in 110
Brake system
brake pads, indicator
lamp 19Brake wear warning
indicator lamp 19
Brakes
ABS 112
brake fluid 125
breaking in 110
indicator/warning lamp
18, 19
parking brake 65
Break-in procedures 110
Bulb replacement 133
Bulb replacement, refer to
Lamps and bulbs 133
Buttons in steering wheel 22
C
California Proposition
65 warning 128
Can holders, see Beverage
holders 98, 99
Capacities 153
Car battery 140
Car care, refer to the Caring
for your vehicle brochure
Car keys, refer to Keys 30
Car radio, refer to the
Owner's Manual for Radio
Car telephone
preparation 99
Car telephone, refer to the
separate Owner's ManualCar vacuum cleaner, con-
necting 100
Car wash, refer to the Caring
for your vehicle brochure
Caring for headlamp cov-
ers, refer to the Caring for
your vehicle brochure 133
Carpet care, refer to the
Caring for your vehicle
brochure
Cassette operation, refer to
the Owner's Manual for
Radio/Onboard Computer
CBC Cornering Brake Con-
trol 112
warning lamp 19
CD changer, refer to the
Owner's Manual for
Radio/Onboard Computer
CD operation, refer to the
Owner's Manual for
Radio/Onboard Computer
Cellular phone 99
Center high-mount brake
lamp
bulb replacement 136
Central locking system 30
button 34
passenger
compartment 34
Charge indicator lamp 18
Check Control 78Check Gas Cap
indicator lamp 19
Child seats, refer to Child-
restraint systems 56
Child-restraint systems 56
Cigarette lighter 100
Cigarette lighter socket 100
Cleaning chrome parts, refer
to the Caring for your vehi-
cle brochure
Cleaning light alloy wheels,
refer to the Caring for your
vehicle brochure
Cleaning the vehicle, refer to
the Caring for your vehicle
brochure
Cleaning windshield 74
Clock 79
12-/24-hour mode 79
setting, refer also to the
Owner's Manual for
Radio/Onboard Computer
Closing
from inside 34
from outside 31
Clothes hooks 101, 111
Clutch
breaking in 110
Cockpit 14
Code, refer to the Owner's
Manual for Radio/Onboard
Computer
OverviewControlsMaintenanceRepairsDataIndex