mirror BMW M3 COUPE 2004 E46 Owner's Manual
[x] Cancel search | Manufacturer: BMW, Model Year: 2004, Model line: M3 COUPE, Model: BMW M3 COUPE 2004 E46Pages: 170, PDF Size: 2.62 MB
Page 8 of 170
Contents
Notes
About this Owner's Manual4
Additional sources of
information4
Symbols used4
Your individual vehicle5
Status at time of printing5
For your own safety5
Symbol on vehicle parts6
Service and warranty7
Reporting safety defects7
Overview
Cockpit14
Instrument cluster16
Indicator and warning lamps18
Buttons in steering wheel22
Hazard warning triangle*23
First-aid kit*23
Refueling24
Fuel specifications25
Tire inflation pressure25
Controls and features
Opening and closing:
Keys30
Central locking system30
Opening and closing – via the
remote control31
Opening and closing – via the
door lock33
Opening and closing – from the
inside34
Luggage compartment lid35
Luggage compartment37
Alarm system*38
Electric power windows40
Glass sunroof, electric*41
To adjust:
Safe seating position43
Seats44
Manual seat adjustment44
Power seat adjustment*45
Head restraints46
Entering the rear47
Safety belts47
Seat and mirror memory*49
Seat heating*50
Steering wheel51
Mirrors51
Passenger safety systems:
Airbags53
Transporting children safely56
Vehicle Memory, Key
Memory60
Page 39 of 170
39
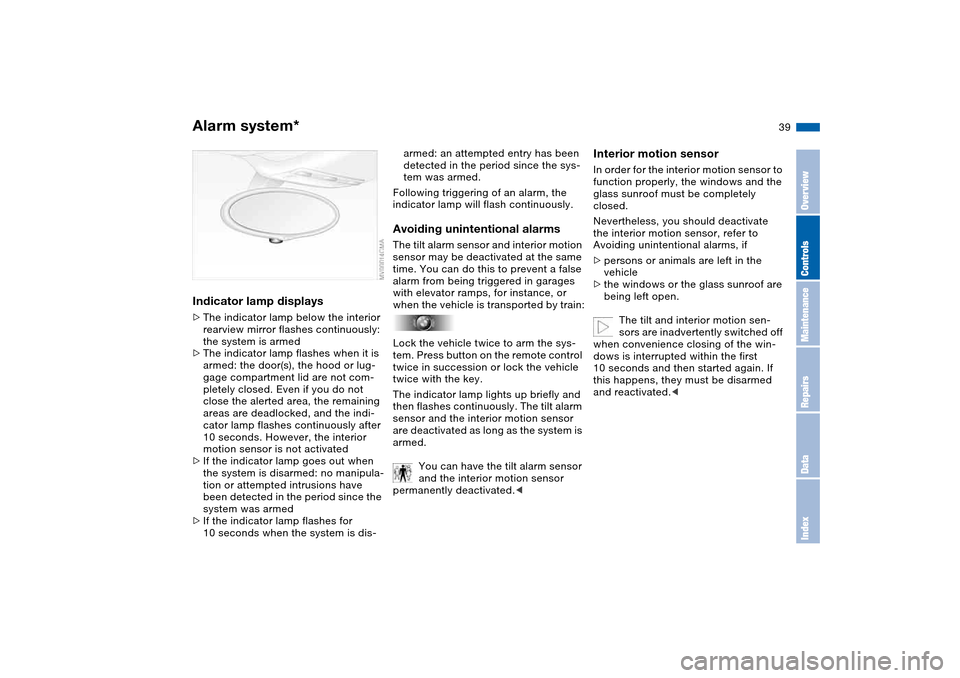
Indicator lamp displays>The indicator lamp below the interior
rearview mirror flashes continuously:
the system is armed
>The indicator lamp flashes when it is
armed: the door(s), the hood or lug-
gage compartment lid are not com-
pletely closed. Even if you do not
close the alerted area, the remaining
areas are deadlocked, and the indi-
cator lamp flashes continuously after
10 seconds. However, the interior
motion sensor is not activated
>If the indicator lamp goes out when
the system is disarmed: no manipula-
tion or attempted intrusions have
been detected in the period since the
system was armed
>If the indicator lamp flashes for
10 seconds when the system is dis-
armed: an attempted entry has been
detected in the period since the sys-
tem was armed.
Following triggering of an alarm, the
indicator lamp will flash continuously.Avoiding unintentional alarmsThe tilt alarm sensor and interior motion
sensor may be deactivated at the same
time. You can do this to prevent a false
alarm from being triggered in garages
with elevator ramps, for instance, or
when the vehicle is transported by train:
Lock the vehicle twice to arm the sys-
tem. Press button on the remote control
twice in succession or lock the vehicle
twice with the key.
The indicator lamp lights up briefly and
then flashes continuously. The tilt alarm
sensor and the interior motion sensor
are deactivated as long as the system is
armed.
You can have the tilt alarm sensor
and the interior motion sensor
permanently deactivated.<
Interior motion sensorIn order for the interior motion sensor to
function properly, the windows and the
glass sunroof must be completely
closed.
Nevertheless, you should deactivate
the interior motion sensor, refer to
Avoiding unintentional alarms, if
>persons or animals are left in the
vehicle
>the windows or the glass sunroof are
being left open.
The tilt and interior motion sen-
sors are inadvertently switched off
when convenience closing of the win-
dows is interrupted within the first
10 seconds and then started again. If
this happens, they must be disarmed
and reactivated.<
Alarm system*
OverviewControlsMaintenanceRepairsDataIndex
Page 49 of 170
49
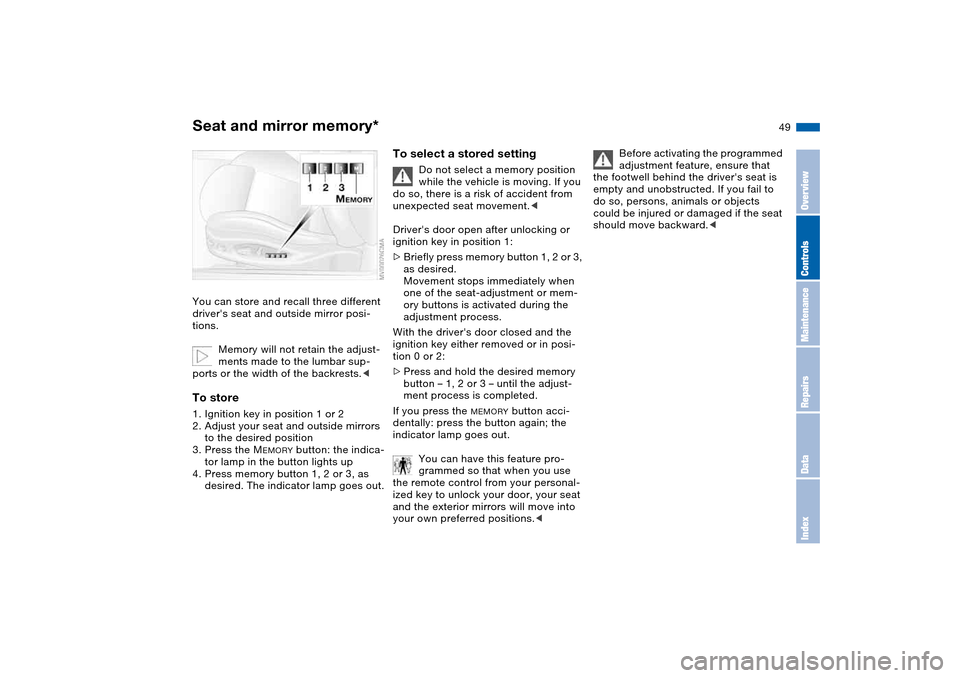
Seat and mirror memory*You can store and recall three different
driver's seat and outside mirror posi-
tions.
Memory will not retain the adjust-
ments made to the lumbar sup-
ports or the width of the backrests.
to the desired position
3. Press the M
EMORY
button: the indica-
tor lamp in the button lights up
4. Press memory button 1, 2 or 3, as
desired. The indicator lamp goes out.
To select a stored setting
Do not select a memory position
while the vehicle is moving. If you
do so, there is a risk of accident from
unexpected seat movement.<
Driver's door open after unlocking or
ignition key in position 1:
>Briefly press memory button 1, 2 or 3,
as desired.
Movement stops immediately when
one of the seat-adjustment or mem-
ory buttons is activated during the
adjustment process.
With the driver's door closed and the
ignition key either removed or in posi-
tion 0 or 2:
>Press and hold the desired memory
button – 1, 2 or 3 – until the adjust-
ment process is completed.
If you press the
MEMORY
button acci-
dentally: press the button again; the
indicator lamp goes out.
You can have this feature pro-
grammed so that when you use
the remote control from your personal-
ized key to unlock your door, your seat
and the exterior mirrors will move into
your own preferred positions.<
Before activating the programmed
adjustment feature, ensure that
the footwell behind the driver's seat is
empty and unobstructed. If you fail to
do so, persons, animals or objects
could be injured or damaged if the seat
should move backward.<
OverviewControlsMaintenanceRepairsDataIndex
Page 50 of 170
50
Passenger-side exterior mirror tilt
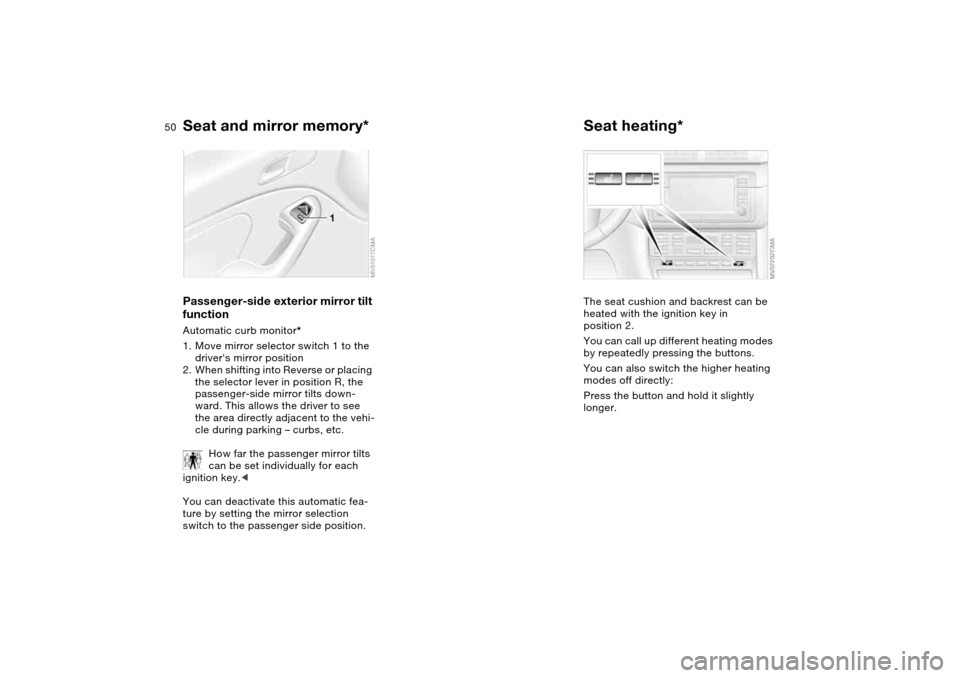
functionAutomatic curb monitor*
1. Move mirror selector switch 1 to the
driver's mirror position
2. When shifting into Reverse or placing
the selector lever in position R, the
passenger-side mirror tilts down-
ward. This allows the driver to see
the area directly adjacent to the vehi-
cle during parking – curbs, etc.
How far the passenger mirror tilts
can be set individually for each
ignition key.<
You can deactivate this automatic fea-
ture by setting the mirror selection
switch to the passenger side position.
Seat heating*The seat cushion and backrest can be
heated with the ignition key in
position 2.
You can call up different heating modes
by repeatedly pressing the buttons.
You can also switch the higher heating
modes off directly:
Press the button and hold it slightly
longer.
Seat and mirror memory*
Page 51 of 170
51
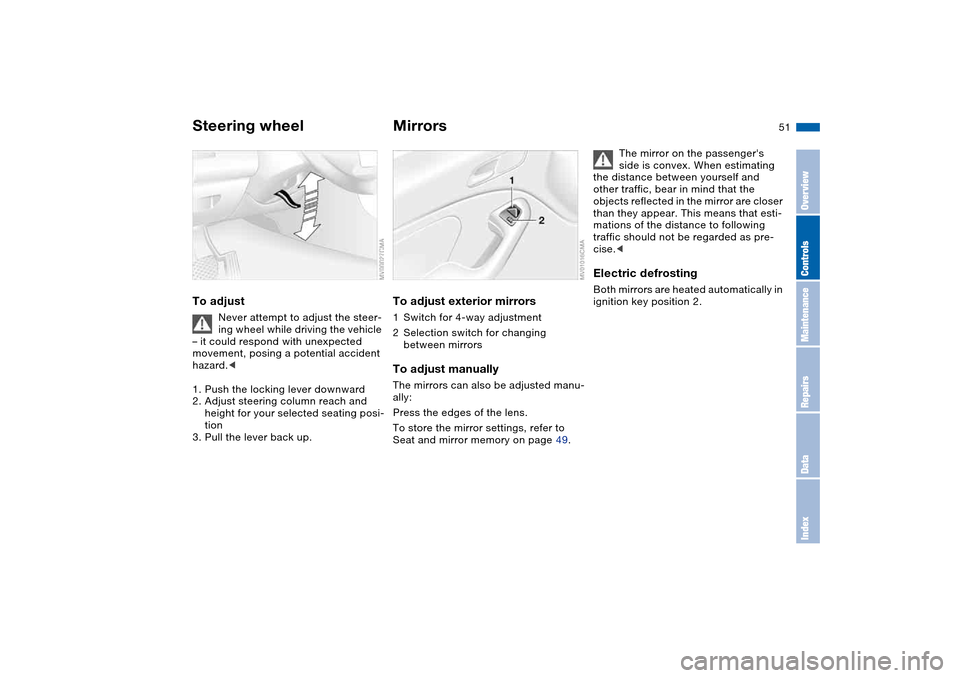
Steering wheelTo adjust
Never attempt to adjust the steer-
ing wheel while driving the vehicle
– it could respond with unexpected
movement, posing a potential accident
hazard.<
1. Push the locking lever downward
2. Adjust steering column reach and
height for your selected seating posi-
tion
3. Pull the lever back up.
MirrorsTo adjust exterior mirrors1Switch for 4-way adjustment
2Selection switch for changing
between mirrorsTo adjust manuallyThe mirrors can also be adjusted manu-
ally:
Press the edges of the lens.
To store the mirror settings, refer to
Seat and mirror memory on page 49.
The mirror on the passenger's
side is convex. When estimating
the distance between yourself and
other traffic, bear in mind that the
objects reflected in the mirror are closer
than they appear. This means that esti-
mations of the distance to following
traffic should not be regarded as pre-
cise.<
Electric defrostingBoth mirrors are heated automatically in
ignition key position 2.
OverviewControlsMaintenanceRepairsDataIndex
Page 52 of 170
52
Interior rearview mirror with
automatic dimming featureThis mirror automatically responds to
ambient light and headlamp glare from
following vehicles by dimming through
an infinitely variable range and auto-
matically reverts to its clear, undimmed
setting whenever you shift into Reverse
or move the selector lever into
position R.
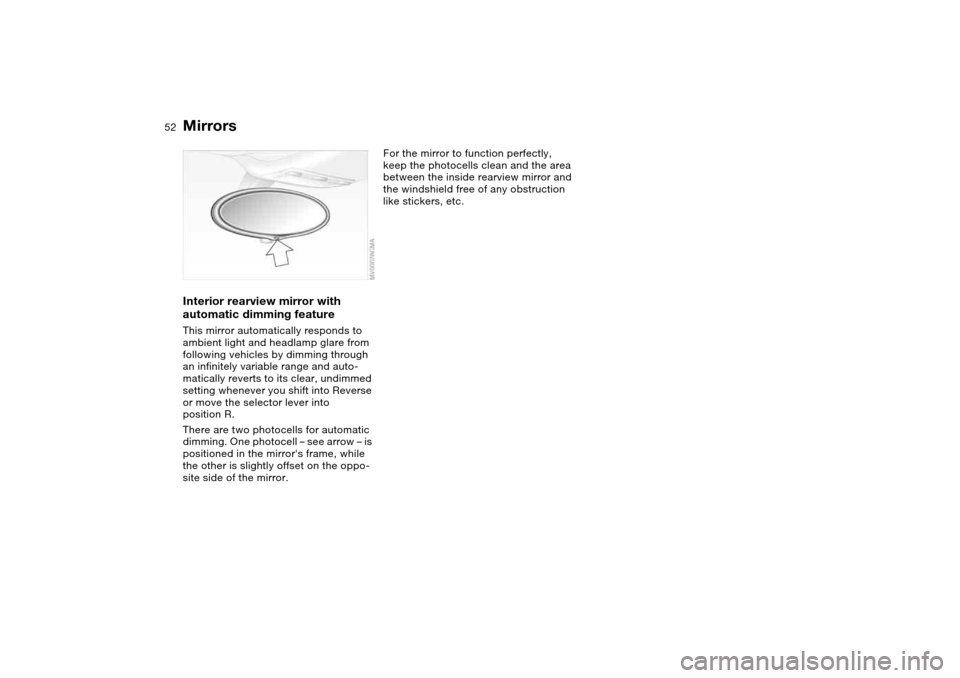
There are two photocells for automatic
dimming. One photocell – see arrow – is
positioned in the mirror's frame, while
the other is slightly offset on the oppo-
site side of the mirror.
For the mirror to function perfectly,
keep the photocells clean and the area
between the inside rearview mirror and
the windshield free of any obstruction
like stickers, etc.
Mirrors
Page 60 of 170
60
Vehicle Memory, Key MemoryHow the system functionsYou have probably frequently wished
that you could configure individual
functions of your vehicles to reflect your
own personal requirements. In engi-
neering your vehicle, BMW has pro-
vided for a number of options for per-
sonal adjustment that can be
programmed into your vehicle at your
BMW center.
The available configuration data fall into
two categories, according to whether
their primary orientation is the vehicle –
Vehicle Memory – or the individual –
Key Memory. You can have up to four
different basic settings adjusted for four
different persons. The only require-
ment is that each person uses his or her
own remote control key.
When your vehicle is unlocked with the
remote control, the vehicle recognizes
the individual user by means of a data
exchange with the key, and makes
adjustments accordingly.
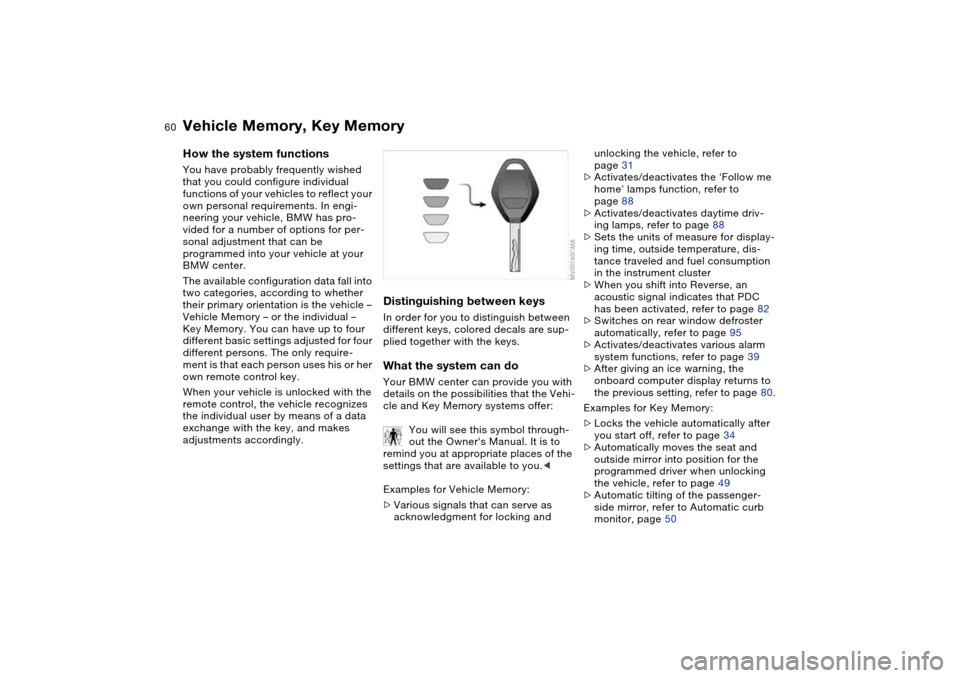
Distinguishing between keysIn order for you to distinguish between
different keys, colored decals are sup-
plied together with the keys.What the system can doYour BMW center can provide you with
details on the possibilities that the Vehi-
cle and Key Memory systems offer:
You will see this symbol through-
out the Owner's Manual. It is to
remind you at appropriate places of the
settings that are available to you.<
Examples for Vehicle Memory:
>Various signals that can serve as
acknowledgment for locking and
unlocking the vehicle, refer to
page 31
>Activates/deactivates the 'Follow me
home' lamps function, refer to
page 88
>Activates/deactivates daytime driv-
ing lamps, refer to page 88
>Sets the units of measure for display-
ing time, outside temperature, dis-
tance traveled and fuel consumption
in the instrument cluster
>When you shift into Reverse, an
acoustic signal indicates that PDC
has been activated, refer to page 82
>Switches on rear window defroster
automatically, refer to page 95
>Activates/deactivates various alarm
system functions, refer to page 39
>After giving an ice warning, the
onboard computer display returns to
the previous setting, refer to page 80.
Examples for Key Memory:
>Locks the vehicle automatically after
you start off, refer to page 34
>Automatically moves the seat and
outside mirror into position for the
programmed driver when unlocking
the vehicle, refer to page 49
>Automatic tilting of the passenger-
side mirror, refer to Automatic curb
monitor, page 50
Page 73 of 170
73
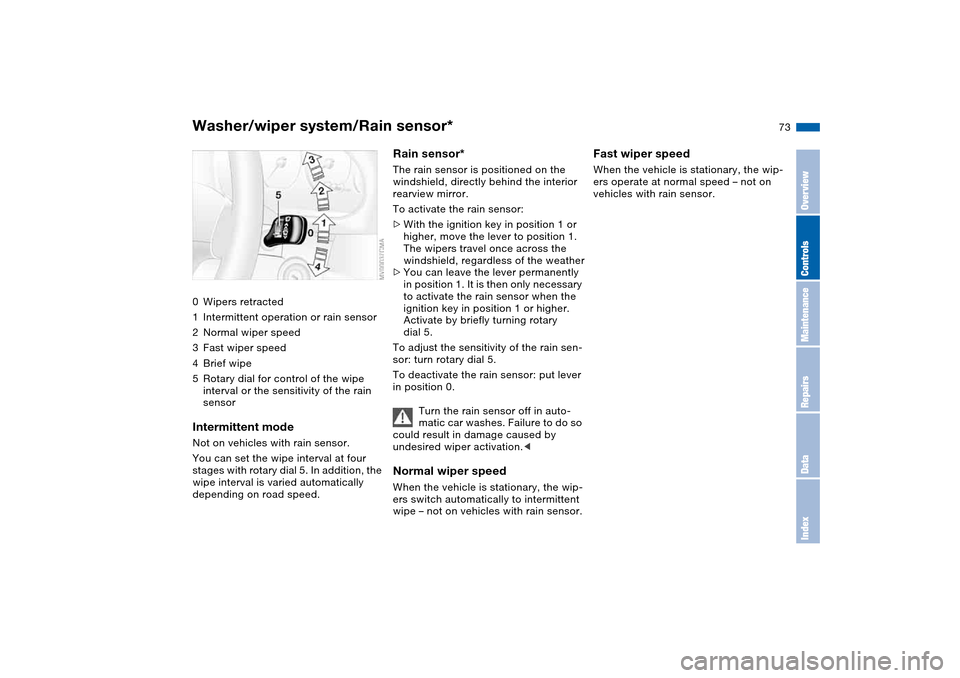
Washer/wiper system/Rain sensor*0Wipers retracted
1Intermittent operation or rain sensor
2Normal wiper speed
3Fast wiper speed
4Brief wipe
5Rotary dial for control of the wipe
interval or the sensitivity of the rain
sensorIntermittent modeNot on vehicles with rain sensor.
You can set the wipe interval at four
stages with rotary dial 5. In addition, the
wipe interval is varied automatically
depending on road speed.
Rain sensor*The rain sensor is positioned on the
windshield, directly behind the interior
rearview mirror.
To activate the rain sensor:
>With the ignition key in position 1 or
higher, move the lever to position 1.
The wipers travel once across the
windshield, regardless of the weather
>You can leave the lever permanently
in position 1. It is then only necessary
to activate the rain sensor when the
ignition key in position 1 or higher.
Activate by briefly turning rotary
dial 5.
To adjust the sensitivity of the rain sen-
sor: turn rotary dial 5.
To deactivate the rain sensor: put lever
in position 0.
Turn the rain sensor off in auto-
matic car washes. Failure to do so
could result in damage caused by
undesired wiper activation.
wipe – not on vehicles with rain sensor.
Fast wiper speedWhen the vehicle is stationary, the wip-
ers operate at normal speed – not on
vehicles with rain sensor.
OverviewControlsMaintenanceRepairsDataIndex
Page 142 of 170
142Giving and receiving assistance
Receiving assistanceThe BMW Group's Mobile Service
offers you 24-hour assistance in the
event of a breakdown, even on week-
ends and holidays.
The telephone numbers of the Mobile
Service control center in your country
are listed in the BMW Dealer Directory.
If your vehicle has the necessary equip-
ment, you can contact the Mobile Ser-
vice or issue an emergency call using
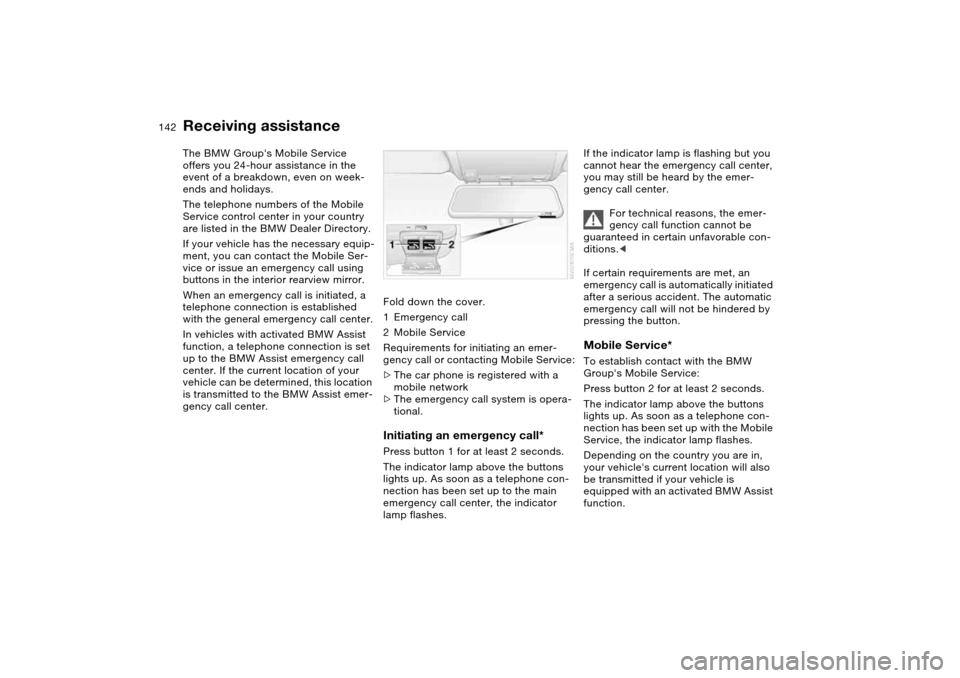
buttons in the interior rearview mirror.
When an emergency call is initiated, a
telephone connection is established
with the general emergency call center.
In vehicles with activated BMW Assist
function, a telephone connection is set
up to the BMW Assist emergency call
center. If the current location of your
vehicle can be determined, this location
is transmitted to the BMW Assist emer-
gency call center.Fold down the cover.
1Emergency call
2Mobile Service
Requirements for initiating an emer-
gency call or contacting Mobile Service:
>The car phone is registered with a
mobile network
>The emergency call system is opera-
tional.
Initiating an emergency call*Press button 1 for at least 2 seconds.
The indicator lamp above the buttons
lights up. As soon as a telephone con-
nection has been set up to the main
emergency call center, the indicator
lamp flashes.
If the indicator lamp is flashing but you
cannot hear the emergency call center,
you may still be heard by the emer-
gency call center.
For technical reasons, the emer-
gency call function cannot be
guaranteed in certain unfavorable con-
ditions.<
If certain requirements are met, an
emergency call is automatically initiated
after a serious accident. The automatic
emergency call will not be hindered by
pressing the button.Mobile Service*To establish contact with the BMW
Group's Mobile Service:
Press button 2 for at least 2 seconds.
The indicator lamp above the buttons
lights up. As soon as a telephone con-
nection has been set up with the Mobile
Service, the indicator lamp flashes.
Depending on the country you are in,
your vehicle's current location will also
be transmitted if your vehicle is
equipped with an activated BMW Assist
function.
Page 156 of 170
Everything from A to ZA
ABS Antilock Brake
System 112
indicator lamp 19
Accessories, refer to For
your own safety 5
Accident, refer to Emer-
gency call 142
Activated-charcoal filter 96
Adding brake fluid 125
Adding liquid sealant
Mobility system 138
Additional sources of infor-
mation 4
Air conditioning mode
automatic climate
control 94
Air distribution
automatic climate
control 94
Air distribution, individual 94
Air outlets, refer to Ventila-
tion 92
Air pressure, refer to Tire
inflation pressure 25, 114
Air recirculation, refer to
Recirculated-air mode 95
Air supply
automatic climate
control 94
Air, drying, refer to Air con-
ditioning mode 94Airbags 53
deactivating 53
indicator lamp 18, 55
sitting safely 43
Airing out, refer to Ventila-
tion 92
AKI, refer to Fuel specifica-
tions 25
Alarm system 38
avoiding unintentional
alarms 39
All-season tires, refer to
Winter tires 118
Alternative oil types 123
Antifreeze 124
coolant 124
washer fluid 122
Antilock Brake System
(ABS) 112
indicator lamp 19
Anti-theft system 30
Anti-theft warning system,
refer to Alarm system 38
Approved axle loads, refer
to Weights 152
Approved gross weight,
refer to Weights 152
Armrest
front 98
rear 99Artificial leather, refer to the
Caring for your vehicle
brochure
Ashtray
front 100
rear 100
Assistant systems, refer to
Dynamic Stability Control
(DSC) 83
AUC Automatic recircu-
lated-air control 95
AUTO program, refer
to Automatic air distribu-
tion 94
Automatic
air distribution 94
air supply 94
cruise control 74
headlamp control 88
Automatic car wash, refer to
the Caring for your vehicle
brochure
Automatic climate control 92
Automatic curb monitor 50
Automatic dimming, interior
rearview mirror 52
Automatic recirculated-air
control (AUC) 95
Automatic windshield
washer, refer to Rain sen-
sor 73Average fuel
consumption 81
Average speed 81
Avoiding unintentional
alarms 39
Axle loads, refer to
Weights 152
B
Backrest
adjusting 44
unlocking 47
width adjustment 46
Backrest, refer to Seat
adjustment 45
Backup lamps 66
bulb replacement 135
Bandages, refer to First-aid
kit 23
Bar, towing 145
Battery 140
charge 140
disposal 140
indicator lamp 18
jump-starting 143
remote control 30, 31
Battery charge current 18
Belts, refer to Safety
belts 47
Beverage holders 98, 99