auto start BMW M3 SEDAN 2009 E90 Owner's Manual
[x] Cancel search | Manufacturer: BMW, Model Year: 2009, Model line: M3 SEDAN, Model: BMW M3 SEDAN 2009 E90Pages: 246, PDF Size: 11.68 MB
Page 17 of 246
At a glance
15Reference
Controls
Driving tips
Communications
Navigation
Entertainment
Mobility
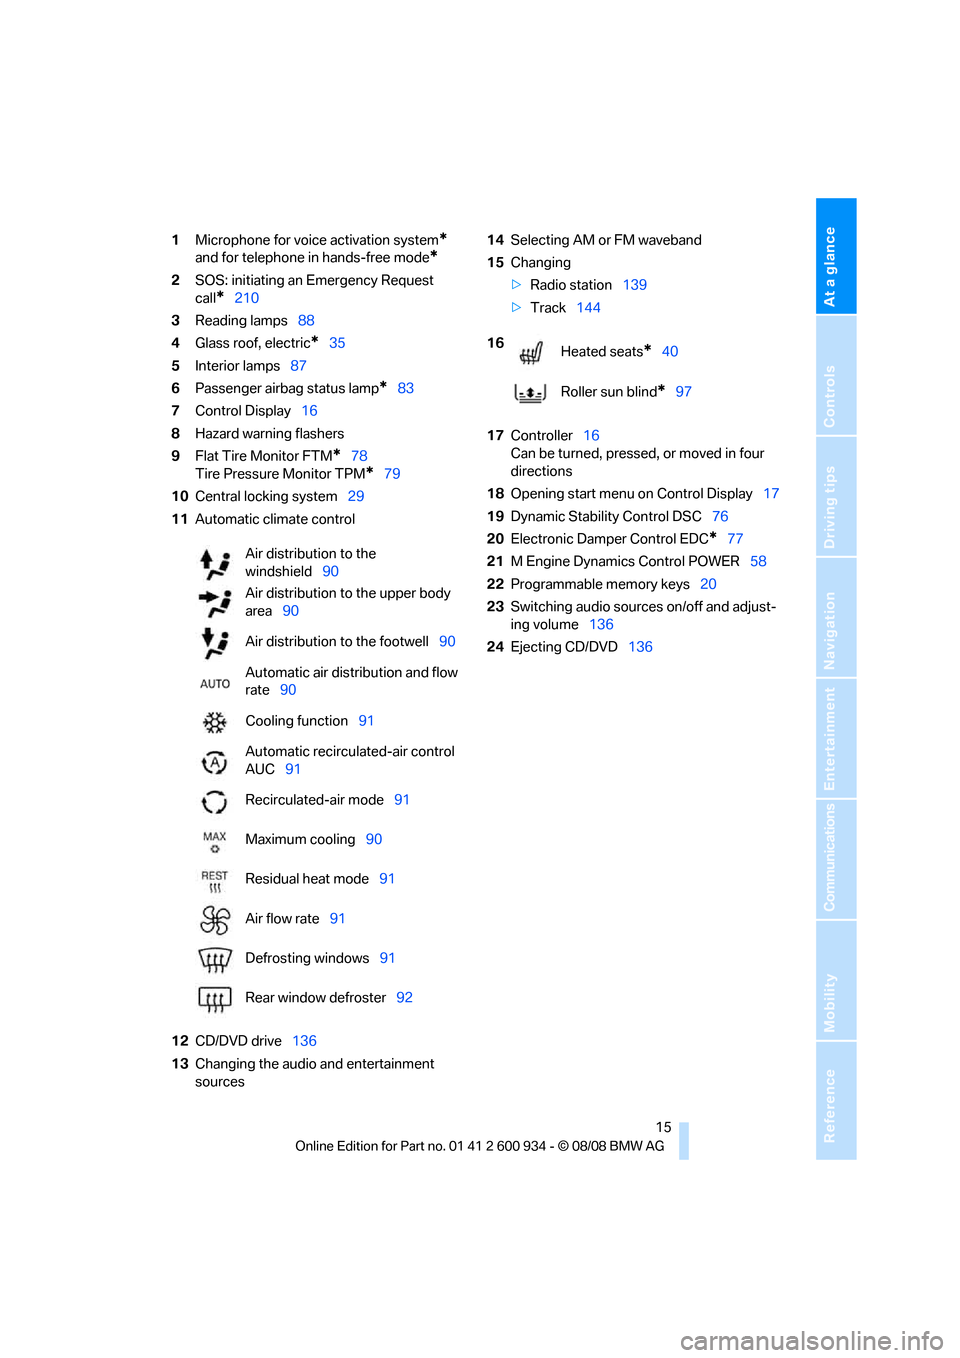
1Microphone for voice activation system*
and for telephone in hands-free mode*
2SOS: initiating an Emergency Request
call
*210
3Reading lamps88
4Glass roof, electric
*35
5Interior lamps87
6Passenger airbag status lamp
*83
7Control Display16
8Hazard warning flashers
9Flat Tire Monitor FTM
*78
Tire Pressure Monitor TPM
*79
10Central locking system29
11Automatic climate control
12CD/DVD drive136
13Changing the audio and entertainment
sources14Selecting AM or FM waveband
15Changing
>Radio station139
>Track144
17Controller16
Can be turned, pressed, or moved in four
directions
18Opening start menu on Control Display17
19Dynamic Stability Control DSC76
20Electronic Damper Control EDC
*77
21M Engine Dynamics Control POWER58
22Programmable memory keys20
23Switching audio sources on/off and adjust-
ing volume136
24Ejecting CD/DVD136 Air distribution to the
windshield90
Air distribution to the upper body
area90
Air distribution to the footwell90
Automatic air distribution and flow
rate90
Cooling function91
Automatic recirculated-air control
AUC91
Recirculated-air mode91
Maximum cooling90
Residual heat mode91
Air flow rate91
Defrosting windows91
Rear window defroster92
16
Heated seats*40
Roller sun blind
*97
ba8_E90M3_cic.book Seite 15 Dienstag, 19. August 2008 11:51 11
Page 29 of 246
Controls
27Reference
At a glance
Driving tips
Communications
Navigation
Entertainment
Mobility
>Calling up the preferred program of the M
Engine Dynamics Control POWER and
Electronic Damper Control EDC
* when
starting the vehicle, refer to Configuring
settings on page44
>Triple turn signal activation, refer to
page58
>Settings for the displays on the Control Dis-
play and in the instrument cluster:
>12h/24h format of the clock, refer to
page69
>Date format, refer to page70
>Brightness of Control Display, refer to
page73
>Language on the Control Display, refer
to page73
>Units of measure, refer to page65
>Show visual warning for Park Distance Con-
trol PDC
*, refer to page75
>Light settings:
>Welcome lamps, refer to page85
>Pathway lighting, refer to page86
>Daytime running lamps, refer to page86
>Automatic climate control: activating/deac-
tivating AUTO program, cooling function
and automatic recirculated-air control, set-
ting temperature, air flow rate and distribu-
tion, refer to page90 ff
>Entertainment:
>Audio volume, refer to page136
>Tone control, refer to page136
>Speed-dependent volume control, refer
to page137
Central locking system
The concept
The central locking system functions when the
driver's door is closed.
The system simultaneously engages and
releases the locks on the following:
>Doors>Luggage compartment lid
>Fuel filler door
Operating from outside
>Via the remote control
>Via the door lock
*
>In cars with convenient access*, via the
handles on the driver's and front passen-
ger's doors
In addition, if the remote control is used, the
welcome lamps, interior lamps and the door's
courtesy lamps
* are switched on or off. The
alarm system
* is also armed or disarmed.
For further details of the alarm system,
refer to
page31.
Operating from inside
By means of the button for central locking, refer
to page29.
In the event of a sufficiently severe accident, the
central locking system unlocks automatically. In
addition, the hazard warning flashers and inte-
rior lamps come on.
Opening and closing:
Using the remote control
Persons or animals in a parked vehicle
could lock the doors from the inside. You
should therefore take the remote control with
you when you leave the vehicle so that the latter
can be opened from outside.<
Unlocking
Press the button.
The interior lamps, the courtesy lamps
* and the
welcome lamps come on.
Setting unlocking characteristics
You can set whether only the driver's door or
the entire vehicle is to be unlocked when the
button is pressed for the first time.
iDrive, for operating principle refer to page16.
1."Settings"
2."Door locks"
ba8_E90M3_cic.book Seite 27 Dienstag, 19. August 2008 11:51 11
Page 32 of 246
Opening and closing
30
Automatic locking
You can also set the situations in which the car
locks:
iDrive, for operating principle refer to page16.
1."Settings"
2."Door locks"
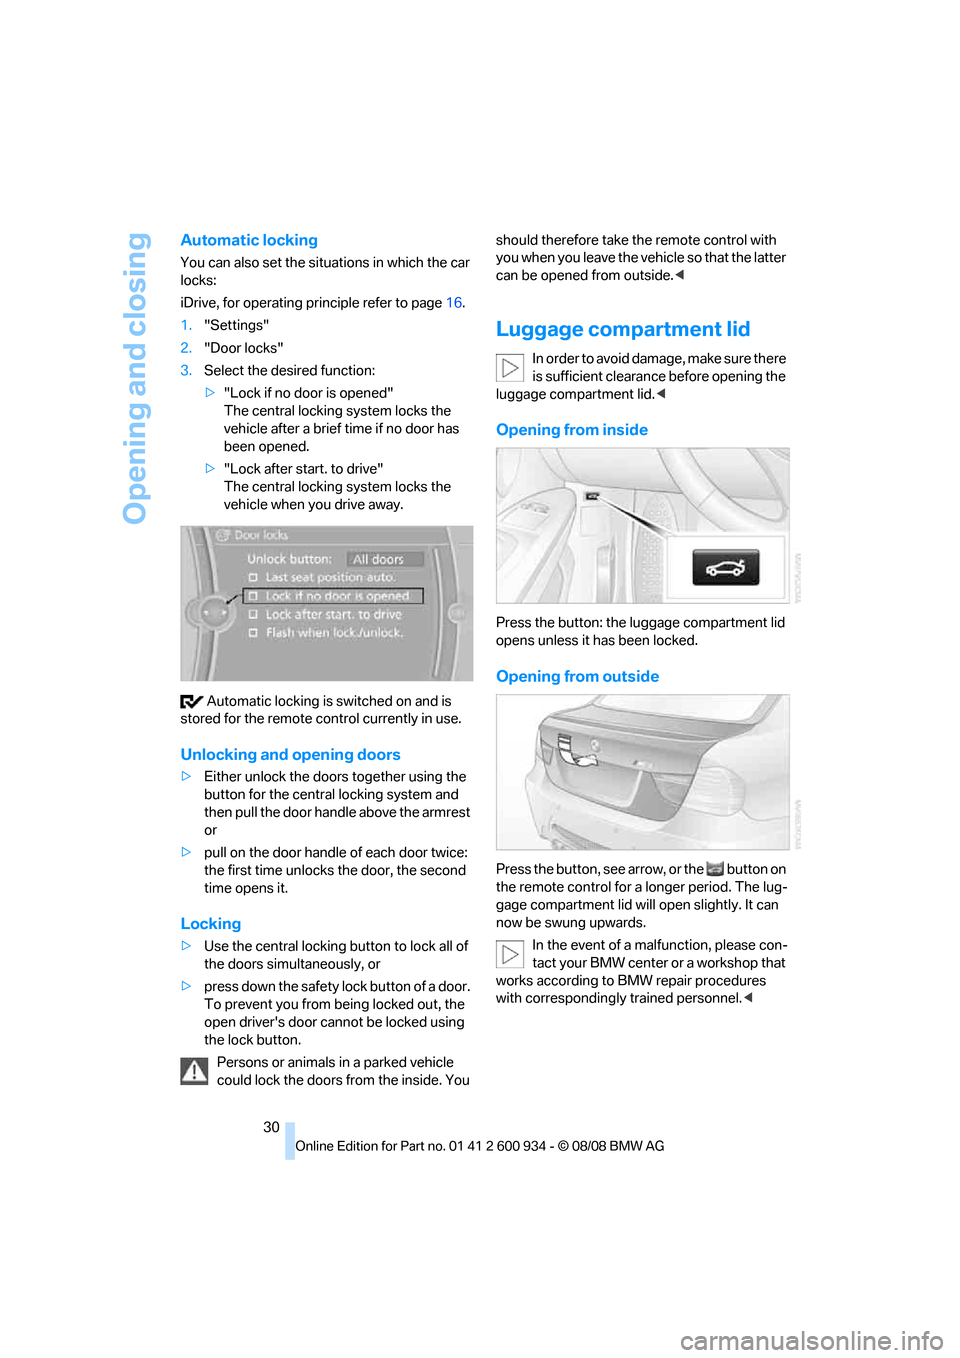
3.Select the desired function:
>"Lock if no door is opened"
The central locking system locks the
vehicle after a brief time if no door has
been opened.
>"Lock after start. to drive"
The central locking system locks the
vehicle when you drive away.
Automatic locking is switched on and is
stored for the remote control currently in use.
Unlocking and opening doors
>Either unlock the doors together using the
button for the central locking system and
then pull the door handle above the armrest
or
>pull on the door handle of each door twice:
the first time unlocks the door, the second
time opens it.
Locking
>Use the central locking button to lock all of
the doors simultaneously, or
>press down the safety lock button of a door.
To prevent you from being locked out, the
open driver's door cannot be locked using
the lock button.
Persons or animals in a parked vehicle
could lock the doors from the inside. You should therefore take the remote control with
you when you leave the vehicle so that the latter
can be opened from outside.<
Luggage compartment lid
In order to avoid damage, make sure there
is sufficient clearance before opening the
luggage compartment lid.<
Opening from inside
Press the button: the luggage compartment lid
opens unless it has been locked.
Opening from outside
Press the button, see arrow, or the button on
the remote control for a longer period. The lug-
gage compartment lid will open slightly. It can
now be swung upwards.
In the event of a malfunction, please con-
tact your BMW center or a workshop that
works according to BMW repair procedures
with correspondingly trained personnel.<
ba8_E90M3_cic.book Seite 30 Dienstag, 19. August 2008 11:51 11
Page 36 of 246
Opening and closing
34
Warning lamps
The warning lamp in the instrument
cluster lights up when you attempt to
start the engine: the engine cannot
be started. The remote control is not inside the
vehicle or is malfunctioning. Take the remote
control with you inside the vehicle or have it
checked. If necessary, insert another remote
control into the ignition lock.
The warning lamp in the instrument
cluster lights up while the engine is
running: the remote control is no
longer inside the vehicle. After the engine is
switched off, the engine can only be restarted
within approx. 10 seconds.
The indicator lamp in the instrument
cluster comes on and a message
appears on the Control Display:
replace the battery in the remote control.
Replacing the battery
The remote control for convenient access con-
tains a battery that will need to be replaced from
time to time.
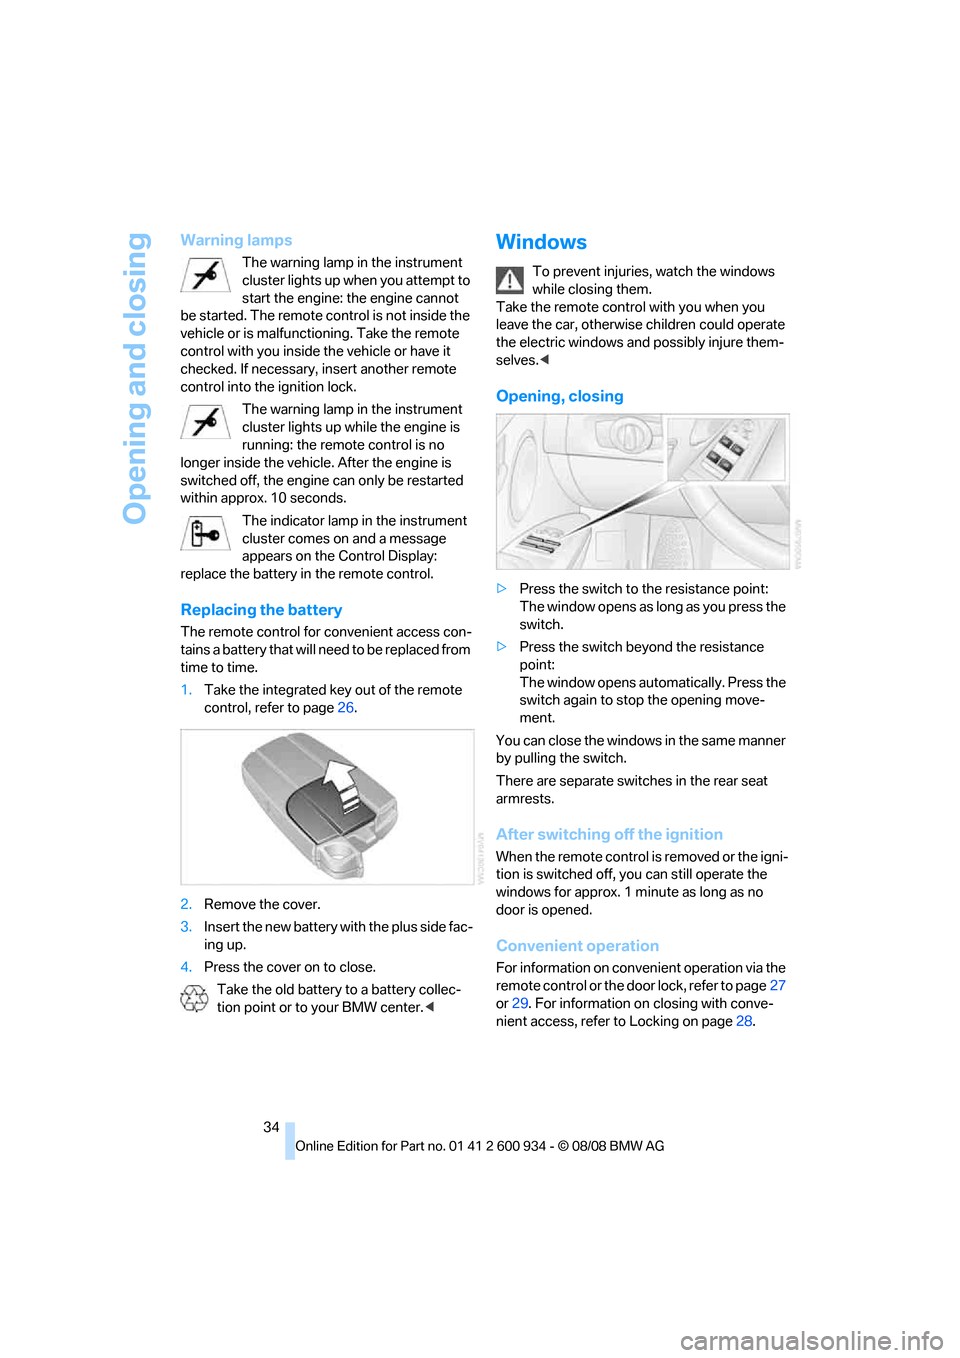
1.Take the integrated key out of the remote
control, refer to page26.
2.Remove the cover.
3.Insert the new battery with the plus side fac-
ing up.
4.Press the cover on to close.
Take the old battery to a battery collec-
tion point or to your BMW center.<
Windows
To prevent injuries, watch the windows
while closing them.
Take the remote control with you when you
leave the car, otherwise children could operate
the electric windows and possibly injure them-
selves.<
Opening, closing
>Press the switch to the resistance point:
The window opens as long as you press the
switch.
>Press the switch beyond the resistance
point:
The window opens automatically. Press the
switch again to stop the opening move-
ment.
You can close the windows in the same manner
by pulling the switch.
There are separate switches in the rear seat
armrests.
After switching off the ignition
When the remote control is removed or the igni-
tion is switched off, you can still operate the
windows for approx. 1 minute as long as no
door is opened.
Convenient operation
For information on convenient operation via the
remote control or the door lock, refer to page27
or29. For information on closing with conve-
nient access, refer to Locking on page28.
ba8_E90M3_cic.book Seite 34 Dienstag, 19. August 2008 11:51 11
Page 51 of 246
Controls
49Reference
At a glance
Driving tips
Communications
Navigation
Entertainment
Mobility
Driving
Ignition lock
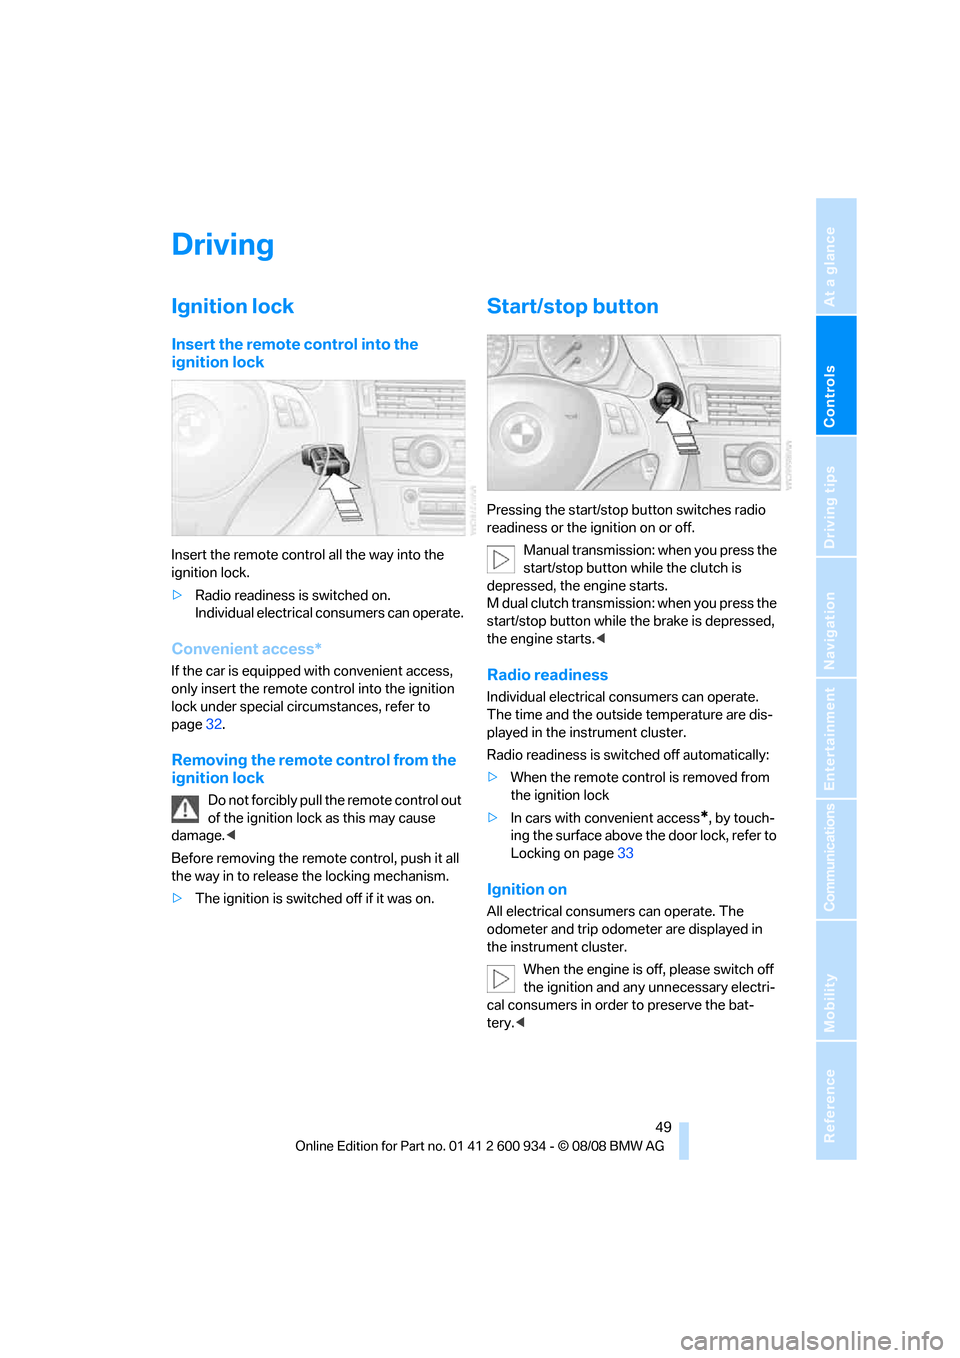
Insert the remote control into the
ignition lock
Insert the remote control all the way into the
ignition lock.
>Radio readiness is switched on.
Individual electrical consumers can operate.
Convenient access*
If the car is equipped with convenient access,
only insert the remote control into the ignition
lock under special circumstances, refer to
page32.
Removing the remote control from the
ignition lock
Do not forcibly pull the remote control out
of the ignition lock as this may cause
damage.<
Before removing the remote control, push it all
the way in to release the locking mechanism.
>The ignition is switched off if it was on.
Start/stop button
Pressing the start/stop button switches radio
readiness or the ignition on or off.
Manual transmission: when you press the
start/stop button while the clutch is
depressed, the engine starts.
M dual clutch transmission: when you press the
start/stop button while the brake is depressed,
the engine starts.<
Radio readiness
Individual electrical consumers can operate.
The time and the outside temperature are dis-
played in the instrument cluster.
Radio readiness is switched off automatically:
>When the remote control is removed from
the ignition lock
>In cars with convenient access
*, by touch-
ing the surface above the door lock, refer to
Locking on page33
Ignition on
All electrical consumers can operate. The
odometer and trip odometer are displayed in
the instrument cluster.
When the engine is off, please switch off
the ignition and any unnecessary electri-
cal consumers in order to preserve the bat-
tery.<
ba8_E90M3_cic.book Seite 49 Dienstag, 19. August 2008 11:51 11
Page 52 of 246
Driving
50
Radio readiness and ignition off
All indicator and warning lamps as well as dis-
plays in the instrument cluster go out.
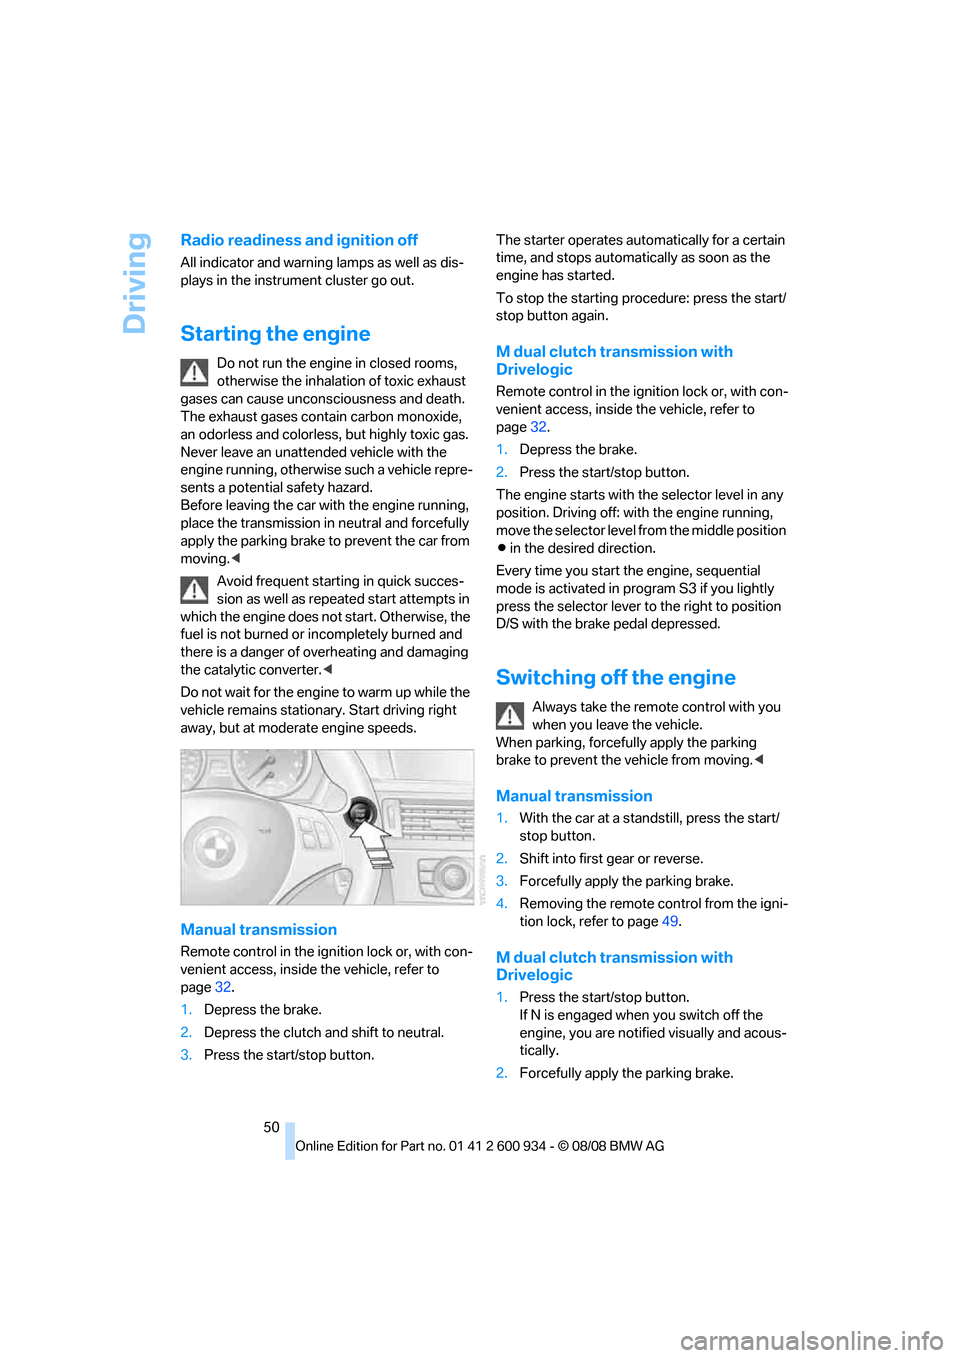
Starting the engine
Do not run the engine in closed rooms,
otherwise the inhalation of toxic exhaust
gases can cause unconsciousness and death.
The exhaust gases contain carbon monoxide,
an odorless and colorless, but highly toxic gas.
Never leave an unattended vehicle with the
engine running, otherwise such a vehicle repre-
sents a potential safety hazard.
Before leaving the car with the engine running,
place the transmission in neutral and forcefully
apply the parking brake to prevent the car from
moving.<
Avoid frequent starting in quick succes-
sion as well as repeated start attempts in
which the engine does not start. Otherwise, the
fuel is not burned or incompletely burned and
there is a danger of overheating and damaging
the catalytic converter.<
Do not wait for the engine to warm up while the
vehicle remains stationary. Start driving right
away, but at moderate engine speeds.
Manual transmission
Remote control in the ignition lock or, with con-
venient access, inside the vehicle, refer to
page32.
1.Depress the brake.
2.Depress the clutch and shift to neutral.
3.Press the start/stop button.The starter operates automatically for a certain
time, and stops automatically as soon as the
engine has started.
To stop the starting procedure: press the start/
stop button again.
M dual clutch transmission with
Drivelogic
Remote control in the ignition lock or, with con-
venient access, inside the vehicle, refer to
page32.
1.Depress the brake.
2.Press the start/stop button.
The engine starts with the selector level in any
position. Driving off: with the engine running,
move the selector level from the middle position
Β in the desired direction.
Every time you start the engine, sequential
mode is activated in program S3 if you lightly
press the selector lever to the right to position
D/S with the brake pedal depressed.
Switching off the engine
Always take the remote control with you
when you leave the vehicle.
When parking, forcefully apply the parking
brake to prevent the vehicle from moving.<
Manual transmission
1.With the car at a standstill, press the start/
stop button.
2.Shift into first gear or reverse.
3.Forcefully apply the parking brake.
4.Removing the remote control from the igni-
tion lock, refer to page49.
M dual clutch transmission with
Drivelogic
1.Press the start/stop button.
If N is engaged when you switch off the
engine, you are notified visually and acous-
tically.
2.Forcefully apply the parking brake.
ba8_E90M3_cic.book Seite 50 Dienstag, 19. August 2008 11:51 11
Page 59 of 246
Controls
57Reference
At a glance
Driving tips
Communications
Navigation
Entertainment
Mobility
3.Press button 2.
4.Use button 1 to select:
>
Shift Lights activated.
>
Shift Lights deactivated.
5.Press button 2.
After the ignition is switched off and the engine
is restarted, the status set for the remote con-
trol in use is active, refer to M Key settings on
page45.
You can set and call up the preferred status
of the Shift Lights via the MDrive, refer to
page44.
Brightness of Shift Lights
The brightness of the Shift Lights can be set
using the brightness level of the instrument
cluster, refer to Instrument lighting on page87.
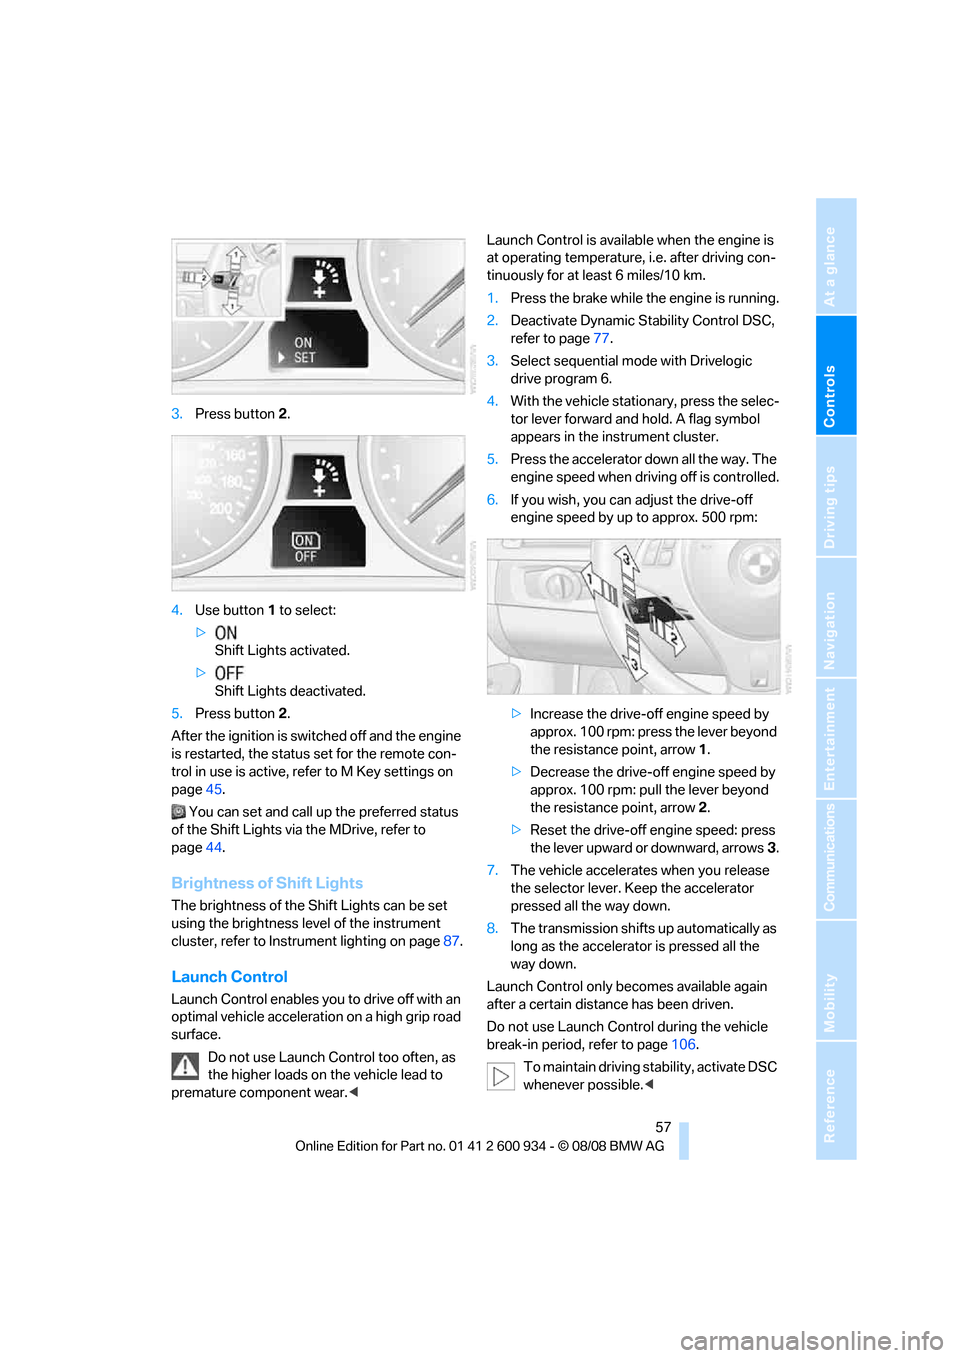
Launch Control
Launch Control enables you to drive off with an
optimal vehicle acceleration on a high grip road
surface.
Do not use Launch Control too often, as
the higher loads on the vehicle lead to
premature component wear.
tinuously for at least 6 miles/10 km.
1.Press the brake while the engine is running.
2.Deactivate Dynamic Stability Control DSC,
refer to page77.
3.Select sequential mode with Drivelogic
drive program 6.
4.With the vehicle stationary, press the selec-
tor lever forward and hold. A flag symbol
appears in the instrument cluster.
5.Press the accelerator down all the way. The
engine speed when driving off is controlled.
6.If you wish, you can adjust the drive-off
engine speed by up to approx. 500 rpm:
>Increase the drive-off engine speed by
approx. 100 rpm: press the lever beyond
the resistance point, arrow1.
>Decrease the drive-off engine speed by
approx. 100 rpm: pull the lever beyond
the resistance point, arrow2.
>Reset the drive-off engine speed: press
the lever upward or downward, arrows3.
7.The vehicle accelerates when you release
the selector lever. Keep the accelerator
pressed all the way down.
8.The transmission shifts up automatically as
long as the accelerator is pressed all the
way down.
Launch Control only becomes available again
after a certain distance has been driven.
Do not use Launch Control during the vehicle
break-in period, refer to page106.
To maintain driving stability, activate DSC
whenever possible.<
ba8_E90M3_cic.book Seite 57 Dienstag, 19. August 2008 11:51 11
Page 78 of 246
Technology for driving comfort and safety
76
Driving stability control
systems
Your BMW has a number of systems that help
to maintain the vehicle's stability even in
adverse driving conditions.
Antilock Brake System ABS
ABS prevents locking of the wheels during
braking. Safe steering response is maintained
even during full braking. Active safety is thus
increased.
The ABS is operational every time you start the
engine. Braking safely, refer to page107.
Electronic brake-force distribution
The system controls the brake pressure in the
rear wheels to ensure stable braking behavior.
Brake assist
When you apply the brakes rapidly, this system
automatically produces the maximum braking
force boost and thus helps to achieve the short-
est possible braking distance during full brak-
ing. This system exploits all of the benefits pro-
vided by ABS.
Do not reduce the pressure on the brake for the
duration of the full braking application.
Dynamic Stability Control DSC
DSC optimizes driving stability and traction. In
addition, the system recognizes unstable driv-
ing situations such as understeering and over-
steering, and helps keep the vehicle on a safe
course within physical limits by reducing engine
power and applying the brakes on individual
wheels.
The laws of physics cannot be repealed,
even with DSC. An appropriate driving
style always remains the responsibility of the
driver. Therefore, do not reduce the additional
safety margin again by taking risks, as this could
result in an accident.<
M Dynamic Mode MDM*
M Dynamic Mode is a mode of the Dynamic
Stability Control DSC that permits greater lon-gitudinal and lateral acceleration when driving
on dry surfaces, yet with reduced driving stabil-
ity. Only at the absolute limit of stability does
the system intervene to stabilize the vehicle by
reducing engine power and applying the brakes
on the wheels. In such situations, additional
corrective steering maneuvers may be neces-
sary.
M Dynamic Mode is switched off every time the
engine is restarted.
When the M Dynamic Mode is on, stabi-
lizing measures are performed to a limited
degree only. Take action yourself, otherwise
there is a risk of an accident.<
To maintain vehicle stability, drive with
the DSC activated and the
MDynamicMode deactivated whenever possi-
ble.<
Activating MDM
Press the button on the steering wheel, refer
to MDrive
* on page44. The MDM indicator
lamp in the instrument cluster lights up if you
previously selected the M Dynamic Mode MDM
in MDrive.
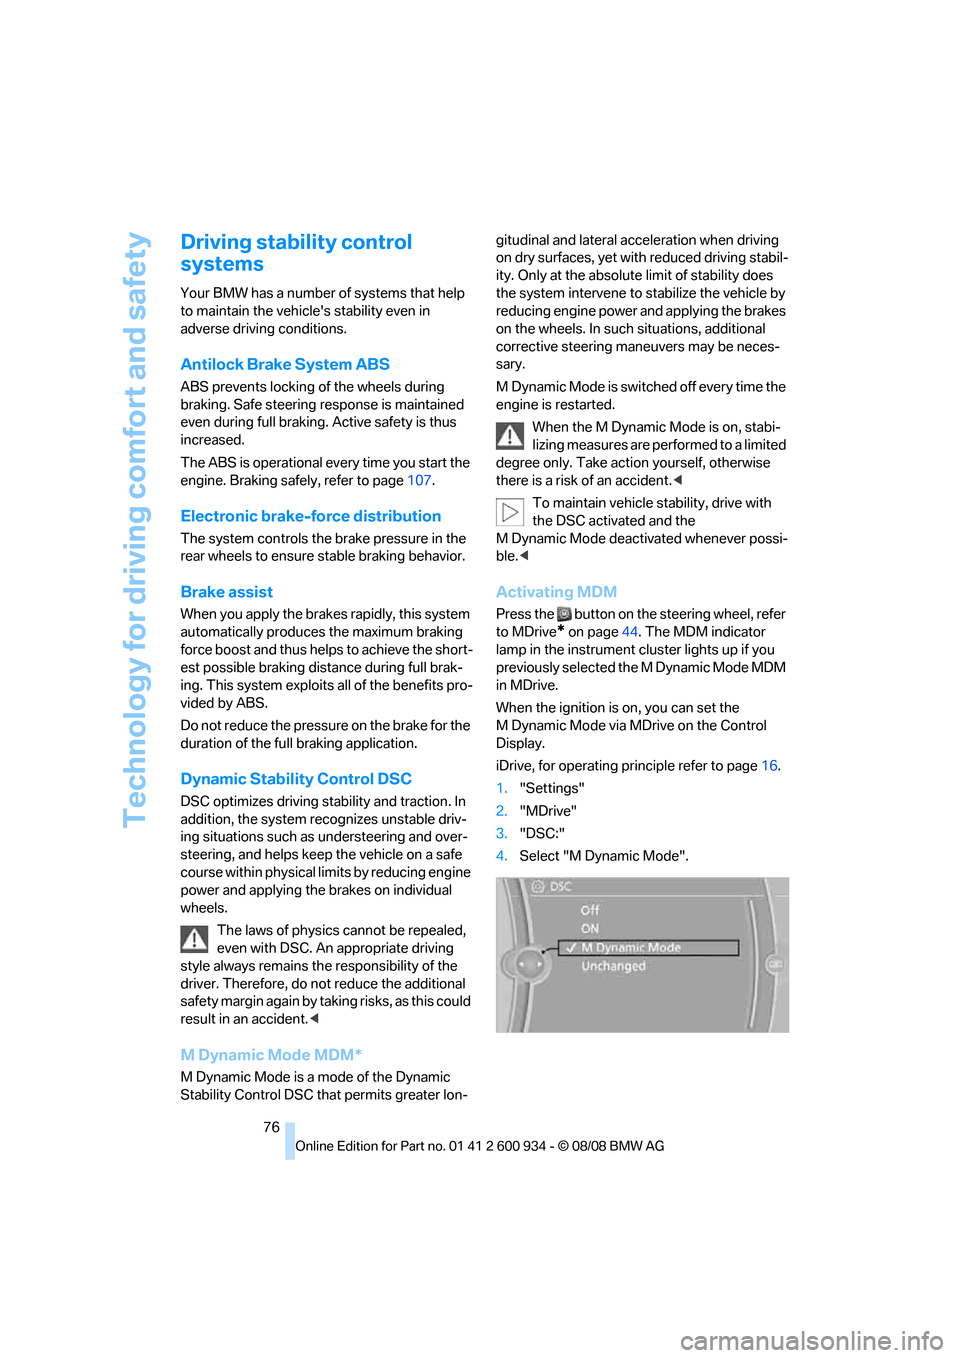
When the ignition is on, you can set the
M Dynamic Mode via MDrive on the Control
Display.
iDrive, for operating principle refer to page16.
1."Settings"
2."MDrive"
3."DSC:"
4.Select "M Dynamic Mode".
ba8_E90M3_cic.book Seite 76 Dienstag, 19. August 2008 11:51 11
Page 79 of 246
Controls
77Reference
At a glance
Driving tips
Communications
Navigation
Entertainment
Mobility
Deactivating MDM
Press the button on the steering wheel
again; the MDM indicator lamp in the instru-
ment cluster goes out.
For better control
The indicator lamp goes out briefly after
the engine is started.
If the indicator lamp lights up:
M Dynamic Mode is activated.
The indicator lamp lights up perma-
nently and the DSC indicator lamp
flashes: M Dynamic Mode is control-
ling the drive and braking forces.
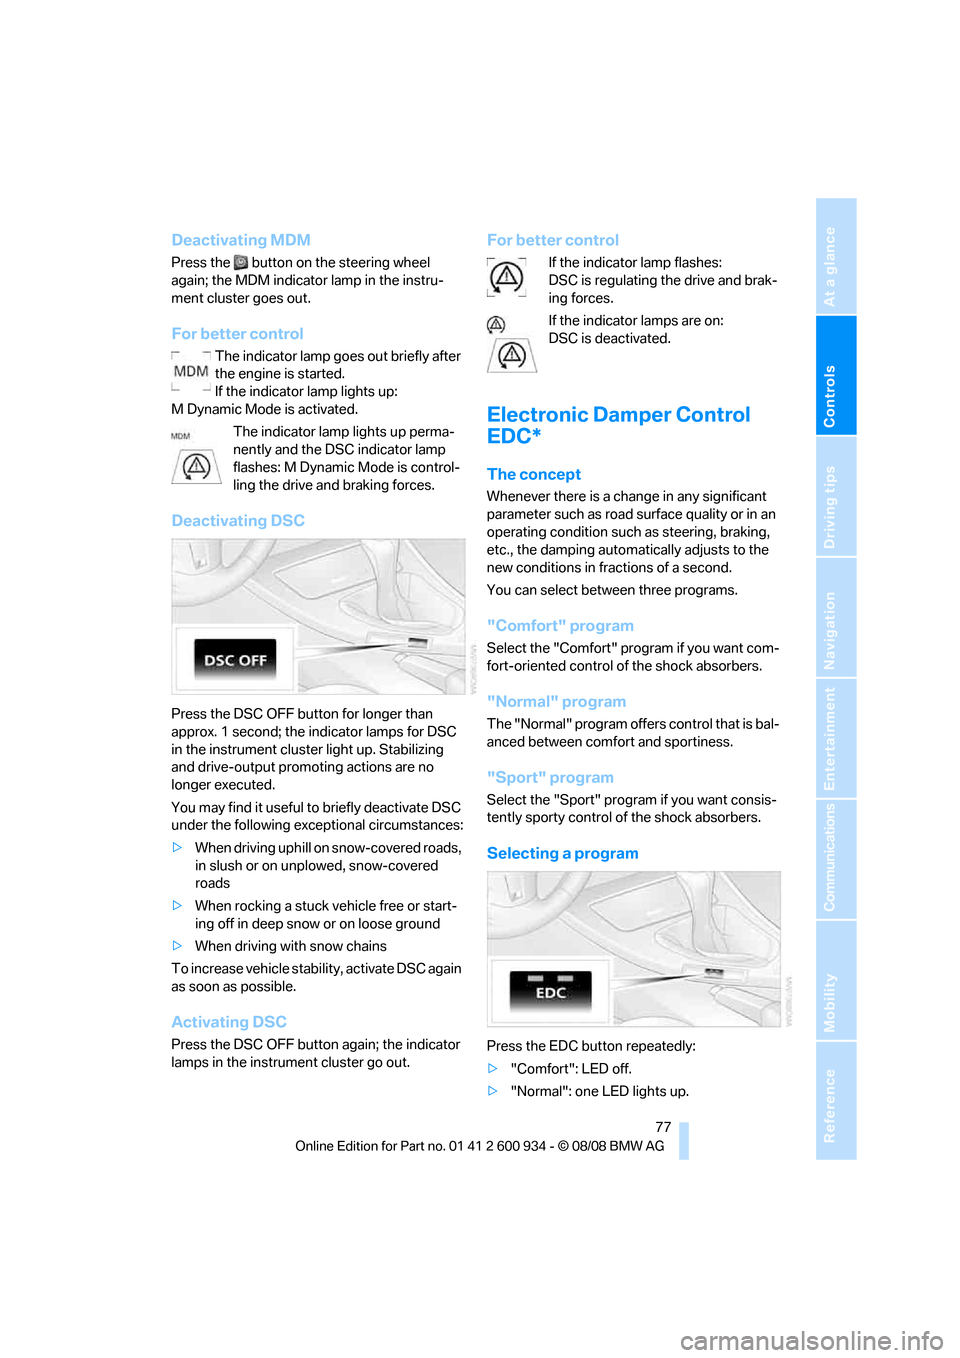
Deactivating DSC
Press the DSC OFF button for longer than
approx. 1 second; the indicator lamps for DSC
in the instrument cluster light up. Stabilizing
and drive-output promoting actions are no
longer executed.
You may find it useful to briefly deactivate DSC
under the following exceptional circumstances:
>When driving uphill on snow-covered roads,
in slush or on unplowed, snow-covered
roads
>When rocking a stuck vehicle free or start-
ing off in deep snow or on loose ground
>When driving with snow chains
To increase vehicle stability, activate DSC again
as soon as possible.
Activating DSC
Press the DSC OFF button again; the indicator
lamps in the instrument cluster go out.
For better control
If the indicator lamp flashes:
DSC is regulating the drive and brak-
ing forces.
If the indicator lamps are on:
DSC is deactivated.
Electronic Damper Control
EDC*
The concept
Whenever there is a change in any significant
parameter such as road surface quality or in an
operating condition such as steering, braking,
etc., the damping automatically adjusts to the
new conditions in fractions of a second.
You can select between three programs.
"Comfort" program
Select the "Comfort" program if you want com-
fort-oriented control of the shock absorbers.
"Normal" program
The "Normal" program offers control that is bal-
anced between comfort and sportiness.
"Sport" program
Select the "Sport" program if you want consis-
tently sporty control of the shock absorbers.
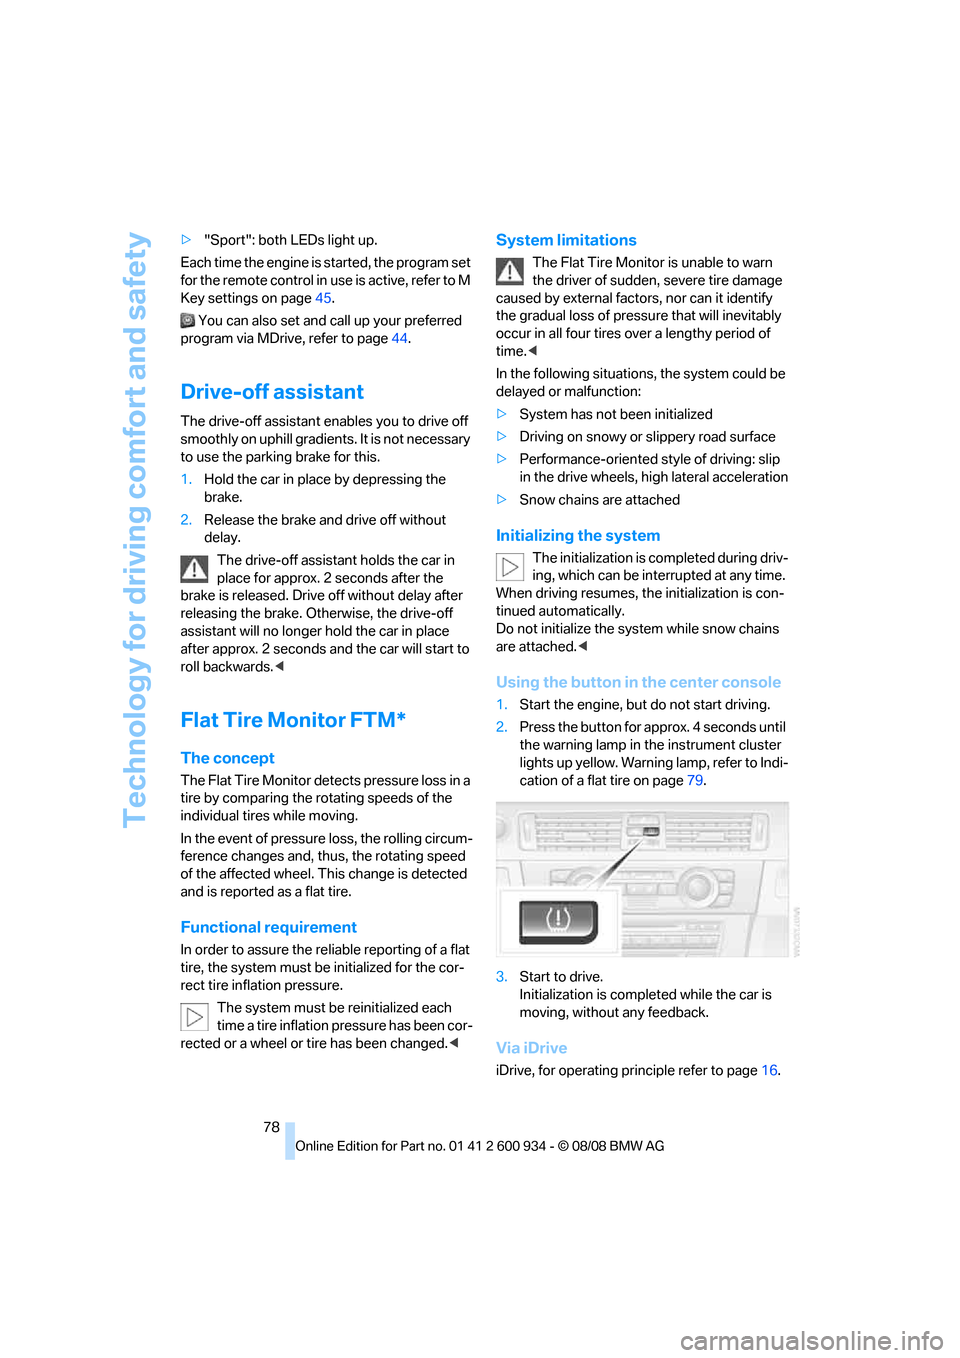
Selecting a program
Press the EDC button repeatedly:
>"Comfort": LED off.
>"Normal": one LED lights up.
ba8_E90M3_cic.book Seite 77 Dienstag, 19. August 2008 11:51 11
Page 80 of 246
Technology for driving comfort and safety
78 >"Sport": both LEDs light up.
Each time the engine is started, the program set
for the remote control in use is active, refer to M
Key settings on page45.
You can also set and call up your preferred
program via MDrive, refer to page44.
Drive-off assistant
The drive-off assistant enables you to drive off
smoothly on uphill gradients. It is not necessary
to use the parking brake for this.
1.Hold the car in place by depressing the
brake.
2.Release the brake and drive off without
delay.
The drive-off assistant holds the car in
place for approx. 2 seconds after the
brake is released. Drive off without delay after
releasing the brake. Otherwise, the drive-off
assistant will no longer hold the car in place
after approx. 2 seconds and the car will start to
roll backwards.<
Flat Tire Monitor FTM*
The concept
The Flat Tire Monitor detects pressure loss in a
tire by comparing the rotating speeds of the
individual tires while moving.
In the event of pressure loss, the rolling circum-
ference changes and, thus, the rotating speed
of the affected wheel. This change is detected
and is reported as a flat tire.
Functional requirement
In order to assure the reliable reporting of a flat
tire, the system must be initialized for the cor-
rect tire inflation pressure.
The system must be reinitialized each
time a tire inflation pressure has been cor-
rected or a wheel or tire has been changed.<
System limitations
The Flat Tire Monitor is unable to warn
the driver of sudden, severe tire damage
caused by external factors, nor can it identify
the gradual loss of pressure that will inevitably
occur in all four tires over a lengthy period of
time.<
In the following situations, the system could be
delayed or malfunction:
>System has not been initialized
>Driving on snowy or slippery road surface
>Performance-oriented style of driving: slip
in the drive wheels, high lateral acceleration
>Snow chains are attached
Initializing the system
The initialization is completed during driv-
ing, which can be interrupted at any time.
When driving resumes, the initialization is con-
tinued automatically.
Do not initialize the system while snow chains
are attached.<
Using the button in the center console
1.Start the engine, but do not start driving.
2.Press the button for approx. 4 seconds until
the warning lamp in the instrument cluster
lights up yellow. Warning lamp, refer to Indi-
cation of a flat tire on page79.
3.Start to drive.
Initialization is completed while the car is
moving, without any feedback.
Via iDrive
iDrive, for operating principle refer to page16.
ba8_E90M3_cic.book Seite 78 Dienstag, 19. August 2008 11:51 11