audio BMW M4 2016 Owners Manual
[x] Cancel search | Manufacturer: BMW, Model Year: 2016, Model line: M4, Model: BMW M4 2016Pages: 228, PDF Size: 4.88 MB
Page 18 of 228
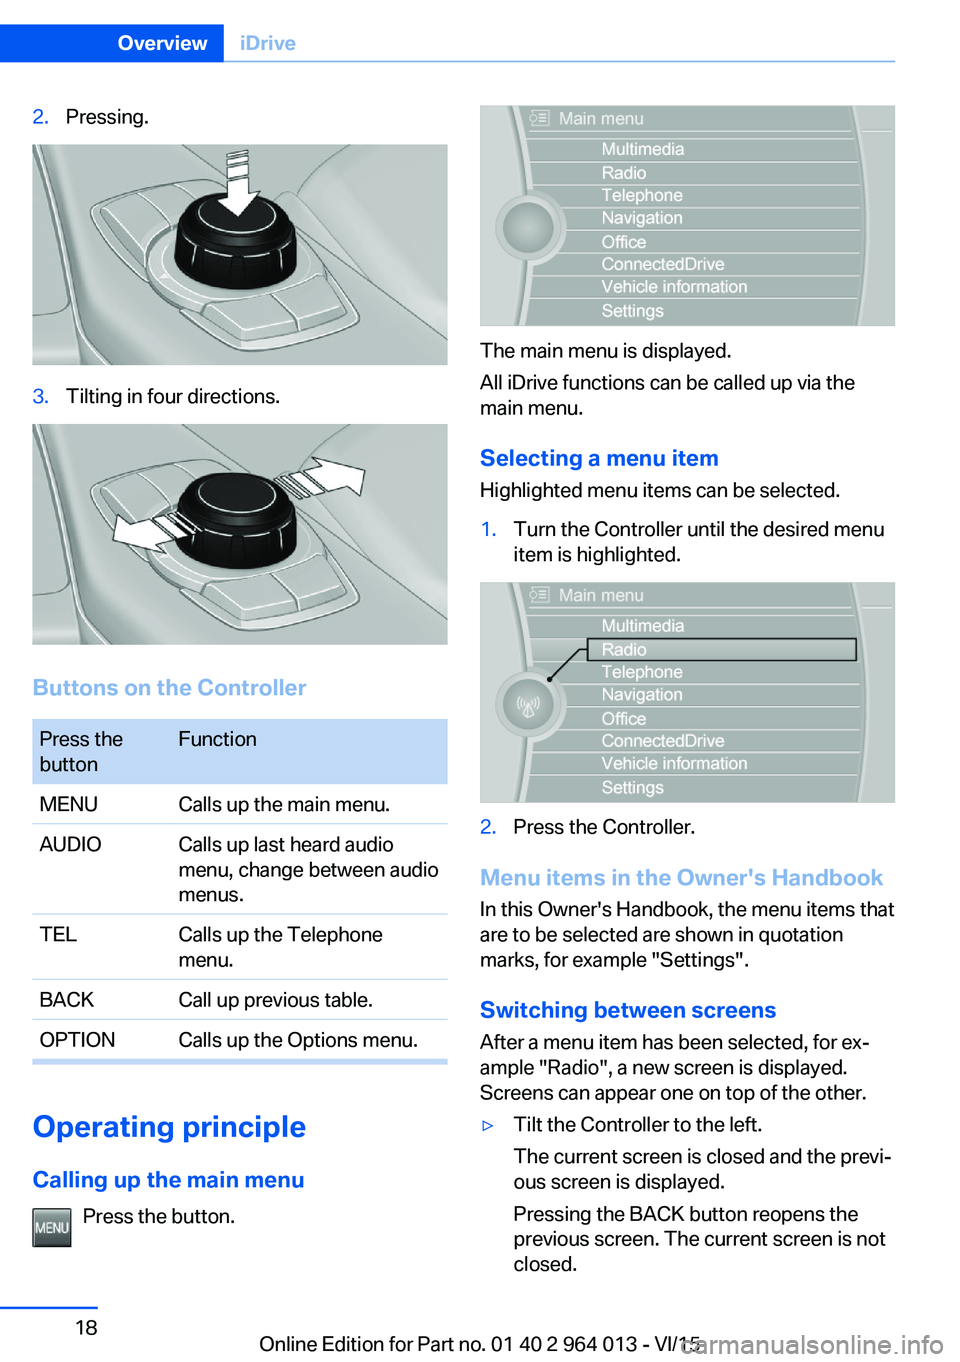
2.Pressing.3.Tilting in four directions.
Buttons on the Controller
Press the
buttonFunctionMENUCalls up the main menu.AUDIOCalls up last heard audio
menu, change between audio
menus.TELCalls up the Telephone
menu.BACKCall up previous table.OPTIONCalls up the Options menu.
Operating principle
Calling up the main menu Press the button.
The main menu is displayed.
All iDrive functions can be called up via the
main menu.
Selecting a menu item
Highlighted menu items can be selected.
1.Turn the Controller until the desired menu
item is highlighted.2.Press the Controller.
Menu items in the Owner's Handbook
In this Owner's Handbook, the menu items that
are to be selected are shown in quotation
marks, for example "Settings".
Switching between screens After a menu item has been selected, for ex‐
ample "Radio", a new screen is displayed.
Screens can appear one on top of the other.
▷Tilt the Controller to the left.
The current screen is closed and the previ‐
ous screen is displayed.
Pressing the BACK button reopens the
previous screen. The current screen is not
closed.Seite 18OverviewiDrive18
Online Edition for Part no. 01 40 2 964 013 - VI/15
Page 19 of 228
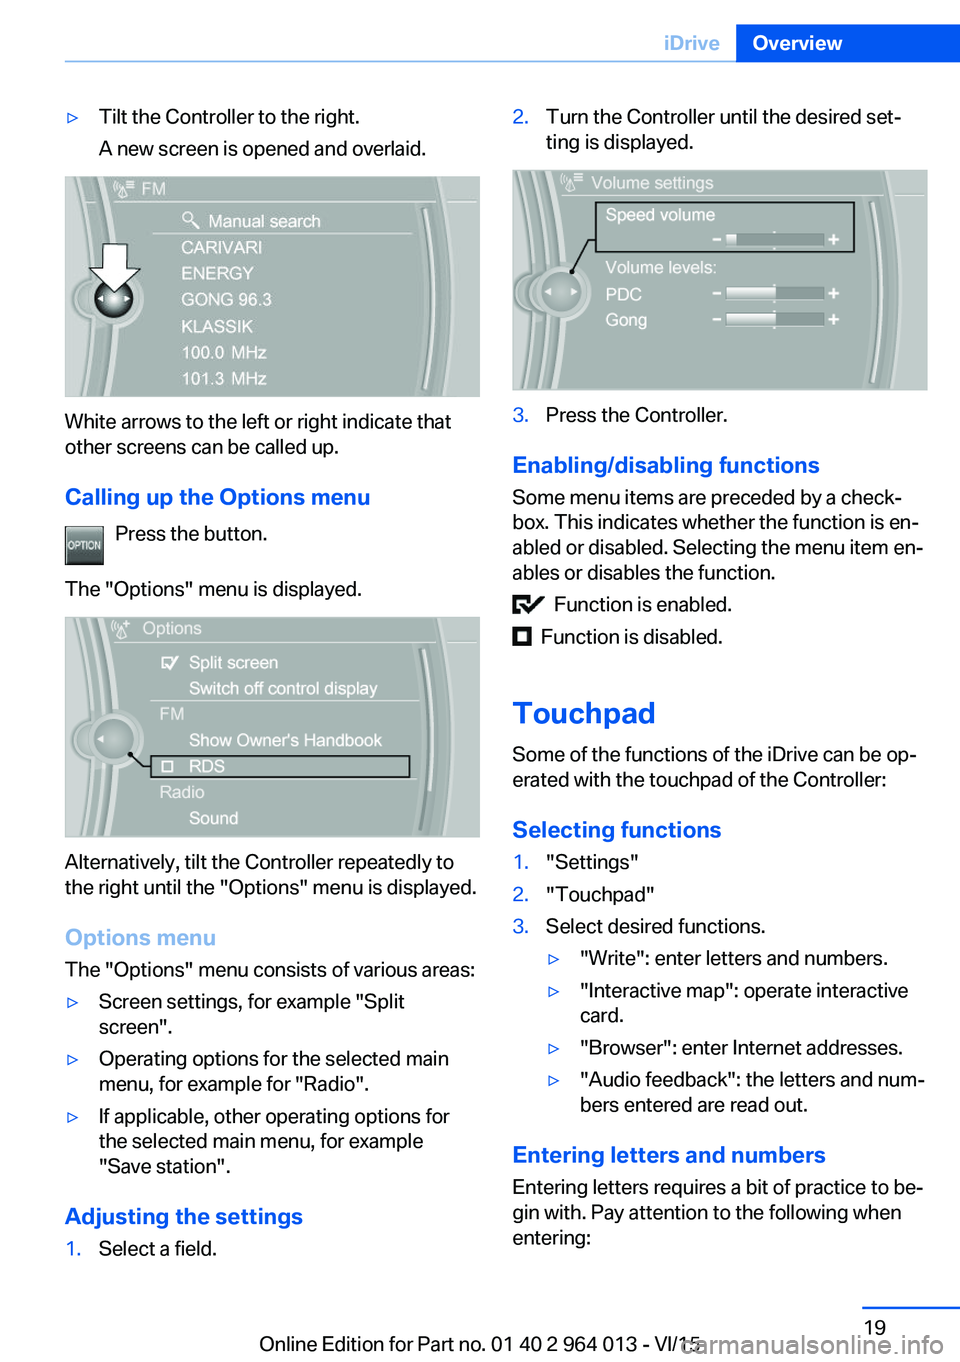
▷Tilt the Controller to the right.
A new screen is opened and overlaid.
White arrows to the left or right indicate that
other screens can be called up.
Calling up the Options menu Press the button.
The "Options" menu is displayed.
Alternatively, tilt the Controller repeatedly to
the right until the "Options" menu is displayed.
Options menu The "Options" menu consists of various areas:
▷Screen settings, for example "Split
screen".▷Operating options for the selected main
menu, for example for "Radio".▷If applicable, other operating options for
the selected main menu, for example
"Save station".
Adjusting the settings
1.Select a field.2.Turn the Controller until the desired set‐
ting is displayed.3.Press the Controller.
Enabling/disabling functions
Some menu items are preceded by a check‐
box. This indicates whether the function is en‐
abled or disabled. Selecting the menu item en‐
ables or disables the function.
Function is enabled.
Function is disabled.
Touchpad
Some of the functions of the iDrive can be op‐
erated with the touchpad of the Controller:
Selecting functions
1."Settings"2."Touchpad"3.Select desired functions.▷"Write": enter letters and numbers.▷"Interactive map": operate interactive
card.▷"Browser": enter Internet addresses.▷"Audio feedback": the letters and num‐
bers entered are read out.
Entering letters and numbers
Entering letters requires a bit of practice to be‐
gin with. Pay attention to the following when
entering:
Seite 19iDriveOverview19
Online Edition for Part no. 01 40 2 964 013 - VI/15
Page 21 of 228
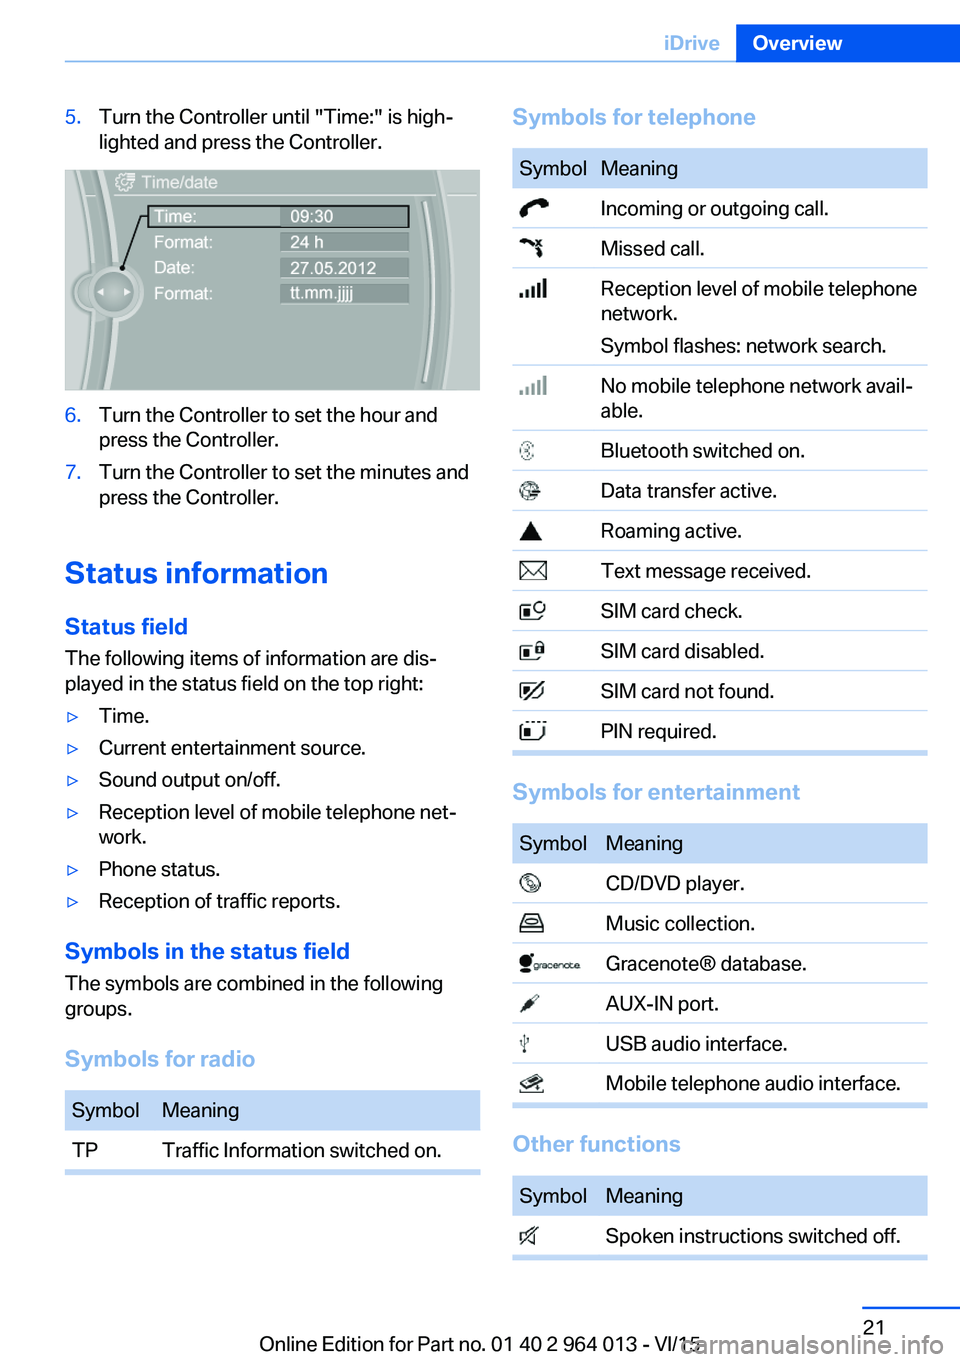
5.Turn the Controller until "Time:" is high‐
lighted and press the Controller.6.Turn the Controller to set the hour and
press the Controller.7.Turn the Controller to set the minutes and
press the Controller.
Status information
Status field The following items of information are dis‐
played in the status field on the top right:
▷Time.▷Current entertainment source.▷Sound output on/off.▷Reception level of mobile telephone net‐
work.▷Phone status.▷Reception of traffic reports.
Symbols in the status field
The symbols are combined in the following
groups.
Symbols for radio
SymbolMeaningTPTraffic Information switched on.Symbols for telephoneSymbolMeaning Incoming or outgoing call. Missed call. Reception level of mobile telephone
network.
Symbol flashes: network search. No mobile telephone network avail‐
able. Bluetooth switched on. Data transfer active. Roaming active. Text message received. SIM card check. SIM card disabled. SIM card not found. PIN required.
Symbols for entertainment
SymbolMeaning CD/DVD player. Music collection. Gracenote® database. AUX-IN port. USB audio interface. Mobile telephone audio interface.
Other functions
SymbolMeaning Spoken instructions switched off.Seite 21iDriveOverview21
Online Edition for Part no. 01 40 2 964 013 - VI/15
Page 26 of 228
If, for example, the menu "Settings" is dis‐
played, the commands for the settings are an‐
nounced.
Running functions using short commands
Main menu functions can be performed imme‐
diately using short commands, almost irre‐
spective of which menu item is selected, for
example ›Vehicle status‹.
Help dialogue to voice control system
Call up help dialogue: ›Help‹.
Further commands for help dialogue:▷›Help with examples‹: information on the
current possible operations and the most
important commands for this are read out.▷›Help with voice input‹: information on the
operating principle of the voice control sys‐
tem is read out.
An example: call up sound
settings
Using main menu Commands on the menu are read out so they
can also be selected using the controller.
1.If necessary, switch on entertainment au‐
dio output.2. Press the button on the steering
wheel.3.›Radio‹4.›Sound‹
Through short command
Desired sound setting can also be started us‐
ing a shortcut.
1.If necessary, switch on entertainment au‐
dio output.2. Press the button on the steering
wheel.3.›Sound‹
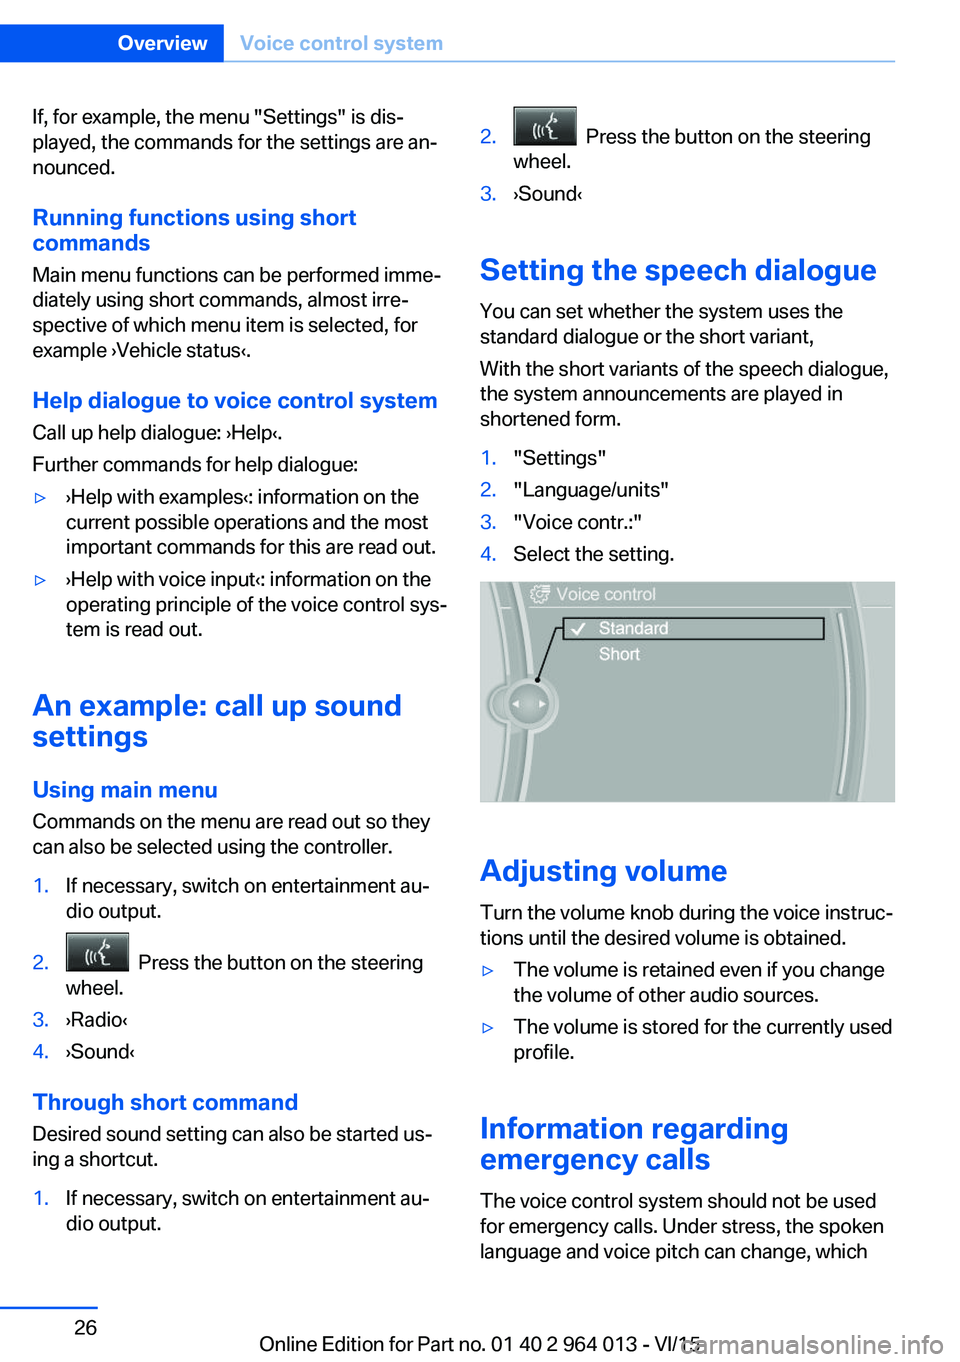
Setting the speech dialogue
You can set whether the system uses the
standard dialogue or the short variant,
With the short variants of the speech dialogue,
the system announcements are played in
shortened form.
1."Settings"2."Language/units"3."Voice contr.:"4.Select the setting.
Adjusting volume
Turn the volume knob during the voice instruc‐
tions until the desired volume is obtained.
▷The volume is retained even if you change
the volume of other audio sources.▷The volume is stored for the currently used
profile.
Information regarding
emergency calls
The voice control system should not be used
for emergency calls. Under stress, the spoken
language and voice pitch can change, which
Seite 26OverviewVoice control system26
Online Edition for Part no. 01 40 2 964 013 - VI/15
Page 90 of 228
System limits
The function may be disabled or inaccurate
under certain conditions, for example:▷In thick fog and heavy rain or snow.▷If road signs are obscured by objects.▷If the vehicle is moving too close to the ve‐
hicle ahead.▷With bright oncoming light.▷When the windscreen in front of the rear-
view mirror is covered with condensation,
dirt, stickers, etc.▷Due to possible wrong detections of the
camera.▷If the speed limits saved in the navigation
system are wrong.▷In areas not covered by the navigation sys‐
tem.▷If there are deviations in relation to the nav‐
igation, for example due to changes in the
road routing.▷On overtaking buses or trucks with speed
stickers.▷If traffic signs do not correspond to the
standard.▷During the calibration process of the cam‐
era immediately after the vehicle is sup‐
plied.
Selection lists in the
instrument cluster
Principle Depending on equipment, the following can be
displayed or operated via the buttons and the
knurled wheel on the steering wheel and using
the displays in the instrument cluster and
Head-Up Display:
▷Current audio source.▷Repeat dialling for telephone.▷Activating the voice control system.Display
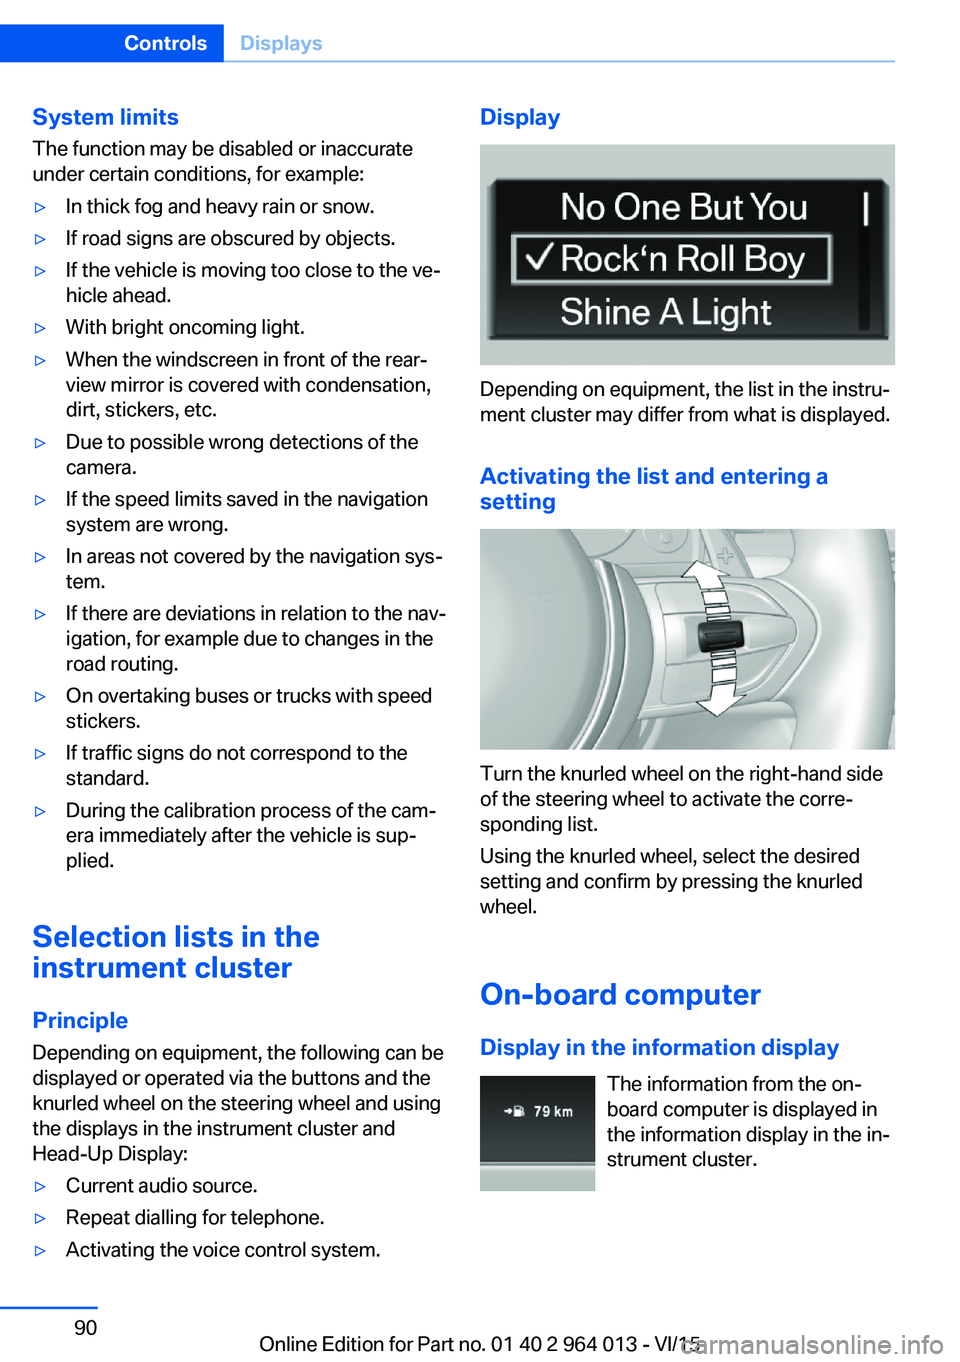
Depending on equipment, the list in the instru‐
ment cluster may differ from what is displayed.
Activating the list and entering a
setting
Turn the knurled wheel on the right-hand side
of the steering wheel to activate the corre‐
sponding list.
Using the knurled wheel, select the desired
setting and confirm by pressing the knurled
wheel.
On-board computer
Display in the information display The information from the on-
board computer is displayed in
the information display in the in‐
strument cluster.
Seite 90ControlsDisplays90
Online Edition for Part no. 01 40 2 964 013 - VI/15
Page 151 of 228
▷Do not connect up USB hard drives.▷Do not use the USB audio interface for
charging external devices.
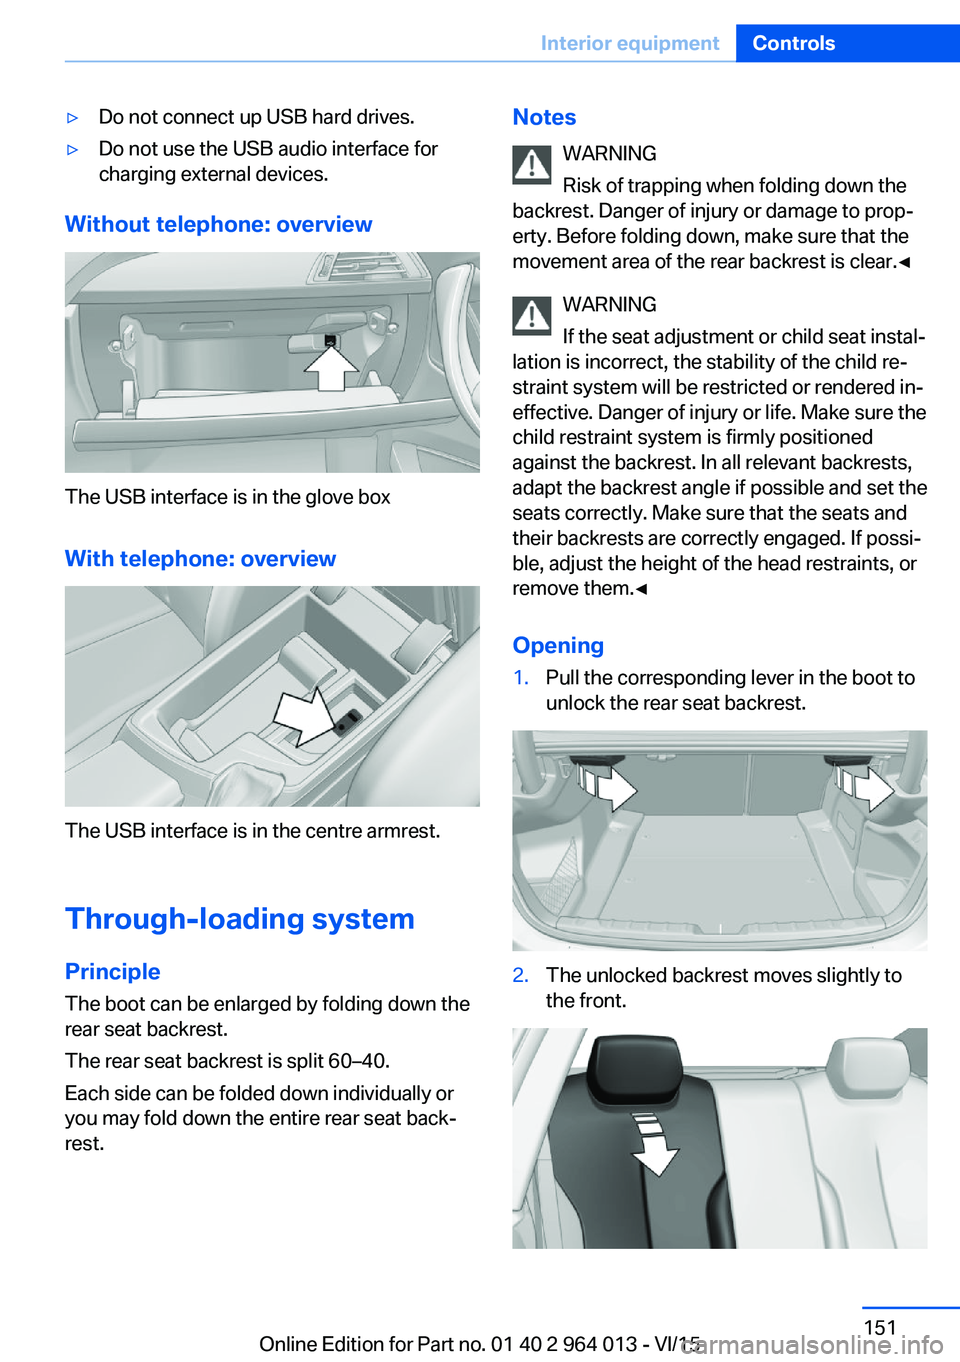
Without telephone: overview
The USB interface is in the glove box
With telephone: overview
The USB interface is in the centre armrest.
Through-loading system PrincipleThe boot can be enlarged by folding down the
rear seat backrest.
The rear seat backrest is split 60–40.
Each side can be folded down individually or
you may fold down the entire rear seat back‐ rest.
Notes
WARNING
Risk of trapping when folding down the
backrest. Danger of injury or damage to prop‐
erty. Before folding down, make sure that the
movement area of the rear backrest is clear.◀
WARNING
If the seat adjustment or child seat instal‐
lation is incorrect, the stability of the child re‐
straint system will be restricted or rendered in‐
effective. Danger of injury or life. Make sure the
child restraint system is firmly positioned
against the backrest. In all relevant backrests,
adapt the backrest angle if possible and set the
seats correctly. Make sure that the seats and
their backrests are correctly engaged. If possi‐
ble, adjust the height of the head restraints, or
remove them.◀
Opening1.Pull the corresponding lever in the boot to
unlock the rear seat backrest.2.The unlocked backrest moves slightly to
the front.Seite 151Interior equipmentControls151
Online Edition for Part no. 01 40 2 964 013 - VI/15
Page 155 of 228
SlidingCentre armrest can be slid in the longitudinal
direction. It engages into the end positions.
Connection for external audio device An external audio device, for ex‐
ample an MP3 player, can be
connected through the AUX-IN
port or the USB audio interface
in the centre armrest.
Storage compartment
between the rear seats
A storage compartment is located between the
rear seats.
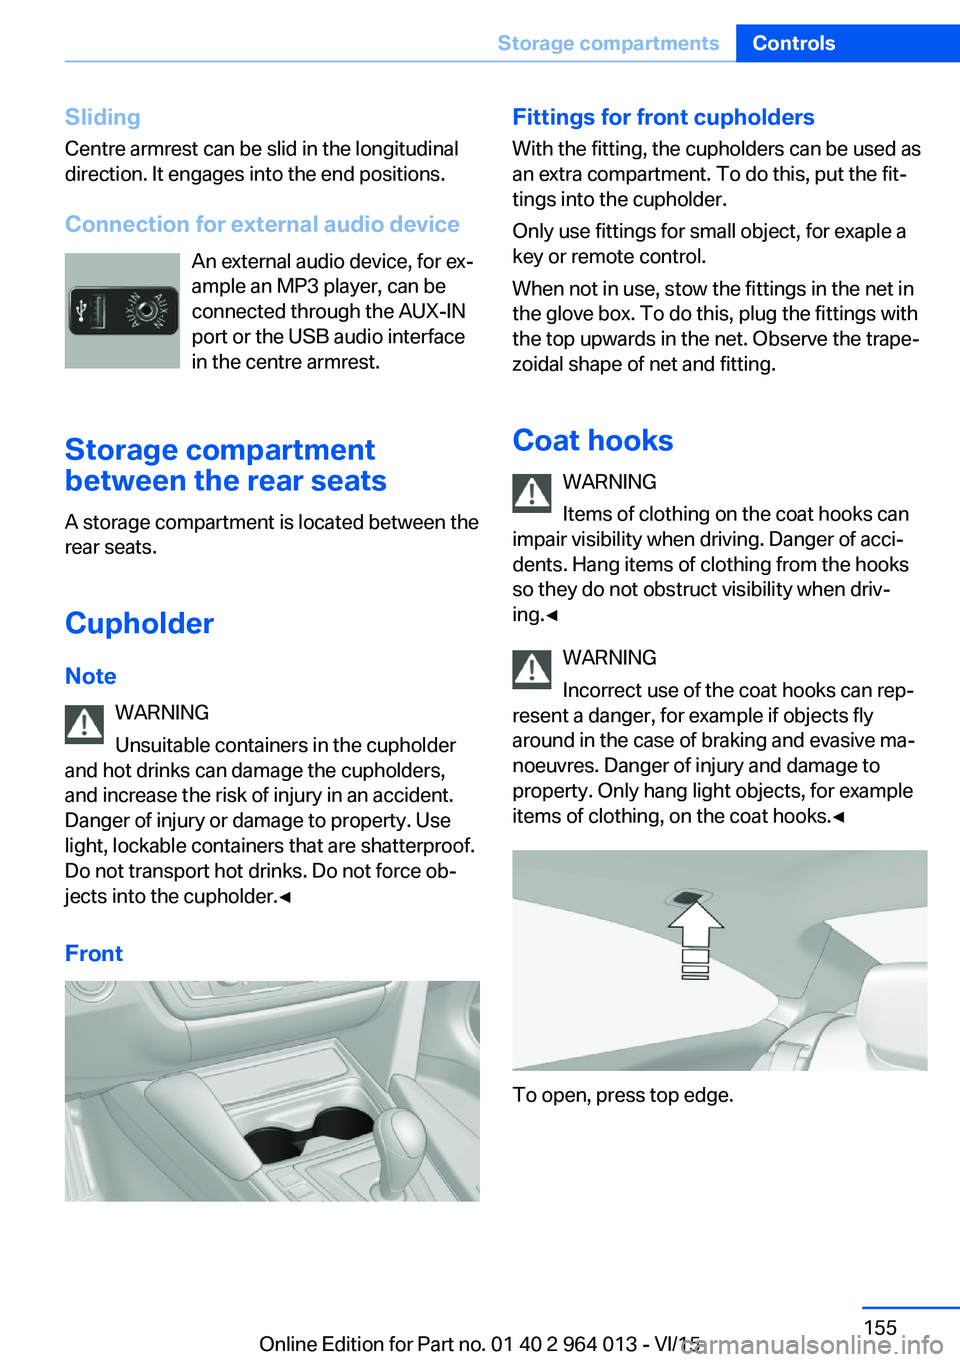
Cupholder
Note WARNING
Unsuitable containers in the cupholder
and hot drinks can damage the cupholders,
and increase the risk of injury in an accident.
Danger of injury or damage to property. Use
light, lockable containers that are shatterproof.
Do not transport hot drinks. Do not force ob‐
jects into the cupholder.◀
FrontFittings for front cupholders
With the fitting, the cupholders can be used as
an extra compartment. To do this, put the fit‐
tings into the cupholder.
Only use fittings for small object, for exaple a
key or remote control.
When not in use, stow the fittings in the net in
the glove box. To do this, plug the fittings with
the top upwards in the net. Observe the trape‐
zoidal shape of net and fitting.
Coat hooks WARNING
Items of clothing on the coat hooks can
impair visibility when driving. Danger of acci‐
dents. Hang items of clothing from the hooks
so they do not obstruct visibility when driv‐
ing.◀
WARNING
Incorrect use of the coat hooks can rep‐
resent a danger, for example if objects fly
around in the case of braking and evasive ma‐
noeuvres. Danger of injury and damage to
property. Only hang light objects, for example items of clothing, on the coat hooks.◀
To open, press top edge.
Seite 155Storage compartmentsControls155
Online Edition for Part no. 01 40 2 964 013 - VI/15