low oil pressure BMW M4 2016 Owners Manual
[x] Cancel search | Manufacturer: BMW, Model Year: 2016, Model line: M4, Model: BMW M4 2016Pages: 228, PDF Size: 4.88 MB
Page 160 of 228
BMW M4 TechnologyVehicle equipment
This chapter describes all standard, national
and special equipment provided in the model
series. Equipment not available in the vehicle is
therefore also described, for example the se‐
lected special equipment or national version.
This also applies to safety-relevant functions
and systems. Comply with the relevant na‐
tional regulations when using the correspond‐
ing functions and systems.
High performance engine The high performance engine generates a
maximum power of 317 kW and a maximum
torque of 550 Nm from 3 litres of capacity.
With its spontaneous responsiveness, a very
broad usable engine speed range is produced.
The maximum engine speed is electronically regulated at 7,600 rpm. Due to the powerful
engine dynamics, the maximum engine speed
is limited when the vehicle is stationary.
Driving hot During the engine warm-up phase, the high
performance engine runs slightly more roughly
due to the emission control.
When the engine is cold, the exhaust has a
slightly metallic undertone, depending on the
system.
Other information for hot driving: engine speed
counter, see page 84, and engine oil tempera‐
ture, see page 84.
M compound brakes The high performance brake system has venti‐
lated compound brake discs.
Depending on design requirements, function
noises may occur when braking. However, thishas no effect on the performance, operational
safety and stability of the brakes.
Braking correctly
To keep the brake system in optimum condi‐
tion, it is desirable to load them at regular inter‐
vals depending on the nature of the vehicle.
M Carbon ceramic brakes
The high performance braking system has per‐
forated carbon ceramic brake disks and is de‐
signed for racetrack operation.
Depending on the material-specific properties, there can be increased functional noises when
braking, particularly when it is wet, shortly be‐
fore the vehicle comes to a stop. This has no
effect on performance, operational safety and
endurance of the brakes.
Due to the effect of wet and salt spray, for ex‐
ample, after using a car wash, condensation
overnight etc., the braking effect may corre‐
spond to a conventional braking system. This
can be detected as reduced braking effect and
compensated for by higher pedal pressure, as
needed.
Clean brake discs and brake calliper before
washing in an automatic car wash with a steam
sprayer or high pressure cleaner to avoid en‐
crustations and caking, for example, due to salt
crystals with a related stationary period. The cleaning effect of automatic car washes gener‐
ally not sufficient for this in the wheel area.
Also follow the information on this under vehi‐
cle washing, see page 208, and safe braking,
see page 163.Seite 160Driving hintsBMW M4 Technology160
Online Edition for Part no. 01 40 2 964 013 - VI/15
Page 178 of 228
ted speed for the tyres fitted must be dis‐
played in the driver's field of view. The sticker
is available from a Service Partner or a qualified
specialist workshop.
If winter tyres are fitted, observe and comply
with the respectively permitted maximum
speed.
Interchanging front and rear wheels
The manufacturer of your vehicle advises
against interchanging the front and rear
wheels. This could impair vehicle handling
Such a change is not permitted in vehicles with
different tyre or rim dimensions on the front
and rear axles.
Tyre storage
Store wheels and tyres in a cool, dry and pref‐
erably dark place when not in use.
Protect tyres against contamination from oil,
grease and fuel.
Do not exceed the maximum tyre pressure in‐
dicated on the tyre's side wall.
Remedying flat tyres Safety measures▷Park the vehicle on a solid surface and as
far away from moving traffic as possible.▷Switch on hazard warning lights.▷Protect the vehicle against rolling, by ap‐
plying the parking brake.▷Engage the steering wheel lock in the
straight ahead position of the wheels.▷Allow all vehicle occupants get out of the
vehicle and guide them out of the danger
area, for example behind the crash barrier.▷Set up warning triangle an appropriate dis‐
tance away.Mobility system
Principle With the mobility system, minor tyre damage
can be quickly sealed, to allow you to drive on.
To do that, liquid sealant is pumped into the
tyres which encloses the damage from the in‐ side when it hardens.
The compressor can be used to check the tyre
inflation pressure.
Notes▷Please observe the notes on the applica‐
tion of the Mobility system which are on
the compressor and the sealant container.▷Applying the Mobility system can be inef‐
fective for tyre damage as from a size of
approximately 4 mm.▷Contact a Service Partner or a qualified
specialist workshop if you are unable to put
the tyre back in operation.▷If possible, foreign matter that has penetra‐
ted the tyre should remain inside the tyre.▷Remove the speed limit sticker from the
sealant container and attach to the steer‐
ing wheel.▷Using sealants can damage the TPM wheel
electronics. If sealant is used, check the
electronics as soon as you get an opportu‐
nity and have them replaced if necessary.
DANGER
A blocked exhaust pipe or inadequate
ventilation can allow harmful exhaust fumes to
penetrate the vehicle. The exhaust gas con‐
tains carbon monoxide, which is colourless and
odourless, but highly toxic. In enclosed spaces,
the exhaust fumes can also build up outside
the vehicle. Danger of fatal injury. Keep the ex‐
haust pipe clear and ensure sufficient ventila‐
tion.◀
Storage
Mobility system is located under boot floor.
Seite 178MobilityWheels and tyres178
Online Edition for Part no. 01 40 2 964 013 - VI/15
Page 181 of 228
3.Take the filler hose of the sealant container
that was previously connected to the tyre
valve and connect it to the free connection
on the sealant container.
This can prevent sealant residues from es‐
caping from the container.4.Pack empty sealant container to avoid soil‐
ing in the boot.5.Store Mobility system in the vehicle again.
Spreading sealant compound
Immediately drive for approximately
10 km/5 mi to evenly distribute the sealing
compound in the tyre.
Do not exceed a speed of 80 km/h/50 mph.
If possible, do not drive slower than
20 km/h/12 mph.
Correcting the tyre inflation pressure
1.Stop in a suitable area.2.Bolt the connecting hose of the compres‐
sor directly onto the tyre valve.3.Insert the plug into the socket on the inside
of the vehicle.4.Correct tyre inflation pressure to 2.5 bar.▷Increase pressure: switch on the com‐
pressor with the engine running or the
ignition switched on.▷Reduce pressure: press the button on
the compressor.
Continuing with journey
Do not exceed maximum permitted speed of
80 km/h, approximately 50 mph.
Reinitialise runflat indicator.
Reinitialise Tyre Pressure Monitor.
Have the punctured tyre and the sealant con‐
tainer of the Mobility system replaced as soon
as possible.
Snow chains
Fine-link snow chains Only certain fine-link snow chains have been
tested, found safe for use in traffic, and cate‐
gorised as suitable by the manufacturer of your
vehicle.
Information regarding suitable snow chains is
available from a Service Partner or a qualified
specialist workshop.
Using Snow chains may only be used in pairs on the
rear wheels with tyres of the following sizes:▷255/40 R 18.▷255/35 R 19.
Observe the snow chain manufacturer's notes.
Ensure that the snow chains are always ade‐
quately taut. Re-tighten them if necessary in
accordance with the chain manufacturer's in‐
structions.
Do not initialise the runflat indicator with snow
chains fitted, as the instrument might other‐
wise issue an incorrect reading.
Do not initialise the Tyre Pressure Monitor with
snow chains fitted, as the instrument might
otherwise issue an incorrect reading.
When driving with snow chains, activate M Dy‐
namic Mode briefly if necessary.
Maximum speed with snow chains
When snow chains are fitted, do not exceed
50 km/h, 30 mph.
Seite 181Wheels and tyresMobility181
Online Edition for Part no. 01 40 2 964 013 - VI/15
Page 211 of 228
ATTENTION
Cleaning agents containing alcohol or
solvents, such as nitro thinners, cold cleans‐
ers, fuel or similar can damage plastic parts.
Danger of damage to property. Use a microfi‐
bre cloth to clean. Slightly moisten the cloth
with water.◀
Seat belts Dirt on the seat belts can interfere with the ac‐
tion of the reel and represent a safety hazard.
WARNING
Chemical cleaners can cause irreparable
damage to the fabric of the seat belts. Lack of protective effect of the seat belts. Danger ofinjury or life. Only use a mild soap and water
solution for cleaning the seat belts.◀
Clean only with a mild soap solution while still
fitted to the vehicle.
Never allow seat belts to retract unless they
are dry.
Carpets and foot mats WARNING
Objects in the driver's footwell can re‐
strict the pedal travel, or block a pedal that has
been pressed. Danger of accidents. Stow
items in the vehicle so that they are secure and
cannot get into the driver's footwell. Only use
floor mats that have been categorised as ap‐
propriate for the vehicle and that can be fas‐
tened accordingly. Do not use any loose floor
mats, and do not place several floor mats on
top of one another. Make sure that there is suf‐
ficient space for the pedals. Ensure that the
floor mats are securely reattached after having
been removed, for example for cleaning.◀
Floor mats can be removed from the vehicle to
enable the interior to be cleaned more thor‐
oughly.
In the event of heavy soiling, clean floor car‐
pets using a microfibre cloth and water or tex‐tile cleaner. In doing so, rub back and forth in
the direction of travel, otherwise the carpet can
become tangled.
Sensors/lenses of the camera
Clean sensors or lenses of the camera using a
cloth moistened with a small amount of a glass
detergent.
Displays/screens/protective sleeve of
the Head-Up Displays
ATTENTION
Chemical cleaners, moisture or fluids of
all kinds can damage the surface of displays
and screens. Danger of damage to property.
Use a clean, anti-static microfibre cloth to
clean.◀
ATTENTION
The surfaces of displays can be dam‐
aged due to improper cleaning. Danger of
damage to property. Avoid applying excessive
pressure and do not use abrasive materials.◀
Use a clean, anti-static microfibre cloth to
clean.
Clean the protective sleeve of the Head-Up
Display with a microfibre cloth and commer‐
cially available dishwashing liquid.
Laying up out of use
When the vehicle is laid up for longer than
three months, special measures are to be
taken. Further information is available from a
Service Partner or a qualified specialist work‐
shop.Seite 211General careMobility211
Online Edition for Part no. 01 40 2 964 013 - VI/15
Page 218 of 228
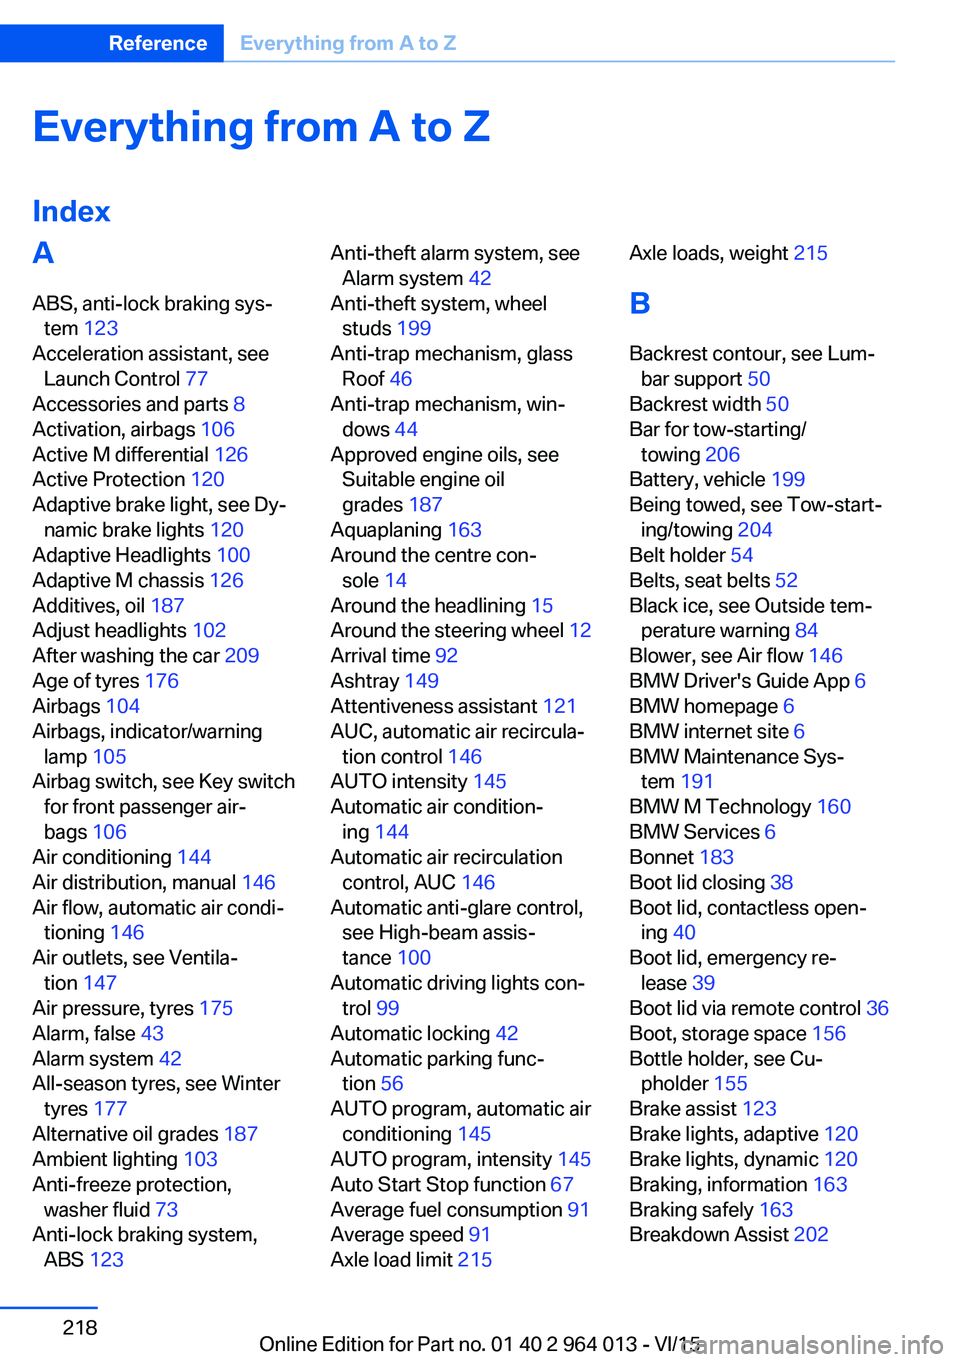
Everything from A to Z
IndexA ABS, anti-lock braking sys‐ tem 123
Acceleration assistant, see Launch Control 77
Accessories and parts 8
Activation, airbags 106
Active M differential 126
Active Protection 120
Adaptive brake light, see Dy‐ namic brake lights 120
Adaptive Headlights 100
Adaptive M chassis 126
Additives, oil 187
Adjust headlights 102
After washing the car 209
Age of tyres 176
Airbags 104
Airbags, indicator/warning lamp 105
Airbag switch, see Key switch for front passenger air‐
bags 106
Air conditioning 144
Air distribution, manual 146
Air flow, automatic air condi‐ tioning 146
Air outlets, see Ventila‐ tion 147
Air pressure, tyres 175
Alarm, false 43
Alarm system 42
All-season tyres, see Winter tyres 177
Alternative oil grades 187
Ambient lighting 103
Anti-freeze protection, washer fluid 73
Anti-lock braking system, ABS 123 Anti-theft alarm system, see
Alarm system 42
Anti-theft system, wheel studs 199
Anti-trap mechanism, glass Roof 46
Anti-trap mechanism, win‐ dows 44
Approved engine oils, see Suitable engine oil
grades 187
Aquaplaning 163
Around the centre con‐ sole 14
Around the headlining 15
Around the steering wheel 12
Arrival time 92
Ashtray 149
Attentiveness assistant 121
AUC, automatic air recircula‐ tion control 146
AUTO intensity 145
Automatic air condition‐ ing 144
Automatic air recirculation control, AUC 146
Automatic anti-glare control, see High-beam assis‐
tance 100
Automatic driving lights con‐ trol 99
Automatic locking 42
Automatic parking func‐ tion 56
AUTO program, automatic air conditioning 145
AUTO program, intensity 145
Auto Start Stop function 67
Average fuel consumption 91
Average speed 91
Axle load limit 215 Axle loads, weight 215
B Backrest contour, see Lum‐ bar support 50
Backrest width 50
Bar for tow-starting/ towing 206
Battery, vehicle 199
Being towed, see Tow-start‐ ing/towing 204
Belt holder 54
Belts, seat belts 52
Black ice, see Outside tem‐ perature warning 84
Blower, see Air flow 146
BMW Driver's Guide App 6
BMW homepage 6
BMW internet site 6
BMW Maintenance Sys‐ tem 191
BMW M Technology 160
BMW Services 6
Bonnet 183
Boot lid closing 38
Boot lid, contactless open‐ ing 40
Boot lid, emergency re‐ lease 39
Boot lid via remote control 36
Boot, storage space 156
Bottle holder, see Cu‐ pholder 155
Brake assist 123
Brake lights, adaptive 120
Brake lights, dynamic 120
Braking, information 163
Braking safely 163
Breakdown Assist 202 Seite 218ReferenceEverything from A to Z218
Online Edition for Part no. 01 40 2 964 013 - VI/15