radio controls BMW M4 2016 Owners Manual
[x] Cancel search | Manufacturer: BMW, Model Year: 2016, Model line: M4, Model: BMW M4 2016Pages: 228, PDF Size: 4.88 MB
Page 33 of 228
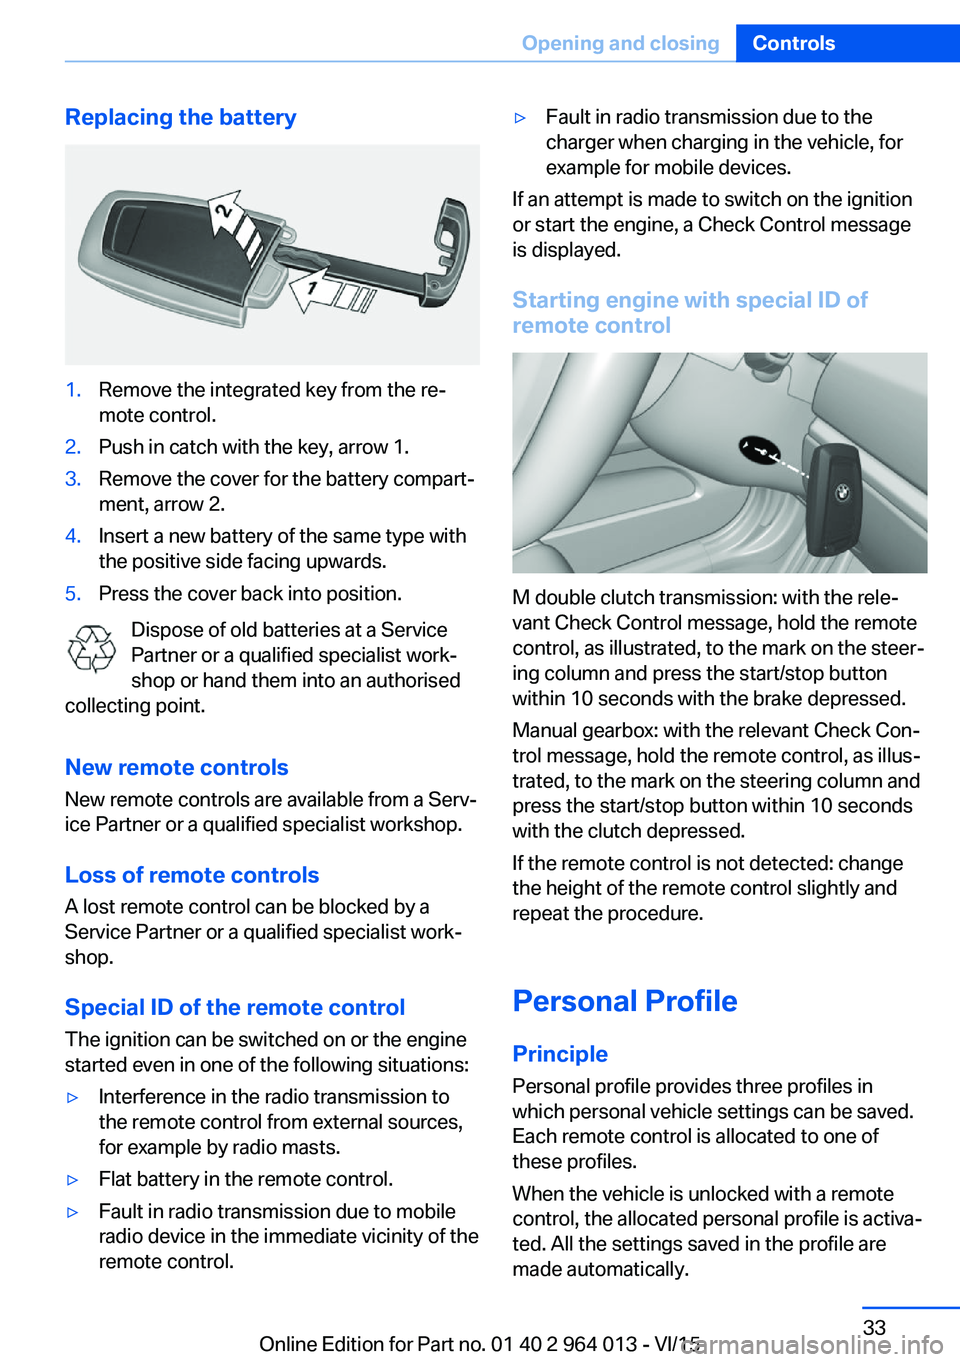
Replacing the battery1.Remove the integrated key from the re‐
mote control.2.Push in catch with the key, arrow 1.3.Remove the cover for the battery compart‐
ment, arrow 2.4.Insert a new battery of the same type with
the positive side facing upwards.5.Press the cover back into position.
Dispose of old batteries at a Service
Partner or a qualified specialist work‐
shop or hand them into an authorised
collecting point.
New remote controlsNew remote controls are available from a Serv‐
ice Partner or a qualified specialist workshop.
Loss of remote controls
A lost remote control can be blocked by a
Service Partner or a qualified specialist work‐
shop.
Special ID of the remote control The ignition can be switched on or the engine
started even in one of the following situations:
▷Interference in the radio transmission to
the remote control from external sources,
for example by radio masts.▷Flat battery in the remote control.▷Fault in radio transmission due to mobile
radio device in the immediate vicinity of the
remote control.▷Fault in radio transmission due to the
charger when charging in the vehicle, for
example for mobile devices.
If an attempt is made to switch on the ignition
or start the engine, a Check Control message
is displayed.
Starting engine with special ID ofremote control
M double clutch transmission: with the rele‐
vant Check Control message, hold the remote
control, as illustrated, to the mark on the steer‐
ing column and press the start/stop button
within 10 seconds with the brake depressed.
Manual gearbox: with the relevant Check Con‐
trol message, hold the remote control, as illus‐
trated, to the mark on the steering column and
press the start/stop button within 10 seconds
with the clutch depressed.
If the remote control is not detected: change
the height of the remote control slightly and
repeat the procedure.
Personal Profile
Principle Personal profile provides three profiles in
which personal vehicle settings can be saved.
Each remote control is allocated to one of
these profiles.
When the vehicle is unlocked with a remote
control, the allocated personal profile is activa‐
ted. All the settings saved in the profile are
made automatically.
Seite 33Opening and closingControls33
Online Edition for Part no. 01 40 2 964 013 - VI/15
Page 34 of 228
If several drivers each use their own remote
control, the vehicle will adapt to their personal
settings when it is unlocked. These settings
are also resaved if the vehicle is used in the in‐
tervening period by someone with a different
remote control.
Changes to settings are saved automatically in
the personal profile.
Three personal profiles and a guest profile can
be created.
Settings
Settings for the following systems and func‐
tions are saved in the active profile. The extent
of settings that can be saved depends on the
country and equipment.▷Unlocking and locking.▷Light.▷Air conditioning.▷Radio.▷Instrument cluster.▷Favourites buttons.▷Volumes, sound.▷Control Display.▷Navigation.▷TV.▷Park Distance Control PDC.▷Rear-view camera.▷Side view.▷Head-Up Display.▷M Drive: configurations.▷Driver's seat position, exterior mirror posi‐
tion, steering wheel position.▷Cruise Control.▷Intelligent Safety.▷Lane change warning.Profile management
Calling up profiles Independently of the remote control that is
used, another profile can be called up.
Via iDrive:1."Settings"2."Profiles"3.Select a profile.▷The settings saved in the called-up profile
are made automatically.▷The profile called up is assigned to the re‐
mote control currently used.▷If the profile has already been allocated to
another remote control, this profile applies
to both remote controls. It is no longer
possible to differentiate between the set‐
tings of both remote controls.
Renaming profiles
To avoid mixing up the profiles, each profile
can be given a personal name.
On the Control Display:
1."Settings"2."Profiles"3.Call up "Options".4."Rename current profile"
Resetting profiles Settings of the active profile are reset to fac‐
tory settings.
On the Control Display:
1."Settings"2."Profiles"3.Call up "Options".4."Reset current profile"
Exporting profiles Most of the settings of the active profile can be
exported.
Seite 34ControlsOpening and closing34
Online Edition for Part no. 01 40 2 964 013 - VI/15
Page 37 of 228
In some equipment versions, doors are also
unlocked if appropriate
To prevent the remote control from being
locked in, do not place the remote control in
the boot.
If the doors were not unlocked, the boot lid is
locked again as soon as it is closed.
Malfunction
Detection of the remote control by the vehicle
may be disrupted by the following circumstan‐
ces, amongst others:▷The battery of the remote control is dis‐
charged. Replacing the battery, see
page 33.▷Disruption of the radio link by transmission
masts or other equipment transmitting
powerful signals.▷Shielding of the remote control by metallic
objects.▷Disruption of the radio link by mobile tele‐
phones or other electronic devices in the
immediate vicinity.
Do not transport the remote control together
with metallic objects or electronic devices.
If there is a malfunction, the vehicle can also be
unlocked and locked from the outside without
remote control, see page 37.
Without remote control
From outside WARNING
If the vehicle is locked from the outside, it
cannot be unlocked from the inside in some
country versions.
If persons must remain in the vehicle for an ex‐ tended period of time and are exposed to ex‐
treme heat or cold, there is a risk of injury or
life. Do not lock the vehicle from the outside
when there is someone inside it.◀
ATTENTION
The door lock is firmly connected to the
door. The door handle can be moved. Pulling
the door handle when the integrated key is in‐
serted can damage the paint or the key. Dan‐
ger of damage to property. Pull out the
integrated key before pulling on the outer door
handle.◀
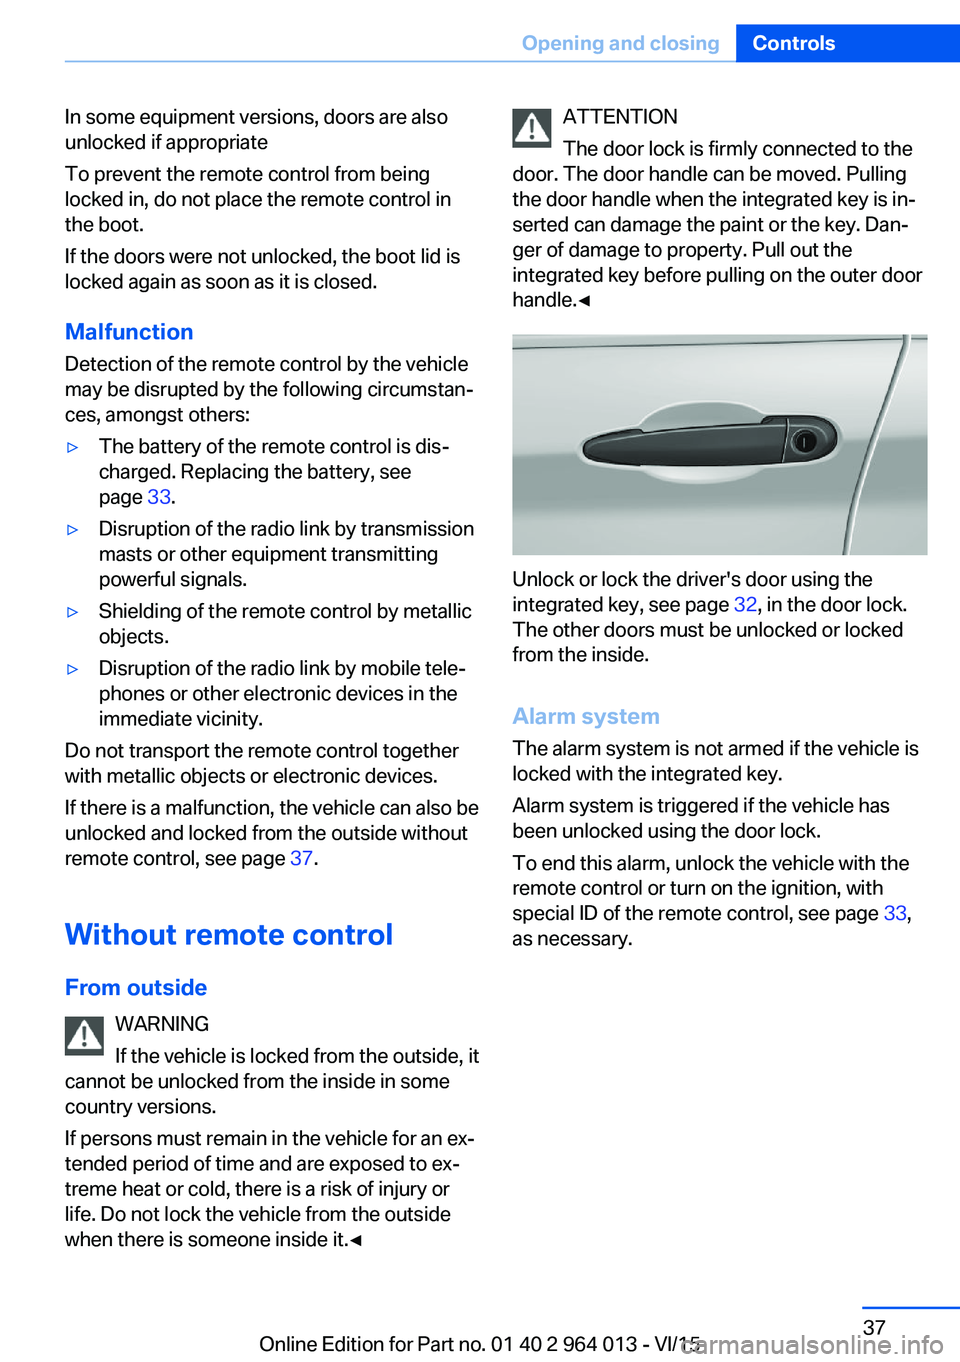
Unlock or lock the driver's door using the
integrated key, see page 32, in the door lock.
The other doors must be unlocked or locked
from the inside.
Alarm system
The alarm system is not armed if the vehicle is
locked with the integrated key.
Alarm system is triggered if the vehicle has
been unlocked using the door lock.
To end this alarm, unlock the vehicle with the
remote control or turn on the ignition, with
special ID of the remote control, see page 33,
as necessary.
Seite 37Opening and closingControls37
Online Edition for Part no. 01 40 2 964 013 - VI/15
Page 41 of 228
The boot lid opens, regardless of whether it
was locked or unlocked.
The hazard warning lights flash before open‐
ing.
If the remote control is within the sensor range,
the boot lid can be accidentally opened by an
unintentional or supposedly recognized foot
movement.
The sensor range extends to approx. 1.50 m,
5 ft behind the rear area.
WARNING
Operating the boot lid can lead to parts
of the body becoming trapped. Danger of in‐
jury. When opening and closing, make sure
that the area of movement of the boot lid is
free.◀
ATTENTION
The boot lids swings rearwards and up‐
wards when opened. Danger of damage to
property. When opening and closing, make
sure that the area of movement of the boot lid
is free.◀
Malfunction
Detection of the remote control by the vehicle
may be disrupted by the following circumstan‐
ces, amongst others:▷The battery of the remote control is dis‐
charged. Replacing the battery, see
page 33.▷Disruption of the radio link by transmission
masts or other equipment transmitting
powerful signals.▷Shielding of the remote control by metallic
objects.▷Disruption of the radio link by mobile tele‐
phones or other electronic devices in the
immediate vicinity.
Do not transport the remote control together
with metallic objects or electronic devices.
In case of a fault, unlock and lock the vehicle
with the buttons on the remote control or with
the integrated key, see page 37.
Settings UnlockingSettings are saved in active profile, see
page 33.
Doors1."Settings"2."Doors/key"3. Select the symbol.4.Select the desired function:▷"Driver's door only"
Only the driver's door and fuel filler flap
are unlocked. Pressing again unlocks
the entire vehicle.▷"All doors"
The entire vehicle is unlocked.▷"Comfort entry"
The entire vehicle is unlocked.
Pressing the button on the remote
control twice in direct succession cau‐
ses the window to be lowered further
when the door is subsequently opened.
Boot lid
Depending on the equipment and country ver‐
sion, these settings are not provided.
1."Settings"2."Doors/key"3. Select the symbol.4.Select the desired function:▷"Tailgate"
Boot lid is opened.▷"Tailgate + door(s)"Seite 41Opening and closingControls41
Online Edition for Part no. 01 40 2 964 013 - VI/15
Page 44 of 228
▷Pressing the start/stop button.▷Releasing the parking brake.▷Opening and closing doors or windows.▷Setting the selector lever to neutral.▷Operating vehicle equipment.
Risk of accident or injury. Do not leave children
or animals unsupervised in the vehicle. When
leaving the vehicle, take the remote control
with you and lock it.◀
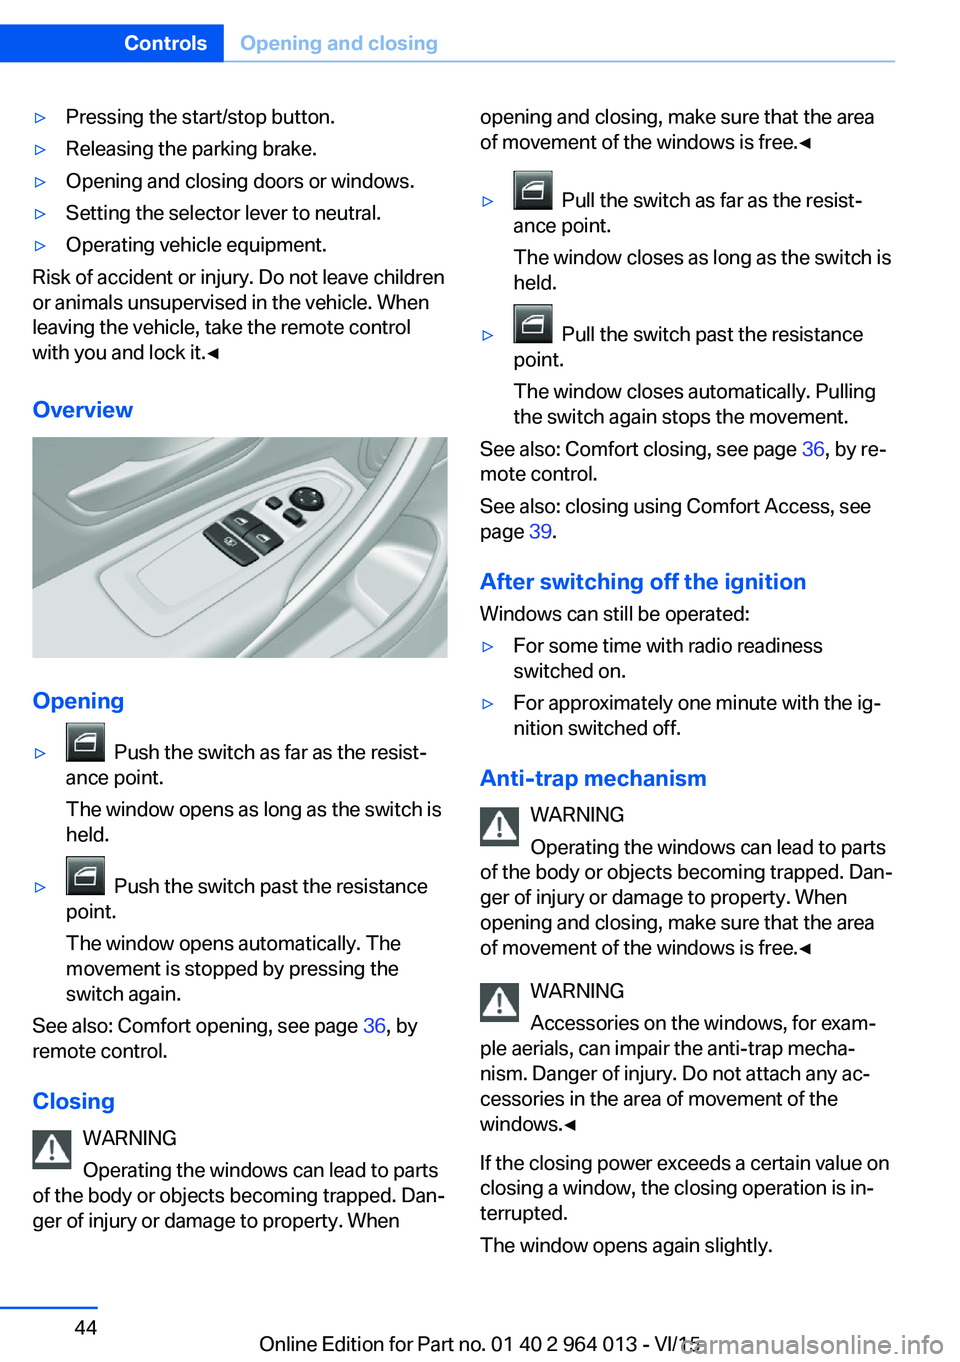
Overview
Opening
▷ Push the switch as far as the resist‐
ance point.
The window opens as long as the switch is
held.▷ Push the switch past the resistance
point.
The window opens automatically. The
movement is stopped by pressing the
switch again.
See also: Comfort opening, see page 36, by
remote control.
Closing WARNING
Operating the windows can lead to parts
of the body or objects becoming trapped. Dan‐
ger of injury or damage to property. When
opening and closing, make sure that the area
of movement of the windows is free.◀▷ Pull the switch as far as the resist‐
ance point.
The window closes as long as the switch is
held.▷ Pull the switch past the resistance
point.
The window closes automatically. Pulling
the switch again stops the movement.
See also: Comfort closing, see page 36, by re‐
mote control.
See also: closing using Comfort Access, see
page 39.
After switching off the ignition Windows can still be operated:
▷For some time with radio readiness
switched on.▷For approximately one minute with the ig‐
nition switched off.
Anti-trap mechanism
WARNING
Operating the windows can lead to parts
of the body or objects becoming trapped. Dan‐
ger of injury or damage to property. When
opening and closing, make sure that the area
of movement of the windows is free.◀
WARNING
Accessories on the windows, for exam‐
ple aerials, can impair the anti-trap mecha‐
nism. Danger of injury. Do not attach any ac‐
cessories in the area of movement of the
windows.◀
If the closing power exceeds a certain value on
closing a window, the closing operation is in‐
terrupted.
The window opens again slightly.
Seite 44ControlsOpening and closing44
Online Edition for Part no. 01 40 2 964 013 - VI/15
Page 65 of 228
DrivingVehicle equipment
This chapter describes all standard, national
and special equipment provided in the model
series. Equipment not available in the vehicle is
therefore also described, for example the se‐
lected special equipment or national version.
This also applies to safety-relevant functions
and systems. Comply with the relevant na‐
tional regulations when using the correspond‐
ing functions and systems.
Start/stop button
Principle The ignition is switched on or offand the engine is started by
pressing the start/stop button.
M double clutch transmission:
The engine starts if the brakes
are applied when the start-stop button is
pressed.
Manual gearbox: The engine starts if the clutch
pedal is pressed when pressing the start/stop
button.
Ignition on M double clutch transmission: Press the start/
stop button without applying the brakes.
Manual gearbox: Press the start/stop button,
do not press the clutch pedal.
All systems are operational.
Most of the indicator and warning lamps in the
instrument cluster are illuminated for different
lengths of time.
To save battery power when the engine is off,
switch off the ignition and any unnecessary
electronic systems.Ignition off
M double clutch transmission: Press the start/
stop button again without applying the brakes.
Manual gearbox: Press the start/stop button
again, do not press the clutch pedal.
All indicator lights in the instrument cluster ex‐
tinguish.
To save battery power when the engine is off,
switch off the ignition and any unnecessary
electronic systems.
Notes
When the ignition is switched off, selector
lever position P will be automatically engaged,
if selector lever position D or R is engaged.
With the vehicle stationary and the engine shut
down, the ignition is switched off automatically
under the following circumstances:▷When locking, even with the low-beam
headlights switched on.▷Shortly before the battery is discharged so
that an engine start remains possible.▷When opening or closing the driver's door,
if the driver's belt is unfastened and the
low-beam headlights are switched off.▷When the driver's belt is unfastened, if the
driver's door is opened and the low-beam
headlights switched off.
After about 15 minutes without further opera‐
tion, low-beam headlights are changed over to
side lights.
Radio ready state
Activate radio ready state: when the engine is
running, press the start/stop button.
Individual electrical systems remain opera‐
tional.
The radio ready sate is automatically switched
off in the following situations:
Seite 65DrivingControls65
Online Edition for Part no. 01 40 2 964 013 - VI/15
Page 66 of 228
▷After approximately eight minutes.▷When locking via the central locking sys‐
tem.▷Shortly before the battery is discharged so
that an engine start remains possible.
Radio readiness remains active when ignition
is switched off automatically, such as for
following reasons:
▷Opening or closing driver's door.▷Unfastening driver's seat belt.▷When low-beam headlights are automati‐
cally changed to side lights.
If engine is switched off and ignition is
switched on, radio ready state will be automati‐
cally activated when door is opened if light is
switched off or daytime driving lights are
switched on, when corresponding equipment
is fitted.
Engine start Notes DANGER
A blocked exhaust pipe or inadequate
ventilation can allow harmful exhaust fumes to
penetrate the vehicle. The exhaust gas con‐
tains carbon monoxide, which is colourless and
odourless, but highly toxic. In enclosed spaces,
the exhaust fumes can also build up outside
the vehicle. Danger of fatal injury. Keep the ex‐
haust pipe clear and ensure sufficient ventila‐
tion.◀
WARNING
An unsecured vehicle can start moving
and rolling away. Danger of accidents. Before
leaving the vehicle, secure it to prevent rolling
away.
Observe the following to ensure that the vehi‐
cle is secured against rolling away:
▷Engage the parking brake.▷Turn the front wheels into the direction of
the kerb on upward or downward gradi‐
ents.▷Additionally secure the vehicle on upward
or downward gradients, e.g. using a
wedge.◀
ATTENTION
Repeated start attempts or starting sev‐
eral times in quick succession means that fuel
is not combusted, or insufficiently so. The cat‐
alytic converter can overheat. Danger of dam‐
age to property. Avoid starting more than once
in quick succession.◀
M double clutch transmission
Starting the engine
1.Press the brake.2.Press the start/stop button.
Starting proceeds for a certain time automati‐
cally and stops as soon as the engine is star‐
ted.
Manual gearbox
Starting the engine
1.Press the brake.2.Depress the clutch and engage idle posi‐
tion.3.Press the start/stop button.
Starting proceeds for a certain time automati‐
cally and stops as soon as the engine is star‐
ted.
Seite 66ControlsDriving66
Online Edition for Part no. 01 40 2 964 013 - VI/15
Page 67 of 228
Stopping the engine
Notes WARNING
Unsupervised children or animals in the
vehicle can set the vehicle in motion and en‐
danger themselves or other road users, for ex‐
ample by the following actions:▷Pressing the start/stop button.▷Releasing the parking brake.▷Opening and closing doors or windows.▷Setting the selector lever to neutral.▷Operating vehicle equipment.
Risk of accident or injury. Do not leave children
or animals unsupervised in the vehicle. When
leaving the vehicle, take the remote control
with you and lock it.◀
WARNING
An unsecured vehicle can start moving
and rolling away. Danger of accidents. Before
leaving the vehicle, secure it to prevent rolling
away.
Observe the following to ensure that the vehi‐
cle is secured against rolling away:
▷Engage the parking brake.▷Turn the front wheels into the direction of
the kerb on upward or downward gradi‐
ents.▷Additionally secure the vehicle on upward
or downward gradients, e.g. using a
wedge.◀
Before entering the car wash
So that the vehicle can roll into the vehicle
wash, follow the information on washing in au‐
tomatic vehicle washes, see page 208.
M double clutch transmission
Stopping the engine
1.Brake the vehicle until it comes to a stop.2.Press the start/stop button.
The engine is switched off.
The radio ready state is switched on.3.Apply the parking brake.
Manual gearbox
Stopping the engine
1.Press the Start/Stop button when the vehi‐
cle is at standstill.2.Engage first gear or reverse.3.Apply the parking brake.
Auto Start Stop function
Principle The Auto Start Stop function helps you to save
fuel. by stopping the engine when stationary,
for example, in a traffic jam or at traffic lights.
The ignition remains switched on. For driving
off, the engine starts automatically.
Automatic operation
After each time the engine is started using the
start/stop button, the Auto Start Stop function
is ready to operate.
The function is activated from 5 km/h,
3 mph3 mph, km/h.
Stopping the engine The engine is automatically shut down whenstationary under the following conditions:
M double clutch transmission:
▷Selector lever in selector lever position D.▷Brake pedal remains depressed while the
vehicle is at a standstill.▷Driver's seat belt buckled or driver's door
closed.
Manual gearbox:
▷Transmission in neutral and clutch pedal
not pressed.Seite 67DrivingControls67
Online Edition for Part no. 01 40 2 964 013 - VI/15
Page 75 of 228
Activating1.Engage a drive position.2.Briefly tap on the accelerator pedal.
The vehicle rolls at minimum speed.
This is possible in 1st and 2nd gear and in re‐
verse.
Deactivating
Brake the vehicle until it comes to a stop.
Flashing display on selector lever of
double clutch transmission
In some situations, the actually engaged gear‐
box setting may be different from the selector
lever position, and the display in the selector
lever flashes.
In these cases, refer to the display in the in‐
strument cluster, see page 75.
D Drive mode
In drive mode, all forward gears are automati‐ cally changed.
Kick-down: for maximum acceleration, for ex‐
ample, when overtaking. To do that, depress
the accelerator pedal beyond the resistance
point.
Change to sequential mode: shift using the
shift paddles or push the selector lever in the
D/S direction.
S sequential mode Change up or change down using the shift
paddle or selector lever without coming off the
gas.
▷Shortly before a minimum speed depend‐
ing on the gear, it automatically down‐
shifts.▷The gears are only shifted up or down with
the appropriate engine speed and road
speed.
For example, there is no downshift at too
high an engine speed.▷Kick-down: by operating the kick-down
and the left shift paddle or selector lever at
the same time, you can change down to
the lowest possible gear.▷Driving off is possible even in 2nd gear on a
level carriageway, for example, when it is
smooth.
To change to Drive mode: press selector lever
in the D/S direction.
R Reverse Engage this position only when the vehicle is
stationary.
For rocking out, even up to 10 km/h, approxi‐
mately 6 mph is possible. To do that, shift be‐
tween forward and reverse gear without apply‐
ing the brakes.
N Neutral, idling Select this in a car wash, for example. The ve‐
hicle will then be able to move, see page 208.
P Park The driven wheels are locked.
Transmission position P is engaged automati‐
cally:
▷After stopping the engine in the radio
ready state, see page 65, or ignition off,
see page 65, when position R or D is en‐
gaged.▷Position N is engaged and ignition is off.
Displays in the instrument cluster
Drive mode
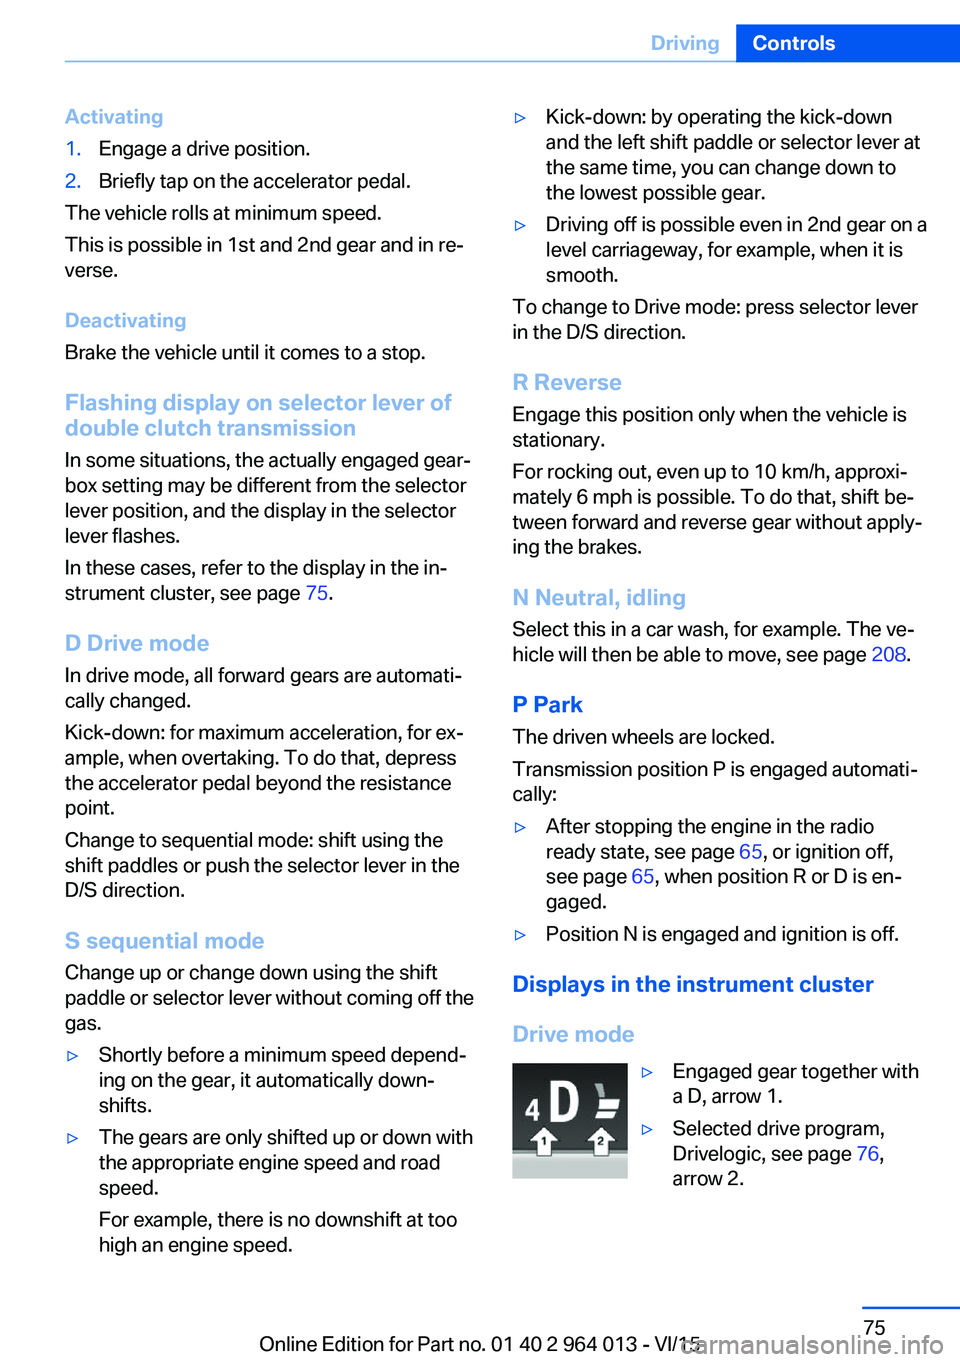
▷Engaged gear together with
a D, arrow 1.▷Selected drive program,
Drivelogic, see page 76,
arrow 2.Seite 75DrivingControls75
Online Edition for Part no. 01 40 2 964 013 - VI/15
Page 99 of 228
Parking lights
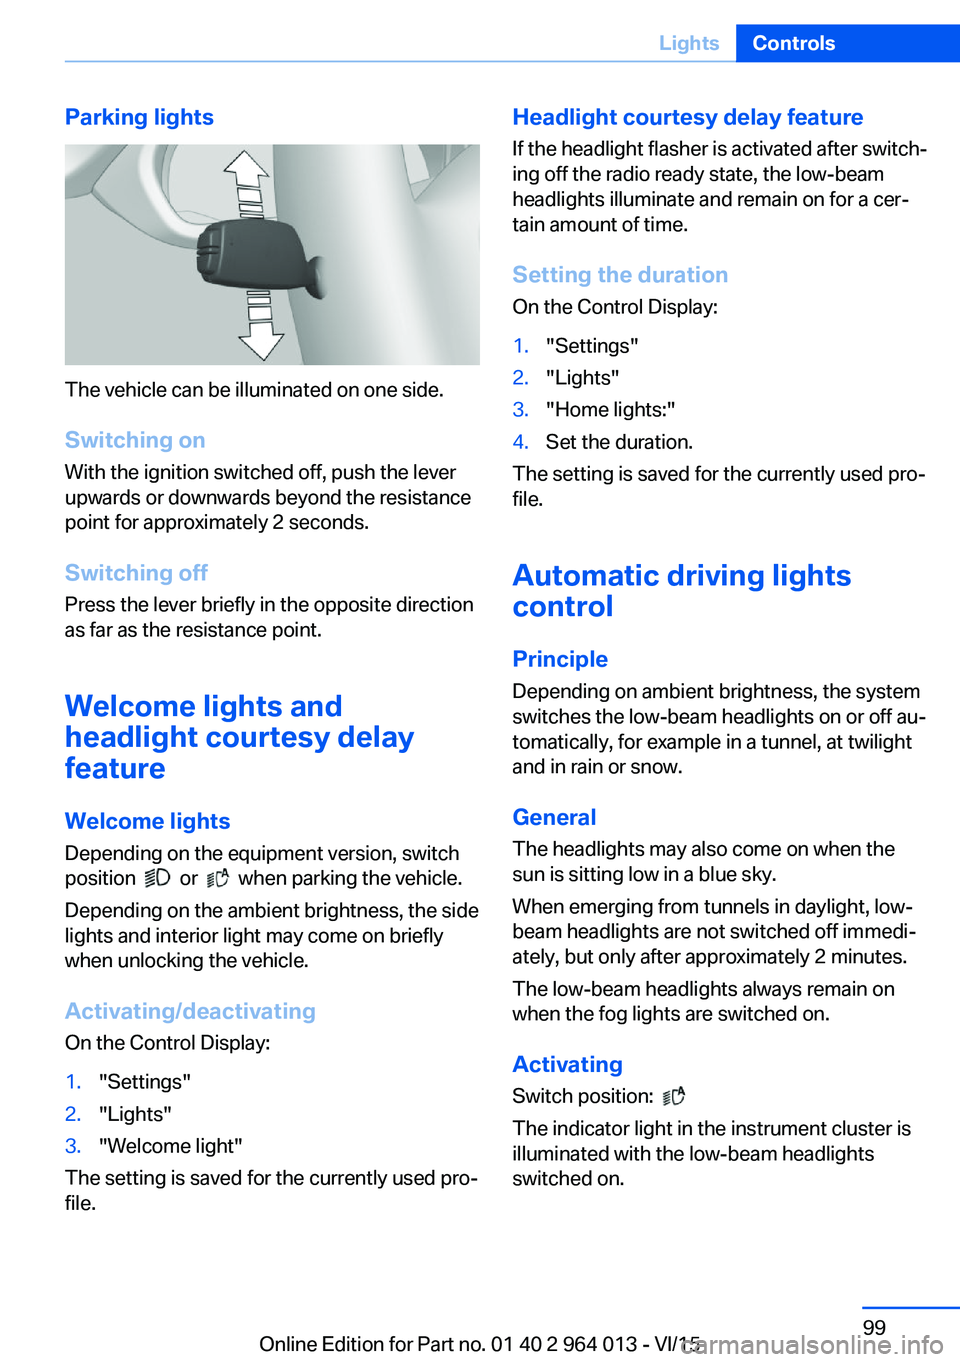
The vehicle can be illuminated on one side.
Switching on With the ignition switched off, push the lever
upwards or downwards beyond the resistance
point for approximately 2 seconds.
Switching off Press the lever briefly in the opposite direction
as far as the resistance point.
Welcome lights and
headlight courtesy delay
feature
Welcome lights Depending on the equipment version, switch
position
or when parking the vehicle.
Depending on the ambient brightness, the side
lights and interior light may come on briefly
when unlocking the vehicle.
Activating/deactivating
On the Control Display:
1."Settings"2."Lights"3."Welcome light"
The setting is saved for the currently used pro‐
file.
Headlight courtesy delay feature
If the headlight flasher is activated after switch‐
ing off the radio ready state, the low-beam
headlights illuminate and remain on for a cer‐
tain amount of time.
Setting the duration
On the Control Display:1."Settings"2."Lights"3."Home lights:"4.Set the duration.
The setting is saved for the currently used pro‐
file.
Automatic driving lightscontrol
Principle Depending on ambient brightness, the system
switches the low-beam headlights on or off au‐
tomatically, for example in a tunnel, at twilight
and in rain or snow.
General The headlights may also come on when the
sun is sitting low in a blue sky.
When emerging from tunnels in daylight, low-
beam headlights are not switched off immedi‐
ately, but only after approximately 2 minutes.
The low-beam headlights always remain on
when the fog lights are switched on.
Activating Switch position:
The indicator light in the instrument cluster is
illuminated with the low-beam headlights
switched on.
Seite 99LightsControls99
Online Edition for Part no. 01 40 2 964 013 - VI/15