navigation system BMW M5 2006 Workshop Manual
[x] Cancel search | Manufacturer: BMW, Model Year: 2006, Model line: M5, Model: BMW M5 2006Pages: 231, PDF Size: 8.44 MB
Page 163 of 231
161
Entertainment
Reference
At a glance
Controls
Driving tips Communications
Navigation
Mobility
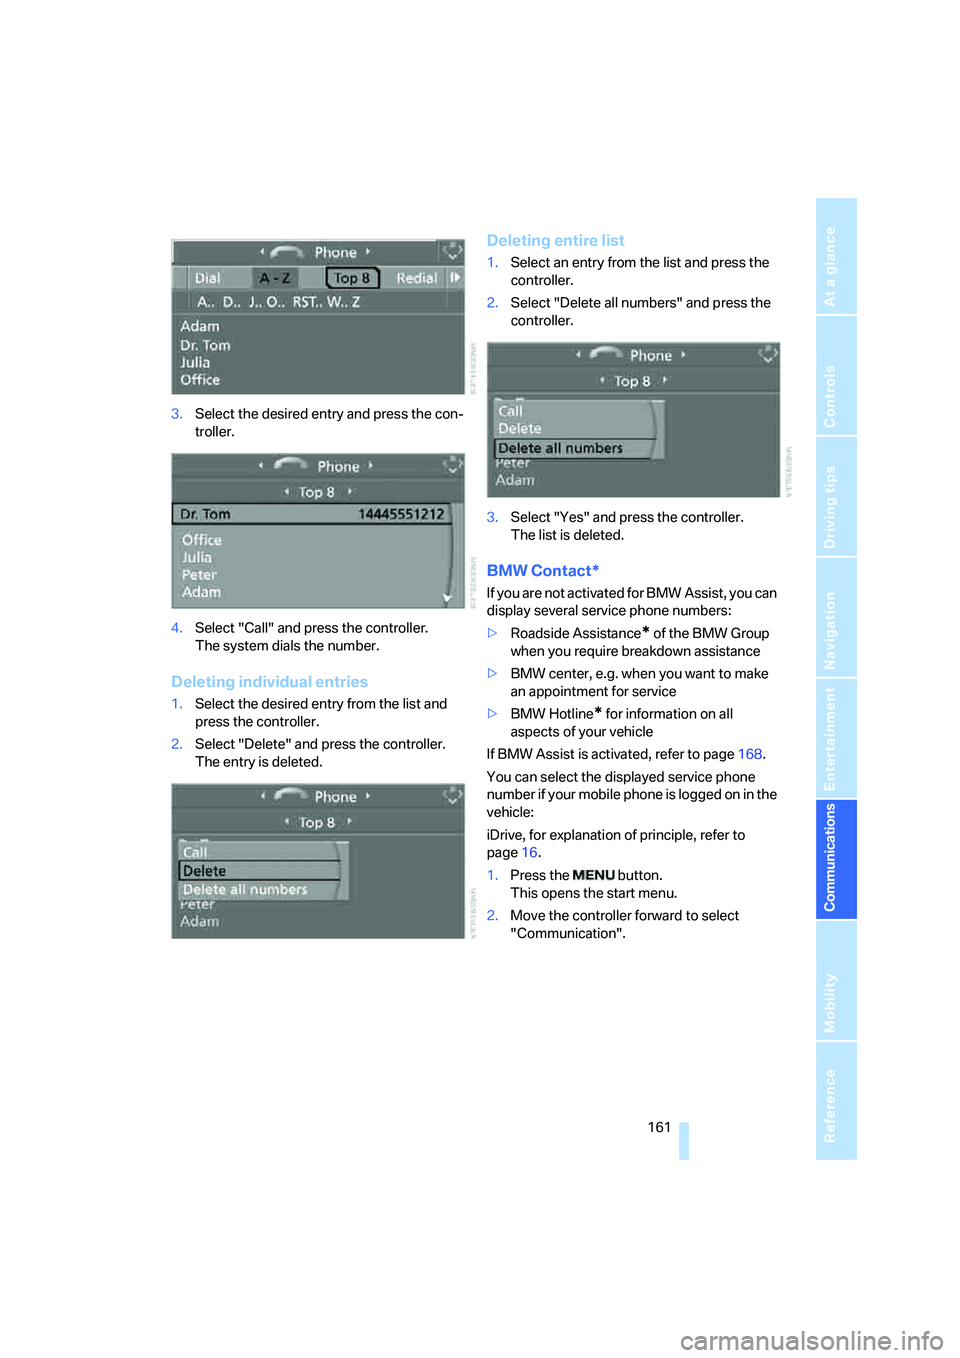
3.Select the desired entry and press the con-
troller.
4.Select "Call" and press the controller.
The system dials the number.
Deleting individual entries
1.Select the desired entry from the list and
press the controller.
2.Select "Delete" and press the controller.
The entry is deleted.
Deleting entire list
1.Select an entry from the list and press the
controller.
2.Select "Delete all numbers" and press the
controller.
3.Select "Yes" and press the controller.
The list is deleted.
BMW Contact*
If you are not activated for BMW Assist, you can
display several service phone numbers:
>Roadside Assistance
* of the BMW Group
when you require breakdown assistance
>BMW center, e.g. when you want to make
an appointment for service
>BMW Hotline
* for information on all
aspects of your vehicle
If BMW Assist is activated, refer to page168.
You can select the displayed service phone
number if your mobile phone is logged on in the
vehicle:
iDrive, for explanation of principle, refer to
page16.
1.Press the button.
This opens the start menu.
2.Move the controller forward to select
"Communication".
Page 165 of 231
163
Entertainment
Reference
At a glance
Controls
Driving tips Communications
Navigation
Mobility
Act according to what is shown on the
mobile phone display, refer to the operating
instructions of your mobile phone.
>Press the button above the storage
compartment. Switching over may take
several seconds.
From handsfree system to mobile
phone
When you telephone via the handsfree system,
you can also continue the call via the mobile
phone if necessary, depending on the mobile
phone model. Act according to what is shown
on the mobile phone display, refer to the oper-
ating instructions of your mobile phone.
Operation by voice*
The concept
You can operate your mobile phone without
having to remove your hands from the steering
wheel. When making your entries, you will be
supported by announcements and questions in
many cases.
The same prerequisites as for operation via
iDrive apply, refer to page158.
Symbols in Owner's Manual
Voice commands
Activating system
1.Press the button on the steering wheel.
An acoustic signal indicates that you can
say commands.
2.Say the command.
The text or numbers that the voice com-
mand system has registered will appear on
the Control Display.
Ending/canceling operation by voice
Press the button on the steering wheel
or
In dialogs where text is spoken, not a command,
e.g. a name, canceling is only possible using the
button on the steering wheel.
Having possible commands read aloud
The system understands default commands
that must be spoken word for word.
You can have the possible commands spoken
by the system at any point:
Using alternative commands
There are often a number of commands to run a
function, e.g.:
The system recognizes digits from zero to nine.
You can say each digit individually or group
them into a sequence to accelerate the input.
{...}Say the specified commands word for
word.
{{...}} Indicates responses of the system.
{Cancel}.
{Help}
{Dial name} or {Name}.
Page 166 of 231
Telephoning
164
Example: dialing phone numbers
Start the dialog:
Press the button on the steering wheel.
Adjusting volume
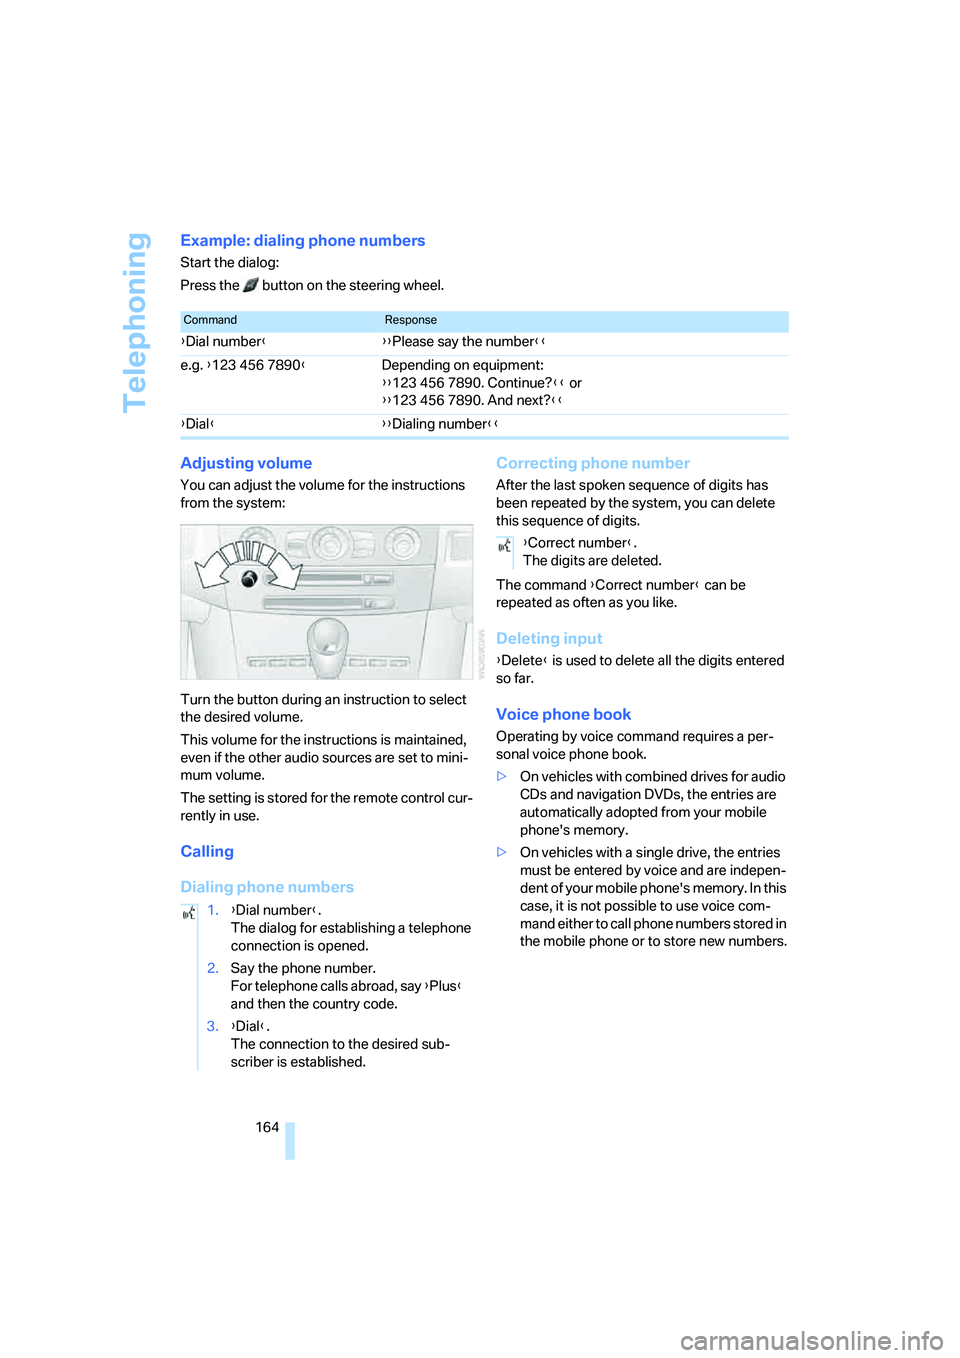
You can adjust the volume for the instructions
from the system:
Turn the button during an instruction to select
the desired volume.
This volume for the instructions is maintained,
even if the other audio sources are set to mini-
mum volume.
The setting is stored for the remote control cur-
rently in use.
Calling
Dialing phone numbersCorrecting phone number
After the last spoken sequence of digits has
been repeated by the system, you can delete
this sequence of digits.
The command {Correct number} can be
repeated as often as you like.
Deleting input
{Delete} is used to delete all the digits entered
so far.
Voice phone book
Operating by voice command requires a per-
sonal voice phone book.
>On vehicles with combined drives for audio
CDs and navigation DVDs, the entries are
automatically adopted from your mobile
phone's memory.
>On vehicles with a single drive, the entries
must be entered by voice and are indepen-
dent of your mobile phone's memory. In this
case, it is not possible to use voice com-
mand either to call phone numbers stored in
the mobile phone or to store new numbers.
CommandResponse
{Dial number}{{Please say the number}}
e.g. {123 456 7890}Depending on equipment:
{{123 456 7890. Continue?}} or
{{123 456 7890. And next?}}
{Dial}{{Dialing number}}
1.{Dial number}.
The dialog for establishing a telephone
connection is opened.
2.Say the phone number.
For telephone calls abroad, say {Plus}
and then the country code.
3.{Dial}.
The connection to the desired sub-
scriber is established.
{Correct number}.
The digits are deleted.
Page 167 of 231
165
Entertainment
Reference
At a glance
Controls
Driving tips Communications
Navigation
Mobility
Creating and editing voice phone
book*
Save entry:
An entry always consists of a name and phone
number.
Delete entry:
You can delete any entry from the voice phone
book.
Delete all entries:
{Delete phone book} deletes all entries in the
phone book.
Have entries read aloud and select:
You can have all the entries of your voice phone
book read aloud in the order of input and select
a certain entry to establish a connection:
Selecting an entry
The connection to the phone number of the
selected entry is established.
Redialing
The {Redial} command calls "Redial".
Notes
The commands in English were available
as of this printing. Other languages are
currently not available. To operate the mobile
phone via the voice command system, refer to
page22.<
Important for voice commands
For voice commands, keep the following in
mind:
>Issue the commands smoothly and at nor-
mal volume, avoiding excessive emphasis
and pauses.
>Keep the doors, windows and glass sunroof
closed to prevent interference from ambi-
ent noise.
>Avoid making other noise in the vehicle
while speaking. 1.{Save name}.
The dialog for storing a name is
opened.
2.Speak name and repeat entry upon
request.
The spoken length of the names in the
phone book must not exceed approx.
2seconds.
3.Say the phone number when prompted.
4.To store the phone number:
{Save}.
1.{Delete name}.
The dialog for deleting an entry is
opened.
2.Say the name when prompted.
3.Confirm the prompt with {Yes}.
1.{Delete phone book}.
The dialog for deleting phone book is
opened.
2.Confirm the prompt with {Yes}.
3.Confirm the repeated prompt with
{Yes}.
1.{Read phone book}.
The dialog for reading phone book is
opened.
2.{Dial number} when the desired entry is
read aloud.
1.{Dial name}.
The dialog for selecting an entry is
opened.
2.Say the name when prompted.
3.Confirm the prompt with {Yes}.
Page 169 of 231
167
Entertainment
Reference
At a glance
Controls
Driving tips Communications
Navigation
Mobility
TeleService , BMW Assist
TeleService
TeleService supports you when communicat-
ing with a BMW center. The built-in car phone
can be used to transmit data regarding the ser-
vice status of your vehicle or regarding legally
mandated inspections directly to your BMW
center. This is the same data that is also stored
for CBS Condition Based Service in the remove
control. Your BMW center can then contact
you, and you can make an appointment that
suits you while you are still on the road. Your
advantage here is that your BMW center can
prepare in advance for the required mainte-
nance work. The TeleService functions are
country-specific: the data regarding the service
status of your vehicle or regarding legally man-
dated inspections is transmitted on a country-
specific basis either automatically before they
fall due or during your calls to the BMW center.
Your BMW center will be glad to provide more
detailed information.
BMW Assist
BMW Assist provides you with other services in
addition to TeleService. For example, the posi-
tion data of your vehicle can be transferred to
the BMW Assist response center if an emer-
gency call
* has been initiated.
Many functions of BMW Assist depend on the
individually agreed contract. Data transmission,
e. g. of the CBS Condition Based Service, dif-
fers from country to country.
The contract of participation with BMW Assist
and the activation must be completed before
you can use BMW Assist.
When the contract expires, the car phone can
be deactivated by a BMW center without having
to visit a BMW center. Following deactivation of
the car phone, no emergency calls can be
made. The car phone can be reactivated after
signing a new contract with a BMW center.You can also use the services of BMW Assist via
the Internet. The range of services is continually
being expanded.
Requirements
You can use TeleService or BMW Assist when
the following requirements are met:
>The installed car phone is logged on to a
cellular telephone network. This network
must be capable of transmitting the ser-
vices.
>To transmit position data, the vehicle must
be able to determine the current position.
This can be displayed on the Control Dis-
play.
>For TeleService or BMW Assist to be acti-
vated and updated, the GPS signal must be
available.
>For BMW Assist: you have applied to your
BMW center or BMW Customer Support for
BMW Assist.
Enabling TeleService or BMW Assist
For you to be able to use the services of
TeleService or BMW Assist, these must be
enabled.
Requirements
>Make sure that the vehicle can determine its
current position. Reception is best when
you have an unobstructed view to the sky.
>Leave radio readiness switched on while
connecting to the system.
Enabling
iDrive, for explanation of principle, refer to
page16.
1.Press the button.
This opens the start menu.
2.Press the controller to open the menu.
**
Page 181 of 231
Mobility
179Reference
At a glance
Controls
Driving tips
Communications
Navigation
Entertainment
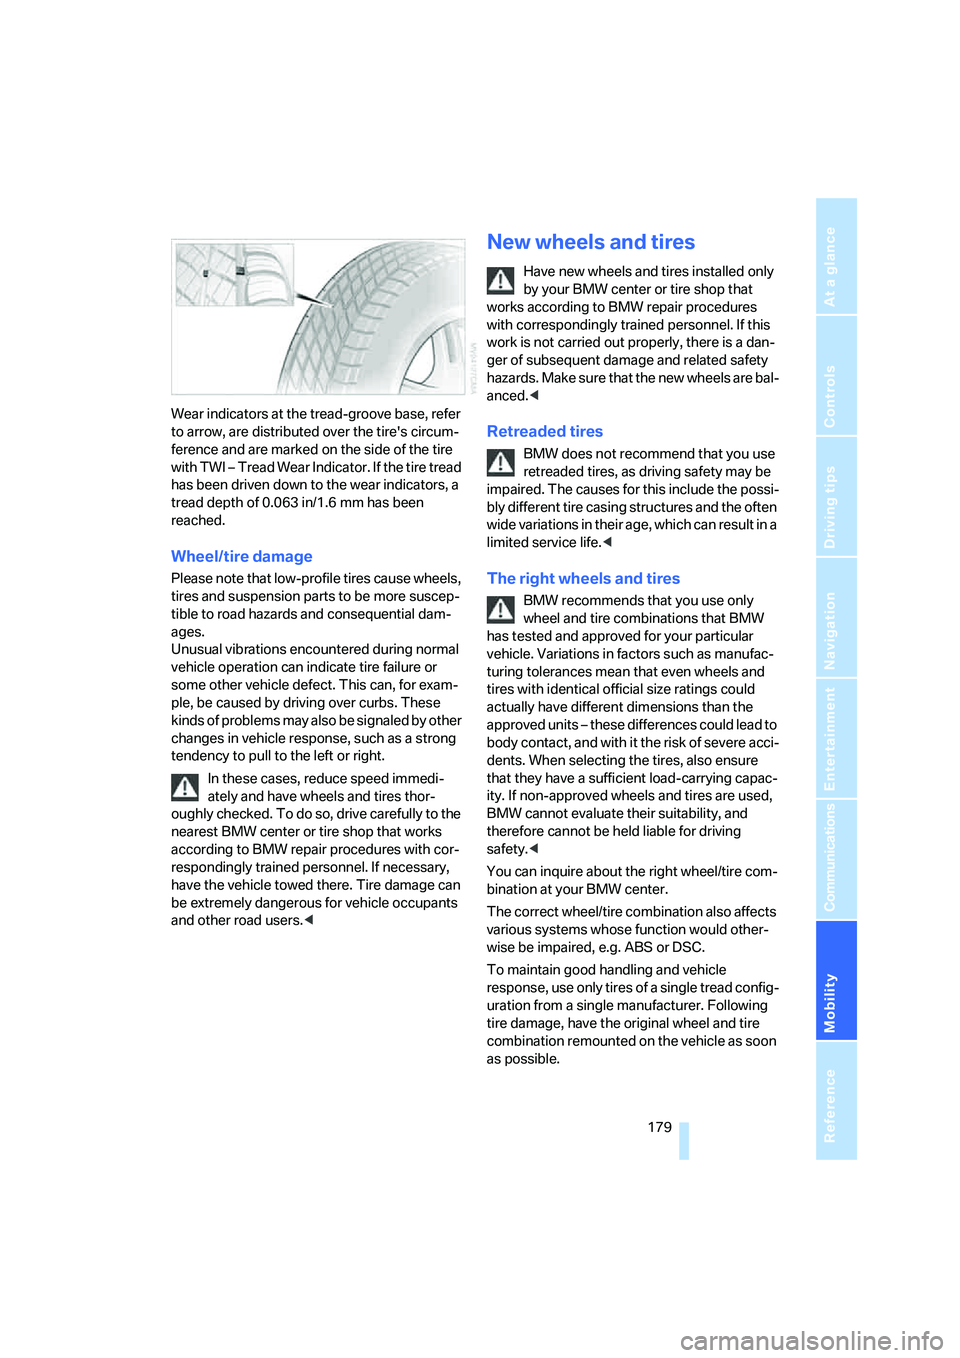
Wear indicators at the tread-groove base, refer
to arrow, are distributed over the tire's circum-
ference and are marked on the side of the tire
with TWI – Tread Wear Indicator. If the tire tread
has been driven down to the wear indicators, a
tread depth of 0.063 in/1.6 mm has been
reached.
Wheel/tire damage
Please note that low-profile tires cause wheels,
tires and suspension parts to be more suscep-
tible to road hazards and consequential dam-
ages.
Unusual vibrations encountered during normal
vehicle operation can indicate tire failure or
some other vehicle defect. This can, for exam-
ple, be caused by driving over curbs. These
kinds of problems may also be signaled by other
changes in vehicle response, such as a strong
tendency to pull to the left or right.
In these cases, reduce speed immedi-
ately and have wheels and tires thor-
oughly checked. To do so, drive carefully to the
nearest BMW center or tire shop that works
according to BMW repair procedures with cor-
respondingly trained personnel. If necessary,
have the vehicle towed there. Tire damage can
be extremely dangerous for vehicle occupants
and other road users.<
New wheels and tires
Have new wheels and tires installed only
by your BMW center or tire shop that
works according to BMW repair procedures
with correspondingly trained personnel. If this
work is not carried out properly, there is a dan-
ger of subsequent damage and related safety
hazards. Make sure that the new wheels are bal-
anced.<
Retreaded tires
BMW does not recommend that you use
retreaded tires, as driving safety may be
impaired. The causes for this include the possi-
bly different tire casing structures and the often
wide variations in their age, which can result in a
limited service life.<
The right wheels and tires
BMW recommends that you use only
wheel and tire combinations that BMW
has tested and approved for your particular
vehicle. Variations in factors such as manufac-
turing tolerances mean that even wheels and
tires with identical official size ratings could
actually have different dimensions than the
approved units – these differences could lead to
body contact, and with it the risk of severe acci-
dents. When selecting the tires, also ensure
that they have a sufficient load-carrying capac-
ity. If non-approved wheels and tires are used,
BMW cannot evaluate their suitability, and
therefore cannot be held liable for driving
safety.<
You can inquire about the right wheel/tire com-
bination at your BMW center.
The correct wheel/tire combination also affects
various systems whose function would other-
wise be impaired, e.g. ABS or DSC.
To maintain good handling and vehicle
response, use only tires of a single tread config-
uration from a single manufacturer. Following
tire damage, have the original wheel and tire
combination remounted on the vehicle as soon
as possible.
Page 187 of 231
Mobility
185Reference
At a glance
Controls
Driving tips
Communications
Navigation
Entertainment
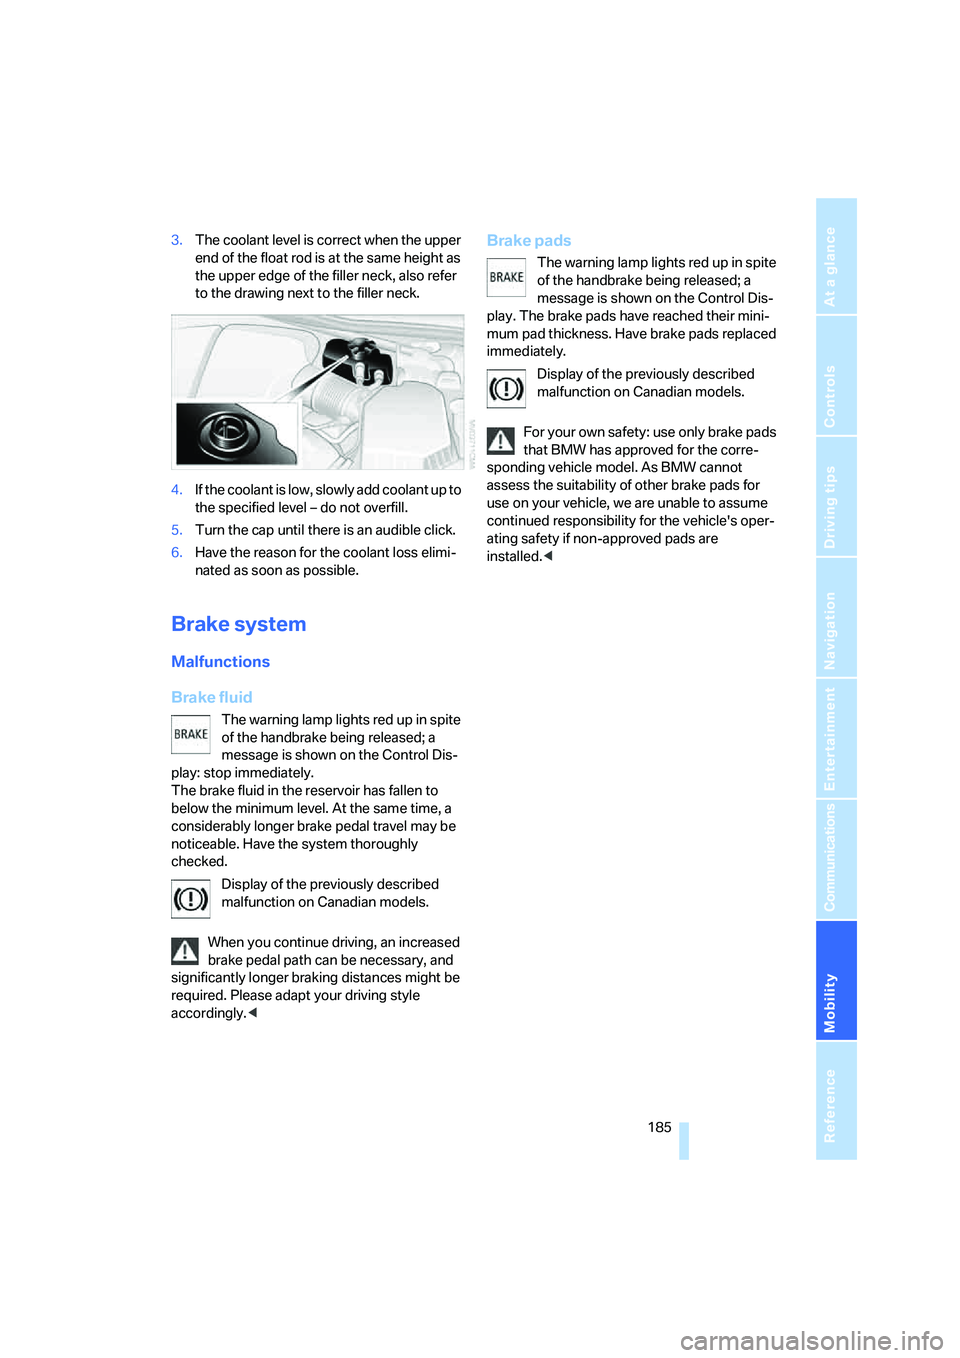
3.The coolant level is correct when the upper
end of the float rod is at the same height as
the upper edge of the filler neck, also refer
to the drawing next to the filler neck.
4.If the coolant is low, slowly add coolant up to
the specified level – do not overfill.
5.Turn the cap until there is an audible click.
6.Have the reason for the coolant loss elimi-
nated as soon as possible.
Brake system
Malfunctions
Brake fluid
The warning lamp lights red up in spite
of the handbrake being released; a
message is shown on the Control Dis-
play: stop immediately.
The brake fluid in the reservoir has fallen to
below the minimum level. At the same time, a
considerably longer brake pedal travel may be
noticeable. Have the system thoroughly
checked.
Display of the previously described
malfunction on Canadian models.
When you continue driving, an increased
brake pedal path can be necessary, and
significantly longer braking distances might be
required. Please adapt your driving style
accordingly.<
Brake pads
The warning lamp lights red up in spite
of the handbrake being released; a
message is shown on the Control Dis-
play. The brake pads have reached their mini-
mum pad thickness. Have brake pads replaced
immediately.
Display of the previously described
malfunction on Canadian models.
For your own safety: use only brake pads
that BMW has approved for the corre-
sponding vehicle model. As BMW cannot
assess the suitability of other brake pads for
use on your vehicle, we are unable to assume
continued responsibility for the vehicle's oper-
ating safety if non-approved pads are
installed.<
Page 189 of 231
Mobility
187Reference
At a glance
Controls
Driving tips
Communications
Navigation
Entertainment
Socket for OBD Onboard
Diagnostics interface
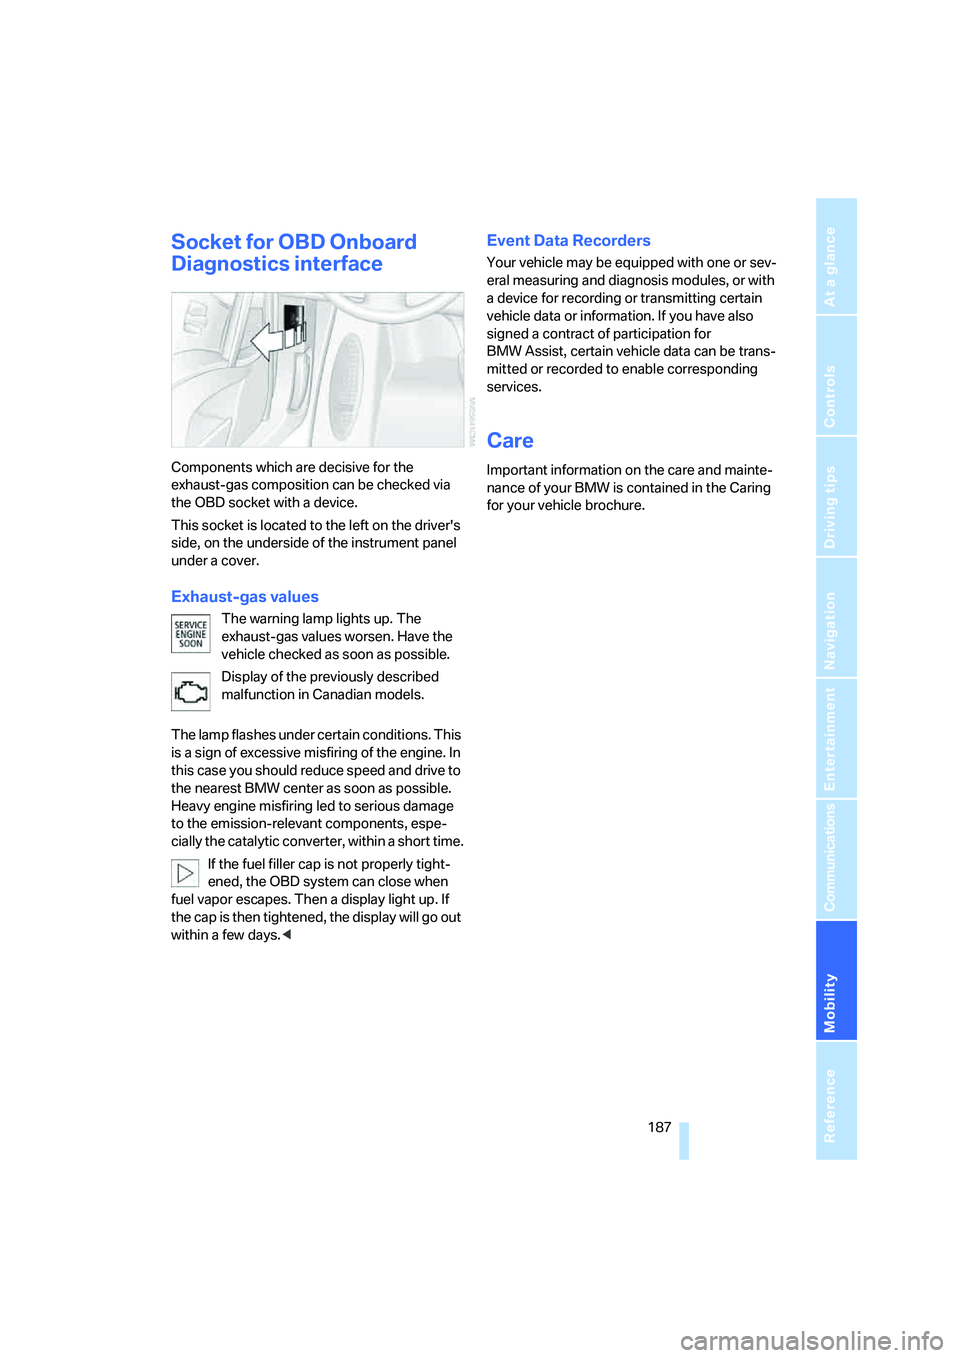
Components which are decisive for the
exhaust-gas composition can be checked via
the OBD socket with a device.
This socket is located to the left on the driver's
side, on the underside of the instrument panel
under a cover.
Exhaust-gas values
The warning lamp lights up. The
exhaust-gas values worsen. Have the
vehicle checked as soon as possible.
Display of the previously described
malfunction in Canadian models.
The lamp flashes under certain conditions. This
is a sign of excessive misfiring of the engine. In
this case you should reduce speed and drive to
the nearest BMW center as soon as possible.
Heavy engine misfiring led to serious damage
to the emission-relevant components, espe-
cially the catalytic converter, within a short time.
If the fuel filler cap is not properly tight-
ened, the OBD system can close when
fuel vapor escapes. Then a display light up. If
the cap is then tightened, the display will go out
within a few days.<
Event Data Recorders
Your vehicle may be equipped with one or sev-
eral measuring and diagnosis modules, or with
a device for recording or transmitting certain
vehicle data or information. If you have also
signed a contract of participation for
BMW Assist, certain vehicle data can be trans-
mitted or recorded to enable corresponding
services.
Care
Important information on the care and mainte-
nance of your BMW is contained in the Caring
for your vehicle brochure.
Page 191 of 231
Mobility
189Reference
At a glance
Controls
Driving tips
Communications
Navigation
Entertainment
procedures with correspondingly trained per-
sonnel. Due to the high voltage present in the
system, there is a danger of fatal injuries when
work is carried out improperly.<
Parking and roadside parking lamps
In the event of a malfunction, please go to your
BMW center or a workshop that works accord-
ing to BMW repair procedures with correspond-
ingly trained personnel.
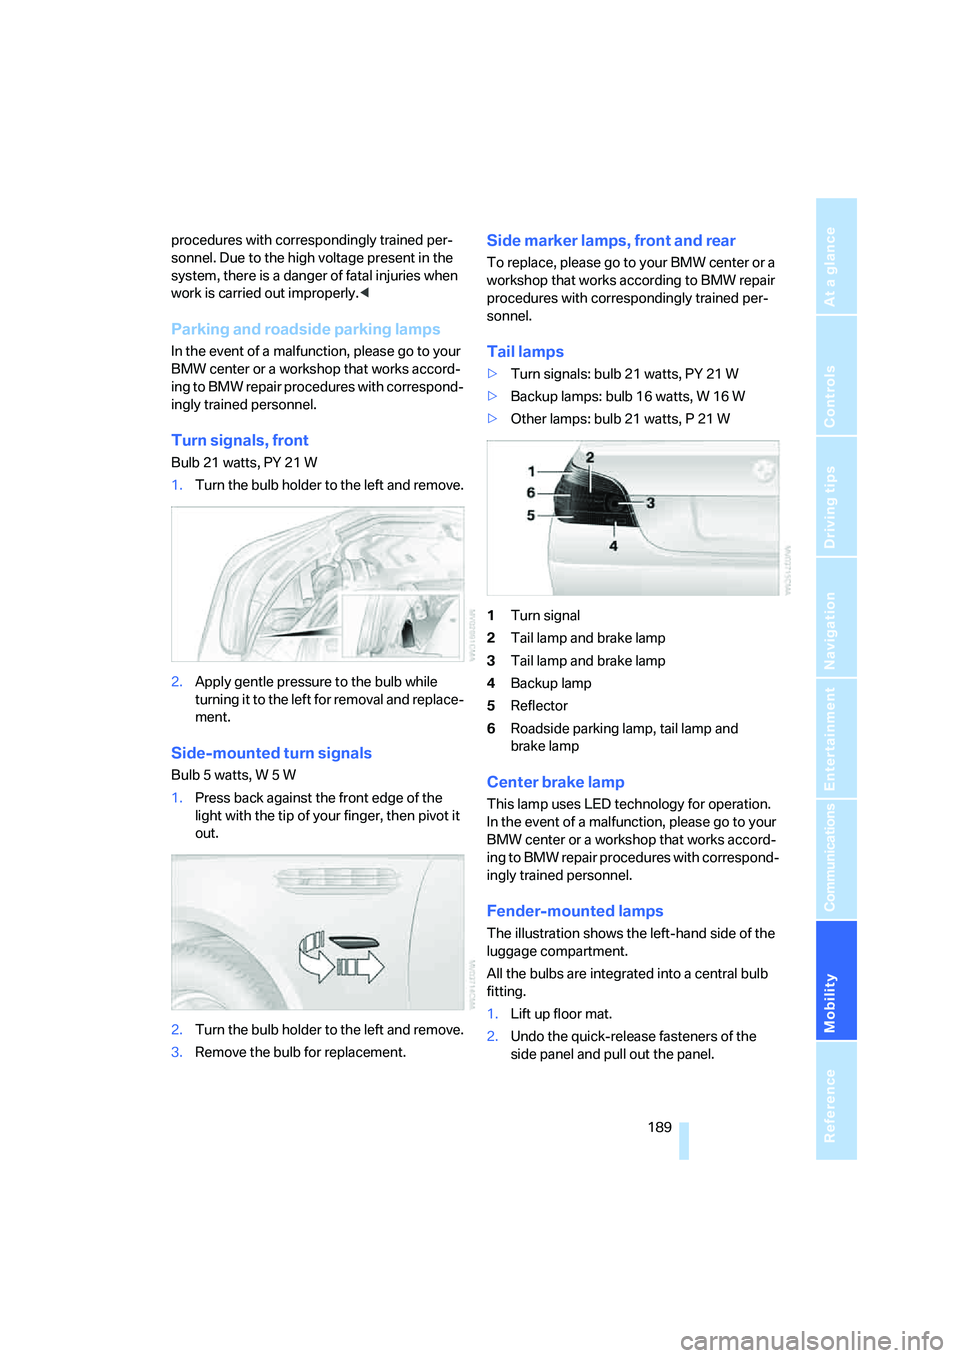
Turn signals, front
Bulb 21 watts, PY 21 W
1.Turn the bulb holder to the left and remove.
2.Apply gentle pressure to the bulb while
turning it to the left for removal and replace-
ment.
Side-mounted turn signals
Bulb 5 watts, W 5 W
1.Press back against the front edge of the
light with the tip of your finger, then pivot it
out.
2.Turn the bulb holder to the left and remove.
3.Remove the bulb for replacement.
Side marker lamps, front and rear
To replace, please go to your BMW center or a
workshop that works according to BMW repair
procedures with correspondingly trained per-
sonnel.
Tail lamps
>Turn signals: bulb 21 watts, PY 21 W
>Backup lamps: bulb 16 watts, W 16 W
>Other lamps: bulb 21 watts, P 21 W
1Turn signal
2Tail lamp and brake lamp
3Tail lamp and brake lamp
4Backup lamp
5Reflector
6Roadside parking lamp, tail lamp and
brake lamp
Center brake lamp
This lamp uses LED technology for operation.
In the event of a malfunction, please go to your
BMW center or a workshop that works accord-
ing to BMW repair procedures with correspond-
ingly trained personnel.
Fender-mounted lamps
The illustration shows the left-hand side of the
luggage compartment.
All the bulbs are integrated into a central bulb
fitting.
1.Lift up floor mat.
2.Undo the quick-release fasteners of the
side panel and pull out the panel.
Page 193 of 231
Mobility
191Reference
At a glance
Controls
Driving tips
Communications
Navigation
Entertainment
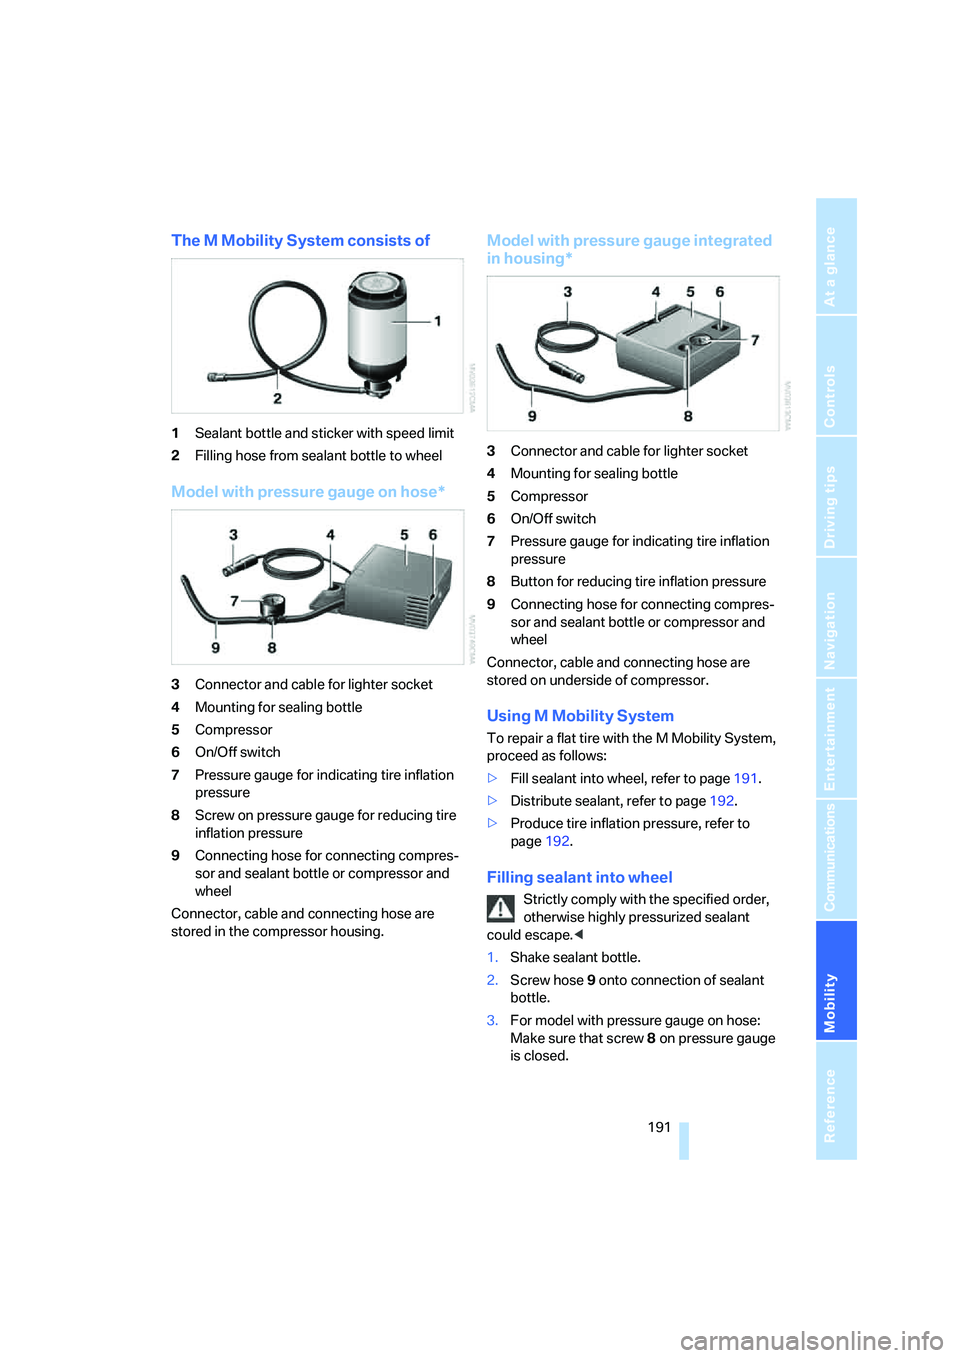
The M Mobility System consists of
1Sealant bottle and sticker with speed limit
2Filling hose from sealant bottle to wheel
Model with pressure gauge on hose*
3Connector and cable for lighter socket
4Mounting for sealing bottle
5Compressor
6On/Off switch
7Pressure gauge for indicating tire inflation
pressure
8Screw on pressure gauge for reducing tire
inflation pressure
9Connecting hose for connecting compres-
sor and sealant bottle or compressor and
wheel
Connector, cable and connecting hose are
stored in the compressor housing.
Model with pressure gauge integrated
in housing*
3Connector and cable for lighter socket
4Mounting for sealing bottle
5Compressor
6On/Off switch
7Pressure gauge for indicating tire inflation
pressure
8Button for reducing tire inflation pressure
9Connecting hose for connecting compres-
sor and sealant bottle or compressor and
wheel
Connector, cable and connecting hose are
stored on underside of compressor.
Using M Mobility System
To repair a flat tire with the M Mobility System,
proceed as follows:
>Fill sealant into wheel, refer to page191.
>Distribute sealant, refer to page192.
>Produce tire inflation pressure, refer to
page192.
Filling sealant into wheel
Strictly comply with the specified order,
otherwise highly pressurized sealant
could escape.<
1.Shake sealant bottle.
2.Screw hose9 onto connection of sealant
bottle.
3.For model with pressure gauge on hose:
Make sure that screw8 on pressure gauge
is closed.