instrument cluster BMW M5 2007 Owners Manual
[x] Cancel search | Manufacturer: BMW, Model Year: 2007, Model line: M5, Model: BMW M5 2007Pages: 253, PDF Size: 8.57 MB
Page 13 of 253
At a glance
11Reference
Controls
Driving tips
Communications
Navigation
Entertainment
Mobility
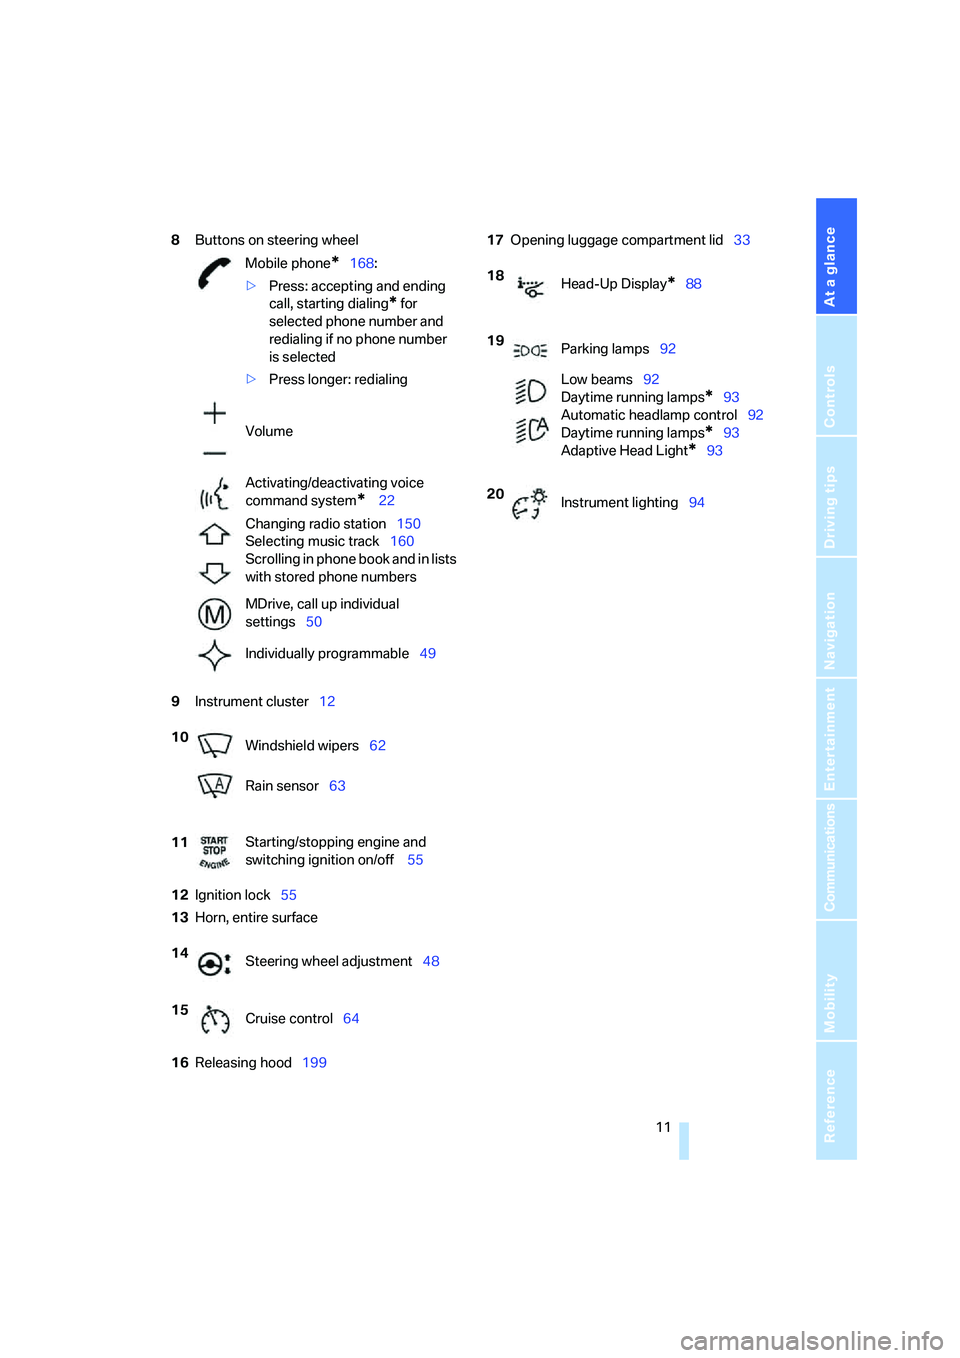
8Buttons on steering wheel
9Instrument cluster12
12Ignition lock55
13Horn, entire surface
16Releasing hood19917Opening luggage compartment lid33
Mobile phone
*168:
>Press: accepting and ending
call, starting dialing
* for
selected phone number and
redialing if no phone number
is selected
>Press longer: redialing
Volume
Activating/deactivating voice
command system
* 22
Changing radio station150
Selecting music track160
Scrolling in phone book and in lists
with stored phone numbers
MDrive, call up individual
settings50
Individually programmable49
10
Windshield wipers62
Rain sensor63
11Starting/stopping engine and
switching ignition on/off 55
14
Steering wheel adjustment48
15
Cruise control64
18
Head-Up Display*88
19
Parking lamps92
Low beams92
Daytime running lamps
*93
Automatic headlamp control92
Daytime running lamps
*93
Adaptive Head Light
*93
20
Instrument lighting94
Page 14 of 253
Cockpit
12
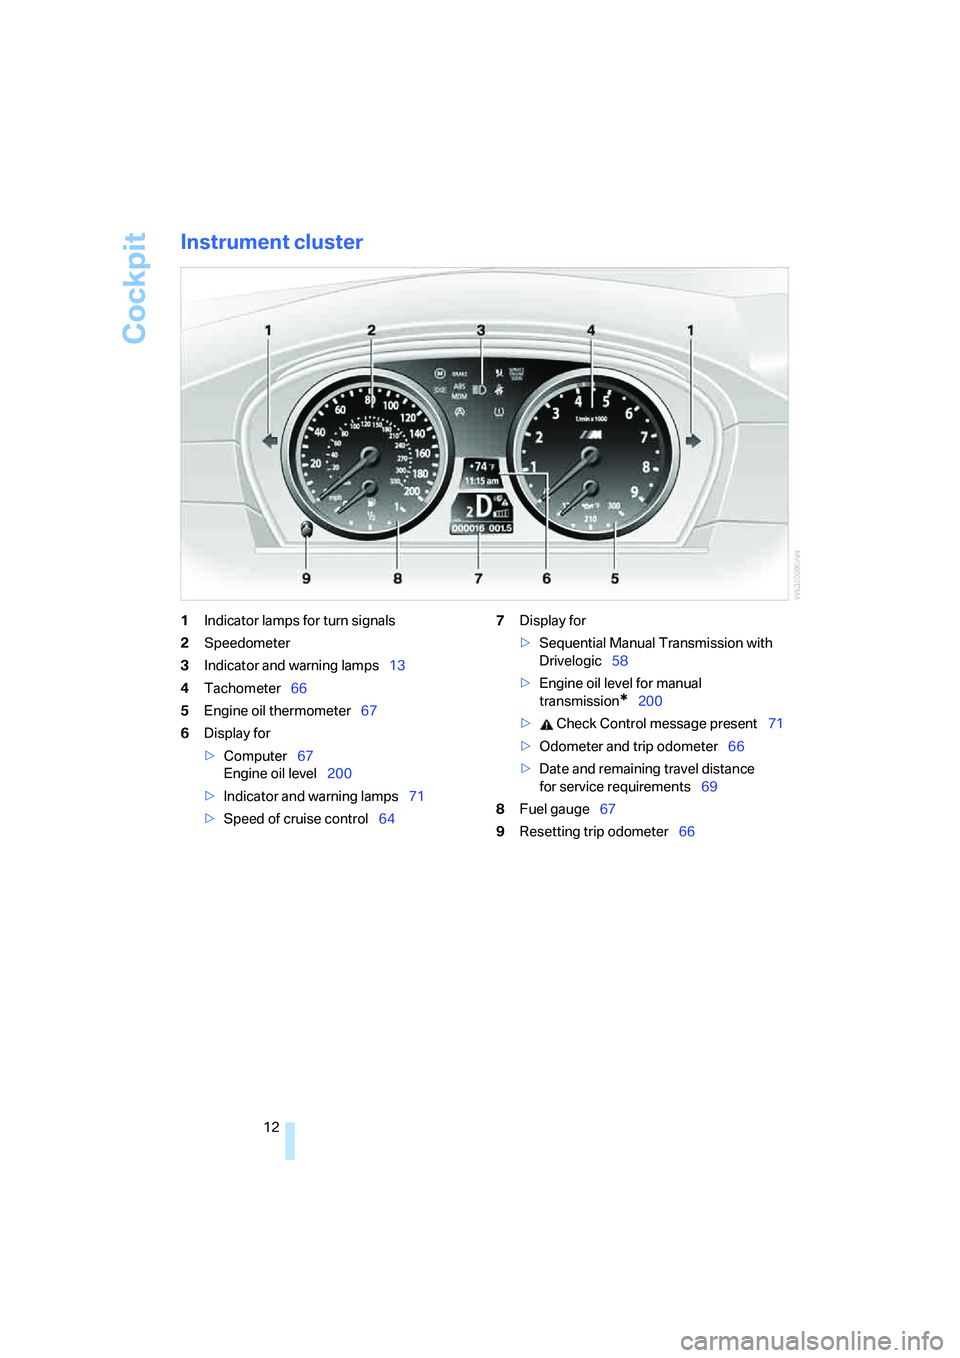
Instrument cluster
1Indicator lamps for turn signals
2Speedometer
3Indicator and warning lamps13
4Tachometer66
5Engine oil thermometer67
6Display for
>Computer67
Engine oil level200
>Indicator and warning lamps71
>Speed of cruise control647Display for
>Sequential Manual Transmission with
Drivelogic58
>Engine oil level for manual
transmission
*200
> Check Control message present71
>Odometer and trip odometer66
>Date and remaining travel distance
for service requirements69
8Fuel gauge67
9Resetting trip odometer66
Page 53 of 253
Controls
51Reference
At a glance
Driving tips
Communications
Navigation
Entertainment
Mobility
The setting is stored for the remote control cur-
rently in use.
Activating settings
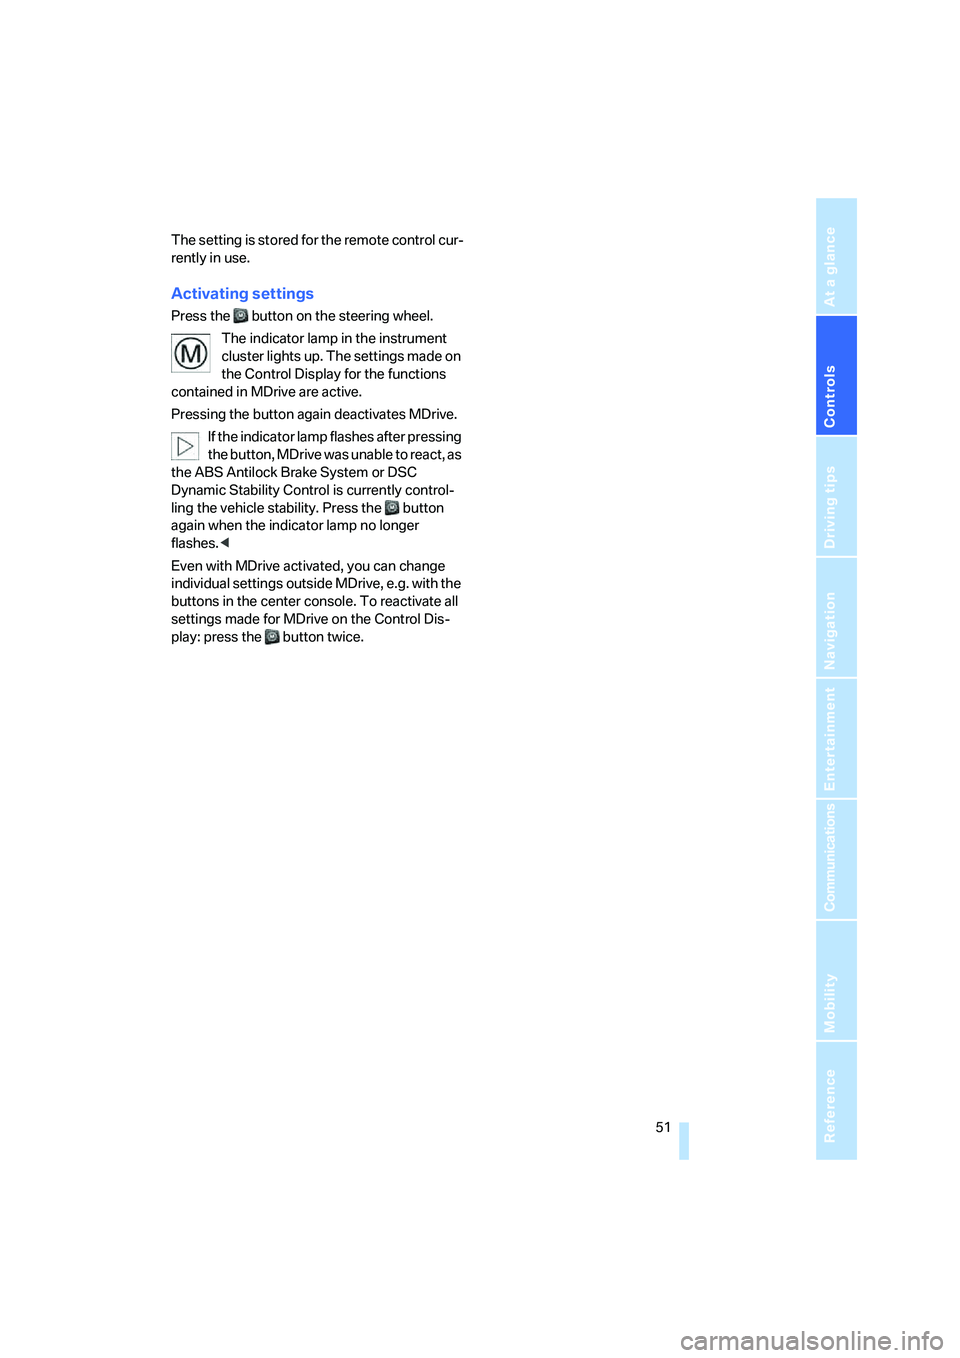
Press the button on the steering wheel.
The indicator lamp in the instrument
cluster lights up. The settings made on
the Control Display for the functions
contained in MDrive are active.
Pressing the button again deactivates MDrive.
If the indicator lamp flashes after pressing
the button, MDrive was unable to react, as
the ABS Antilock Brake System or DSC
Dynamic Stability Control is currently control-
ling the vehicle stability. Press the button
again when the indicator lamp no longer
flashes.<
Even with MDrive activated, you can change
individual settings outside MDrive, e.g. with the
buttons in the center console. To reactivate all
settings made for MDrive on the Control Dis-
play: press the button twice.
Page 57 of 253
Controls
55Reference
At a glance
Driving tips
Communications
Navigation
Entertainment
Mobility
Driving
Ignition lock
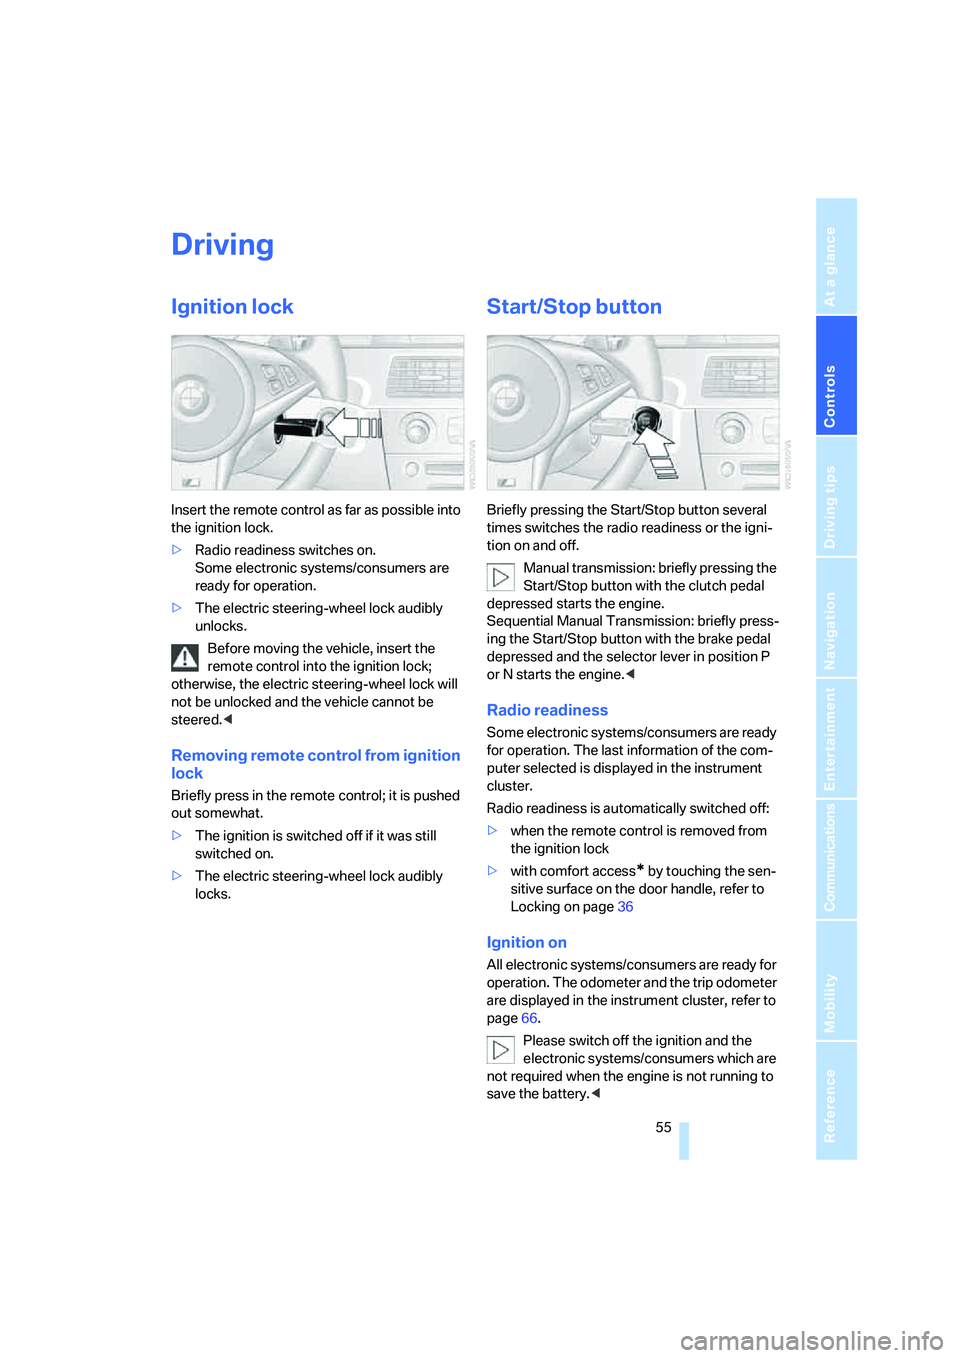
Insert the remote control as far as possible into
the ignition lock.
>Radio readiness switches on.
Some electronic systems/consumers are
ready for operation.
>The electric steering-wheel lock audibly
unlocks.
Before moving the vehicle, insert the
remote control into the ignition lock;
otherwise, the electric steering-wheel lock will
not be unlocked and the vehicle cannot be
steered.<
Removing remote control from ignition
lock
Briefly press in the remote control; it is pushed
out somewhat.
>The ignition is switched off if it was still
switched on.
>The electric steering-wheel lock audibly
locks.
Start/Stop button
Briefly pressing the Start/Stop button several
times switches the radio readiness or the igni-
tion on and off.
Manual transmission: briefly pressing the
Start/Stop button with the clutch pedal
depressed starts the engine.
Sequential Manual Transmission: briefly press-
ing the Start/Stop button with the brake pedal
depressed and the selector lever in position P
or N starts the engine.<
Radio readiness
Some electronic systems/consumers are ready
for operation. The last information of the com-
puter selected is displayed in the instrument
cluster.
Radio readiness is automatically switched off:
>when the remote control is removed from
the ignition lock
>with comfort access
* by touching the sen-
sitive surface on the door handle, refer to
Locking on page36
Ignition on
All electronic systems/consumers are ready for
operation. The odometer and the trip odometer
are displayed in the instrument cluster, refer to
page66.
Please switch off the ignition and the
electronic systems/consumers which are
not required when the engine is not running to
save the battery.<
Page 58 of 253
Driving
56
Radio readiness and ignition switched
off
All indicator and warning lamps in the instru-
ment cluster go out.
Starting engine
Do not run the engine in closed rooms,
otherwise the inhalation of toxic exhaust
gases can cause unconsciousness and death.
The exhaust gases contain carbon monoxide,
an odorless and colorless, but highly toxic gas.
Never leave an unattended vehicle with the
engine running, as such a vehicle represents a
potential safety hazard.
Before leaving the vehicle with the engine run-
ning, shift into neutral
* or move the selector
lever into the N position and set the handbrake,
otherwise the vehicle can begin to roll.<
When starting the engine, do not press the
accelerator pedal.
Do not allow the engine to warm up by leaving it
running while the vehicle remains stationary.
Instead, begin to drive at a moderate engine
speed.
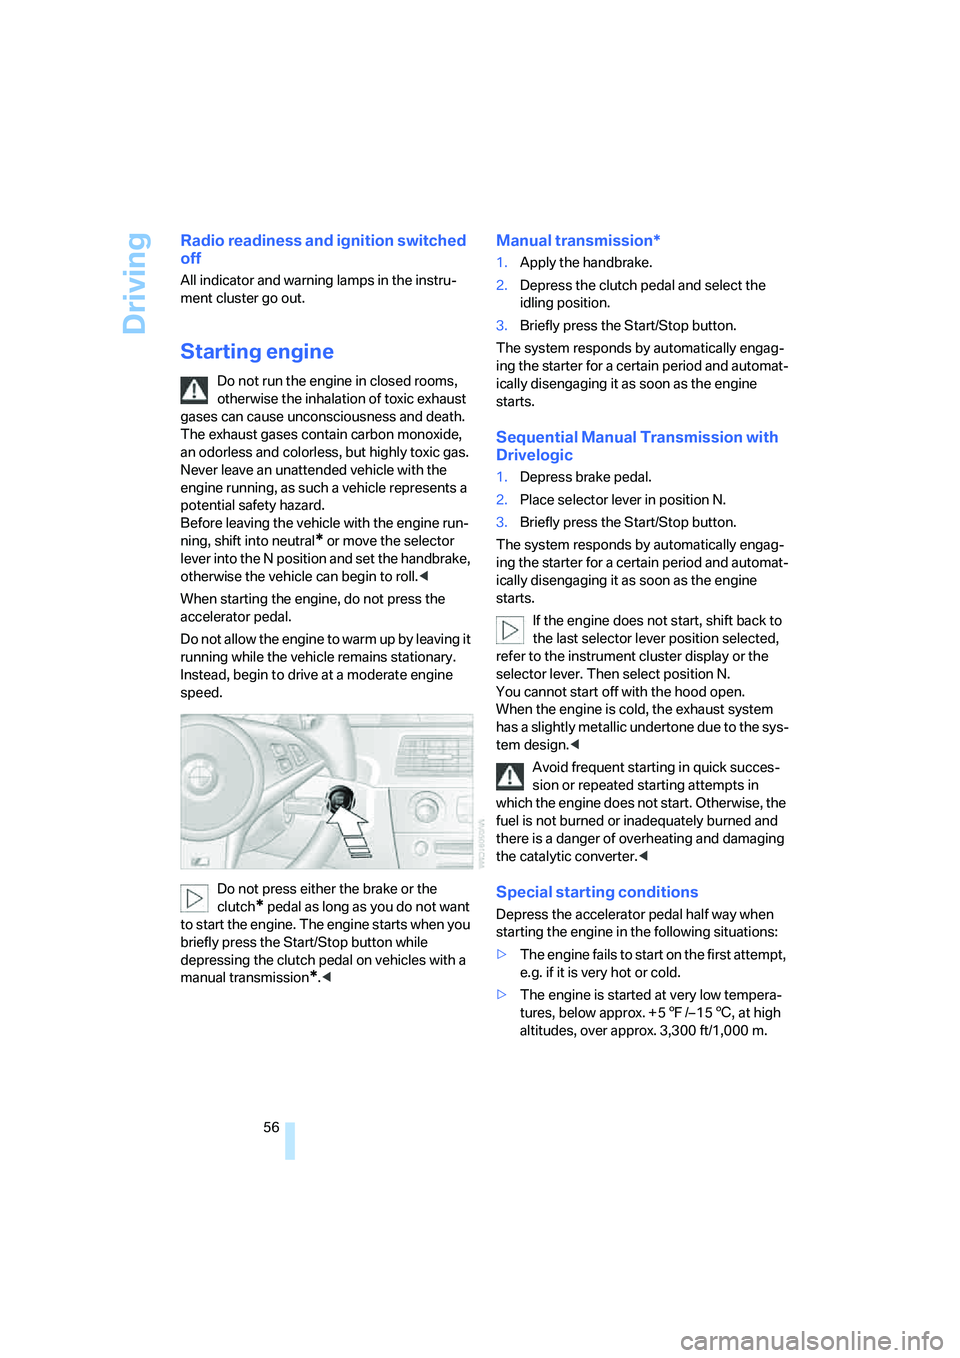
Do not press either the brake or the
clutch
* pedal as long as you do not want
to start the engine. The engine starts when you
briefly press the Start/Stop button while
depressing the clutch pedal on vehicles with a
manual transmission
*.<
Manual transmission*
1.Apply the handbrake.
2.Depress the clutch pedal and select the
idling position.
3.Briefly press the Start/Stop button.
The system responds by automatically engag-
ing the starter for a certain period and automat-
ically disengaging it as soon as the engine
starts.
Sequential Manual Transmission with
Drivelogic
1.Depress brake pedal.
2.Place selector lever in position N.
3.Briefly press the Start/Stop button.
The system responds by automatically engag-
ing the starter for a certain period and automat-
ically disengaging it as soon as the engine
starts.
If the engine does not start, shift back to
the last selector lever position selected,
refer to the instrument cluster display or the
selector lever. Then select position N.
You cannot start off with the hood open.
When the engine is cold, the exhaust system
has a slightly metallic undertone due to the sys-
tem design.<
Avoid frequent starting in quick succes-
sion or repeated starting attempts in
which the engine does not start. Otherwise, the
fuel is not burned or inadequately burned and
there is a danger of overheating and damaging
the catalytic converter.<
Special starting conditions
Depress the accelerator pedal half way when
starting the engine in the following situations:
>The engine fails to start on the first attempt,
e.g. if it is very hot or cold.
>The engine is started at very low tempera-
tures, below approx. + 57/– 156, at high
altitudes, over approx. 3,300 ft/1,000 m.
Page 61 of 253
Controls
59Reference
At a glance
Driving tips
Communications
Navigation
Entertainment
Mobility
S Sequential mode
You can shift up and down using the shift pad-
dles or the selector lever. You do not need to
remove your foot from the accelerator to do so.
After every engine start, as soon as the selector
lever is pushed to the right into the drive posi-
tionΒ and the brake pedal is pressed, the
Sequential mode is activated.
Starting off is also possible on a level road sur-
face in second gear, e.g. in case of ice.
In the following situations, the Sequential Man-
ual Transmission thinks for you:
>Upshifts and downshifts are executed only
when they will result in a plausible combina-
tion of engine and vehicle speed; thus, for
example, a downshift that would cause the
engine to overrev will not be executed by
the system.
>When the vehicle is stationary, the trans-
mission automatically downshifts into first
gear.
>Shortly before dropping below a gear-
dependent minimum speed, the transmis-
sion downshifts automatically even without
your intervention.
D Drive mode
In the Drive mode, all forward gears are shifted
automatically.
Shifting from Sequential mode to Drive mode:
press selector lever to the right toward D/S.
To switch back into the Sequential mode: press
selector lever to the right again toward D/S or
shift using the shift paddles or the selector
lever.
Kick-down: for rapid acceleration, e. g. when
passing, press the accelerator pedal as far
down as it will go. You achieve maximum accel-
eration.
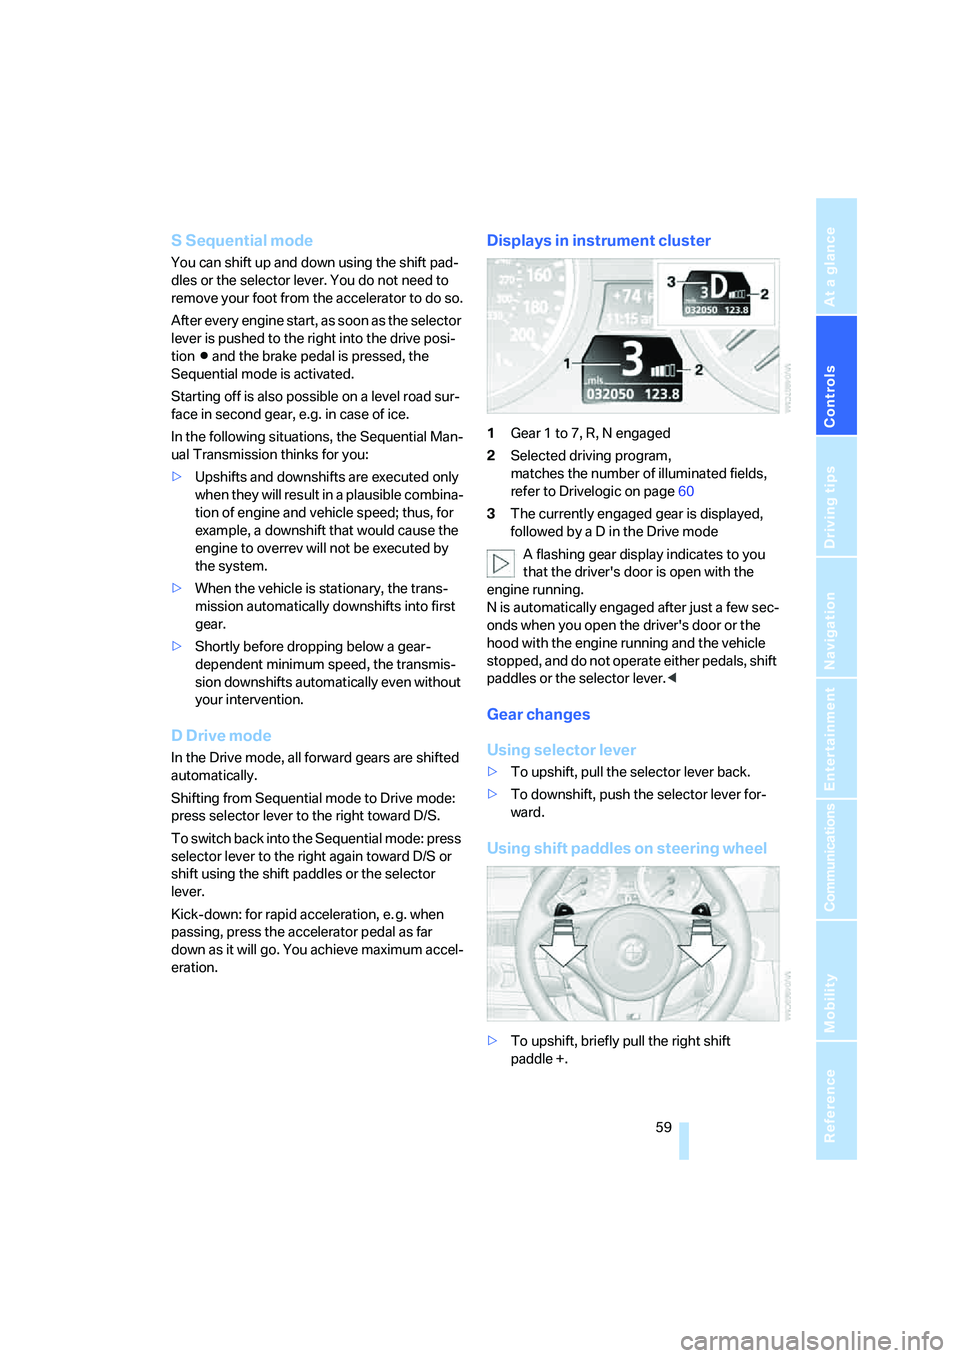
Displays in instrument cluster
1Gear 1 to 7, R, N engaged
2Selected driving program,
matches the number of illuminated fields,
refer to Drivelogic on page60
3The currently engaged gear is displayed,
followed by a D in the Drive mode
A flashing gear display indicates to you
that the driver's door is open with the
engine running.
N is automatically engaged after just a few sec-
onds when you open the driver's door or the
hood with the engine running and the vehicle
stopped, and do not operate either pedals, shift
paddles or the selector lever.<
Gear changes
Using selector lever
>To upshift, pull the selector lever back.
>To downshift, push the selector lever for-
ward.
Using shift paddles on steering wheel
>To upshift, briefly pull the right shift
paddle +.
Page 62 of 253
Driving
60 >To downshift, briefly pull the left shift
paddle –.
Drivelogic
With Drivelogic various driving programs are
available to you.
Each time you change between the Sequential
mode and the Drive mode, the driving program
last selected in the respective mode is active.
Exception: after the first change from the
Sequential to the Drive mode, driving program 3
is active.
In Drive mode
Five driving programs, from relaxed 1 to sporty/
highly dynamic 5 are available for selection.
In Sequential mode
You can choose from six driving programs from
balanced/dynamic 1 to sporty/purist 6.
Each time the engine is started, driving pro-
gram 3 is activated.
The sporty/purist driving program 6 is only
available with the DSC Dynamic Stability Con-
trol deactivated, refer to page80. When DSC is
activated, the system switches from driving
program 6 to 5.
To maintain vehicle stability, always drive
with the DSC switched on when possi-
ble.<
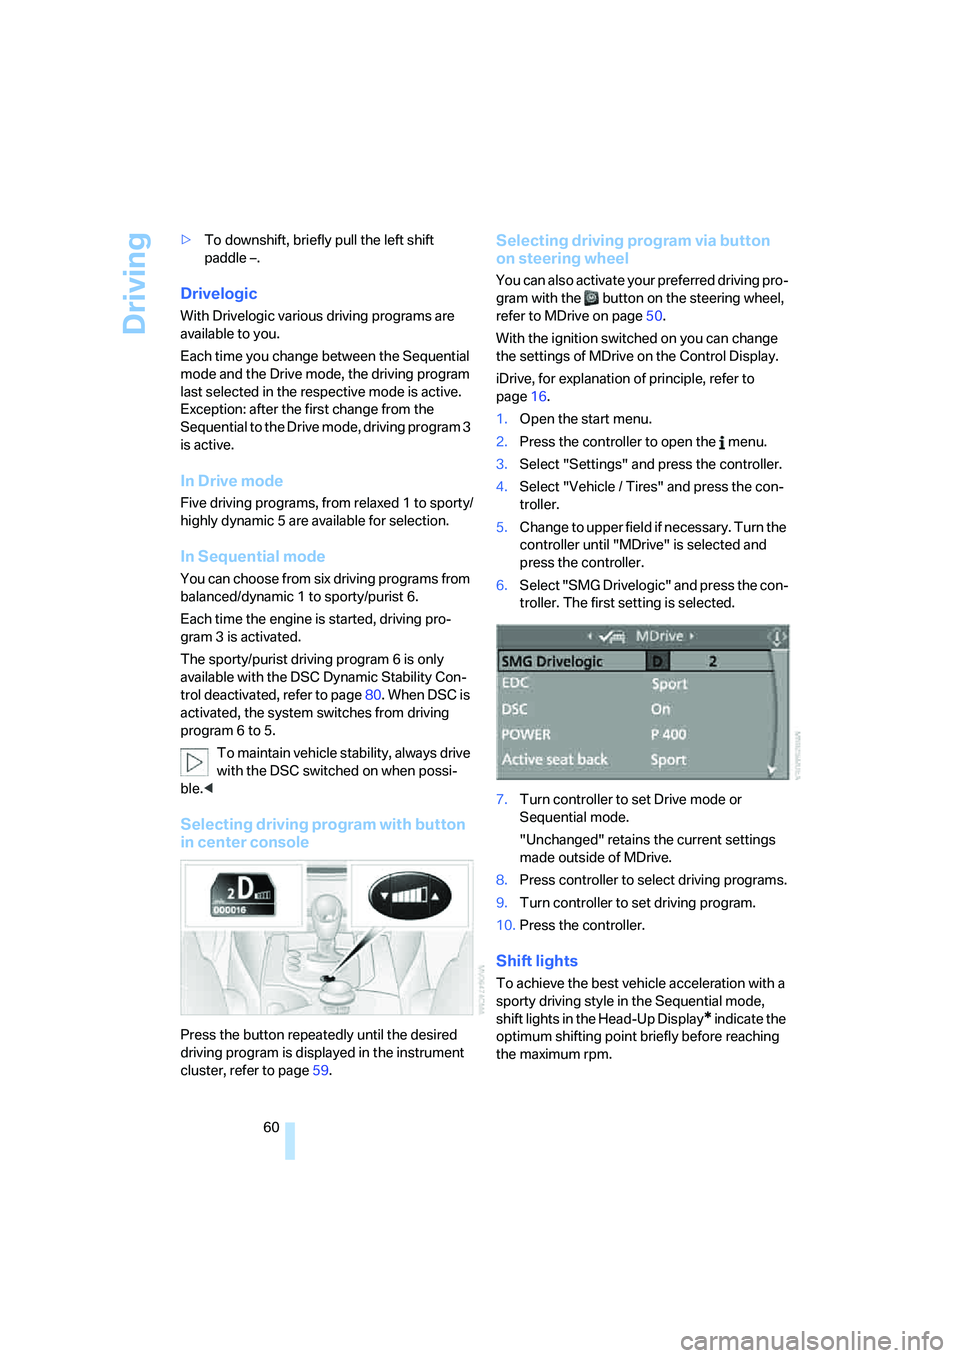
Selecting driving program with button
in center console
Press the button repeatedly until the desired
driving program is displayed in the instrument
cluster, refer to page59.
Selecting driving program via button
on steering wheel
You can also activate your preferred driving pro-
gram with the button on the steering wheel,
refer to MDrive on page50.
With the ignition switched on you can change
the settings of MDrive on the Control Display.
iDrive, for explanation of principle, refer to
page16.
1.Open the start menu.
2.Press the controller to open the menu.
3.Select "Settings" and press the controller.
4.Select "Vehicle / Tires" and press the con-
troller.
5.Change to upper field if necessary. Turn the
controller until "MDrive" is selected and
press the controller.
6.Select "SMG Drivelogic" and press the con-
troller. The first setting is selected.
7.Turn controller to set Drive mode or
Sequential mode.
"Unchanged" retains the current settings
made outside of MDrive.
8.Press controller to select driving programs.
9.Turn controller to set driving program.
10.Press the controller.
Shift lights
To achieve the best vehicle acceleration with a
sporty driving style in the Sequential mode,
shift lights in the Head-Up Display
* indicate the
optimum shifting point briefly before reaching
the maximum rpm.
Page 66 of 253
Driving
64
Cruise control
The concept
The cruise control is available for use at speeds
of approx. 20 mph/30 km/h and higher. The
vehicle stores and maintains the speed that you
set using the lever mounted on the steering col-
umn.
Do not use the cruise control under driv-
ing conditions that do not permit a con-
stant speed, e.g. when driving on winding
roads , in heavy traffic o r in poor roa d co nditions
such as snow, rain, ice, and loose road surface.
Otherwise you could loose control of the vehi-
cle and cause an accident.<
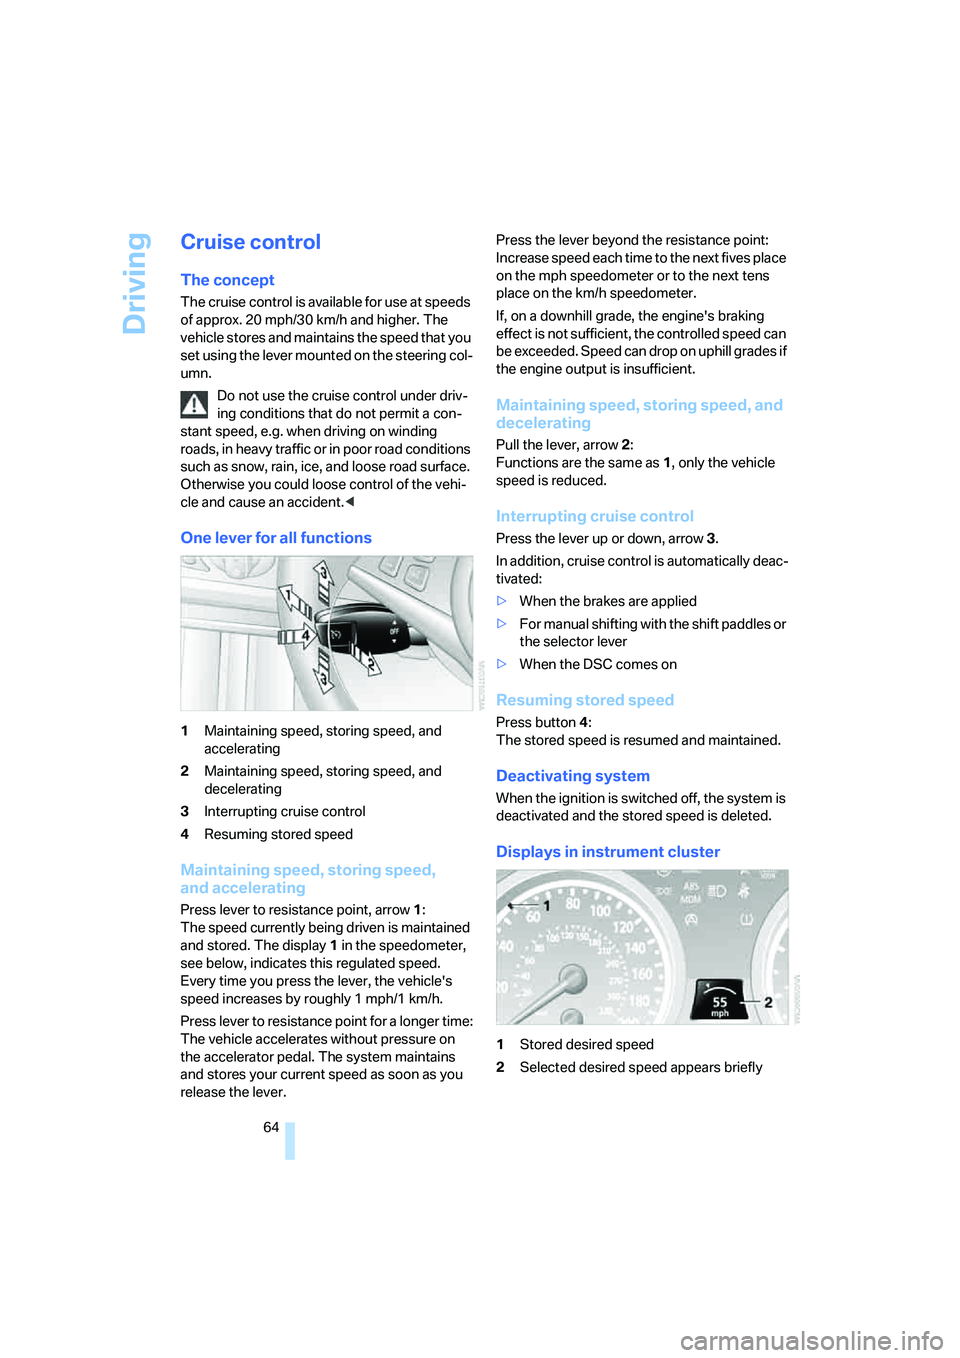
One lever for all functions
1Maintaining speed, storing speed, and
accelerating
2Maintaining speed, storing speed, and
decelerating
3Interrupting cruise control
4Resuming stored speed
Maintaining speed, storing speed,
and accelerating
Press lever to resistance point, arrow 1:
The speed currently being driven is maintained
and stored. The display1 in the speedometer,
see below, indicates this regulated speed.
Every time you press the lever, the vehicle's
speed increases by roughly 1 mph/1 km/h.
Press lever to resistance point for a longer time:
The vehicle accelerates without pressure on
the accelerator pedal. The system maintains
and stores your current speed as soon as you
release the lever.Press the lever beyond the resistance point:
Increase speed each time to the next fives place
on the mph speedometer or to the next tens
place on the km/h speedometer.
If, on a downhill grade, the engine's braking
effect is not sufficient, the controlled speed can
be exceeded. Speed can drop on uphill grades if
the engine output is insufficient.
Maintaining speed, storing speed, and
decelerating
Pull the lever, arrow2:
Functions are the same as1, only the vehicle
speed is reduced.
Interrupting cruise control
Press the lever up or down, arrow3.
In addition, cruise control is automatically deac-
tivated:
>When the brakes are applied
>For manual shifting with the shift paddles or
the selector lever
>When the DSC comes on
Resuming stored speed
Press button4:
The stored speed is resumed and maintained.
Deactivating system
When the ignition is switched off, the system is
deactivated and the stored speed is deleted.
Displays in instrument cluster
1Stored desired speed
2Selected desired speed appears briefly
Page 69 of 253
Controls
67Reference
At a glance
Driving tips
Communications
Navigation
Entertainment
Mobility
Engine oil thermometer
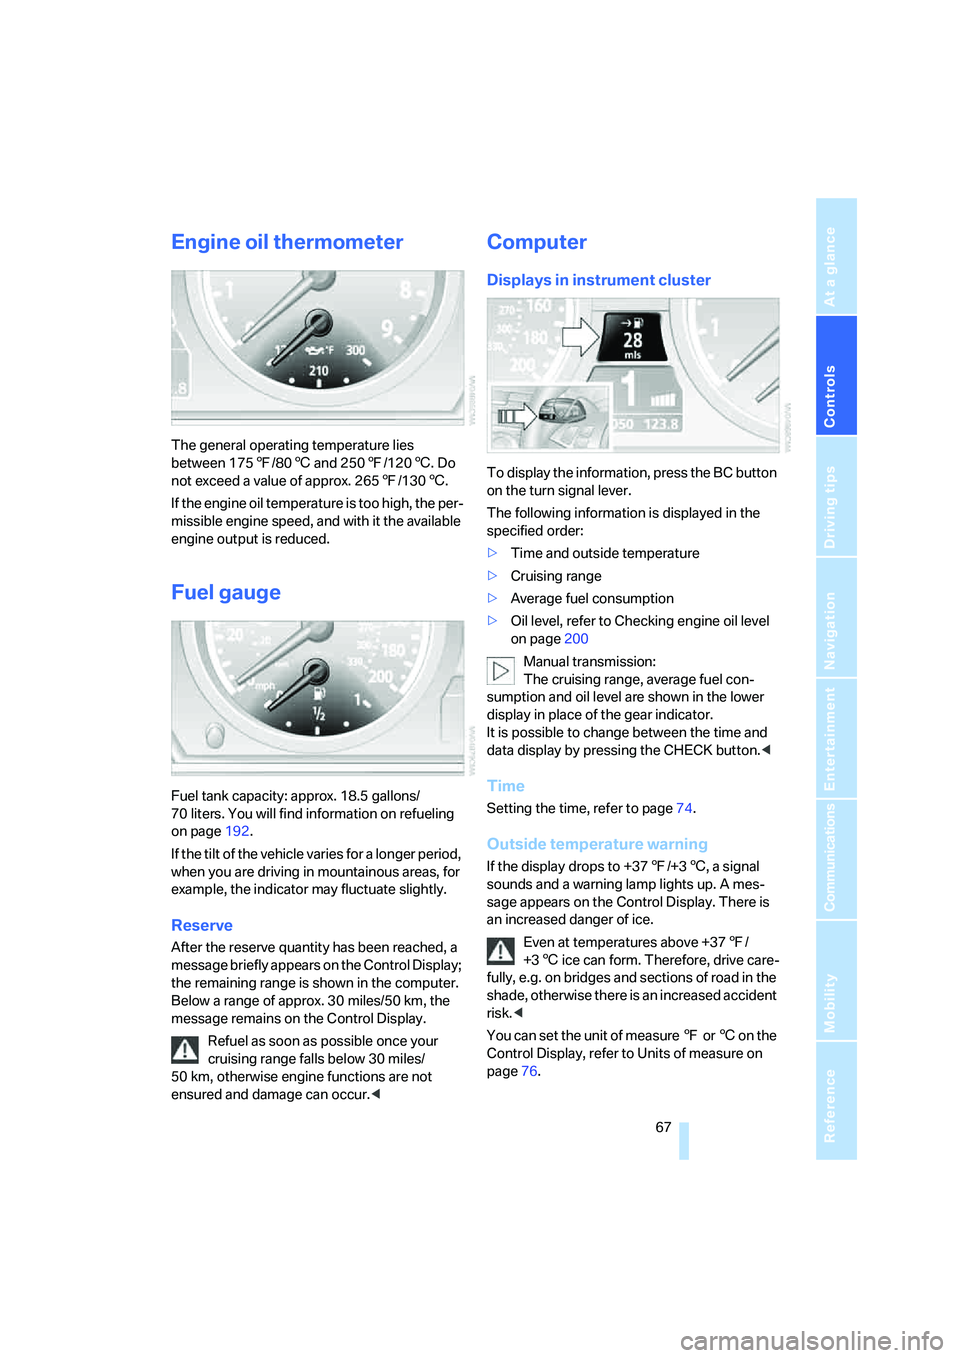
The general operating temperature lies
between 1757/806 and 2507/1206. Do
not exceed a value of approx. 2657/1306.
If the engine oil temperature is too high, the per-
missible engine speed, and with it the available
engine output is reduced.
Fuel gauge
Fuel tank capacity: approx. 18.5 gallons/
70 liters. You will find information on refueling
on page192.
If the tilt of the vehicle varies for a longer period,
when you are driving in mountainous areas, for
example, the indicator may fluctuate slightly.
Reserve
After the reserve quantity has been reached, a
message briefly appears on the Control Display;
the remaining range is shown in the computer.
Below a range of approx. 30 miles/50 km, the
message remains on the Control Display.
Refuel as soon as possible once your
cruising range falls below 30 miles/
50 km, otherwise engine functions are not
ensured and damage can occur.<
Computer
Displays in instrument cluster
To display the information, press the BC button
on the turn signal lever.
The following information is displayed in the
specified order:
>Time and outside temperature
>Cruising range
>Average fuel consumption
>Oil level, refer to Checking engine oil level
on page200
Manual transmission:
The cruising range, average fuel con-
sumption and oil level are shown in the lower
display in place of the gear indicator.
It is possible to change between the time and
data display by pressing the CHECK button.<
Time
Setting the time, refer to page74.
Outside temperature warning
If the display drops to +377/+36, a signal
sounds and a warning lamp lights up. A mes-
sage appears on the Control Display. There is
an increased danger of ice.
Even at temperatures above +377/
+36 ice can form. Therefore, drive care-
fully, e.g. on bridges and sections of road in the
shade, otherwise there is an increased accident
risk.<
You can set the unit of measure 7 or 6 on the
Control Display, refer to Units of measure on
page76.
Page 73 of 253
Controls
71Reference
At a glance
Driving tips
Communications
Navigation
Entertainment
Mobility
7.Select "State inspection" and press the
controller.
8.Select "Set service date" and press the
controller. The month is highlighted.
9.Turn the controller to make the adjustment.
10.Press the controller to apply the setting.
The year is highlighted.
11.Turn the controller to make the adjustment.
12.Press the controller to apply the setting.
The date entry is stored.
To exit the menu:
Select the arrow and press the controller.
Check Control
The concept
The Check Control monitors functions in the
vehicle and issues a message if there is a mal-
function in the monitored systems. This kind of
Check Control message consists of indicator
and warning lamps in the instrument cluster,
and if necessary an acoustic signal and text
messages at the bottom of the Control Display.
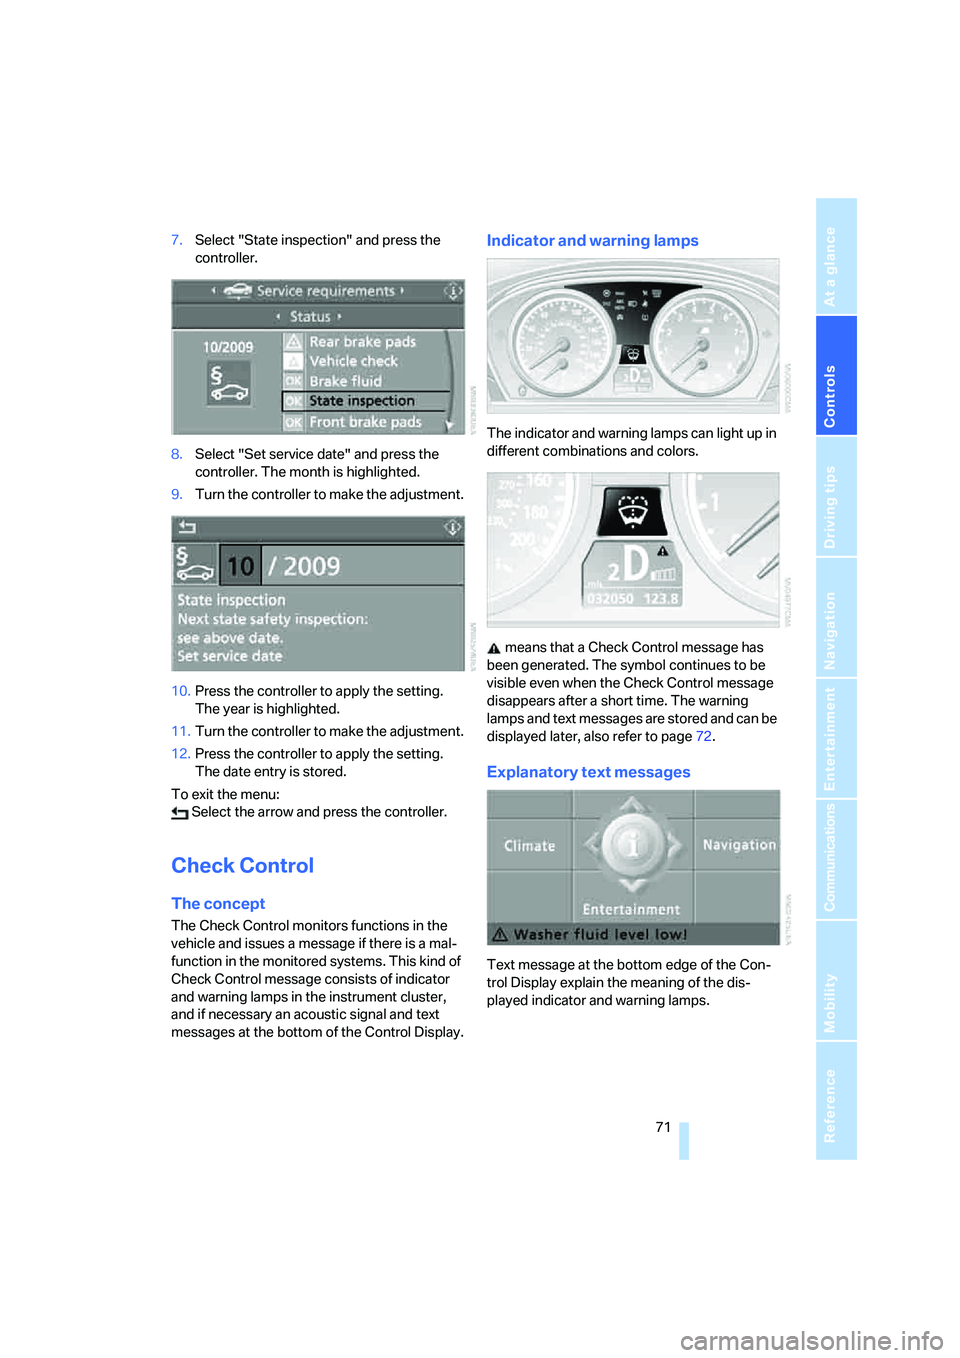
Indicator and warning lamps
The indicator and warning lamps can light up in
different combinations and colors.
means that a Check Control message has
been generated. The symbol continues to be
visible even when the Check Control message
disappears after a short time. The warning
lamps and text messages are stored and can be
displayed later, also refer to page72.
Explanatory text messages
Text message at the bottom edge of the Con-
trol Display explain the meaning of the dis-
played indicator and warning lamps.