towing BMW M5 2014 F10M Owner's Manual
[x] Cancel search | Manufacturer: BMW, Model Year: 2014, Model line: M5, Model: BMW M5 2014 F10MPages: 237, PDF Size: 5.21 MB
Page 50 of 237
▷"Acoustic sig. lock/unlock"▷"Flash when lock/unlock"
Automatic lockingThe settings are saved in the active profile, re‐fer to page 35.
1."Settings"2."Doors/key"3.Select the desired function:▷"Lock if no door is opened"
The vehicle locks automatically after a
short period of time if no door is
opened.▷"Lock after start driving"
The vehicle locks automatically after
you drive off.
Retrieving the seat, mirror, and
steering wheel settings
The driver's seat, exterior mirror, and steering
wheel position adjusted last will be stored for
the active profile.
When the vehicle is unlocked, these positions
are automatically retrieved if this function was
activated.
Pinch hazard when moving back the seat
If this function is used, first make sure
that the footwell behind the driver's seat is
empty. Otherwise, people might get injured or
objects damaged when the seat is moved
back.◀
The adjustment procedure is interrupted:
▷When a seat position reel is pressed.▷When a button of the seat, mirror, and
steering wheel memory is pressed briefly.
Activating the setting
1."Settings"2."Doors/key"3."Last seat position autom."Alarm system
The conceptWhen the vehicle is locked, the vehicle alarm
system responds to:▷Opening a door, the hood or the trunk lid.▷Movements in the interior.▷Changes in the vehicle tilt, e. g., during at‐
tempts at stealing a wheel or when towing
the car.▷Disconnected battery voltage.
The alarm system briefly signals tampering:
▷By sounding an acoustic alarm.▷By switching on the hazard warning sys‐
tem.▷By flashing the daytime running lights.
Arming and disarming the alarm
system
When you unlock or lock the vehicle, either
with the remote control, Comfort Access or at
the door lock the alarm system is disarmed or
armed at the same time.
Door lock and armed alarm systemUnlocking via the door lock will trigger the
alarm on some country-specific versions.
Trunk lid and armed alarm system The trunk lid can be opened even when the
alarm system is armed.
After the trunk lid is closed, it is locked and
monitored again when the doors are locked.
The hazard warning system flashes once.
Panic mode
You can trigger the alarm system if you find
yourself in a dangerous situation.
Press button on the remote control for
at least 3 seconds.
To reel off the alarm: press any button.
Seite 46ControlsOpening and closing46
Online Edition for Part no. 0140 2 956 245 - X/14
Page 119 of 237
The braking intervention is executed only if
DSC Dynamic Stability Control is switched on
and M Dynamic mode MDM is not activated.
The braking intervention can be interrupted by
stepping on the accelerator pedal or by ac‐
tively moving the steering wheel.
Object detection can be restricted. Limitations
of the detection range and functional restric‐
tions are to be considered.
Tow-starting and towing
For towing the vehicle turn, switch off the
Intelligent Safety systems; otherwise malfunc‐
tions of the individual braking systems might
lead to accidents.◀
System limits Be alert
Due to system limitations, warnings may
be not issued at all, or may be issued late or
improperly. Therefore, always be alert and
ready to intervene; otherwise, there is the risk
of an accident.◀
Detection range
The system's detection potential is limited.
Thus a warning might not be issued or be is‐
sued late.
E. g. the following situations may not be de‐
tected:▷Slow moving vehicles when you approach
them at high speed.▷Vehicles that suddenly swerve in front of
you, or sharply decelerating vehicles.▷Vehicles with an unusual rear appearance.▷Two-wheeled vehicles ahead of you.
Functional limitations
The system may not be fully functional in the
following situations:
▷In heavy fog, rain, sprayed water or snow‐
fall.▷In tight curves.▷If the driving stability control systems are
limited or deactivated, e.g., DSC OFF.▷If, depending on the vehicle equipment
version, the field of view of the camera in
the mirror or the radar sensor is dirty or ob‐
scured.▷Up to 10 seconds after the start of the en‐
gine, via the Start/Stop knob.▷During calibration of the camera immedi‐
ately after vehicle shipment.▷If there is constant blinding effects be‐
cause of oncoming light, e.g., from the sun
low in the sky.
Warning sensitivity
The more sensitive the warning settings are,
the more warnings are displayed. However,
there may also be an excess of false warnings.
Pedestrian warning
Depending on how the vehicle is equipped, the
function warns of an imminent collision with
pedestrians during daytime or nighttime.
The function is subdivided into the following
systems:
▷During daytime: Pedestrian warning with
city braking function, refer to page 115▷At night: Night vision, refer to page 118
Pedestrian warning with city
braking function
The concept The ystem can help prevent accidents with pe‐
destrians.
The system issues a warning in the city driving
speed area if there is imminent danger of a col‐
lision with pedestrians and includes a braking
function.
Seite 115SafetyControls115
Online Edition for Part no. 0140 2 956 245 - X/14
Page 121 of 237
Press button: the systems are turned on. The
LED lights up.
Warning with braking function
Note Adapting your speed and driving style
The warning does not relieve the driver
of the responsibility to adapt his or her driving
speed and style to the traffic conditions.◀
Display If a collision with a person detected in this way
is imminent, a warning symbol appears on the
instrument cluster and in the Head-up Display.
The red symbol is displayed and a sig‐
nal sounds.
Intervene immediately by braking or make an
evasive maneuver.
Braking intervention
The warning prompts the driver himself/herself
to react. During a warning, the maximum brak‐
ing force is used. Premise for the brake boos‐
ter is sufficiently quick and hard stepping on
the brake pedal. The system can assist with
some braking intervention if there is risk of a
collision. At low speeds vehicles may thus
come to a complete stop.
Manual transmission: During a braking inter‐
vention up to a complete stop, the engine may
be shut down.
The braking intervention is executed only if
DSC Dynamic Stability Control is switched on
and M Dynamic mode MDM is not activated.
The braking intervention can be interrupted by
stepping on the accelerator pedal or by ac‐
tively moving the steering wheel.
Object detection can be restricted. Limitations
of the detection range and functional restric‐
tions are to be considered.Tow-starting and towing
For towing the vehicle turn, switch off the
Intelligent Safety systems; otherwise malfunc‐
tions of the individual braking systems might
lead to accidents.◀
System limits Be alert
Due to system limitations, warnings may
be not issued at all, or may be issued late or
improperly. Therefore, always be alert and
ready to intervene; otherwise, there is the risk
of an accident.◀
Detection range
The detection potential of the camera is lim‐
ited.
Thus a warning might not be issued or be is‐
sued late.
E. g. the following situations may not be de‐
tected:▷Partially covered pedestrians.▷Pedestrians that are not detected as such
because of the viewing angle or contour.▷Pedestrians outside of the detection range.▷Pedestrians having a body size less than
32 in/80 cm.
Functional limitations
The system may not be fully functional or may
not be available in the following situations:
▷In heavy fog, rain, sprayed water or snow‐
fall.▷In tight curves.▷If the driving stability control systems are
deactivated, e.g. DSC OFF.▷If the camera viewing field or the front
windshield are dirty or covered.▷Up to 10 seconds after the start of the en‐
gine, via the Start/Stop knob.Seite 117SafetyControls117
Online Edition for Part no. 0140 2 956 245 - X/14
Page 177 of 237
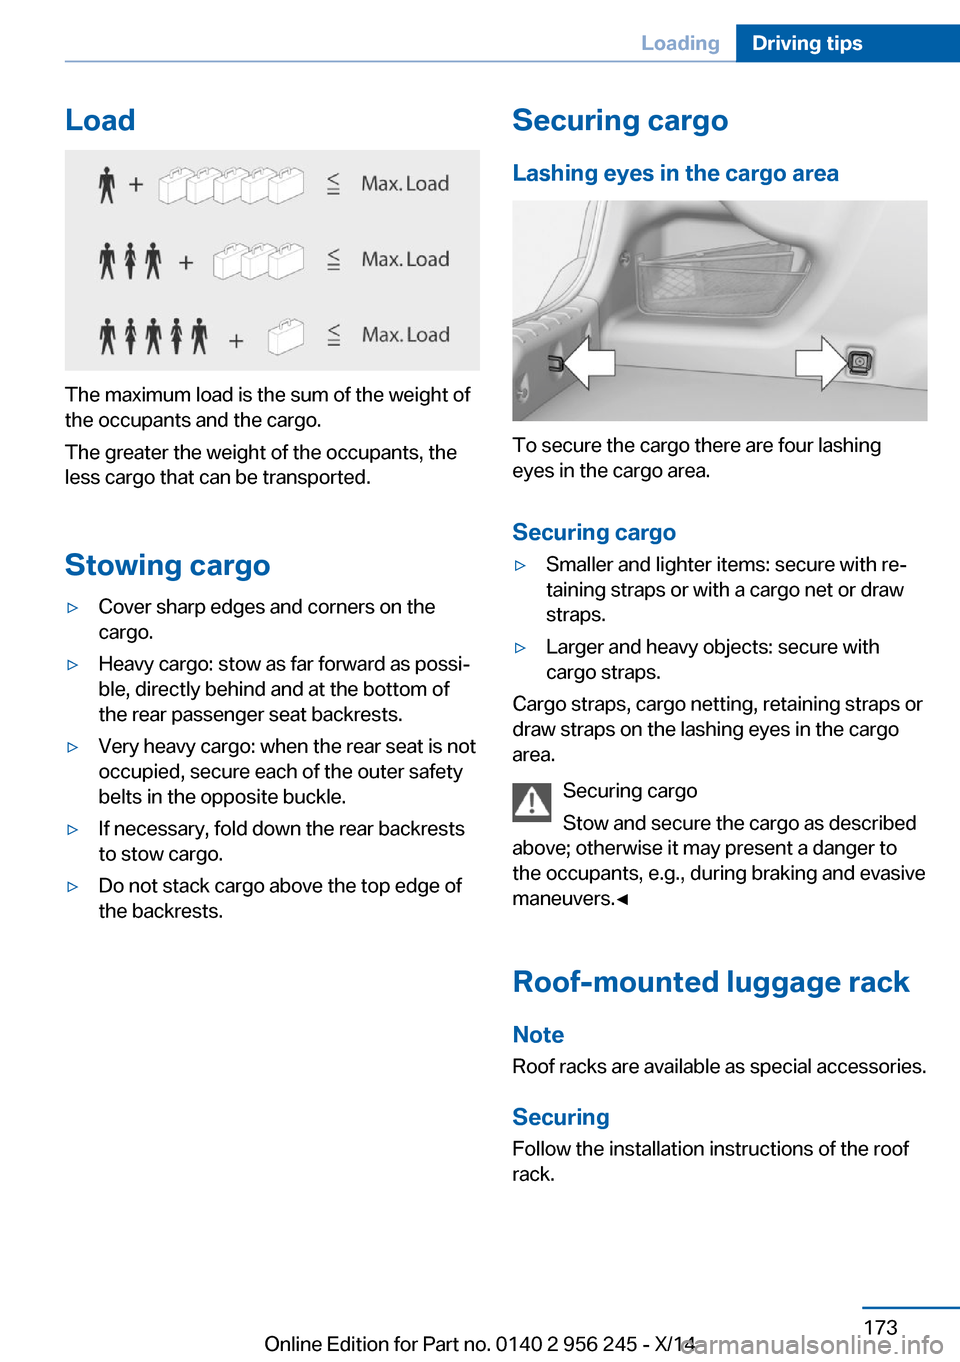
Load
The maximum load is the sum of the weight of
the occupants and the cargo.
The greater the weight of the occupants, the
less cargo that can be transported.
Stowing cargo
▷Cover sharp edges and corners on the
cargo.▷Heavy cargo: stow as far forward as possi‐
ble, directly behind and at the bottom of
the rear passenger seat backrests.▷Very heavy cargo: when the rear seat is not
occupied, secure each of the outer safety
belts in the opposite buckle.▷If necessary, fold down the rear backrests
to stow cargo.▷Do not stack cargo above the top edge of
the backrests.Securing cargo
Lashing eyes in the cargo area
To secure the cargo there are four lashing
eyes in the cargo area.
Securing cargo
▷Smaller and lighter items: secure with re‐
taining straps or with a cargo net or draw
straps.▷Larger and heavy objects: secure with
cargo straps.
Cargo straps, cargo netting, retaining straps or
draw straps on the lashing eyes in the cargo
area.
Securing cargo
Stow and secure the cargo as described
above; otherwise it may present a danger to
the occupants, e.g., during braking and evasive
maneuvers.◀
Roof-mounted luggage rack Note
Roof racks are available as special accessories.
Securing
Follow the installation instructions of the roof
rack.
Seite 173LoadingDriving tips173
Online Edition for Part no. 0140 2 956 245 - X/14
Page 195 of 237

4.Insert the sealant container on the com‐
pressor housing in an upright position.5.Screw the filling hose of the sealant con‐
tainer onto the tire valve of the defective
wheel.6.With the compressor switched off, insert
the plug into the power socket inside the
vehicle.7.With the ignition turned on or the engine
running, reel on the compressor.
Switch off the compressor after 10 mi‐
nutes
Do not allow the compressor to run longer than
10 minutes; otherwise, the device will overheat
and may be damaged.◀
Let the compressor run for approx. 3 to 8 mi‐
nutes to fill the tire with sealant and achieve a
tire inflation pressure of approx. 2.5 bar.
While the tire is being filled with sealant, the
tire inflation pressure may sporadically reach
approx. 5 bar. Do not reel off the compressor at
this point.
If a tire inflation pressure of 2 bar is not
reached:
1.Switch off the compressor.2.Unscrew the filling hose from the wheel.3.Drive 33 ft/10 m forward and back to dis‐
tribute the sealant in the tire.4.Inflate the tire again using the compressor.
If a tire inflation pressure of 2 bar cannot be
reached, contact your service center.
Stowing the Mobility System
1.Unscrew the filling hose of the sealant con‐
tainer from the wheel.2.Unscrew the connection hose of the com‐
pressor from the sealant container.3.Connect the filling hose of the sealant con‐
tainer previously connected to the tire
valve with the available connector on the
sealant container.Seite 191Wheels and tiresMobility191
Online Edition for Part no. 0140 2 956 245 - X/14
Page 215 of 237
other attempt in order to allow the dis‐
charged battery to recharge.3.Let both engines run for several minutes.4.Disconnect the jumper cables in the re‐
verse order.
Check the battery and recharge if needed.
Tow-starting and towing Note Tow-starting and towing
For towing the vehicle turn, switch off the
Intelligent Safety systems; otherwise malfunc‐
tions of the individual braking systems might
lead to accidents.◀
Manual transmission
Observe before towing your vehicle Gearshift lever in neutral position.
Towing When the parking brake is blocked
The parking brake cannot be released
manually.
Do not tow the vehicle with the parking brake
blocked, or the vehicle can be damaged.
Contact your service center.◀
Follow the towing instructions
Follow all towing instructions; otherwise,
vehicle damage or accidents may occur.◀
▷Make sure that the ignition is switched on;
otherwise, the low beams, tail lights, turn
signals, and wipers may be unavailable.▷Do not tow the vehicle with the rear axle
tilted, as the front wheels could turn.▷When the engine is stopped, there is no
power assist. Consequently, more force
needs to be applied when braking and
steering.▷Larger steering wheel movements are re‐
quired.▷The towing vehicle must not be lighter
than the vehicle being towed; otherwise,
it will not be possible to control the vehi‐
cle's response.
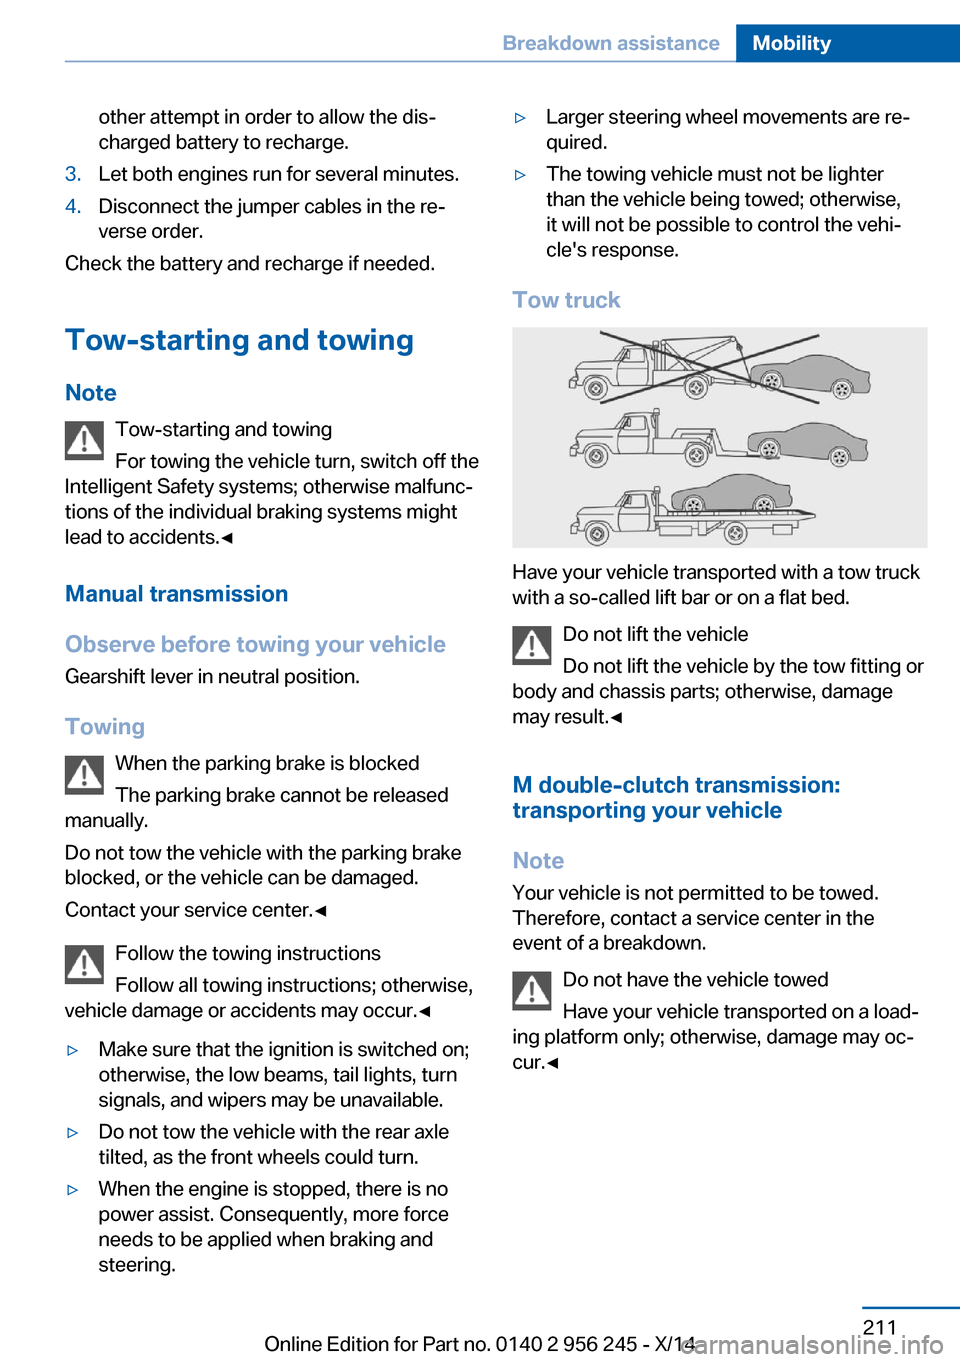
Tow truck
Have your vehicle transported with a tow truck
with a so-called lift bar or on a flat bed.
Do not lift the vehicle
Do not lift the vehicle by the tow fitting or
body and chassis parts; otherwise, damage
may result.◀
M double-clutch transmission:
transporting your vehicle
Note Your vehicle is not permitted to be towed.
Therefore, contact a service center in the
event of a breakdown.
Do not have the vehicle towed
Have your vehicle transported on a load‐
ing platform only; otherwise, damage may oc‐
cur.◀
Seite 211Breakdown assistanceMobility211
Online Edition for Part no. 0140 2 956 245 - X/14
Page 216 of 237
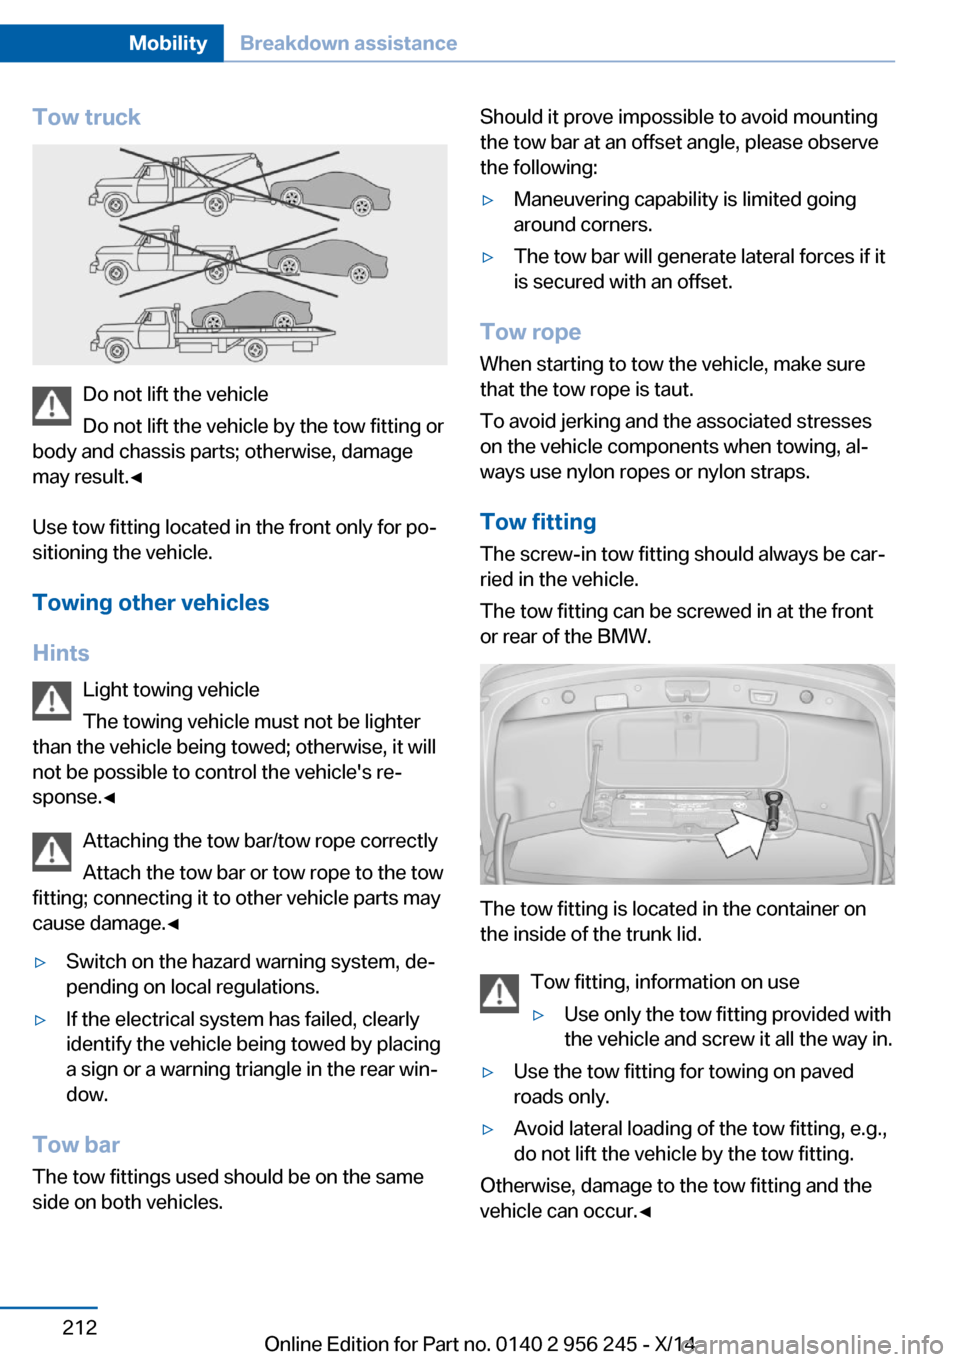
Tow truck
Do not lift the vehicle
Do not lift the vehicle by the tow fitting or
body and chassis parts; otherwise, damage
may result.◀
Use tow fitting located in the front only for po‐
sitioning the vehicle.
Towing other vehicles
Hints Light towing vehicle
The towing vehicle must not be lighter
than the vehicle being towed; otherwise, it will
not be possible to control the vehicle's re‐
sponse.◀
Attaching the tow bar/tow rope correctly
Attach the tow bar or tow rope to the tow
fitting; connecting it to other vehicle parts may
cause damage.◀
▷Switch on the hazard warning system, de‐
pending on local regulations.▷If the electrical system has failed, clearly
identify the vehicle being towed by placing
a sign or a warning triangle in the rear win‐
dow.
Tow bar
The tow fittings used should be on the same
side on both vehicles.
Should it prove impossible to avoid mounting
the tow bar at an offset angle, please observe
the following:▷Maneuvering capability is limited going
around corners.▷The tow bar will generate lateral forces if it
is secured with an offset.
Tow rope
When starting to tow the vehicle, make sure
that the tow rope is taut.
To avoid jerking and the associated stresses
on the vehicle components when towing, al‐
ways use nylon ropes or nylon straps.
Tow fitting
The screw-in tow fitting should always be car‐
ried in the vehicle.
The tow fitting can be screwed in at the front
or rear of the BMW.
The tow fitting is located in the container on
the inside of the trunk lid.
Tow fitting, information on use
▷Use only the tow fitting provided with
the vehicle and screw it all the way in.▷Use the tow fitting for towing on paved
roads only.▷Avoid lateral loading of the tow fitting, e.g.,
do not lift the vehicle by the tow fitting.
Otherwise, damage to the tow fitting and the
vehicle can occur.◀
Seite 212MobilityBreakdown assistance212
Online Edition for Part no. 0140 2 956 245 - X/14
Page 226 of 237
Everything from A to Z
IndexA ABS, Antilock Brake Sys‐ tem 127
Acceleration Assistant, refer to Launch Control 80
Activated-charcoal filter 146
Active Blind Spot Detec‐ tion 122
Active M differential 129
Active Protection 124
Active seat, front 54
Active seat ventilation, front 55
Adaptive brake lights, refer to Brake force display 124
Adaptive Light Control 101
Additives, oil 196
Adjustments, seats/head re‐ straints 52
After washing vehicle 215
Airbags 105
Airbags, indicator/warning light 106
Air circulation, refer to Recir‐ culated-air mode 145
Air, dehumidifying, refer to Cooling function 145
Air distribution, manual 144
Air flow, automatic climate control 144
Air outlets, see ventila‐ tion 146
Air pressure, tires 184
Alarm system 46
Alarm, unintentional 47
All around the center con‐ sole 16
All around the roofliner 17
All around the steering wheel 14 All-season tires, refer to Win‐
ter tires 189
Alternating-code hand-held transmitter 151
Alternative oil types 197
Ambient light 103
Animal detection, see Night Vision 118
Antifreeze, washer fluid 76
Antilock Brake System, ABS 127
Anti-slip control, refer to DSC 127
Approved axle load 220
Approved engine oils 197
Armrest, refer to Center arm‐ rest 160
Arrival time 95
Ashtray 152
Ashtray, front 152, 153
Ashtray, rear 153
Assistance, Roadside Assis‐ tance 209
Assistance when driving off 127
Attentiveness assistant 124
AUTO intensity 144
Automatic car wash 214
Automatic climate con‐ trol 143
Automatic Curb Monitor 60
Automatic deactivation, front- seat passenger airbags 107
Automatic headlight con‐ trol 101
Automatic locking 46
Automatic recirculated-air control 145
Automatic Soft Closing, doors 40
Automatic trunk lid 41 AUTO program, automatic cli‐
mate control 144
AUTO program, intensity 144
Auto Start/Stop function 70
Average fuel consumption 94
Average speed 94
Axle loads, weights 220
B Backrest curvature, refer to Lumbar support 53
Backrest, width 53
Band-aids, refer to First aid kit 209
Bar for tow-starting/ towing 212
Battery replacement, vehicle battery 206
Battery replacement, vehicle remote control 34
Battery, vehicle 206
Belts, safety belts 55
Beverage holder, cu‐ pholder 161
Blinds, sun protection 49
BMW Assist, see user's manual for Navigation, En‐
tertainment and Communi‐
cation
BMW maintenance sys‐ tem 199
BMW M technology 166
Bottle holder, refer to Cu‐ pholder 161
Brake assistant 127
Brake discs, break-in 168
Brake force display 124
Brake lights, adaptive 124
Brake lights, brake force dis‐ play 124 Seite 222ReferenceEverything from A to Z222
Online Edition for Part no. 0140 2 956 245 - X/14
Page 229 of 237
Exterior mirror, automaticdimming feature 60
Exterior mirrors 59
External start 209
External temperature dis‐ play 88
External temperature warn‐ ing 88
Eyes for securing cargo 173
F
Failure message, see Check Control 84
False alarm, refer to Uninten‐ tional alarm 47
Fan, refer to Air flow 144
Filler neck for engine oil 196
Fine wood, care 216
First aid kit 209
Fitting for towing, see tow fit‐ ting 212
Flat tire, changing wheels 205
Flat Tire Monitor FTM 111
Flat tire, Tire Pressure Moni‐ tor TPM 108
Flat tire, warning lamp 109, 111
Flooding 170
Floor carpet, care 217
Floor mats, care 217
Fold down the rear seat back‐ rest, see Though-loading
system 155
Fold-out position, wiper 76
Foot brake 170
Front airbags 105
Front-end collision warning with City Braking func‐
tion 113
Front lights 202
front-seat passenger airbags, automatic deactivation 107
Front-seat passenger airbags, indicator lamp 107 FTM Flat Tire Monitor 111
Fuel 182
Fuel consumption, current 89
Fuel consumption, refer to Average fuel consump‐
tion 94
Fuel filler flap 180
Fuel gauge 87
Fuel lid 180
Fuel quality 182
Fuel recommendation 182
Fuel, tank capacity 221
Fuse 207
G
Garage door opener, refer to Universal Integrated Remote
Control 150
Gasoline 182
Gear change 79
Gear shift indicator 92
General driving notes 169
Glare shield 152
Glass sunroof, powered 49
Glove compartment 159
Gross vehicle weight, ap‐ proved 220
Ground clearance 171
H
Handbrake, refer to Parking brake 72
Hand-held transmitter, alter‐ nating code 151
Hazard warning flashers 208
Head airbags 105
Headlight control, auto‐ matic 101
Headlight courtesy delay fea‐ ture 100
Headlight courtesy delay fea‐ ture via remote control 38
Headlight flasher 74
Headlight glass 202 Headlights 202
Headlights, care 215
Headlight washer system 74
Head restraints 52
Head restraints, front 56
Head restraints, rear 57
Head-up Display 97
Head-up Display, care 217
Head-up display, M view 98
Head-up display, standard view 98
Heavy cargo, stowing 173
Height, vehicle 220
High-beam Assistant 102
High beams 74
High beams/low beams, refer to High-beam Assistant 102
Higher speed range 171
Hills 170
Hill start assistant, refer to Drive-off assistant 127
Hints 6
Holder for beverages 161
Hood 193
Horn 14
Hotel function, trunk lid 42
Hot exhaust system 169
HUD Head-up Display 97
Hydroplaning 169
I Ice warning, see External temperature warning 88
Icy roads, see External tem‐ perature warning 88
Identification marks, tires 185
Identification number, see ve‐ hicle identification num‐
ber 9
iDrive 18
Ignition key, refer to Remote control 34
Ignition off 68
Ignition on 68 Seite 225Everything from A to ZReference225
Online Edition for Part no. 0140 2 956 245 - X/14
Page 231 of 237
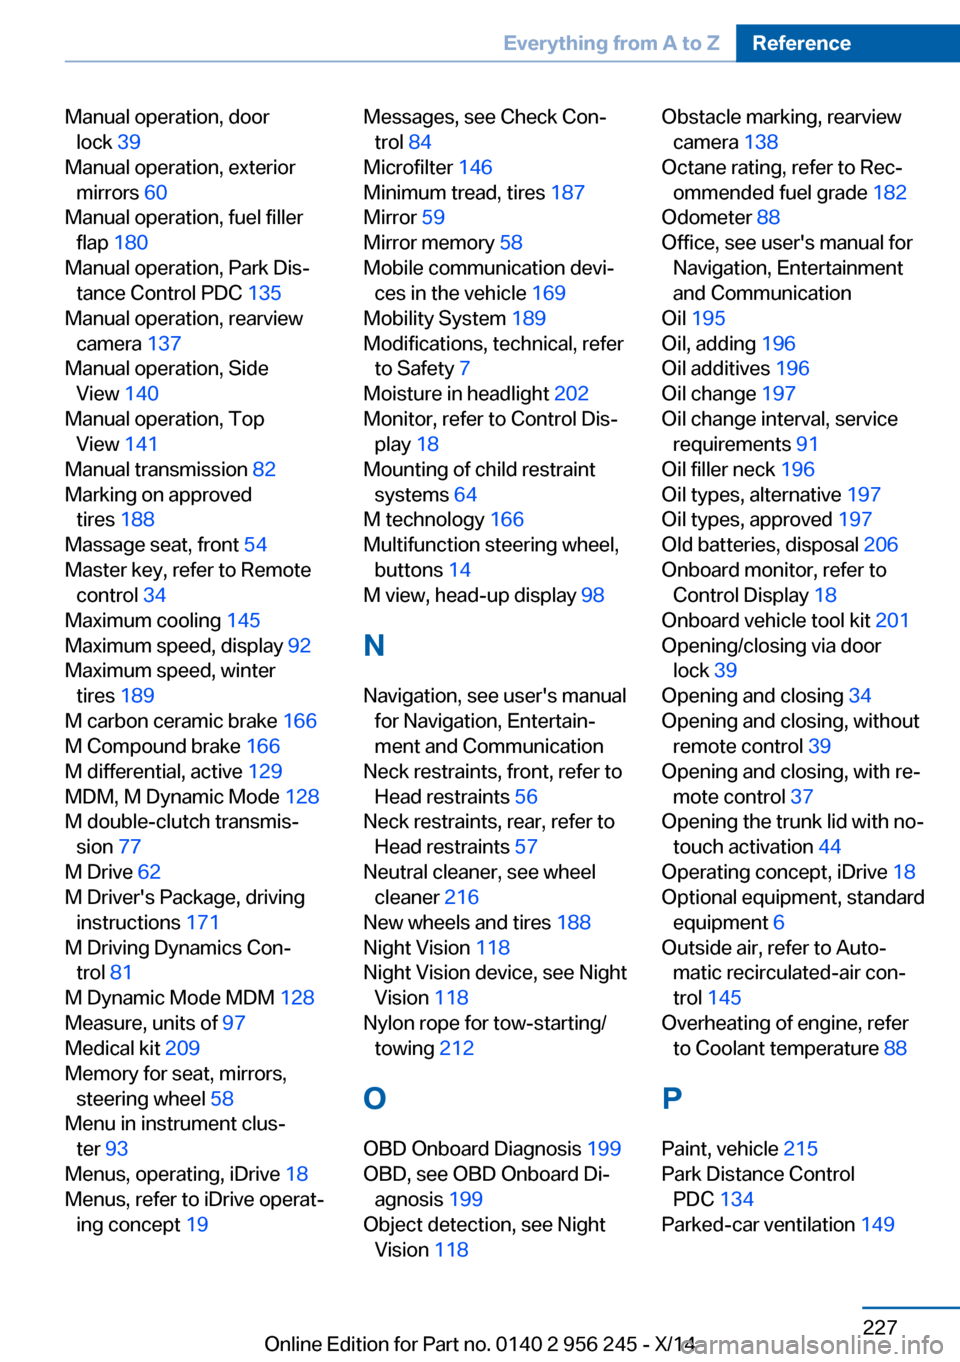
Manual operation, doorlock 39
Manual operation, exterior mirrors 60
Manual operation, fuel filler flap 180
Manual operation, Park Dis‐ tance Control PDC 135
Manual operation, rearview camera 137
Manual operation, Side View 140
Manual operation, Top View 141
Manual transmission 82
Marking on approved tires 188
Massage seat, front 54
Master key, refer to Remote control 34
Maximum cooling 145
Maximum speed, display 92
Maximum speed, winter tires 189
M carbon ceramic brake 166
M Compound brake 166
M differential, active 129
MDM, M Dynamic Mode 128
M double-clutch transmis‐ sion 77
M Drive 62
M Driver's Package, driving instructions 171
M Driving Dynamics Con‐ trol 81
M Dynamic Mode MDM 128
Measure, units of 97
Medical kit 209
Memory for seat, mirrors, steering wheel 58
Menu in instrument clus‐ ter 93
Menus, operating, iDrive 18
Menus, refer to iDrive operat‐ ing concept 19 Messages, see Check Con‐
trol 84
Microfilter 146
Minimum tread, tires 187
Mirror 59
Mirror memory 58
Mobile communication devi‐ ces in the vehicle 169
Mobility System 189
Modifications, technical, refer to Safety 7
Moisture in headlight 202
Monitor, refer to Control Dis‐ play 18
Mounting of child restraint systems 64
M technology 166
Multifunction steering wheel, buttons 14
M view, head-up display 98
N Navigation, see user's manual for Navigation, Entertain‐
ment and Communication
Neck restraints, front, refer to Head restraints 56
Neck restraints, rear, refer to Head restraints 57
Neutral cleaner, see wheel cleaner 216
New wheels and tires 188
Night Vision 118
Night Vision device, see Night Vision 118
Nylon rope for tow-starting/ towing 212
O OBD Onboard Diagnosis 199
OBD, see OBD Onboard Di‐ agnosis 199
Object detection, see Night Vision 118 Obstacle marking, rearview
camera 138
Octane rating, refer to Rec‐ ommended fuel grade 182
Odometer 88
Office, see user's manual for Navigation, Entertainment
and Communication
Oil 195
Oil, adding 196
Oil additives 196
Oil change 197
Oil change interval, service requirements 91
Oil filler neck 196
Oil types, alternative 197
Oil types, approved 197
Old batteries, disposal 206
Onboard monitor, refer to Control Display 18
Onboard vehicle tool kit 201
Opening/closing via door lock 39
Opening and closing 34
Opening and closing, without remote control 39
Opening and closing, with re‐ mote control 37
Opening the trunk lid with no- touch activation 44
Operating concept, iDrive 18
Optional equipment, standard equipment 6
Outside air, refer to Auto‐ matic recirculated-air con‐
trol 145
Overheating of engine, refer to Coolant temperature 88
P Paint, vehicle 215
Park Distance Control PDC 134
Parked-car ventilation 149 Seite 227Everything from A to ZReference227
Online Edition for Part no. 0140 2 956 245 - X/14