ABS BMW M5 SEDAN 2003 Owners Manual
[x] Cancel search | Manufacturer: BMW, Model Year: 2003, Model line: M5 SEDAN, Model: BMW M5 SEDAN 2003Pages: 155, PDF Size: 1.87 MB
Page 17 of 155
17n
OverviewControlsMaintenanceRepairsDataIndex
Indicator and warning lamps
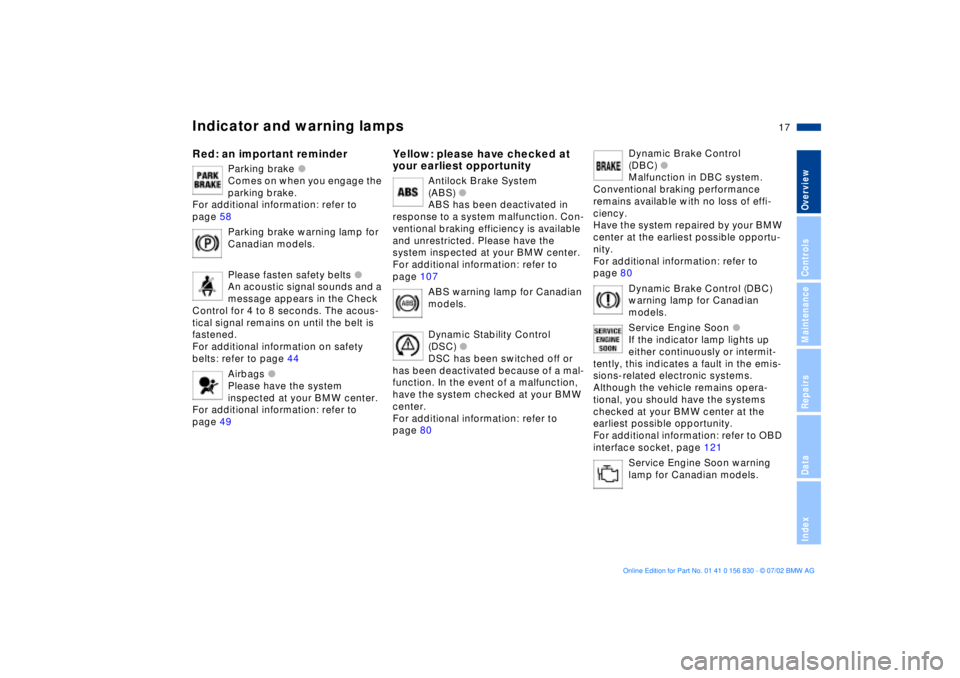
Red: an important reminder
Parking brake
l
Comes on when you engage the
parking brake.
For additional information: refer to
page 58
Parking brake warning lamp for
Canadian models.
Please fasten safety belts
l
An acoustic signal sounds and a
message appears in the Check
Control for 4 to 8 seconds. The acous-
tical signal remains on until the belt is
fastened.
For additional information on safety
belts: refer to page 44
Airbags
l
Please have the system
inspected at your BMW center.
For additional information: refer to
page 49
Yellow: please have checked at
your earliest opportunity
Antilock Brake System
(ABS)
l
ABS has been deactivated in
response to a system malfunction. Con-
ventional braking efficiency is available
and unrestricted. Please have the
system inspected at your BMW center.
For additional information: refer to
page 107
ABS warning lamp for Canadian
models.
Dynamic Stability Control
(DSC)
l
DSC has been switched off or
has been deactivated because of a mal-
function. In the event of a malfunction,
have the system checked at your BMW
center.
For additional information: refer to
page 80
Dynamic Brake Control
(DBC)
l
Malfunction in DBC system.
Conventional braking performance
remains available with no loss of effi-
ciency.
Have the system repaired by your BMW
center at the earliest possible opportu-
nity.
For additional information: refer to
page 80
Dynamic Brake Control (DBC)
warning lamp for Canadian
models.
Service Engine Soon
l
If the indicator lamp lights up
either continuously or intermit-
tently, this indicates a fault in the emis-
sions-related electronic systems.
Although the vehicle remains opera-
tional, you should have the systems
checked at your BMW center at the
earliest possible opportunity.
For additional information: refer to OBD
interface socket, page 121
Service Engine Soon warning
lamp for Canadian models.
Page 33 of 155
33n
OverviewControlsMaintenanceRepairsDataIndex
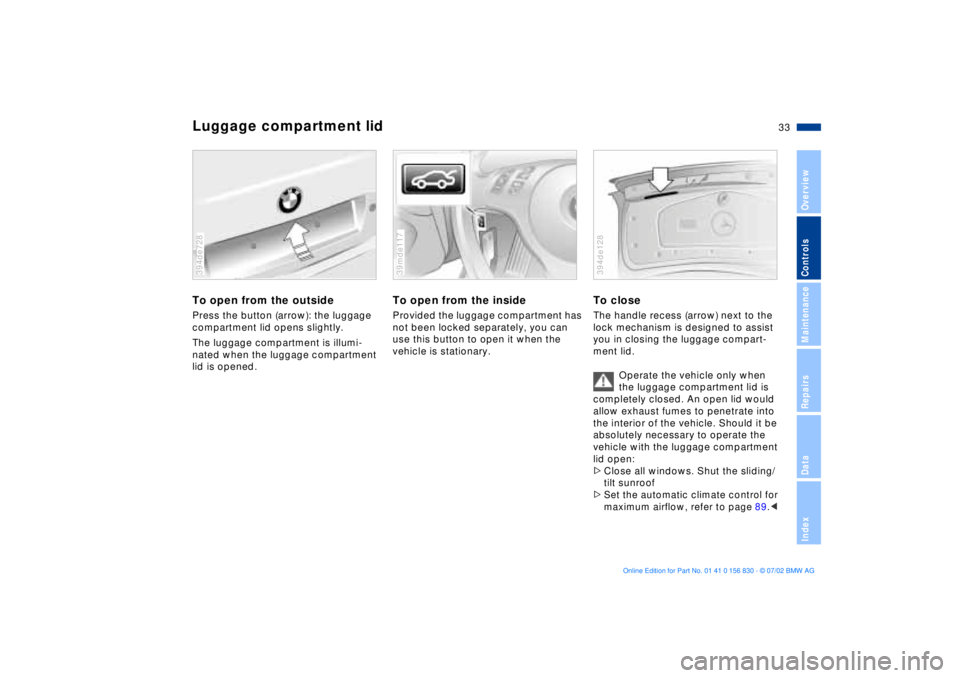
Luggage compartment lidTo open from the outsidePress the button (arrow): the luggage
compartment lid opens slightly.
The luggage compartment is illumi-
nated when the luggage compartment
lid is opened. 394de728
To open from the insideProvided the luggage compartment has
not been locked separately, you can
use this button to open it when the
vehicle is stationary. 39mde117
To closeThe handle recess (arrow) next to the
lock mechanism is designed to assist
you in closing the luggage compart-
ment lid.
Operate the vehicle only when
the luggage compartment lid is
completely closed. An open lid would
allow exhaust fumes to penetrate into
the interior of the vehicle. Should it be
absolutely necessary to operate the
vehicle with the luggage compartment
lid open:
>Close all windows. Shut the sliding/
tilt sunroof>Set the automatic climate control for
maximum airflow, refer to page 89.
<
394de128
Page 40 of 155

40n
For relaxed and fatigue-free driving you
should select a seating position that
reflects your personal requirements.
Correct seating position combines with
safety belts and airbags to enhance
occupant safety in the event of an acci-
dent. To ensure that the vehicle's safety
systems provide you with optimal pro-
tection, we request that you direct your
careful attention to the following sec-
tion.
For additional information on trans-
porting children, refer to page 51.
Sitting safely with airbags
Always maintain an adequate dis-
tance between yourself and
the airbags. Always hold the steering
wheel by the rim with the hands at the
9 and 3-o'clock positions to keep any
chance of injury to hands or arms to an
absolute minimum should the airbag be
deployed. Never allow any objects,
individuals or animals to obstruct the
areas between passengers and airbags.
Never use the front airbag's cover as a
storage tray or support for objects of
any kind. Never allow front passengers
to rest their feet or legs on the airbag
cover.<
For airbag locations and additional
information on airbags refer to page 49.Sitting safely with safety belt
Never allow more than one person
to wear a single safety belt. Never
allow infants or small children to ride in
a passenger's lap. Avoid twisting the
belt while routing it firmly across the
pelvis and shoulder, wear it as snugly
against your body as possible. Do not
allow the belt to rest against hard or
fragile objects in your pockets. Do not
route the belt across your neck, or run it
across sharp edges. Avoid wearing
bulky clothing and pull on the lap belt
periodically to retension it over your
shoulders. In the event of a frontal
impact, a loose lap belt could slide over
the hips, leading to abdominal injury. In
addition, the safety belt's restraint
effectiveness is reduced if it is worn
loosely. Expectant mothers should
always wear their safety belts, taking
care to position the lap belt against the
lower hips, where it will not exert pres-
sure against the abdominal area.<
For information on using the safety
belts refer to page 44.
When adjusting your seat, always
observe the following precautions
Never try to adjust your seat while
operating the vehicle. The seat
could respond with an unexpected
movement, and the ensuing loss of
vehicle control could lead to an acci-
dent. Never ride with the backrest
reclined to an extreme horizontal angle
(important for front passengers to
remember), otherwise, there is a risk
that you will slide under the safety belt
in an accident, thus negating the pro-
tection the safety belt provides.
Do not move the seats to the rear when
the vehicle is at an extreme angle (on
garage ramps or steep slopes, for
example). If you do so, the automatic
safety belt height adjustment can be
disengaged.<
Seat adjustment>BMW M sport seat, refer to page 41
>BMW comfort seat, refer to page 42
>Head restraints, refer to page 43
>BMW active seat, refer to page 43
Sitting safely Seats
Page 67 of 155

67n
OverviewControlsMaintenanceRepairsDataIndex
Check Control Priority 2
These displays appear for 20 seconds
with the ignition key in position 2. The
warning symbols remain after the mes-
sage disappears. The messages can be
recalled again with CHECK button 3.
>"TRUNKLID OPEN"
This message appears only when you
initially begin a trip
>"DOOR OPEN"
This message appears after a defined
road speed has been exceeded
>"FASTEN SEAT BELTS"
*
In addition to this message, an indi-
cator lamp with the safety belt icon
appears and an acoustic signal is
sounded
>"WASHER FLUID LOW"
Too low; top up fluid at the next
opportunity. Refer to page 115
>"CHECK ENGINE OIL LEV"
The oil level is at the absolute min-
imum, so add engine oil as soon as
possible. Refer to page 115. Until
then, do not drive more than approx.
30 miles (50 km)>"TIRE PRESSURE SET"
The Flat Tire Monitor has adopted the
tires' current inflation pressures as its
reference levels. Refer to page 82
>"TIRECONTROL INACTIVE"
Transient malfunctions and system
errors in the Flat Tire Monitor. Refer
to page 83
>"CHECK BRAKE LIGHTS"
A lamp has failed or the electrical cir-
cuit has a fault. Refer to pages 126
and 132 or consult a BMW center
>"CHECK LOWBEAM LIGHTS"
"CHECK SIDE LIGHTS"
"CHECK REAR LIGHTS"
"CHECK FRONT FOGLAMPS"
"CHECK LICPLATE LIGHT"
"CHECK HIGHBEAM LIGHT"
"CHECK BACK UP LIGHTS"
Defective bulb or circuit. Refer to
page 124 and following and
page 132 or consult a BMW center>"CHECK BRAKE LININGS"
Have the brake pads checked at your
BMW center. Refer to page 108
>"CHECK COOLANT LEVEL"
The coolant level is too low; top off
at the next opportunity. Refer to
page 118
>"CHECK FILLER CAP"
Check to see whether the fuel filler
cap has been properly closed. Refer
to page 21
>"ENGINE FAILSAFE PROG"
Indicates a malfunction in the elec-
tronic engine-management system,
which then reverts to an emergency
default program allowing continued
operation at reduced power and
lower engine speeds.
Please have the system inspected by
your BMW center
>
"OUTSIDE TEMPERATURE 24 7
(Ð 5.0 6)"This temperature display is only an
example. The current temperature is
displayed at outside temperatures of
37.5 7 (+3 6) and below. Refer also
to page 63.
Page 80 of 155
80n
Dynamic Stability Control (DSC)DSC maintains vehicle stability, even in
critical driving situations.
The system optimizes vehicle stability
during acceleration and when starting
from a full stop, as well as enhancing
traction. In addition, the system recog-
nizes unstable vehicle conditions
(understeering or oversteering, for
example) and holds the vehicle on a
sure course by intervening via the
engine and by braking at the individual
wheels.
The system starts up automatically
each time you start the engine.Indicator lamp
The indicator lamp in the instru-
ment cluster goes out shortly
after you switch on the ignition.
Refer to page 17.
Indicator lamp flashes:
The system is active and governs drive
and braking force.
If the indicator lamp fails to go out after
the engine is started, or if it comes on
during normal driving and stays on:
There is a system malfunction or the
system was deactivated with the button.
You can continue to drive the vehicle
normally, but without DSC. Please con-
sult your BMW center for repairs.
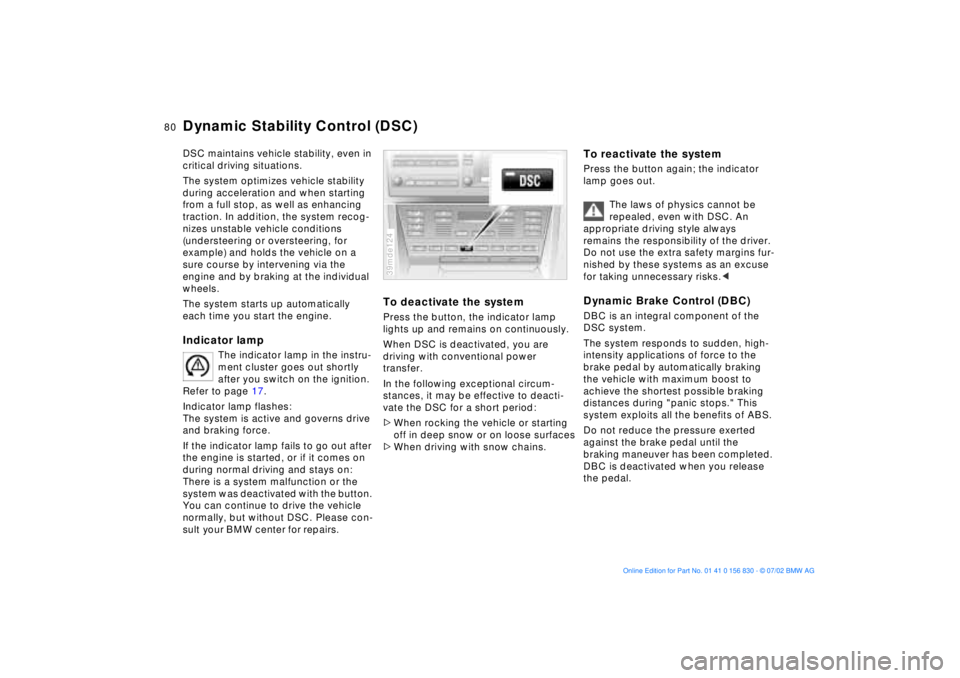
To deactivate the systemPress the button, the indicator lamp
lights up and remains on continuously.
When DSC is deactivated, you are
driving with conventional power
transfer.
In the following exceptional circum-
stances, it may be effective to deacti-
vate the DSC for a short period:
>When rocking the vehicle or starting
off in deep snow or on loose surfaces
>When driving with snow chains.39mde124
To reactivate the systemPress the button again; the indicator
lamp goes out.
The laws of physics cannot be
repealed, even with DSC. An
appropriate driving style always
remains the responsibility of the driver.
Do not use the extra safety margins fur-
nished by these systems as an excuse
for taking unnecessary risks.
The system responds to sudden, high-
intensity applications of force to the
brake pedal by automatically braking
the vehicle with maximum boost to
achieve the shortest possible braking
distances during "panic stops." This
system exploits all the benefits of ABS.
Do not reduce the pressure exerted
against the brake pedal until the
braking maneuver has been completed.
DBC is deactivated when you release
the pedal.
Page 107 of 155
107n
OverviewControlsMaintenanceRepairsDataIndex
Driving notes Antilock Brake System
Brakes:
Do not rest your foot on the brake
pedal while driving. Even light but con-
sistent pedal pressure can lead to high
temperatures, brake wear and possibly
even brake failure.
Hydroplaning:
When driving on wet or slushy roads,
reduce vehicle speed. If you do not,
a wedge of water may form between
the tires and the road surface. This phe-
nomenon is referred to as aquaplaning,
or hydroplaning, and can lead to partial
or complete loss of traction, vehicle
control and braking effectiveness.
Driving through water:
When there is water on the roads, do
not drive in it if it is deeper than 1 ft
(30 cm). If the water is at that depth,
drive only at walking speed, otherwise
the vehicle can sustain damage to the
engine, the electrical systems and the
transmission.
Rear parcel tray:
Do not place heavy or hard objects on
the rear parcel tray. If you do so, they
could pose a danger to vehicle occu-
pants during a braking or evasive
maneuver.
Clothes hooks:
When suspending clothing from the
hooks, ensure that they will not obstruct
the driver's vision. Do not hang any
heavy objects on the hooks, otherwise,
passengers could be injured e.g. during
any hard braking or evasive maneuvers,
or during an accident.<
The conceptThe Antilock Brake System (ABS) keeps
the wheels from locking during braking,
thereby enhancing active driving safety.
With ABS, the shortest possible braking
distances are achieved under most
conditions (on straight-aways and in
curves, on asphalt, ice, wet road sur-
faces, etc.).Braking with ABSIf you are in a situation that requires
full braking, you will exploit the full ben-
efits of the ABS system if you apply
maximum pedal pressure ("panic stop").
Pulsation at the brake pedal combined
with sounds from the hydraulic circuits
indicates to the driver that ABS is in its
active mode.
Page 111 of 155
111n
OverviewControlsMaintenanceRepairsDataIndex
Tire replacement Wheel and tire combinations
Do not use retreaded tires, since
driving safety may be impaired.
This is due to the possible variations in
casing structures and, in some cases,
to their extreme age, which can lead to
a decrease in their durability.<
Tire ageThe date on which the tire was manu-
factured is indicated by the code on the
sidewall:
DOT ... 3401 indicates that the tire was
manufactured in week 34 of the year
2001.
Although tires may have a theoretical
service life of up to 10 years, BMW
strongly recommends that you replace
all tires after an absolute maximum of
6 years.
The right choice
Never mount wheels and tires that
have not been specifically
approved by BMW for use on your par-
ticular model. Although other wheels
and tires may theoretically have the
same dimensions, variations in factors
such as manufacturing tolerances can
result in contact between tire and body-
work, ultimately leading to serious acci-
dents. If non-approved wheels and tires
are used, BMW cannot evaluate their
suitability, and therefore cannot be held
liable for driving safety.<
BMW has tested certain tires for each
tire size, rated them according to road
safety and approved them. Your BMW
center can inform you which tires have
been tested in this way. Observe pos-
sible national guidelines, e.g. regarding
entry into vehicle documents.
Because various systems on your
vehicle, such as ABS, DSC and
the Flat Tire Monitor, rely on the correct
combination of tires and wheels for
optimal operation, their operation may
be adversely affected if other tires and/
or wheels are mounted .
You should therefore ensure that tires
from a single manufacturer with the
same tread pattern are mounted at all
four wheels. After installing a spare tire
in response to a flat tire you should
always ensure that a tire of the original
specifications is remounted as soon as
possible.<
The use of rims and wheel bolts
that do not meet the specifica-
tions of the original factory-installed
equipment will affect the safe operation
of your vehicle and may cause an acci-
dent and personal injury.
Never mix tires of different design, such
as steel-belted radials with radial bias-
belted or bias-ply tires, etc. Mixing tire
types will adversely affect roadholding and can lead to loss of vehicle control.
possible. Protect the tires against con-
tact with oil, grease and fuel.
Page 118 of 155
118n
Coolant Brake fluidChecking coolant level and
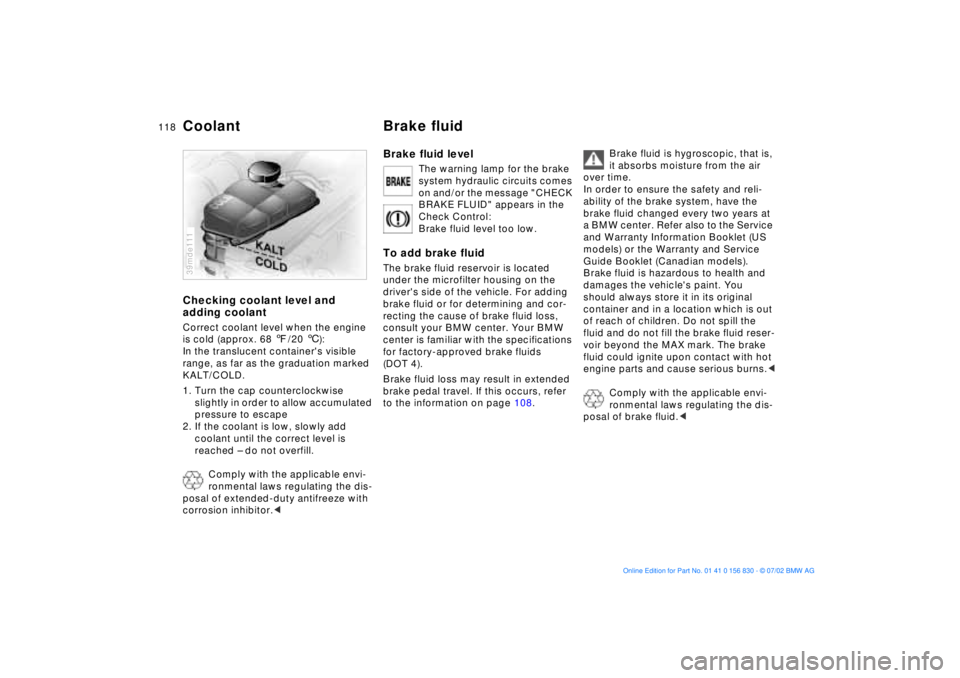
adding coolantCorrect coolant level when the engine
is cold (approx. 68 7/20 6):
In the translucent container's visible
range, as far as the graduation marked
KALT/COLD.
1. Turn the cap counterclockwise
slightly in order to allow accumulated
pressure to escape
2. If the coolant is low, slowly add
coolant until the correct level is
reached Ð do not overfill.
Comply with the applicable envi-
ronmental laws regulating the dis-
posal of extended-duty antifreeze with
corrosion inhibitor.<39mde111
Brake fluid level
The warning lamp for the brake
system hydraulic circuits comes
on and/or the message "CHECK
BRAKE FLUID" appears in the
Check Control:
Brake fluid level too low.
To add brake fluidThe brake fluid reservoir is located
under the microfilter housing on the
driver's side of the vehicle. For adding
brake fluid or for determining and cor-
recting the cause of brake fluid loss,
consult your BMW center. Your BMW
center is familiar with the specifications
for factory-approved brake fluids
(DOT 4).
Brake fluid loss may result in extended
brake pedal travel. If this occurs, refer
to the information on page 108.
Brake fluid is hygroscopic, that is,
it absorbs moisture from the air
over time.
In order to ensure the safety and reli-
ability of the brake system, have the
brake fluid changed every two years at
a BMW center. Refer also to the Service
and Warranty Information Booklet (US
models) or the Warranty and Service
Guide Booklet (Canadian models).
Brake fluid is hazardous to health and
damages the vehicle's paint. You
should always store it in its original
container and in a location which is out
of reach of children. Do not spill the
fluid and do not fill the brake fluid reser-
voir beyond the MAX mark. The brake
fluid could ignite upon contact with hot
engine parts and cause serious burns.<
Comply with the applicable envi-
ronmental laws regulating the dis-
posal of brake fluid.<
Page 133 of 155
133n
OverviewControlsMaintenanceRepairsDataIndex
Do not use spray starter fluids to start
the engine.
When your battery is discharged you
can used two jumper cables to start
your vehicle with power from the bat-
tery in a second vehicle. You can also
use the same method to help start
another vehicle. Use only jumper cables
with fully insulated handles on the ter-
minal clamps.
Do not touch high-voltage wiring
and cables on a running engine.
There is a risk of fatal injury if you do
this. Carefully observe the following
instructions to avoid personal injury
and/or damage to one or both vehi-
cles.<
1. Ensure that the battery in the sup-
port vehicle is also rated at
12 volts. This information is pro-
vided on the top of the battery
casing
2. Do not disconnect your battery from
your vehicle's electrical system.
Switch off all electrical accessories
in both vehicles
3. Make absolutely certain that there
is no contact between the body-
work of the two vehicles Ð short cir-
cuit hazard
4. Start the engine on the support
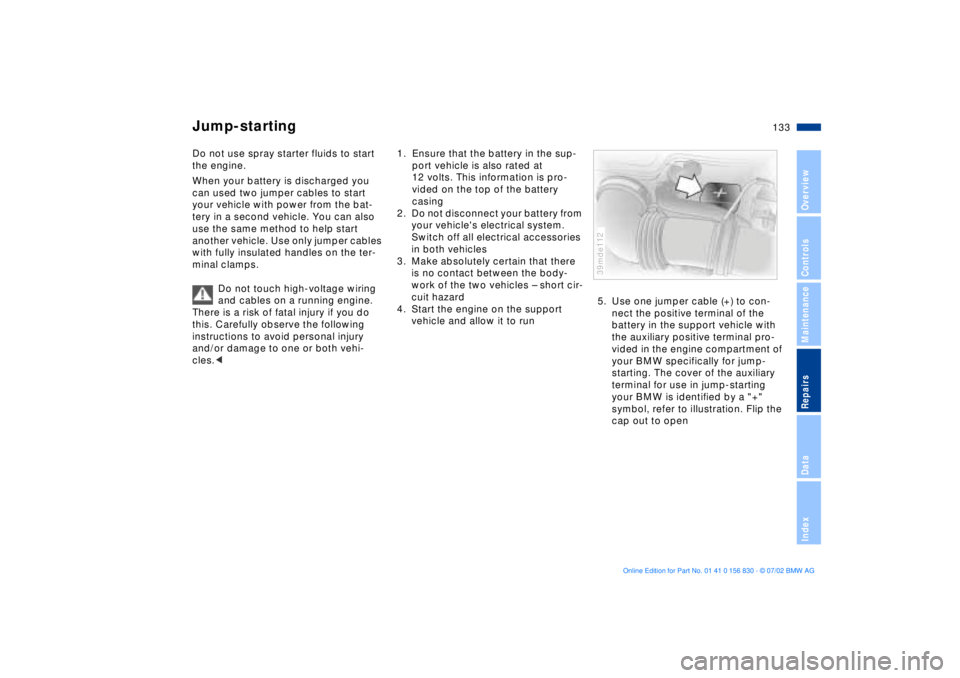
vehicle and allow it to run5. Use one jumper cable (+) to con-
nect the positive terminal of the
battery in the support vehicle with
the auxiliary positive terminal pro-
vided in the engine compartment of
your BMW specifically for jump-
starting. The cover of the auxiliary
terminal for use in jump-starting
your BMW is identified by a "+"
symbol, refer to illustration. Flip the
cap out to open
39mde112
Jump-starting
Page 135 of 155
135n
OverviewControlsMaintenanceRepairsDataIndex
Towing the vehicleTow fittingThe screw-in tow fitting is stored in the
onboard tool kit; be sure that it remains
in the vehicle at all times. This fitting
is designed for installation in the tow
sockets located at the front and rear of
the vehicle, and is intended for towing
on proper road surfaces only.
It should not be used to pull a vehicle
out of deep snow, mud, sand, etc.
Always observe all applicable towing
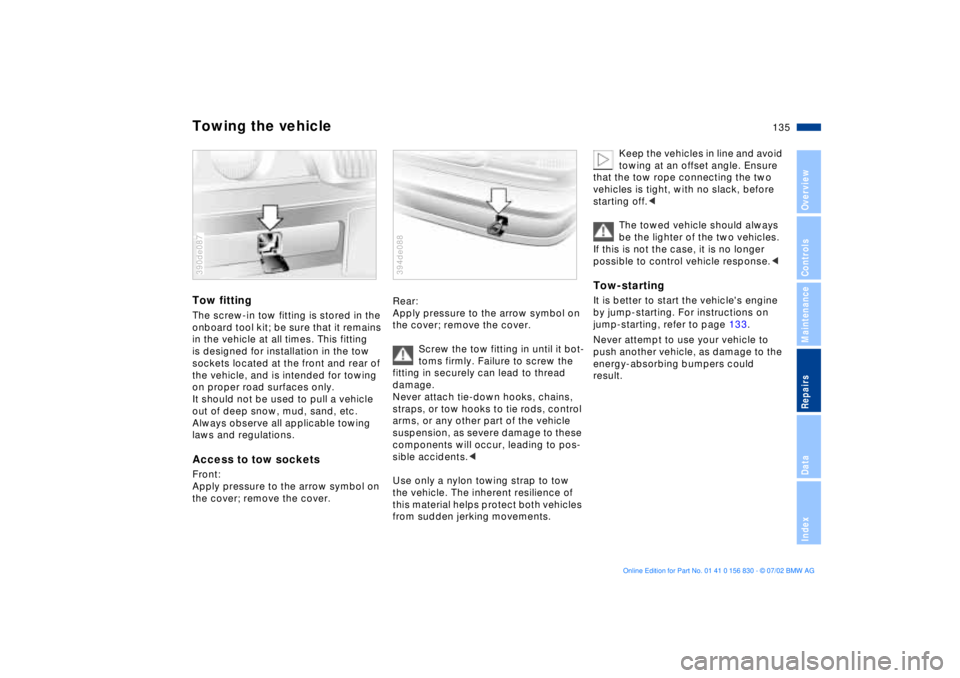
laws and regulations.Access to tow sockets Front:
Apply pressure to the arrow symbol on
the cover; remove the cover.390de087
Rear:
Apply pressure to the arrow symbol on
the cover; remove the cover.
Screw the tow fitting in until it bot-
toms firmly. Failure to screw the
fitting in securely can lead to thread
damage.
Never attach tie-down hooks, chains,
straps, or tow hooks to tie rods, control
arms, or any other part of the vehicle
suspension, as severe damage to these
components will occur, leading to pos-
sible accidents.<
Use only a nylon towing strap to tow
the vehicle. The inherent resilience of
this material helps protect both vehicles
from sudden jerking movements.394de088
Keep the vehicles in line and avoid
towing at an offset angle. Ensure
that the tow rope connecting the two
vehicles is tight, with no slack, before
starting off.<
The towed vehicle should always
be the lighter of the two vehicles.
If this is not the case, it is no longer
possible to control vehicle response.<
Tow-startingIt is better to start the vehicle's engine
by jump-starting. For instructions on
jump-starting, refer to page 133.
Never attempt to use your vehicle to
push another vehicle, as damage to the
energy-absorbing bumpers could
result.