tow BMW M5 SEDAN 2003 Owners Manual
[x] Cancel search | Manufacturer: BMW, Model Year: 2003, Model line: M5 SEDAN, Model: BMW M5 SEDAN 2003Pages: 155, PDF Size: 1.87 MB
Page 6 of 155

Contents
Operation, maintenance
Owner service procedures
Special operating instructions:
Break-in procedures106
Driving notes107
Antilock Brake System107
Brake system108
Wheels and tires:
Tire inflation pressure109
Tire condition109
Tire replacement110
Wheel and tire
combinations111
Special characteristics of winter
tires112
Snow chains112
In the engine compartment:
Hood113
Engine compartment
essentials114
Washer fluids115
Engine oil115
Coolant117
Brake fluid118
Maintenance:
The BMW Maintenance
System119
Laws and regulations:
Technical modifications120
California Proposition
65 Warning120
OBD interface socket121
Replacement procedures:
Onboard tool kit124
Windshield wiper blades124
Lamps and bulbs124
Repairing a flat tire128
Battery131
Fuses132
Assistance, giving and
receiving:
Jump-starting133
Towing the vehicle135
Page 35 of 155
35n
OverviewControlsMaintenanceRepairsDataIndex
Alarm systemThe conceptThe vehicle alarm system responds:
>When a door, the hood or the lug-
gage compartment lid are opened
>To movement inside the vehicle (inte-
rior motion sensor)
>Variations in the vehicle's tilt angle of
the kind that occur during attempts to
steal the wheels or tow the vehicle
>To interruption of battery voltage.
The system responds to unauthorized
vehicle entry and attempted theft by
simultaneously activating the following:
>Sounding an acoustical alarm for
30 seconds
>The hazard warning flashers are acti-
vated for approx. five minutes
>The high beams flash on and off in
the same rhythm as the hazard
warning flashers.
To arm and disarm the
alarm systemWhen the vehicle is locked or unlocked
with the key or the remote control, the
alarm system is also simultaneously
armed or disarmed.
You can have different acknowl-
edgment messages set to confirm
arming and disarming.<
You can also open the luggage com-
partment lid when the system is armed
by pressing the button on the remote
control (refer to page 29). When you
close the luggage compartment lid, the
luggage compartment is secured again.
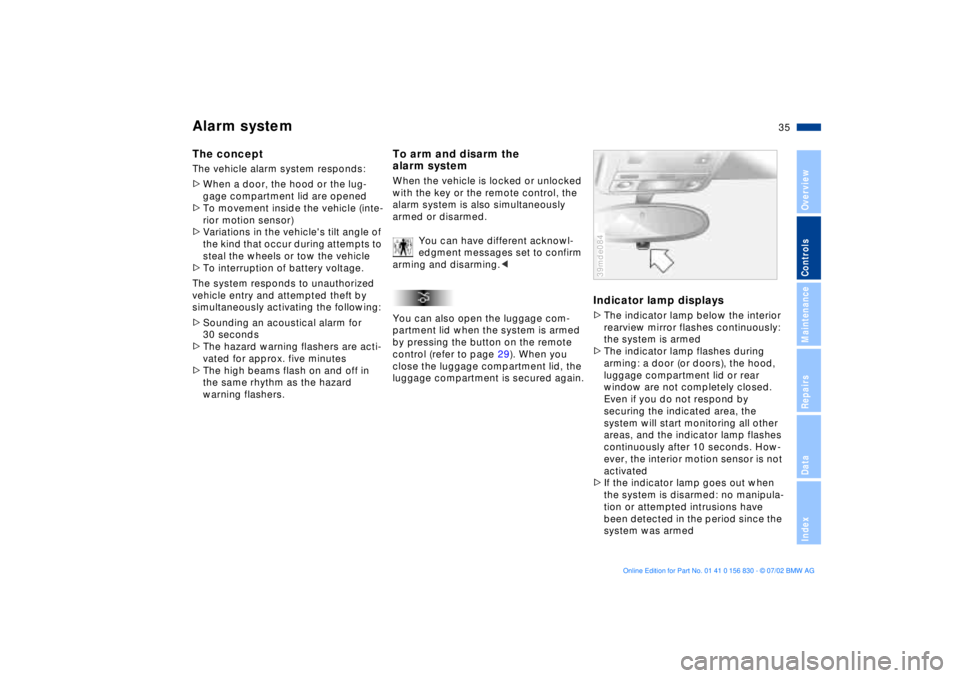
Indicator lamp displays>The indicator lamp below the interior
rearview mirror flashes continuously:
the system is armed
>The indicator lamp flashes during
arming: a door (or doors), the hood,
luggage compartment lid or rear
window are not completely closed.
Even if you do not respond by
securing the indicated area, the
system will start monitoring all other
areas, and the indicator lamp flashes
continuously after 10 seconds. How-
ever, the interior motion sensor is not
activated
>If the indicator lamp goes out when
the system is disarmed: no manipula-
tion or attempted intrusions have
been detected in the period since the
system was armed39mde084
Page 38 of 155
38n
Sliding/tilt sunroof
*
To prevent injuries, exercise
care when closing the sliding/tilt
sunroof and keep it in your field of
vision until it is shut.
Before leaving the vehicle, switch off
the electric sunroof mechanism by
removing the ignition key. Do not leave
children unattended in the vehicle with
access to vehicle keys. The key can be
used to start the engine and to operate
vehicle systems such as the power sun-
roof, etc. Unsupervised use of these
systems can result in serious personal
injury.<
For convenience operation via the door
lock or remote control, refer to page 27
or 29.
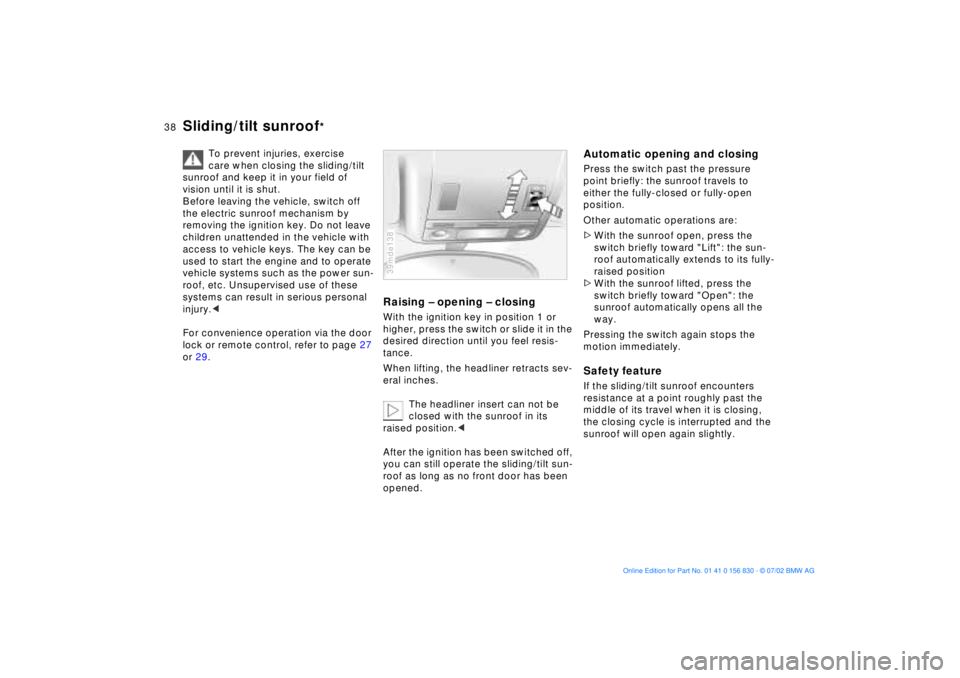
Raising Ð opening Ð closingWith the ignition key in position 1 or
higher, press the switch or slide it in the
desired direction until you feel resis-
tance.
When lifting, the headliner retracts sev-
eral inches.
The headliner insert can not be
closed with the sunroof in its
raised position.<
After the ignition has been switched off,
you can still operate the sliding/tilt sun-
roof as long as no front door has been
opened.39mde138
Automatic opening and closingPress the switch past the pressure
point briefly: the sunroof travels to
either the fully-closed or fully-open
position.
Other automatic operations are:
>With the sunroof open, press the
switch briefly toward "Lift": the sun-
roof automatically extends to its fully-
raised position
>With the sunroof lifted, press the
switch briefly toward "Open": the
sunroof automatically opens all the
way.
Pressing the switch again stops the
motion immediately.Safety featureIf the sliding/tilt sunroof encounters
resistance at a point roughly past the
middle of its travel when it is closing,
the closing cycle is interrupted and the
sunroof will open again slightly.
Page 39 of 155
39n
OverviewControlsMaintenanceRepairsDataIndex
Sliding/tilt sunroof
*
Despite this safety feature, be
extremely careful to ensure that
the closing path of the roof is not
obstructed. Remember that the safety
mechanism may not be able to detect
every kind of potential obstruction (very
thin objects, for instance). You can dis-
able this safety feature by pressing the
switch beyond the pressure point and
holding it.<
Sliding/tilt sunroof with glass
moonroof insert
*
The options and control procedures are
essentially the same as those previ-
ously described for the sliding/tilt sun-
roof. In order to open the raised roof,
press the control switch towards
"Open" and maintain pressure until the
roof has reached the desired position.
The headliner insert slides back some-
what when you raise the sunroof, and
retracts along with the sunroof panel
when you slide it back. The insert then
remains open, and you can slide it back
and forth to adjust it whenever the sun-
roof is not fully retracted.
Interruption in the electrical
supplyAfter interruptions in the electrical
supply (when the battery is discon-
nected, for instance), the sunroof may
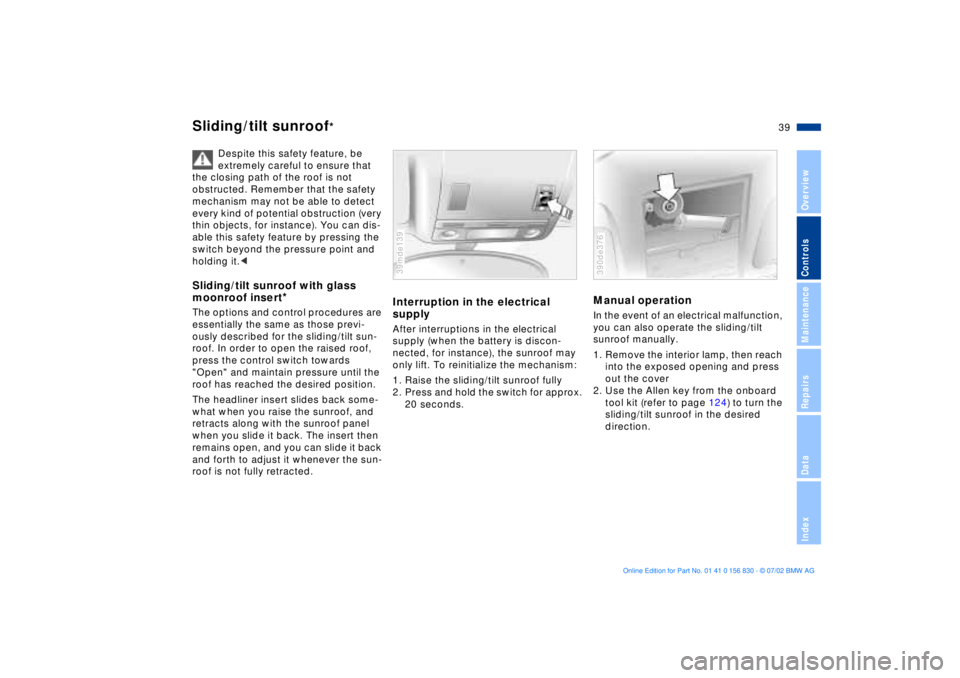
only lift. To reinitialize the mechanism:
1. Raise the sliding/tilt sunroof fully
2. Press and hold the switch for approx.
20 seconds.39mde139
Manual operation In the event of an electrical malfunction,
you can also operate the sliding/tilt
sunroof manually.
1. Remove the interior lamp, then reach
into the exposed opening and press
out the cover
2. Use the Allen key from the onboard
tool kit (refer to page 124) to turn the
sliding/tilt sunroof in the desired
direction. 390de376
Page 79 of 155

79n
OverviewControlsMaintenanceRepairsDataIndex
Park Distance Control (PDC)
*
PDC does not remove the driver's
personal responsibility for evalu-
ating the distance between the vehicle
and any obstacles. Even with the sen-
sors, there is a blind spot in which
objects cannot be detected. This
applies especially in those cases where
the system approaches the physical
limits of ultrasonic measurement, as
occurs with e. g. tow bars and trailer
couplings, and in the vicinity of thin or
wedge-shaped objects.
Certain sources of sound, such as a
loud radio, could drown out the PDC
signal tone.<
Keep the sensors clean and free
of ice or snow in order to ensure
that they will continue to operate effec-
tively.
Do not apply high-pressure spray to the
sensors for a prolonged period of time.
Maintain an adequate distance of more
than 4 in (10 cm).<
Page 87 of 155
87n
OverviewControlsMaintenanceRepairsDataIndex
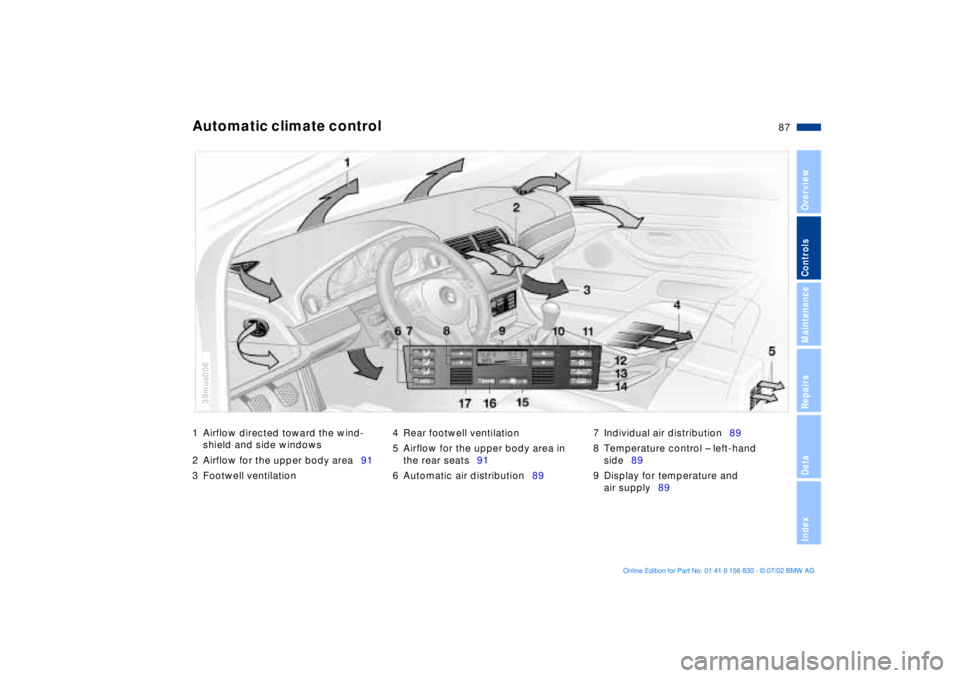
1 Airflow directed toward the wind-
shield and side windows
2 Airflow for the upper body area91
3 Footwell ventilation4 Rear footwell ventilation
5 Airflow for the upper body area in
the rear seats91
6 Automatic air distribution897 Individual air distribution89
8 Temperature control Ð left-hand
side89
9 Display for temperature and
air supply89Automatic climate control
39mus006
Page 91 of 155
91n
OverviewControlsMaintenanceRepairsDataIndex
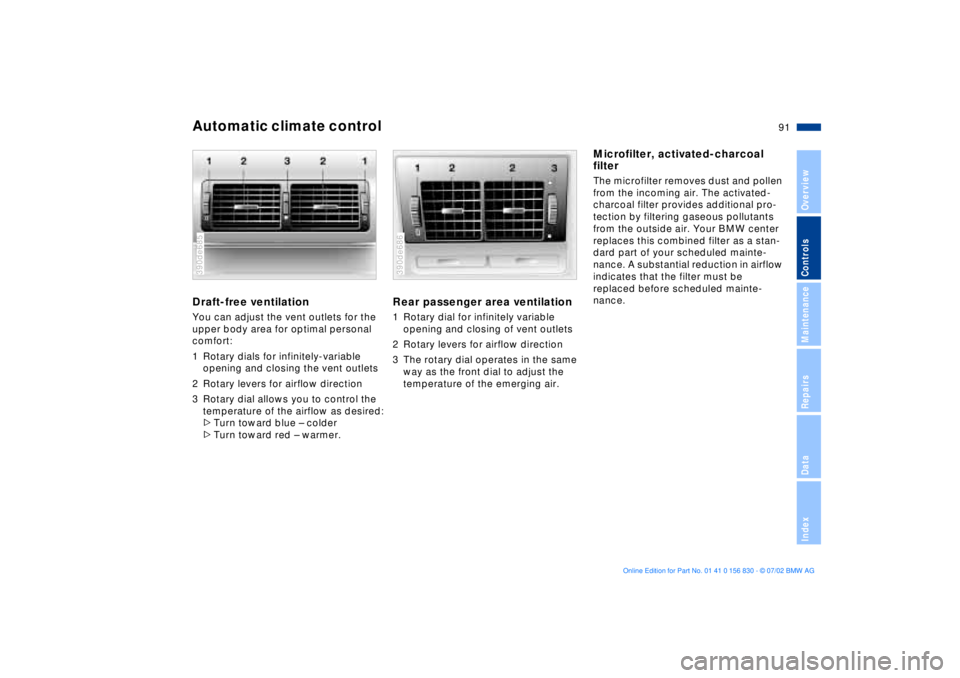
Automatic climate control Draft-free ventilation You can adjust the vent outlets for the
upper body area for optimal personal
comfort:
1 Rotary dials for infinitely-variable
opening and closing the vent outlets
2 Rotary levers for airflow direction
3 Rotary dial allows you to control the
temperature of the airflow as desired:
>Turn toward blue Ð colder
>Turn toward red Ð warmer.390de685
Rear passenger area ventilation1 Rotary dial for infinitely variable
opening and closing of vent outlets
2 Rotary levers for airflow direction
3 The rotary dial operates in the same
way as the front dial to adjust the
temperature of the emerging air.390de686
Microfilter, activated-charcoal
filter The microfilter removes dust and pollen
from the incoming air. The activated-
charcoal filter provides additional pro-
tection by filtering gaseous pollutants
from the outside air. Your BMW center
replaces this combined filter as a stan-
dard part of your scheduled mainte-
nance. A substantial reduction in airflow
indicates that the filter must be
replaced before scheduled mainte-
nance.
Page 102 of 155
102n
Ski bag
*
Cargo loading
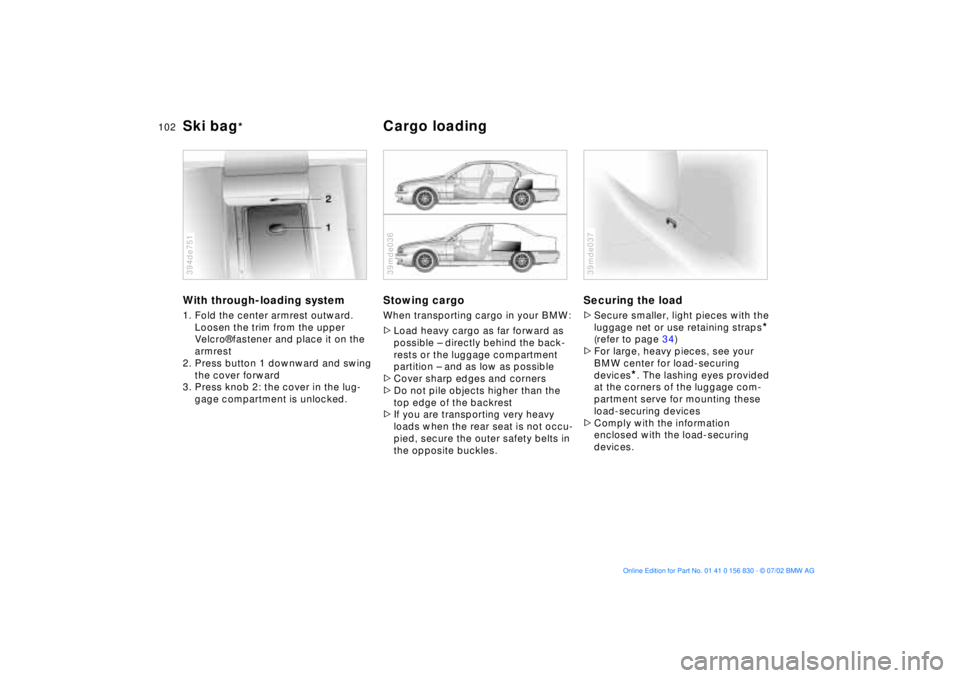
With through-loading system1. Fold the center armrest outward.
Loosen the trim from the upper
Velcro¨ fastener and place it on the
armrest
2. Press button 1 downward and swing
the cover forward
3. Press knob 2: the cover in the lug-
gage compartment is unlocked. 394de751
Stowing cargo When transporting cargo in your BMW:
>Load heavy cargo as far forward as
possible Ð directly behind the back-
rests or the luggage compartment
partition Ð and as low as possible
>Cover sharp edges and corners
>Do not pile objects higher than the
top edge of the backrest
>If you are transporting very heavy
loads when the rear seat is not occu-
pied, secure the outer safety belts in
the opposite buckles.39mde036
Securing the load >Secure smaller, light pieces with the
luggage net or use retaining straps
*
(refer to page 34)
>For large, heavy pieces, see your
BMW center for load-securing
devices
*. The lashing eyes provided
at the corners of the luggage com-
partment serve for mounting these
load-securing devices
>Comply with the information
enclosed with the load-securing
devices.
39mde037
Page 106 of 155

106n
To ensure that your vehicle provides
maximum economy throughout a long
service life, we request that you
observe the following.
Your BMW M5 is a masterpiece of
superlative technology. To ensure
that you derive maximum satisfaction
from its extensive array of advanced
features while simultaneously creating
the basis for many years of driving plea-
sure, we urge you to observe the fol-
lowing precautions during the initial
period of operation.<
Engine and differentialUp to 1,200 miles (2,000 km):
Drive at varying engine speeds and
road speeds, but do not exceed
5,500 rpm or 105 mph (170 km/h)
during this period.
Comply with all official speed limits.
Do not depress the accelerator pedal to
the full-throttle position.
Following the Break-in inspection at
1,200 miles (2,000 km), you can gradu-
ally increase engine or road speeds.
You should also comply with these
break-in procedures if the engine or dif-
ferential is replaced later in the course
of the vehicle service life.
TiresOwing to technical factors associated
with their manufacture, tires do not
achieve their full traction potential until
an initial break-in period has elapsed.
Thus drive with extra care during the
initial 200 miles (300 km).
Comply with all official speed limits.
When the vehicle is operated on
wet or slushy roads, a wedge of
water may from between the tire and
the road surface. This phenomenon is
referred to as aquaplaning, or hydro-
planing, and can lead to partial or com-
plete loss of traction, vehicle control
and braking effectiveness. Reduce your
speed on wet roads.<
Brake systemApproximately 300 miles (500 km) must
elapse before the brake pads and
rotors achieve the optimal pad-surface
and wear patterns required for trouble-
free operation and long service life later
on.
To break-in the separate parking brake
drums, apply the parking brake lightly
when coasting to a standstill (at a traffic
signal, for instance), provided that
traffic conditions allow you to do so. To
avoid corrosion, repeat this procedure
from time to time.
The brake lamps do not come on
when the parking brake is applied.
Vacuum for the brake system servo unit
on your BMW is available only when the
engine is running. When you move the
vehicle with the engine shut off Ð when
towing, for instance Ð substantially
higher levels of pedal force will be
required to brake the vehicle.
(500 km). Engage the gears carefully
during the break-in period.
Break-in procedures
Page 109 of 155
109n
OverviewControlsMaintenanceRepairsDataIndex
Information for your safetyThe factory-approved radial tires are
matched to the vehicle and have been
selected to provide optimum safety and
driving comfort on your vehicle.
It is not merely the tire's service life,
but also driving comfort and Ð above
all else Ð driving safety that depend on
the condition of the tires and the main-
tenance of the specified tire inflation
pressure.
Incorrect inflation pressures are
a frequent cause of tire problems
and flat tires. Tire pressure also has a
major effect on your BMW's handling
response. Check tire inflation pressures
on a regular basis (refer to page 22), at
least every two weeks and before every
long trip. If you fail to observe these
precautions, incorrect tire pressures
can cause driving instability and tire
damage, ultimately resulting in an
accident.<
Tire tread Ð tire damageInspect your tires frequently for tread
wear, signs of damage and for foreign
objects lodged in the tread. Check the
tread depth.
The tread depth should not drop
below 0.12 in (3 mm), even though, for
example the legally specified minimum
tread depth in Europe is only 0.063 in
(1.6 mm). Below a tread depth of
0.12 in (3 mm) there is an increased risk
of hydroplaning, even at relatively mod-
erate speeds and with only small
amounts of water on the road.
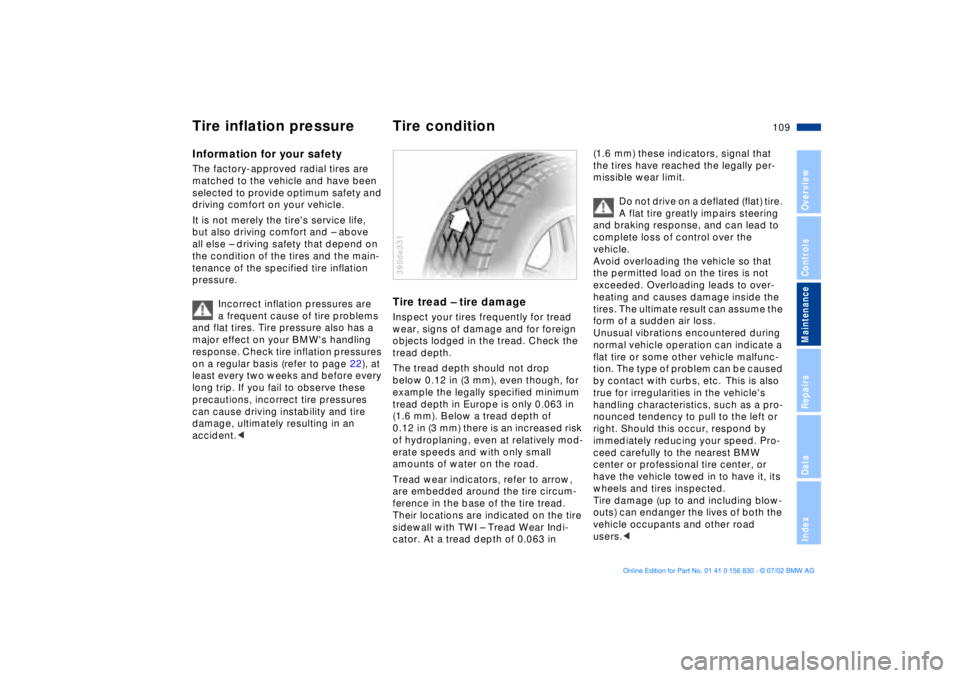
Tread wear indicators, refer to arrow,
are embedded around the tire circum-
ference in the base of the tire tread.
Their locations are indicated on the tire
sidewall with TWI Ð Tread Wear Indi-
cator. At a tread depth of 0.063 in 390de331
(1.6 mm) these indicators, signal that
the tires have reached the legally per-
missible wear limit.
Do not drive on a deflated (flat) tire.
A flat tire greatly impairs steering
and braking response, and can lead to
complete loss of control over the
vehicle.
Avoid overloading the vehicle so that
the permitted load on the tires is not
exceeded. Overloading leads to over-
heating and causes damage inside the
tires. The ultimate result can assume the
form of a sudden air loss.
Unusual vibrations encountered during
normal vehicle operation can indicate a
flat tire or some other vehicle malfunc-
tion. The type of problem can be caused
by contact with curbs, etc. This is also
true for irregularities in the vehicle's
handling characteristics, such as a pro-
nounced tendency to pull to the left or
right. Should this occur, respond by
immediately reducing your speed. Pro-
ceed carefully to the nearest BMW
center or professional tire center, or
have the vehicle towed in to have it, its
wheels and tires inspected.
Tire damage (up to and including blow-
outs) can endanger the lives of both the
vehicle occupants and other road
users.<
Tire inflation pressure Tire condition