brake light BMW M5 SEDAN 2007 E60 Owner's Manual
[x] Cancel search | Manufacturer: BMW, Model Year: 2007, Model line: M5 SEDAN, Model: BMW M5 SEDAN 2007 E60Pages: 256, PDF Size: 12.5 MB
Page 15 of 256
At a glance
13Reference
Controls
Driving tips
Communications
Navigation
Entertainment
Mobility
Indicator and warning lamps
The concept
The indicator and warning lamps can light up in
different combinations and colors.
Some lamps are tested for proper function by
briefly lighting up during starting of the engine
or when the ignition is switched on.
Explanatory text messages
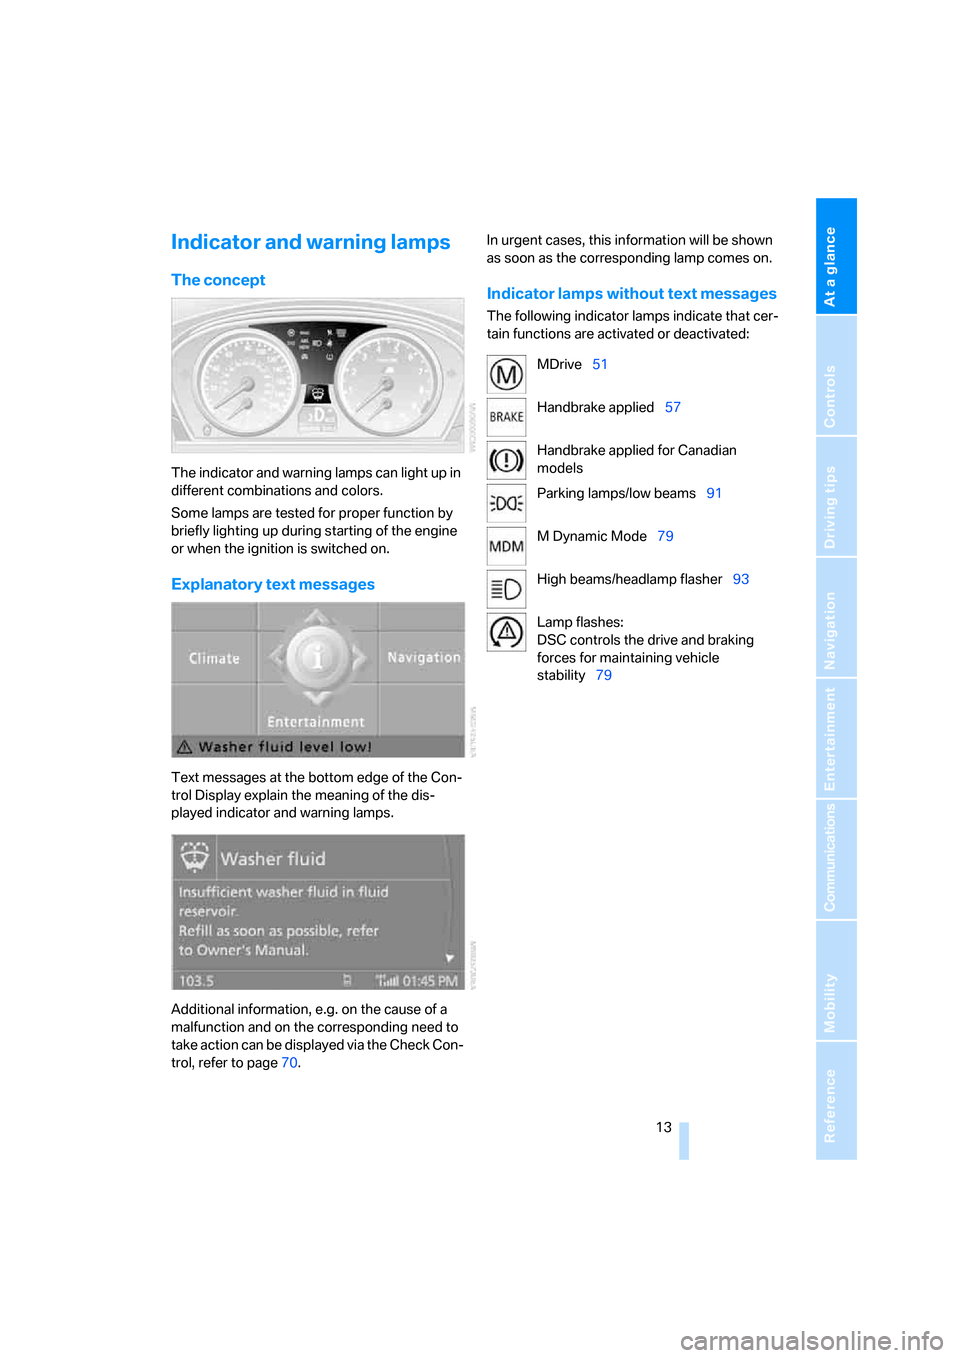
Text messages at the bottom edge of the Con-
trol Display explain the meaning of the dis-
played indicator and warning lamps.
Additional information, e.g. on the cause of a
malfunction and on the corresponding need to
take action can be displayed via the Check Con-
trol, refer to page70.In urgent cases, this information will be shown
as soon as the corresponding lamp comes on.
Indicator lamps without text messages
The following indicator lamps indicate that cer-
tain functions are activated or deactivated:
MDrive51
Handbrake applied57
Handbrake applied for Canadian
models
Parking lamps/low beams91
M Dynamic Mode79
High beams/headlamp flasher93
Lamp flashes:
DSC controls the drive and braking
forces for maintaining vehicle
stability79
ba8_m5us.book Seite 13 Montag, 5. Februar 2007 12:03 12
Page 39 of 256
Controls
37Reference
At a glance
Driving tips
Communications
Navigation
Entertainment
Mobility
The windows and the glass sunroof* are
closed.
Watch during the closing process to be
sure that no one is injured. Removing the
hand from the door handle stops the closing
process immediately.<
Opening luggage compartment lid
separately
Press the button on the luggage compartment
lid. This corresponds to pressing the button.
If the vehicle detects that a remote con-
trol has been accidentally left inside the
locked vehicle's cargo bay after the luggage
compartment lid is closed, the lid will reopen.
The hazard warning flashers flash and a signal
*
sounds.<
Switching on radio readiness
By briefly pressing the Start/Stop button, you
switch on the radio readiness, refer to page55.
When doing so, do not depress the brake
or clutch pedal, otherwise the engine will
start immediately.<
Starting engine
You can start the engine or switch on the igni-
tion if a remote control is located in the interior
of the vehicle. It need not be inserted in the igni-
tion lock, refer to page55.
If you take the remote control with you when
leaving the vehicle with the engine running, a
warning lamp lights up. In addition, a message
appears on the Control Display. As long as no
remote control is detected in the vehicle, it is
only possible to restart the engine within
approx. 10 seconds after it is switched off.
Malfunction
The comfort access function may malfunction
due to local radio waves. Then open or close the
vehicle with the buttons on the remote control
or with a key. To start the engine following this,
insert the remote control in the ignition lock.
Replacing battery
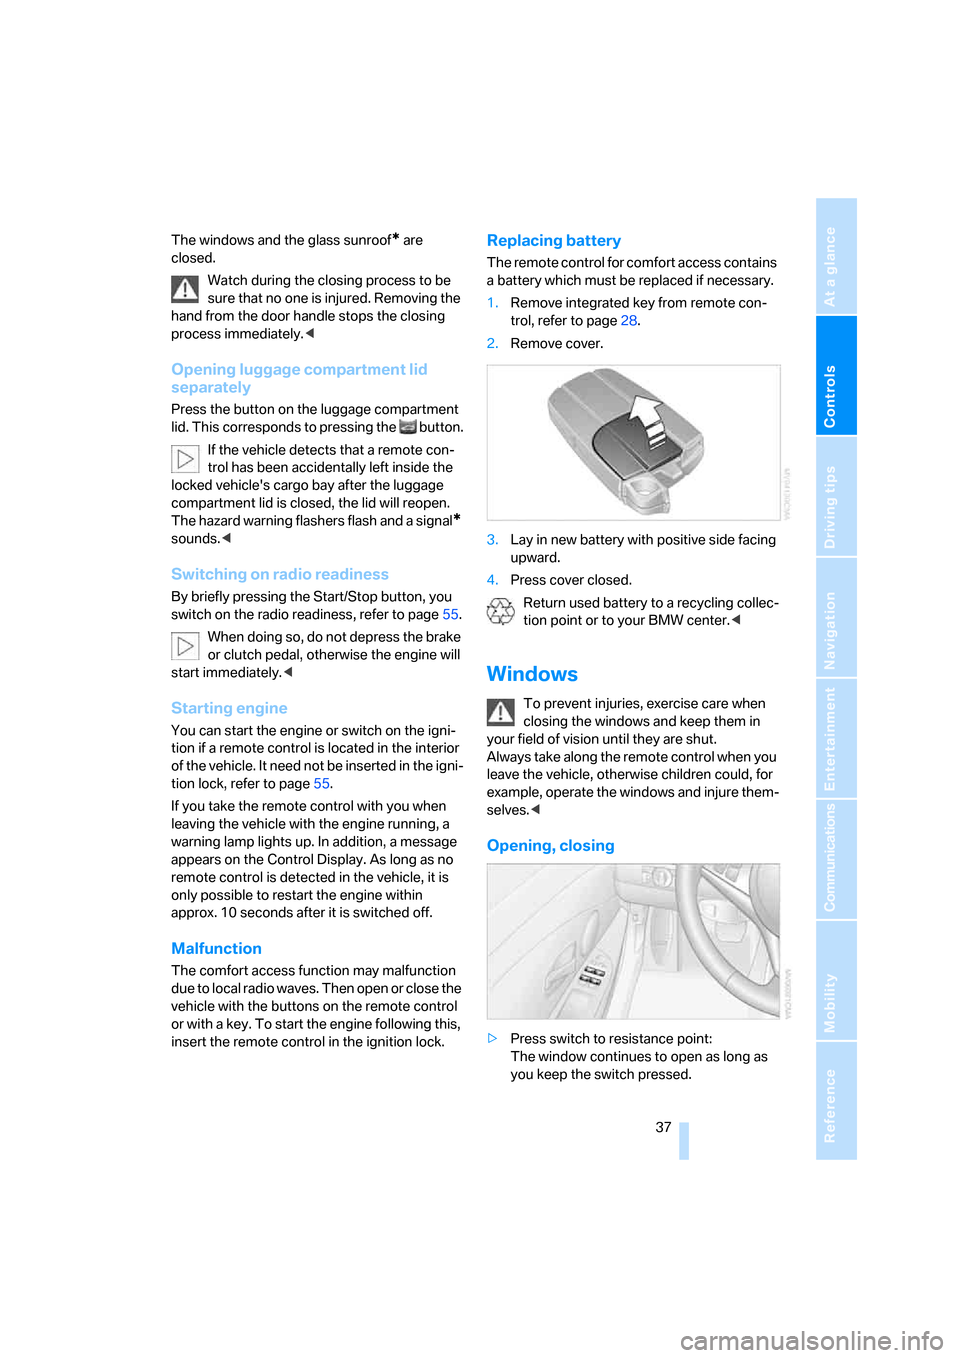
The remote control for comfort access contains
a battery which must be replaced if necessary.
1.Remove integrated key from remote con-
trol, refer to page28.
2.Remove cover.
3.Lay in new battery with positive side facing
upward.
4.Press cover closed.
Return used battery to a recycling collec-
tion point or to your BMW center.<
Windows
To prevent injuries, exercise care when
closing the windows and keep them in
your field of vision until they are shut.
Always take along the remote control when you
leave the vehicle, otherwise children could, for
example, operate the windows and injure them-
selves.<
Opening, closing
>Press switch to resistance point:
The window continues to open as long as
you keep the switch pressed.
ba8_m5us.book Seite 37 Montag, 5. Februar 2007 12:03 12
Page 53 of 256
Controls
51Reference
At a glance
Driving tips
Communications
Navigation
Entertainment
Mobility
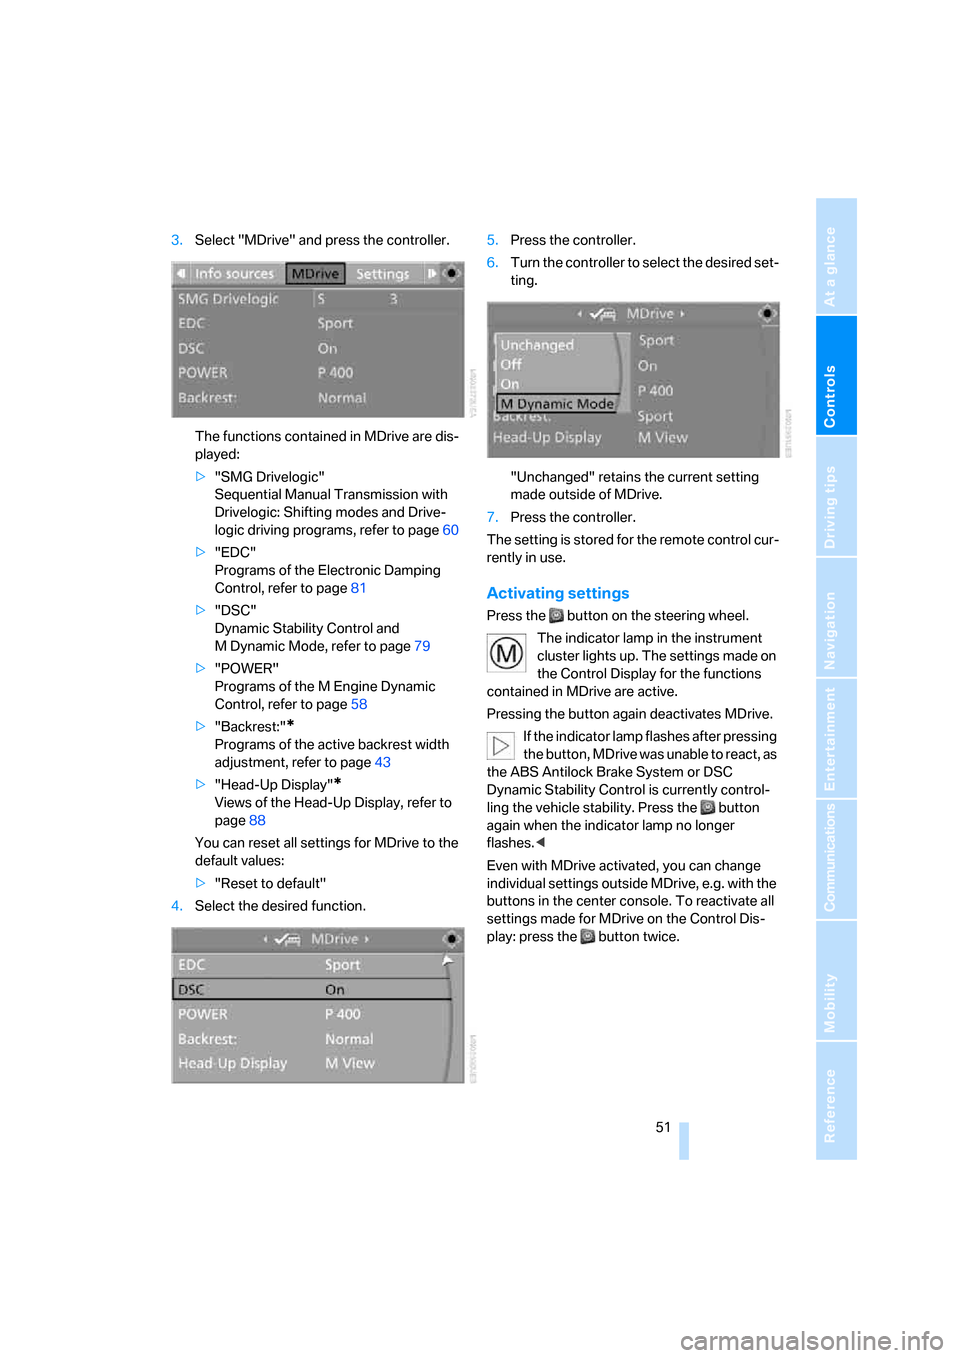
3.Select "MDrive" and press the controller.
The functions contained in MDrive are dis-
played:
>"SMG Drivelogic"
Sequential Manual Transmission with
Drivelogic: Shifting modes and Drive-
logic driving programs, refer to page60
>"EDC"
Programs of the Electronic Damping
Control, refer to page81
>"DSC"
Dynamic Stability Control and
M Dynamic Mode, refer to page79
>"POWER"
Programs of the M Engine Dynamic
Control, refer to page58
>"Backrest:"
*
Programs of the active backrest width
adjustment, refer to page43
>"Head-Up Display"
*
Views of the Head-Up Display, refer to
page88
You can reset all settings for MDrive to the
default values:
>"Reset to default"
4.Select the desired function.5.Press the controller.
6.Turn the controller to select the desired set-
ting.
"Unchanged" retains the current setting
made outside of MDrive.
7.Press the controller.
The setting is stored for the remote control cur-
rently in use.
Activating settings
Press the button on the steering wheel.
The indicator lamp in the instrument
cluster lights up. The settings made on
the Control Display for the functions
contained in MDrive are active.
Pressing the button again deactivates MDrive.
If the indicator lamp flashes after pressing
the button, MDrive was unable to react, as
the ABS Antilock Brake System or DSC
Dynamic Stability Control is currently control-
ling the vehicle stability. Press the button
again when the indicator lamp no longer
flashes.<
Even with MDrive activated, you can change
individual settings outside MDrive, e.g. with the
buttons in the center console. To reactivate all
settings made for MDrive on the Control Dis-
play: press the button twice.
ba8_m5us.book Seite 51 Montag, 5. Februar 2007 12:03 12
Page 58 of 256
Driving
56
Radio readiness and ignition switched
off
All indicator and warning lamps in the instru-
ment cluster go out.
Starting engine
Do not run the engine in closed rooms,
otherwise the inhalation of toxic exhaust
gases can cause unconsciousness and death.
The exhaust gases contain carbon monoxide,
an odorless and colorless, but highly toxic gas.
Never leave an unattended vehicle with the
engine running, as such a vehicle represents a
potential safety hazard.
Before leaving the vehicle with the engine run-
ning, shift into neutral
* or move the selector
lever into position N and firmly apply the hand-
brake, otherwise the vehicle can begin to roll.<
Avoid frequent starting in quick succes-
sion or repeated starting attempts in
which the engine does not start. Otherwise, the
fuel is not burned or inadequately burned and
there is a danger of overheating and damaging
the catalytic converter.<
Do not allow the engine to warm up by leaving it
running while the vehicle remains stationary.
Instead, begin to drive at a moderate engine
speed.
Manual transmission*
Remote control in ignition lock or with comfort
access in vehicle, refer to page36.
1.Depress brake pedal.
2.Depress the clutch pedal and select the
idling position.
3.Press the Start/Stop button.
Sequential Manual Transmission with
Drivelogic
Remote control in ignition lock or with comfort
access in vehicle, refer to page36.
1.Firmly apply the handbrake.
2.Depress brake pedal.
3.Place selector lever in position N.
4.Press the Start/Stop button.
If the engine does not start, shift back to
the last selector lever position selected,
refer to the instrument cluster display or the
selector lever. Then select position N.
You cannot start off with the hood open.
When the engine is cold, the exhaust system
has a slightly metallic undertone due to the sys-
tem design.<
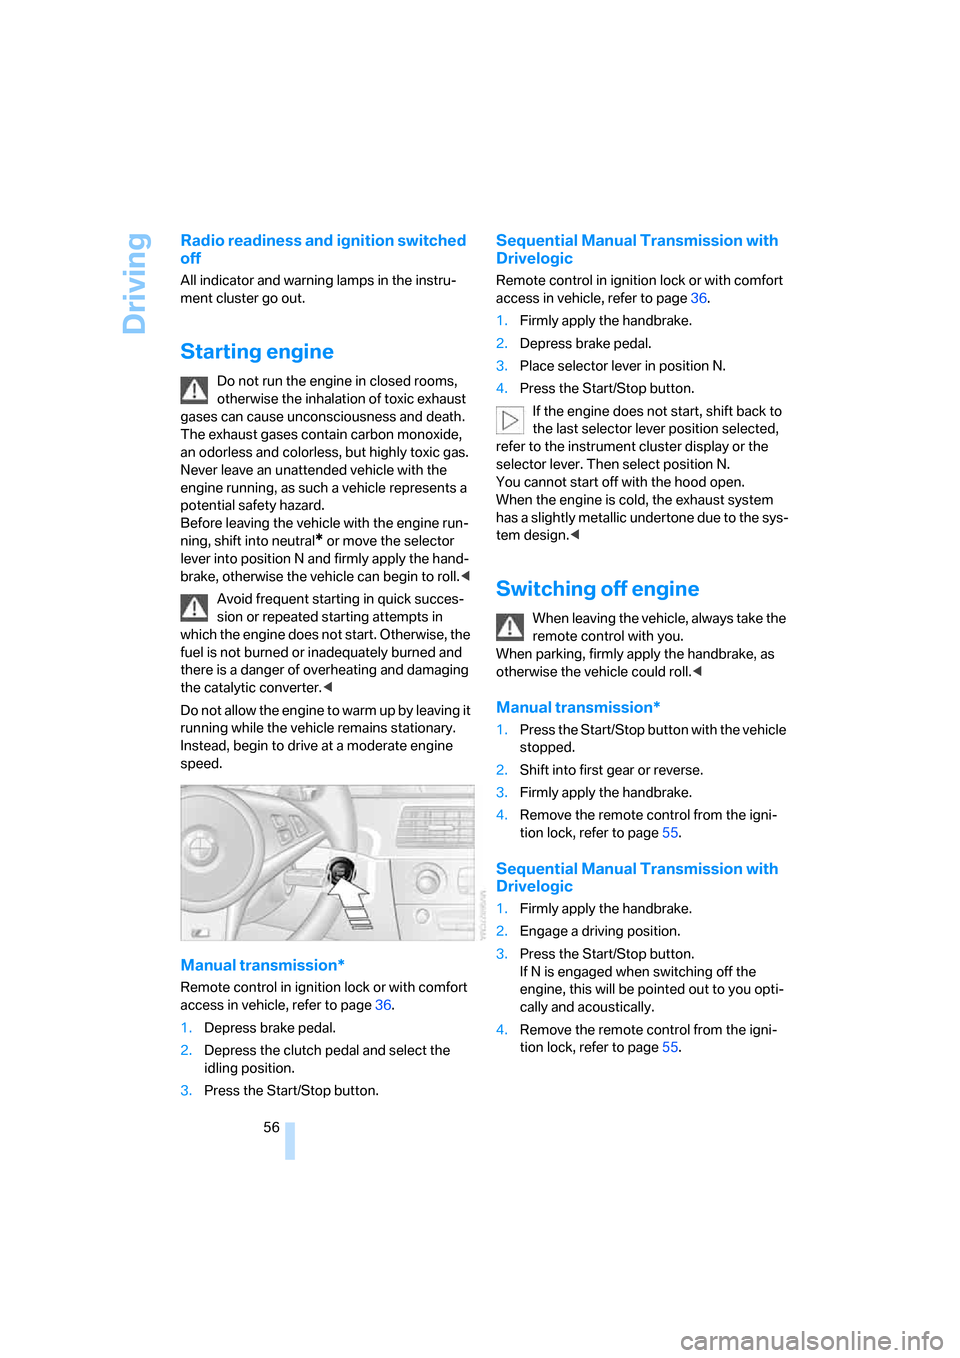
Switching off engine
When leaving the vehicle, always take the
remote control with you.
When parking, firmly apply the handbrake, as
otherwise the vehicle could roll.<
Manual transmission*
1.Press the Start/Stop button with the vehicle
stopped.
2.Shift into first gear or reverse.
3.Firmly apply the handbrake.
4.Remove the remote control from the igni-
tion lock, refer to page55.
Sequential Manual Transmission with
Drivelogic
1.Firmly apply the handbrake.
2.Engage a driving position.
3.Press the Start/Stop button.
If N is engaged when switching off the
engine, this will be pointed out to you opti-
cally and acoustically.
4.Remove the remote control from the igni-
tion lock, refer to page55.
ba8_m5us.book Seite 56 Montag, 5. Februar 2007 12:03 12
Page 59 of 256
Controls
57Reference
At a glance
Driving tips
Communications
Navigation
Entertainment
Mobility
Handbrake
The handbrake is primarily intended to prevent
the vehicle from rolling while parked; it brakes
the rear wheels.
Indicator lamp
The indicator lamp lights up, and a sig-
nal also sounds when starting off. The
handbrake is applied.
Indicator lamp for Canadian models.
Applying
The lever locks in position automatically.
Releasing
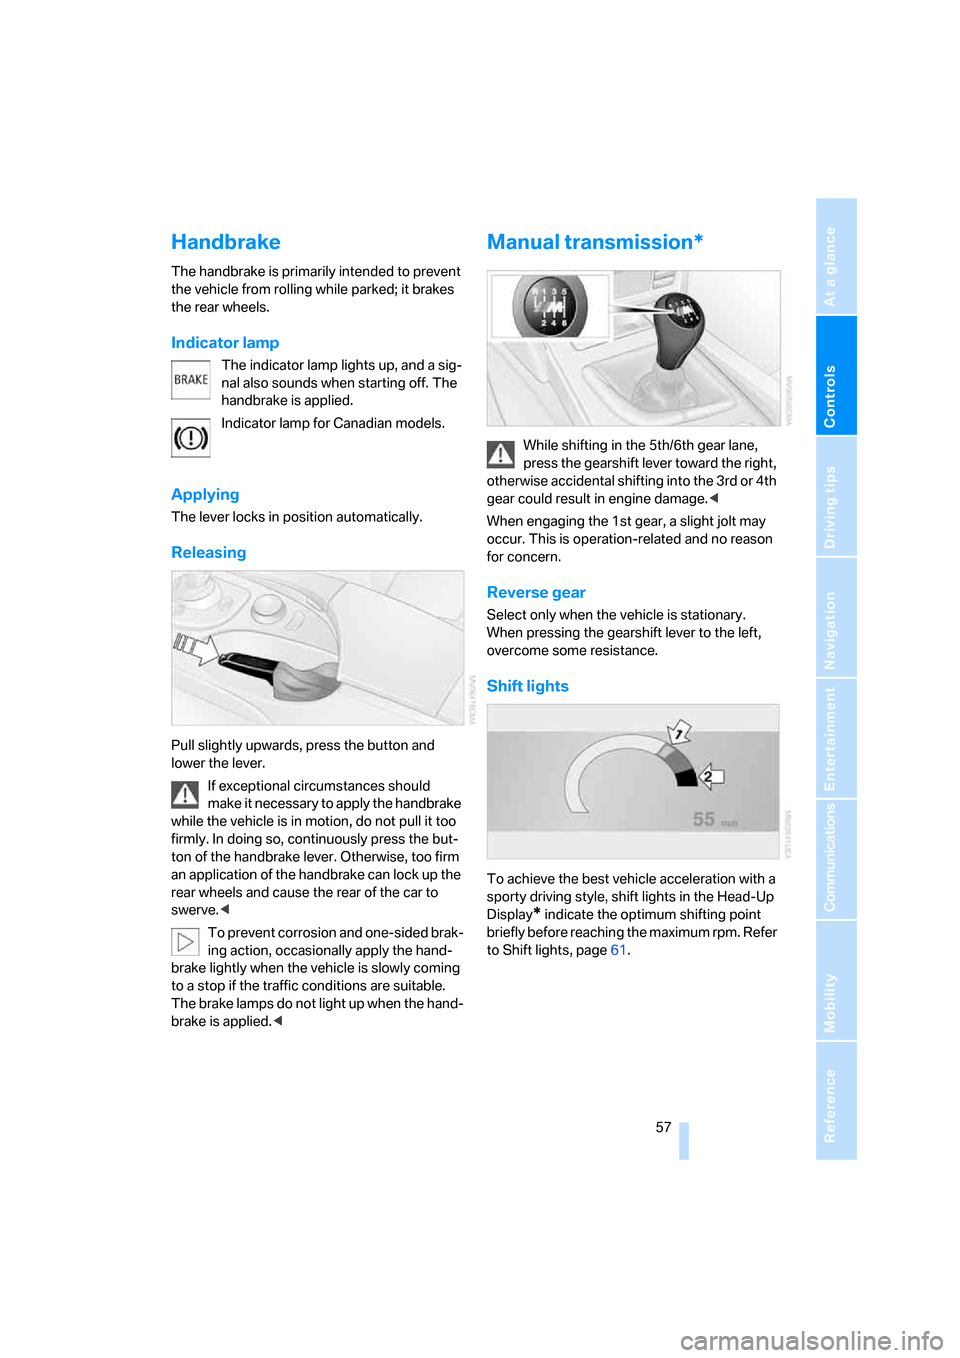
Pull slightly upwards, press the button and
lower the lever.
If exceptional circumstances should
make it necessary to apply the handbrake
while the vehicle is in motion, do not pull it too
firmly. In doing so, continuously press the but-
ton of the handbrake lever. Otherwise, too firm
an application of the handbrake can lock up the
rear wheels and cause the rear of the car to
swerve.<
To prevent corrosion and one-sided brak-
ing action, occasionally apply the hand-
brake lightly when the vehicle is slowly coming
to a stop if the traffic conditions are suitable.
The brake lamps do not light up when the hand-
brake is applied.<
Manual transmission*
While shifting in the 5th/6th gear lane,
press the gearshift lever toward the right,
otherwise accidental shifting into the 3rd or 4th
gear could result in engine damage.<
When engaging the 1st gear, a slight jolt may
occur. This is operation-related and no reason
for concern.
Reverse gear
Select only when the vehicle is stationary.
When pressing the gearshift lever to the left,
overcome some resistance.
Shift lights
To achieve the best vehicle acceleration with a
sporty driving style, shift lights in the Head-Up
Display
* indicate the optimum shifting point
briefly before reaching the maximum rpm. Refer
to Shift lights, page61.
ba8_m5us.book Seite 57 Montag, 5. Februar 2007 12:03 12
Page 65 of 256
Controls
63Reference
At a glance
Driving tips
Communications
Navigation
Entertainment
Mobility
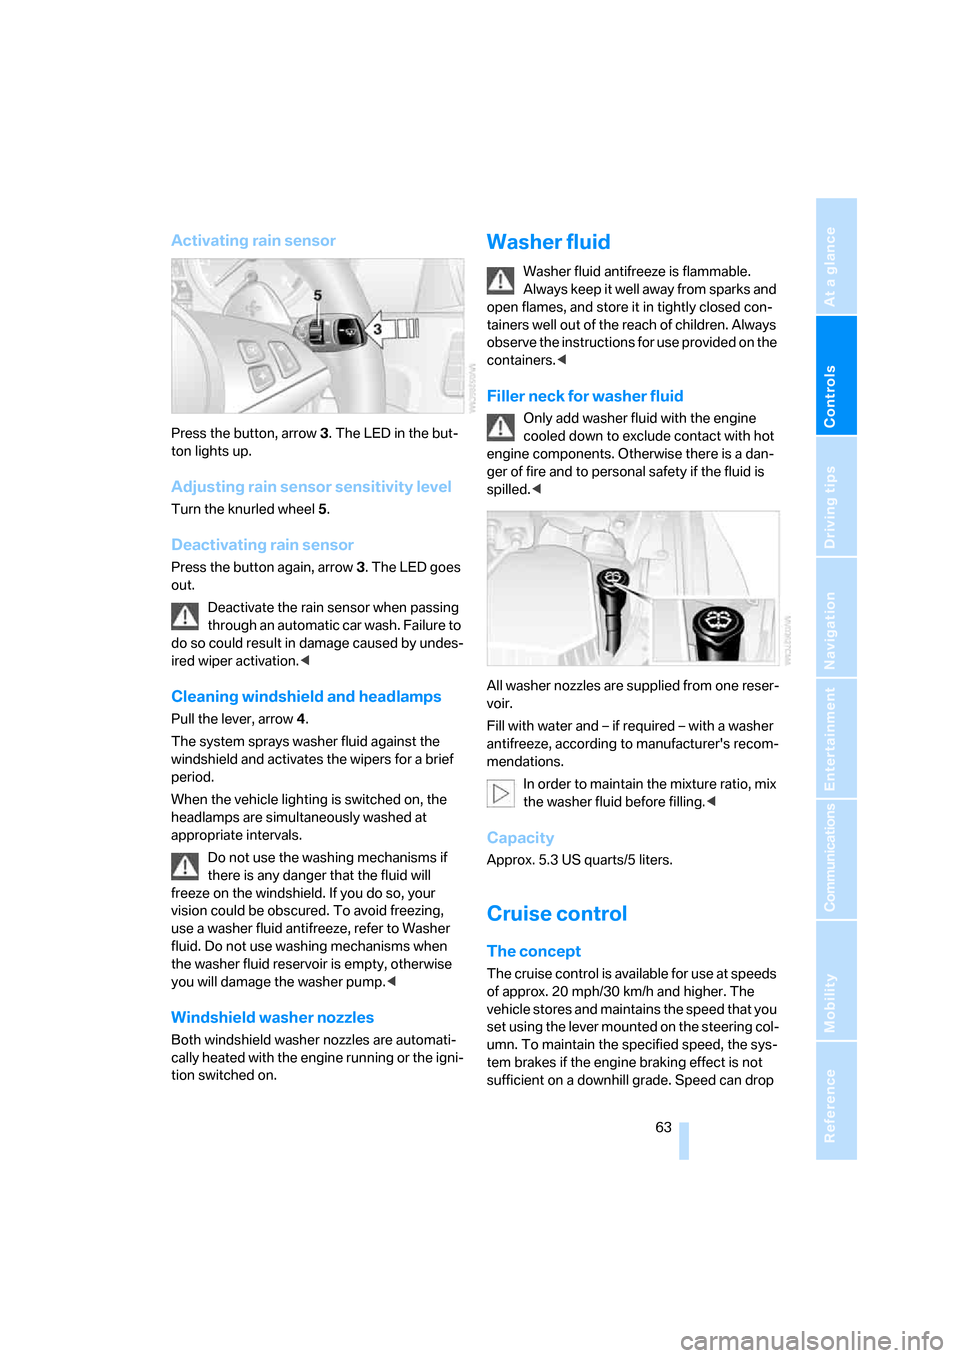
Activating rain sensor
Press the button, arrow3. The LED in the but-
ton lights up.
Adjusting rain sensor sensitivity level
Turn the knurled wheel5.
Deactivating rain sensor
Press the button again, arrow3. The LED goes
out.
Deactivate the rain sensor when passing
through an automatic car wash. Failure to
do so could result in damage caused by undes-
ired wiper activation.<
Cleaning windshield and headlamps
Pull the lever, arrow4.
The system sprays washer fluid against the
windshield and activates the wipers for a brief
period.
When the vehicle lighting is switched on, the
headlamps are simultaneously washed at
appropriate intervals.
Do not use the washing mechanisms if
there is any danger that the fluid will
freeze on the windshield. If you do so, your
vision could be obscured. To avoid freezing,
use a washer fluid antifreeze, refer to Washer
fluid. Do not use washing mechanisms when
the washer fluid reservoir is empty, otherwise
you will damage the washer pump.<
Windshield washer nozzles
Both windshield washer nozzles are automati-
cally heated with the engine running or the igni-
tion switched on.
Washer fluid
Washer fluid antifreeze is flammable.
Always keep it well away from sparks and
open flames, and store it in tightly closed con-
tainers well out of the reach of children. Always
observe the instructions for use provided on the
containers.<
Filler neck for washer fluid
Only add washer fluid with the engine
cooled down to exclude contact with hot
engine components. Otherwise there is a dan-
ger of fire and to personal safety if the fluid is
spilled.<
All washer nozzles are supplied from one reser-
voir.
Fill with water and – if required – with a washer
antifreeze, according to manufacturer's recom-
mendations.
In order to maintain the mixture ratio, mix
the washer fluid before filling.<
Capacity
Approx. 5.3 US quarts/5 liters.
Cruise control
The concept
The cruise control is available for use at speeds
of approx. 20 mph/30 km/h and higher. The
vehicle stores and maintains the speed that you
set using the lever mounted on the steering col-
umn. To maintain the specified speed, the sys-
tem brakes if the engine braking effect is not
sufficient on a downhill grade. Speed can drop
ba8_m5us.book Seite 63 Montag, 5. Februar 2007 12:03 12
Page 81 of 256
Controls
79Reference
At a glance
Driving tips
Communications
Navigation
Entertainment
Mobility
Brake assistant
When you apply the brakes rapidly, this system
automatically produces the maximum braking
force boost and thus helps to achieve the short-
est possible braking distance during full brak-
ing. This system exploits all of the benefits pro-
vided by ABS.
Do not reduce the pressure on the brake pedal
for the duration of the full braking.
DSC Dynamic Stability Control
DSC optimizes vehicle stability and traction. It
also detects unstable driving states such as
understeering and oversteering, and helps
keep the vehicle on course within the physical
limits by reducing the engine output and by
braking at the wheels.
The DSC is operational every time you start the
engine.
The laws of physics cannot be repealed,
even with DSC. An appropriate driving
style always remains the responsibility of the
driver. Therefore, do not reduce the additional
safety margin further by taking risks.<
Indicator lamp
The indicator lamp goes out shortly
after the engine is started.
The indicator lamp flashes: DSC con-
trols the drive forces and brake forces.
The indicator lamp stays lit: DSC is deactivated.
MDynamic Mode MDM
The M Dynamic Mode is a mode of the DSC
Dynamic Stability Control. It enables driving
with greater longitudinal and lateral accelera-
tion on dry road surfaces, however with limited
vehicle stability. The system does not provide
stabilizing intervention by reducing the engine
output and braking at the wheels until the abso-
lute driving limit is reached. Additional steering
corrections may also be required in this driving
state.
The M Dynamic Mode is deactivated each time
the engine is started.With the M Dynamic Mode activated, sta-
bilizing interventions are only carried out
to a reduced degree. Take action yourself, oth-
erwise there is a risk of an accident.<
To maintain vehicle stability, drive with
DSC activated and the M Dynamic Mode
deactivated whenever possible.<
Indicator lamp
The indicator lamp goes out shortly
after the engine is started.
The indicator lamp stays lit: M Dynamic
Mode is activated.
The indicator lamp lights up continuously and
the DSC indicator lamp flashes: the M Dynamic
Mode is active and controls the drive and brak-
ing forces.
Activating MDM
You activate the M Dynamic Mode with the
button on the steering wheel, refer to MDrive on
page50.
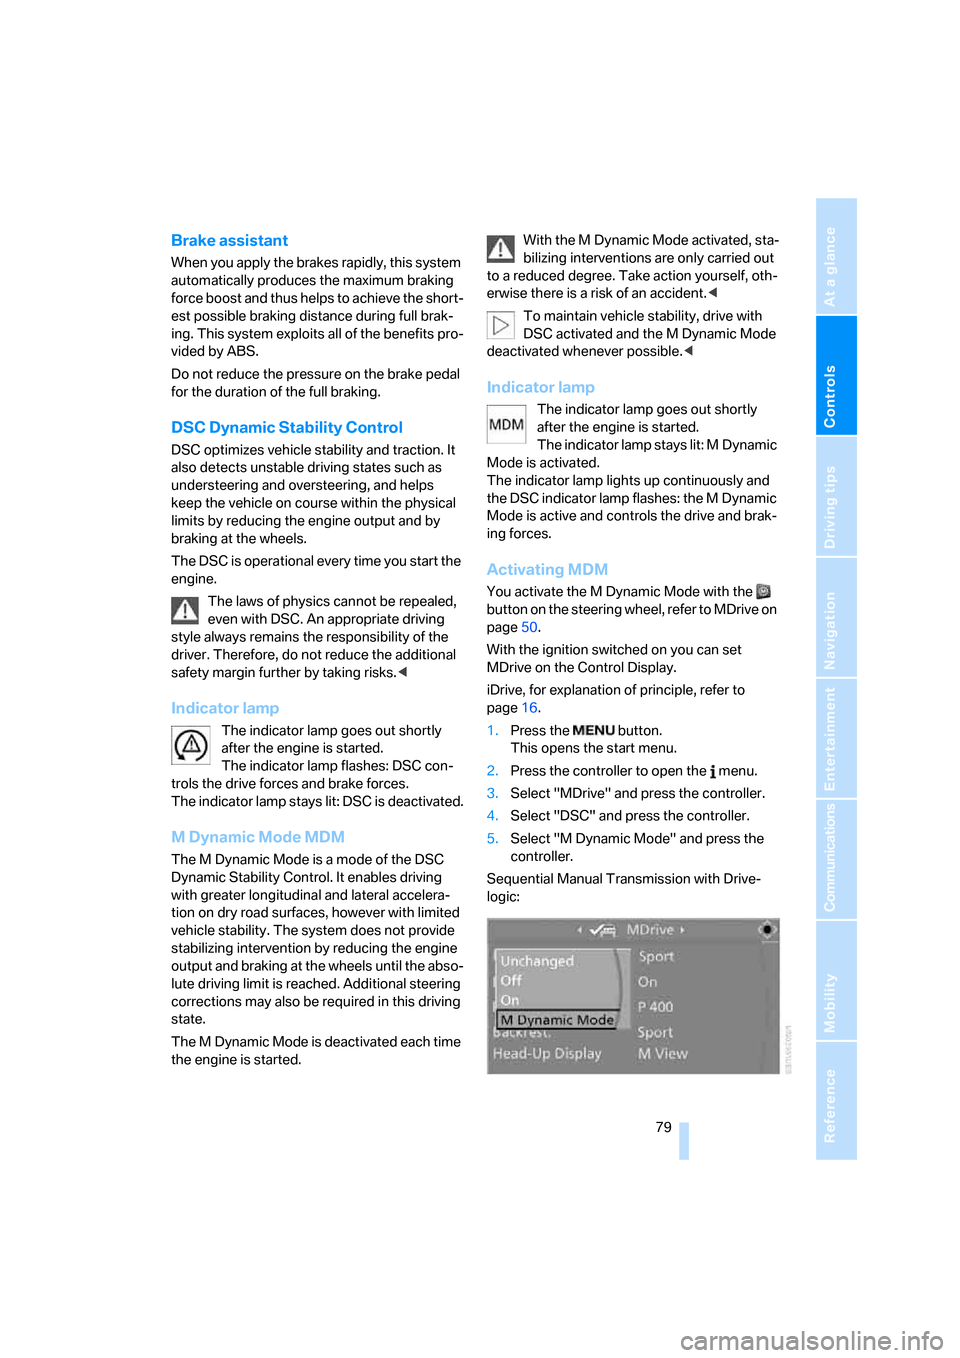
With the ignition switched on you can set
MDrive on the Control Display.
iDrive, for explanation of principle, refer to
page16.
1.Press the button.
This opens the start menu.
2.Press the controller to open the menu.
3.Select "MDrive" and press the controller.
4.Select "DSC" and press the controller.
5.Select "M Dynamic Mode" and press the
controller.
Sequential Manual Transmission with Drive-
logic:
ba8_m5us.book Seite 79 Montag, 5. Februar 2007 12:03 12
Page 82 of 256
Technology for comfort, convenience and safety
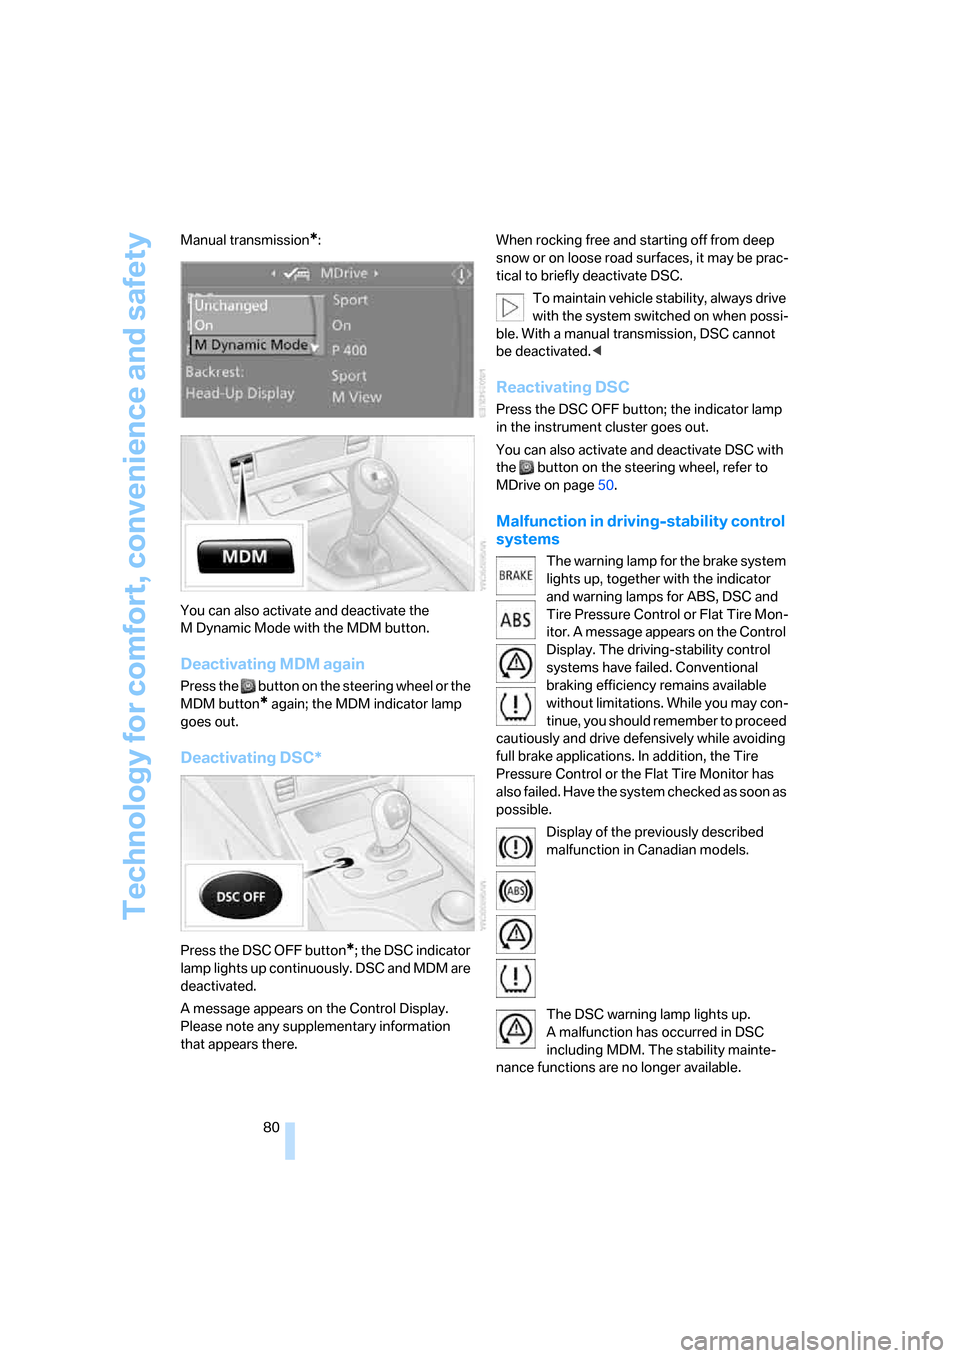
80 Manual transmission
*:
You can also activate and deactivate the
M Dynamic Mode with the MDM button.
Deactivating MDM again
Press the button on the steering wheel or the
MDM button
* again; the MDM indicator lamp
goes out.
Deactivating DSC*
Press the DSC OFF button*; the DSC indicator
lamp lights up continuously. DSC and MDM are
deactivated.
A message appears on the Control Display.
Please note any supplementary information
that appears there.When rocking free and starting off from deep
snow or on loose road surfaces, it may be prac-
tical to briefly deactivate DSC.
To maintain vehicle stability, always drive
with the system switched on when possi-
ble. With a manual transmission, DSC cannot
be deactivated.<
Reactivating DSC
Press the DSC OFF button; the indicator lamp
in the instrument cluster goes out.
You can also activate and deactivate DSC with
the button on the steering wheel, refer to
MDrive on page50.
Malfunction in driving-stability control
systems
The warning lamp for the brake system
lights up, together with the indicator
and warning lamps for ABS, DSC and
Tire Pressure Control or Flat Tire Mon-
itor. A message appears on the Control
Display. The driving-stability control
systems have failed. Conventional
braking efficiency remains available
without limitations. While you may con-
tinue, you should remember to proceed
cautiously and drive defensively while avoiding
full brake applications. In addition, the Tire
Pressure Control or the Flat Tire Monitor has
also failed. Have the system checked as soon as
possible.
Display of the previously described
malfunction in Canadian models.
The DSC warning lamp lights up.
A malfunction has occurred in DSC
including MDM. The stability mainte-
nance functions are no longer available.
ba8_m5us.book Seite 80 Montag, 5. Februar 2007 12:03 12
Page 83 of 256
Controls
81Reference
At a glance
Driving tips
Communications
Navigation
Entertainment
Mobility
The vehicle remains operational. Have the sys-
tem checked as soon as possible.
The brake system warning lamp lights
up yellow. A message appears on the
Control Display. The brake assistant is
defective. Have the system checked as soon as
possible.
Display of the previously described
malfunction in Canadian models.
EDC Electronic Damping
Control
The concept
If the influencing variables such as road surface
quality or operating conditions such as steer-
ing, braking etc. change, the damping automat-
ically adjusts to the new conditions within a
fraction of a second.
You can choose from three programs.
"Comfort" program
Select the "Comfort" program if you want com-
fort-oriented coordination of shock absorbers
and steering.
"Normal" program
The "Normal" program offers a balanced mix-
ture of the comfort and the sport program.
"Sport" program
Select the "Sport" program if you want a con-
sistently sporty coordination of shock absorb-
ers and steering.
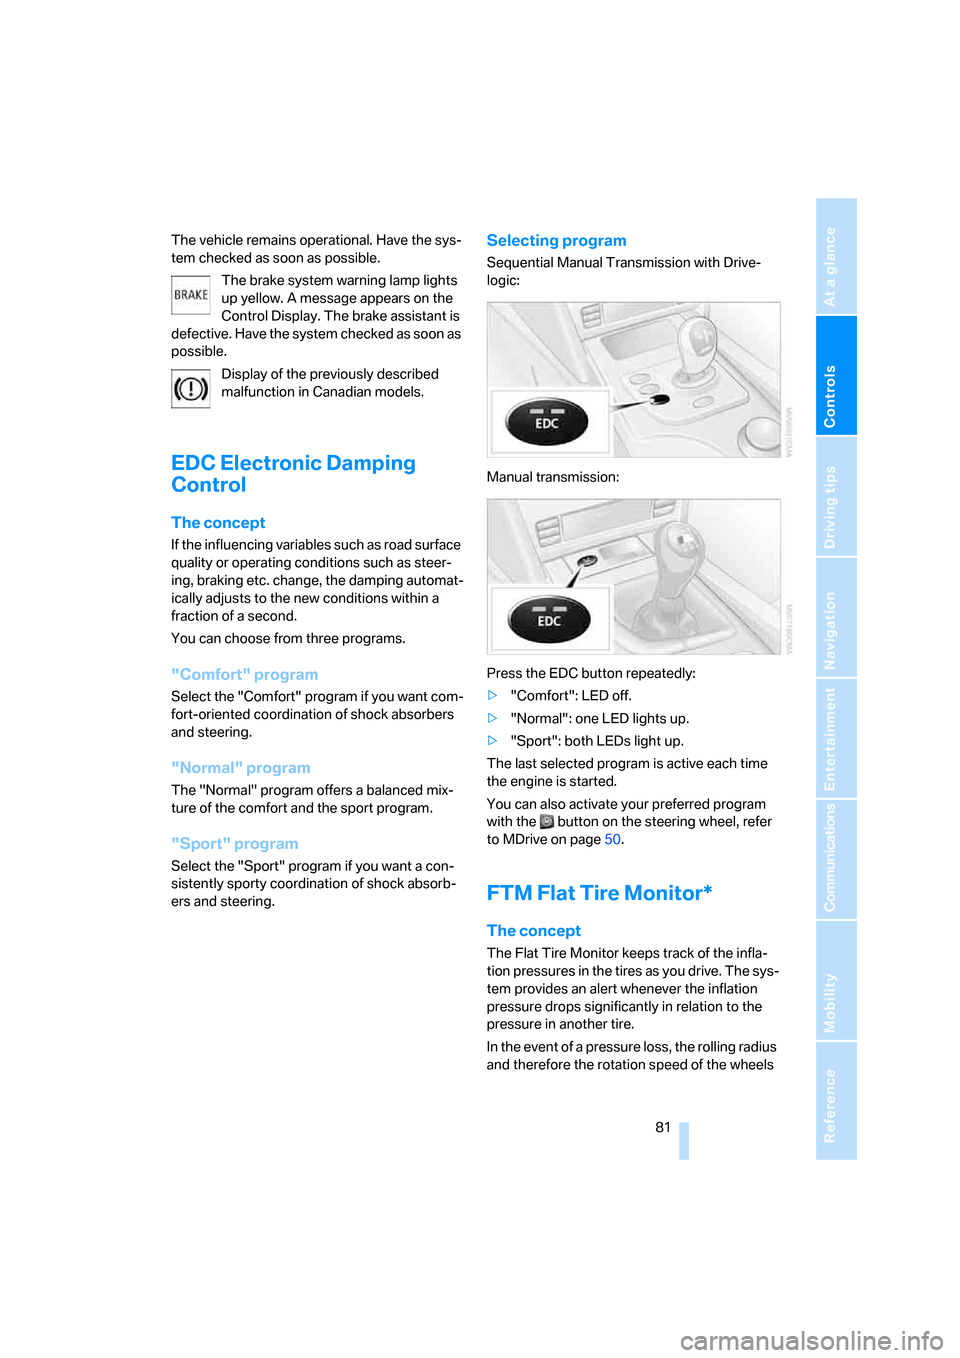
Selecting program
Sequential Manual Transmission with Drive-
logic:
Manual transmission:
Press the EDC button repeatedly:
>"Comfort": LED off.
>"Normal": one LED lights up.
>"Sport": both LEDs light up.
The last selected program is active each time
the engine is started.
You can also activate your preferred program
with the button on the steering wheel, refer
to MDrive on page50.
FTM Flat Tire Monitor*
The concept
The Flat Tire Monitor keeps track of the infla-
tion pressures in the tires as you drive. The sys-
tem provides an alert whenever the inflation
pressure drops significantly in relation to the
pressure in another tire.
In the event of a pressure loss, the rolling radius
and therefore the rotation speed of the wheels
ba8_m5us.book Seite 81 Montag, 5. Februar 2007 12:03 12
Page 87 of 256
Controls
85Reference
At a glance
Driving tips
Communications
Navigation
Entertainment
Mobility
works according to BMW repair procedures
with correspondingly trained personnel.
Malfunction
The yellow warning lamp flashes and
then lights up continuously. The tires
are shown in gray on the Control Dis-
play and a message is displayed. No flat tire can
be detected.
A message like this is displayed in the following
situations:
>In case of a malfunction;
have the system checked.
>If a wheel is mounted without TPM elec-
tronics
>If TPM is temporarily interfered with by
other systems or devices which use the
same radio frequency.
Declaration according to NHTSA/
FMVSS 138 Tire Pressure Monitoring
Systems
Each tire, including the spare*, should be
checked monthly when cold and inflated to the
inflation pressure recommended by the vehicle
manufacturer on the vehicle placard or tire infla-
tion pressure label. If your vehicle has tires of a
different size than the size indicated on the
vehicle placard or tire inflation pressure label,
you should determine the proper tire inflation
pressure for those tires. As an added safety fea-
ture, your vehicle has been equipped with a tire
pressure monitoring system, TPMS, that illumi-
nates a low tire pressure telltale when one or
more of your tires are significantly under-
inflated. Accordingly, when the low tire pres-
sure telltale illuminates, you should stop and
check your tires as soon as possible, and inflate
them to the proper pressure. Driving on a signif-
icantly under-inflated tire causes the tire to
overheat and can lead to tire failure. Under-
inflation also reduces fuel efficiency and tire
tread life, and may affect the vehicle's handling
and stopping ability. Please note that the TPMS
is not a substitute for proper tire maintenance,
and it is the driver's responsibility to maintain
correct tire pressure, even if under-inflation has not reached the level to trigger illumination of
the TPMS low tire pressure telltale.
The TPMS malfunction indicator is combined
with the low tire pressure telltale. When the sys-
tem detects a malfunction, the telltale will flash
for approximately one minute and then remain
continuously illuminated. This sequence will
continue upon subsequent vehicle startups as
long as the malfunction exists. When the mal-
function indicator lights up, the system may not
be able to detect or signal low tire pressure as
intended. TPMS malfunctions may occur for a
variety of reasons, including the installation of
replacement or alternate tires or wheels on the
vehicle that prevent the TPMS from functioning
properly. Always check the TPMS malfunction
telltale after replacing one or more tires or
wheels on your vehicle to ensure that the
replacement or alternate tires and wheels allow
the TPMS to continue to function properly.
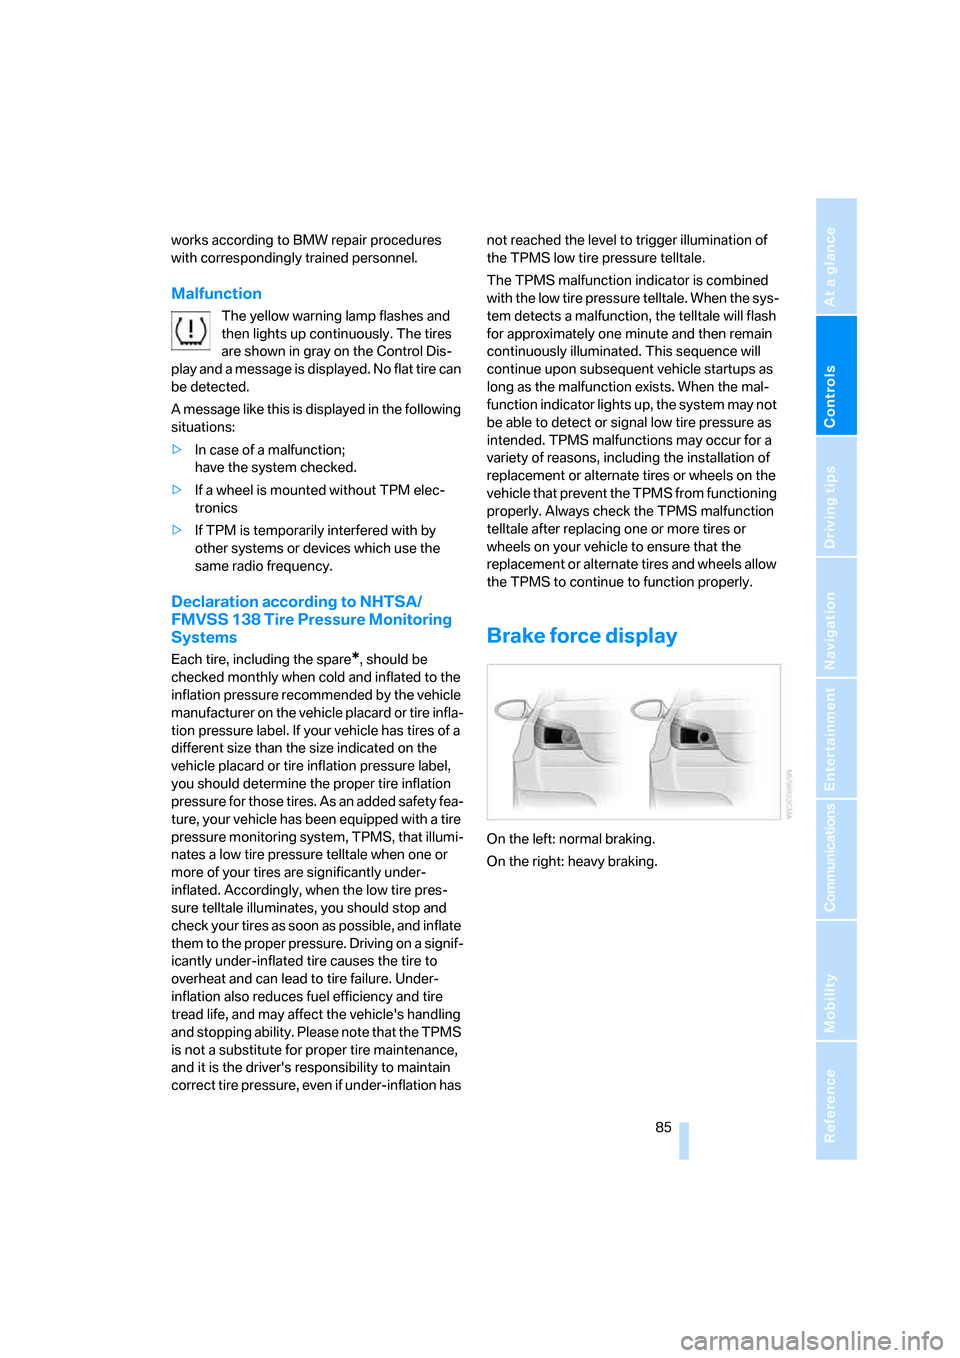
Brake force display
On the left: normal braking.
On the right: heavy braking.
ba8_m5us.book Seite 85 Montag, 5. Februar 2007 12:03 12