check engine BMW M6 2008 E63 User Guide
[x] Cancel search | Manufacturer: BMW, Model Year: 2008, Model line: M6, Model: BMW M6 2008 E63Pages: 262, PDF Size: 8.86 MB
Page 96 of 262
Technology for comfort, convenience and safety
94
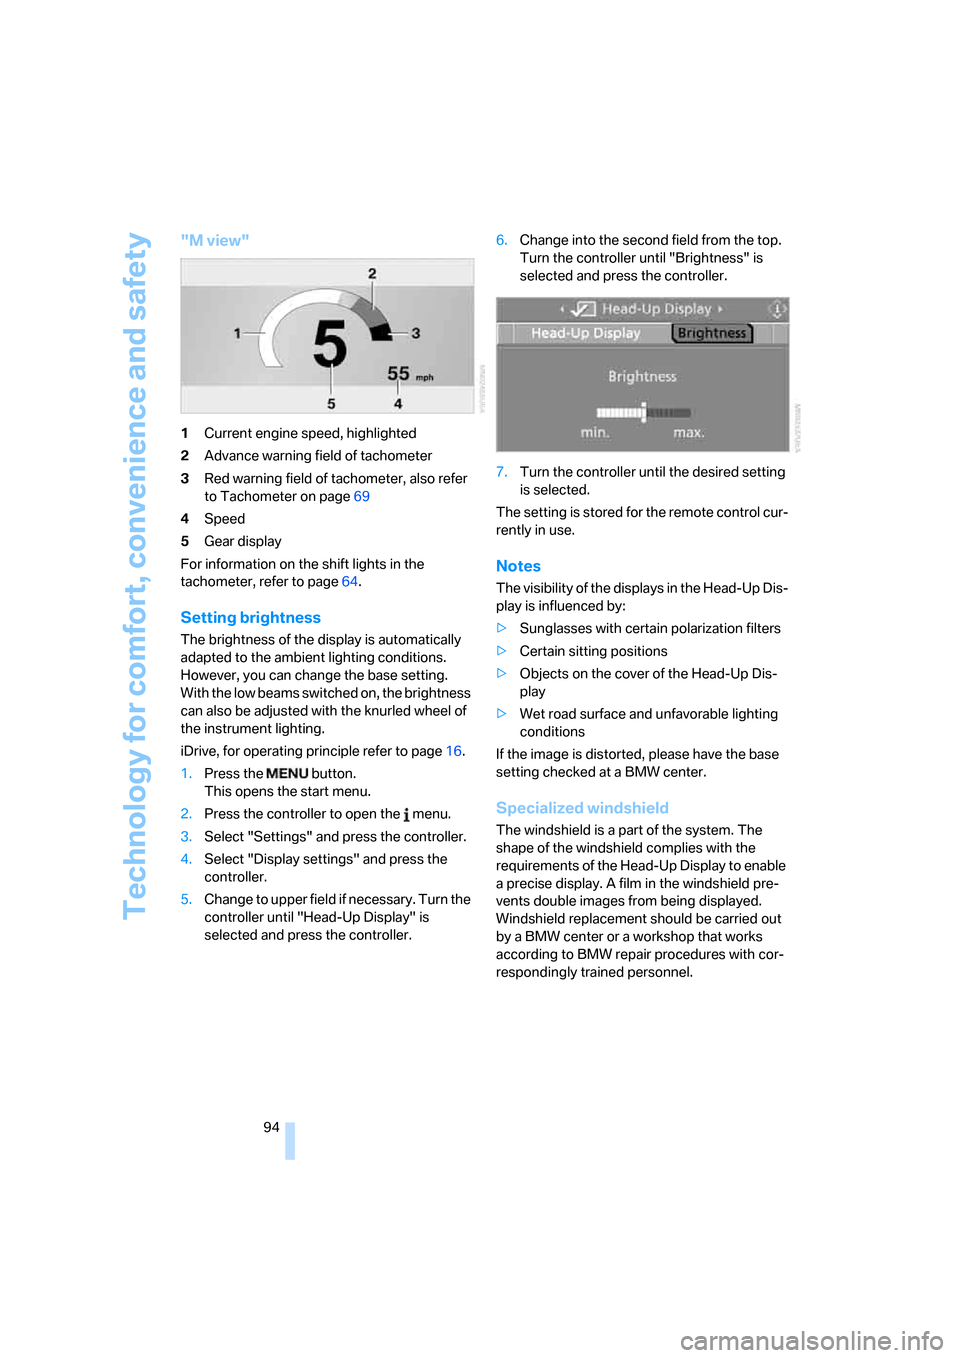
"M view"
1Current engine speed, highlighted
2Advance warning field of tachometer
3Red warning field of tachometer, also refer
to Tachometer on page69
4Speed
5Gear display
For information on the shift lights in the
tachometer, refer to page64.
Setting brightness
The brightness of the display is automatically
adapted to the ambient lighting conditions.
However, you can change the base setting.
With the low beams switched on, the brightness
can also be adjusted with the knurled wheel of
the instrument lighting.
iDrive, for operating principle refer to page16.
1.Press the button.
This opens the start menu.
2.Press the controller to open the menu.
3.Select "Settings" and press the controller.
4.Select "Display settings" and press the
controller.
5.Change to upper field if necessary. Turn the
controller until "Head-Up Display" is
selected and press the controller.6.Change into the second field from the top.
Turn the controller until "Brightness" is
selected and press the controller.
7.Turn the controller until the desired setting
is selected.
The setting is stored for the remote control cur-
rently in use.
Notes
The visibility of the displays in the Head-Up Dis-
play is influenced by:
>Sunglasses with certain polarization filters
>Certain sitting positions
>Objects on the cover of the Head-Up Dis-
play
>Wet road surface and unfavorable lighting
conditions
If the image is distorted, please have the base
setting checked at a BMW center.
Specialized windshield
The windshield is a part of the system. The
shape of the windshield complies with the
requirements of the Head-Up Display to enable
a precise display. A film in the windshield pre-
vents double images from being displayed.
Windshield replacement should be carried out
by a BMW center or a workshop that works
according to BMW repair procedures with cor-
respondingly trained personnel.
Page 110 of 262
Practical interior accessories
108
Practical interior accessories
Integrated universal remote
control*
The concept
The integrated universal remote control can
replace as many as three hand-held transmit-
ters for various remote-controlled accessories,
such as garage and gate or lighting systems.
The integrated universal remote control regis-
ters and stores signals from the original hand-
held transmitters.
The signal of an original hand-held transmitter
can be programmed on one of the three mem-
ory buttons1. After this, the programmed
memory button1 will operate the system in
question. The LED2 flashes to confirm trans-
mission of the signal.
If you sell your vehicle one day, delete the saved
programs beforehand for your own security,
refer to page109.
To prevent possible damage or injury,
before programming or using the inte-
grated universal remote control, always inspect
the immediate area to make certain that no peo-
ple, animals or objects are within the travel
range of the device. Also, comply with the
safety precautions of the original hand-held
transmitter.<
Checking compatibility
If you see this symbol on the packaging
or in the manual supplied with the orig-
inal hand-held transmitter, it is safe to
assume that it is compatible with the integrated
universal remote control.
If you have additional questions, please
contact your BMW center or call:
1-800-355-3515.
Information is also provided on the Internet at:
www.bmwusa.com or
www.homelink.com.
HomeLink is a registered trademark of
Johnson Controls, Inc.<
Programming
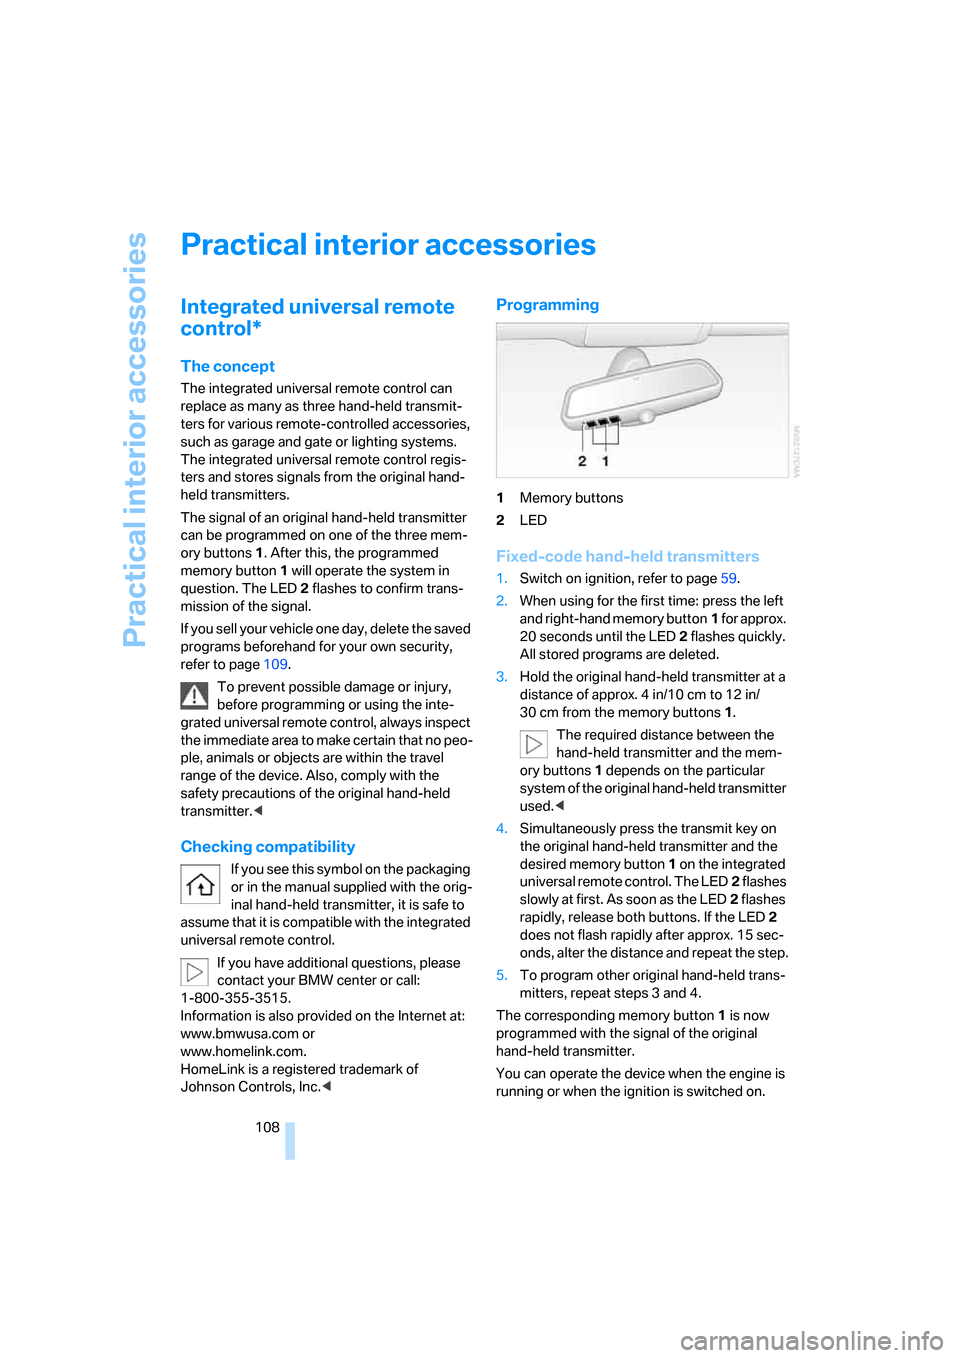
1Memory buttons
2LED
Fixed-code hand-held transmitters
1.Switch on ignition, refer to page59.
2.When using for the first time: press the left
and right-hand memory button1 for approx.
20 seconds until the LED2 flashes quickly.
All stored programs are deleted.
3.Hold the original hand-held transmitter at a
distance of approx. 4 in/10 cm to 12 in/
30 cm from the memory buttons1.
The required distance between the
hand-held transmitter and the mem-
ory buttons1 depends on the particular
system of the original hand-held transmitter
used.<
4.Simultaneously press the transmit key on
the original hand-held transmitter and the
desired memory button 1 on the integrated
universal remote control. The LED2 flashes
slowly at first. As soon as the LED2 flashes
rapidly, release both buttons. If the LED2
does not flash rapidly after approx. 15 sec-
onds, alter the distance and repeat the step.
5.To program other original hand-held trans-
mitters, repeat steps 3 and 4.
The corresponding memory button 1 is now
programmed with the signal of the original
hand-held transmitter.
You can operate the device when the engine is
running or when the ignition is switched on.
Page 212 of 262
Under the hood
210
Engine oil
Engine oil consumption depends on driving
style and driving conditions.
Checking engine oil level
Your vehicle is equipped with an electronic oil
level check.
The oil level can be displayed when the engine
is at operating temperature. Constant short-
distance driving or a very sporty driving style
can make it impossible for a measurement to be
taken.
Displays in instrument cluster
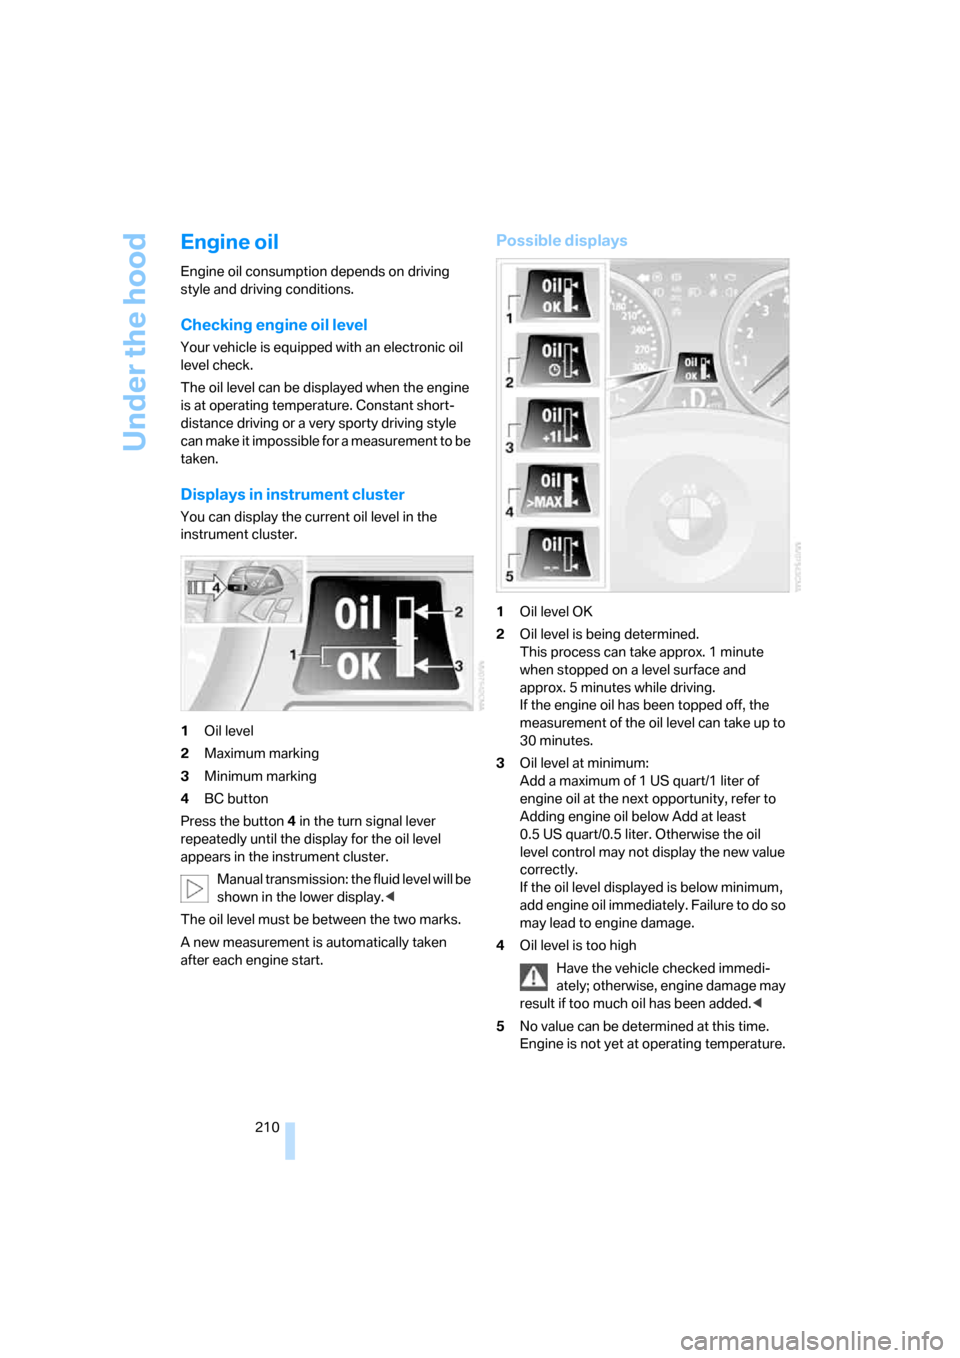
You can display the current oil level in the
instrument cluster.
1Oil level
2Maximum marking
3Minimum marking
4BC button
Press the button4 in the turn signal lever
repeatedly until the display for the oil level
appears in the instrument cluster.
Manual transmission: the fluid level will be
shown in the lower display.<
The oil level must be between the two marks.
A new measurement is automatically taken
after each engine start.
Possible displays
1Oil level OK
2Oil level is being determined.
This process can take approx. 1 minute
when stopped on a level surface and
approx. 5 minutes while driving.
If the engine oil has been topped off, the
measurement of the oil level can take up to
30 minutes.
3Oil level at minimum:
Add a maximum of 1 US quart/1 liter of
engine oil at the next opportunity, refer to
Adding engine oil below Add at least
0.5 US quart/0.5 liter. Otherwise the oil
level control may not display the new value
correctly.
If the oil level displayed is below minimum,
add engine oil immediately. Failure to do so
may lead to engine damage.
4Oil level is too high
Have the vehicle checked immedi-
ately; otherwise, engine damage may
result if too much oil has been added.<
5No value can be determined at this time.
Engine is not yet at operating temperature.
Page 213 of 262
Mobility
211Reference
At a glance
Controls
Driving tips
Communications
Navigation
Entertainment
Fast measurement
In addition to the automatic measurement, you
can also determine the current oil level manu-
ally, e.g. after adding engine oil, but with a lower
degree of measuring accuracy.
1.With the engine at operating temperature,
i.e. after at least 6 miles/10 km of uninter-
rupted driving, park the vehicle in a horizon-
tal position.
2.Allow the engine to run at idle.
3.Press the BC button in the turn signal lever
repeatedly until the oil level display is
shown in the instrument cluster.
4.Press the BC button for at least 2 seconds.
The oil level is determined. A clock symbol
is displayed during the measurement.
5.After approx. 1 minute the current oil level is
displayed.
Displaying via iDrive
iDrive, for operating principle refer to page16.
1.Press the button.
This opens the start menu.
2.Press the controller to open the menu.
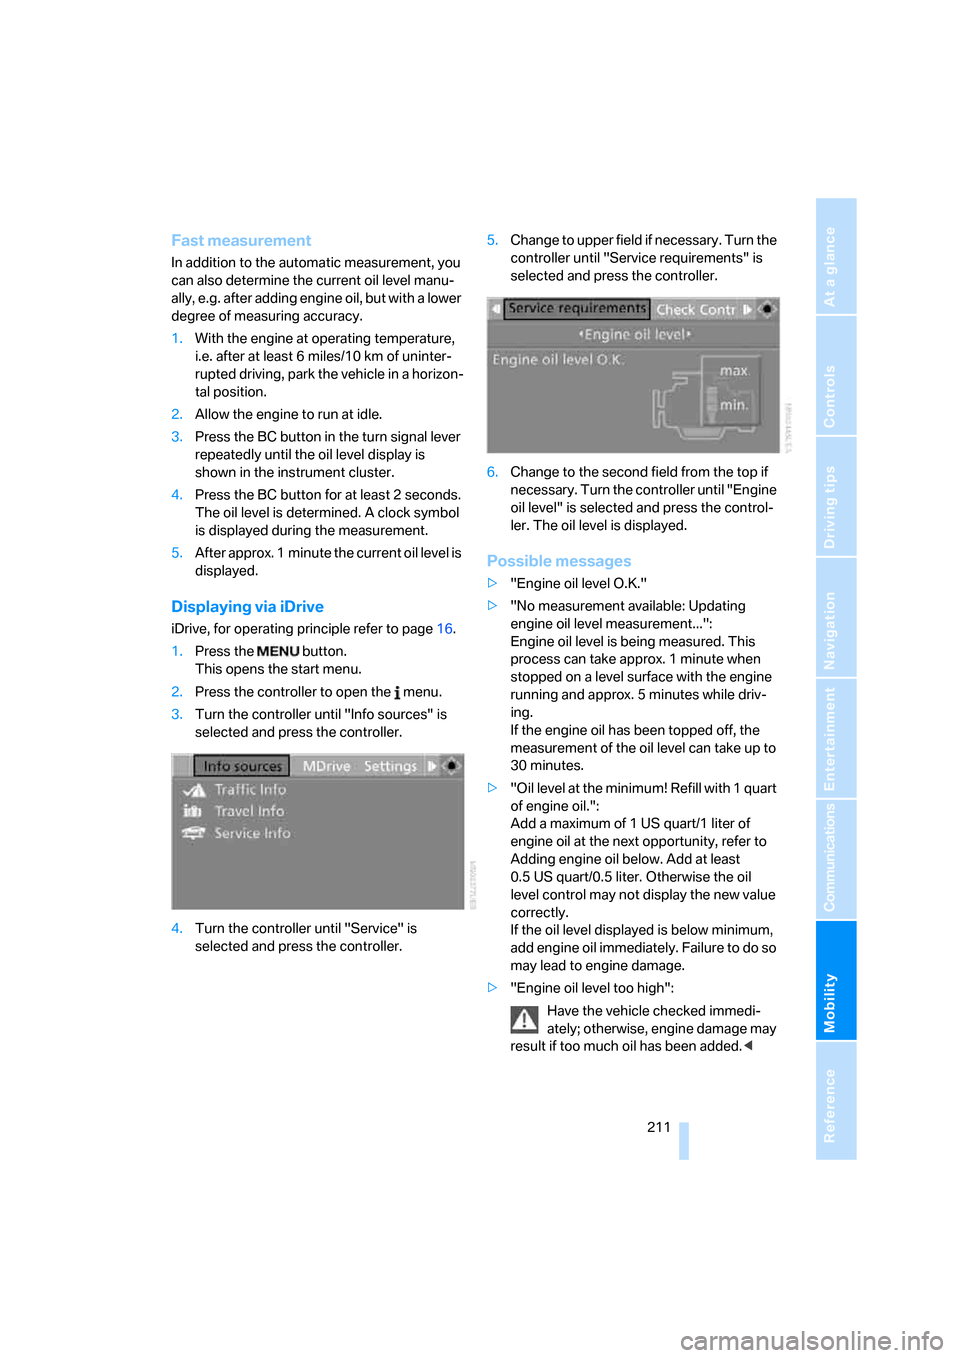
3.Turn the controller until "Info sources" is
selected and press the controller.
4.Turn the controller until "Service" is
selected and press the controller.5.Change to upper field if necessary. Turn the
controller until "Service requirements" is
selected and press the controller.
6.Change to the second field from the top if
necessary. Turn the controller until "Engine
oil level" is selected and press the control-
ler. The oil level is displayed.
Possible messages
>"Engine oil level O.K."
>"No measurement available: Updating
engine oil level measurement...":
Engine oil level is being measured. This
process can take approx. 1 minute when
stopped on a level surface with the engine
running and approx. 5 minutes while driv-
ing.
If the engine oil has been topped off, the
measurement of the oil level can take up to
30 minutes.
>"Oil level at the minimum! Refill with 1 quart
of engine oil.":
Add a maximum of 1 US quart/1 liter of
engine oil at the next opportunity, refer to
Adding engine oil below. Add at least
0.5 US quart/0.5 liter. Otherwise the oil
level control may not display the new value
correctly.
If the oil level displayed is below minimum,
add engine oil immediately. Failure to do so
may lead to engine damage.
>"Engine oil level too high":
Have the vehicle checked immedi-
ately; otherwise, engine damage may
result if too much oil has been added.<
Page 214 of 262
Under the hood
212 >"Please observe recalculated service inter-
val for engine oil":
Do not add engine oil. Before continuing to
drive, note the recalculated remaining mile-
age until the next oil change service, refer to
Service requirements on page72. Have the
system checked as soon as possible.
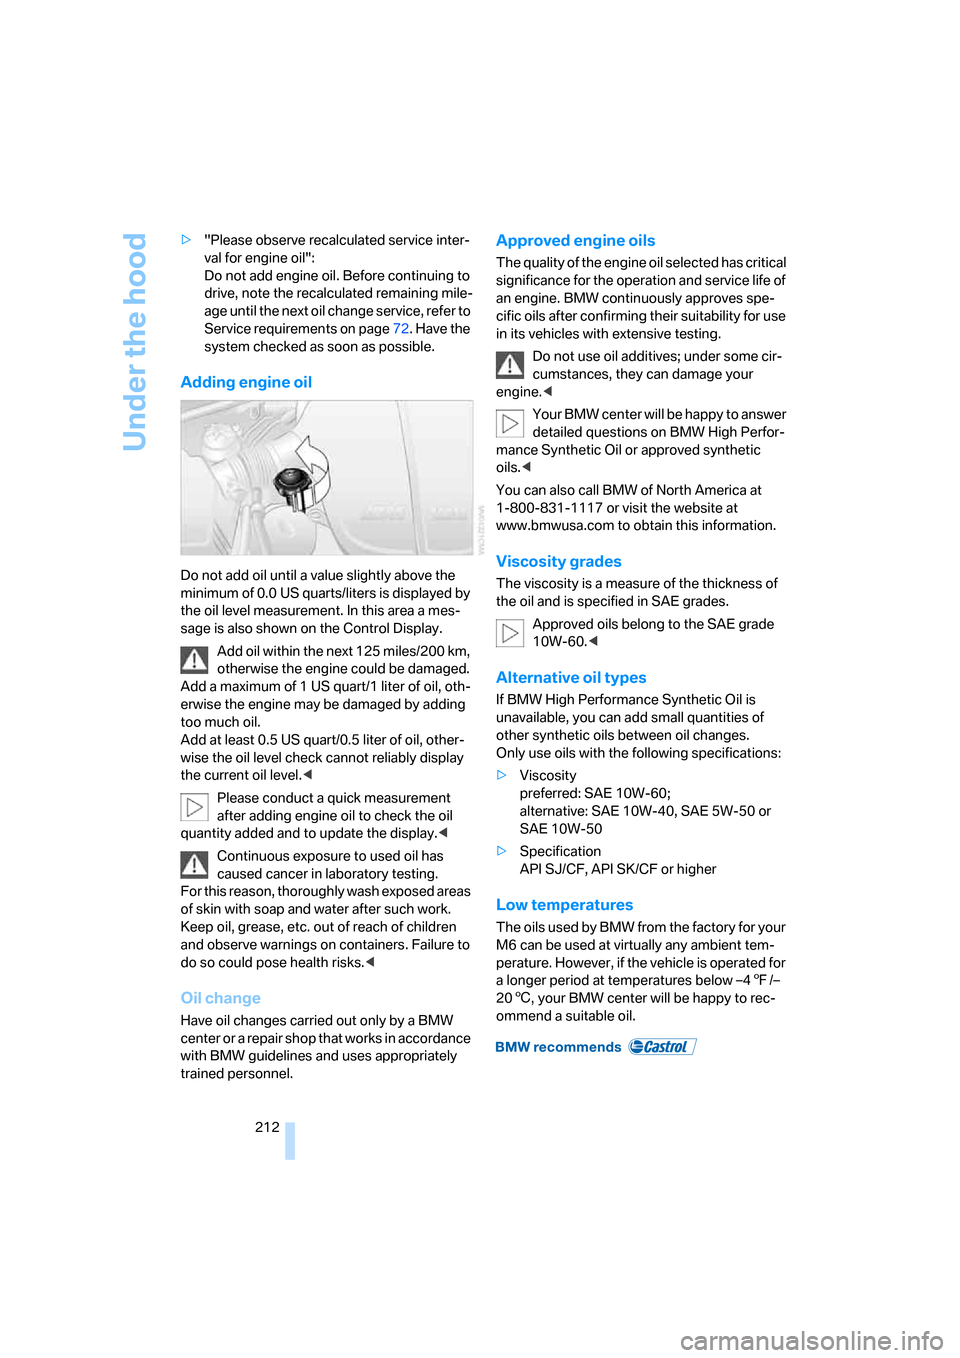
Adding engine oil
Do not add oil until a value slightly above the
minimum of 0.0 US quarts/liters is displayed by
the oil level measurement. In this area a mes-
sage is also shown on the Control Display.
Add oil within the next 125 miles/200 km,
otherwise the engine could be damaged.
Add a maximum of 1 US quart/1 liter of oil, oth-
erwise the engine may be damaged by adding
too much oil.
Add at least 0.5 US quart/0.5 liter of oil, other-
wise the oil level check cannot reliably display
the current oil level.<
Please conduct a quick measurement
after adding engine oil to check the oil
quantity added and to update the display.<
Continuous exposure to used oil has
caused cancer in laboratory testing.
For this reason, thoroughly wash exposed areas
of skin with soap and water after such work.
Keep oil, grease, etc. out of reach of children
and observe warnings on containers. Failure to
do so could pose health risks.<
Oil change
Have oil changes carried out only by a BMW
center or a repair shop that works in accordance
with BMW guidelines and uses appropriately
trained personnel.
Approved engine oils
The quality of the engine oil selected has critical
significance for the operation and service life of
an engine. BMW continuously approves spe-
cific oils after confirming their suitability for use
in its vehicles with extensive testing.
Do not use oil additives; under some cir-
cumstances, they can damage your
engine.<
Your BMW center will be happy to answer
detailed questions on BMW High Perfor-
mance Synthetic Oil or approved synthetic
oils.<
You can also call BMW of North America at
1-800-831-1117 or visit the website at
www.bmwusa.com to obtain this information.
Viscosity grades
The viscosity is a measure of the thickness of
the oil and is specified in SAE grades.
Approved oils belong to the SAE grade
10W-60.<
Alternative oil types
If BMW High Performance Synthetic Oil is
unavailable, you can add small quantities of
other synthetic oils between oil changes.
Only use oils with the following specifications:
>Viscosity
preferred: SAE 10W-60;
alternative: SAE 10W-40, SAE 5W-50 or
SAE 10W-50
>Specification
API SJ/CF, API SK/CF or higher
Low temperatures
The oils used by BMW from the factory for your
M6 can be used at virtually any ambient tem-
perature. However, if the vehicle is operated for
a longer period at temperatures below –47/–
206, your BMW center will be happy to rec-
ommend a suitable oil.
Page 215 of 262
Mobility
213Reference
At a glance
Controls
Driving tips
Communications
Navigation
Entertainment
Coolant
Do not open the cooling system when the
engine is hot. Escaping coolant can cause
burns.<
Coolant is composed of equal parts water and a
coolant additive. Not all commercially available
additives are suitable for your BMW. Ask your
BMW center for suitable additives.
Only use suitable additives, otherwise
engine damage may result. The additives
present a health hazard.<
Always observe all applicable environ-
mental laws and regulations when dis-
posing of used coolant additives.<
Checking coolant level
1.Do not open the hood until the engine has
cooled down.
2.Turn the cap of the expansion tank counter-
clockwise to allow any accumulated pres-
sure to escape, then continue turning to
open.
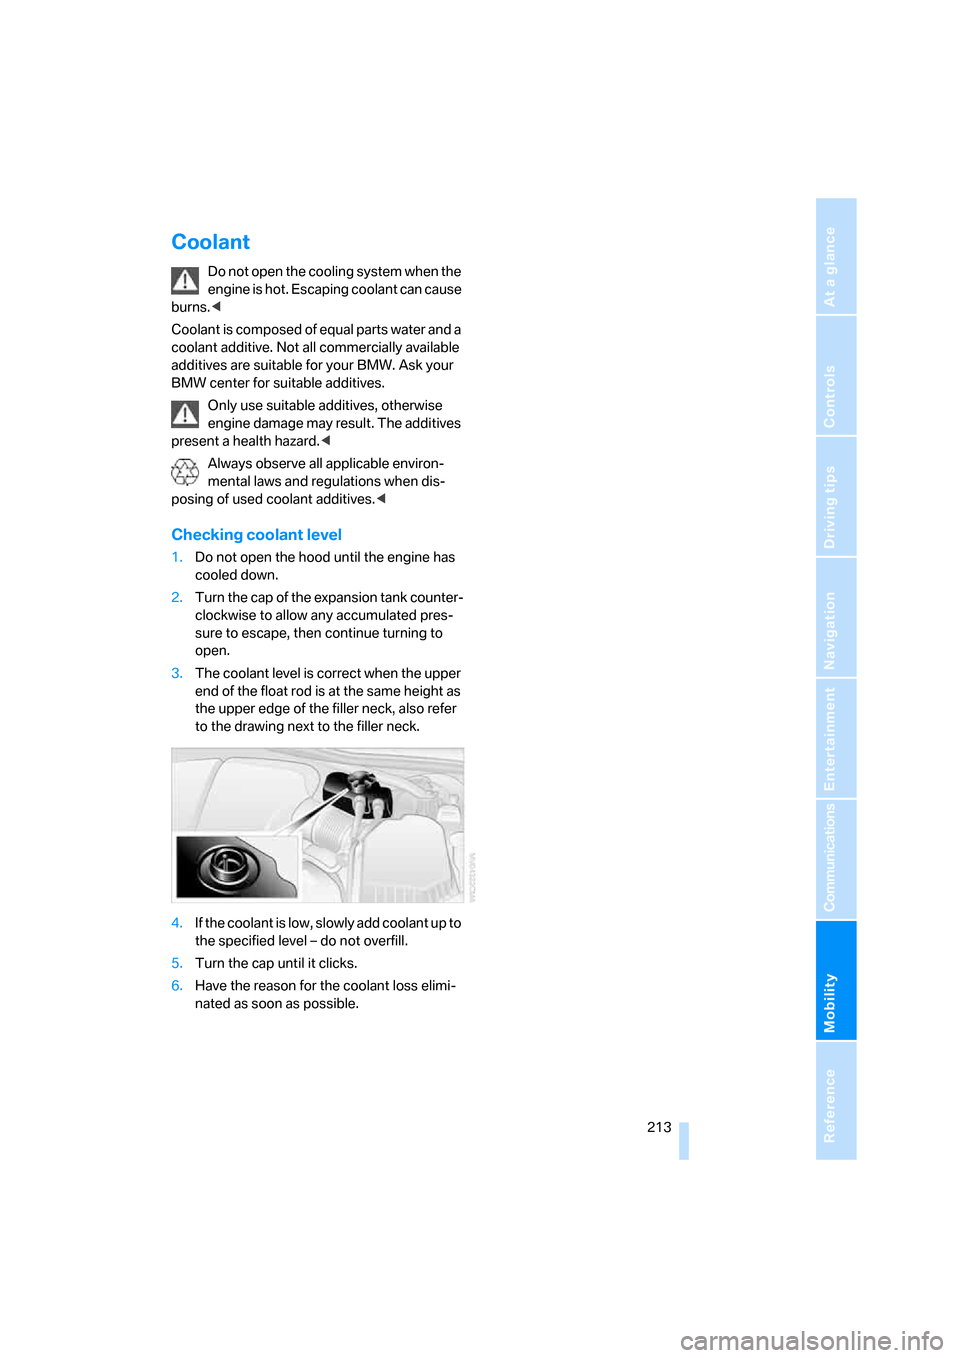
3.The coolant level is correct when the upper
end of the float rod is at the same height as
the upper edge of the filler neck, also refer
to the drawing next to the filler neck.
4.If the coolant is low, slowly add coolant up to
the specified level – do not overfill.
5.Turn the cap until it clicks.
6.Have the reason for the coolant loss elimi-
nated as soon as possible.
Page 216 of 262
Maintenance
214
Maintenance
BMW Maintenance System
The BMW Maintenance System supports the
preservation of the traffic and operating safety
of your BMW. The service schedule also
includes operations related to the vehicle's
comfort and convenience features, such as
replacement of the filters for the inside air.
The ultimate objective is to ensure economical
maintenance by providing the ideal service for
your vehicle.
Should the day come when you decide to sell
your BMW, you will find that a complete dealer
service history is an asset of inestimable value.
CBS Condition Based Service
Sensors and special algorithms take the differ-
ent driving conditions of your BMW into
account. Condition Based Service uses this to
determine the current and future service
requirements. By letting you define a service
and maintenance regimen that reflects your
own individual requirements, the system builds
the basis for trouble-free driving.
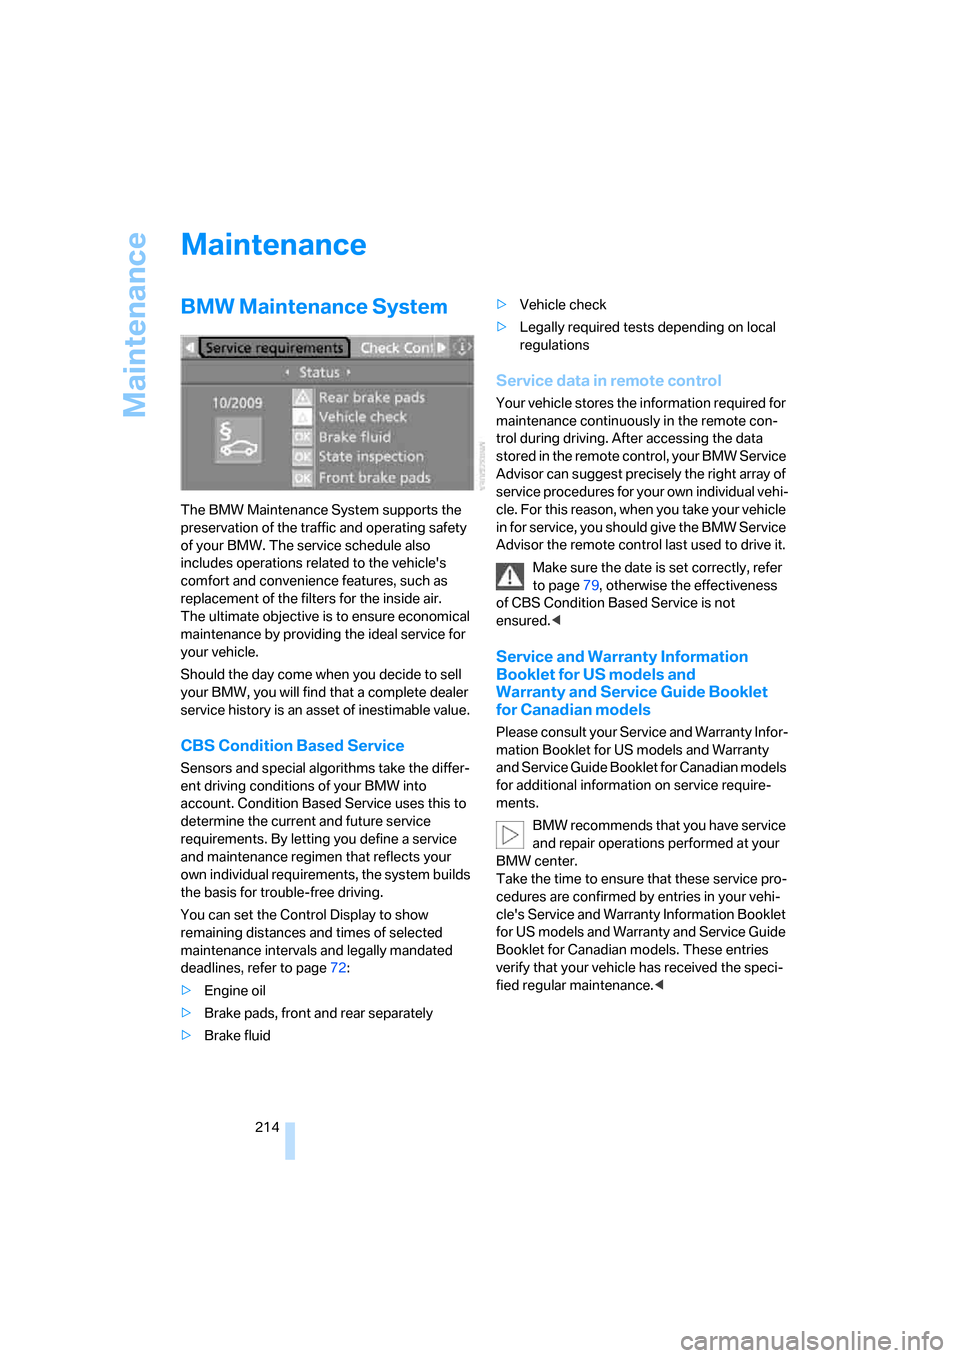
You can set the Control Display to show
remaining distances and times of selected
maintenance intervals and legally mandated
deadlines, refer to page72:
>Engine oil
>Brake pads, front and rear separately
>Brake fluid>Vehicle check
>Legally required tests depending on local
regulations
Service data in remote control
Your vehicle stores the information required for
maintenance continuously in the remote con-
trol during driving. After accessing the data
stored in the remote control, your BMW Service
Advisor can suggest precisely the right array of
service procedures for your own individual vehi-
cle. For this reason, when you take your vehicle
in for service, you should give the BMW Service
Advisor the remote control last used to drive it.
Make sure the date is set correctly, refer
to page79, otherwise the effectiveness
of CBS Condition Based Service is not
ensured.<
Service and Warranty Information
Booklet for US models and
Warranty and Service Guide Booklet
for Canadian models
Please consult your Service and Warranty Infor-
mation Booklet for US models and Warranty
and Service Guide Booklet for Canadian models
for additional information on service require-
ments.
BMW recommends that you have service
and repair operations performed at your
BMW center.
Take the time to ensure that these service pro-
cedures are confirmed by entries in your vehi-
cle's Service and Warranty Information Booklet
for US models and Warranty and Service Guide
Booklet for Canadian models. These entries
verify that your vehicle has received the speci-
fied regular maintenance.<
Page 217 of 262
Mobility
215Reference
At a glance
Controls
Driving tips
Communications
Navigation
Entertainment
Socket for OBD Onboard
Diagnostics interface
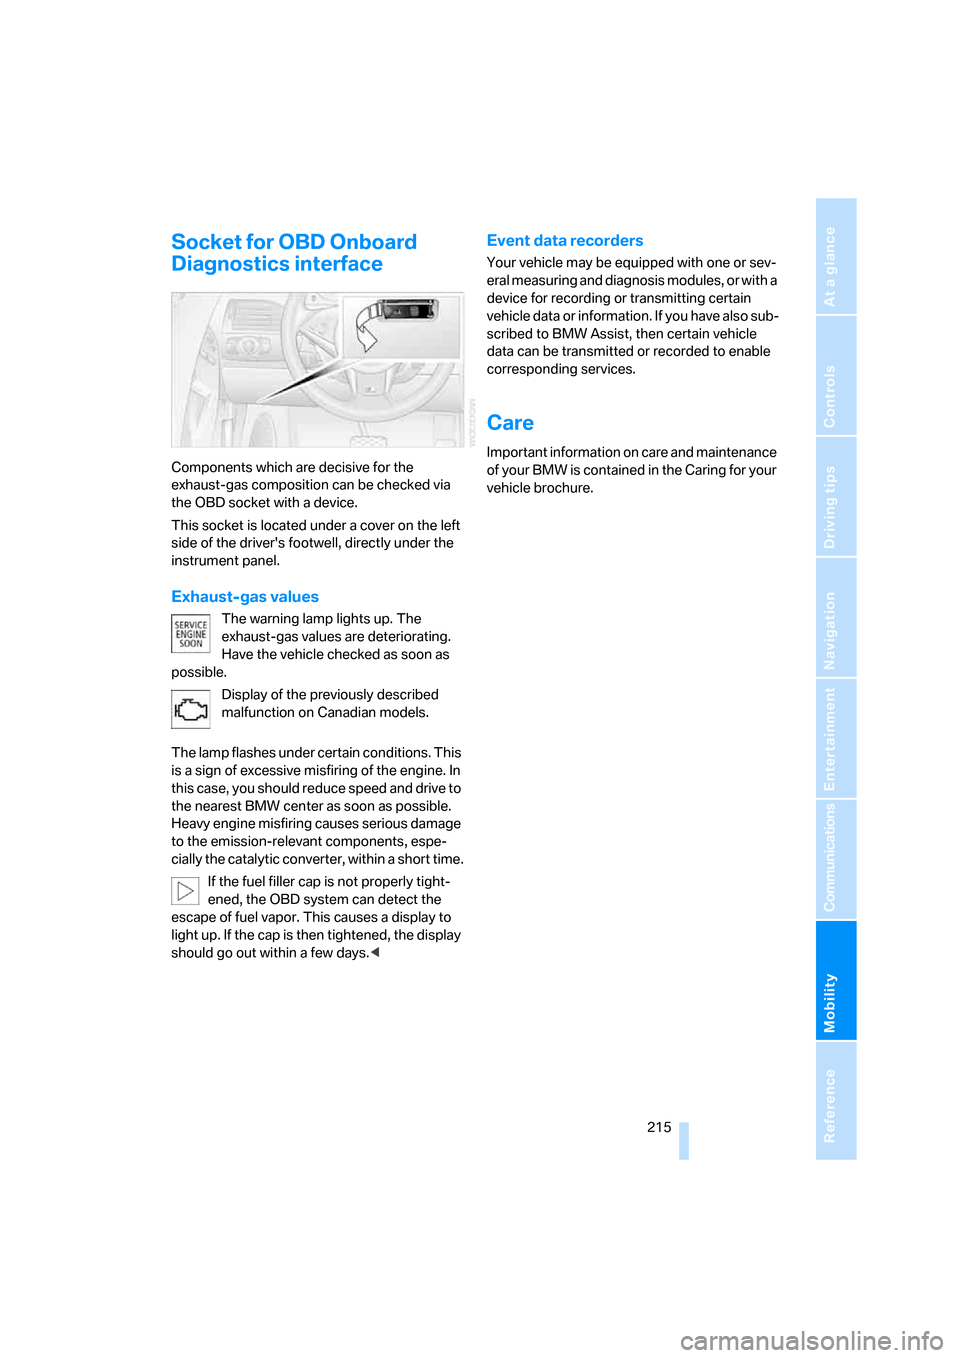
Components which are decisive for the
exhaust-gas composition can be checked via
the OBD socket with a device.
This socket is located under a cover on the left
side of the driver's footwell, directly under the
instrument panel.
Exhaust-gas values
The warning lamp lights up. The
exhaust-gas values are deteriorating.
Have the vehicle checked as soon as
possible.
Display of the previously described
malfunction on Canadian models.
The lamp flashes under certain conditions. This
is a sign of excessive misfiring of the engine. In
this case, you should reduce speed and drive to
the nearest BMW center as soon as possible.
Heavy engine misfiring causes serious damage
to the emission-relevant components, espe-
cially the catalytic converter, within a short time.
If the fuel filler cap is not properly tight-
ened, the OBD system can detect the
escape of fuel vapor. This causes a display to
light up. If the cap is then tightened, the display
should go out within a few days.<
Event data recorders
Your vehicle may be equipped with one or sev-
eral measuring and diagnosis modules, or with a
device for recording or transmitting certain
vehicle data or information. If you have also sub-
scribed to BMW Assist, then certain vehicle
data can be transmitted or recorded to enable
corresponding services.
Care
Important information on care and maintenance
of your BMW is contained in the Caring for your
vehicle brochure.
Page 222 of 262
Replacing components
220 4.Correct tire inflation pressure to 29 psi/
200 kPa. With the ignition switched on:
>Increase inflation pressure: switch on
device, position I. To check currently set
inflation pressure, briefly switch off
device.
Do not allow compressor to run
longer than 10 minutes, otherwise
the device will overheat and may be dam-
aged.<
>Reduce inflation pressure: press
button8 or turn screw8 on pressure
gauge.
If the inflation pressure is not held, drive
the vehicle again, refer to Distributing
sealant. Then repeat steps 1 to 4 once.
Using the M Mobility System can be ineffective
with tire damage from a size of approx. 0.16 in/
4 mm. Please contact the nearest BMW center,
refer to page225, or a workshop that works
according to BMW repair procedures with cor-
respondingly trained personnel if the tire can-
not be made ready for driving with the
M Mobility System.<
The tire inflation pressure must be at least
29 psi/200 kPa. Otherwise, do not con-
tinue driving.<
Continue driving
Do not exceed the permissible maximum
speed of 50 mph/80 km/h, otherwise
accidents can occur.<
Reinitialize the Flat Tire Monitor.
For details, refer to page86.
Have the defective tire and the sealant bottle of
the M Mobility System replaced as soon as
possible.<
Changing wheels*
Safety precautions in the event of a flat
tire or wheel change: park the vehicle as
far as possible from passing traffic and on solid
ground. Switch on the hazard warning flashers.
Apply the handbrake and shift into first gear or
reverse with the manual transmission, or move the selector lever into a drive position with the
sequential transmission.
Have all vehicle occupants get out of the vehicle
and ensure that they remain outside the imme-
diate area in a safe place, such as behind a
guardrail.
If a warning triangle
* or portable hazard warning
lamp
* is required, set it up on the roadside at an
appropriate distance from the rear of the vehi-
cle. Comply with all safety guidelines and regu-
lations.
Change the wheel only on a level, firm surface
which is not slippery. The vehicle or the jack
could slip to the side if you attempt to raise the
vehicle on a soft or slippery surface such as
snow, ice, tiles, etc.
Position the jack on a firm support surface.
Do not use a wooden block or similar object as a
support base for the jack, as this would prevent
it from extending to its full support height and
reduce its load-carrying capacity.
To avoid serious or fatal injury: never lie under
the vehicle, and never start the engine while it is
supported by the jack.<
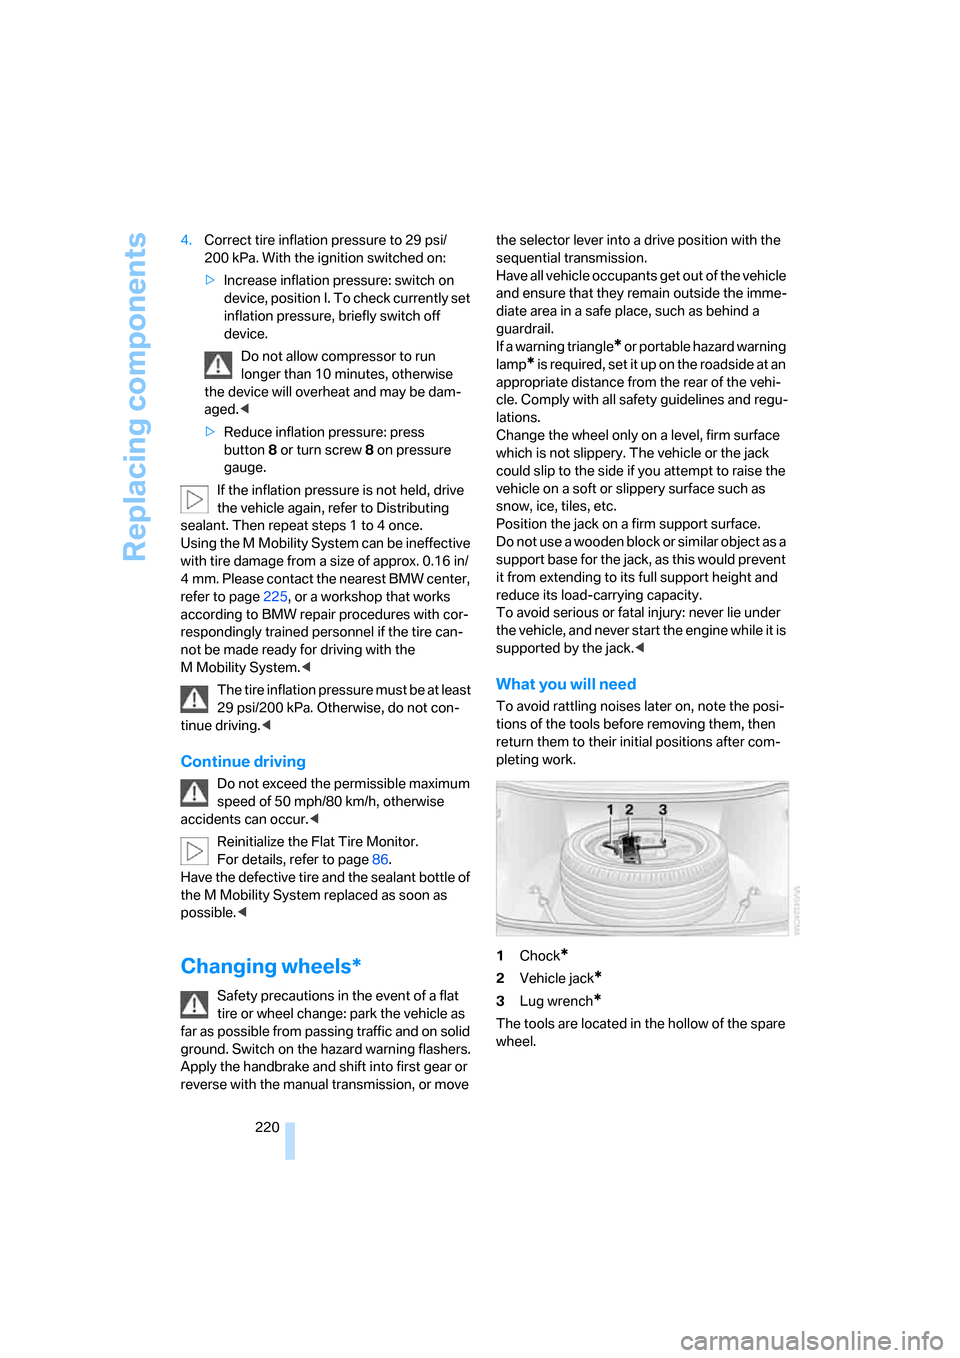
What you will need
To avoid rattling noises later on, note the posi-
tions of the tools before removing them, then
return them to their initial positions after com-
pleting work.
1Chock
*
2Vehicle jack*
3Lug wrench*
The tools are located in the hollow of the spare
wheel.
Page 227 of 262
Mobility
225Reference
At a glance
Controls
Driving tips
Communications
Navigation
Entertainment
Warning triangle*
The warning triangle is located on the left-hand
side in the luggage compartment.
First-aid kit*
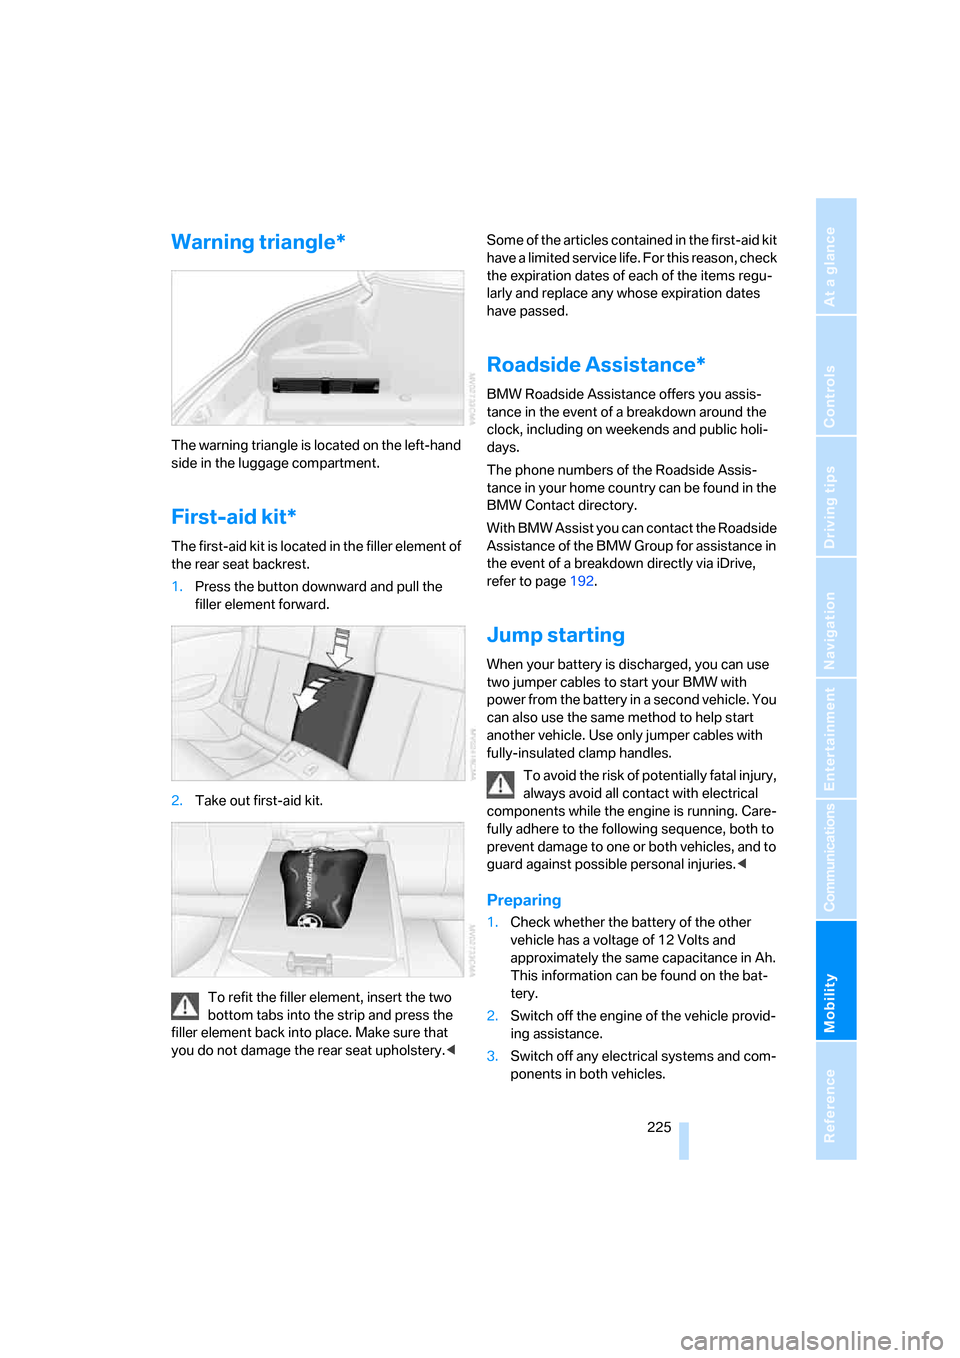
The first-aid kit is located in the filler element of
the rear seat backrest.
1.Press the button downward and pull the
filler element forward.
2.Take out first-aid kit.
To refit the filler element, insert the two
bottom tabs into the strip and press the
filler element back into place. Make sure that
you do not damage the rear seat upholstery.
the expiration dates of each of the items regu-
larly and replace any whose expiration dates
have passed.
Roadside Assistance*
BMW Roadside Assistance offers you assis-
tance in the event of a breakdown around the
clock, including on weekends and public holi-
days.
The phone numbers of the Roadside Assis-
tance in your home country can be found in the
BMW Contact directory.
With BMW Assist you can contact the Roadside
Assistance of the BMW Group for assistance in
the event of a breakdown directly via iDrive,
refer to page192.
Jump starting
When your battery is discharged, you can use
two jumper cables to start your BMW with
power from the battery in a second vehicle. You
can also use the same method to help start
another vehicle. Use only jumper cables with
fully-insulated clamp handles.
To avoid the risk of potentially fatal injury,
always avoid all contact with electrical
components while the engine is running. Care-
fully adhere to the following sequence, both to
prevent damage to one or both vehicles, and to
guard against possible personal injuries.<
Preparing
1.Check whether the battery of the other
vehicle has a voltage of 12 Volts and
approximately the same capacitance in Ah.
This information can be found on the bat-
tery.
2.Switch off the engine of the vehicle provid-
ing assistance.
3.Switch off any electrical systems and com-
ponents in both vehicles.