ESP BMW M6 2008 E63 Workshop Manual
[x] Cancel search | Manufacturer: BMW, Model Year: 2008, Model line: M6, Model: BMW M6 2008 E63Pages: 262, PDF Size: 8.86 MB
Page 203 of 262
Mobility
201Reference
At a glance
Controls
Driving tips
Communications
Navigation
Entertainment
Fuel specifications
Never used leaded gasoline; it will perma-
nently damage the catalytic converter.
Do not use E85, i.e. fuel that consists of 85%
ethanol, or Flex Fuel. Otherwise permanent
damage to the engine and the fuel supply sys-
tem will result.<
Required fuel
Super Premium Gasoline/AKI 93
Always use this premium grade fuel to obtain
maximum fuel economy and performance.
The minimum approved fuel grade is AKI 91.
Do not use gasoline below the specified
minimum quality, otherwise engine dam-
age can result.<
Use high-quality brands
Field experience has demonstrated significant
differences in fuel quality: volatility, composi-
tion, additives, etc., among gasolines offered for
sale in the United States and Canada. Fuels
containing up to and including 10 % ethanol or
other oxygenates with up to 2.8 % oxygen by
weight, that is, 15 % MTBE or 3 % methanol
plus an equivalent amount of co-solvent, will
not void the applicable warranties with respect
to defects in materials or workmanship.
The use of poor-quality fuels may result in
problems relating to drivability and start-
ing, and to a tendency to stall, especially under
certain environmental conditions such as high
ambient temperature and high altitude.
Should you encounter drivability problems
which you suspect could be related to the fuel
you are using, we recommend that you respond
by switching to a recognized high-quality brand
such as gasoline that is advertised as Top Tier
Detergent Gasoline.
Failure to comply with these recommendations
may also result in unscheduled maintenance.<
Page 204 of 262
Wheels and tires
202
Wheels and tires
Tire inflation pressure
Information for your safety
The condition of the tires and the maintenance
of the specified tire pressure are crucial not only
to the tire's service life, but also to driving com-
fort and most importantly, driving safety.
Checking pressure
Only check tire inflation pressure when the tires
are cold. This means after a maximum of
1.25 miles/2 km driving or when the vehicle has
been parked for at least 2 hours. When tires are
warm, the tire inflation pressure increases.
Check the tire inflation pressure regularly
and correct if necessary, including on the
spare wheel
*: at least twice a month and before
starting long trips. Otherwise, driving instability
or tire damage, and therefore accidents, can
result from incorrect tire inflation pressures.<
After correcting the tire inflation pressure,
reinitialize the Flat Tire Monitor, refer to
page86, or reset the Tire Pressure Monitor,
refer to page88.<
Pressure specifications
The tables below provide all the correct inflation
pressures for the specified tire sizes at ambient
temperature.
The inflation pressures apply to the tire
sizes and tire brands respectively
approved and recommended by BMW; a list of
these is available from your BMW center.<
For correct identification of the right tire infla-
tion pressure for your tires, observe the follow-
ing:
>Tire sizes for your vehicle
>Load conditions
>Maximum allowable driving speed
Tire inflation pressures for driving
up to 100 mph/160 km/h
For normal driving up to 100 mph/160 km/h,
adjust pressures to the respective tire inflation
pressures listed on the following pages in the
column for traveling speeds up to a max. of
100 mph/160 km/h to achieve optimum driving
comfort.
These pressure specifications can be found on
the door post when you open the driver's door.
The permissible top speed for these tire
inflation pressures is 100 mph/160 km/h.
Do not exceed this speed; otherwise, tire dam-
age and accidents may result.<
Tire inflation pressures for driving
above 100 mph/160 km/h
In order to drive at maximum speeds in
excess of 100 mph/160 km/h, please
note the tire pressures for speeds exceeding
100 mph/160 km/h listed in the relevant column
of the table on the following pages and adjust
your tire inflation pressures as needed. Other-
wise, tire damage and accidents could occur.<
Observe all national and local maximum speed
limits, otherwise violations of the law could
occur.
Page 207 of 262
Mobility
205Reference
At a glance
Controls
Driving tips
Communications
Navigation
Entertainment
Temperature
The temperature grades are A, the highest, B,
and C, representing the tire's resistance to the
generation of heat and its ability to dissipate
heat when tested under controlled conditions
on a specified indoor laboratory test wheel.
Sustained high temperature can cause the
material of the tire to degenerate and reduce
tire life, and excessive temperature can lead to
sudden tire failure. The grade C corresponds to
a level of performance which all passenger car
tires must meet under the Federal Motor Vehi-
cle Safety Standard No. 109. Grades B and A
represent higher levels of performance on the
laboratory test wheel than the minimum
required by law.
The temperature grade for this tire is
established for a tire that is properly
inflated and not overloaded. Excessive speed,
underinflation, or excessive loading, either sep-
arately or in combination, can cause heat
buildup and possible tire failure.<
M+S
Winter and all-season tires.
These have better winter properties than sum-
mer tires.
XL
Indicates specially reinforced tires.
Tire condition
Inspect your tires frequently for tread wear,
signs of damage and foreign objects lodged in
the tread, and check the tread depth.
Minimum tread depth
The tread depth should not drop below 0.12 in/
3 mm, although, for example, European legisla-
tion only specifies a minimum tread depth of
0.063 in/1.6 mm. At tread depths below 0.12 in/
3 mm, there is an increased risk of high-speed
hydroplaning, even when only small amounts of
water are present on the road surface.Winter tires noticeably loose their suitability for
winter use below a tread depth of 0.16 in/4 mm.
New tires should be mounted in the interest of
safety.
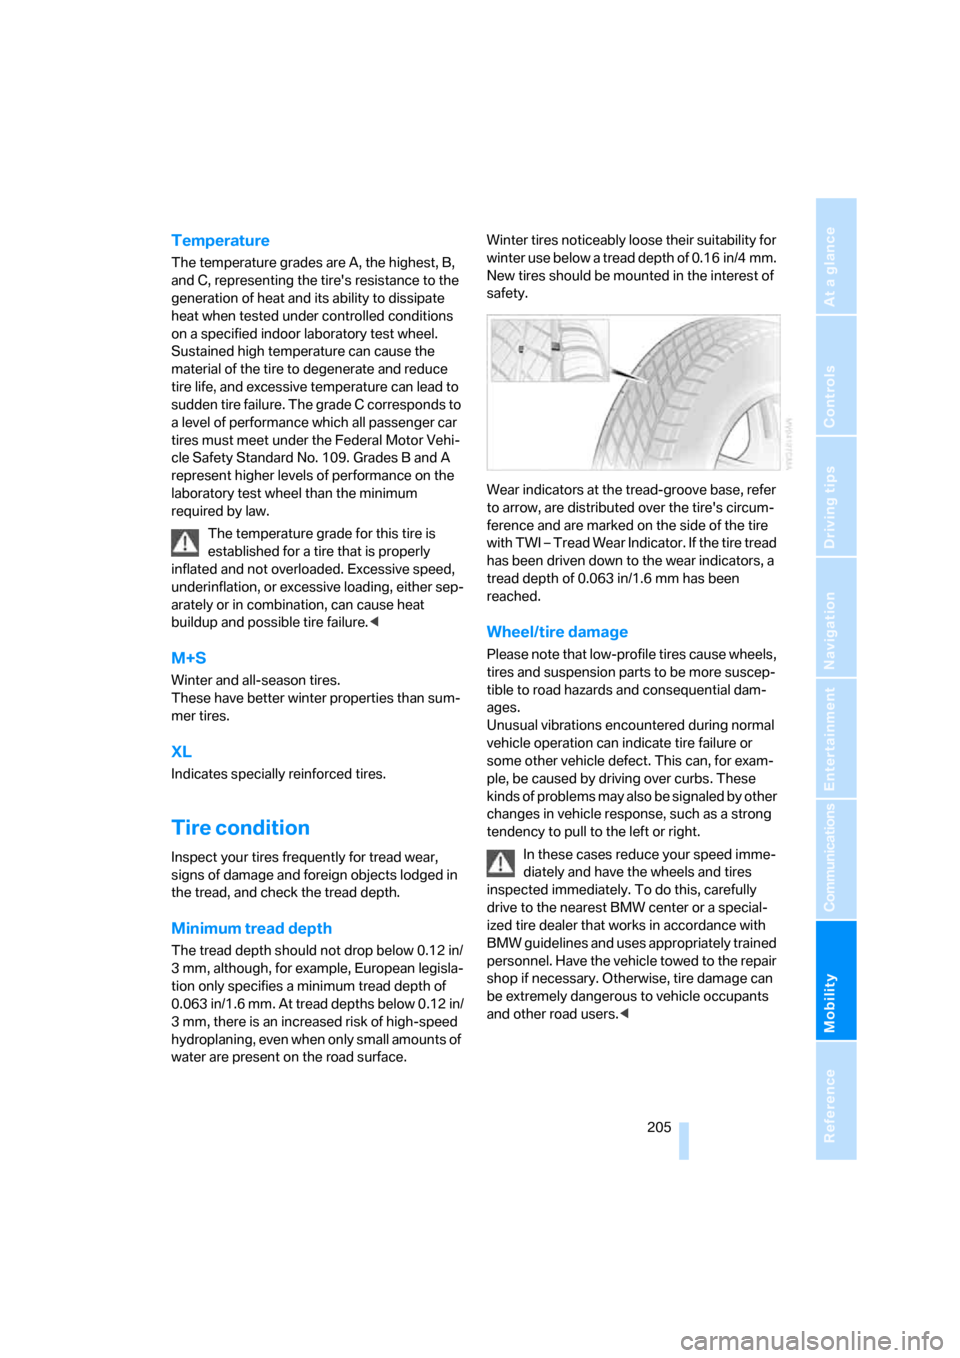
Wear indicators at the tread-groove base, refer
to arrow, are distributed over the tire's circum-
ference and are marked on the side of the tire
with TWI – Tread Wear Indicator. If the tire tread
has been driven down to the wear indicators, a
tread depth of 0.063 in/1.6 mm has been
reached.
Wheel/tire damage
Please note that low-profile tires cause wheels,
tires and suspension parts to be more suscep-
tible to road hazards and consequential dam-
ages.
Unusual vibrations encountered during normal
vehicle operation can indicate tire failure or
some other vehicle defect. This can, for exam-
ple, be caused by driving over curbs. These
kinds of problems may also be signaled by other
changes in vehicle response, such as a strong
tendency to pull to the left or right.
In these cases reduce your speed imme-
diately and have the wheels and tires
inspected immediately. To do this, carefully
drive to the nearest BMW center or a special-
ized tire dealer that works in accordance with
BMW guidelines and uses appropriately trained
personnel. Have the vehicle towed to the repair
shop if necessary. Otherwise, tire damage can
be extremely dangerous to vehicle occupants
and other road users.<
Page 208 of 262
Wheels and tires
206
New wheels and tires
Only have new wheels and tires mounted
by a BMW center or a repair shop that
works in accordance with BMW guidelines and
uses appropriately trained personnel. If this
work is not carried out properly, there is a dan-
ger of subsequent damage and related safety
h a z a r d s . M a k e s u re t h a t t h e n e w w h ee l s a r e b a l-
anced.<
Retreaded tires
BMW does not recommend the use of
retreaded tires; otherwise, driving safety
may be reduced. Potentially substantial varia-
tions in the design and the age of the carcasses
can result in a reduced service life.<
The right wheels and tires
BMW recommends that you use only
wheel and tire combinations that BMW
has tested and approved for your particular
vehicle. Variations in factors such as manufac-
turing tolerances mean that even wheels and
tires with identical official size ratings could
actually have different dimensions than the
approved units – these differences could lead to
body contact, and with it the risk of severe acci-
dents. When selecting the tires, also ensure
that they have a sufficient load-carrying capac-
ity. If non-approved wheels and tires are used,
BMW cannot evaluate their suitability, and
therefore cannot be held liable for driving
safety.<
You can find out the right wheel-tire combina-
tion from your BMW center.
The right wheel-and-tire combination is
another vital factor in ensuring reliable opera-
tion of various vehicle systems such as ABS
and DSC.
To maintain good handling and vehicle
response, use only tires of a single tread config-
uration from a single manufacturer. After a tire is
damaged, always remember to have the original
wheel and tire combination remounted on the
vehicle as soon as possible.
Wheels with electronics for
TPM Tire Pressure Monitor
When mounting new tires or converting from
summer to winter tires or vice versa, only use
wheels with TPM electronics, otherwise the
Tire Pressure Monitor cannot detect a flat tire,
refer to page87. Your BMW center will be
happy to advise you on this subject.
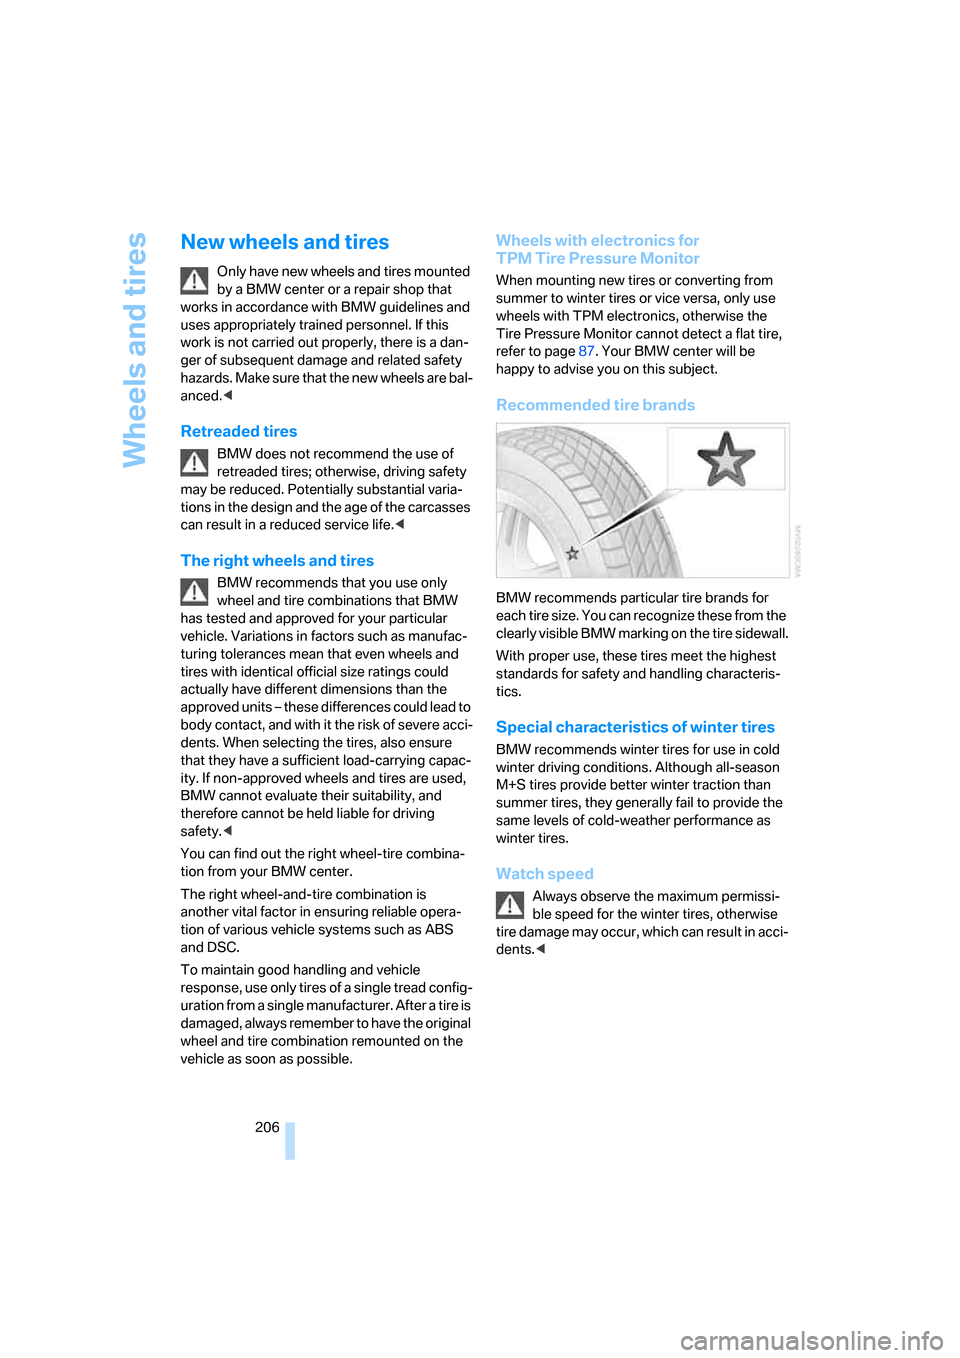
Recommended tire brands
BMW recommends particular tire brands for
each tire size. You can recognize these from the
clearly visible BMW marking on the tire sidewall.
With proper use, these tires meet the highest
standards for safety and handling characteris-
tics.
Special characteristics of winter tires
BMW recommends winter tires for use in cold
winter driving conditions. Although all-season
M+S tires provide better winter traction than
summer tires, they generally fail to provide the
same levels of cold-weather performance as
winter tires.
Watch speed
Always observe the maximum permissi-
ble speed for the winter tires, otherwise
t i re d a m a g e m a y o c cu r , w h ic h c a n re s u l t i n a c c i-
dents.<
Page 217 of 262
Mobility
215Reference
At a glance
Controls
Driving tips
Communications
Navigation
Entertainment
Socket for OBD Onboard
Diagnostics interface
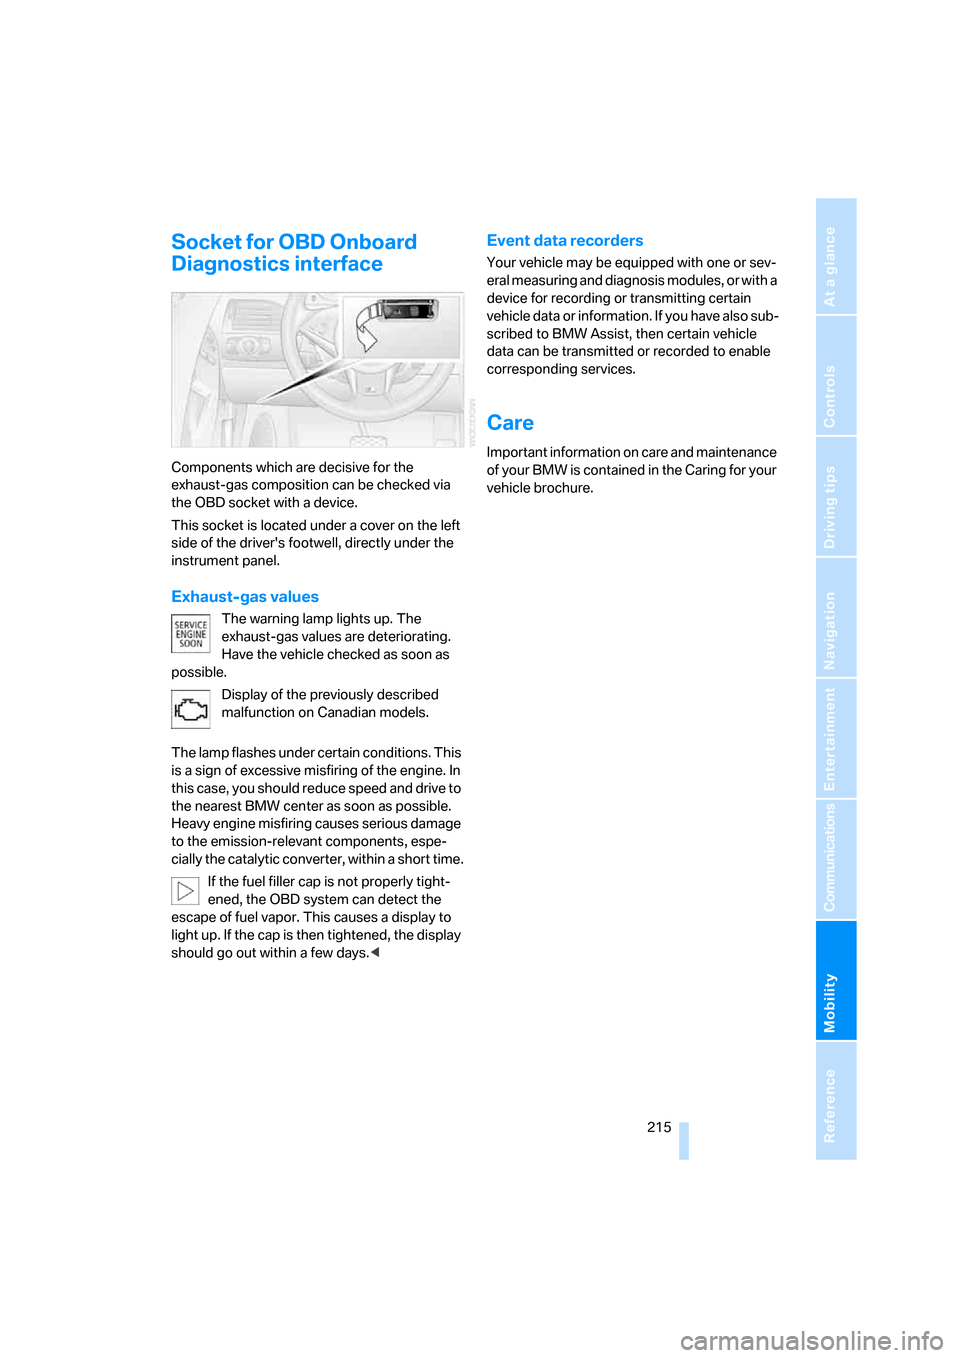
Components which are decisive for the
exhaust-gas composition can be checked via
the OBD socket with a device.
This socket is located under a cover on the left
side of the driver's footwell, directly under the
instrument panel.
Exhaust-gas values
The warning lamp lights up. The
exhaust-gas values are deteriorating.
Have the vehicle checked as soon as
possible.
Display of the previously described
malfunction on Canadian models.
The lamp flashes under certain conditions. This
is a sign of excessive misfiring of the engine. In
this case, you should reduce speed and drive to
the nearest BMW center as soon as possible.
Heavy engine misfiring causes serious damage
to the emission-relevant components, espe-
cially the catalytic converter, within a short time.
If the fuel filler cap is not properly tight-
ened, the OBD system can detect the
escape of fuel vapor. This causes a display to
light up. If the cap is then tightened, the display
should go out within a few days.<
Event data recorders
Your vehicle may be equipped with one or sev-
eral measuring and diagnosis modules, or with a
device for recording or transmitting certain
vehicle data or information. If you have also sub-
scribed to BMW Assist, then certain vehicle
data can be transmitted or recorded to enable
corresponding services.
Care
Important information on care and maintenance
of your BMW is contained in the Caring for your
vehicle brochure.
Page 218 of 262
Replacing components
216
Replacing components
Onboard tool kit
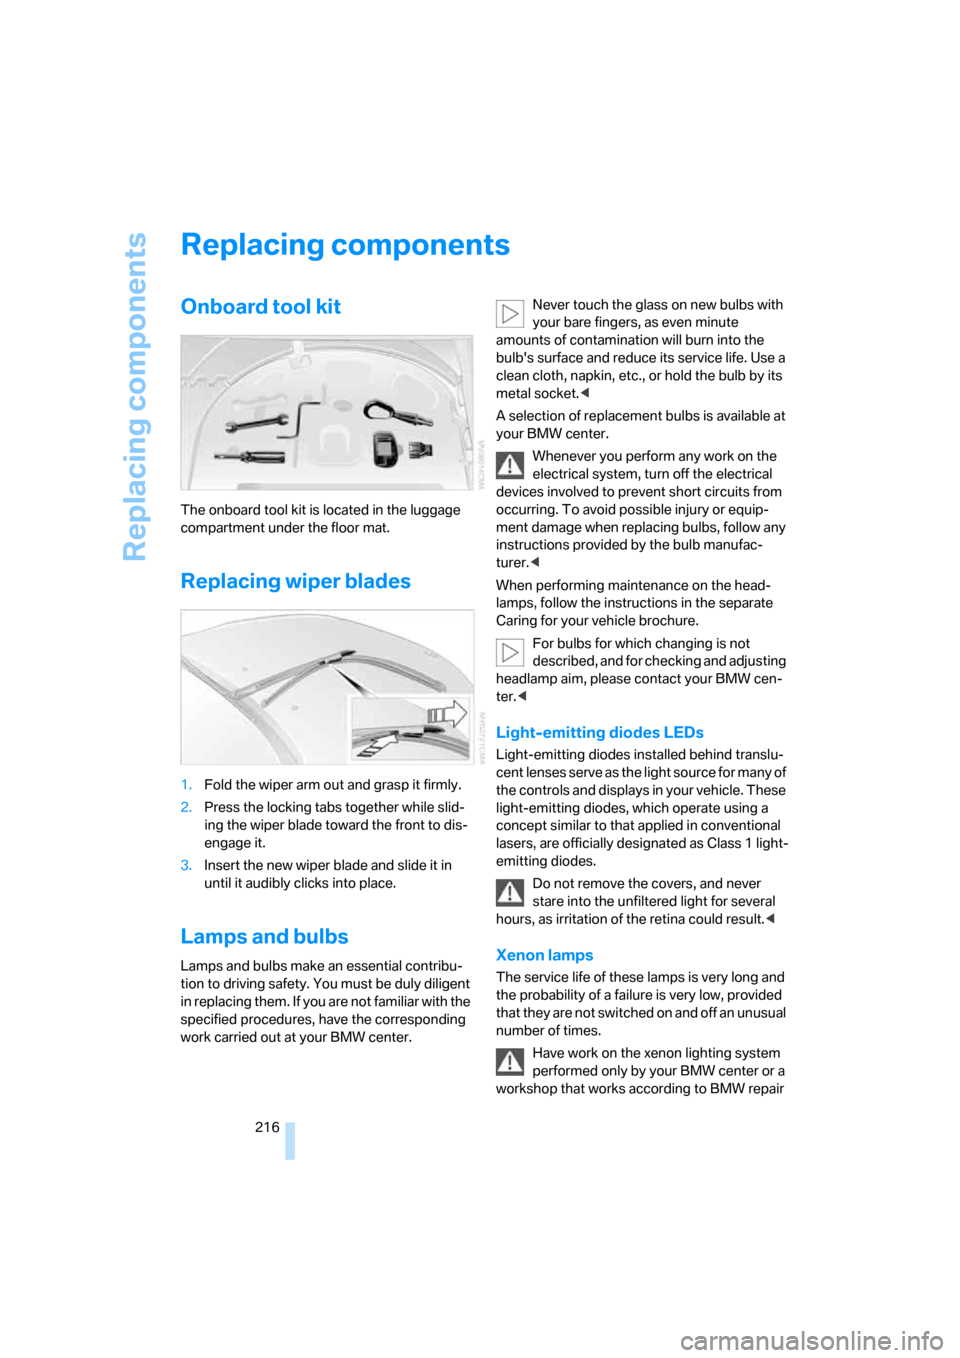
The onboard tool kit is located in the luggage
compartment under the floor mat.
Replacing wiper blades
1.Fold the wiper arm out and grasp it firmly.
2.Press the locking tabs together while slid-
ing the wiper blade toward the front to dis-
engage it.
3.Insert the new wiper blade and slide it in
until it audibly clicks into place.
Lamps and bulbs
Lamps and bulbs make an essential contribu-
tion to driving safety. You must be duly diligent
in replacing them. If you are not familiar with the
specified procedures, have the corresponding
work carried out at your BMW center.Never touch the glass on new bulbs with
your bare fingers, as even minute
amounts of contamination will burn into the
bulb's surface and reduce its service life. Use a
clean cloth, napkin, etc., or hold the bulb by its
metal socket.<
A selection of replacement bulbs is available at
your BMW center.
Whenever you perform any work on the
electrical system, turn off the electrical
devices involved to prevent short circuits from
occurring. To avoid possible injury or equip-
ment damage when replacing bulbs, follow any
instructions provided by the bulb manufac-
turer.<
When performing maintenance on the head-
lamps, follow the instructions in the separate
Caring for your vehicle brochure.
For bulbs for which changing is not
described, and for checking and adjusting
headlamp aim, please contact your BMW cen-
ter.<
Light-emitting diodes LEDs
Light-emitting diodes installed behind translu-
cent lenses serve as the light source for many of
the controls and displays in your vehicle. These
light-emitting diodes, which operate using a
concept similar to that applied in conventional
lasers, are officially designated as Class 1 light-
emitting diodes.
Do not remove the covers, and never
stare into the unfiltered light for several
hours, as irritation of the retina could result.<
Xenon lamps
The service life of these lamps is very long and
the probability of a failure is very low, provided
that they are not switched on and off an unusual
number of times.
Have work on the xenon lighting system
performed only by your BMW center or a
workshop that works according to BMW repair
Page 219 of 262
Mobility
217Reference
At a glance
Controls
Driving tips
Communications
Navigation
Entertainment
procedures with correspondingly trained per-
sonnel. Due to the high voltage involved, there
is a danger to life and limb when work is carried
out improperly.<
Parking lamps, roadside parking
lamps, daytime running lamps
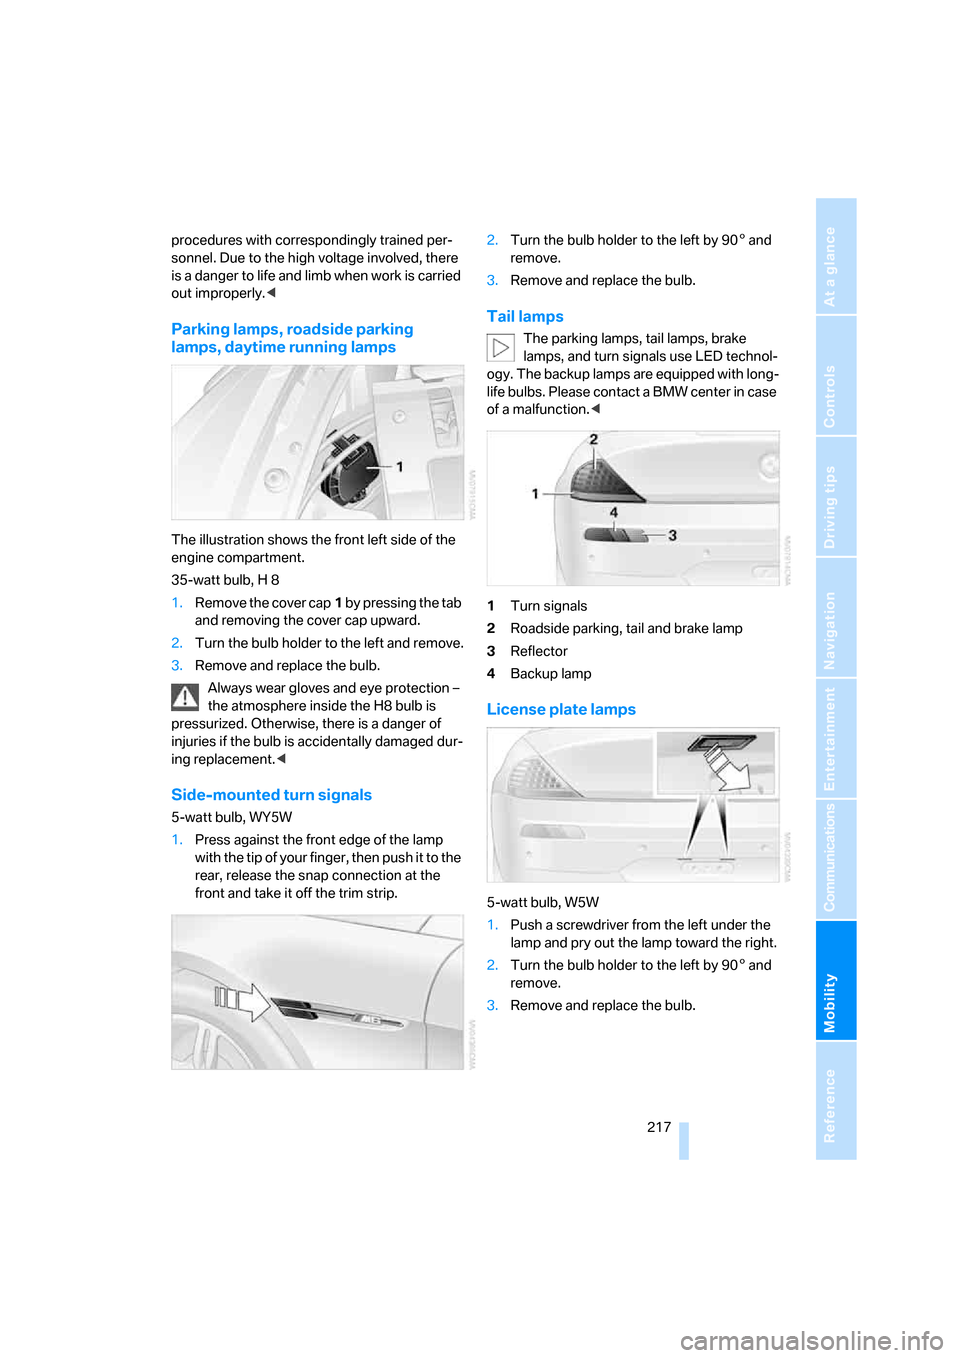
The illustration shows the front left side of the
engine compartment.
35-watt bulb, H 8
1.Remove the cover cap1 by pressing the tab
and removing the cover cap upward.
2.Turn the bulb holder to the left and remove.
3.Remove and replace the bulb.
Always wear gloves and eye protection –
the atmosphere inside the H8 bulb is
pressurized. Otherwise, there is a danger of
injuries if the bulb is accidentally damaged dur-
ing replacement.<
Side-mounted turn signals
5-watt bulb, WY5W
1.Press against the front edge of the lamp
with the tip of your finger, then push it to the
rear, release the snap connection at the
front and take it off the trim strip.2.Turn the bulb holder to the left by 905 and
remove.
3.Remove and replace the bulb.
Tail lamps
The parking lamps, tail lamps, brake
lamps, and turn signals use LED technol-
ogy. The backup lamps are equipped with long-
life bulbs. Please contact a BMW center in case
of a malfunction.<
1Turn signals
2Roadside parking, tail and brake lamp
3Reflector
4Backup lamp
License plate lamps
5-watt bulb, W5W
1.Push a screwdriver from the left under the
lamp and pry out the lamp toward the right.
2.Turn the bulb holder to the left by 905 and
remove.
3.Remove and replace the bulb.
Page 220 of 262
Replacing components
218
Repairing flat tire with
M Mobility System
To repair a flat tire, an M Mobility System is pro-
vided in the BMW M6. Using this system you
can apply a sealant in the inside of the tire, seal
off the damaged area, restore the tire inflation
pressure and then continue driving.
Safety measures in case of a breakdown:
Park the vehicle as far as possible from
passing traffic and on solid ground. Switch on
the hazard warning flashers.
Apply the handbrake and shift into first gear or
reverse with the manual transmission, or move
the selector lever into a drive position with the
sequential transmission. Have all vehicle occu-
pants get out of the vehicle and ensure that they
remain outside the immediate area in a safe
place, such as behind a guardrail.
If a warning triangle
* or portable hazard warning
lamp
* is required, set it up on the roadside at an
appropriate distance from the rear of the vehi-
cle. Comply with all safety guidelines and regu-
lations.<
Preparation
The M Mobility System is located in the lug-
gage compartment under the floor panel flap.
Do not remove foreign bodies which have pen-
etrated the tire if possible.
Corresponding information on using the
M Mobility System are also provided on
the device.<
Before using the M Mobility System,
observe the information on the sealant
bottle.
Please observe the best-by date on the
sealant bottle.<
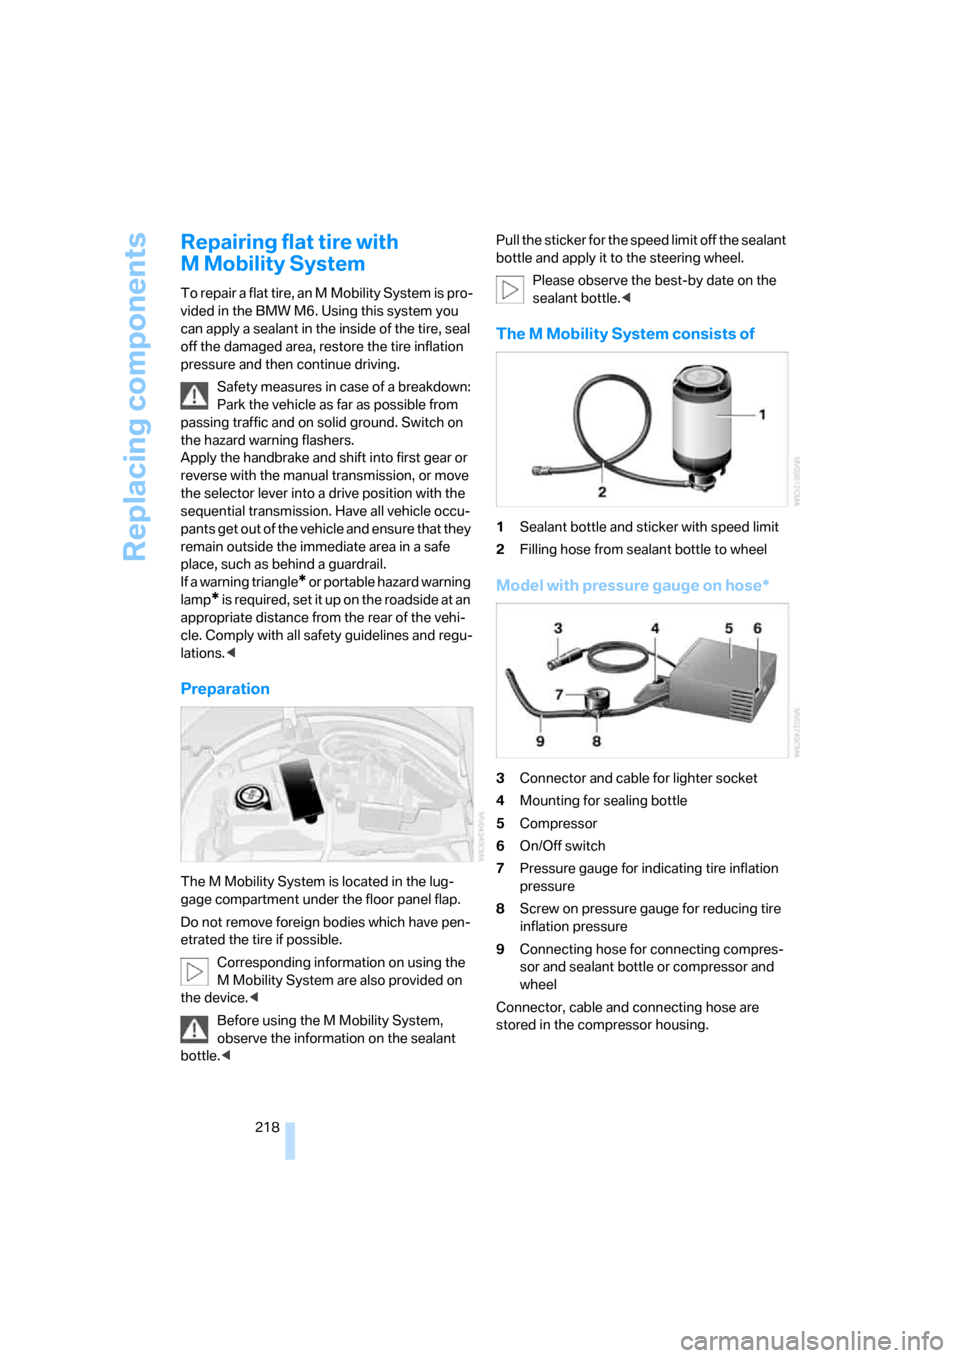
The M Mobility System consists of
1Sealant bottle and sticker with speed limit
2Filling hose from sealant bottle to wheel
Model with pressure gauge on hose*
3Connector and cable for lighter socket
4Mounting for sealing bottle
5Compressor
6On/Off switch
7Pressure gauge for indicating tire inflation
pressure
8Screw on pressure gauge for reducing tire
inflation pressure
9Connecting hose for connecting compres-
sor and sealant bottle or compressor and
wheel
Connector, cable and connecting hose are
stored in the compressor housing.
Page 222 of 262
Replacing components
220 4.Correct tire inflation pressure to 29 psi/
200 kPa. With the ignition switched on:
>Increase inflation pressure: switch on
device, position I. To check currently set
inflation pressure, briefly switch off
device.
Do not allow compressor to run
longer than 10 minutes, otherwise
the device will overheat and may be dam-
aged.<
>Reduce inflation pressure: press
button8 or turn screw8 on pressure
gauge.
If the inflation pressure is not held, drive
the vehicle again, refer to Distributing
sealant. Then repeat steps 1 to 4 once.
Using the M Mobility System can be ineffective
with tire damage from a size of approx. 0.16 in/
4 mm. Please contact the nearest BMW center,
refer to page225, or a workshop that works
according to BMW repair procedures with cor-
respondingly trained personnel if the tire can-
not be made ready for driving with the
M Mobility System.<
The tire inflation pressure must be at least
29 psi/200 kPa. Otherwise, do not con-
tinue driving.<
Continue driving
Do not exceed the permissible maximum
speed of 50 mph/80 km/h, otherwise
accidents can occur.<
Reinitialize the Flat Tire Monitor.
For details, refer to page86.
Have the defective tire and the sealant bottle of
the M Mobility System replaced as soon as
possible.<
Changing wheels*
Safety precautions in the event of a flat
tire or wheel change: park the vehicle as
far as possible from passing traffic and on solid
ground. Switch on the hazard warning flashers.
Apply the handbrake and shift into first gear or
reverse with the manual transmission, or move the selector lever into a drive position with the
sequential transmission.
Have all vehicle occupants get out of the vehicle
and ensure that they remain outside the imme-
diate area in a safe place, such as behind a
guardrail.
If a warning triangle
* or portable hazard warning
lamp
* is required, set it up on the roadside at an
appropriate distance from the rear of the vehi-
cle. Comply with all safety guidelines and regu-
lations.
Change the wheel only on a level, firm surface
which is not slippery. The vehicle or the jack
could slip to the side if you attempt to raise the
vehicle on a soft or slippery surface such as
snow, ice, tiles, etc.
Position the jack on a firm support surface.
Do not use a wooden block or similar object as a
support base for the jack, as this would prevent
it from extending to its full support height and
reduce its load-carrying capacity.
To avoid serious or fatal injury: never lie under
the vehicle, and never start the engine while it is
supported by the jack.<
What you will need
To avoid rattling noises later on, note the posi-
tions of the tools before removing them, then
return them to their initial positions after com-
pleting work.
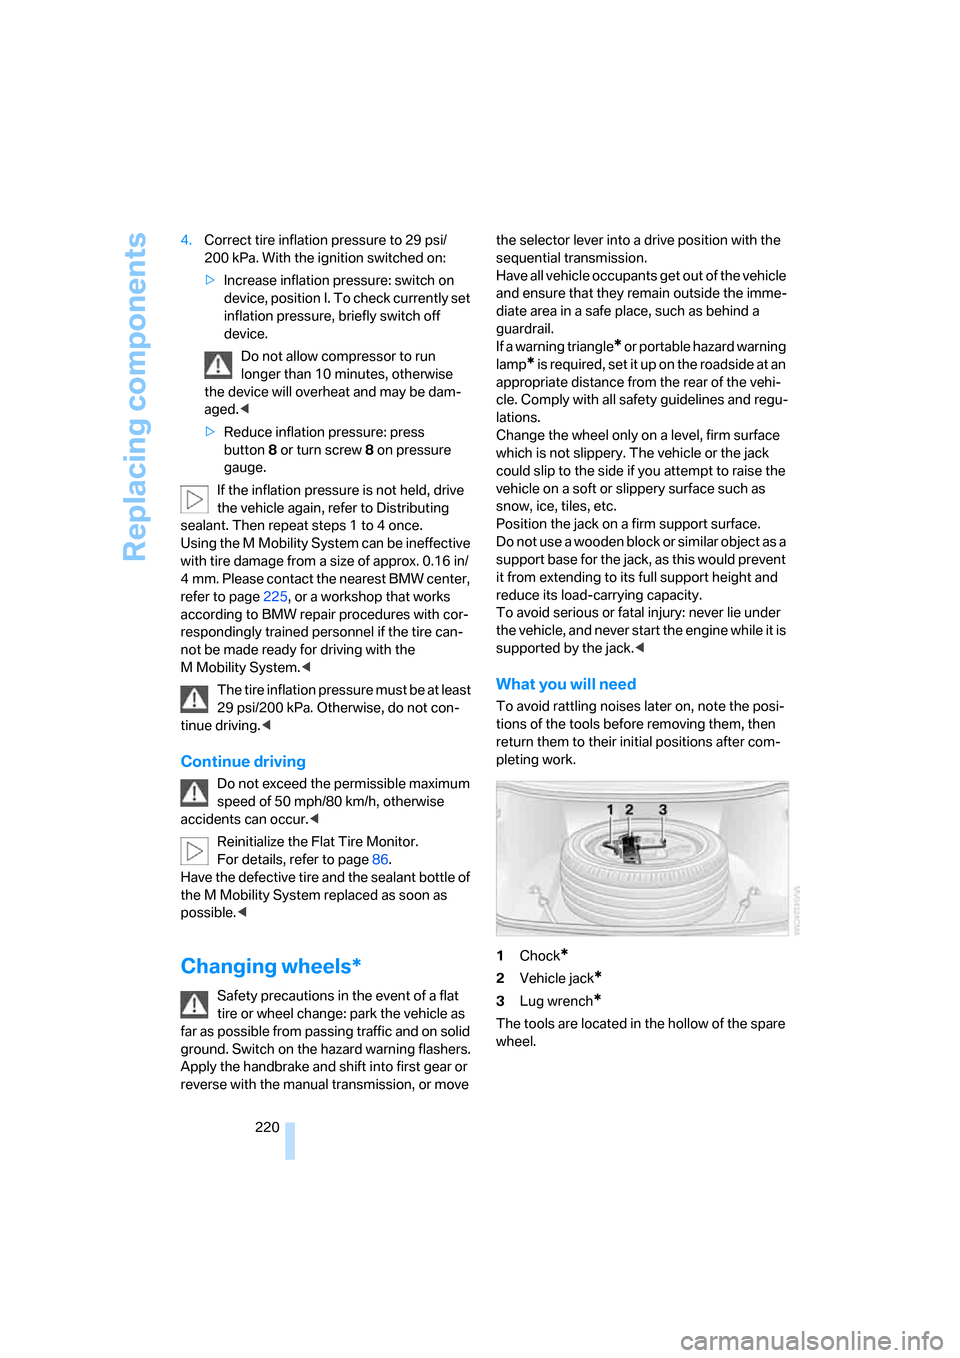
1Chock
*
2Vehicle jack*
3Lug wrench*
The tools are located in the hollow of the spare
wheel.
Page 226 of 262
Giving and receiving assistance
224
Giving and receiving assistance
Emergency request
Conditions for an emergency request:
>Full preparation package mobile phone.
With this equipment, an emergency request
is still possible when no mobile phone is
paired in the vehicle.
>BMW Assist is activated.
Activating BMW Assist, refer to page196.
>Radio readiness is activated.
>The BMW Assist system is logged on to a
mobile phone network.
>The emergency request system is opera-
ble.
Once your service contract for BMW Assist
expires, the BMW Assist system can be deacti-
vated by a BMW center without you having to
visit a workshop. Following deactivation of the
BMW Assist system, no emergency requests
can be made. The BMW Assist system can be
reactivated after concluding a new agreement
at a BMW center.
Initiating an emergency request
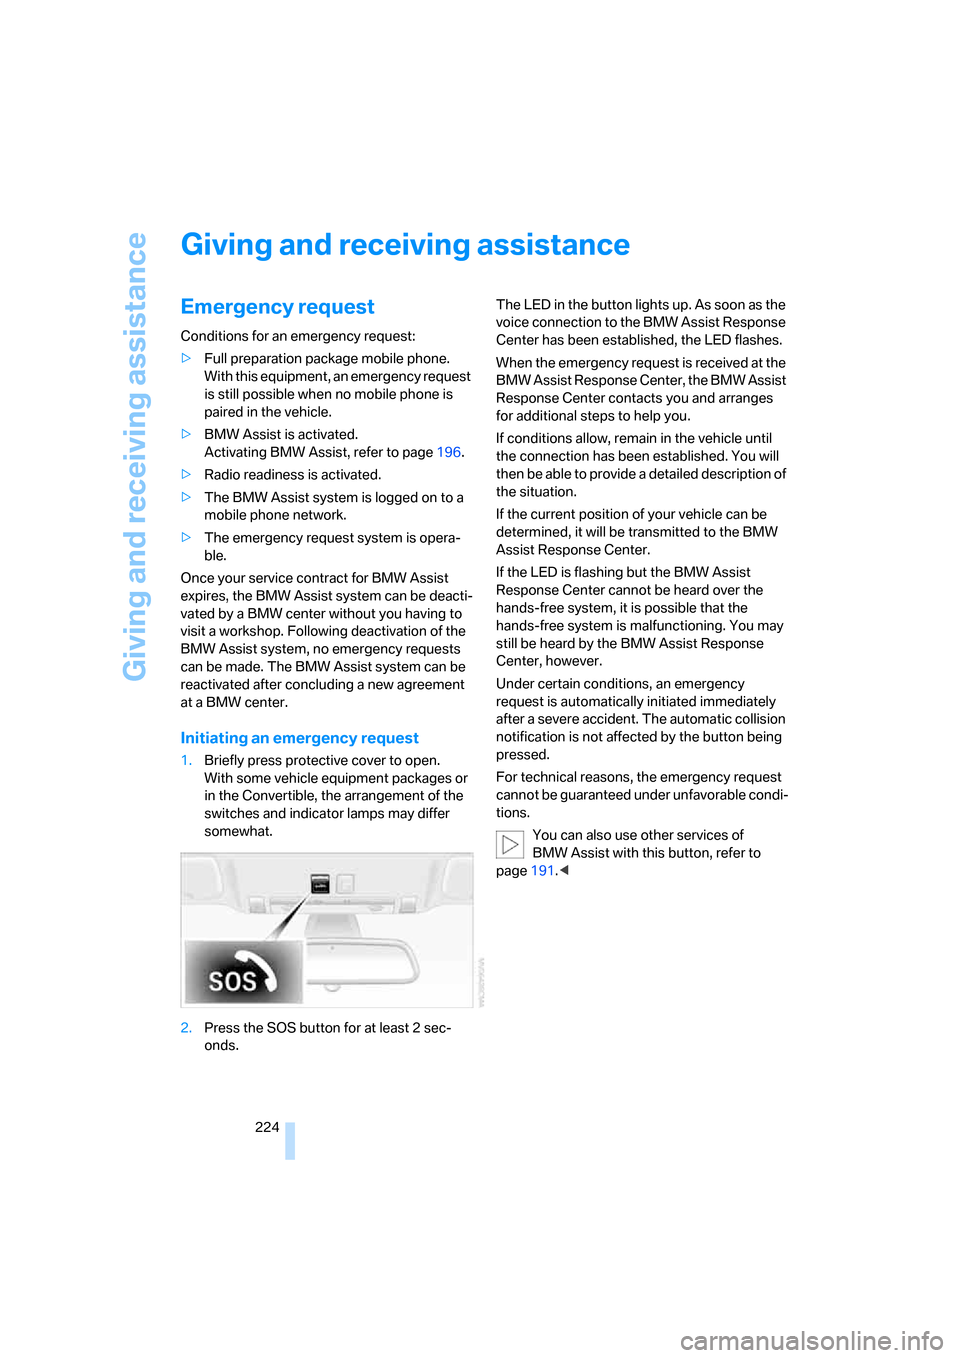
1.Briefly press protective cover to open.
With some vehicle equipment packages or
in the Convertible, the arrangement of the
switches and indicator lamps may differ
somewhat.
2.Press the SOS button for at least 2 sec-
onds.The LED in the button lights up. As soon as the
voice connection to the BMW Assist Response
Center has been established, the LED flashes.
When the emergency request is received at the
BMW Assist Response Center, the BMW Assist
Response Center contacts you and arranges
for additional steps to help you.
If conditions allow, remain in the vehicle until
the connection has been established. You will
then be able to provide a detailed description of
the situation.
If the current position of your vehicle can be
determined, it will be transmitted to the BMW
Assist Response Center.
If the LED is flashing but the BMW Assist
Response Center cannot be heard over the
hands-free system, it is possible that the
hands-free system is malfunctioning. You may
still be heard by the BMW Assist Response
Center, however.
Under certain conditions, an emergency
request is automatically initiated immediately
after a severe accident. The automatic collision
notification is not affected by the button being
pressed.
For technical reasons, the emergency request
cannot be guaranteed under unfavorable condi-
tions.
You can also use other services of
BMW Assist with this button, refer to
page191.<