heating BMW M6 CONVERTIBLE 2002 Owners Manual
[x] Cancel search | Manufacturer: BMW, Model Year: 2002, Model line: M6 CONVERTIBLE, Model: BMW M6 CONVERTIBLE 2002Pages: 186, PDF Size: 2.77 MB
Page 4 of 186

Contents
© 2001 Bayerische Motoren Werke
Aktiengesellschaft
Munich, Germany
Reprinting, including excerpts, only with the
written consent of BMW AG, Munich.
Order No. 01 41 0 156 213
US English VIII/2001
Printed in Germany
Printed on environmentally friendly paper
(bleached without chlorine, suitable for recycling).
Overview
Controls and features
Cockpit14
Instrument cluster15
Indicator and warning lamps19
Steering wheel with multifunction
buttons22
Warning triangle23
First-aid kit23
Refueling24
Fuel specifications25
Tire inflation pressure26
Locks and security systems:
Keys32
Central locking system32
Opening and closing Ð via the
door lock33
Opening and closing Ð via the
remote control34
Opening and closing Ð from the
inside37
Luggage compartment lid/
Tailgate38
Rear window40
Luggage compartment42
Alarm system42
Electric power windows44
Sliding/tilt sunroof46
Adjustments:
Correct sitting posture48
Seats48
Manually-adjusted seat49
Electric power seats50
Head restraints52
BMW actice seat52
Safety belts53
Seat, mirror and steering wheel
memory54
Seat heating55
Adjusting steering wheel56
Heated steering wheel56
Mirrors57
Passenger safety systems:
Airbags58
Transporting children safely61
Vehicle Memory, Key
Memory64
Driving:
Steering/Ignition lock66
Starting the engine66
Switching off the engine68
Parking brake68
Manual transmission69
Automatic transmission70
Automatic transmission with
Steptronic73
Indicator/Headlamp flasher76
Washer/Wiper system/Rain
sensor76
Cruise control78
Everything under control:
Odometer, outside temperature
display80
Tachometer81
Energy control81
Fuel gauge81
Coolant temperature gauge82
Service Interval Display82
Check Control83
Computer86
Multi-Information Display
(MID)87
Digital clock in the MID89
Computer in the MID91
Contents
Page 19 of 186
19n
OverviewControlsMaintenanceRepairsDataIndex
Indicator and warning lamps
Technology that monitors itself
The system runs a check on the
warning and indicator lamps marked by
"
l
" each time you switch on the igni-
tion. They each light up once for
different periods of time.
If a fault should occur in one of these
systems, the corresponding lamp does
not go out after the engine is started or
it lights up while the vehicle is moving.
The following section describes how
you should respond.
Red: stop immediately
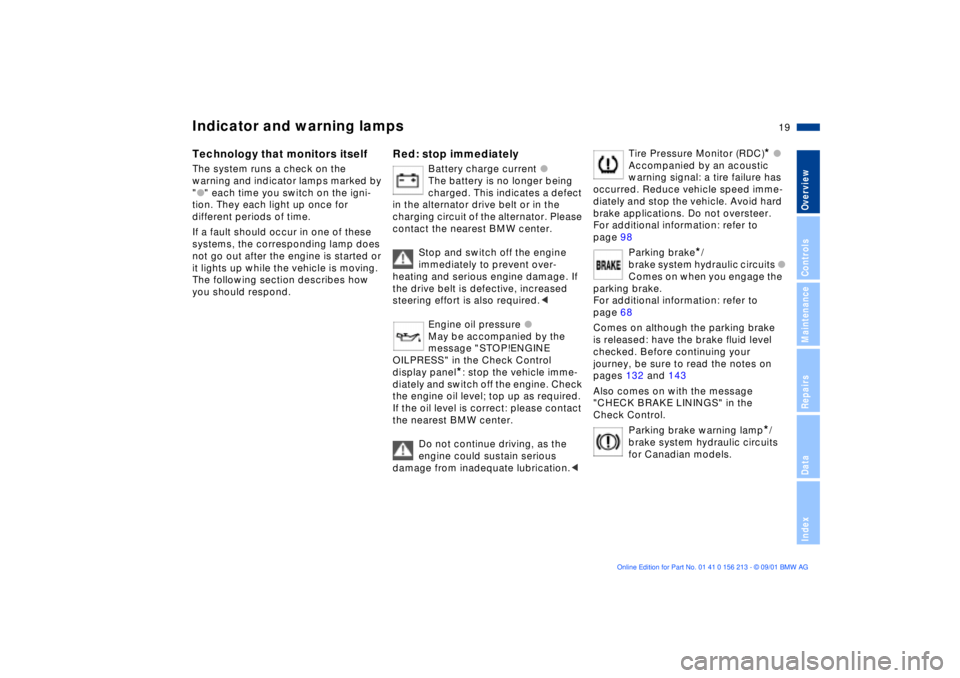
Battery charge current
l
The battery is no longer being
charged. This indicates a defect
in the alternator drive belt or in the
charging circuit of the alternator. Please
contact the nearest BMW center.
Stop and switch off the engine
immediately to prevent over-
heating and serious engine damage. If
the drive belt is defective, increased
steering effort is also required.
<
Engine oil pressure
l
May be accompanied by the
message "STOP!ENGINE
OILPRESS" in the Check Control
display panel
*
: stop the vehicle imme-
diately and switch off the engine. Check
the engine oil level; top up as required.
If the oil level is correct: please contact
the nearest BMW center.
Do not continue driving, as the
engine could sustain serious
damage from inadequate lubrication.
<
Tire Pressure Monitor (RDC)
*
l
Accompanied by an acoustic
warning signal: a tire failure has
occurred. Reduce vehicle speed imme-
diately and stop the vehicle. Avoid hard
brake applications. Do not oversteer.
For additional information: refer to
page 98
Parking brake
*
/
brake system hydraulic circuits
l
Comes on when you engage the
parking brake.
For additional information: refer to
page 68
Comes on although the parking brake
is released: have the brake fluid level
checked. Before continuing your
journey, be sure to read the notes on
pages 132 and 143
Also comes on with the message
"CHECK BRAKE LININGS" in the
Check Control.
Parking brake warning lamp
*
/
brake system hydraulic circuits
for Canadian models.
Page 55 of 186
55n
OverviewControlsMaintenanceRepairsDataIndex
Seat, mirror and steering wheel memory Seat heating
*
Your BMW center can adjust your
vehicle's systems in such a
manner that your personalized settings
are automatically called up for the seat,
mirror and steering wheel positions
when you unlock the vehicle with your
personal remote control key.<
Before using the key memory
feature to unlock the vehicle
always ensure that no objects are
stored in the footwell behind the
driver's seat. If you fail to do so,
persons or objects could be injured or
damaged if the seat should move back-
ward.<
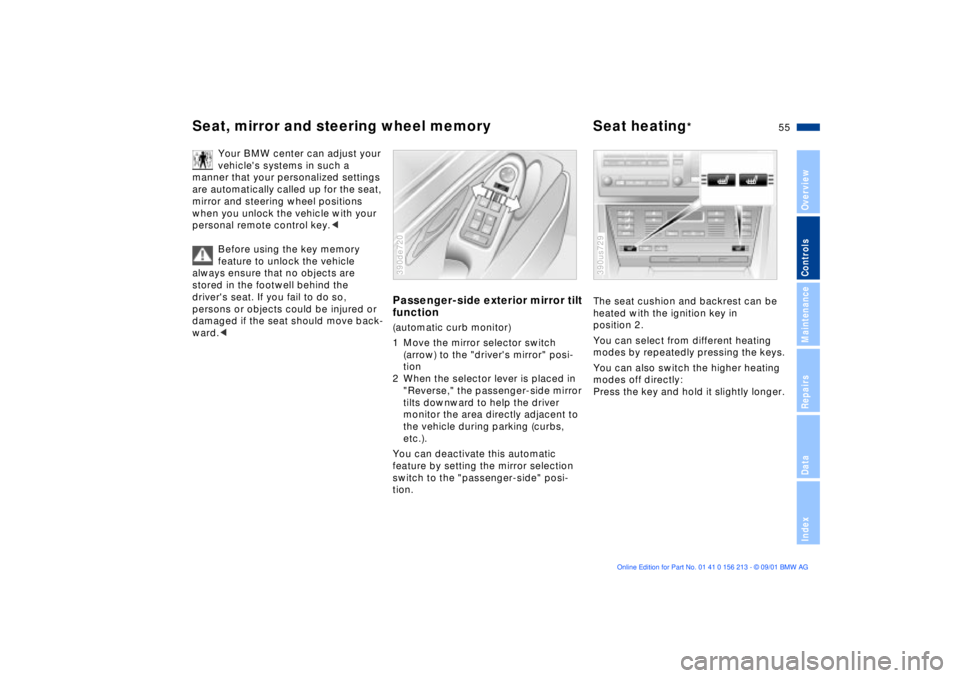
Passenger-side exterior mirror tilt
function(automatic curb monitor)
1 Move the mirror selector switch
(arrow) to the "driver's mirror" posi-
tion
2 When the selector lever is placed in
"Reverse," the passenger-side mirror
tilts downward to help the driver
monitor the area directly adjacent to
the vehicle during parking (curbs,
etc.).
You can deactivate this automatic
feature by setting the mirror selection
switch to the "passenger-side" posi-
tion.390de720
The seat cushion and backrest can be
heated with the ignition key in
position 2.
You can select from different heating
modes by repeatedly pressing the keys.
You can also switch the higher heating
modes off directly:
Press the key and hold it slightly longer.390us729
Page 56 of 186
56n
Adjusting steering wheel Heated steering wheel
*
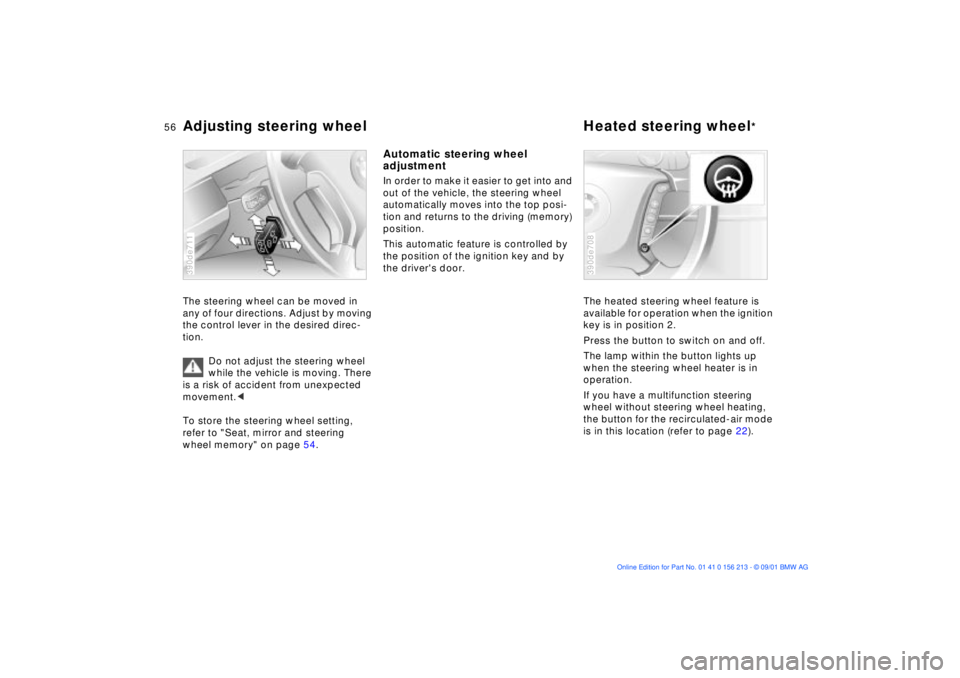
The steering wheel can be moved in
any of four directions. Adjust by moving
the control lever in the desired direc-
tion.
Do not adjust the steering wheel
while the vehicle is moving. There
is a risk of accident from unexpected
movement.<
To store the steering wheel setting,
refer to "Seat, mirror and steering
wheel memory" on page 54.390de711
Automatic steering wheel
adjustmentIn order to make it easier to get into and
out of the vehicle, the steering wheel
automatically moves into the top posi-
tion and returns to the driving (memory)
position.
This automatic feature is controlled by
the position of the ignition key and by
the driver's door.
The heated steering wheel feature is
available for operation when the ignition
key is in position 2.
Press the button to switch on and off.
The lamp within the button lights up
when the steering wheel heater is in
operation.
If you have a multifunction steering
wheel without steering wheel heating,
the button for the recirculated-air mode
is in this location (refer to page 22).
390de708
Page 105 of 186
105n
OverviewControlsMaintenanceRepairsDataIndex
Air conditioningTemperature
The numbers in the display
panel are reference figures for
general orientation. We
recommend a setting of 70 7
(22 6) for a congenial in-car climate.
When you start the vehicle, this system
adjusts the air to the selected tempera-
ture as quickly as possible, and then
maintains that temperature constantly.
Air distribution
You can direct the emerging
air toward the windows ,
toward your upper body or
into the footwell . All inter-
mediate settings are also available. In
the setting, there is a low flow of air
onto the windows to keep them free of
condensation.
Air supply
You can control the emerging
air's flow rate through an infi-
nitely-variable range. The
heating and ventilation
become more and more effective as the
air supply settings are increased. In the
"0" setting, the blower and climate
control are switched off and the outside
air supply is blocked.
Rear window defroster
The indicator lamp comes
on to indicate that the rear
window defroster is in operation. The
rear window defroster switches off
automatically.
Cooling
The air conditioning cools
and dehumidifies the
incoming air before reheating it to the
selected temperature. Depending on
the weather, the windshield may fog
over briefly when the engine is started.
You can reduce condensation forming
on the windows by switching on the air
conditioning.
Condensation forms in the air
conditioning system during opera-
tion, which then exits under the vehicle.
Traces of condensed water of this kind
are thus normal.<
Recirculated-air mode
You can respond to
unpleasant odors in the
surrounding environment by using this
mode to temporarily suspend the flow
of outside air into the vehicle's interior.
The system then recirculates the air
currently within the vehicle.
If your vehicle is equipped with a multi-
function steering wheel
featuring a
recirculated-air button then you can
also select the recirculated-air mode
from this location (refer to page 22).
If the windows should fog over in
the recirculated-air mode, switch
the recirculated-air mode off and
increase the air supply as required.<
Page 108 of 186
108n
Automatic climate control
*
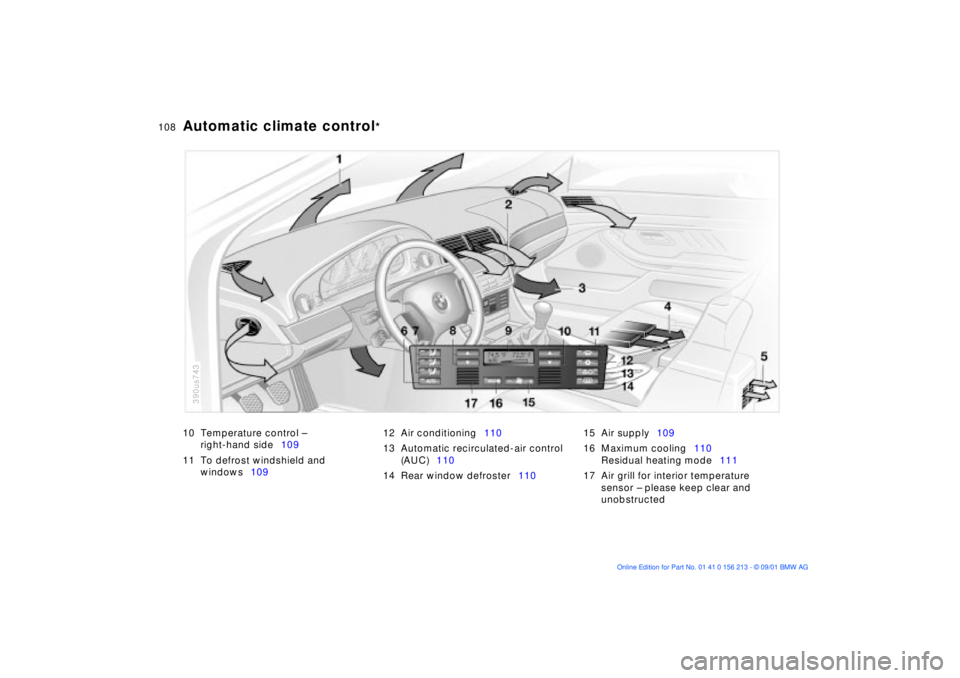
10 Temperature control Ð
right-hand side109
11 To defrost windshield and
windows10912 Air conditioning110
13 Automatic recirculated-air control
(AUC)110
14 Rear window defroster11015 Air supply109
16 Maximum cooling110
Residual heating mode111
17 Air grill for interior temperature
sensor Ð please keep clear and
unobstructed
390us743
Page 109 of 186
109n
OverviewControlsMaintenanceRepairsDataIndex
Automatic climate control
*
Tips for pleasant drivingUse the automatic system, that is,
press AUTO button 6. Select an interior
temperature that you find comfortable.
Detailed setting options are described
for you in the following section.
You can make the settings of your
vehicle in such a manner that,
when you unlock the vehicle with the
remote control of your personal key,
your own personalized setting for the
automatic climate control is initiated.< Automatic air distribution
The AUTO program
assumes the adjustment of
the air distribution and the air supply for
you and also adapts the temperature to
external influences (summer, winter) to
meet preferences you can specify.
Individual air distribution
You can cancel the AUTO
program by selecting
specific distribution patterns
to suit your own individual
requirements. While the
AUTO program is then deactivated, the
automatic airflow control remains in
operation. The system directs air to the
windows , the upper body and
into the footwells . You can reacti-
vate the automatic air distribution mode
by selecting the AUTO button.
Temperature
You can make individual
temperature settings on the
driver's side or the front
passenger side. Your selection appears
in display panel 7. The numbers that
appear in the panel are reference
figures for interior temperature. We
recommend a setting of 72 7 (22 6)
for a congenial interior climate, even
when the air conditioner is in operation.
When you start the vehicle, the system
ensures that the selected temperature
is achieved as quickly as possible. It
then maintains this temperature,
regardless of the season.
Air supply
AUTO appears in display
panel 9, while the AUTO
program automatically controls the flow
of incoming air, refer to overview on
page 107. You can use "+" and "Ð" to
vary the airflow. When your setting is
displayed by bars, the automatic airflow
is switched off. Automatic air distribu-
tion maintains its setting. You can reac-
tivate the automatic airflow by pressing
the AUTO button.
When you press "Ð " during operation at
minimum blower speed all displays are
canceled: the blower, heating and air
conditioner are switched off. The
outside air supply is deactivated. By
pressing any button of the automatic
climate control (except the MAX
button 16), you can switch the system
back on.
To defrost windshield and
windows
This program quickly
removes ice and conden-
sation from the windshield and the side
windows.
Page 111 of 186
111n
OverviewControlsMaintenanceRepairsDataIndex
Automatic climate control
*
Residual heating mode
The heat which is stored in
the engine is utilized for
heating the interior when the engine
has been switched off (while waiting at
a railroad crossing, for instance).
In ignition key position 1, you can alter
the settings of the automatic climate
control. In ignition key position 0, the
system automatically directs heated air
to the windshield, side windows and
footwells.
This function is available for oper-
ation when the outside tempera-
ture is below approximately 59 7
(15 6), with the engine warm from
recent operation and an adequate
charge in the battery. The LED on the
button will light up when all conditions
have been met.<
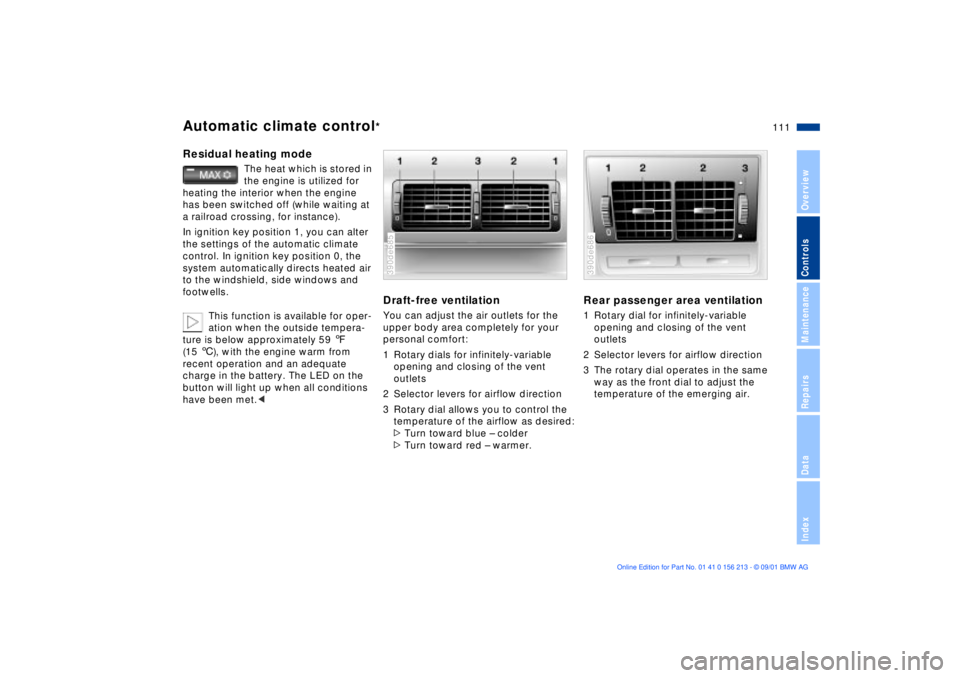
Draft-free ventilationYou can adjust the air outlets for the
upper body area completely for your
personal comfort:
1 Rotary dials for infinitely-variable
opening and closing of the vent
outlets
2 Selector levers for airflow direction
3 Rotary dial allows you to control the
temperature of the airflow as desired:
>Turn toward blue Ð colder
>Turn toward red Ð warmer.390de685
Rear passenger area ventilation1 Rotary dial for infinitely-variable
opening and closing of the vent
outlets
2 Selector levers for airflow direction
3 The rotary dial operates in the same
way as the front dial to adjust the
temperature of the emerging air.390de686
Page 133 of 186
133n
OverviewControlsMaintenanceRepairsDataIndex
Information for your safetyThe factory-approved radial tires are
matched to the vehicle and have been
selected to provide optimum safety and
driving comfort.
It is not merely the tire's service life, but
also driving comfort and Ð above all else
Ð driving safety which depend on the
condition of the tires and the mainte-
nance of the specified tire pressure.
Incorrect inflation pressures are a
frequent cause of tire problems
and tire damage. Tire pressure also has
a major effect on your BMW's handling
response. We recommend that you
check the tire pressure Ð remember to
check the spare as well Ð before every
extended trip, as well as at least every
two weeks in normal use (refer to
page 26). Failure to observe these
precautions can result in incorrect tire
pressures, which cause instable
handling response as well as tire
damage, and can ultimately lead to an
accident.<
Tire tread Ð Tire damageInspect your tires frequently for tread
wear, signs of damage and for foreign
objects lodged in the tread. Check the
tread depth.
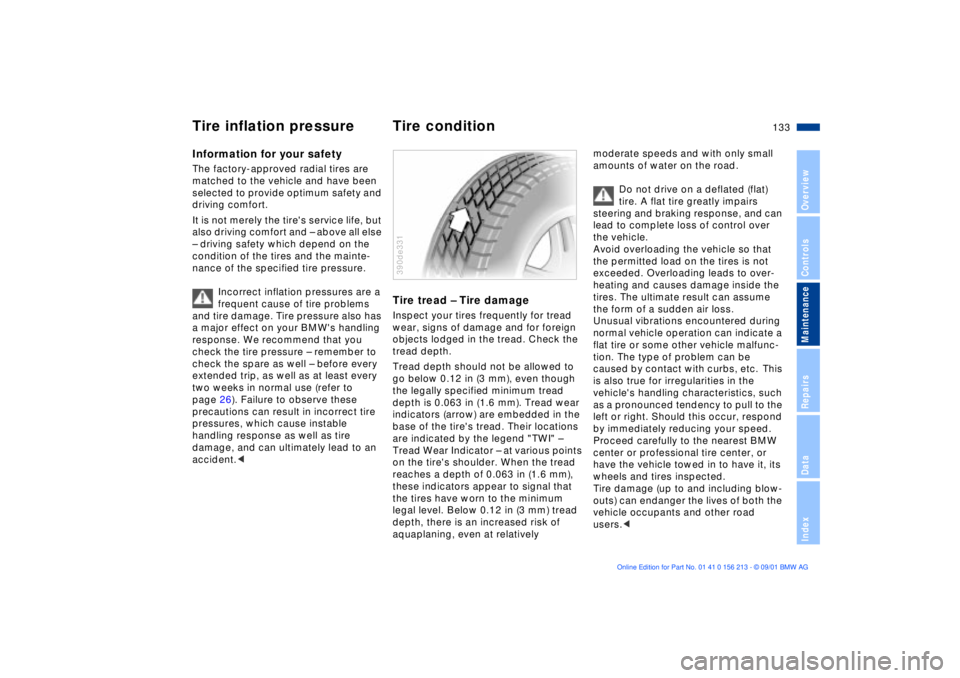
Tread depth should not be allowed to
go below 0.12 in (3 mm), even though
the legally specified minimum tread
depth is 0.063 in (1.6 mm). Tread wear
indicators (arrow) are embedded in the
base of the tire's tread. Their locations
are indicated by the legend "TWI" Ð
Tread Wear Indicator Ð at various points
on the tire's shoulder. When the tread
reaches a depth of 0.063 in (1.6 mm),
these indicators appear to signal that
the tires have worn to the minimum
legal level. Below 0.12 in (3 mm) tread
depth, there is an increased risk of
aquaplaning, even at relatively 390de331
moderate speeds and with only small
amounts of water on the road.
Do not drive on a deflated (flat)
tire. A flat tire greatly impairs
steering and braking response, and can
lead to complete loss of control over
the vehicle.
Avoid overloading the vehicle so that
the permitted load on the tires is not
exceeded. Overloading leads to over-
heating and causes damage inside the
tires. The ultimate result can assume
the form of a sudden air loss.
Unusual vibrations encountered during
normal vehicle operation can indicate a
flat tire or some other vehicle malfunc-
tion. The type of problem can be
caused by contact with curbs, etc. This
is also true for irregularities in the
vehicle's handling characteristics, such
as a pronounced tendency to pull to the
left or right. Should this occur, respond
by immediately reducing your speed.
Proceed carefully to the nearest BMW
center or professional tire center, or
have the vehicle towed in to have it, its
wheels and tires inspected.
Tire damage (up to and including blow-
outs) can endanger the lives of both the
vehicle occupants and other road
users.<
Tire inflation pressure Tire condition
Page 178 of 186
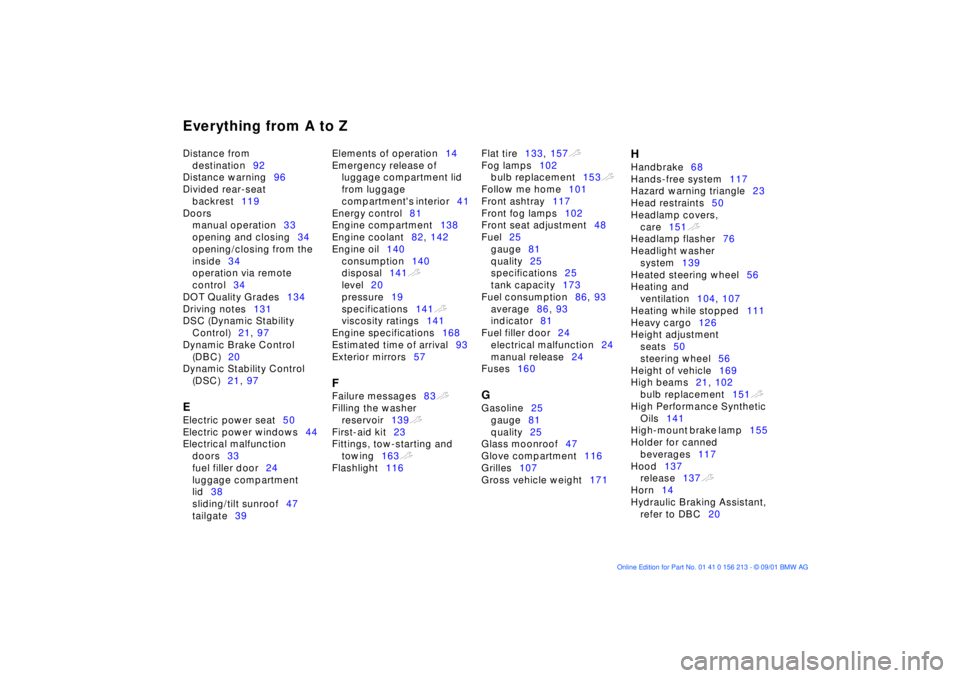
Everything from A to ZDistance from
destination92
Distance warning96
Divided rear-seat
backrest119
Doors
manual operation33
opening and closing34
opening/closing from the
inside34
operation via remote
control34
DOT Quality Grades134
Driving notes131
DSC (Dynamic Stability
Control)21, 97
Dynamic Brake Control
(DBC)20
Dynamic Stability Control
(DSC)21, 97 E
Electric power seat50
Electric power windows44
Electrical malfunction
doors33
fuel filler door24
luggage compartment
lid38
sliding/tilt sunroof47
tailgate39 Elements of operation14
Emergency release of
luggage compartment lid
from luggage
compartment's interior41
Energy control81
Engine compartment138
Engine coolant82, 142
Engine oil140
consumption140
disposal141t
level20
pressure19
specifications141t
viscosity ratings141
Engine specifications168
Estimated time of arrival93
Exterior mirrors57
F
Failure messages83t
Filling the washer
reservoir139t
First-aid kit23
Fittings, tow-starting and
towing163t
Flashlight116 Flat tire133, 157t
Fog lamps102
bulb replacement153t
Follow me home101
Front ashtray117
Front fog lamps102
Front seat adjustment48
Fuel25
gauge81
quality25
specifications25
tank capacity173
Fuel consumption86, 93
average86, 93
indicator81
Fuel filler door24
electrical malfunction24
manual release24
Fuses160
G
Gasoline25
gauge81
quality25
Glass moonroof47
Glove compartment116
Grilles107
Gross vehicle weight171
H
Handbrake68
Hands-free system117
Hazard warning triangle23
Head restraints50
Headlamp covers,
care151t
Headlamp flasher76
Headlight washer
system139
Heated steering wheel56
Heating and
ventilation104, 107
Heating while stopped111
Heavy cargo126
Height adjustment
seats50
steering wheel56
Height of vehicle169
High beams21, 102
bulb replacement151t
High Performance Synthetic
Oils141
High-mount brake lamp155
Holder for canned
beverages117
Hood137
release137t
Horn14
Hydraulic Braking Assistant,
refer to DBC20