trunk BMW M6 CONVERTIBLE 2013 F12 User Guide
[x] Cancel search | Manufacturer: BMW, Model Year: 2013, Model line: M6 CONVERTIBLE, Model: BMW M6 CONVERTIBLE 2013 F12Pages: 222, PDF Size: 7.3 MB
Page 47 of 222
The rear window opens and closes automati‐
cally when the convertible top is opened or
closed.
Closing Pull the switch.
The rear window closes while the switch
is being held.
Pinch protection system
If the closing force exceeds a specific value as
a window closes, the closing action is inter‐ rupted.
The window reopens slightly.
The rear window is not equipped with pinch
protection.
Danger of pinching even with pinch pro‐
tection
Even with the pinch protection system, check
that the window's closing path is clear; other‐
wise, the closing action may not stop in certain
situations, e.g., if thin objects are present.◀
No window accessories
Do not install any accessories in the
range of movement of the windows; otherwise, the pinch protection system will be impaired.◀
Closing without the pinch protection system
Keep the closing path clear
Monitor the closing process and make
sure that the closing path of the window is clear; otherwise, injuries may result.◀
For example, if there is an external danger or if
ice on the windows prevents a window from
closing normally, proceed as follows:1.Pull the switch past the resistance point
and hold it there.The pinch protection is limited and the
window reopens slightly if the closing force
exceeds a certain value.2.Pull the switch past the resistance point
again within approx. 4 seconds and hold it
there.
The window closes without pinch protec‐
tion.
Convertible top
General information The convertible top can be opened or closed
at speeds up to approx. 25 mph/40 km/h.
If the vehicle is accelerated above a speed of
approx. 30 mph/50 km/h while the convertible
top is being moved, the convertible top move‐
ment stops.
Tips about the convertible top:
▷If possible, close the convertible top when
the vehicle is parked. A closed convertible
top protects it from weather-related dam‐
age and to some extent from theft.▷Event when the convertible top is closed,
only store valuables in the locked cargo
area.▷At higher speeds, vacuum produced in the
passenger compartment cause the
convertible top to begin to flatten. Increase
the amount of air via the automatic climate
control so that no vacuum is produced in
the vehicle.
Hints
The trunk lid cannot be opened if the
convertible top is not fully opened or closed.
Safety information about the convertible
top
▷With temperatures below +14 ℉/-10 ℃ do
not open the convertible top; otherwise
damages could result.Seite 43Opening and closingControls43
Online Edition for Part no. 01 40 2 910 746 - VI/13
Page 48 of 222
▷Do not leave the open convertible top in
the convertible top well longer than one
day while the top is still wet; otherwise,
damage could result due to moisture.▷When opening the convertible top, make
sure there are no foreign bodies on top of
it.▷The convertible top pivots up during open‐
ing and closing. When the top is moved,
e.g., in garages, make sure that there is a
minimum height of 79 inches/2 meters;
otherwise, it damages may result.▷Do not place any objects on the convertible
top, otherwise, they could fall and cause
damage or injuries.▷When the rollover protection system is ex‐
tended, do not under any circumstances
move the convertible top.▷Always open or close the convertible top
completely. Convertible top and
convertible top well storage cover are
locked in the final positions. Driving with
the convertible tope or convertible top well
storage cover unlocked can result in dam‐
age.▷Do not reach into the convertible top
mechanism during the opening and closing
operation. Keep children away from the
opening path of the convertible top, other‐
wise, there is a risk of injury.▷When the convertible top is opened during
driving, be alert to traffic; otherwise, it may
result in an accident. If possible, do not
move the convertible top while driving in
reverse because rearward vision is se‐
verely impaired while the convertible top is
in motion. During windy conditions, do not
operate the convertible top while driving.
Do not drive faster than 30 mph/50 km/h;
otherwise, vehicle damage may occur.▷Do not attach any roof carrier systems;
otherwise, an accident may occur.◀Functional requirements
The ignition or radio ready state must be
switched on.
It is not possible to start the engine and oper‐
ate the convertible top simultaneously. When
the engine is started, the convertible top
movement is briefly interrupted.
Under the following conditions, the convertible
top movement cannot be moved and a Check
Control message is displayed.▷Cargo area partition is flipped up.▷Trunk lid is open.▷External temperature is too low.▷Vehicle system too low.▷Convertible top drive is overheating.▷Movement of the convertible top not al‐
lowed because of national regulations.▷Vehicle speed is too high.
Before opening and closing
▷Follow the safety instructions for the
convertible top.▷Make sure that the cargo area partition in
the cargo area is folded down.▷Make sure that the cargo does not push
against the cargo area partition from be‐
low.▷Make sure that the trunk lid is closed.
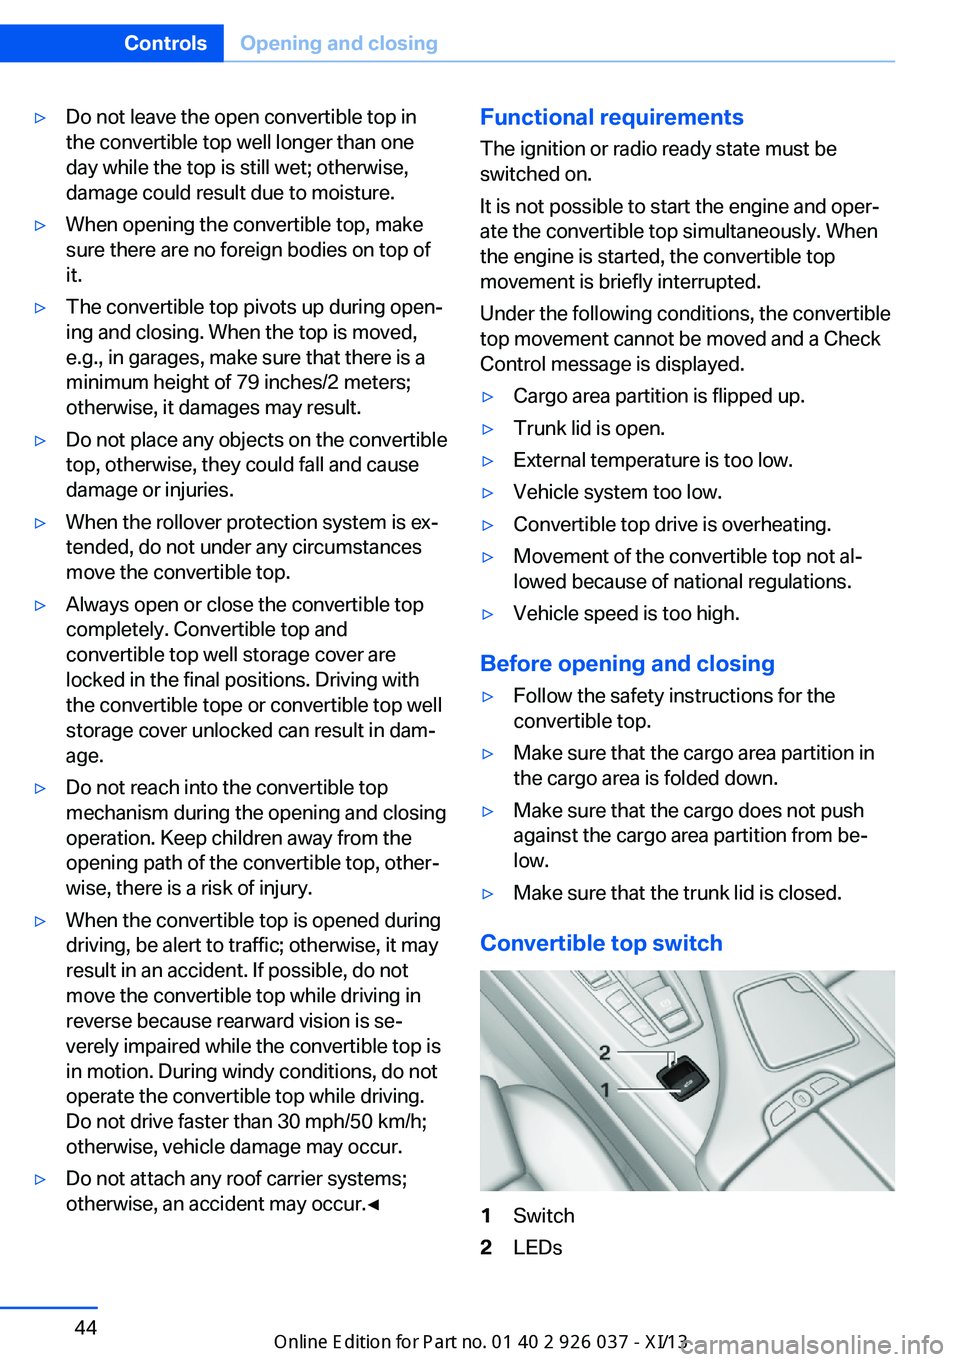
Convertible top switch
1Switch2LEDsSeite 44ControlsOpening and closing44
Online Edition for Part no. 01 40 2 910 746 - VI/13
Page 49 of 222
Opening and closing from the insideIn order to protect the battery, move the
convertible top only when the engine is run‐
ning if possible.
Before closing the convertible top, remove any
foreign objects from the windshield frame; oth‐
erwise, closing may be prevented.▷Press and hold the switch. The
convertible top opens while the
switch is being pressed.▷Pull the switch and hold it. The
convertible top closes while the
switch is being pulled.
Push or pull switch until the convertible top is
completely open or closed and the end of the
procedure is indicated by a corresponding
Check Control message. Always make sure
that the convertible top well storage cover is
completely closed. If the convertible top is
completely open or closed, convertible top and
convertible top well storage cover are latched.
The side windows and the rear window go
down when the convertible top control switch
is pulled or pushed.
LEDs
▷Left LED lights up green: convertible top is
opened or closed. If the operation is com‐
pleted, the LED goes out and a corre‐
sponding Check Control message is dis‐
played.▷Right LED flashes red after the switch is
released: operating sequence has not yet
concluded.▷Right LED comes on red when the switch
is pressed: cargo area partition is flipped
up, trunk lid is not closed or there is a mal‐
function. Convertible top cannot be moved.
In addition to the red LED, a check control
message is displayed.
Interruption
Always open/close the convertible top
completely
A convertible top that is not opened or closed
completely is not locked and represents a haz‐
ard.◀
The convertible top movement is interrupted if
the switch is released. The sequence can be
continued in the desired direction using the
switch.
If there is a longer interruption, convertible top
and convertible top well storage cover remain
approx. 10 minutes in the current position be‐
fore they slowly go down. The convertible top
and the convertible top well storage cover are
not locked. Operate switch again until the
convertible operation is terminated.
Convenient operation from outside
When equipped with Comfort Access the
convertible top can also be operated from out‐
side:▷Convenient opening with remote opera‐
tion, refer to page 34.▷Convenient closing with the remote con‐
trol, refer to page 34.
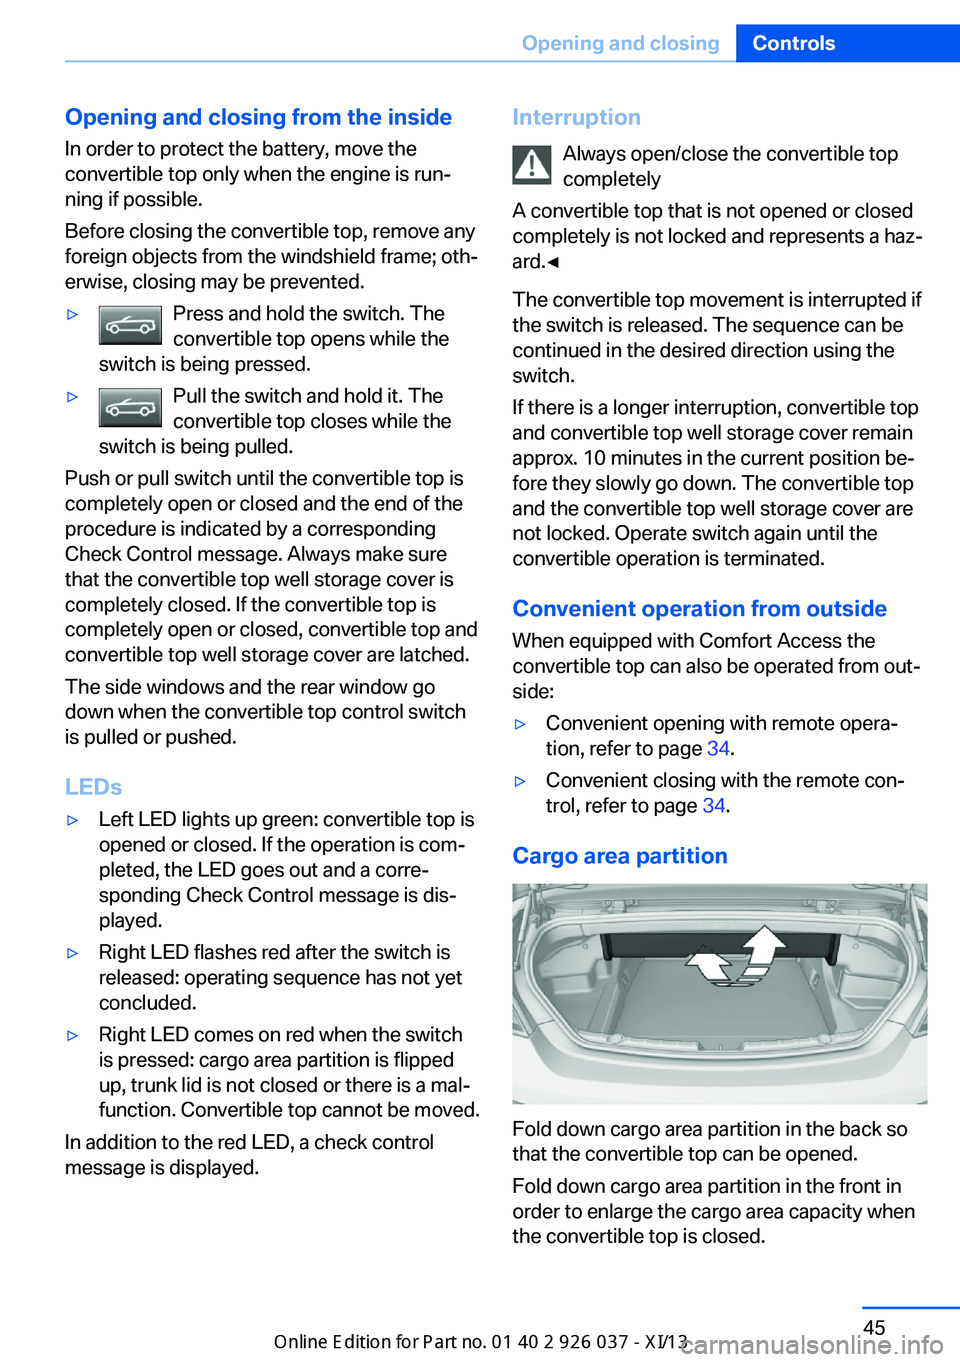
Cargo area partition
Fold down cargo area partition in the back so
that the convertible top can be opened.
Fold down cargo area partition in the front in
order to enlarge the cargo area capacity when
the convertible top is closed.
Seite 45Opening and closingControls45
Online Edition for Part no. 01 40 2 910 746 - VI/13
Page 50 of 222
Manually close convertible top
If there is a defect, the convertible top can be
manually closed. Two persons are necessary
to do this.
Do not manually open convertible top
and close it manually only in emergency
situations.
Do not manually open the convertible top. The
convertible top well storage cover cannot latch
if there is an electrical defect and would open
during driving.
Manually close the convertible top only in
emergency situations.
Damage can result from improper handling.◀
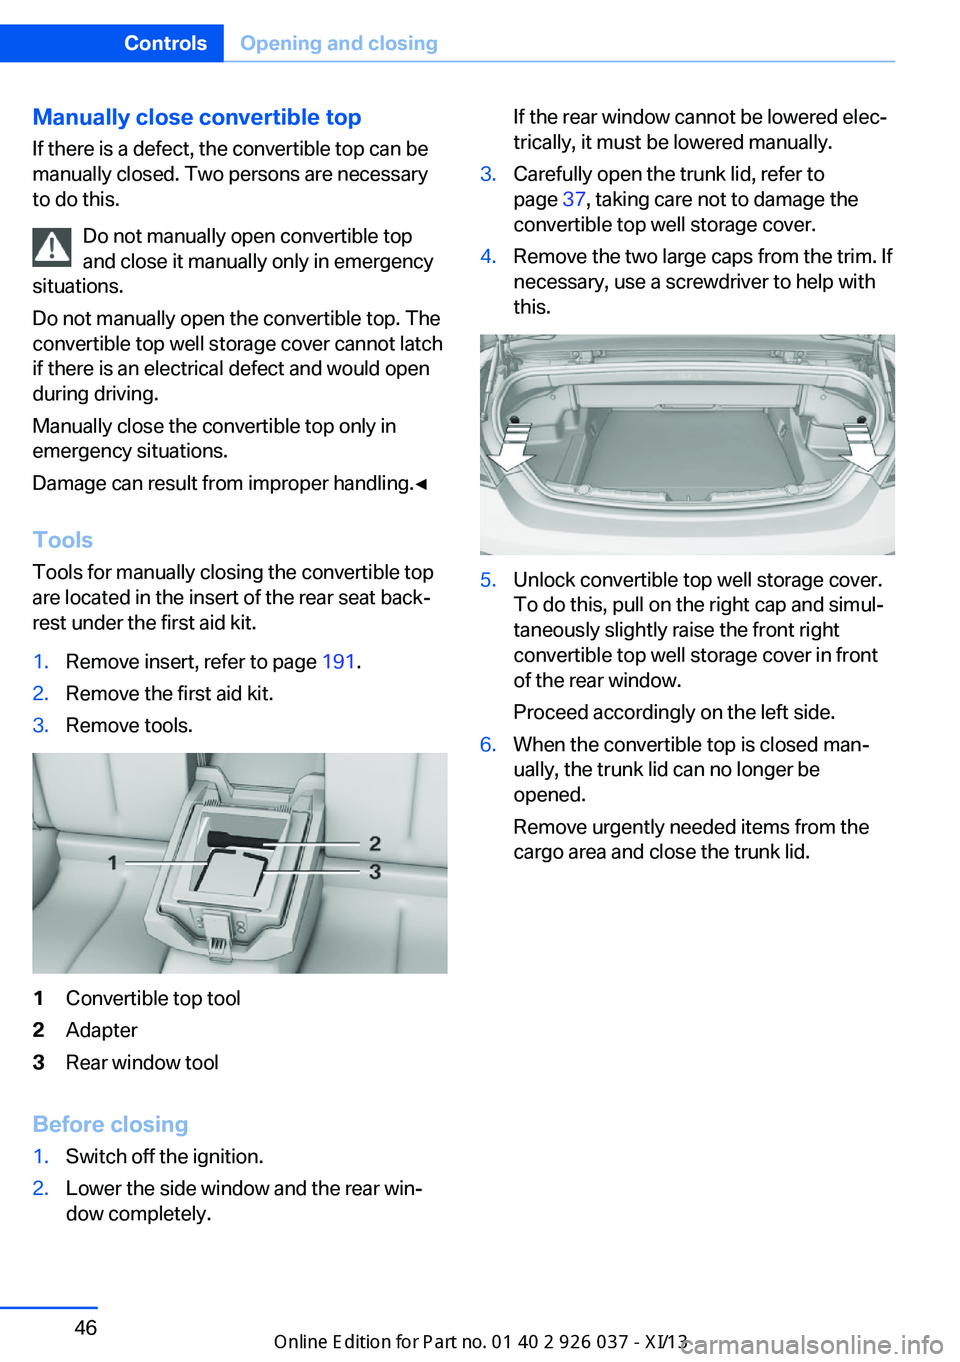
ToolsTools for manually closing the convertible top
are located in the insert of the rear seat back‐
rest under the first aid kit.1.Remove insert, refer to page 191.2.Remove the first aid kit.3.Remove tools.1Convertible top tool2Adapter3Rear window tool
Before closing
1.Switch off the ignition.2.Lower the side window and the rear win‐
dow completely.If the rear window cannot be lowered elec‐
trically, it must be lowered manually.3.Carefully open the trunk lid, refer to
page 37, taking care not to damage the
convertible top well storage cover.4.Remove the two large caps from the trim. If
necessary, use a screwdriver to help with
this.5.Unlock convertible top well storage cover.
To do this, pull on the right cap and simul‐
taneously slightly raise the front right
convertible top well storage cover in front
of the rear window.
Proceed accordingly on the left side.6.When the convertible top is closed man‐
ually, the trunk lid can no longer be
opened.
Remove urgently needed items from the
cargo area and close the trunk lid.Seite 46ControlsOpening and closing46
Online Edition for Part no. 01 40 2 910 746 - VI/13
Page 61 of 222
Storing1.Switch on the ignition.2.Set the desired position.3. Press the button. The LED in the
button lights up.4.Press the desired button 1 or 2. The LED
goes out.
If the M button is pressed accidentally:
Press the button again.
The LED goes out.
Calling up settings Do not retrieve the memory while driving
Do not retrieve the memory setting while
driving, as an unexpected movement of the
seat or steering wheel could result in an acci‐
dent.◀
Comfort function
1.Open the driver's door.2.Switch off the ignition.3.Briefly press the desired button 1 or 2.
The corresponding seat position is performed
automatically.
The procedure stops when a switch for adjust‐
ing the seat or one of the buttons is pressed.
Safety mode
1.Close the driver's door or switch on the ig‐
nition.2.Press and hold the desired button 1 or 2
until the adjustment procedure is com‐
pleted.
Calling up of a seat position
deactivated
After a brief period, the calling up of stored
seat positions is deactivated to save battery
power.
To reactivate calling up of a seat position:
▷Open or close the door or trunk lid.▷Press a button on the remote control.▷Press the Start/Stop button.
Mirrors
Exterior mirrors
At a glance
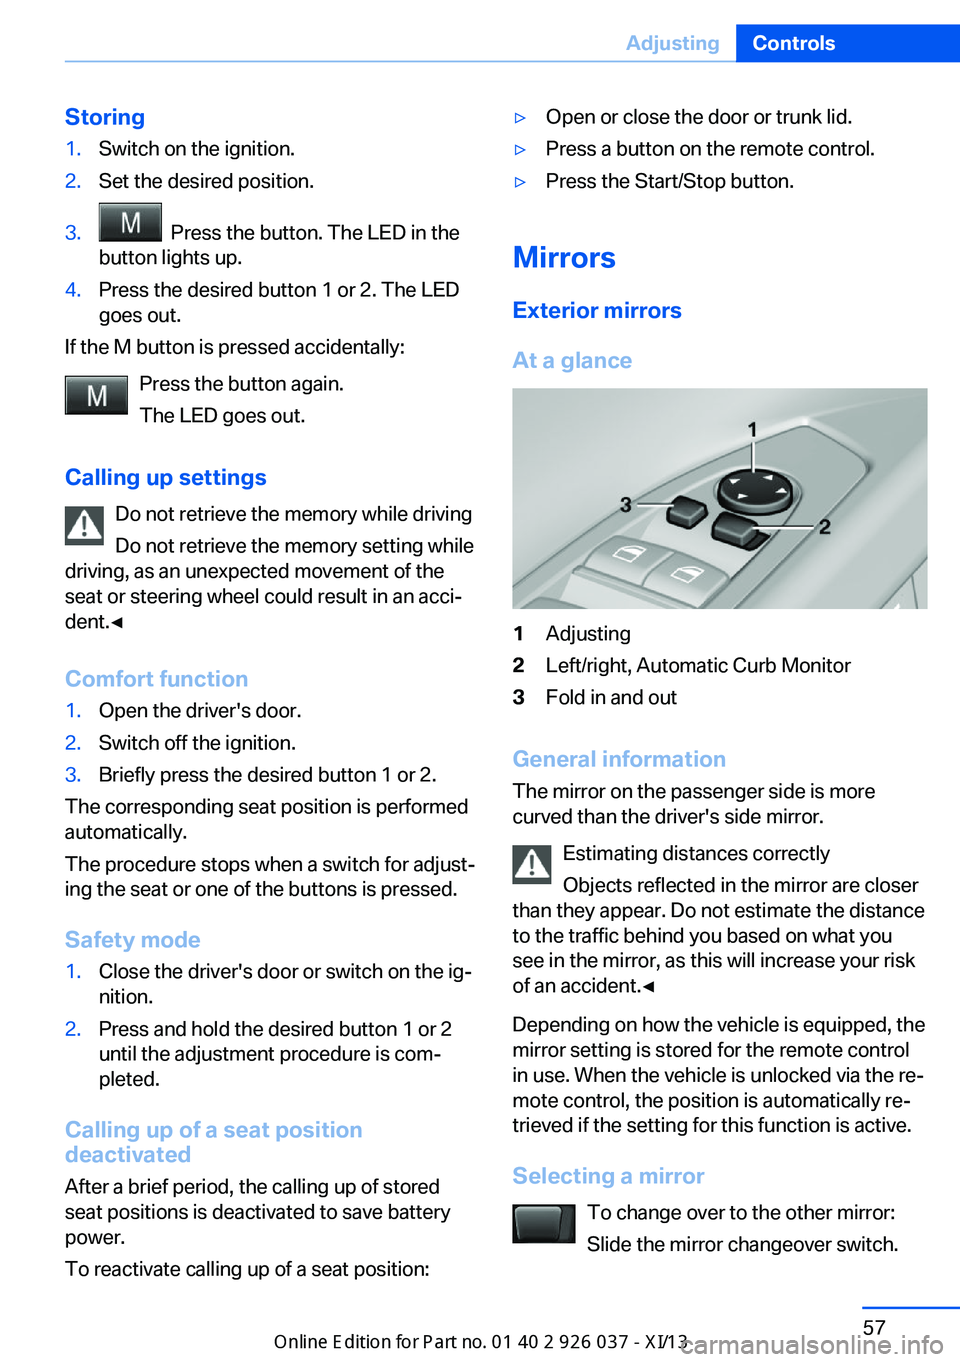
1Adjusting2Left/right, Automatic Curb Monitor3Fold in and out
General information
The mirror on the passenger side is more
curved than the driver's side mirror.
Estimating distances correctly
Objects reflected in the mirror are closer
than they appear. Do not estimate the distance
to the traffic behind you based on what you
see in the mirror, as this will increase your risk
of an accident.◀
Depending on how the vehicle is equipped, the
mirror setting is stored for the remote control
in use. When the vehicle is unlocked via the re‐
mote control, the position is automatically re‐
trieved if the setting for this function is active.
Selecting a mirror To change over to the other mirror:Slide the mirror changeover switch.
Seite 57AdjustingControls57
Online Edition for Part no. 01 40 2 910 746 - VI/13
Page 132 of 222
At a glance
Button in the vehicle
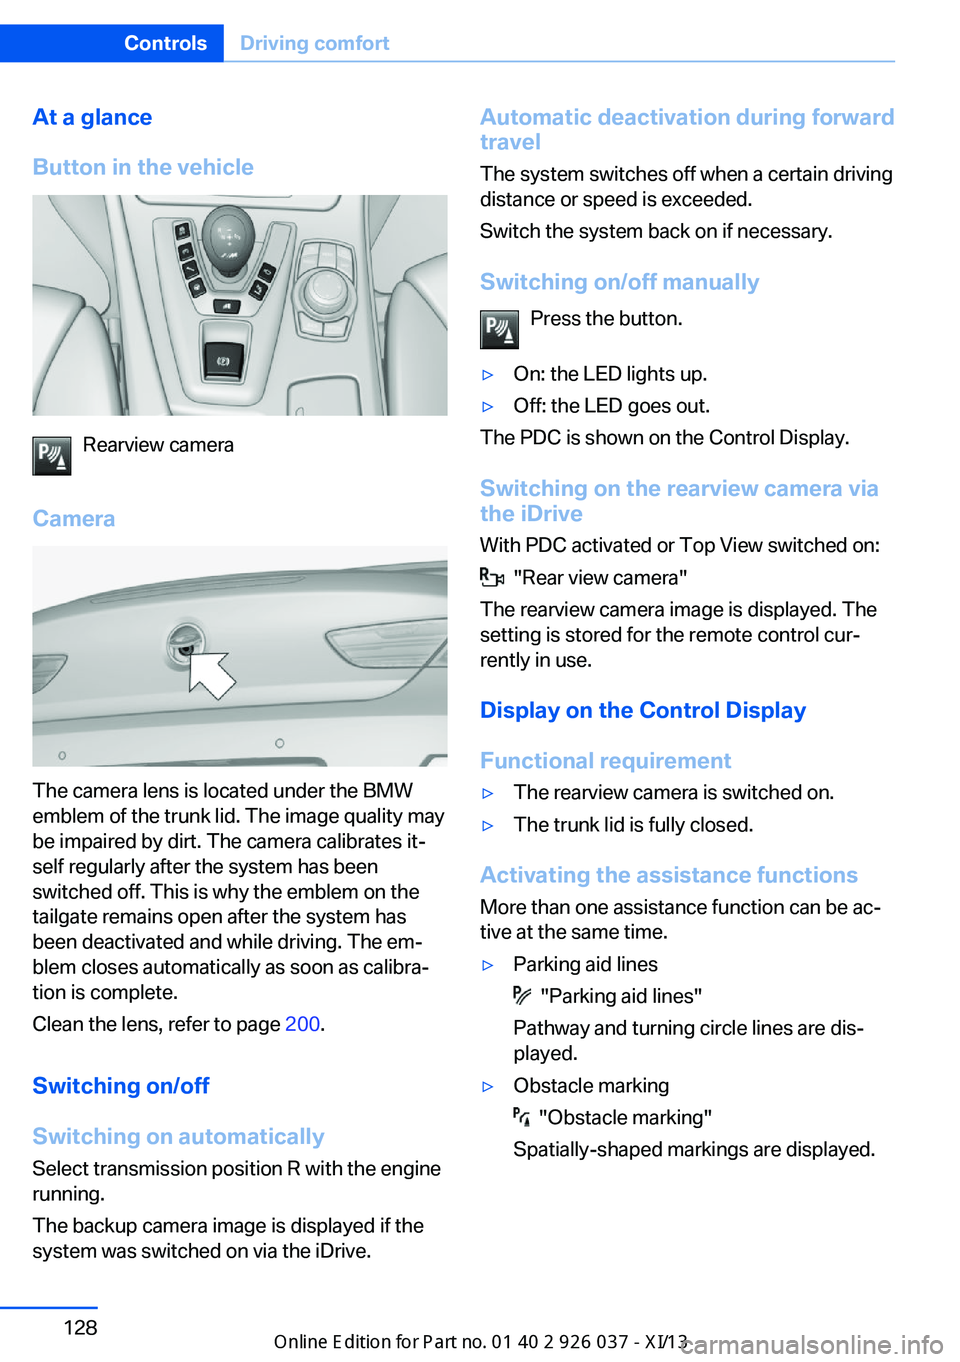
Rearview camera
Camera
The camera lens is located under the BMW
emblem of the trunk lid. The image quality may
be impaired by dirt. The camera calibrates it‐
self regularly after the system has been
switched off. This is why the emblem on the
tailgate remains open after the system has
been deactivated and while driving. The em‐
blem closes automatically as soon as calibra‐
tion is complete.
Clean the lens, refer to page 200.
Switching on/off
Switching on automatically Select transmission position R with the engine
running.
The backup camera image is displayed if the
system was switched on via the iDrive.
Automatic deactivation during forward
travel
The system switches off when a certain driving
distance or speed is exceeded.
Switch the system back on if necessary.
Switching on/off manually Press the button.▷On: the LED lights up.▷Off: the LED goes out.
The PDC is shown on the Control Display.
Switching on the rearview camera via
the iDrive
With PDC activated or Top View switched on:
"Rear view camera"
The rearview camera image is displayed. The
setting is stored for the remote control cur‐
rently in use.
Display on the Control Display
Functional requirement
▷The rearview camera is switched on.▷The trunk lid is fully closed.
Activating the assistance functions
More than one assistance function can be ac‐
tive at the same time.
▷Parking aid lines
"Parking aid lines"
Pathway and turning circle lines are dis‐
played.
▷Obstacle marking
"Obstacle marking"
Spatially-shaped markings are displayed.
Seite 128ControlsDriving comfort128
Online Edition for Part no. 01 40 2 910 746 - VI/13
Page 136 of 222
Displaying the turning circle and
pathway lines▷The static, red turning circle line shows the
space needed to the side of the vehicle
when the steering wheel is turned all the
way.▷The variable, green pathway line assists
you in assessing the amount of space ac‐
tually needed to the side of the vehicle.
The pathway line is dependent on the cur‐
rent steering angle and is continuously ad‐
justed with the steering wheel movement.
"Parking aid lines"
Turning circle and pathway lines are displayed.
System limits
Top View cannot be used in the following sit‐
uations:
▷With a door open.▷With the trunk lid open.▷With an exterior mirror folded in.▷In poor light.
A Check Control message is displayed in some
of these situations.
Side View The concept Side View provides an early look at cross traffic
at blind driveways and intersections. Road
users concealed by obstacles to the left and
right of the vehicle can only be detected rela‐
tively late from the driver's seat. To improve
visibility, two cameras in the front of the vehi‐
cle record the traffic situation on each side.
Notes
The images from both cameras are shown si‐
multaneously on the Control Display.
Check the traffic situation as well
Check the traffic situation around the ve‐
hicle on blind driveways and intersections with
your own eyes. Otherwise, an accident could
result from road users or objects located out‐
side the picture area of the Side View cam‐
eras.◀
At a glance
Button in the vehicle
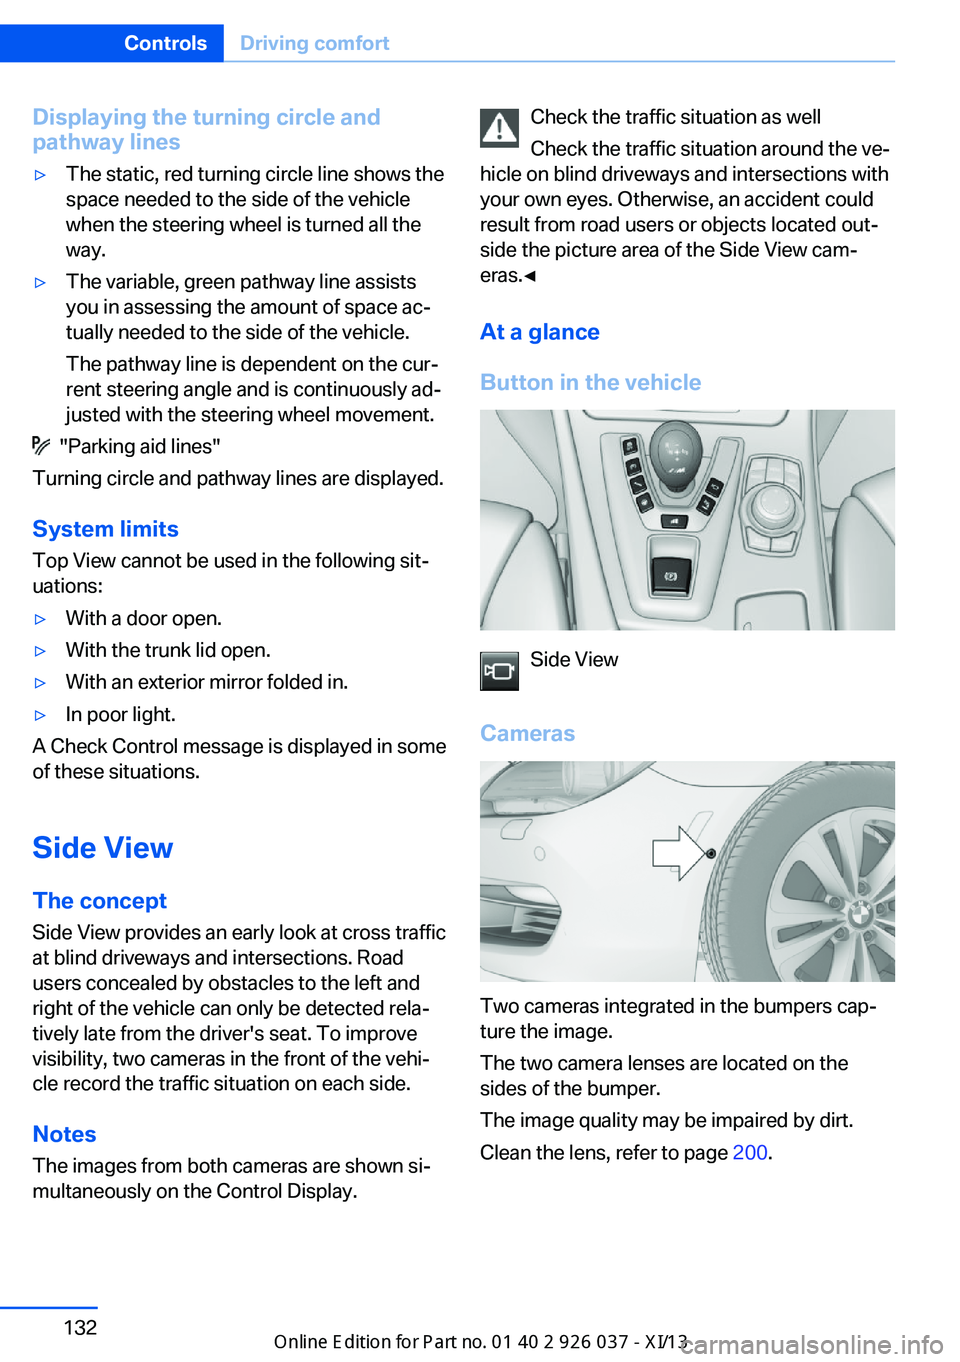
Side View
Cameras
Two cameras integrated in the bumpers cap‐
ture the image.
The two camera lenses are located on the
sides of the bumper.
The image quality may be impaired by dirt.
Clean the lens, refer to page 200.
Seite 132ControlsDriving comfort132
Online Edition for Part no. 01 40 2 910 746 - VI/13
Page 151 of 222
Without Professional navigation
system or TV: at a glance
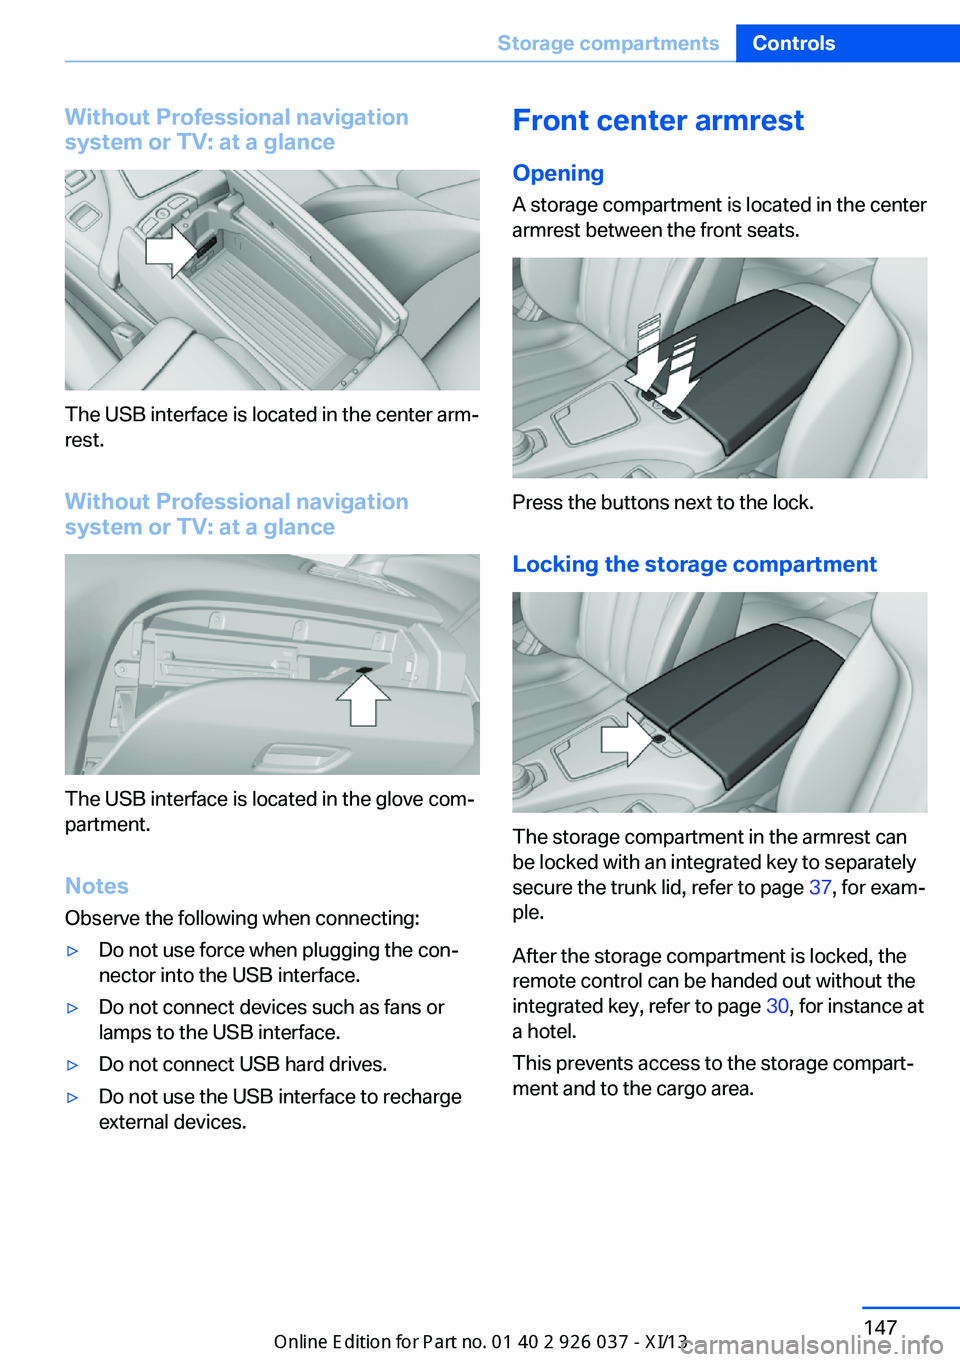
The USB interface is located in the center arm‐
rest.
Without Professional navigation
system or TV: at a glance
The USB interface is located in the glove com‐
partment.
Notes
Observe the following when connecting:
▷Do not use force when plugging the con‐
nector into the USB interface.▷Do not connect devices such as fans or
lamps to the USB interface.▷Do not connect USB hard drives.▷Do not use the USB interface to recharge
external devices.Front center armrest
Opening A storage compartment is located in the center
armrest between the front seats.
Press the buttons next to the lock.
Locking the storage compartment
The storage compartment in the armrest can
be locked with an integrated key to separately
secure the trunk lid, refer to page 37, for exam‐
ple.
After the storage compartment is locked, the
remote control can be handed out without the
integrated key, refer to page 30, for instance at
a hotel.
This prevents access to the storage compart‐
ment and to the cargo area.
Seite 147Storage compartmentsControls147
Online Edition for Part no. 01 40 2 910 746 - VI/13
Page 159 of 222
General driving notes
Closing the trunk lid Drive with the trunk lid closed
Only drive with the tailgate closed; other‐
wise, in the event of an accident or braking and
evasive maneuvers, passengers and other road
users may be injured, and the vehicle may be
damaged. In addition, exhaust fumes may en‐
ter the passenger compartment.◀
If driving with the tailgate open cannot be avoided:▷If the convertible top is closed, close all
windows.▷Greatly increase the blower speed.▷Drive moderately.
Hot exhaust system
Hot exhaust system
High temperatures are generated in the
exhaust system.
Do not remove the heat shields installed and
never apply undercoating to them. Make sure
that flammable materials, e. g. hay, leaves,
grass, etc. do not come in contact with the hot
exhaust system during driving, while in idle po‐
sition mode, or when parked. Such contact
could lead to a fire, and with it the risk of seri‐
ous personal injury as well as property dam‐
age.
Do not touch hot exhaust pipes; otherwise,
there is the danger of getting burned.◀
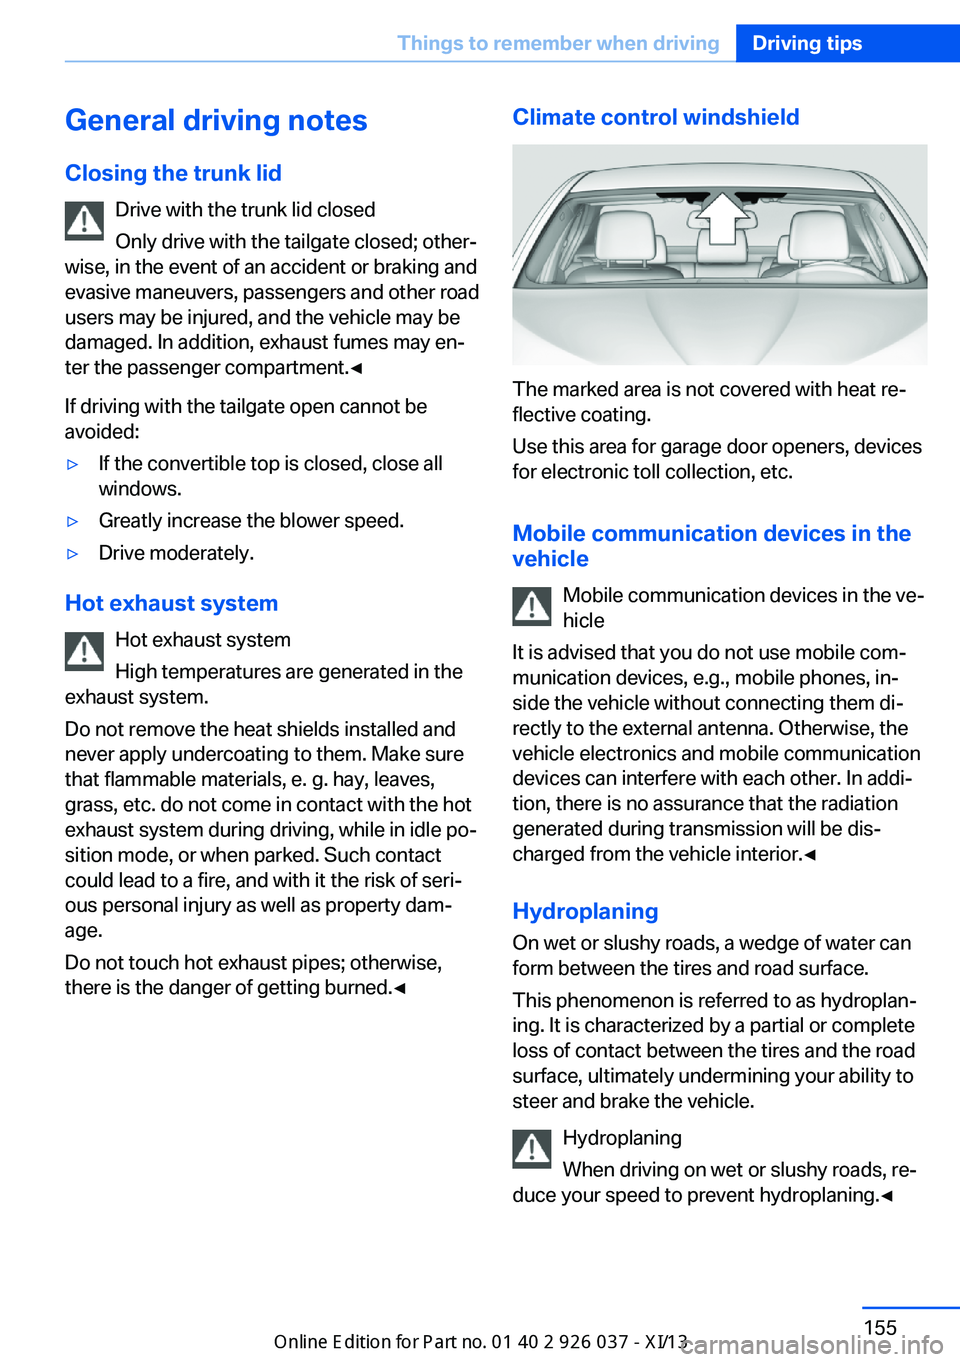
Climate control windshield
The marked area is not covered with heat re‐
flective coating.
Use this area for garage door openers, devices
for electronic toll collection, etc.
Mobile communication devices in the vehicle
Mobile communication devices in the ve‐
hicle
It is advised that you do not use mobile com‐
munication devices, e.g., mobile phones, in‐
side the vehicle without connecting them di‐
rectly to the external antenna. Otherwise, the
vehicle electronics and mobile communication
devices can interfere with each other. In addi‐
tion, there is no assurance that the radiation
generated during transmission will be dis‐
charged from the vehicle interior.◀
Hydroplaning On wet or slushy roads, a wedge of water can
form between the tires and road surface.
This phenomenon is referred to as hydroplan‐
ing. It is characterized by a partial or complete
loss of contact between the tires and the road
surface, ultimately undermining your ability to
steer and brake the vehicle.
Hydroplaning
When driving on wet or slushy roads, re‐
duce your speed to prevent hydroplaning.◀
Seite 155Things to remember when drivingDriving tips155
Online Edition for Part no. 01 40 2 910 746 - VI/13
Page 162 of 222
LoadingVehicle equipment
All standard, country-specific and optional
equipment that is offered in the model series is
described in this chapter. Therefore, equip‐
ment is also described that is not available in a
vehicle, e. g., because of the selected optional
equipment or country variant. This also applies
for safety-related functions and systems.
Hints Overloading the vehicle
To avoid exceeding the approved carry‐
ing capacity of the tires, never overload the ve‐
hicle. Overloading can lead to overheating and
increases the rate at which damage develops
inside the tires. This could result in a sudden
loss of tire inflation pressure.◀
No fluids in the trunk
Make sure that fluids do not leak into the
trunk; otherwise, the vehicle may be dam‐
aged.◀
Determining the load limit1.Locate the following statement on your ve‐
hicle’s placard:▷The combined weight of occupants
and cargo should never exceed XXX kg
or YYY lbs. Otherwise, damage to thevehicle and unstable driving situations
may result.2.Determine the combined weight of the
driver and passengers that will be riding in
your vehicle.3.Subtract the combined weight of the driver
and passengers from XXX kilograms or
YYY pounds.4.The resulting figure equals the available
amount of cargo and luggage load ca‐
pacity.
For example, if the YYY amount equals
1,000 lbs and there will be four 150 lbs
passengers in your vehicle, the amount of
available cargo and luggage load capacity
is 400 lbs: 1,000 lbs minus 600 lbs =
400 lbs.5.Determine the combined weight of lug‐
gage and cargo being loaded on the vehi‐
cle. That weight may not safely exceed the
available cargo and luggage load capacity
calculated in Step 4.
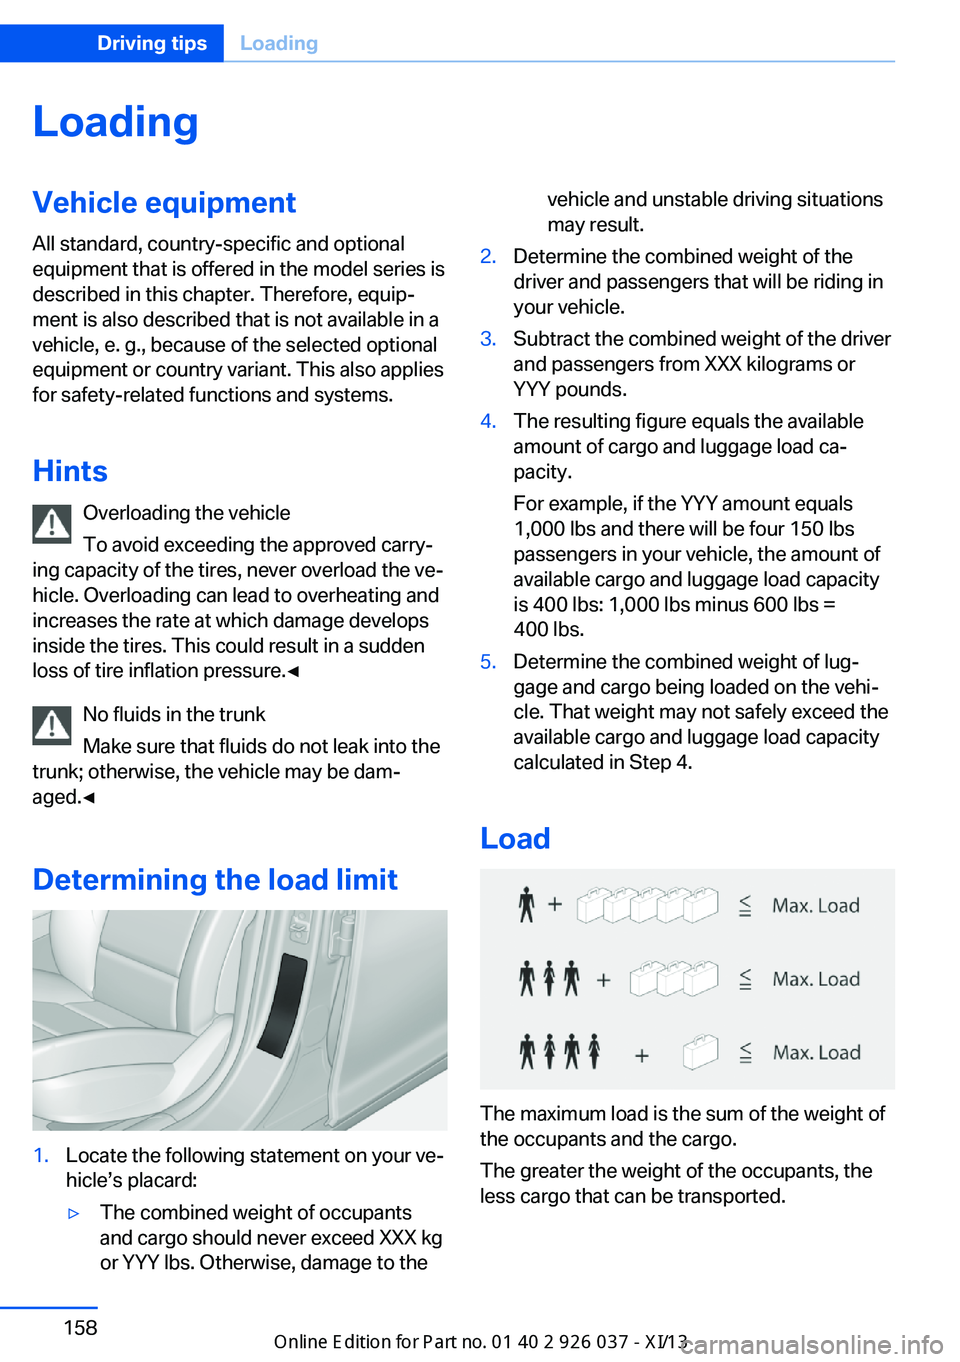
Load
The maximum load is the sum of the weight of
the occupants and the cargo.
The greater the weight of the occupants, the
less cargo that can be transported.
Seite 158Driving tipsLoading158
Online Edition for Part no. 01 40 2 910 746 - VI/13