lights BMW M6 COUPE 2006 E63 Owner's Manual
[x] Cancel search | Manufacturer: BMW, Model Year: 2006, Model line: M6 COUPE, Model: BMW M6 COUPE 2006 E63Pages: 227, PDF Size: 8.32 MB
Page 38 of 227
Opening and closing
36 >In stacking garages
>When transporting on car-carrying trains
>When animals are to remain in the vehicle
Switching off tilt alarm sensor and
interior motion sensor
Press the button on the remote control
again as soon as the vehicle is locked.
The indicator lamp lights up briefly and then
flashes continuously. The tilt alarm sensor and
the interior motion sensor are switched off until
the vehicle is unlocked and locked again.
Comfort access*
Comfort access enables you to access your
vehicle without having to hold the remote con-
trol in your hand. It is sufficient to carry the
remote control with you, e.g. in your jacket
pocket. The vehicle automatically detects the
related remote control in the immediate vicinity
or in the interior.
Comfort access supports the following func-
tions:
>Unlocking/locking vehicle
>Comfort locking
>Opening luggage compartment lid
separately
>Starting engine
Functional requirement
>The vehicle or the luggage compartment lid
can only be locked if the vehicle detects that
the remote control you are carrying is out-
side the vehicle.
>The next unlocking and locking cycle is not
possible until after approx. 2 seconds.
>The engine can only be started if the vehicle
detects that the remote control is located in
the vehicle.
Comparison with ordinary remote
control
You can control the functions mentioned previ-
ously with the comfort access or by pressing
the buttons on the remote control. Before doing
so, please familiarize yourself with the informa-
tion on opening and closing, starting on
page28.
The special features when using comfort
access are described below.
Should as short delay occur when open-
ing or closing the windows, the system is
checking whether a remote control is located in
the vehicle. Please repeat opening or closing if
necessary.<
Unlocking
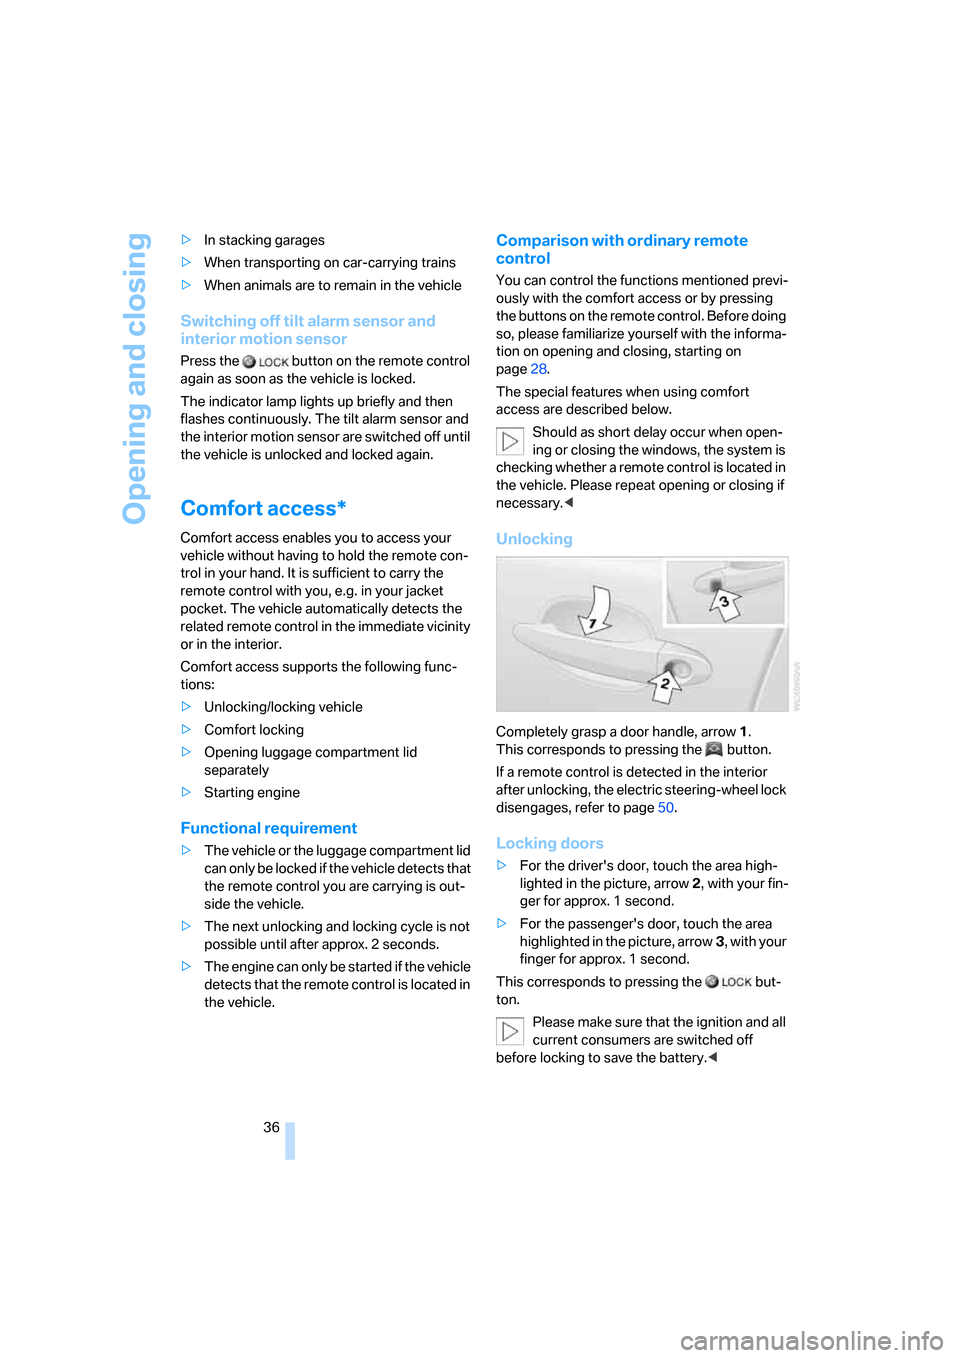
Completely grasp a door handle, arrow1.
This corresponds to pressing the button.
If a remote control is detected in the interior
after unlocking, the electric steering-wheel lock
disengages, refer to page50.
Locking doors
>For the driver's door, touch the area high-
lighted in the picture, arrow2, with your fin-
ger for approx. 1 second.
>For the passenger's door, touch the area
highlighted in the picture, arrow3, with your
finger for approx. 1 second.
This corresponds to pressing the but-
ton.
Please make sure that the ignition and all
current consumers are switched off
before locking to save the battery.<
Page 39 of 227
Controls
37Reference
At a glance
Driving tips
Communications
Navigation
Entertainment
Mobility
Comfort locking
Hold a finger or the back of the hand on the sur-
face, arrow2 or 3.
The windows are closed.
Watch during the closing process to be
sure that no one is injured. Removing the
hand from the door handle stops the closing
process immediately.<
Opening luggage compartment lid
separately
Press the upper half of the BMW emblem.
This corresponds to pressing the button.
If a remote control accidentally left in the
luggage compartment is detected inside
the locked vehicle after the luggage compart-
ment lid has been closed, then the luggage
compartment lid opens again. The hazard warn-
ing flashers flash and a signal
* sounds.<
Switching on radio readiness
By briefly pressing the Start/Stop button, you
switch on the radio readiness, refer to page50.
When doing so, do not depress the brake
pedal, otherwise the engine will start.<
Starting engine
You can start the engine or switch on the igni-
tion if a remote control is located on the interior
of the vehicle. It need not be inserted in the igni-
tion lock, refer to page50.
If you take the remote control with you when
leaving the vehicle with the engine running, a
warning lamp lights up. In addition, a message
appears on the Control Display. As long as no
remote control is detected in the vehicle, it is
only possible to restart the engine within
approx. 10 seconds after it is switched off.
Malfunction
The comfort access function may malfunction
due to local radio waves. If this occurs, then
open or close the vehicle with the buttons on
the remote control or with a key. To start the
engine after this, insert the remote control in the
ignition lock.
Replacing battery
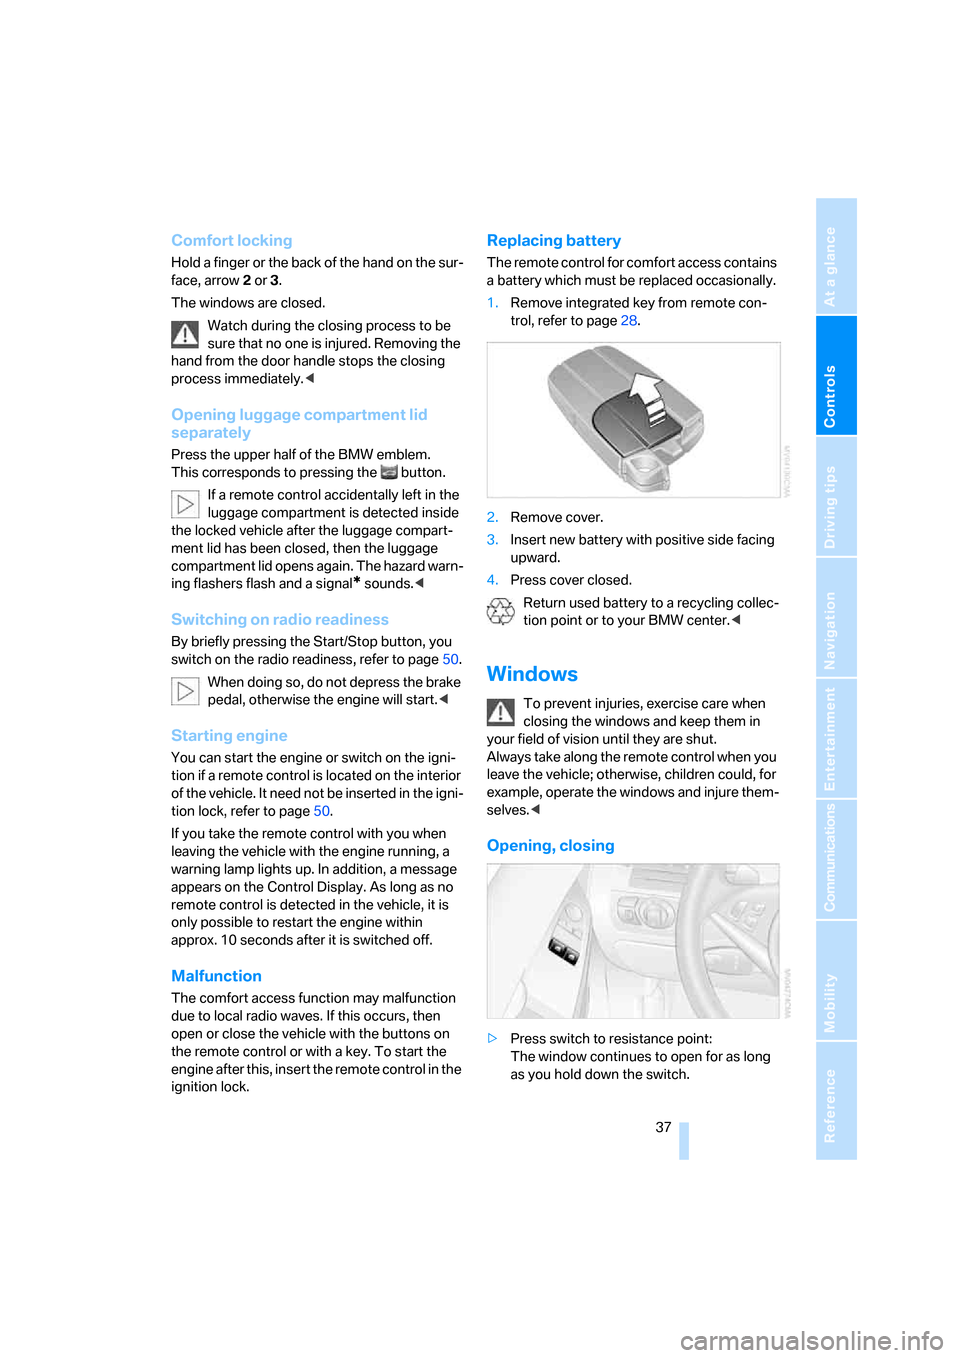
The remote control for comfort access contains
a battery which must be replaced occasionally.
1.Remove integrated key from remote con-
trol, refer to page28.
2.Remove cover.
3.Insert new battery with positive side facing
upward.
4.Press cover closed.
Return used battery to a recycling collec-
tion point or to your BMW center.<
Windows
To prevent injuries, exercise care when
closing the windows and keep them in
your field of vision until they are shut.
Always take along the remote control when you
leave the vehicle; otherwise, children could, for
example, operate the windows and injure them-
selves.<
Opening, closing
>Press switch to resistance point:
The window continues to open for as long
as you hold down the switch.
Page 43 of 227
Controls
41Reference
At a glance
Driving tips
Communications
Navigation
Entertainment
Mobility
3.Press the button:
The LED in the button lights up.
4.Press the desired memory button 1, 2 or3:
The LED goes out.
Requesting
Do not request a position from the mem-
ory while the vehicle is moving. There is a
risk of accident from unexpected movement of
the seat or steering wheel.<
Convenience mode
1.Open the driver's door after unlocking or
switch on radio readiness, refer to page50.
2.Briefly press the desired memory button1,
2 or3.
The system immediately cancels the adjust-
ment procedure when you briefly press one of
the seat adjustment switches or one of the
memory buttons.
The adjusting procedure for the steering wheel
is immediately interrupted if you briefly press
the switch for the steering wheel adjustment in
any direction, refer to page44.
Safety feature
1.Close the driver's door and switch ignition
on or off, refer to page50.
2.Press the desired memory button 1, 2 or3
and maintain pressure until the adjustment
process has been completed.
If the button was pressed inadvertently:
press the button again; the LED goes out.
Activating with remote control
The last positions of the driver's seat, external
rearview mirrors, and steering wheel are stored
for the remote key currently in use.
You can choose when the position is requested:
>Request when unlocking vehicle
>Request when opening driver's door
iDrive, for explanation of principle, refer to
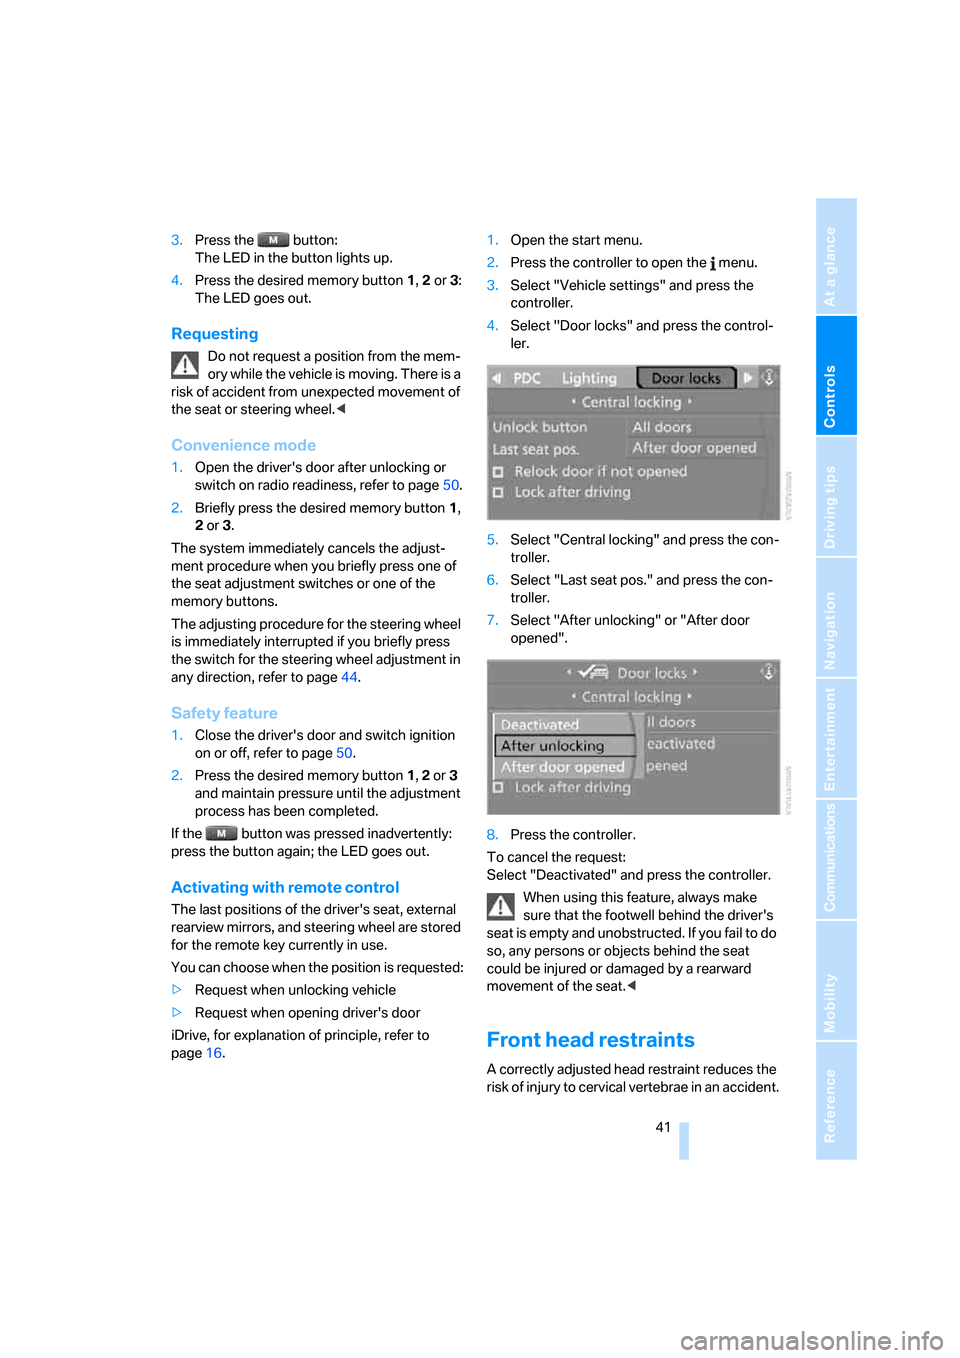
page16.1.Open the start menu.
2.Press the controller to open the menu.
3.Select "Vehicle settings" and press the
controller.
4.Select "Door locks" and press the control-
ler.
5.Select "Central locking" and press the con-
troller.
6.Select "Last seat pos." and press the con-
troller.
7.Select "After unlocking" or "After door
opened".
8.Press the controller.
To cancel the request:
Select "Deactivated" and press the controller.
When using this feature, always make
sure that the footwell behind the driver's
seat is empty and unobstructed. If you fail to do
so, any persons or objects behind the seat
could be injured or damaged by a rearward
movement of the seat.<
Front head restraints
A correctly adjusted head restraint reduces the
risk of injury to cervical vertebrae in an accident.
Page 45 of 227
Controls
43Reference
At a glance
Driving tips
Communications
Navigation
Entertainment
Mobility
Fastening
Make sure you hear the latch plate engage in
the belt buckle.
Releasing
1.Hold the belt firmly.
2.Press the red button in the belt buckle.
3.Guide the belt into its reel.
The shoulder strap's anchorage point will be in
the correct position for adults of every build if
the seat is correctly adjusted, refer to page39.
Safety belt reminder for driver's seat
and passenger seat*
The indicator lamp lights up and a sig-
nal sounds. At the same time, an addi-
tional message appears on the Control
Display. Please check whether safety belts are
being worn correctly.
The safety belt memory is operative at speeds
above approx. 5 mph/8 km/h. It can also be acti-
vated if objects are placed on the passenger
seat.
Damage to safety belts
In the event of loads caused by accidents
or other damage: replace the belt system
including the safety belt tensioner and any child
restraint systems, and have the belt anchor
points checked. Have this work carried out only
by a BMW center or a workshop that works
according to BMW repair procedures with
appropriately trained personnel. Otherwise cor-
rect operation of this safety equipment is not
guaranteed.<
Heated seats
The temperature setting advances one step in
its control sequence each time you press the
button. The maximum temperature is supplied
when three LEDs are lit.
To switch off:
Press the button longer.
Mirrors
Exterior mirrors
The mirror on the passenger's side is
more curved than the driver's mirror.
Objects reflected in the mirror are closer than
they appear. Do not estimate the distance of
following traffic based on what you see in the
mirrors; otherwise, there is an increased acci-
dent risk.<
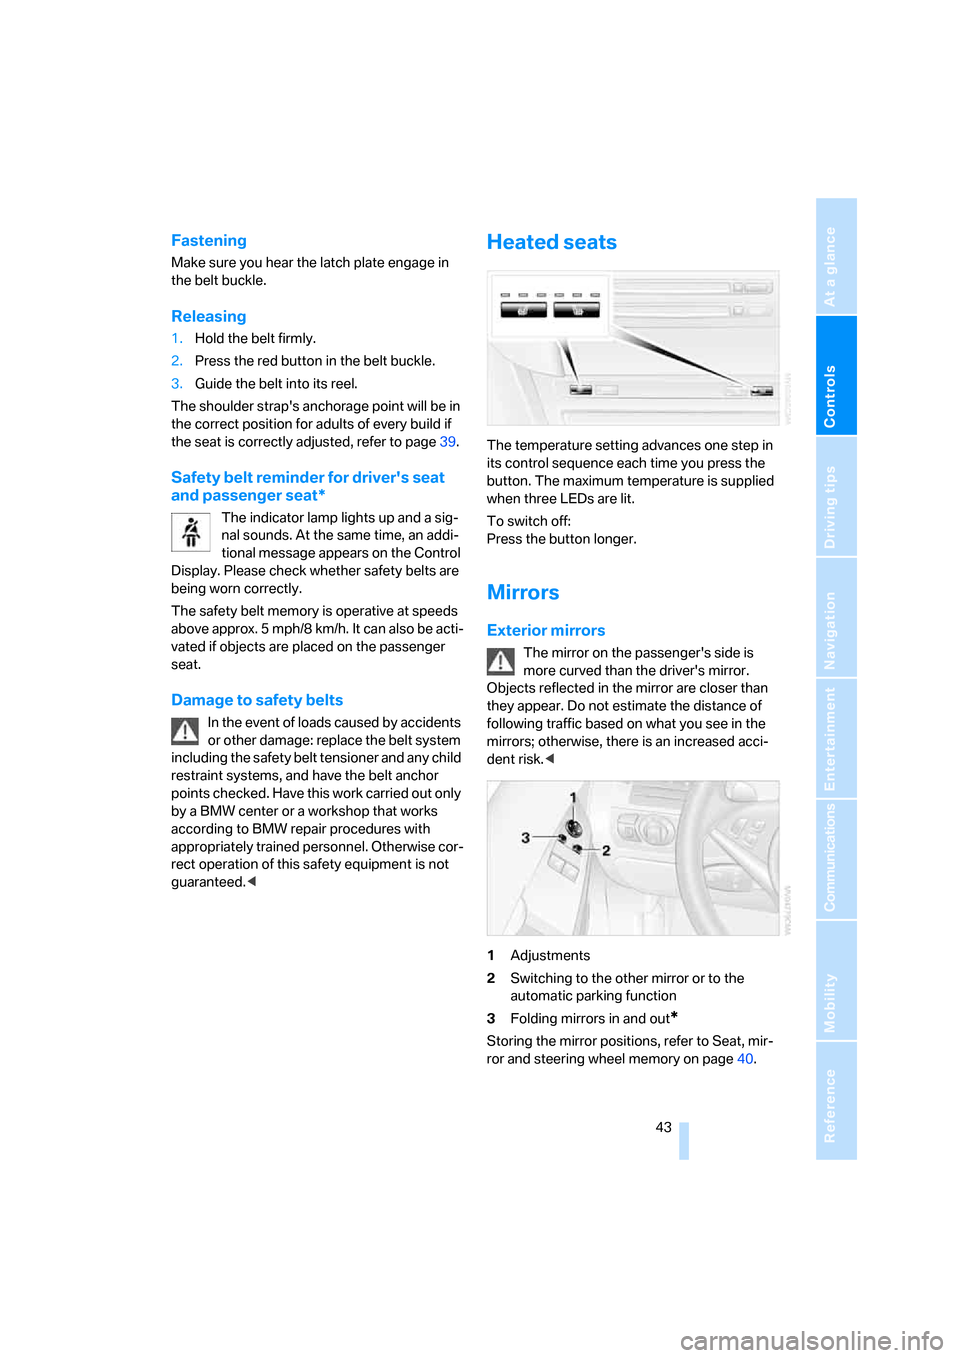
1Adjustments
2Switching to the other mirror or to the
automatic parking function
3Folding mirrors in and out
*
Storing the mirror positions, refer to Seat, mir-
ror and steering wheel memory on page40.
Page 49 of 227
Controls
47Reference
At a glance
Driving tips
Communications
Navigation
Entertainment
Mobility
Activating settings
Press the button on the steering wheel.
The indicator lamp in the instrument
cluster lights up. The settings made on
the Control Display for the functions
contained in MDrive are active.
Pressing the button again deactivates MDrive.
If the indicator lamp flashes after pressing
the button, MDrive was unable to react, as
the ABS Antilock Brake System or DSC
Dynamic Stability Control is currently control-
ling the vehicle stability. Press the button
again when the indicator lamp no longer
flashes.<
Even with MDrive activated, you can change
individual settings outside MDrive, e.g. with the
buttons in the center console. To reactivate all
settings made for MDrive on the Control Dis-
play: press the button twice.
Page 54 of 227
Driving
52
Indicator lamp
The indicator lamp lights up, and a sig-
nal also sounds when starting off. The
handbrake is engaged.
Indicator lamp for Canadian models.
Engaging
The lever engages automatically.
Releasing
Pull slightly upwards, press the button and
lower the lever.
If exceptional circumstances should
make it necessary to engage the hand-
brake while the vehicle is in motion, do not pull
it too strongly. In doing so, continuously press
the button of the handbrake lever. Otherwise,
excessive pressure can lead to the rear wheels
locking up and loss of traction – fishtailing – at
the rear axle.<
To prevent corrosion and one-sided brak-
ing action, occasionally apply the hand-
brake lightly when the vehicle is slowly coming
to a stop if the traffic conditions are suitable.
The brake lamps do not light up when the hand-
brake is engaged.<
Sequential Manual
Transmission with Drivelogic
The concept
The SMG Sequential Manual Transmission
with Drivelogic is an automated manual trans-mission in which an electrohydraulic system
handles the clutching and gear changes.
The Sequential Manual Transmission is oper-
ated with the selector lever and two shift pad-
dles on the steering wheel.
It offers the following functions:
>Choice of manual or automatic mode:
Sequential mode or Drive mode
>Selection option between different driving
programs, Drivelogic, refer to page54
>Upshift display, shift lights, refer to page55
>Automatic downshifting and prevention of
incorrect shifting even in sequential opera-
tion
>Automatic double clutching
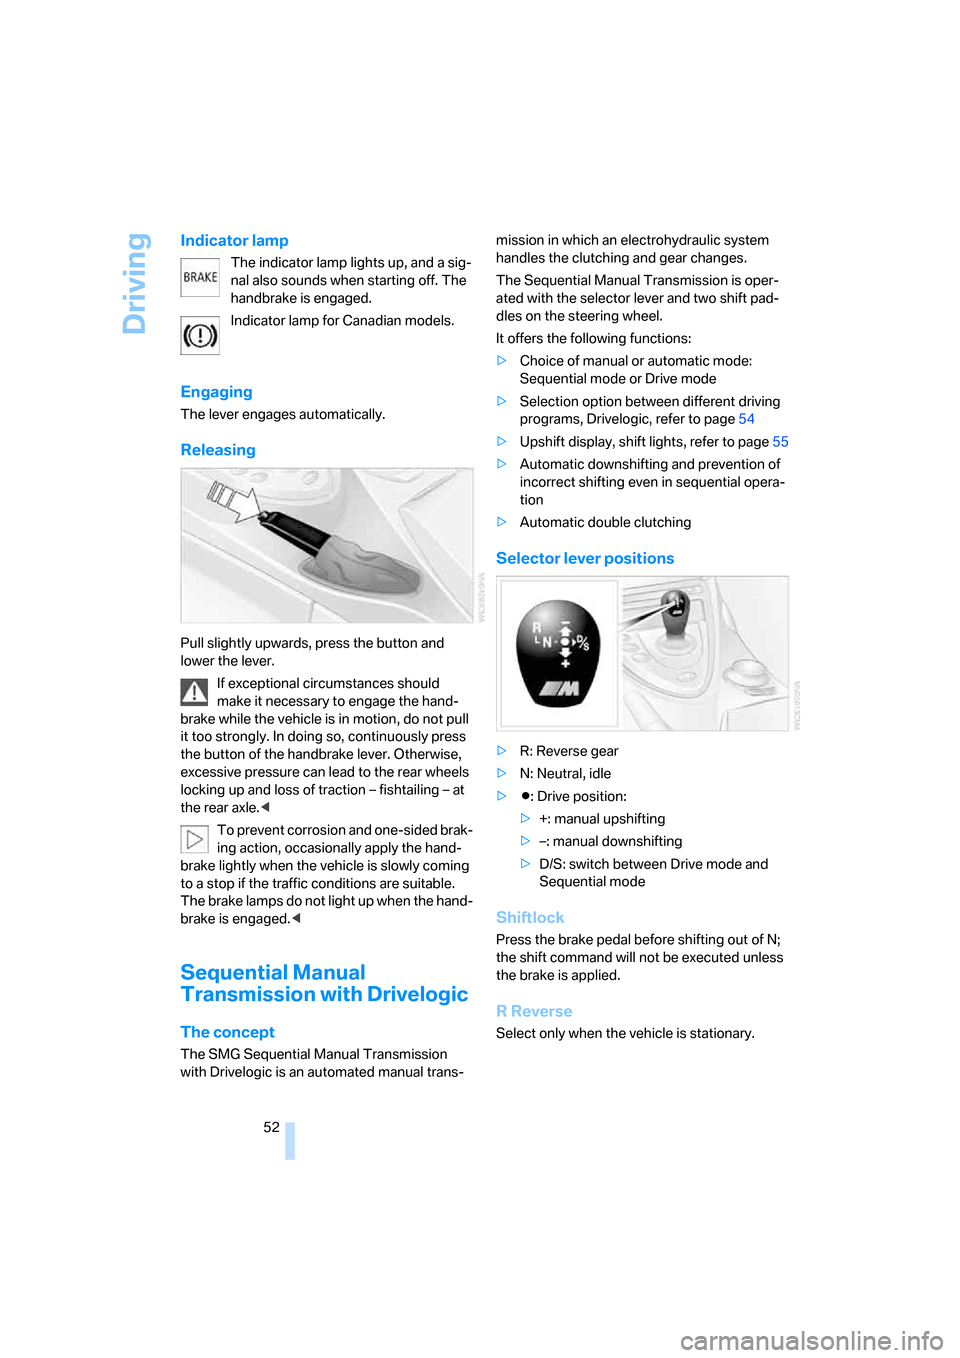
Selector lever positions
>R: Reverse gear
>N: Neutral, idle
>Β: Drive position:
>+: manual upshifting
>–: manual downshifting
>D/S: switch between Drive mode and
Sequential mode
Shiftlock
Press the brake pedal before shifting out of N;
the shift command will not be executed unless
the brake is applied.
R Reverse
Select only when the vehicle is stationary.
Page 57 of 227
Controls
55Reference
At a glance
Driving tips
Communications
Navigation
Entertainment
Mobility
7.Press the controller to select driving pro-
grams.
8.Turn the controller to set driving program.
9.Press the controller.
Shift lights
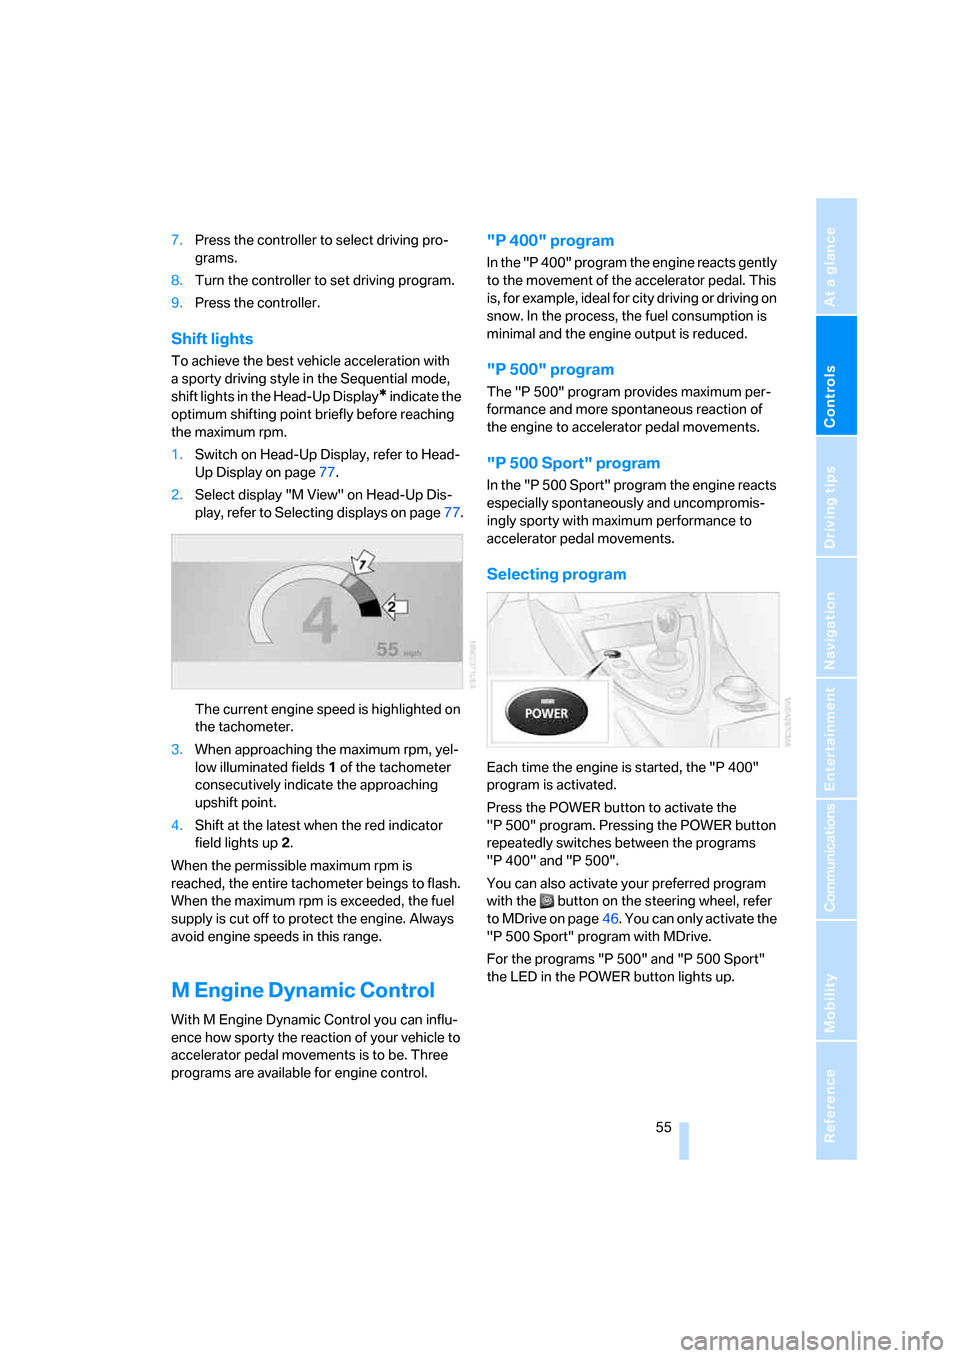
To achieve the best vehicle acceleration with
a sporty driving style in the Sequential mode,
shift lights in the Head-Up Display
* indicate the
optimum shifting point briefly before reaching
the maximum rpm.
1.Switch on Head-Up Display, refer to Head-
Up Display on page77.
2.Select display "M View" on Head-Up Dis-
play, refer to Selecting displays on page77.
The current engine speed is highlighted on
the tachometer.
3.When approaching the maximum rpm, yel-
low illuminated fields1 of the tachometer
consecutively indicate the approaching
upshift point.
4.Shift at the latest when the red indicator
field lights up2.
When the permissible maximum rpm is
reached, the entire tachometer beings to flash.
When the maximum rpm is exceeded, the fuel
supply is cut off to protect the engine. Always
avoid engine speeds in this range.
M Engine Dynamic Control
With M Engine Dynamic Control you can influ-
ence how sporty the reaction of your vehicle to
accelerator pedal movements is to be. Three
programs are available for engine control.
"P 400" program
In the "P 400" program the engine reacts gently
to the movement of the accelerator pedal. This
is, for example, ideal for city driving or driving on
snow. In the process, the fuel consumption is
minimal and the engine output is reduced.
"P 500" program
The "P 500" program provides maximum per-
formance and more spontaneous reaction of
the engine to accelerator pedal movements.
"P 500 Sport" program
In the "P 500 Sport" program the engine reacts
especially spontaneously and uncompromis-
ingly sporty with maximum performance to
accelerator pedal movements.
Selecting program
Each time the engine is started, the "P 400"
program is activated.
Press the POWER button to activate the
"P 500" program. Pressing the POWER button
repeatedly switches between the programs
"P 400" and "P 500".
You can also activate your preferred program
with the button on the steering wheel, refer
to MDrive on page46. You can only activate the
"P 500 Sport" program with MDrive.
For the programs "P 500" and "P 500 Sport"
the LED in the POWER button lights up.
Page 59 of 227
Controls
57Reference
At a glance
Driving tips
Communications
Navigation
Entertainment
Mobility
The system reverts to operation at normal
speed whenever the vehicle is stationary.
Rain sensor
Wiper operation is controlled automatically as a
function of the rain intensity. The rain sensor is
located on the windshield, directly in front of the
interior rearview mirror.
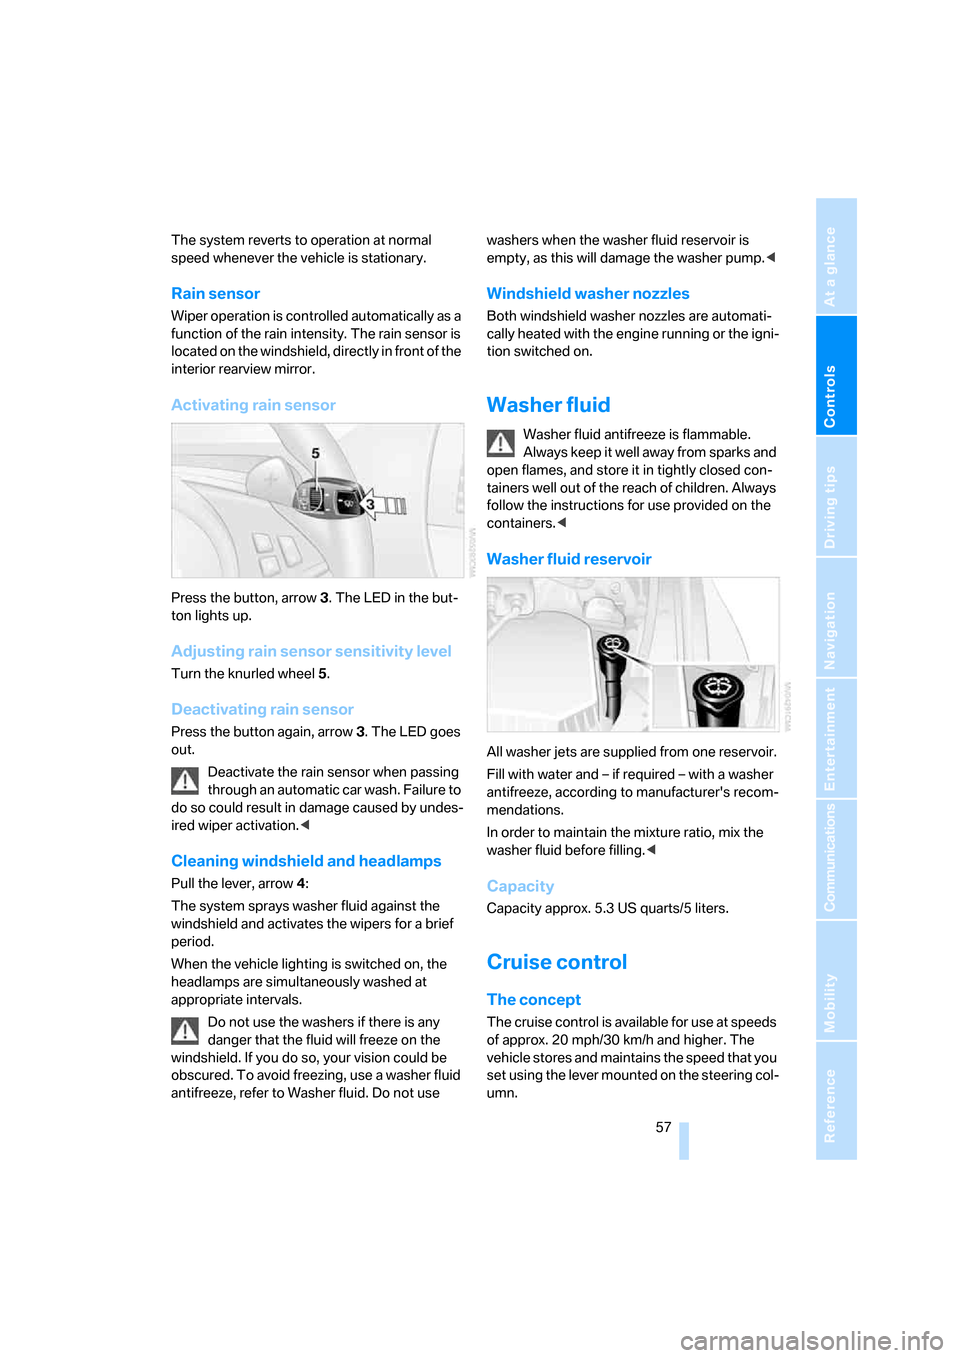
Activating rain sensor
Press the button, arrow3. The LED in the but-
ton lights up.
Adjusting rain sensor sensitivity level
Turn the knurled wheel5.
Deactivating rain sensor
Press the button again, arrow3. The LED goes
out.
Deactivate the rain sensor when passing
through an automatic car wash. Failure to
do so could result in damage caused by undes-
ired wiper activation.<
Cleaning windshield and headlamps
Pull the lever, arrow4:
The system sprays washer fluid against the
windshield and activates the wipers for a brief
period.
When the vehicle lighting is switched on, the
headlamps are simultaneously washed at
appropriate intervals.
Do not use the washers if there is any
danger that the fluid will freeze on the
windshield. If you do so, your vision could be
obscured. To avoid freezing, use a washer fluid
antifreeze, refer to Washer fluid. Do not use washers when the washer fluid reservoir is
empty, as this will damage the washer pump.<
Windshield washer nozzles
Both windshield washer nozzles are automati-
cally heated with the engine running or the igni-
tion switched on.
Washer fluid
Washer fluid antifreeze is flammable.
Always keep it well away from sparks and
open flames, and store it in tightly closed con-
tainers well out of the reach of children. Always
follow the instructions for use provided on the
containers.<
Washer fluid reservoir
All washer jets are supplied from one reservoir.
Fill with water and – if required – with a washer
antifreeze, according to manufacturer's recom-
mendations.
In order to maintain the mixture ratio, mix the
washer fluid before filling.<
Capacity
Capacity approx. 5.3 US quarts/5 liters.
Cruise control
The concept
The cruise control is available for use at speeds
of approx. 20 mph/30 km/h and higher. The
vehicle stores and maintains the speed that you
set using the lever mounted on the steering col-
umn.
Page 61 of 227
Controls
59Reference
At a glance
Driving tips
Communications
Navigation
Entertainment
Mobility
Everything under control
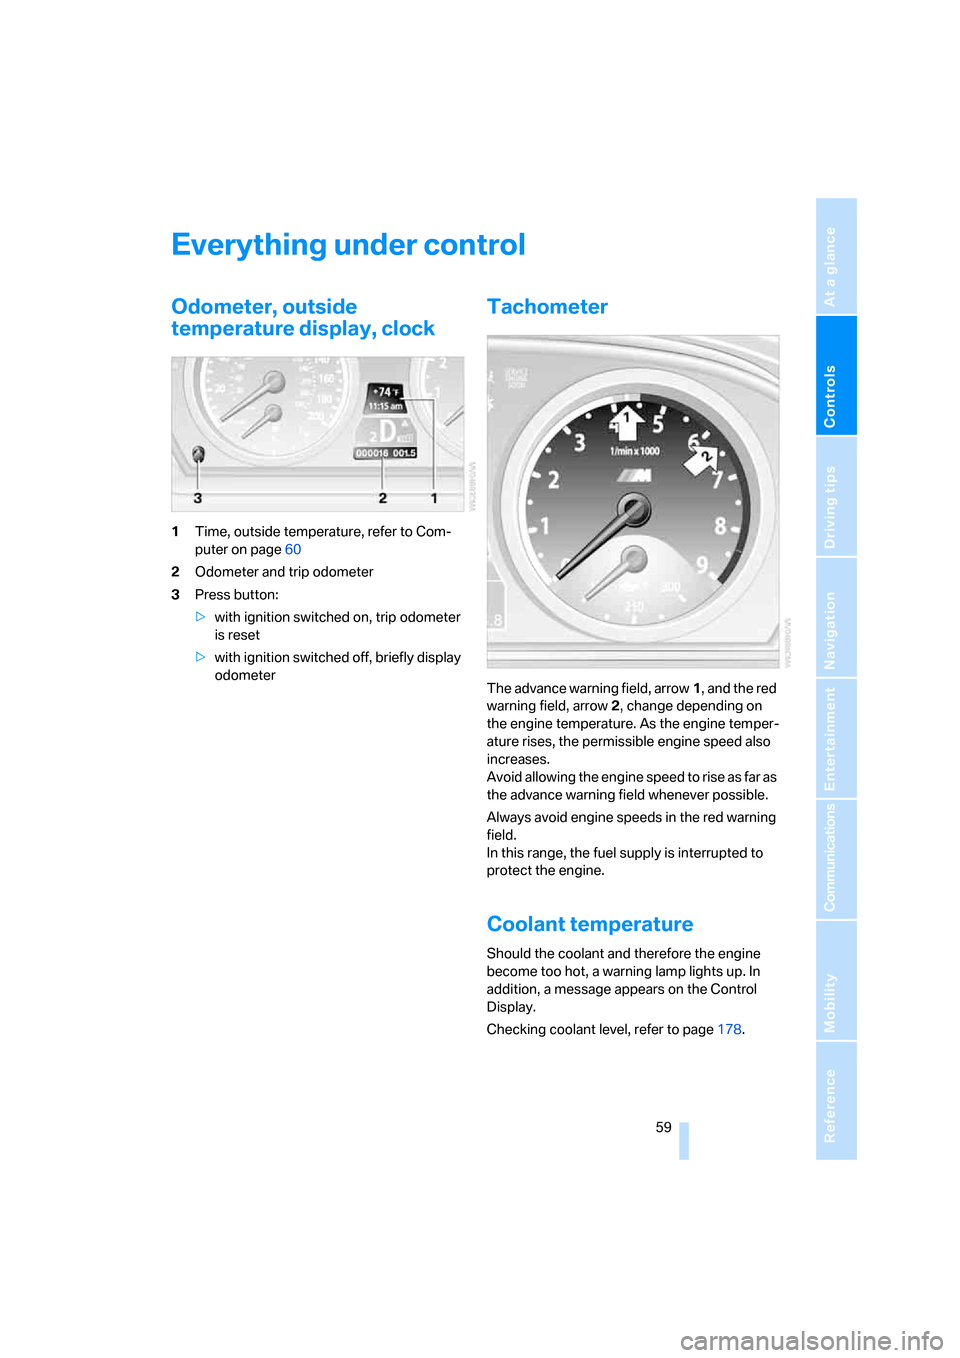
Odometer, outside
temperature display, clock
1Time, outside temperature, refer to Com-
puter on page60
2Odometer and trip odometer
3Press button:
>with ignition switched on, trip odometer
is reset
>with ignition switched off, briefly display
odometer
Tachometer
The advance warning field, arrow1, and the red
warning field, arrow2, change depending on
the engine temperature. As the engine temper-
ature rises, the permissible engine speed also
increases.
Avoid allowing the engine speed to rise as far as
the advance warning field whenever possible.
Always avoid engine speeds in the red warning
field.
In this range, the fuel supply is interrupted to
protect the engine.
Coolant temperature
Should the coolant and therefore the engine
become too hot, a warning lamp lights up. In
addition, a message appears on the Control
Display.
Checking coolant level, refer to page178.
Page 62 of 227
Everything under control
60
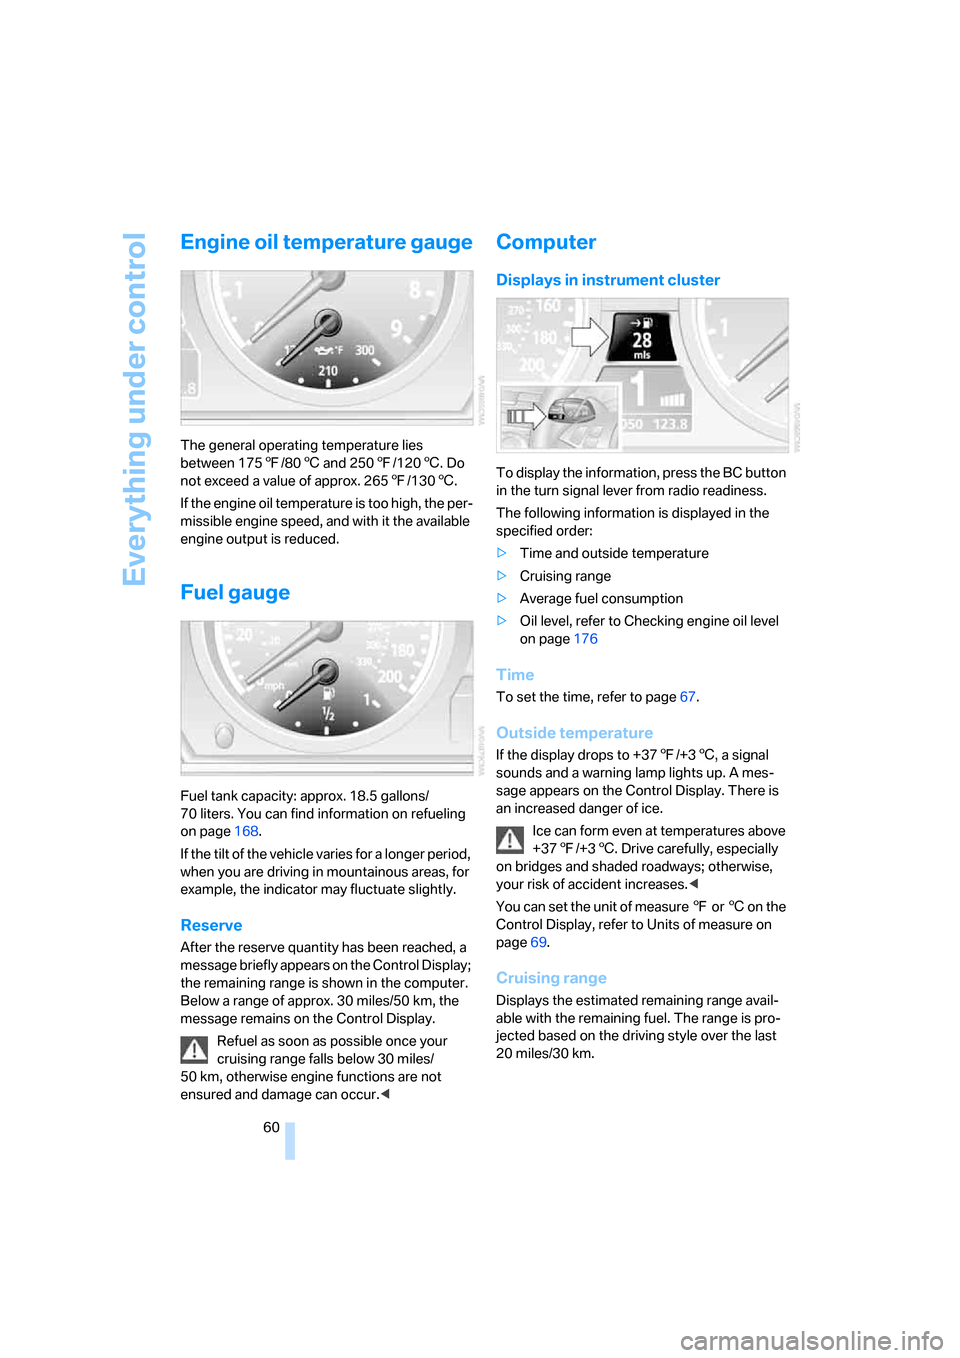
Engine oil temperature gauge
The general operating temperature lies
between 1757/806 and 2507/1206. Do
not exceed a value of approx. 2657/1306.
If the engine oil temperature is too high, the per-
missible engine speed, and with it the available
engine output is reduced.
Fuel gauge
Fuel tank capacity: approx. 18.5 gallons/
70 liters. You can find information on refueling
on page168.
If the tilt of the vehicle varies for a longer period,
when you are driving in mountainous areas, for
example, the indicator may fluctuate slightly.
Reserve
After the reserve quantity has been reached, a
message briefly appears on the Control Display;
the remaining range is shown in the computer.
Below a range of approx. 30 miles/50 km, the
message remains on the Control Display.
Refuel as soon as possible once your
cruising range falls below 30 miles/
50 km, otherwise engine functions are not
ensured and damage can occur.<
Computer
Displays in instrument cluster
To display the information, press the BC button
in the turn signal lever from radio readiness.
The following information is displayed in the
specified order:
>Time and outside temperature
>Cruising range
>Average fuel consumption
>Oil level, refer to Checking engine oil level
on page176
Time
To set the time, refer to page67.
Outside temperature
If the display drops to +377/+36, a signal
sounds and a warning lamp lights up. A mes-
sage appears on the Control Display. There is
an increased danger of ice.
Ice can form even at temperatures above
+377/+36. Drive carefully, especially
on bridges and shaded roadways; otherwise,
your risk of accident increases.<
You can set the unit of measure 7 or 6 on the
Control Display, refer to Units of measure on
page69.
Cruising range
Displays the estimated remaining range avail-
able with the remaining fuel. The range is pro-
jected based on the driving style over the last
20 miles/30 km.