lock BMW MOTORRAD K 1200 GT 2006 Rider's Manual (in English)
[x] Cancel search | Manufacturer: BMW MOTORRAD, Model Year: 2006, Model line: K 1200 GT, Model: BMW MOTORRAD K 1200 GT 2006Pages: 172, PDF Size: 1.98 MB
Page 123 of 172
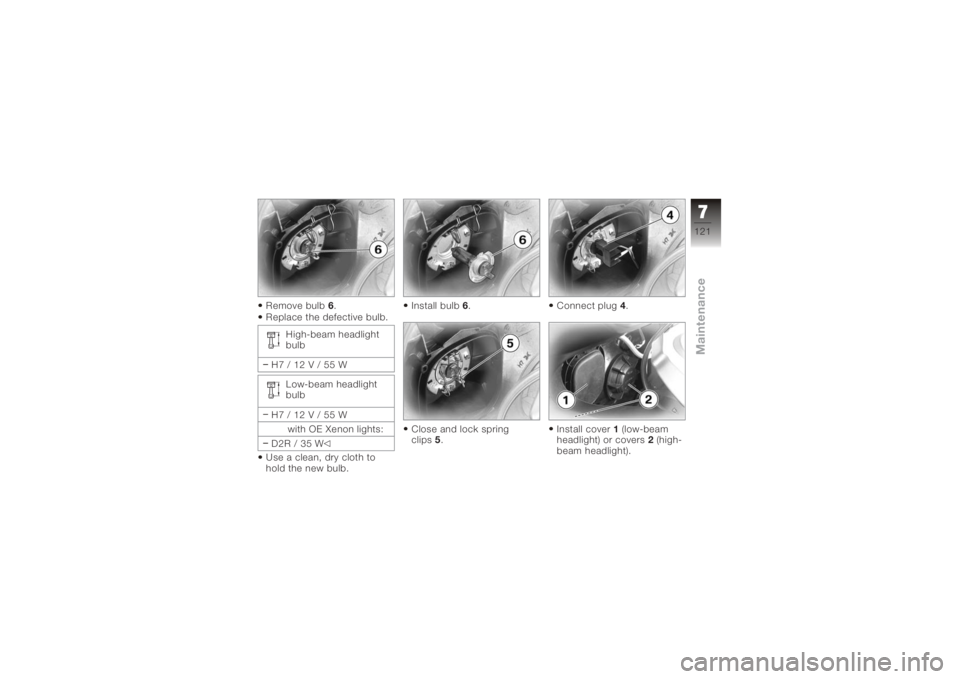
Remove bulb6.
Replace the defective bulb.
High-beam headlight
bulb
H7/12V/55W Low-beam headlight
bulb
H7/12V/55W with OE Xenon lights:
D2R / 35 W
Use a clean, dry cloth to
hold the new bulb. Install bulb
6.
Close and lock spring
clips 5. Connect plug
4.
Install cover 1(low-beam
headlight) or covers 2(high-
beam headlight).
7121zMaintenance
Page 124 of 172
Replacing parking-light
bulbs
If it is not standing firmly,
the motorcycle could
topple in the course of the
operations described below.
Always make sure that the
motorcycle is stable and
firmly supported.
Make sure the ground is
level and firm and place the
motorcycle on its stand.
Switch off the ignition.
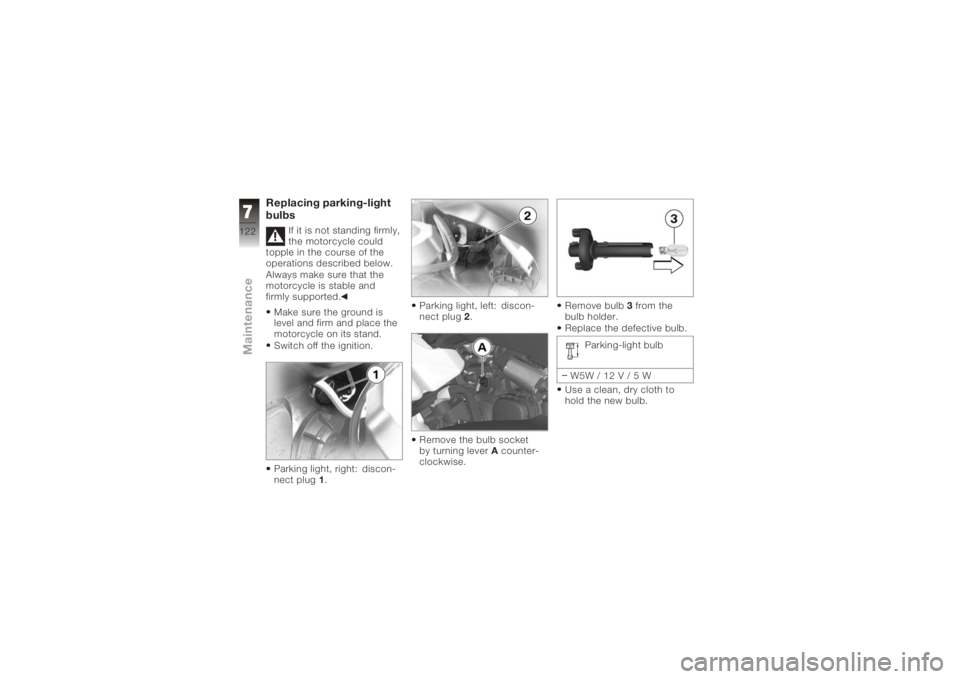
Parking light, right: discon-
nect plug 1. Parking light, left: discon-
nect plug
2.
Remove the bulb socket
by turning lever Acounter-
clockwise. Remove bulb
3from the
bulb holder.
Replace the defective bulb.
Parking-light bulb
W5W/12V/5W
Use a clean, dry cloth to
hold the new bulb.
7122zMaintenance
Page 125 of 172
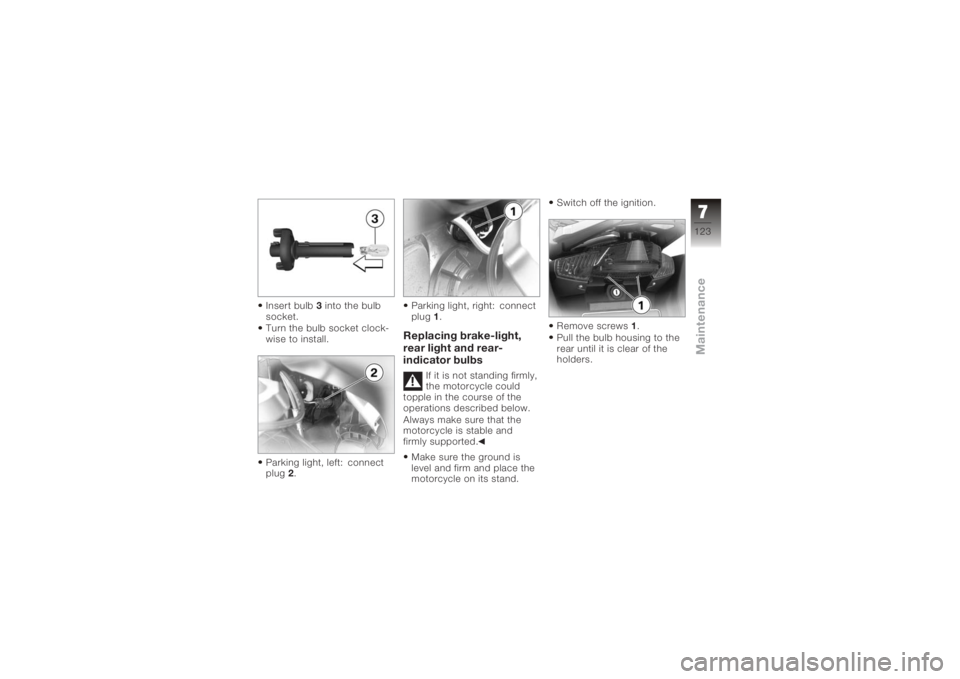
Insert bulb3into the bulb
socket.
Turn the bulb socket clock-
wise to install.
Parking light, left: connect
plug 2. Parking light, right: connect
plug
1.
Replacing brake-light,
rear light and rear-
indicator bulbs
If it is not standing firmly,
the motorcycle could
topple in the course of the
operations described below.
Always make sure that the
motorcycle is stable and
firmly supported.
Make sure the ground is
level and firm and place the
motorcycle on its stand. Switch off the ignition.
Remove screws
1.
Pull the bulb housing to the
rear until it is clear of the
holders.
7123zMaintenance
Page 126 of 172
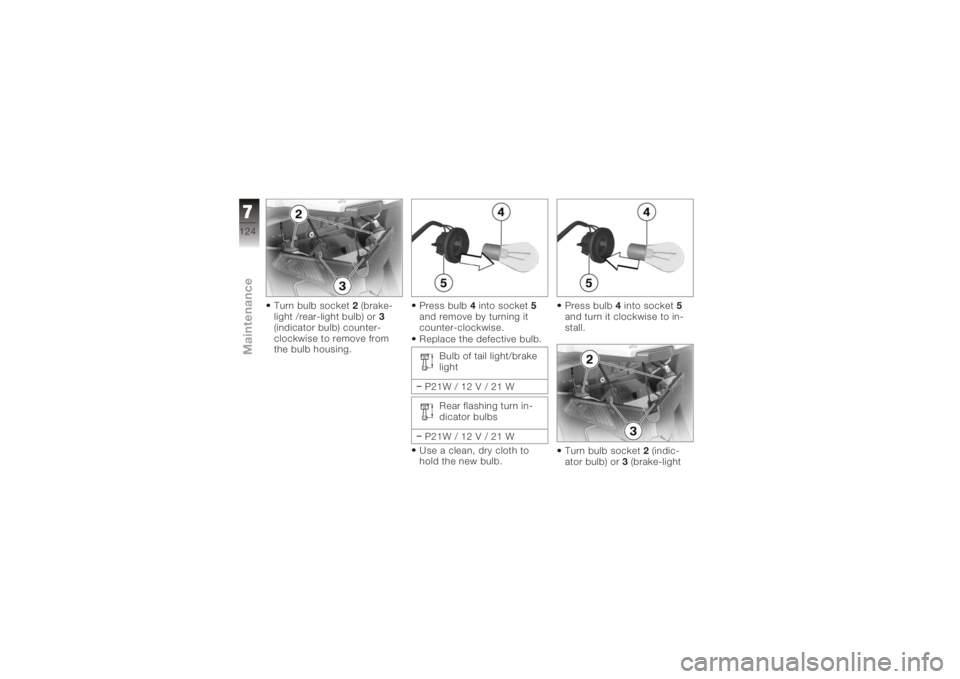
Turn bulb socket2(brake-
light /rear-light bulb) or 3
(indicator bulb) counter-
clockwise to remove from
the bulb housing. Press bulb
4into socket 5
and remove by turning it
counter-clockwise.
Replace the defective bulb.
Bulb of tail light/brake
light
P21W / 12 V / 21 W Rear flashing turn in-
dicator bulbs
P21W / 12 V / 21 W
Use a clean, dry cloth to
hold the new bulb. Press bulb
4into socket 5
and turn it clockwise to in-
stall.
Turn bulb socket 2(indic-
ator bulb) or 3(brake-light
7124zMaintenance
Page 127 of 172
/rear-light bulb) clockwise to
install it in the bulb housing.
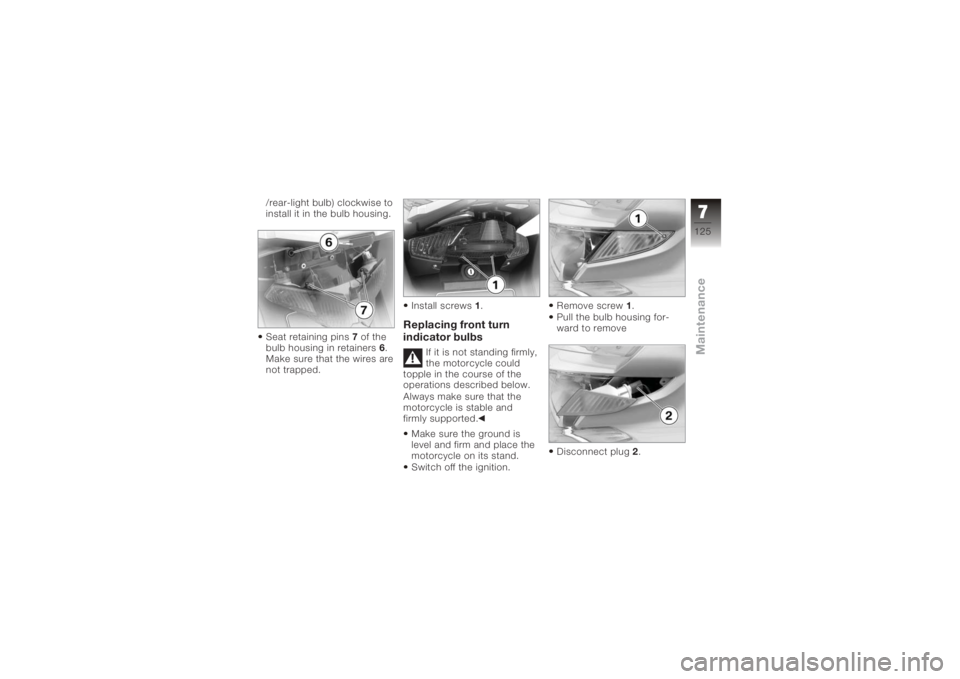
Seat retaining pins7of the
bulb housing in retainers 6.
Make sure that the wires are
not trapped. Install screws
1.
Replacing front turn
indicator bulbs
If it is not standing firmly,
the motorcycle could
topple in the course of the
operations described below.
Always make sure that the
motorcycle is stable and
firmly supported.
Make sure the ground is
level and firm and place the
motorcycle on its stand.
Switch off the ignition. Remove screw
1.
Pull the bulb housing for-
ward to remove
Disconnect plug 2.
7125zMaintenance
Page 128 of 172
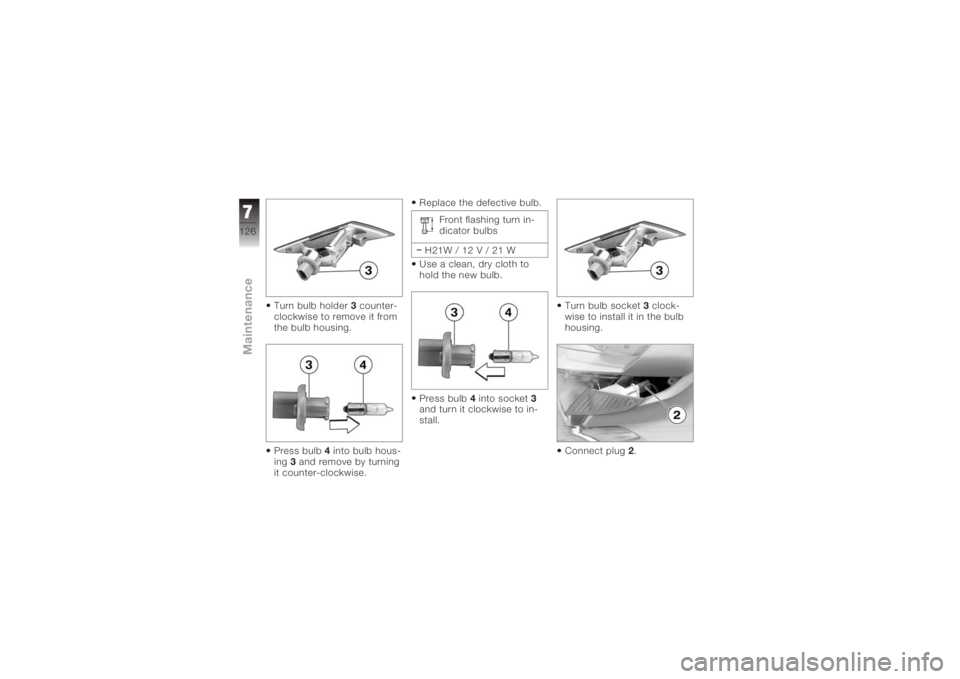
Turn bulb holder3counter-
clockwise to remove it from
the bulb housing.
Press bulb 4into bulb hous-
ing 3and remove by turning
it counter-clockwise. Replace the defective bulb.
Front flashing turn in-
dicator bulbs
H21W / 12 V / 21 W
Use a clean, dry cloth to
hold the new bulb.
Press bulb 4into socket 3
and turn it clockwise to in-
stall. Turn bulb socket
3clock-
wise to install it in the bulb
housing.
Connect plug 2.
7126zMaintenance
Page 130 of 172
end to the negative terminal
of the discharged battery.
Start the engine of the
vehicle with the discharged
battery in the usual way; if
the engine does not start,
wait a few minutes before
repeating the attempt
in order to protect the
starter motor and the donor
battery.
Allow both engines to idle
for a few minutes before
disconnecting the jump
leads.
Disconnect the jump lead
from the negative termin-
als first, then disconnect the
second lead from the posit-
ive terminals.
Installing battery-
compartment cover
( 130)
BatteryMaintenance instructionsCorrect upkeep, recharging
and storage will prolong the
life of the battery and are es-
sential if warranty claims are
to be considered.
Compliance with the points
below is important in order to
maximise battery life:Keep the surface of the bat-
tery clean and dry
Do not open the battery
Do not top up with water
Be sure to read and com-
ply with the instructions for
charging the battery on the
following pages
Do not turn the battery up-
side down
If the battery is not dis-
connected, the on-board
electronics (e.g. clock, etc.)
gradually drain the battery. This can cause the battery
to run flat. If this happens,
warranty claims will not be ac-
cepted.
If the motorcycle is to be out
of use for more than four
weeks, disconnect the battery
or connect a suitable trickle
charger to the battery.
BMW Motorrad has de-
veloped a trickle-charger
specially designed for com-
patibility with the electronics
of your motorcycle. Using this
charger, you can keep the
battery charged during long
periods of disuse, without
having to disconnect the bat-
tery from the motorcycle's
on-board systems. You can
obtain additional information
from your authorised BMW
Motorrad dealer.
7128zMaintenance
Page 134 of 172
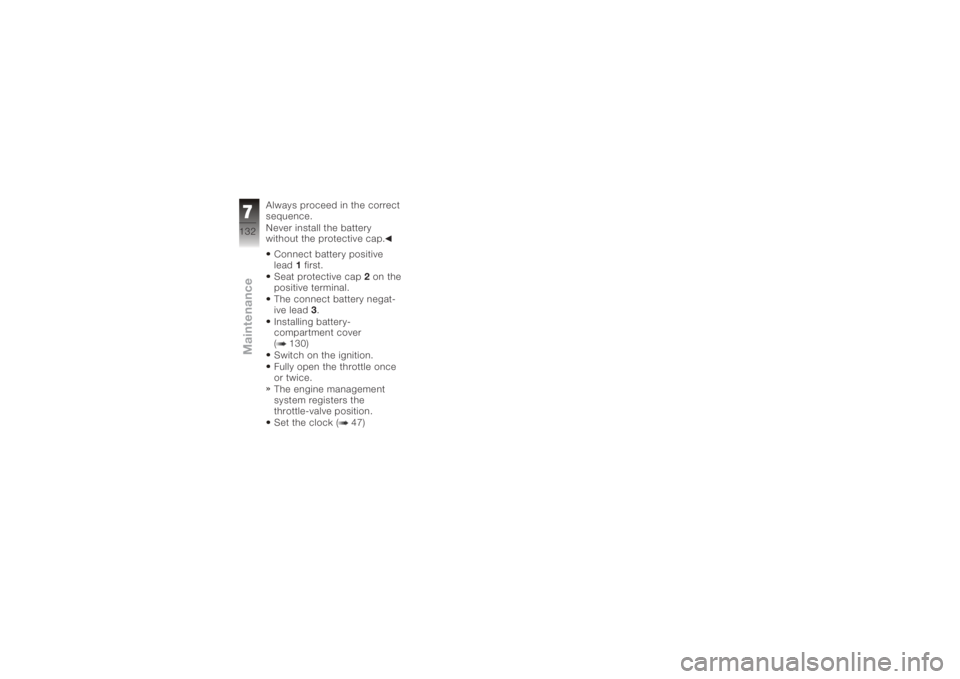
Always proceed in the correct
sequence.
Never install the battery
without the protective cap.Connect battery positive
lead 1first.
Seat protective cap 2on the
positive terminal.
The connect battery negat-
ive lead 3.
Installing battery-
compartment cover
( 130)
Switch on the ignition.
Fully open the throttle once
or twice.
The engine management
system registers the
throttle-valve position.
Set the clock ( 47)
7132zMaintenance
Page 147 of 172
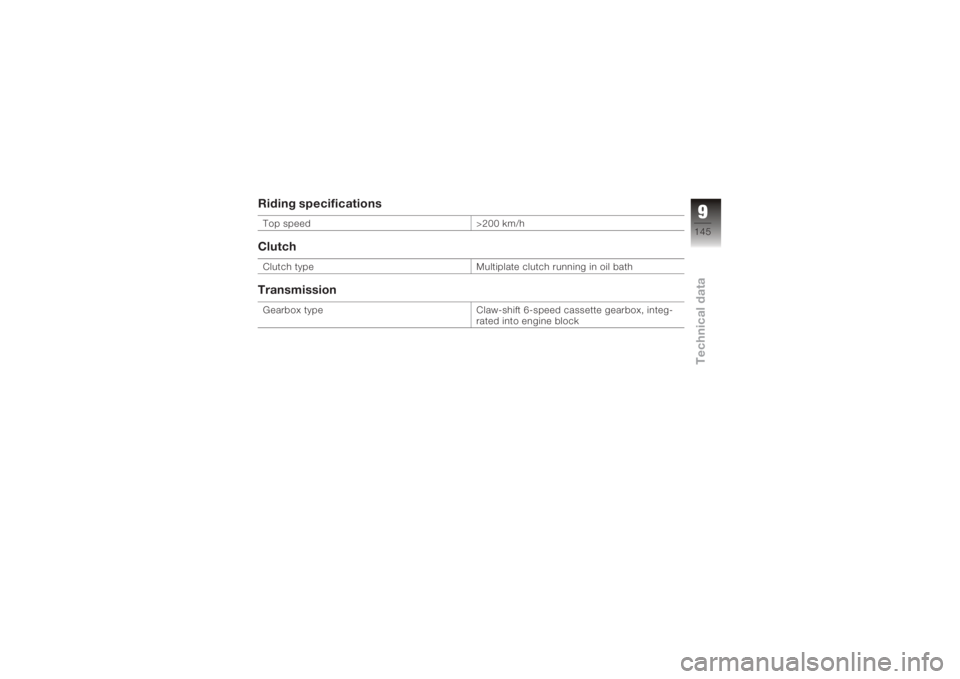
Riding specificationsTop speed>200 km/hClutchClutch typeMultiplate clutch running in oil bathTransmissionGearbox typeClaw-shift 6-speed cassette gearbox, integ-
rated into engine block
9145zTechnical data
Page 166 of 172
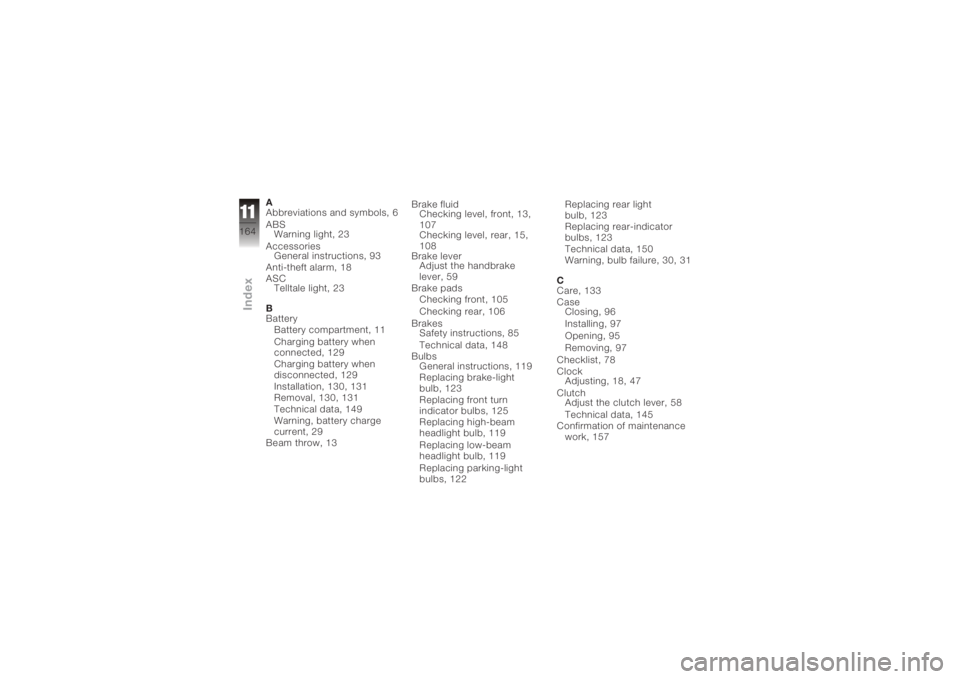
A
Abbreviations and symbols, 6
ABSWarning light, 23
Accessories General instructions, 93
Anti-theft alarm, 18
ASC Telltale light, 23
B
Battery Battery compartment, 11
Charging battery when
connected, 129
Charging battery when
disconnected, 129
Installation, 130, 131
Removal, 130, 131
Technical data, 149
Warning, battery charge
current, 29
Beam throw, 13 Brake fluid
Checking level, front, 13,
107
Checking level, rear, 15,
108
Brake lever Adjust the handbrake
lever, 59
Brake pads Checking front, 105
Checking rear, 106
Brakes Safety instructions, 85
Technical data, 148
Bulbs General instructions, 119
Replacing brake-light
bulb, 123
Replacing front turn
indicator bulbs, 125
Replacing high-beam
headlight bulb, 119
Replacing low-beam
headlight bulb, 119
Replacing parking-light
bulbs, 122 Replacing rear light
bulb, 123
Replacing rear-indicator
bulbs, 123
Technical data, 150
Warning, bulb failure, 30, 31
C
Care, 133
Case Closing, 96
Installing, 97
Opening, 95
Removing, 97
Checklist, 78
Clock Adjusting, 18, 47
Clutch Adjust the clutch lever, 58
Technical data, 145
Confirmation of maintenance work, 157
11164zIndex