brake fluid BMW MOTORRAD K 1200 GT 2006 Rider's Manual (in English)
[x] Cancel search | Manufacturer: BMW MOTORRAD, Model Year: 2006, Model line: K 1200 GT, Model: BMW MOTORRAD K 1200 GT 2006Pages: 172, PDF Size: 1.98 MB
Page 5 of 172
Spring preload.......... 69
Shock absorbers . . . . . . . . 70
Electronic Suspension
Adjustment ESA
OE
....... 71
Tyres . . ................. 73
5 Riding . . . . . . .......... 75
Safety instructions . . . . . . . 76
Checklist . . . . . . .......... 78
Starting ................. 78
Running in . . . . .......... 81
Parking your
motorcycle . . . . .......... 82
Refuelling . . . . . .......... 83
Tyre pressure control
RDC
OE
.................. 85
Brake system, general . . . 85
Brake system with BMW
Motorrad Integral ABS . . . 86
Electronic engine
management with BMW
Motorrad ASC
OE
......... 90
6 Accessories .......... 93
General instructions . . . . . 94
Power socket . .......... 94
Luggage . . . . . . .......... 95 Case . . .
................. 95
Topcase
OA
.............. 98
7 Maintenance . . . ..... 101
General instructions . . . . 102
Toolkit . ................ 102
Engine oil . . . . . ......... 103
Brake system,
general ................ 105
Brake pads . . . . ......... 105
Brake fluid . . . . ......... 107
Clutch . ................ 109
Tyres . . ................ 109
Rims . . . ................ 110
Wheels . ................ 110
Front-wheel stand . ..... 117
Bulbs . . ................ 119
Jump start . . . . ......... 127
Battery . ................ 128
8 Care . ................ 133
Care products . ......... 134
Washing motorcycle . . . . 134
Cleaning easily damaged
components . . . ......... 135
Paint care . . . . . ......... 136 Protective wax
coating
................ 136
Laying up the
motorcycle . . . . ......... 136
Restoring motorcycle to
use .................... 137
9 Technical data . . ..... 139
Troubleshooting
chart . . . ................ 140
Threaded fasteners ..... 141
Engine . ................ 142
Riding specifications . . . . 145
Clutch . ................ 145
Transmission . . ......... 145
Final drive . . . . . ......... 147
Running gear . . ......... 147
Brakes . ................ 148
Wheels and tyres . . ..... 148
Electrics . . . . . . ......... 149
Frame . . ................ 151
Dimensions . . . ......... 151
Weights ................ 152
Page 15 of 172
General view, right
side1Filler neck, fuel ( 83)
2 Adjustable handlebars
( 59)
3 Brake-fluid reservoir,
front ( 107)
4 Adjuster for headlight
beam throw underneath
the instrument cluster
( 61)
5 Stowage compartment
( 63)
6 Vehicle identification
number
213zGeneral views
Page 17 of 172

Underneath the seat1Seat height adjuster
( 66)
2 Filler neck for engine oil
and oil dipstick ( 103)
( 105)
3 Brake-fluid reservoir, rear
( 108)
4 Helmet holder ( 68)
5 Rider's Manual
6 Toolkit ( 102)
215zGeneral views
Page 61 of 172
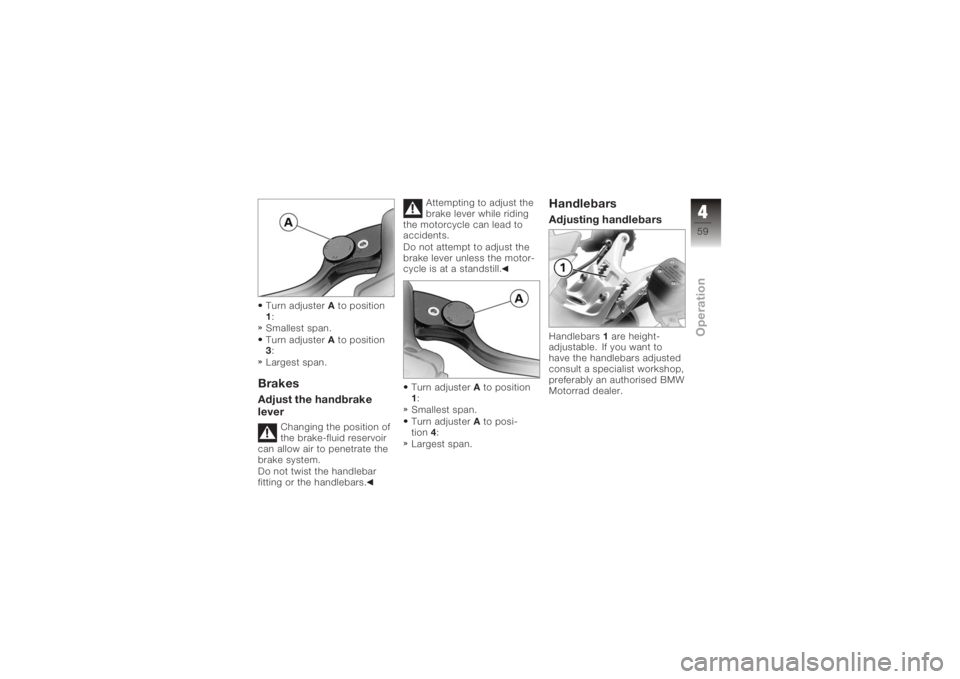
Turn adjusterAto position
1 :
Smallest span.
Turn adjuster Ato position
3 :
Largest span.BrakesAdjust the handbrake
lever
Changing the position of
the brake-fluid reservoir
can allow air to penetrate the
brake system.
Do not twist the handlebar
fitting or the handlebars. Attempting to adjust the
brake lever while riding
the motorcycle can lead to
accidents.
Do not attempt to adjust the
brake lever unless the motor-
cycle is at a standstill.
Turn adjuster Ato position
1 :
Smallest span.
Turn adjuster Ato posi-
tion 4:
Largest span.
HandlebarsAdjusting handlebarsHandlebars 1are height-
adjustable. If you want to
have the handlebars adjusted
consult a specialist workshop,
preferably an authorised BMW
Motorrad dealer.
459zOperation
Page 80 of 172
ponents are not designed to
withstand. Damage caused in
this way is not covered by the
warranty.
Do not tamper with the
control unit of the electronic
engine-management
system.ChecklistUse the following checklist
to check important functions,
settings and wear limits be-
fore you ride off.Brakes
Brake-fluid levels, front and
rear
Clutch
Clutch fluid level
Shock absorber setting and
spring preload
Tyre-tread depth and tyre
pressures Cases correctly installed
and luggage secured
At regular intervals: Engine oil level (every refuel-
ling stop)
StartingSide standYou cannot start the motor-
cycle with the side stand ex-
tended and a gear engaged.
The engine will switch itself off
if you start it with the gearbox
in neutral and then engage a
gear before retracting the side
stand.GearboxYou can start the engine
when the gearbox is in neutral
or if you pull the clutch with
a gear engaged. Do not pull
the clutch until after you have
switched on the ignition, as
otherwise the engine will refuse to start. When the
gearbox is in neutral, the
green neutral telltale light is
on and the gear indicator
in the multifunction display
shows N.
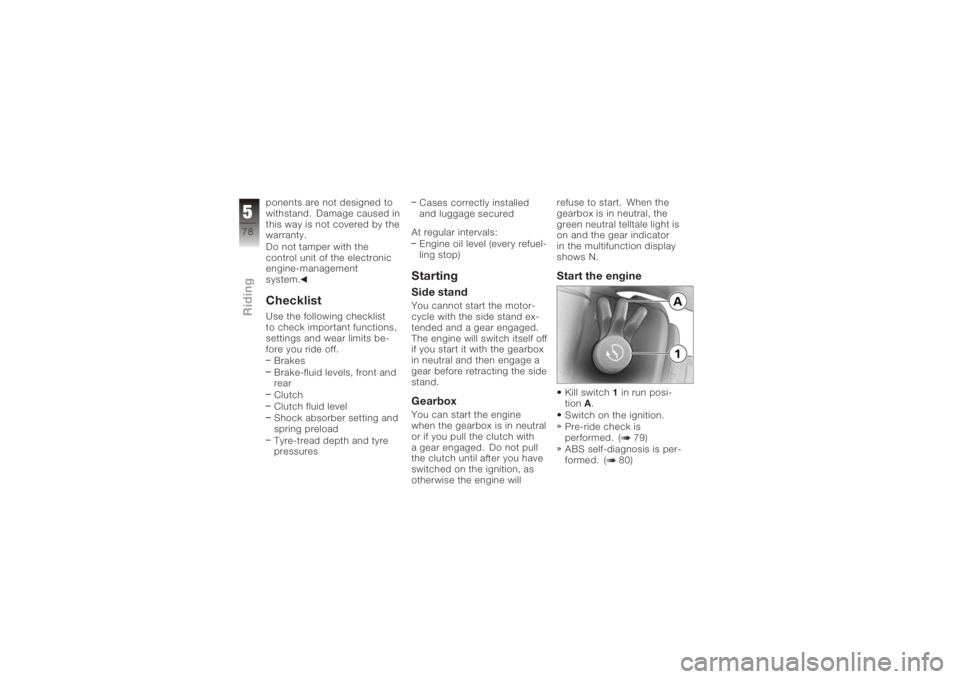
Start the engineKill switch
1in run posi-
tion A.
Switch on the ignition.
Pre-ride check is
performed. ( 79)
ABS self-diagnosis is per-
formed. ( 80)
578zRiding
Page 103 of 172
Maintenance
General instructions . . . . . . . . . . 102
Toolkit . . . . . . . . . . . . . . . . . . . . . . . 102
Engine oil . . . . . . . . . . . . . . . . . . . . 103
Brake system, general . . . . . . . . 105
Brake pads . . . . . . . . . . . . . . . . . . . 105
Brake fluid . . . . . . . . . . . . . . . . . . . 107
Clutch . . . . . . . . . . . . . . . . . . . . . . . 109
Tyres . . . . . . . . . . . . . . . . . . . . . . . . 109
Rims . . . . . . . . . . . . . . . . . . . . . . . . . 110
Wheels . . . . . . . . . . . . . . . . . . . . . . 110
Front-wheel stand . . . . . . . . . . . . 117
Bulbs . . . . . . . . . . . . . . . . . . . . . . . . 119
Jump start . . . . . . . . . . . . . . . . . . . 127
Battery . . . . . . . . . . . . . . . . . . . . . . . 128
7101zMaintenance
Page 109 of 172
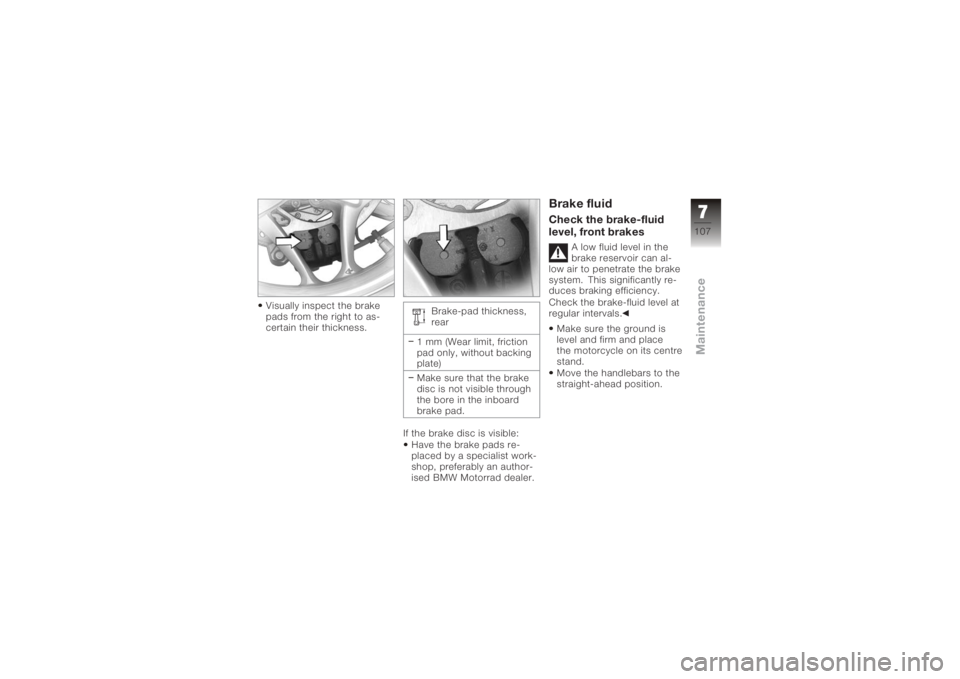
Visually inspect the brake
pads from the right to as-
certain their thickness.Brake-pad thickness,
rear
1 mm (Wear limit, friction
pad only, without backing
plate)
Make sure that the brake
disc is not visible through
the bore in the inboard
brake pad.
If the brake disc is visible: Have the brake pads re-
placed by a specialist work-
shop, preferably an author-
ised BMW Motorrad dealer.
Brake fluidCheck the brake-fluid
level, front brakes
A low fluid level in the
brake reservoir can al-
low air to penetrate the brake
system. This significantly re-
duces braking efficiency.
Check the brake-fluid level at
regular intervals.
Make sure the ground is
level and firm and place
the motorcycle on its centre
stand.
Move the handlebars to the
straight-ahead position.
7107zMaintenance
Page 110 of 172
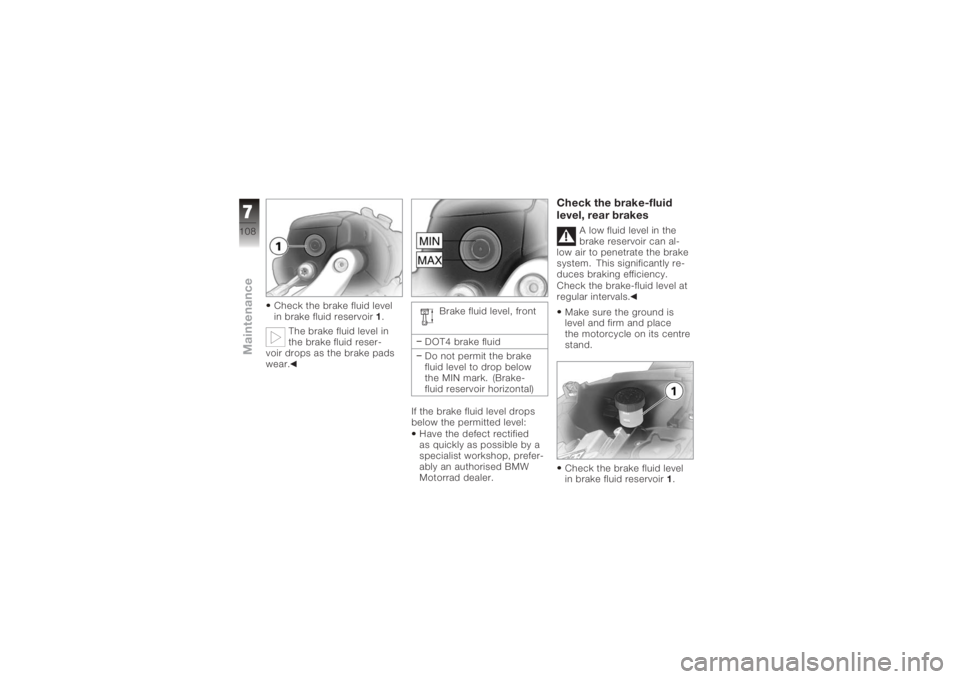
Check the brake fluid level
in brake fluid reservoir1.
The brake fluid level in
the brake fluid reser-
voir drops as the brake pads
wear. Brake fluid level, front
DOT4 brake fluid
Do not permit the brake
fluid level to drop below
the MIN mark. (Brake-
fluid reservoir horizontal)
If the brake fluid level drops
below the permitted level: Have the defect rectified
as quickly as possible by a
specialist workshop, prefer-
ably an authorised BMW
Motorrad dealer.
Check the brake-fluid
level, rear brakes
A low fluid level in the
brake reservoir can al-
low air to penetrate the brake
system. This significantly re-
duces braking efficiency.
Check the brake-fluid level at
regular intervals.
Make sure the ground is
level and firm and place
the motorcycle on its centre
stand.
Check the brake fluid level
in brake fluid reservoir 1.
7108zMaintenance
Page 111 of 172
The brake fluid level in
the brake fluid reser-
voir drops as the brake pads
wear.
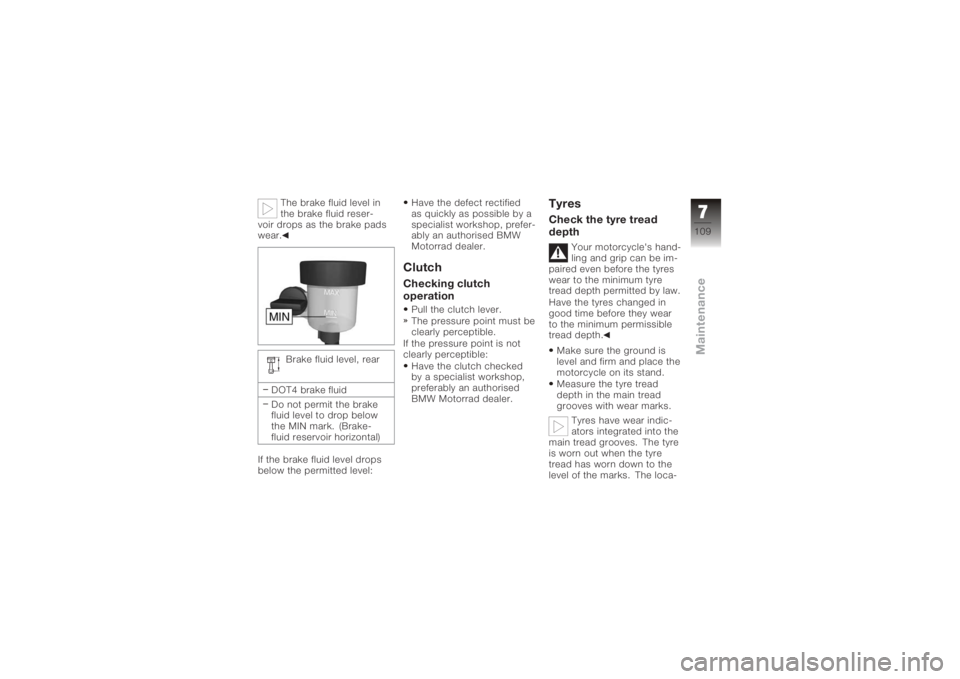
Brake fluid level, rear
DOT4 brake fluid
Do not permit the brake
fluid level to drop below
the MIN mark. (Brake-
fluid reservoir horizontal)
If the brake fluid level drops
below the permitted level: Have the defect rectified
as quickly as possible by a
specialist workshop, prefer-
ably an authorised BMW
Motorrad dealer.
ClutchChecking clutch
operationPull the clutch lever.
The pressure point must be
clearly perceptible.
If the pressure point is not
clearly perceptible:
Have the clutch checked
by a specialist workshop,
preferably an authorised
BMW Motorrad dealer.
TyresCheck the tyre tread
depth
Your motorcycle's hand-
ling and grip can be im-
paired even before the tyres
wear to the minimum tyre
tread depth permitted by law.
Have the tyres changed in
good time before they wear
to the minimum permissible
tread depth.
Make sure the ground is
level and firm and place the
motorcycle on its stand.
Measure the tyre tread
depth in the main tread
grooves with wear marks. Tyres have wear indic-
ators integrated into the
main tread grooves. The tyre
is worn out when the tyre
tread has worn down to the
level of the marks. The loca-
7109zMaintenance
Page 138 of 172
Paint careWashing the motorcycle
regularly will help counteract
the long-term effects of
substances that damage
the paint, especially if your
motorcycle is ridden in areas
with high air pollution or
natural sources of dirt, for
example tree resin or pollen.
Remove particularly
aggressive substances
immediately, however, as
otherwise the paint can
be affected or become
discoloured. Substances
of this nature include spilt
fuel, oil, grease, brake fluid
and bird droppings. We
recommend BMW vehicle
polish or BMW paint cleaner
for this purpose.
Marks on the paintwork are
particularly easy to see after
the motorcycle has been
washed. Remove stains ofthis kind immediately, using
cleaning-grade benzene or
petroleum spirit on a clean
cloth or ball of cotton wool.
We recommend that specks
of tar be removed with BMW
tar remover. Remember to
wax the parts treated in this
way.
Protective wax
coatingFor the protective wax coating
of paint, we recommend that
you use only BMW vehicle
wax or agents that contain
carnauba wax or synthetic
waxes.
It is time to rewax the paint-
work when water "puddles"
on the surface, instead of
forming beads.
Laying up the
motorcycleClean the motorcycle.
Remove the battery.
Spray the brake and clutch
lever pivots and the main
and side stand pivots with a
suitable lubricant.
Coat bright metal and
chrome-plated parts with
an acid-free grease (e.g.
Vaseline).
Stand the motorcycle in a
dry room in such a way that
there is no load on either
wheel.
Before laying the vehicle
up out of use, have the
engine oil and the oil filter ele-
ment changed by a special-
ist workshop, preferably an
authorised BMW Motorrad
dealer. Combine work for lay-
ing up/restoring to use with a
BMW service or inspection.
8136zCare