brake BMW MOTORRAD K 1200 S 2005 Rider's Manual (in English)
[x] Cancel search | Manufacturer: BMW MOTORRAD, Model Year: 2005, Model line: K 1200 S, Model: BMW MOTORRAD K 1200 S 2005Pages: 165, PDF Size: 2.01 MB
Page 37 of 165
Operation
Ignition switch and steering
lock . .......................... 36
Electronic immobiliser ......... 37
Hazard warning flashers . . . .... 38
Tripmaster .................... 39
On-board computer
OE
......... 41
Clock ......................... 44
Emergency off switch (kill
switch) ........................ 45
Grip heating
OE
................ 45
Clutch ........................ 46
Brakes ........................ 46
Lights ......................... 47
Headlight . .................... 48
Turn indicators . ............... 49
Seat . ......................... 50 Helmet holder . .
............... 52
Luggage loops . ............... 53
Mirrors . . . ..................... 53
Spring preload . ............... 53
Shock absorbers .............. 54
Electronic Suspension
Adjustment ESA
OE
............ 56
Tyres ......................... 57
435zOperation
Page 38 of 165
Ignition switch and
steering lockKeysYou receive one master key
and one spare key. Please
consult the information on the
electronic immobiliser (EWS) if
a key is lost or mislaid ( 37).Ignition switch and steer-
ing lock, tank filler cap
lock and seat lock are all op-
erated with the same key. If
you wish you can arrange to
have the cases available as
optional accessories fitted
with locks that can be opened
with this key as well.
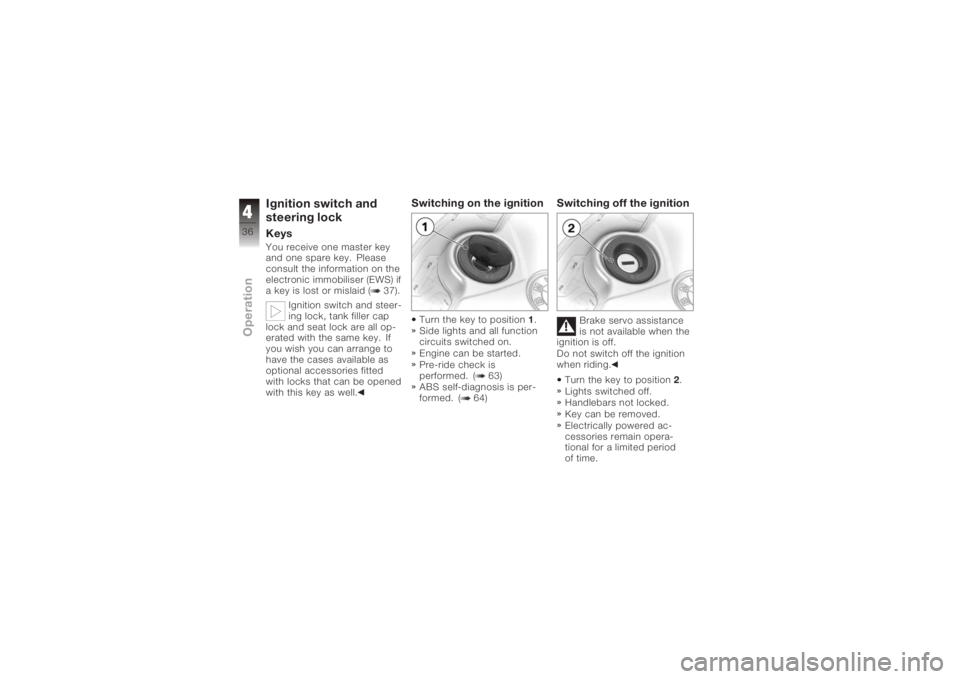
Switching on the ignitionTurn the key to position 1.
Side lights and all function
circuits switched on.
Engine can be started.
Pre-ride check is
performed. ( 63)
ABS self-diagnosis is per-
formed. ( 64)
Switching off the ignition
Brake servo assistance
is not available when the
ignition is off.
Do not switch off the ignition
when riding.
Turn the key to position 2.
Lights switched off.
Handlebars not locked.
Key can be removed.
Electrically powered ac-
cessories remain opera-
tional for a limited period
of time.
436zOperation
Page 48 of 165
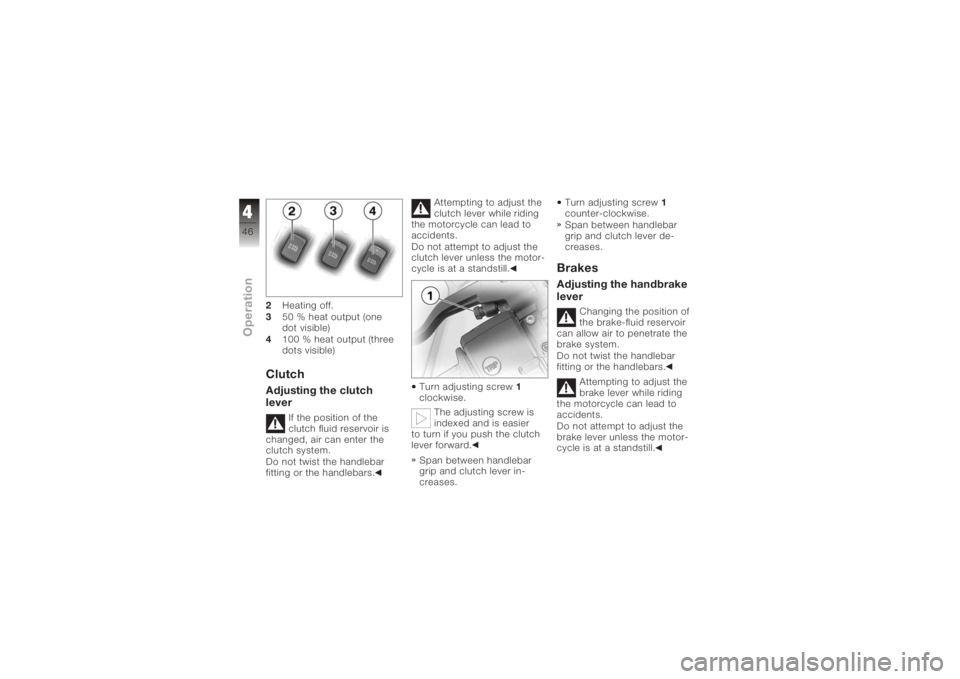
2Heating off.
3 50 % heat output (one
dot visible)
4 100 % heat output (three
dots visible)ClutchAdjusting the clutch
lever
If the position of the
clutch fluid reservoir is
changed, air can enter the
clutch system.
Do not twist the handlebar
fitting or the handlebars. Attempting to adjust the
clutch lever while riding
the motorcycle can lead to
accidents.
Do not attempt to adjust the
clutch lever unless the motor-
cycle is at a standstill.
Turn adjusting screw 1
clockwise.
The adjusting screw is
indexed and is easier
to turn if you push the clutch
lever forward.
Span between handlebar
grip and clutch lever in-
creases. Turn adjusting screw
1
counter-clockwise.
Span between handlebar
grip and clutch lever de-
creases.
BrakesAdjusting the handbrake
lever
Changing the position of
the brake-fluid reservoir
can allow air to penetrate the
brake system.
Do not twist the handlebar
fitting or the handlebars.
Attempting to adjust the
brake lever while riding
the motorcycle can lead to
accidents.
Do not attempt to adjust the
brake lever unless the motor-
cycle is at a standstill.
446zOperation
Page 49 of 165
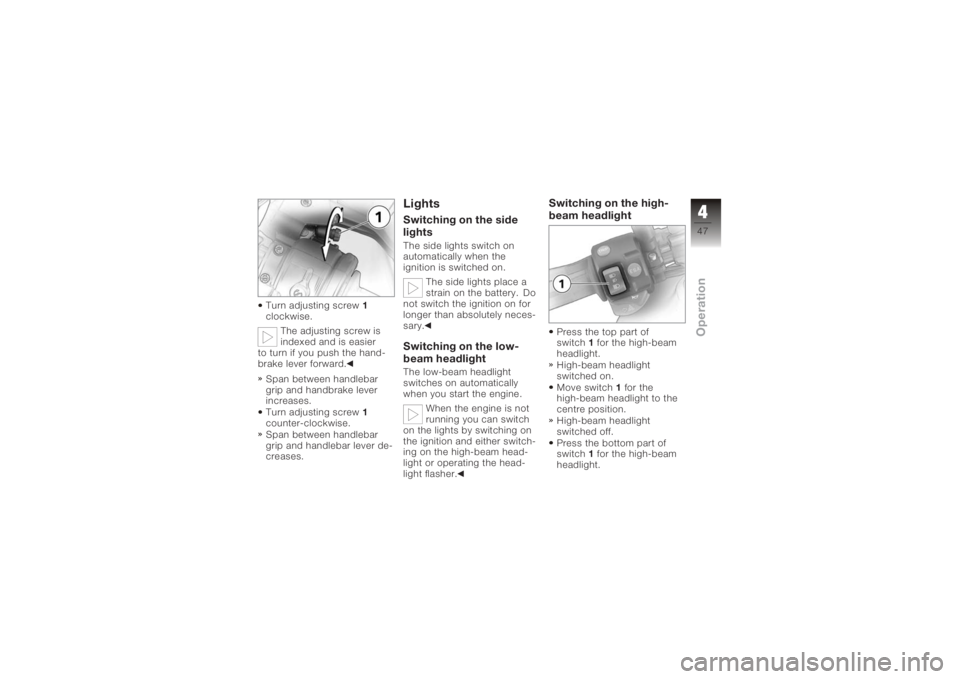
Turn adjusting screw1
clockwise.
The adjusting screw is
indexed and is easier
to turn if you push the hand-
brake lever forward.
Span between handlebar
grip and handbrake lever
increases.
Turn adjusting screw 1
counter-clockwise.
Span between handlebar
grip and handlebar lever de-
creases.
LightsSwitching on the side
lightsThe side lights switch on
automatically when the
ignition is switched on.
The side lights place a
strain on the battery. Do
not switch the ignition on for
longer than absolutely neces-
sary.Switching on the low-
beam headlightThe low-beam headlight
switches on automatically
when you start the engine.
When the engine is not
running you can switch
on the lights by switching on
the ignition and either switch-
ing on the high-beam head-
light or operating the head-
light flasher.
Switching on the high-
beam headlightPress the top part of
switch 1for the high-beam
headlight.
High-beam headlight
switched on.
Move switch 1for the
high-beam headlight to the
centre position.
High-beam headlight
switched off.
Press the bottom part of
switch 1for the high-beam
headlight.
447zOperation
Page 61 of 165
Riding
Safety instructions............. 60
Checklist . . .................... 62
Starting . . . .................... 62
Pulling away . . . ............... 65
Running in .................... 65
Parking your motorcycle . . . .... 69
Refuelling . .................... 76
Brake system, general ......... 77
Brake system with BMW Integral
ABS .......................... 77
559zRiding
Page 64 of 165
components are not designed
to withstand. Damage caused
in this way is not covered by
the warranty.
Do not tamper with the
control unit of the electronic
engine-management
system.ChecklistUse the following checklist
to check important functions,
settings and wear limits be-
fore you ride off.Brakes
Brake-fluid levels, front and
rear
Clutch
Clutch fluid level
Shock absorber setting and
spring preload
Tyre-tread depth and tyre
pressures Cases correctly installed
and luggage secured
At regular intervals: Engine oil level (every refuel-
ling stop)
Brake-pad wear (every third
refuelling stop)
StartingSide standYou cannot start the motor-
cycle with the side stand ex-
tended and a gear engaged.
The engine will switch itself
off if you start it with the gear-
box in neutral and then en-
gage a gear before retracting
the side stand.GearboxYou can start the engine
when the gearbox is in neutral
or if you pull the clutch with a
gear engaged. Switch on the
ignition before you pull the clutch. When the gearbox is
in neutral, the green neutral
telltale light is on and the gear
indicator in the multifunction
display shows 0.
Starting the engine
If you switch on the ig-
nition while the brakes
are applied, then start the
engine and ride off immedi-
ately, the BMW Integral ABS
remains in residual braking
function mode. Self-diagnosis
is performed as soon as the
brake levers are in their fully
released positions for the first
time. Until this completes the
ABS function is not available;
the same applies to power
assistance for the brakes.
When you start the engine,
wait for the ABS to complete
its self-diagnosis.
Switch on the ignition.
562zRiding
Page 66 of 165
Phase 2General warning light
lights up red.CHECK!
indicator appears
on the display.
If the 'General' warning light is
not displayed:
Some malfunctions can-
not be indicated if the
'General' warning light cannot
be displayed.
Check that the 'General'
warning light comes on, and
that it lights up yellow and
then red.
Have the fault rectified as
soon as possible by a spe-
cialist workshop, preferably
an authorised BMW Motor-
rad dealer.
ABS warning lightsThere are two country-
dependent versions of the
ABS warning light:
Country-dependent ver-
sion 1.
Country-dependent ver-
sion 2.
The description below is
based on country-dependent
version 1.ABS self-diagnosisBMW Integral ABS performs
self-diagnosis and a
pull-away test to ensure its
operability. Self-diagnosis
is performed automatically
when you switch on the
ignition. Self-diagnosis is
not performed unless both
brake levers are in their fully
released positions. Phase 1
Self-diagnosis is in progress.
General warning light
lights up red.
ABS warning light
flashes four times per
second.
Phase 2
Self-diagnosis is complete.
ABS warning light
flashes once per
second.
If self-diagnosis did not com-
plete:
Release the brake levers as
soon as possible.
If an error message appears
when self-diagnosis com-
pletes: See the section entitled
"Status indicators" for in-
formation on how to inter-
pret these messages.
564zRiding
Page 67 of 165
The ABS warning light
does not go out until the
pull-away test completes.
Pulling awayStarting on gradientsSelect a gear.
Release the clutch lever and
both brake levers.
Switch on the ignition.
ABS pull-away testWhen you pull away, the
BMW Integral ABS checks the
ABS sensors.
ABS warning light
flashes once per
second.
The ABS warning light goes
out when the pull-away test
completes.
If an error message appears
when the pull-away test com-
pletes: See the section entitled
"Status indicators" for in-
formation on how to inter-
pret these messages.Running inThe first 1000 kmWhile running in the mo-
torcycle, vary the throttle
opening and engine-speed
range frequently. Try to do most of your rid-
ing during this initial period
on twisting, fairly hilly roads,
avoiding high-speed main
roads and highways if pos-
sible.
Exceeding the specified
engine speeds while run-
ning in will lead to increased
engine wear.
Keep to the specified engine
speeds for running in.
Do not exceed the rpm lim-
its recommended for run-
ning in.
Running-in speeds
7000 min
-1
No full-load acceleration.
Avoid low engine speeds at
full load.
Do not omit the first inspec-
tion after 500 - 1200 km.
565zRiding
Wait for ABS self-diagnosis
to complete.
Apply the brakes and disen-
gage the clutch.
Start the engine.Pre-ride check is
performed. ( 63)
Page 68 of 165
Brake padsNew brake pads must "bed
down" and therefore do not
achieve their optimum friction
levels during the first 500 km.
You can compensate for this
initial reduction in braking ef-
ficiency by exerting greater
pressure on the levers.New brake pads can ex-
tend stopping distance
by a significant margin.
Apply the brakes in good
time.TyresNew tyres have a smooth
surface. This must be
roughened by riding in a
restrained manner at various
heel angles until the tyres
are run in. This running in
procedure is essential if the
tyres are to achieve maximum
grip. Tyres do not have their
full grip when new and
there is a risk of accident at
extreme angles of heel.
Avoid extreme angles of
heel.
566zRiding
Page 71 of 165
Parking your motor-
cycle
Placing motorcycle on
side stand
If the ground is soft or
uneven, there is no guar-
antee that the motorcycle will
rest firmly on the stand.
Always check that the ground
under the stand is level and
firm.
Switch off the engine.
Pull the handbrake lever.
Hold the motorcycle upright
and balanced.
Use your left foot to extend
the side stand fully (arrow). The side stand is de-
signed to support only
the weight of the motorcycle.
Do not lean or sit on the mo-
torcycle with the side stand
extended. Slowly lean the motorcycle
to the side until its weight
is taken by the stand and
dismount to the left.
If the motorcycle is on
the side stand, the sur-
face of the ground will de-
termine whether it is better to
turn the handlebars to the left
or right. However, the motor-
cycle is more stable on a level
surface with the handlebars
turned to the left than with
the handlebars turned to the
right.
On level ground, always turn
the handlebars to the left to
set the steering lock.
Turn the handlebars to full
left or right lock.
Check that the motorcycle
is standing firmly. On a gradient, the mo-
torcycle should always
face uphill; select 1st gear.
569zRiding