wheel torque BMW MOTORRAD K 1200 S 2005 Rider's Manual (in English)
[x] Cancel search | Manufacturer: BMW MOTORRAD, Model Year: 2005, Model line: K 1200 S, Model: BMW MOTORRAD K 1200 S 2005Pages: 165, PDF Size: 2.01 MB
Page 105 of 165
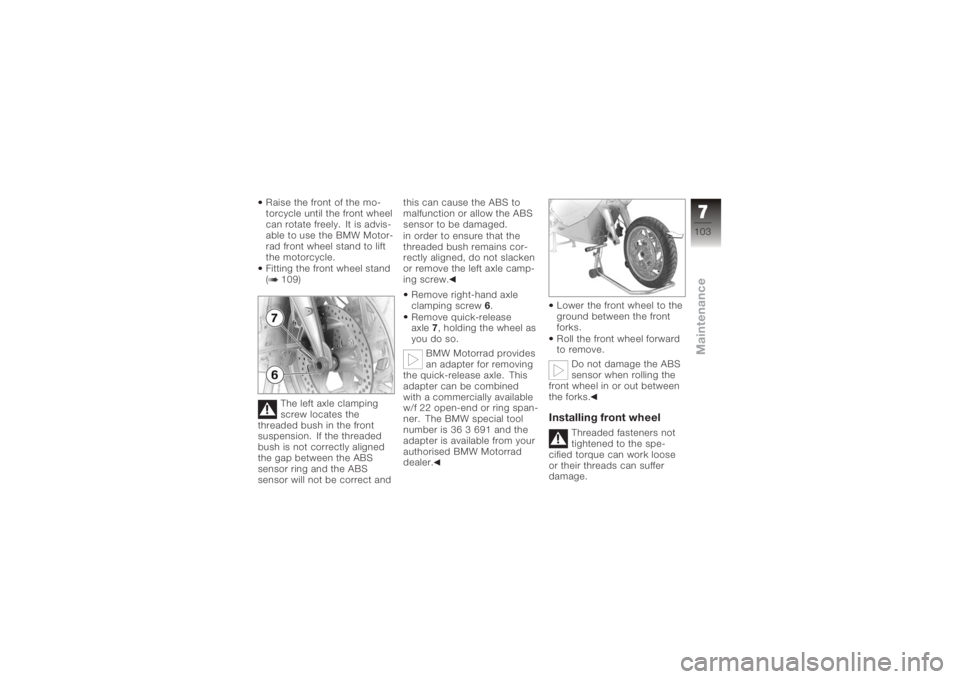
Raise the front of the mo-
torcycle until the front wheel
can rotate freely. It is advis-
able to use the BMW Motor-
rad front wheel stand to lift
the motorcycle.
Fitting the front wheel stand
( 109)The left axle clamping
screw locates the
threaded bush in the front
suspension. If the threaded
bush is not correctly aligned
the gap between the ABS
sensor ring and the ABS
sensor will not be correct and this can cause the ABS to
malfunction or allow the ABS
sensor to be damaged.
in order to ensure that the
threaded bush remains cor-
rectly aligned, do not slacken
or remove the left axle camp-
ing screw.
Remove right-hand axle
clamping screw 6.
Remove quick-release
axle 7, holding the wheel as
you do so.
BMW Motorrad provides
an adapter for removing
the quick-release axle. This
adapter can be combined
with a commercially available
w/f 22 open-end or ring span-
ner. The BMW special tool
number is 36 3 691 and the
adapter is available from your
authorised BMW Motorrad
dealer. Lower the front wheel to the
ground between the front
forks.
Roll the front wheel forward
to remove.
Do not damage the ABS
sensor when rolling the
front wheel in or out between
the forks.
Installing front wheel
Threaded fasteners not
tightened to the spe-
cified torque can work loose
or their threads can suffer
damage.
7103zMaintenance
Page 106 of 165
Always have the security of
the fasteners checked by a
specialist workshop, prefer-
ably an authorised BMW Mo-
torrad dealer.There is a risk of
damaging parts of the
front brake, particularly the
BMW Integral ABS, in the
course of the procedure
described below.
Take care not to damage the
brake system, in particular the
ABS sensor with cable and
the ABS sensor ring.
The front wheel must be
installed right way round
to rotate in the correct direc-
tion.
Note the direction-of-rotation
arrows on the tyre or the
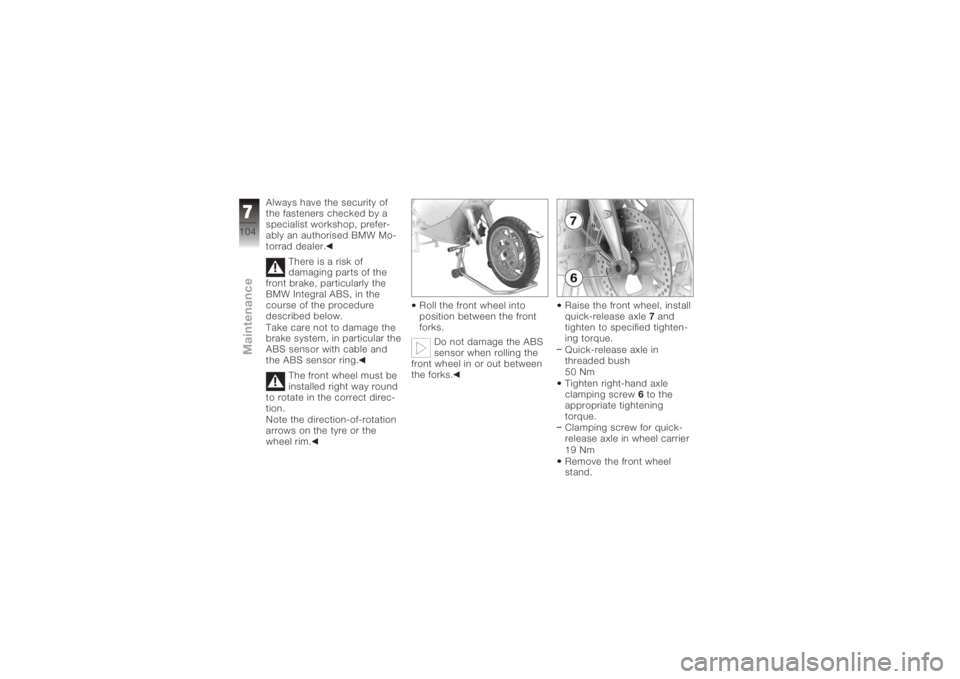
wheel rim. Roll the front wheel into
position between the front
forks.
Do not damage the ABS
sensor when rolling the
front wheel in or out between
the forks. Raise the front wheel, install
quick-release axle
7and
tighten to specified tighten-
ing torque.
Quick-release axle in
threaded bush
50 Nm
Tighten right-hand axle
clamping screw 6to the
appropriate tightening
torque.
Clamping screw for quick-
release axle in wheel carrier
19 Nm
Remove the front wheel
stand.
7104zMaintenance
Page 109 of 165
Lower the rear wheel to the
ground.
Roll the rear wheel out to-
ward the rear.
If you are using a BMW Mo-
torrad rear wheel stand: re-
install the retaining disc.Installing rear wheel
Threaded fasteners not
tightened to the spe-
cified torque can work loose
or their threads can suffer
damage.
Always have the security of
the fasteners checked by a
specialist workshop, prefer- ably an authorised BMW Mo-
torrad dealer.
If you are using a BMW Mo-
torrad rear wheel stand: re-
move the retaining disc.
Roll the rear wheel into po-
sition at the rear-wheel ad-
apter.
Seat the rear wheel on the
rear-wheel adapter.
If you are using a BMW Mo-
torrad rear wheel stand: re-
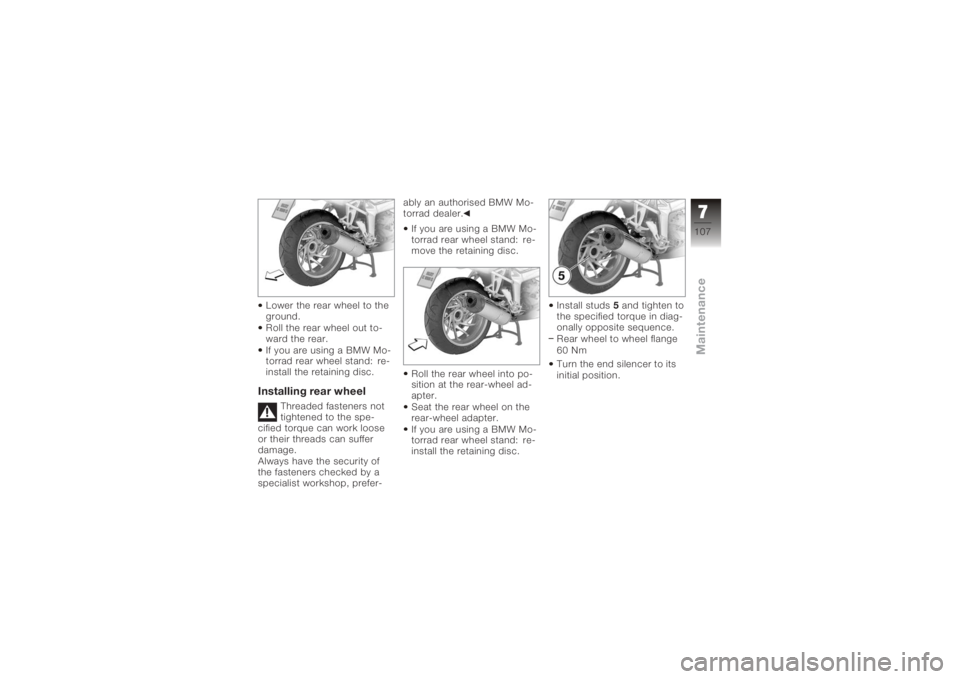
install the retaining disc. Install studs
5and tighten to
the specified torque in diag-
onally opposite sequence.
Rear wheel to wheel flange
60 Nm
Turn the end silencer to its
initial position.
7107zMaintenance
Page 135 of 165
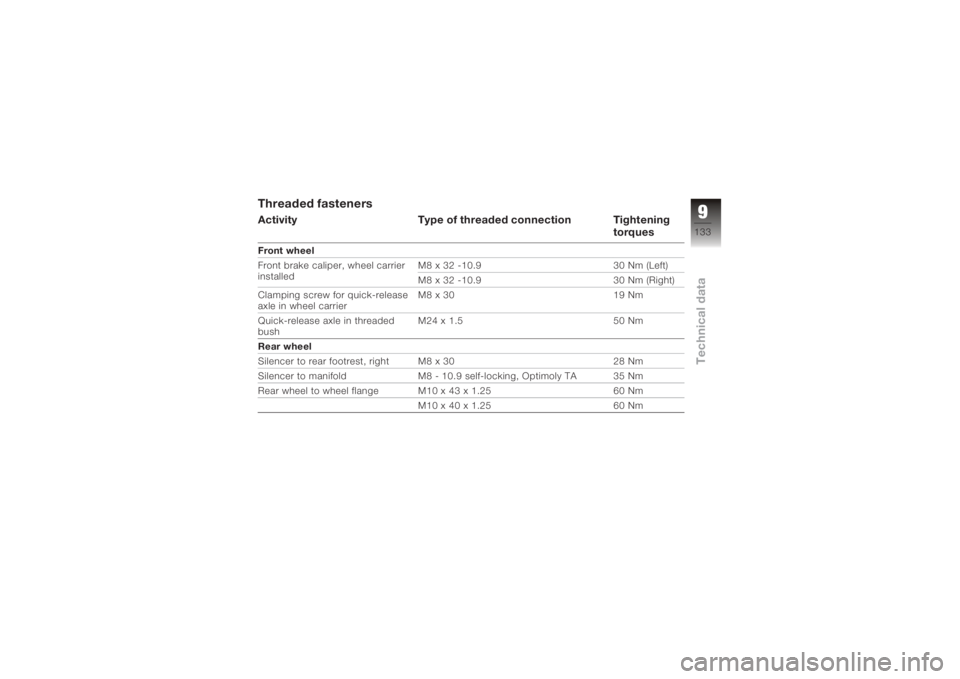
Threaded fastenersActivityType of threaded connection Tightening
torquesFront wheel
Front brake caliper, wheel carrier
installedM8 x 32 -10.9
30 Nm (Left)
M8 x 32 -10.9 30 Nm (Right)
Clamping screw for quick-release
axle in wheel carrier M8 x 30
19 Nm
Quick-release axle in threaded
bush M24 x 1.5
50 Nm
Rear wheel
Silencer to rear footrest, right M8 x 30 28 Nm
Silencer to manifold M8 - 10.9 self-locking, Optimoly TA 35 Nm
Rear wheel to wheel flange M10 x 43 x 1.25 60 Nm
M10 x 40 x 1.25 60 Nm
9133zTechnical data
Page 159 of 165
ToolkitOverview, basic kit, 92
Overview, supplementary
kit, 92
Torques, 131
Transmission Starting the engine, 62
Technical data, 136
Tripmaster, 20 Operation, 39
Resetting the tripmeter, 40
Residual range, 40
Selecting readings, 39
Troubleshooting chart, 132
Turn indicators Left, 15, 49
Right, 16, 49
Switching off, 16, 50
Tyres Checking tread depth, 101
Checking tyre pressures, 57
Technical data, 138 V
Vehicle
General view, left side, 11
General view, right side, 13
Laying up, 128
restoring to use, 129
W
Warning lights, 17
Warnings, 20 Mode of presentation, 21
Warnings, overview, 22, 29
Wheels Installing front wheel, 103
Installing rear wheel, 107
Removing front wheel, 101
Removing rear wheel, 105
Technical data, 138
11157zIndex