manual mode BMW X1 2014 E84 Owner's Manual
[x] Cancel search | Manufacturer: BMW, Model Year: 2014, Model line: X1, Model: BMW X1 2014 E84Pages: 297, PDF Size: 7 MB
Page 10 of 297
NotesUsing this Owner's Manual
The fastest way to find information on a partic‐
ular topic is by using the index.
An initial overview of the vehicle is provided in
the first chapter.
Additional sources of information Should you have any questions, your service
center will be glad to advise you at any time.
Information on BMW, e.g., on technology, is
available on the Internet: bmwusa.com
Symbols
Indicates precautions that must be followed
precisely in order to avoid the possibility of
personal injury and serious damage to the
vehicle.
◄ Marks the end of a specific item of
information.
"..." Identifies display texts in vehicle used to
select individual functions.
›...‹ Verbal instructions to use with the voice
activation system.
››...‹‹ Identifies the answers generated by the
voice activation system.
Refers to measures that can be taken to
help protect the environment.
Symbols on vehicle components
Indicates that you should consult the
relevant section of this Owner's Manual for
information on a particular part or assembly.
Vehicle equipment
This Owner's Manual describes all models, all
series equipment, as well as country-specific
and special equipment offered in the model
series.Therefore, this Owner's Manual also de‐
scribes and depicts equipment that may not be
contained in your vehicle because of the se‐
lected special equipment or country version,
for example.
This also applies to safety-related functions
and systems.
For options and equipment not described in
this Owner's Manual, please refer to the Sup‐
plementary Owner's Manuals.
On right-hand drive vehicles, some controls
are arranged differently than shown in the illus‐
trations.
Status of this Owner's
Manual at time of printing
The manufacturer of your vehicle pursues a
policy of constant development that is con‐
ceived to ensure that our vehicles continue to
embody the highest quality and safety stan‐
dards. In rare cases, therefore, the features de‐
scribed in this Owner's Manual may differ from
those in your vehicle.
Updates made after the editorial
deadline
Any updates made after the editorial deadline
for the Owner's Manuals are located in the ap‐
pendix of the printed quick reference for the
vehicle.
For your own safety Warranty
Your vehicle is technically configured for the
operating conditions and registration require‐
ments applying in the country of first delivery
— homologation. If your vehicle is to be oper‐
ated in a different country it might be neces‐Seite 6Notes6
Online Edition for Part no. 01 40 2 957 353 - X/14
Page 29 of 297
Voice activation systemVehicle equipment
This chapter describes all series equipment as
well as country-specific and special equipment
offered for this model series. Therefore, it also
describes equipment that may not be found in
your vehicle, for instance due to the selected
special equipment or the country version. This
also applies to safety-related functions and
systems.
When using the features and systems descri‐
bed here, adhere to local regulations.
The concept▷Most functions that are displayed on the
Control Display can be operated with the
voice activation system using spoken com‐
mands. The system prompts you to make
your entries.▷Functions that can only be used when the
vehicle is stationary cannot be operated
using the voice activation system.▷The system uses a special microphone lo‐
cated in the area of the interior rearview
mirror.▷›...‹ Verbal instructions in the Owner's
Manual to use with the voice activation
system.
Requirements
Via the Control Display, set a language that is
also supported by the voice activation system
so that the spoken commands can be identi‐
fied.
Set the language, refer to page 77.
Using voice activation
Activating the voice activation system1. Press the button on the steering
wheel.2.Wait for the signal.3.Say the command.
The command appears on the Control Dis‐
play.
The symbol on the Control Display indi‐
cates that the voice activation system is active.
If no other commands are available, operate
the function via iDrive in this case.
Terminating the voice activation
system
Briefly press the button on the steer‐
ing wheel or ›Cancel‹.
Possible commands
Most menu items on the Control Display can
be voiced as commands.
The available commands depend on the menu
that is currently displayed on the Control Dis‐
play.
The functions of the main menu have short
commands.
Some list items, such as the phone book en‐
tries, can also be selected via the voice activa‐
tion system. Say the list items exactly as they
are displayed on the list.
Having possible commands read aloud You can have the system read possible com‐
mands aloud: ›Voice commands‹.
Seite 25Voice activation systemAt a glance25
Online Edition for Part no. 01 40 2 957 353 - X/14
Page 48 of 297
AdjustingVehicle equipment
This chapter describes all series equipment as
well as country-specific and special equipment
offered for this model series. Therefore, it also
describes equipment that may not be found in
your vehicle, for instance due to the selected
special equipment or the country version. This
also applies to safety-related functions and
systems.
When using the features and systems descri‐
bed here, adhere to local regulations.
Sitting safely The ideal seating position can make a vital
contribution to relaxed, fatigue-free driving.
The seating position plays an important role in
an accident in combination with:▷Safety belts, refer to page 46.▷Head restraints, refer to page 47.▷Airbags, refer to page 88.
Seats
Note before adjusting Do not adjust the seat while driving
Never attempt to adjust the driver's seat
while driving. The seat could respond with un‐
expected movement and the ensuing loss of
vehicle control could lead to an accident.◀
Do not incline the backrest too far to the
rear
Do not incline the backrest on the front pas‐
senger side too far to the rear during driving.
Otherwise, there is the danger of sliding under
the safety belt in an accident. This would elimi‐
nate the protection normally provided by the
belt.◀
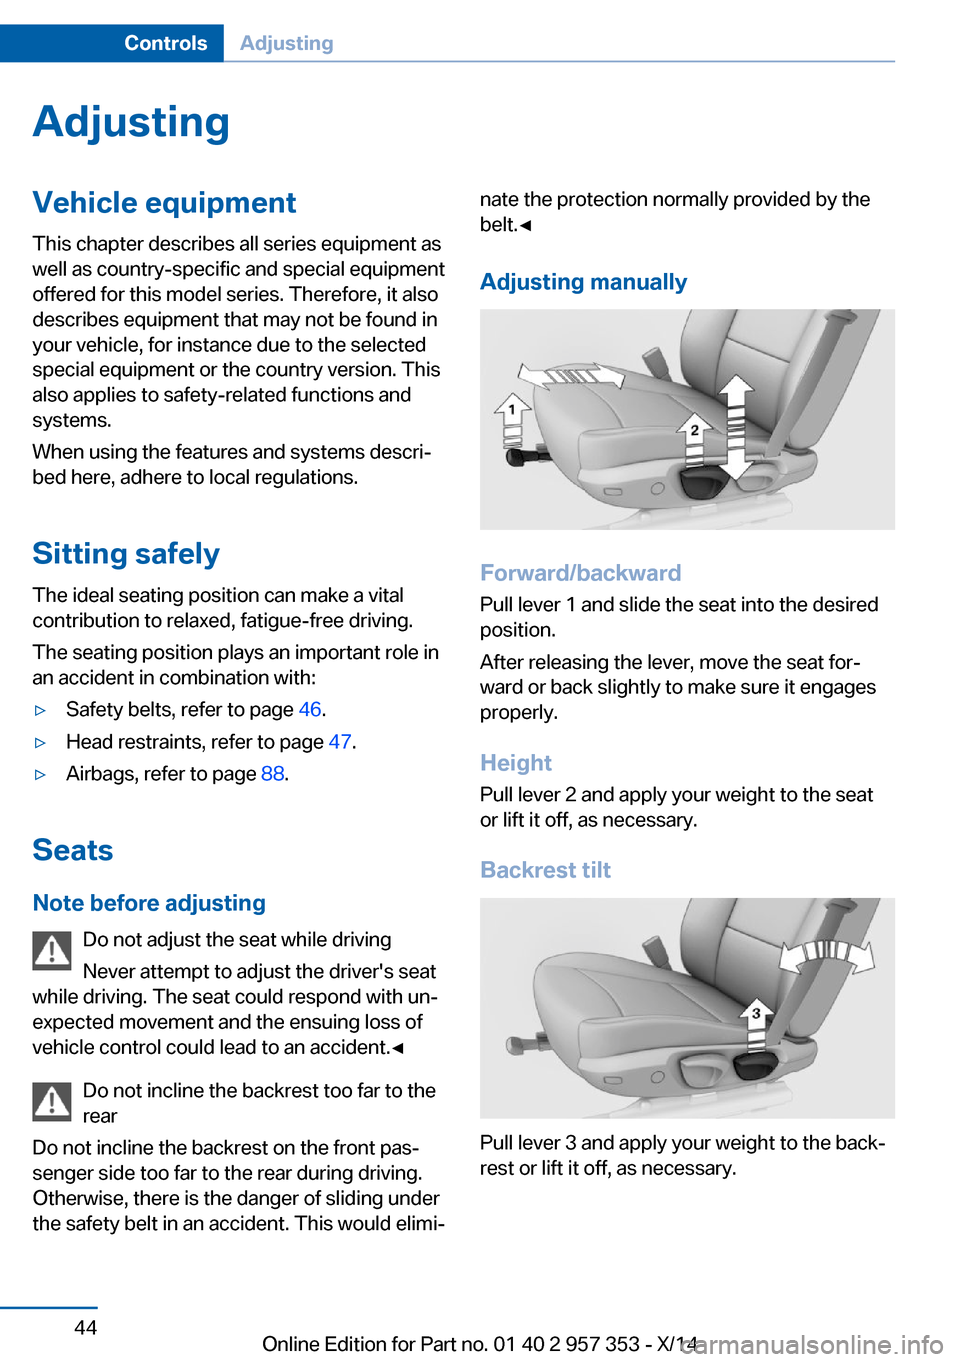
Adjusting manually
Forward/backward Pull lever 1 and slide the seat into the desired
position.
After releasing the lever, move the seat for‐
ward or back slightly to make sure it engages
properly.
Height
Pull lever 2 and apply your weight to the seat
or lift it off, as necessary.
Backrest tilt
Pull lever 3 and apply your weight to the back‐
rest or lift it off, as necessary.
Seite 44ControlsAdjusting44
Online Edition for Part no. 01 40 2 957 353 - X/14
Page 53 of 297
Calling up settingsDo not retrieve the memory setting while
driving
Do not retrieve the memory setting while driv‐
ing, as an unexpected seat movement could
result in an accident.◀
Comfort function1.Open the driver's door after unlocking or
switch on the radio ready state, refer to
page 57.2.Briefly press the desired memory but‐
ton 1 or 2.
The seat is automatically moved to the stored
position.
The procedure stops when a switch for setting
the seat or one of the memory buttons is
pressed.
Safety mode
1.Close the driver's door and switch the igni‐
tion on or off, refer to page 57.2.Press and hold the desired memory button
1 or 2 until the setting procedure is com‐
pleted.
Mirrors
Exterior mirrors
General information The mirror on the passenger side is more
curved than the driver's mirror.
Estimating distances correctly
Objects reflected in the mirror are closer
than they appear. Do not estimate the distance
to the traffic behind you based on what you
see in the mirror, as this will increase your risk
of an accident.◀
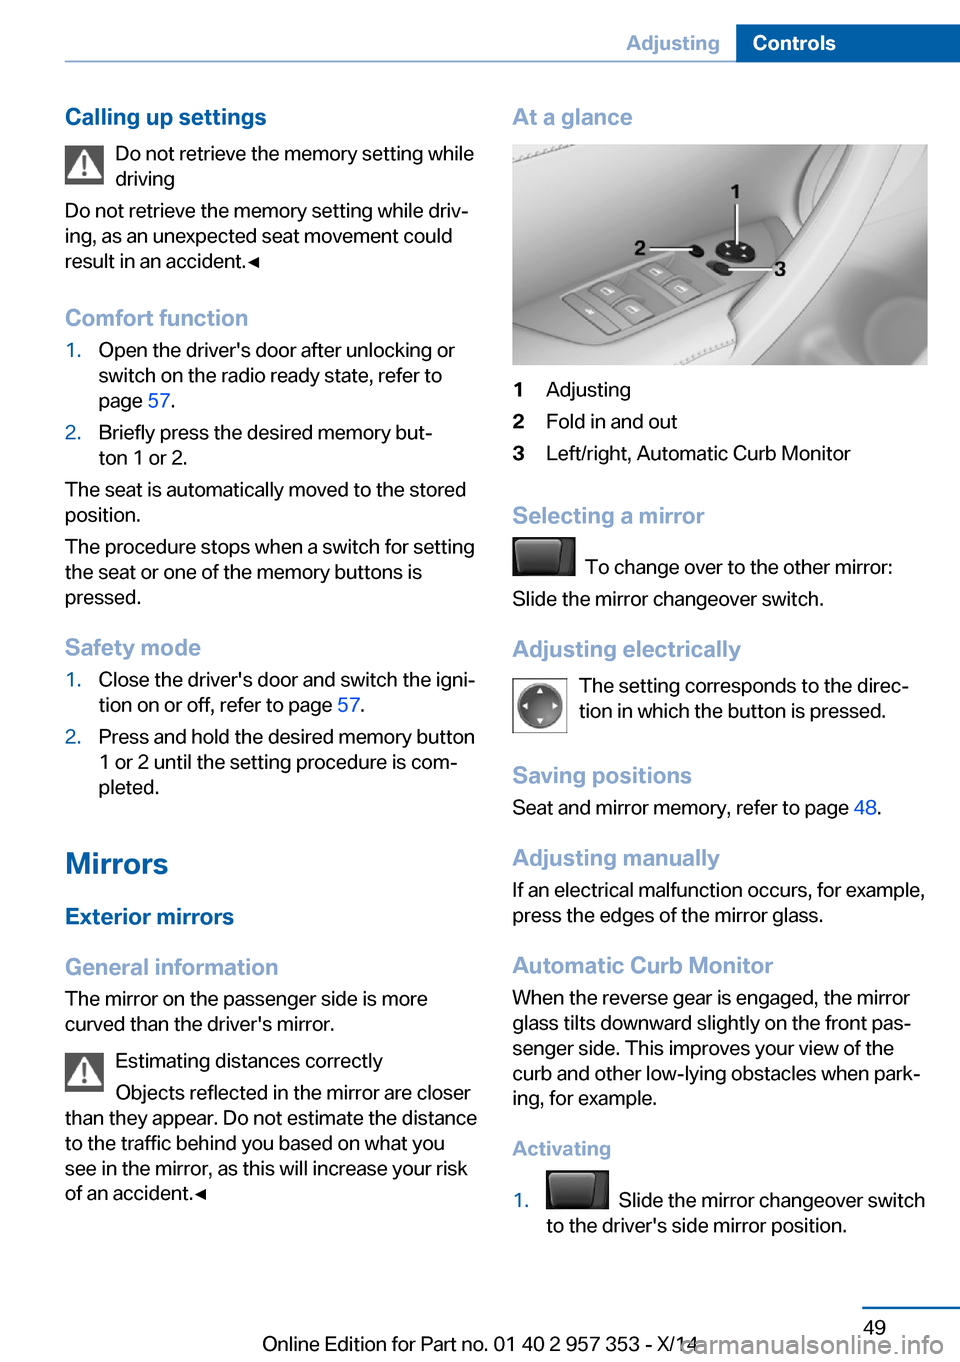
At a glance1Adjusting2Fold in and out3Left/right, Automatic Curb Monitor
Selecting a mirror
To change over to the other mirror:
Slide the mirror changeover switch.
Adjusting electrically The setting corresponds to the direc‐
tion in which the button is pressed.
Saving positions
Seat and mirror memory, refer to page 48.
Adjusting manually If an electrical malfunction occurs, for example,
press the edges of the mirror glass.
Automatic Curb Monitor When the reverse gear is engaged, the mirror
glass tilts downward slightly on the front pas‐
senger side. This improves your view of the
curb and other low-lying obstacles when park‐
ing, for example.
Activating
1. Slide the mirror changeover switch
to the driver's side mirror position.
Seite 49AdjustingControls49
Online Edition for Part no. 01 40 2 957 353 - X/14
Page 69 of 297
Washer fluid
General information Antifreeze for washer fluid
Antifreeze is flammable and can cause
injuries if used improperly.
Therefore, keep it away from sources of igni‐
tion.
Only keep it in the closed original container
and inaccessible to children.
Follow the notes and instructions on the con‐
tainer.
United States: The washer fluid mixture ratio is
regulated by the U.S. EPA and many individual
states; do not exceed the allowable washer
fluid dilution ratios limits that apply. Follow the
usage instructions on the washer fluid con‐
tainer. Use BMW's Windshield Washer Con‐
centrate or the equivalent.◀
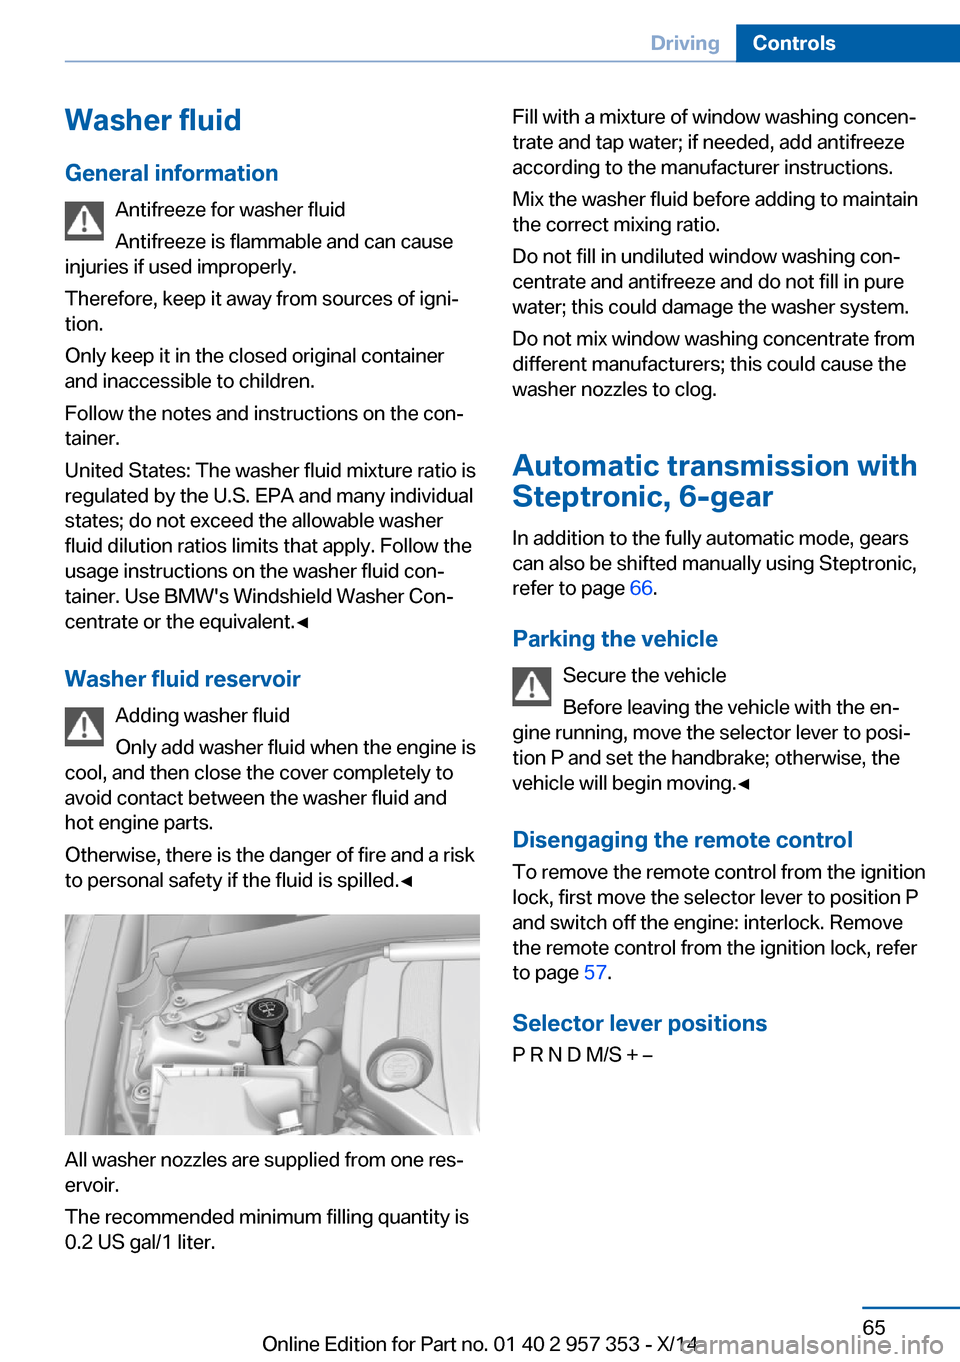
Washer fluid reservoir Adding washer fluid
Only add washer fluid when the engine is
cool, and then close the cover completely to
avoid contact between the washer fluid and
hot engine parts.
Otherwise, there is the danger of fire and a risk
to personal safety if the fluid is spilled.◀
All washer nozzles are supplied from one res‐
ervoir.
The recommended minimum filling quantity is
0.2 US gal/1 liter.
Fill with a mixture of window washing concen‐
trate and tap water; if needed, add antifreeze
according to the manufacturer instructions.
Mix the washer fluid before adding to maintain
the correct mixing ratio.
Do not fill in undiluted window washing con‐
centrate and antifreeze and do not fill in pure
water; this could damage the washer system.
Do not mix window washing concentrate from
different manufacturers; this could cause the
washer nozzles to clog.
Automatic transmission with
Steptronic, 6-gear
In addition to the fully automatic mode, gears
can also be shifted manually using Steptronic,
refer to page 66.
Parking the vehicle Secure the vehicle
Before leaving the vehicle with the en‐
gine running, move the selector lever to posi‐
tion P and set the handbrake; otherwise, the
vehicle will begin moving.◀
Disengaging the remote control To remove the remote control from the ignition
lock, first move the selector lever to position P
and switch off the engine: interlock. Remove
the remote control from the ignition lock, refer
to page 57.
Selector lever positions
P R N D M/S + –Seite 65DrivingControls65
Online Edition for Part no. 01 40 2 957 353 - X/14
Page 70 of 297
Displays in the instrument cluster
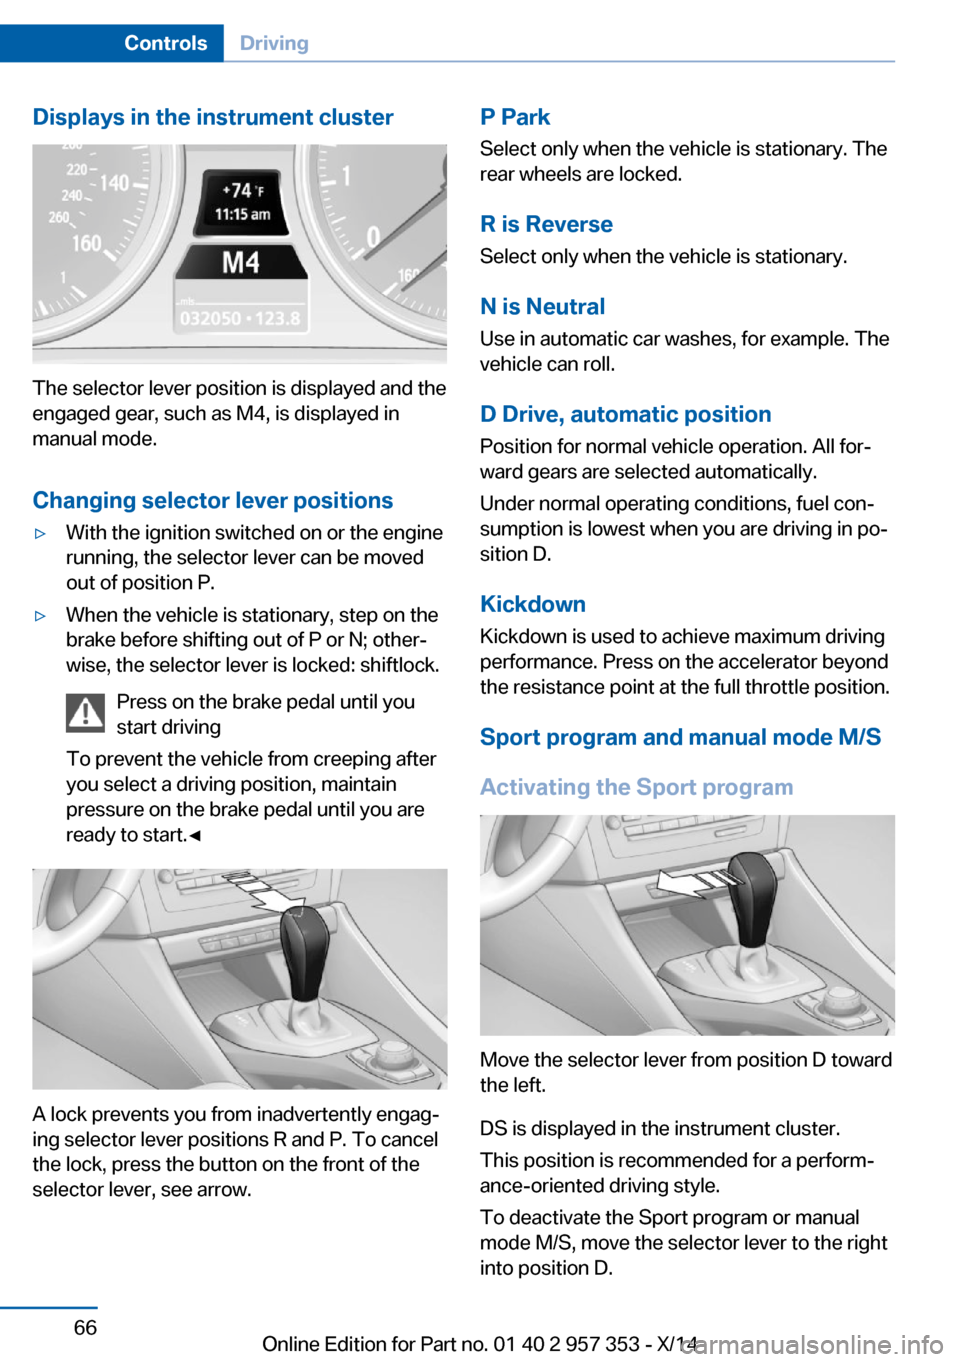
The selector lever position is displayed and the
engaged gear, such as M4, is displayed in
manual mode.
Changing selector lever positions
▷With the ignition switched on or the engine
running, the selector lever can be moved
out of position P.▷When the vehicle is stationary, step on the
brake before shifting out of P or N; other‐
wise, the selector lever is locked: shiftlock.
Press on the brake pedal until you
start driving
To prevent the vehicle from creeping after
you select a driving position, maintain
pressure on the brake pedal until you are
ready to start.◀
A lock prevents you from inadvertently engag‐
ing selector lever positions R and P. To cancel
the lock, press the button on the front of the
selector lever, see arrow.
P Park
Select only when the vehicle is stationary. The
rear wheels are locked.
R is Reverse Select only when the vehicle is stationary.
N is Neutral Use in automatic car washes, for example. The
vehicle can roll.
D Drive, automatic position Position for normal vehicle operation. All for‐
ward gears are selected automatically.
Under normal operating conditions, fuel con‐
sumption is lowest when you are driving in po‐
sition D.
Kickdown
Kickdown is used to achieve maximum driving
performance. Press on the accelerator beyond
the resistance point at the full throttle position.
Sport program and manual mode M/S
Activating the Sport program
Move the selector lever from position D toward
the left.
DS is displayed in the instrument cluster.
This position is recommended for a perform‐
ance-oriented driving style.
To deactivate the Sport program or manual
mode M/S, move the selector lever to the right
into position D.
Seite 66ControlsDriving66
Online Edition for Part no. 01 40 2 957 353 - X/14
Page 71 of 297
Activating the M/S manual mode
Move the selector lever from position D toward
the left.
Push the selector lever forward or backward.
Manual mode becomes active and the gear is
changed.
The engaged gear is displayed in the instru‐
ment cluster, e.g., M1.▷To shift down: press the selector lever for‐
ward.▷To shift up: press the selector lever back‐
ward.
The vehicle only shifts up or down at appropri‐
ate engine and road speeds, e.g., it does not
shift down if the engine speed is too high. The
selected gear is briefly displayed in the instru‐
ment panel, followed by the current gear.
Shifting gears using the shift paddles on the steering wheel
The shift paddles on the steering wheel allow
you to shift gears quickly while keeping both
hands on the steering wheel.
▷When the shift paddles on the steering
wheel are used to shift gears while in auto‐
matic mode, the transmission switches to
manual mode.▷If the shift paddles are not used to acceler‐
ate or shift gears for a certain amount of
time, the transmission switches back to
automatic mode.
If the selector lever is in the M/S gear plane,
manual mode remains active.
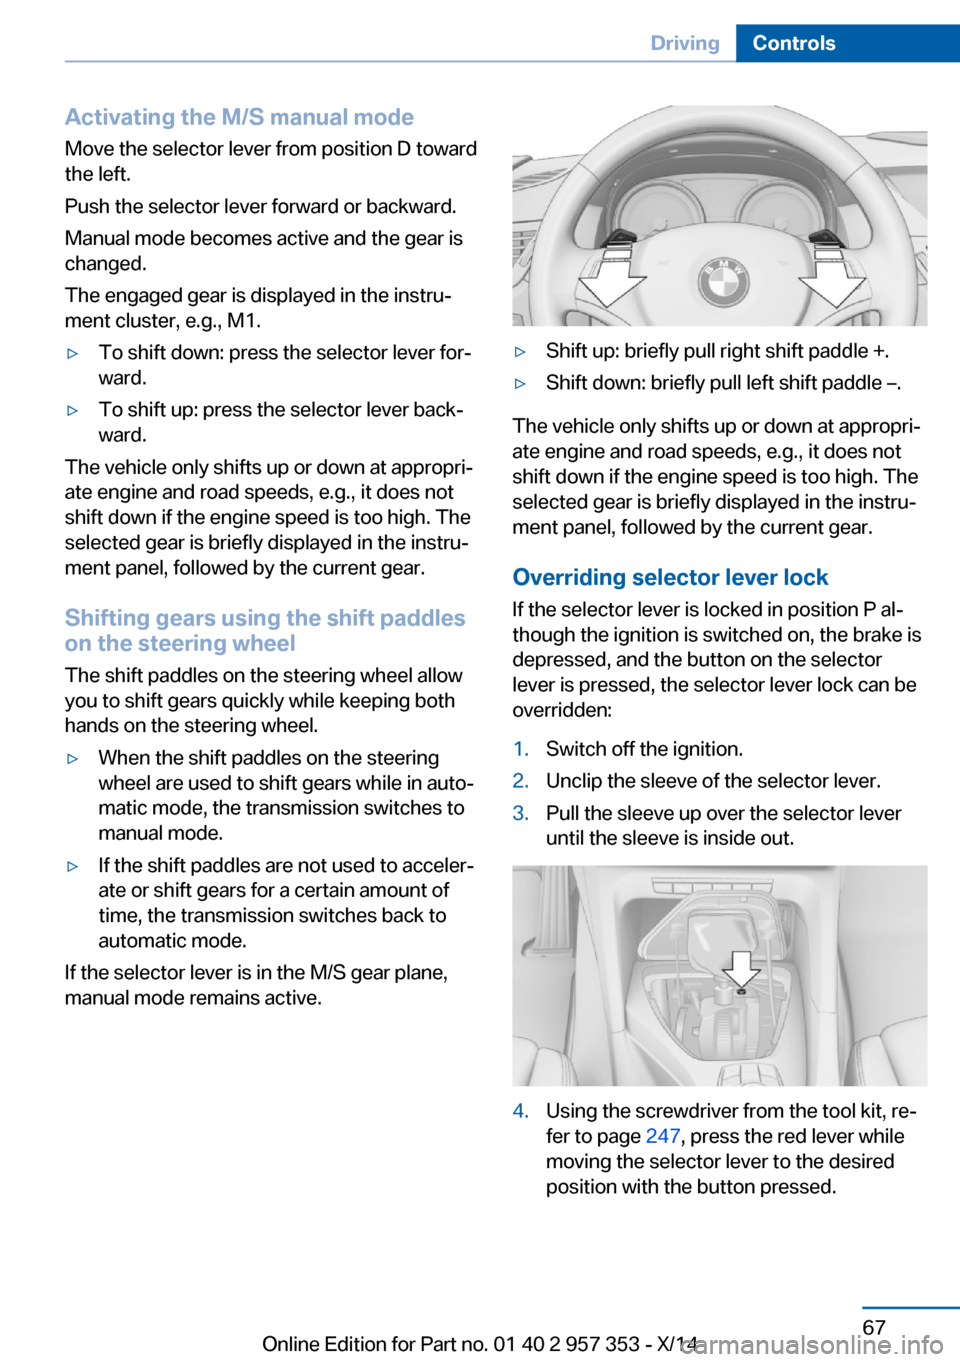
▷Shift up: briefly pull right shift paddle +.▷Shift down: briefly pull left shift paddle –.
The vehicle only shifts up or down at appropri‐
ate engine and road speeds, e.g., it does not
shift down if the engine speed is too high. The
selected gear is briefly displayed in the instru‐
ment panel, followed by the current gear.
Overriding selector lever lock If the selector lever is locked in position P al‐
though the ignition is switched on, the brake is
depressed, and the button on the selector
lever is pressed, the selector lever lock can be
overridden:
1.Switch off the ignition.2.Unclip the sleeve of the selector lever.3.Pull the sleeve up over the selector lever
until the sleeve is inside out.4.Using the screwdriver from the tool kit, re‐
fer to page 247, press the red lever while
moving the selector lever to the desired
position with the button pressed.Seite 67DrivingControls67
Online Edition for Part no. 01 40 2 957 353 - X/14
Page 73 of 297
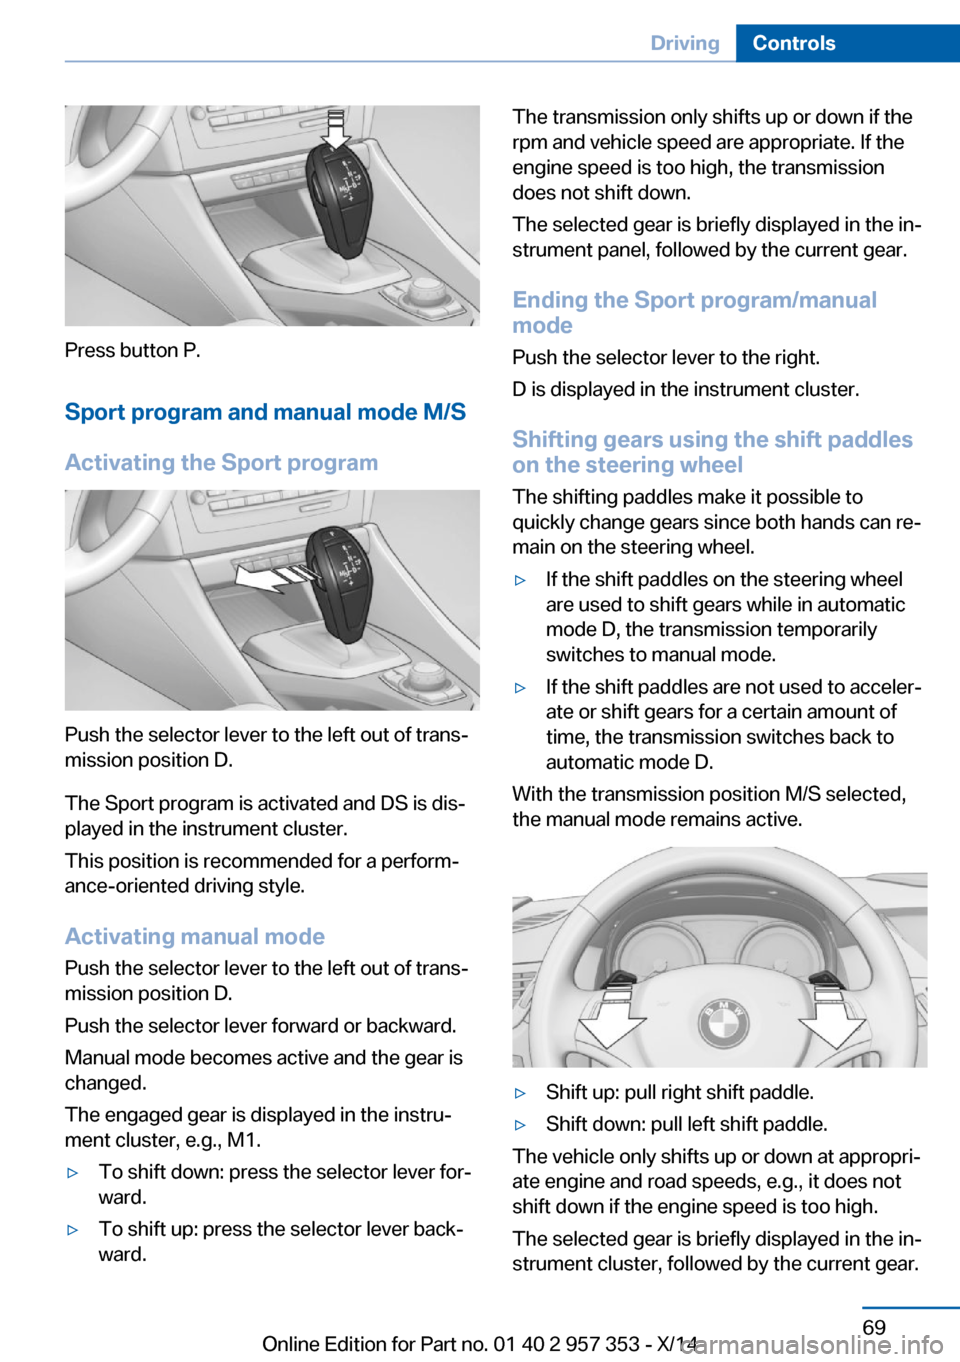
Press button P.Sport program and manual mode M/S
Activating the Sport program
Push the selector lever to the left out of trans‐
mission position D.
The Sport program is activated and DS is dis‐
played in the instrument cluster.
This position is recommended for a perform‐
ance-oriented driving style.
Activating manual mode
Push the selector lever to the left out of trans‐
mission position D.
Push the selector lever forward or backward.
Manual mode becomes active and the gear is
changed.
The engaged gear is displayed in the instru‐
ment cluster, e.g., M1.
▷To shift down: press the selector lever for‐
ward.▷To shift up: press the selector lever back‐
ward.The transmission only shifts up or down if the
rpm and vehicle speed are appropriate. If the
engine speed is too high, the transmission
does not shift down.
The selected gear is briefly displayed in the in‐
strument panel, followed by the current gear.
Ending the Sport program/manual
mode
Push the selector lever to the right.
D is displayed in the instrument cluster.
Shifting gears using the shift paddles
on the steering wheel
The shifting paddles make it possible to
quickly change gears since both hands can re‐
main on the steering wheel.▷If the shift paddles on the steering wheel
are used to shift gears while in automatic
mode D, the transmission temporarily
switches to manual mode.▷If the shift paddles are not used to acceler‐
ate or shift gears for a certain amount of
time, the transmission switches back to
automatic mode D.
With the transmission position M/S selected,
the manual mode remains active.
▷Shift up: pull right shift paddle.▷Shift down: pull left shift paddle.
The vehicle only shifts up or down at appropri‐
ate engine and road speeds, e.g., it does not
shift down if the engine speed is too high.
The selected gear is briefly displayed in the in‐
strument cluster, followed by the current gear.
Seite 69DrivingControls69
Online Edition for Part no. 01 40 2 957 353 - X/14
Page 74 of 297
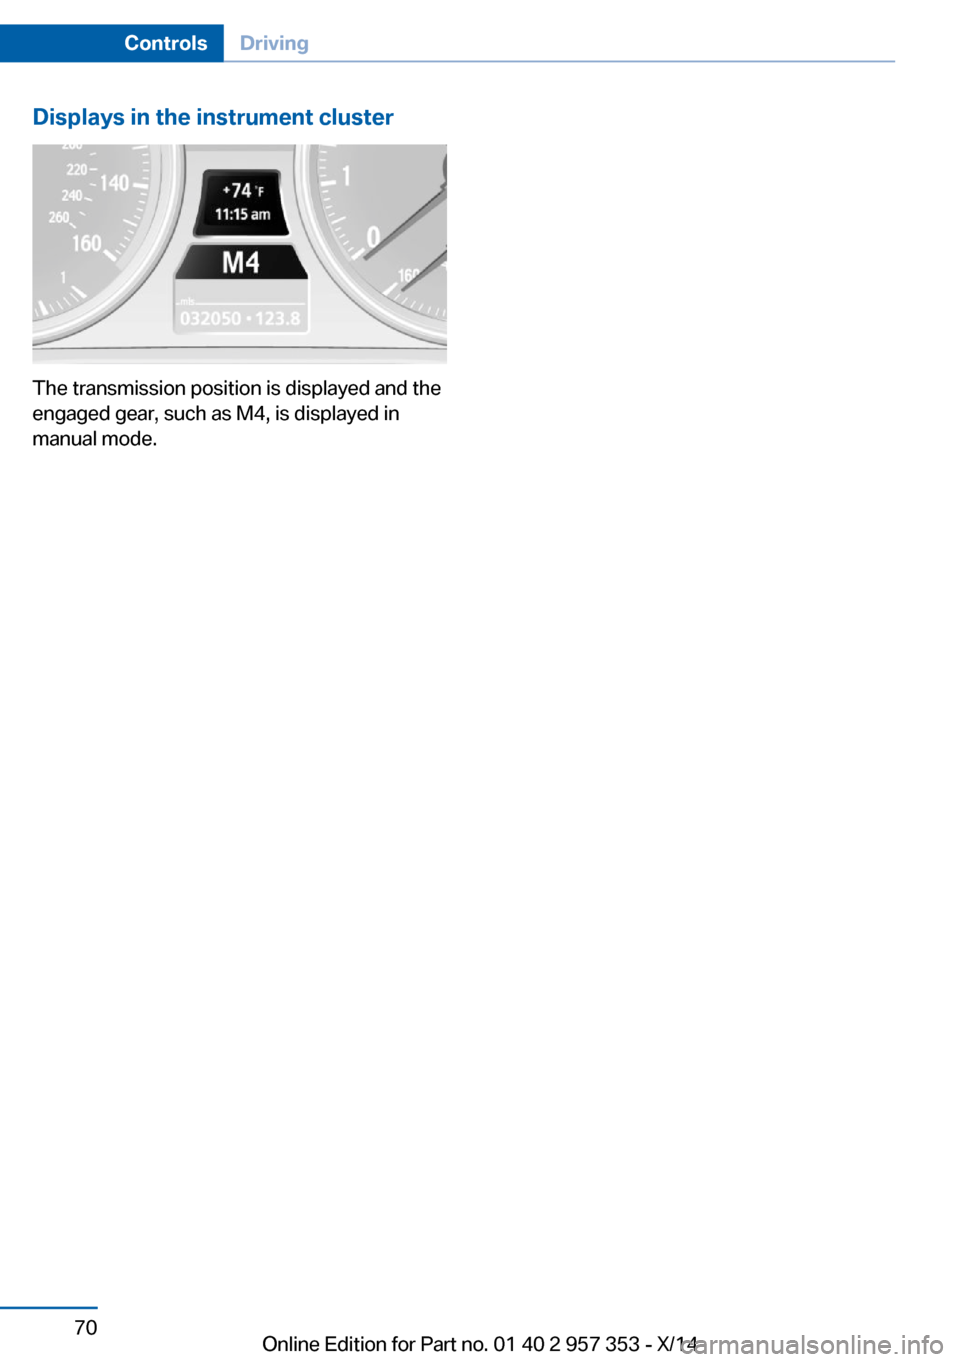
Displays in the instrument cluster
The transmission position is displayed and the
engaged gear, such as M4, is displayed in
manual mode.
Seite 70ControlsDriving70
Online Edition for Part no. 01 40 2 957 353 - X/14
Page 112 of 297
ClimateVehicle equipmentThis chapter describes all series equipment as
well as country-specific and special equipment
offered for this model series. Therefore, it also
describes equipment that may not be found in
your vehicle, for instance due to the selectedspecial equipment or the country version. This
also applies to safety-related functions and
systems.
When using the features and systems descri‐
bed here, adhere to local regulations.
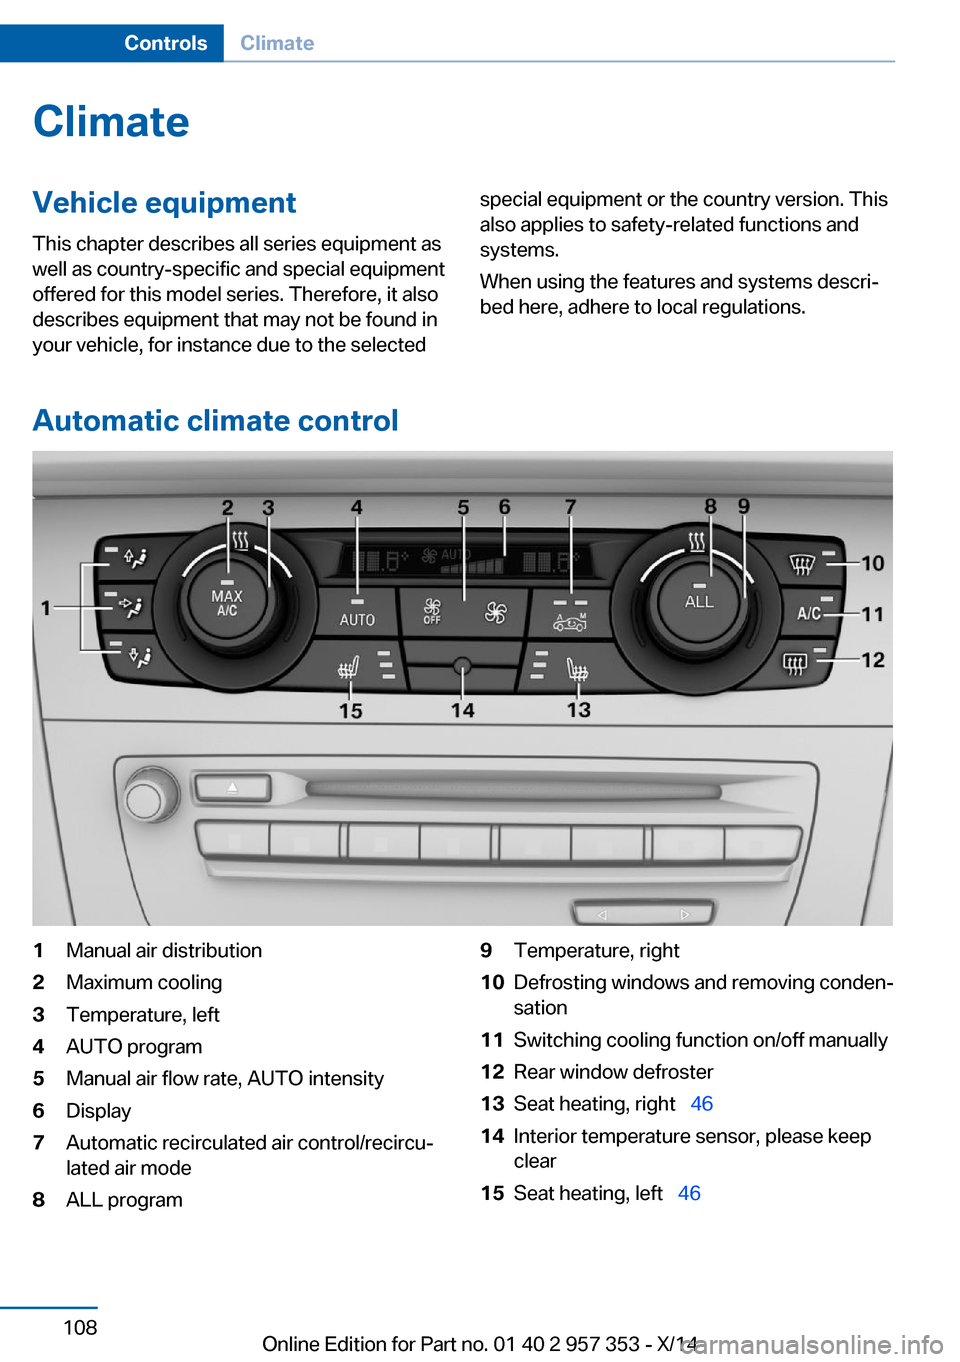
Automatic climate control
1Manual air distribution2Maximum cooling3Temperature, left4AUTO program5Manual air flow rate, AUTO intensity6Display7Automatic recirculated air control/recircu‐
lated air mode8ALL program9Temperature, right10Defrosting windows and removing conden‐
sation11Switching cooling function on/off manually12Rear window defroster13Seat heating, right 4614Interior temperature sensor, please keep
clear15Seat heating, left 46Seite 108ControlsClimate108
Online Edition for Part no. 01 40 2 957 353 - X/14