wheel BMW X1 2015 E84 Workshop Manual
[x] Cancel search | Manufacturer: BMW, Model Year: 2015, Model line: X1, Model: BMW X1 2015 E84Pages: 297, PDF Size: 7.01 MB
Page 242 of 297
Incorrect wheel and tire combinations impair
the function of a variety of systems such as
ABS or DSC.
To maintain good handling and vehicle re‐
sponse, use only tires with a single tread con‐
figuration from a single manufacturer.
Following tire damage, have the original wheel
and tire combination remounted on the vehicle
as soon as possible.
Approved wheels and tires
The manufacturer of your vehicle recom‐
mends that you use only wheels and tires that
have been approved for your particular vehicle
model.
For example, despite having the same official
size ratings, variations can lead to body con‐
tact and with it, the risk of severe accidents.
The manufacturer of your vehicle cannot eval‐
uate non-approved wheels and tires to deter‐
mine if they are suited for use, and therefore
cannot ensure the operating safety of the vehi‐
cle if they are mounted.◀
Wheels with electronics for TPM Tire
Pressure Monitor
When mounting new tires or changing from
summer to winter tires or vice versa, only use
wheels with TPM electronics; otherwise, the
Tire Pressure Monitor will not be able to detect
a flat tire, refer to page 95. Your service center
will be glad to advise you.Recommended tire brands
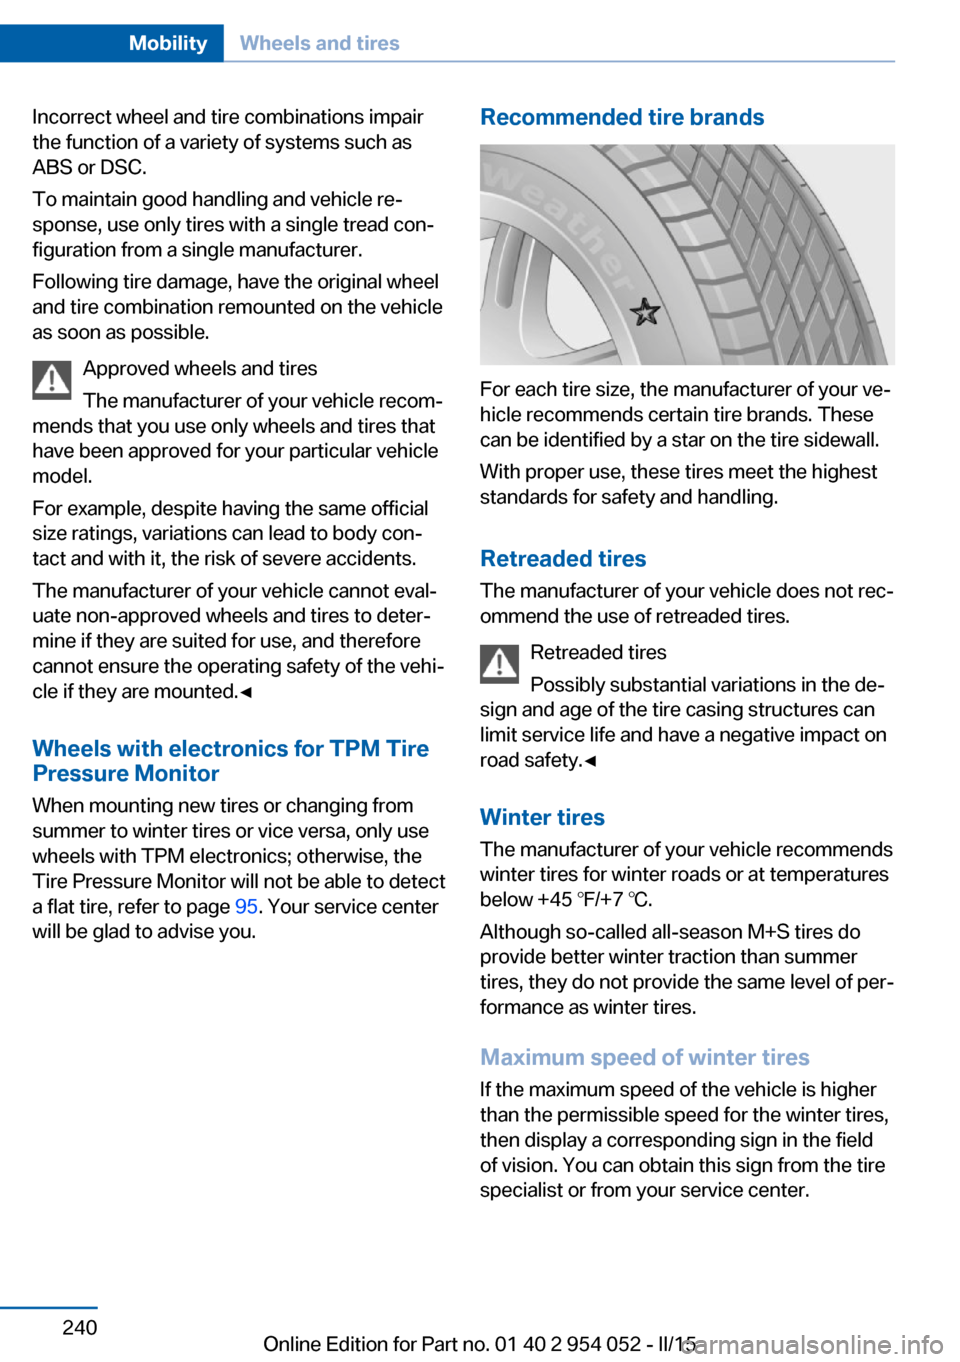
For each tire size, the manufacturer of your ve‐
hicle recommends certain tire brands. These
can be identified by a star on the tire sidewall.
With proper use, these tires meet the highest
standards for safety and handling.
Retreaded tires The manufacturer of your vehicle does not rec‐
ommend the use of retreaded tires.
Retreaded tires
Possibly substantial variations in the de‐
sign and age of the tire casing structures can
limit service life and have a negative impact on
road safety.◀
Winter tires
The manufacturer of your vehicle recommends
winter tires for winter roads or at temperatures
below +45 ℉/+7 ℃.
Although so-called all-season M+S tires do
provide better winter traction than summer tires, they do not provide the same level of per‐
formance as winter tires.
Maximum speed of winter tires
If the maximum speed of the vehicle is higher
than the permissible speed for the winter tires,
then display a corresponding sign in the field
of vision. You can obtain this sign from the tire
specialist or from your service center.
Seite 240MobilityWheels and tires240
Online Edition for Part no. 01 40 2 954 052 - II/15
Page 243 of 297
Maximum speed for winter tires
Do not exceed the maximum speed for
the winter tires; otherwise, tire damage and ac‐
cidents can occur.◀
Run-flat tires
For your own safety, only use run-flat tires.
Your service center will be glad to advise you.
Rotating wheels between axlesThe manufacturer of your vehicle advises
against swapping wheels between the front
and rear axles.
This can impair the handling characteristics.
Rotating the tires is not permissible when us‐
ing different types of tires.
Storage
Store wheels and tires in a cool, dry place with
as little exposure to light as possible.
Always protect tires against all contact with oil,
grease and fuels.
Do not exceed the maximum tire inflation pres‐
sure indicated on the side wall of the tire.
Run-flat tires
Label
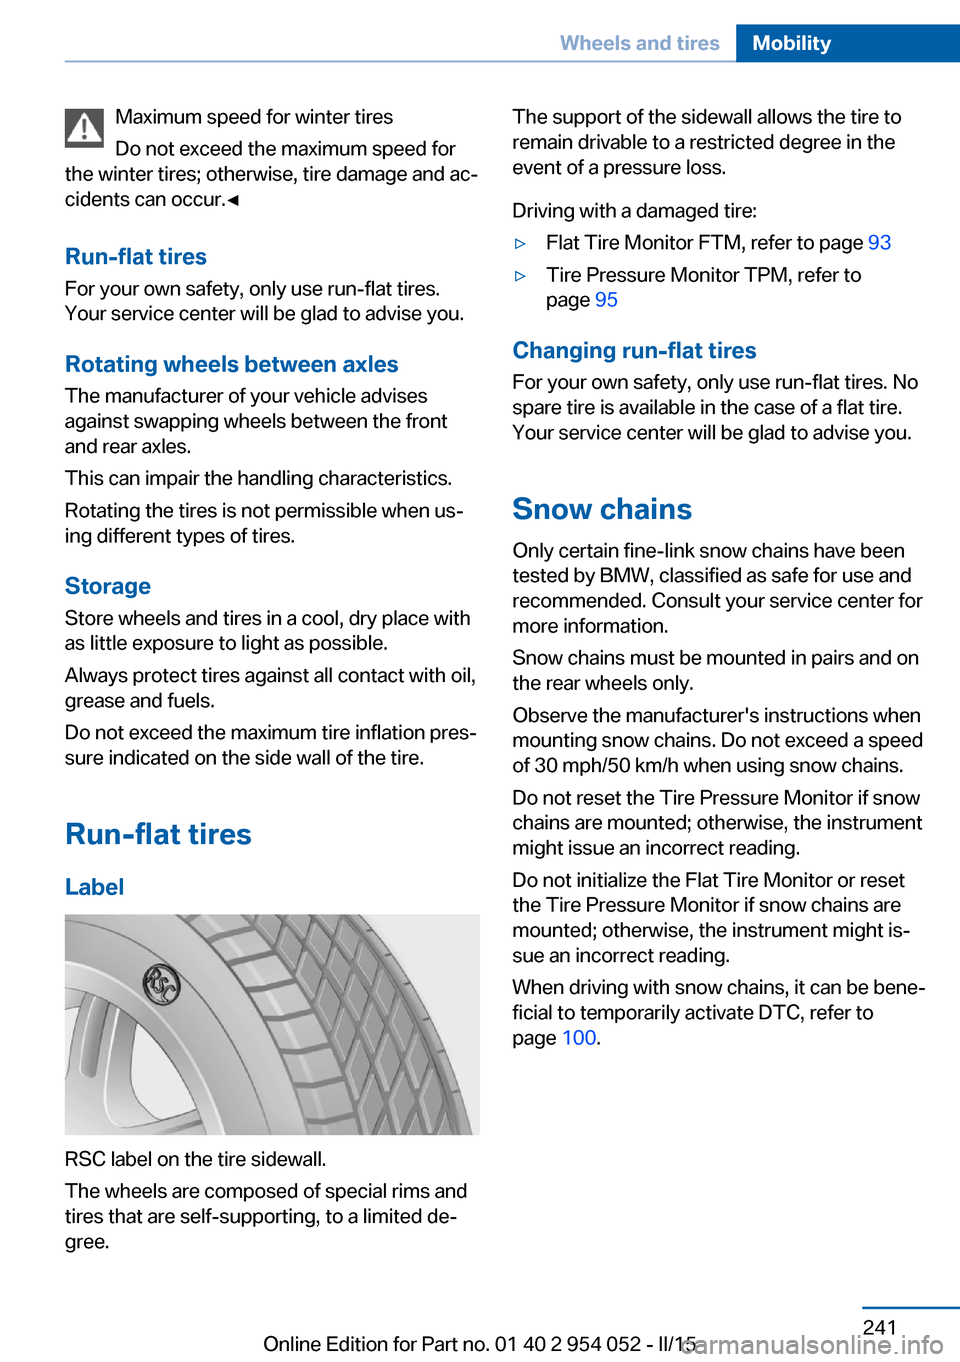
RSC label on the tire sidewall.
The wheels are composed of special rims and
tires that are self-supporting, to a limited de‐
gree.
The support of the sidewall allows the tire to
remain drivable to a restricted degree in the
event of a pressure loss.
Driving with a damaged tire:▷Flat Tire Monitor FTM, refer to page 93▷Tire Pressure Monitor TPM, refer to
page 95
Changing run-flat tires
For your own safety, only use run-flat tires. No
spare tire is available in the case of a flat tire.
Your service center will be glad to advise you.
Snow chains
Only certain fine-link snow chains have been
tested by BMW, classified as safe for use and
recommended. Consult your service center for
more information.
Snow chains must be mounted in pairs and on the rear wheels only.
Observe the manufacturer's instructions when
mounting snow chains. Do not exceed a speed
of 30 mph/50 km/h when using snow chains.
Do not reset the Tire Pressure Monitor if snow
chains are mounted; otherwise, the instrument
might issue an incorrect reading.
Do not initialize the Flat Tire Monitor or reset
the Tire Pressure Monitor if snow chains are
mounted; otherwise, the instrument might is‐
sue an incorrect reading.
When driving with snow chains, it can be bene‐
ficial to temporarily activate DTC, refer to
page 100.
Seite 241Wheels and tiresMobility241
Online Edition for Part no. 01 40 2 954 052 - II/15
Page 253 of 297
Headlight setting
Changing the bulbs and lights may influence
the headlight settings. Have the headlight set‐
ting checked by a service center and corrected
if necessary after changing bulbs or lights.
Removing the headlight cover
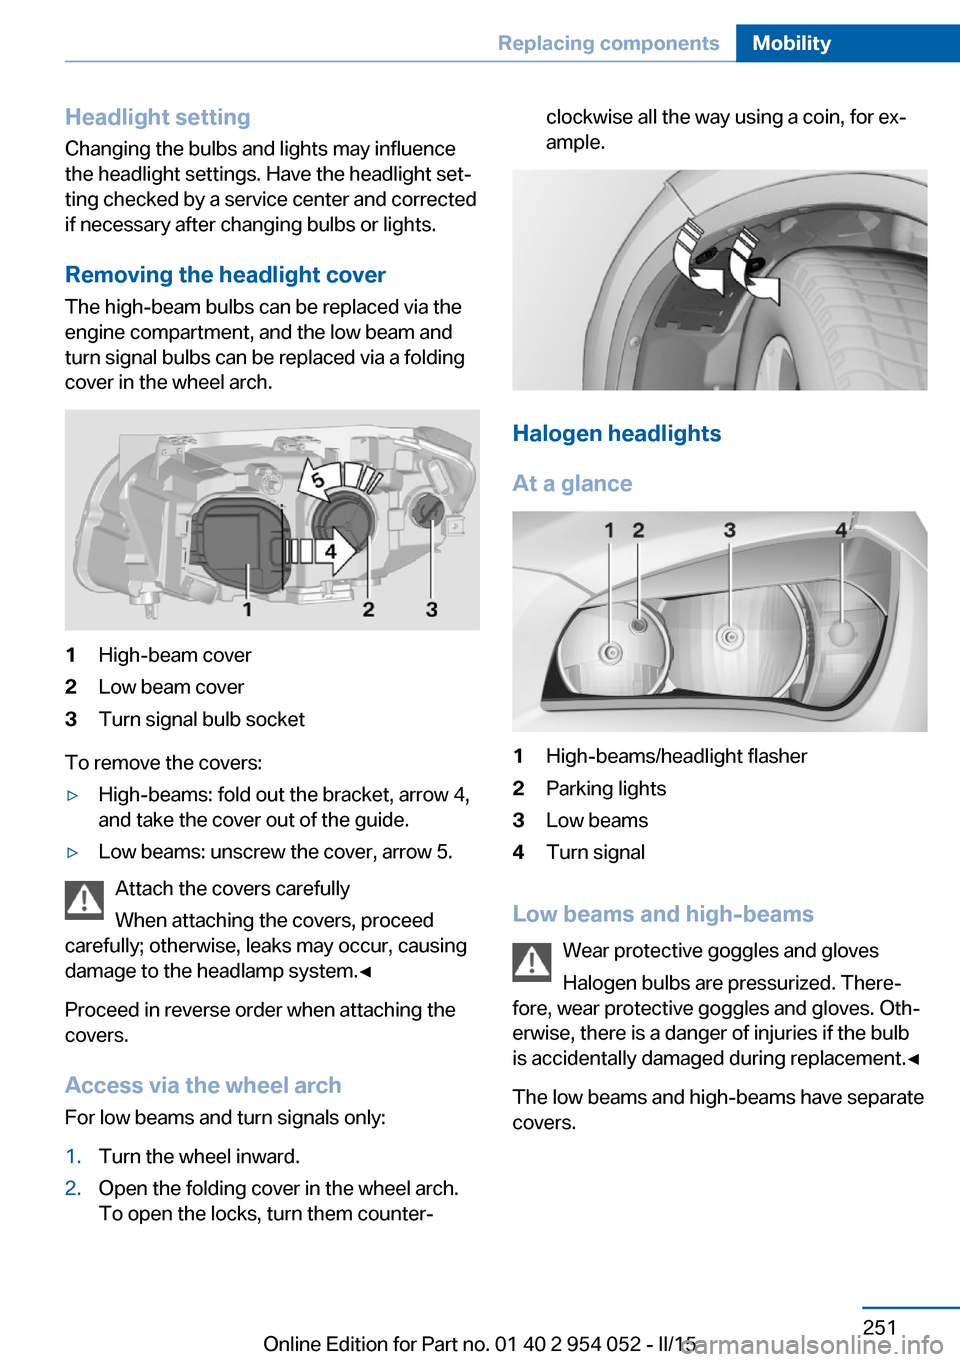
The high-beam bulbs can be replaced via the
engine compartment, and the low beam and
turn signal bulbs can be replaced via a folding
cover in the wheel arch.1High-beam cover2Low beam cover3Turn signal bulb socket
To remove the covers:
▷High-beams: fold out the bracket, arrow 4,
and take the cover out of the guide.▷Low beams: unscrew the cover, arrow 5.
Attach the covers carefully
When attaching the covers, proceed
carefully; otherwise, leaks may occur, causing
damage to the headlamp system.◀
Proceed in reverse order when attaching the
covers.
Access via the wheel arch For low beams and turn signals only:
1.Turn the wheel inward.2.Open the folding cover in the wheel arch.
To open the locks, turn them counter‐clockwise all the way using a coin, for ex‐
ample.
Halogen headlights
At a glance
1High-beams/headlight flasher2Parking lights3Low beams4Turn signal
Low beams and high-beams Wear protective goggles and gloves
Halogen bulbs are pressurized. There‐
fore, wear protective goggles and gloves. Oth‐
erwise, there is a danger of injuries if the bulb
is accidentally damaged during replacement.◀
The low beams and high-beams have separate
covers.
Seite 251Replacing componentsMobility251
Online Edition for Part no. 01 40 2 954 052 - II/15
Page 254 of 297
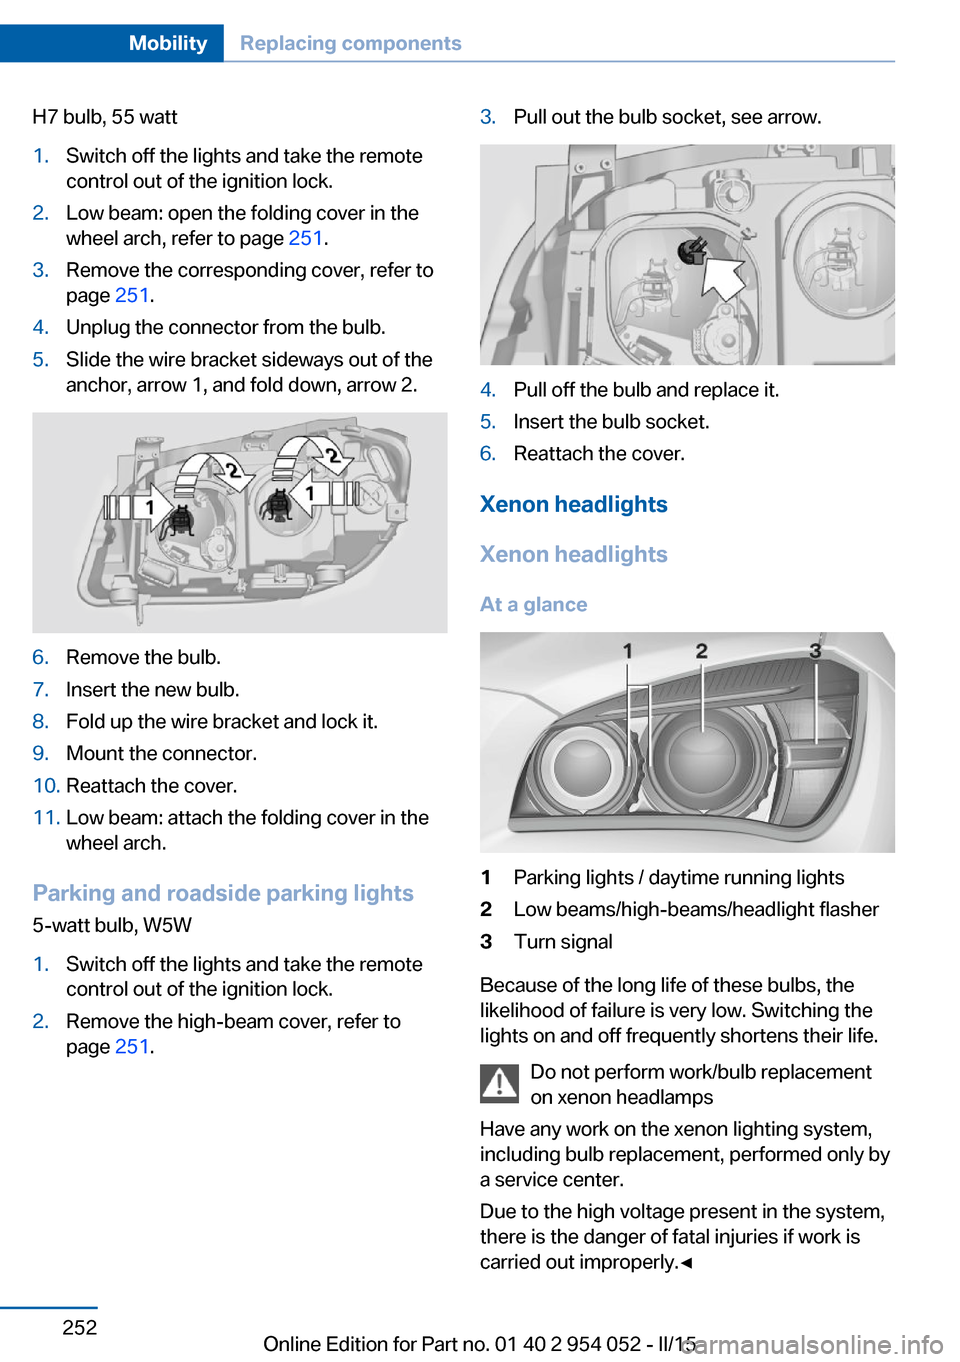
H7 bulb, 55 watt1.Switch off the lights and take the remote
control out of the ignition lock.2.Low beam: open the folding cover in the
wheel arch, refer to page 251.3.Remove the corresponding cover, refer to
page 251.4.Unplug the connector from the bulb.5.Slide the wire bracket sideways out of the
anchor, arrow 1, and fold down, arrow 2.6.Remove the bulb.7.Insert the new bulb.8.Fold up the wire bracket and lock it.9.Mount the connector.10.Reattach the cover.11.Low beam: attach the folding cover in the
wheel arch.
Parking and roadside parking lights
5-watt bulb, W5W
1.Switch off the lights and take the remote
control out of the ignition lock.2.Remove the high-beam cover, refer to
page 251.3.Pull out the bulb socket, see arrow.4.Pull off the bulb and replace it.5.Insert the bulb socket.6.Reattach the cover.
Xenon headlights
Xenon headlights
At a glance
1Parking lights / daytime running lights2Low beams/high-beams/headlight flasher3Turn signal
Because of the long life of these bulbs, the
likelihood of failure is very low. Switching the
lights on and off frequently shortens their life.
Do not perform work/bulb replacement
on xenon headlamps
Have any work on the xenon lighting system,
including bulb replacement, performed only by
a service center.
Due to the high voltage present in the system,
there is the danger of fatal injuries if work is
carried out improperly.◀
Seite 252MobilityReplacing components252
Online Edition for Part no. 01 40 2 954 052 - II/15
Page 255 of 297
Adhere to the general instructions, refer to
page 250.
With Xenon headlights, the following lights are
designed with LED technology:▷Parking and roadside parking lights.▷Daytime running lights.
Contact your service center in the event of a
malfunction.
Parking lights and roadside parking
lights, daytime running lights
H8 bulb, 35 watt
1.Switch off the lights and take the remote
control out of the ignition lock.2.Remove the high-beam cover, refer to
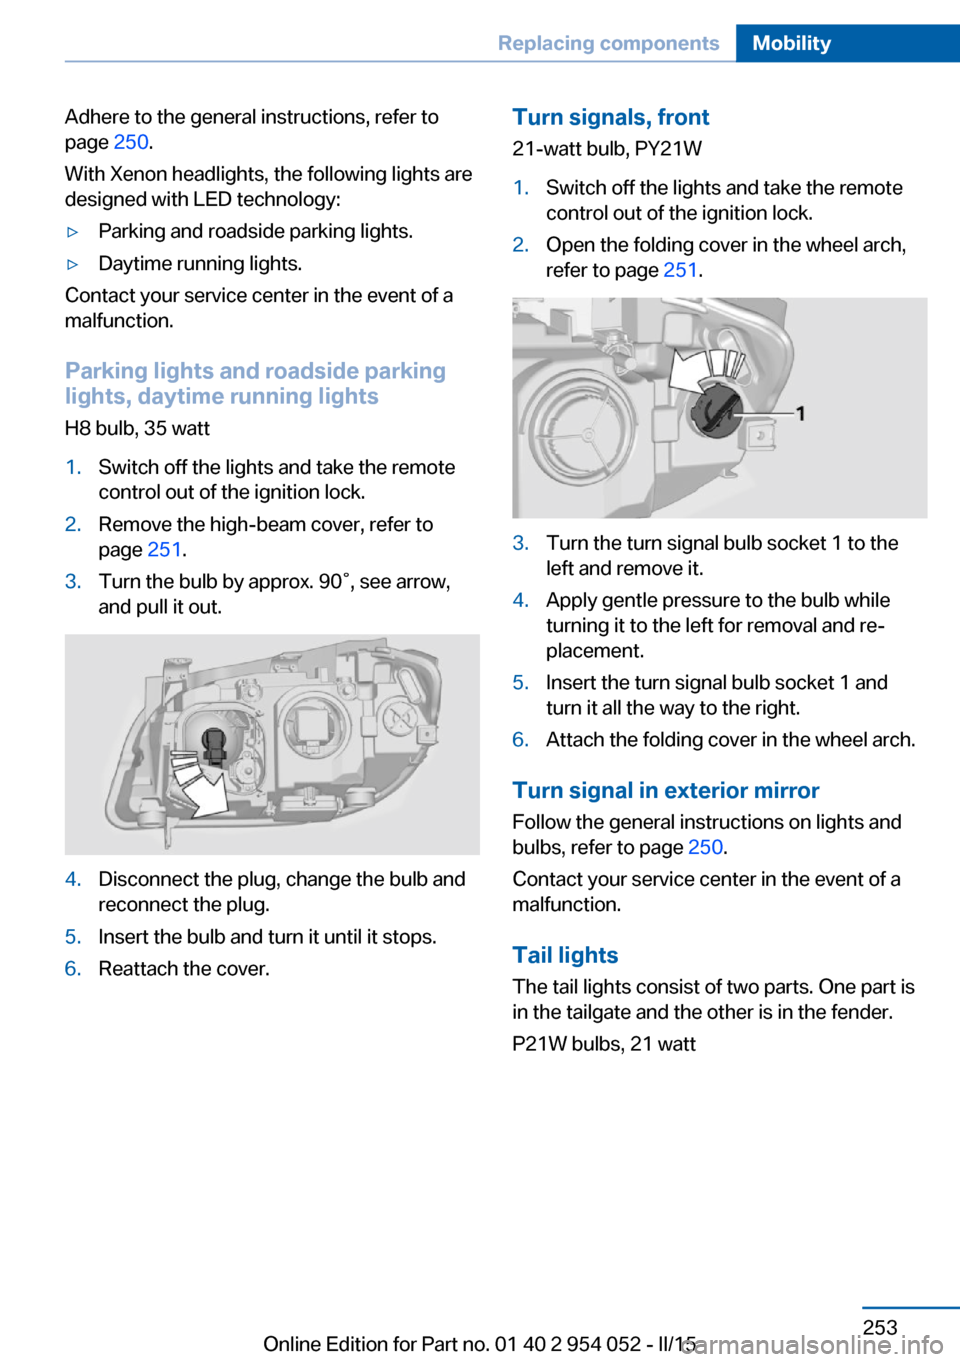
page 251.3.Turn the bulb by approx. 90˚, see arrow,
and pull it out.4.Disconnect the plug, change the bulb and
reconnect the plug.5.Insert the bulb and turn it until it stops.6.Reattach the cover.Turn signals, front
21-watt bulb, PY21W1.Switch off the lights and take the remote
control out of the ignition lock.2.Open the folding cover in the wheel arch,
refer to page 251.3.Turn the turn signal bulb socket 1 to the
left and remove it.4.Apply gentle pressure to the bulb while
turning it to the left for removal and re‐
placement.5.Insert the turn signal bulb socket 1 and
turn it all the way to the right.6.Attach the folding cover in the wheel arch.
Turn signal in exterior mirror
Follow the general instructions on lights and
bulbs, refer to page 250.
Contact your service center in the event of a
malfunction.
Tail lights
The tail lights consist of two parts. One part is
in the tailgate and the other is in the fender.
P21W bulbs, 21 watt
Seite 253Replacing componentsMobility253
Online Edition for Part no. 01 40 2 954 052 - II/15
Page 257 of 297
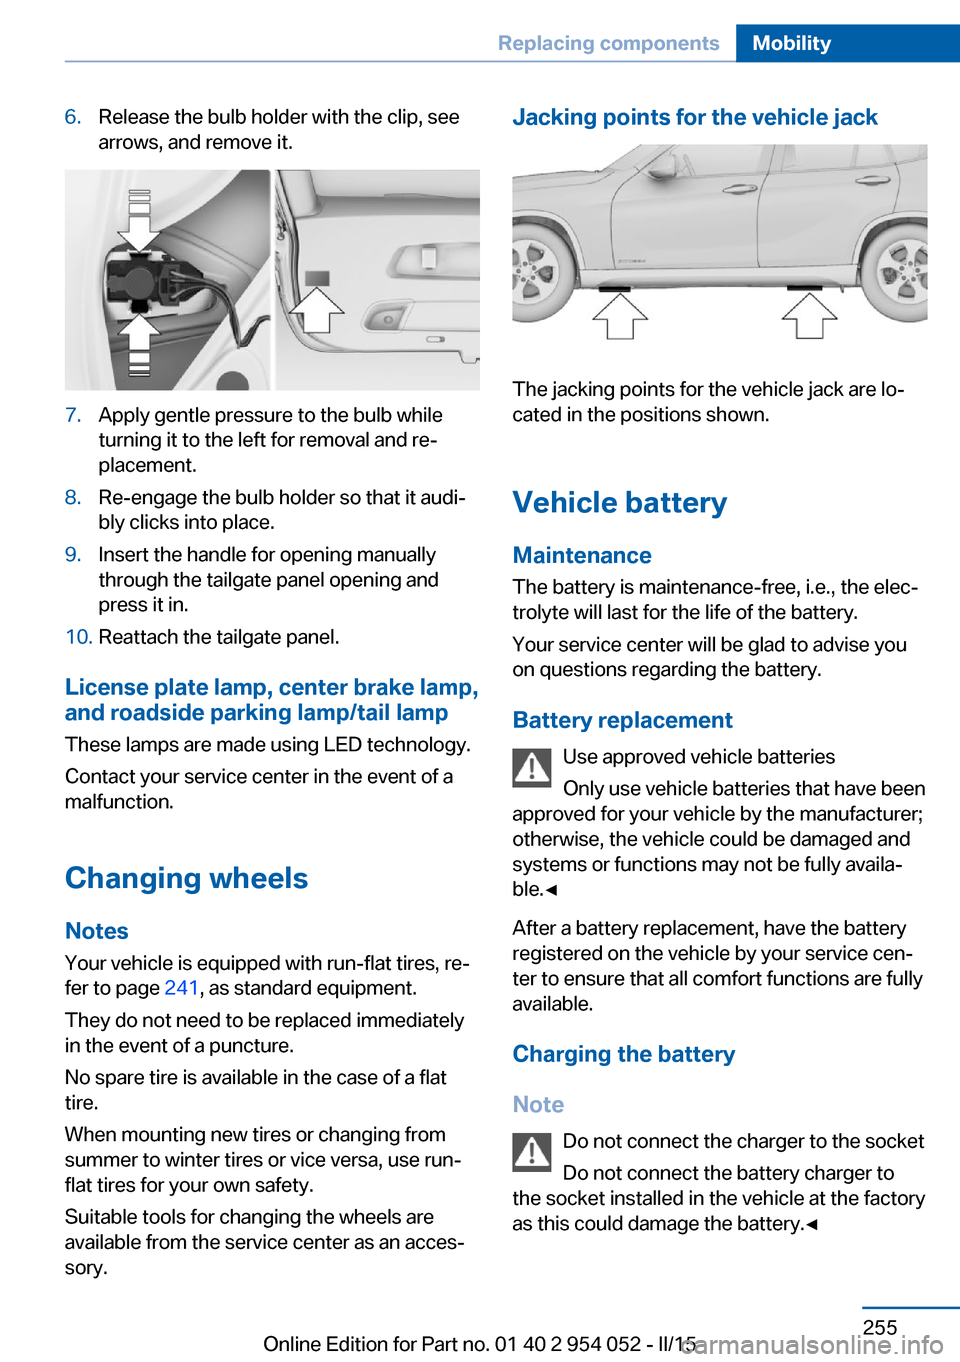
6.Release the bulb holder with the clip, see
arrows, and remove it.7.Apply gentle pressure to the bulb while
turning it to the left for removal and re‐
placement.8.Re-engage the bulb holder so that it audi‐
bly clicks into place.9.Insert the handle for opening manually
through the tailgate panel opening and
press it in.10.Reattach the tailgate panel.
License plate lamp, center brake lamp, and roadside parking lamp/tail lamp
These lamps are made using LED technology.
Contact your service center in the event of a
malfunction.
Changing wheels
Notes
Your vehicle is equipped with run-flat tires, re‐
fer to page 241, as standard equipment.
They do not need to be replaced immediately
in the event of a puncture.
No spare tire is available in the case of a flat
tire.
When mounting new tires or changing from
summer to winter tires or vice versa, use run-
flat tires for your own safety.
Suitable tools for changing the wheels are
available from the service center as an acces‐
sory.
Jacking points for the vehicle jack
The jacking points for the vehicle jack are lo‐
cated in the positions shown.
Vehicle battery
Maintenance
The battery is maintenance-free, i.e., the elec‐ trolyte will last for the life of the battery.
Your service center will be glad to advise you
on questions regarding the battery.
Battery replacement Use approved vehicle batteries
Only use vehicle batteries that have been
approved for your vehicle by the manufacturer;
otherwise, the vehicle could be damaged and
systems or functions may not be fully availa‐
ble.◀
After a battery replacement, have the battery
registered on the vehicle by your service cen‐
ter to ensure that all comfort functions are fully
available.
Charging the battery
Note Do not connect the charger to the socket
Do not connect the battery charger to
the socket installed in the vehicle at the factory
as this could damage the battery.◀
Seite 255Replacing componentsMobility255
Online Edition for Part no. 01 40 2 954 052 - II/15
Page 262 of 297
Automatic transmission, 8-gear:
transporting your vehicle
Note Your vehicle is not permitted to be towed.
Therefore, contact a service center in the
event of a breakdown.
Do not have the vehicle towed
Have your vehicle transported on a load‐
ing platform only; otherwise, damage may oc‐
cur.◀
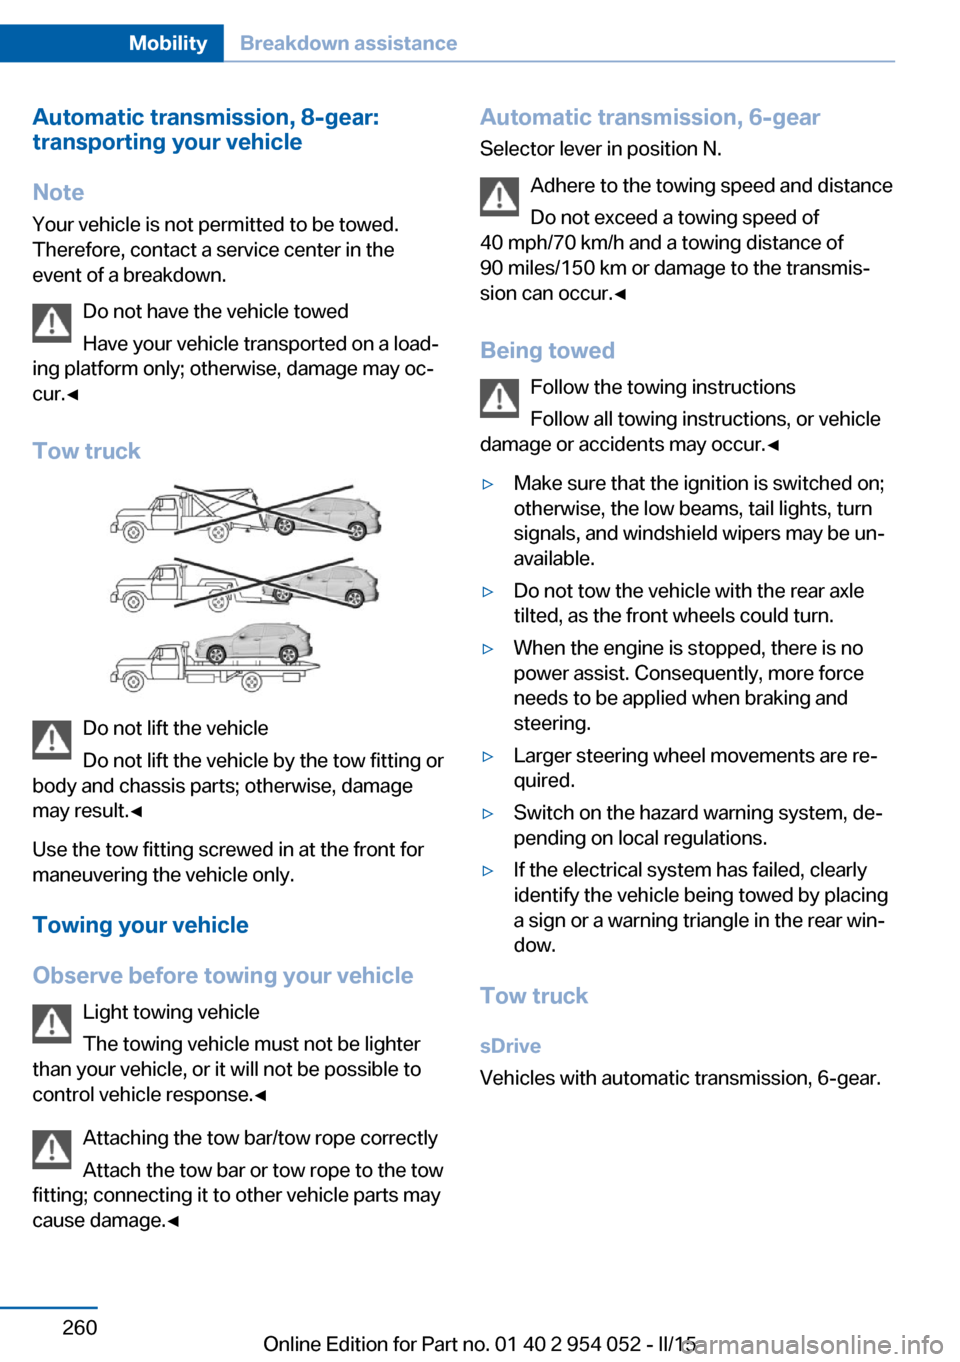
Tow truck
Do not lift the vehicle
Do not lift the vehicle by the tow fitting or
body and chassis parts; otherwise, damage
may result.◀
Use the tow fitting screwed in at the front for
maneuvering the vehicle only.
Towing your vehicle
Observe before towing your vehicle Light towing vehicle
The towing vehicle must not be lighter
than your vehicle, or it will not be possible to
control vehicle response.◀
Attaching the tow bar/tow rope correctly
Attach the tow bar or tow rope to the tow
fitting; connecting it to other vehicle parts may
cause damage.◀
Automatic transmission, 6-gear
Selector lever in position N.
Adhere to the towing speed and distance
Do not exceed a towing speed of
40 mph/70 km/h and a towing distance of
90 miles/150 km or damage to the transmis‐
sion can occur.◀
Being towed Follow the towing instructions
Follow all towing instructions, or vehicle
damage or accidents may occur.◀▷Make sure that the ignition is switched on;
otherwise, the low beams, tail lights, turn
signals, and windshield wipers may be un‐
available.▷Do not tow the vehicle with the rear axle
tilted, as the front wheels could turn.▷When the engine is stopped, there is no
power assist. Consequently, more force
needs to be applied when braking and
steering.▷Larger steering wheel movements are re‐
quired.▷Switch on the hazard warning system, de‐
pending on local regulations.▷If the electrical system has failed, clearly
identify the vehicle being towed by placing
a sign or a warning triangle in the rear win‐
dow.
Tow truck
sDrive
Vehicles with automatic transmission, 6-gear.
Seite 260MobilityBreakdown assistance260
Online Edition for Part no. 01 40 2 954 052 - II/15
Page 263 of 297
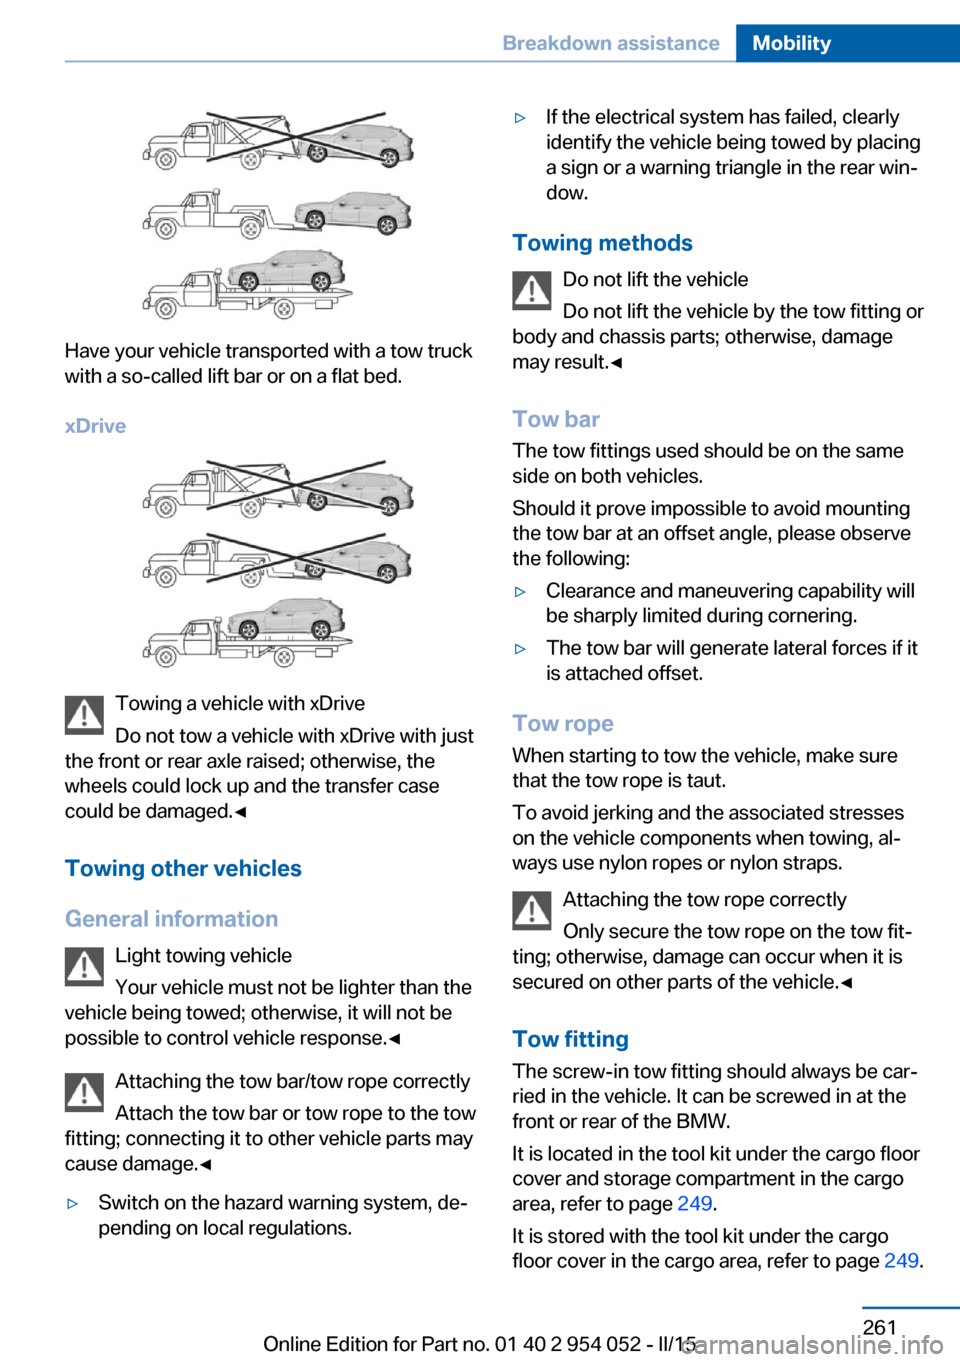
Have your vehicle transported with a tow truck
with a so-called lift bar or on a flat bed.
xDrive
Towing a vehicle with xDrive
Do not tow a vehicle with xDrive with just
the front or rear axle raised; otherwise, the
wheels could lock up and the transfer case
could be damaged.◀
Towing other vehicles
General information Light towing vehicle
Your vehicle must not be lighter than the
vehicle being towed; otherwise, it will not be possible to control vehicle response.◀
Attaching the tow bar/tow rope correctly
Attach the tow bar or tow rope to the tow
fitting; connecting it to other vehicle parts may
cause damage.◀
▷Switch on the hazard warning system, de‐
pending on local regulations.▷If the electrical system has failed, clearly
identify the vehicle being towed by placing
a sign or a warning triangle in the rear win‐
dow.
Towing methods
Do not lift the vehicle
Do not lift the vehicle by the tow fitting or
body and chassis parts; otherwise, damage
may result.◀
Tow bar The tow fittings used should be on the same
side on both vehicles.
Should it prove impossible to avoid mounting
the tow bar at an offset angle, please observe
the following:
▷Clearance and maneuvering capability will
be sharply limited during cornering.▷The tow bar will generate lateral forces if it
is attached offset.
Tow rope
When starting to tow the vehicle, make sure
that the tow rope is taut.
To avoid jerking and the associated stresses
on the vehicle components when towing, al‐
ways use nylon ropes or nylon straps.
Attaching the tow rope correctly
Only secure the tow rope on the tow fit‐
ting; otherwise, damage can occur when it is
secured on other parts of the vehicle.◀
Tow fitting
The screw-in tow fitting should always be car‐
ried in the vehicle. It can be screwed in at the
front or rear of the BMW.
It is located in the tool kit under the cargo floor
cover and storage compartment in the cargo
area, refer to page 249.
It is stored with the tool kit under the cargo floor cover in the cargo area, refer to page 249.
Seite 261Breakdown assistanceMobility261
Online Edition for Part no. 01 40 2 954 052 - II/15
Page 265 of 297
CareVehicle equipmentThis chapter describes all series equipment as
well as country-specific and special equipment
offered for this model series. Therefore, it also
describes equipment that may not be found in
your vehicle, for instance due to the selected
special equipment or the country version. This
also applies to safety-related functions and
systems.
When using the features and systems descri‐
bed here, adhere to local regulations.
Car washes Notes Steam jets or high-pressure washers
When using steam jets or high-pressure
washers, hold them a sufficient distance away
and use a maximum temperature of
140 ℉/60 ℃.
Holding them too close or using excessively
high pressures or temperatures can cause
damage or preliminary damage that may then
lead to long-term damage.
Follow the operating instructions for the high-
pressure washer.◀
Do not direct steam or high-pressure washers
toward the decorative labels applied by the
manufacturer; otherwise, damage may result.
Cleaning sensors/cameras with high-
pressure washers
When using high-pressure washers, do not
spray the exterior sensors and cameras, for
Park Distance Control or the backup camera,
for instance, for extended periods of time and
only from a distance of at least 12 in/30 cm.◀Regularly remove foreign bodies, such as
leaves, from the area below the windshield
when the hood is open.
Wash your vehicle frequently, particularly in
winter.
Intense soiling and road salt can damage the
vehicle.
Washing in automatic car washes Give preference to cloth car washes or those
that use soft brushes in order to avoid paint damage.
Notes Note the following:▷Make sure that the wheels and tires are not
damaged by the transport mechanisms.▷Fold in the exterior mirrors; otherwise, they
may be damaged, depending on the width
of the vehicle.▷Deactivate the rain sensor, refer to
page 65, to avoid unintentional wiper acti‐
vation.▷Move the rear window wiper to its resting
position, deactivate it, and protect it
against damage. Ask the car wash operator
about any necessary protective measures.▷Remove additional attachments, for in‐
stance a spoiler or telephone antenna, if
there is a risk that these may be damaged.
Guide rails in car washes
Avoid car washes with guide rails higher
than 4 in/10 cm; otherwise, the vehicle body
could be damaged.◀
Before driving into a car wash The vehicle is able to roll if the following steps
are taken.
Seite 263CareMobility263
Online Edition for Part no. 01 40 2 954 052 - II/15
Page 267 of 297
If they are very dirty, e.g., beverage stains, use
a soft sponge or microfiber cloth with a suita‐
ble interior cleaner.
Clean the upholstery down to the seams using
large sweeping motions. Avoid rubbing the
material vigorously.
Damage from Velcro® fasteners
Open Velcro® fasteners on pants or
other articles of clothing can damage the seat
covers. Ensure that any Velcro® fasteners are
closed.◀
Caring for special components
Light-alloy wheels When cleaning the wheels on the vehicle, only
use a neutral wheel rim cleaner with a pH value
of 5 to 9. Do not use abrasive cleaners or a
steam jet hotter than 140 ℉/60 ℃; otherwise,
damage may result. Adhere to the manufac‐
turer instructions.
Aggressive, acidic, or alkaline cleaners may
destroy the protective coating of neighboring
components such as the brake disc.
Chrome surfaces
Carefully clean components such as the radia‐
tor grille or door handles with an ample supply
of water, possibly with shampoo added, partic‐
ularly when they have been exposed to road
salt.
Rubber components
Aside from water, treat only with rubber
cleansers.
When cleaning rubber seals, do not use any
silicon-containing car care products in order to
avoid damage or reduced noise damping.
Fine wood parts Clean fine wood facing and fine wood compo‐
nents only with a moist rag. Then dry with a
soft cloth.Plastic components
These include:▷Imitation leather surfaces.▷Headliner.▷Lamp lenses.▷Instrument cluster cover.▷Matte black spray-coated components.▷Painted parts in the interior.
Clean with a microfiber cloth.
Moisten the cloth lightly with water if neces‐
sary.
Do not soak the headliner.
Do not use cleansers that contain alcohol
or solvents
Do not use cleansers that contain alcohol or
solvents, such as lacquer thinners, heavy-duty
grease removers, fuel, or such; this could lead
to surface damage.◀
Safety belts
Dirty belt straps impede the reeling action and
thus have a negative impact on safety.
No chemical cleaning
Do not clean chemically; this can destroy
the webbing.◀
Use only a mild soapy solution, with the safety
belts clipped into their buckles.
Do not allow the reels to retract the safety
belts until they are dry.
Carpets and floor mats No objects in the area around the pedals
Keep floor mats, carpets, and any other
objects out of the area of motion of the pedals;
otherwise, the function of the pedals could be
impeded while driving
Do not place additional floor mats over existing
mats or other objects.
Seite 265CareMobility265
Online Edition for Part no. 01 40 2 954 052 - II/15