engine BMW X1 2016 F48 Repair Manual
[x] Cancel search | Manufacturer: BMW, Model Year: 2016, Model line: X1, Model: BMW X1 2016 F48Pages: 242, PDF Size: 7.12 MB
Page 204 of 242
MaintenanceVehicle features and options
This chapter describes all standard, country-
specific and optional features offered with the
series. It also describes features that are not
necessarily available in your car, e. g., due to
the selected options or country versions. This
also applies to safety-related functions and
systems. The respectively applicable country
provisions must be observed when using the
respective features and systems.
BMW maintenance system The maintenance system indicates required
maintenance measures, and thereby provides
support in maintaining road safety and the op‐
erational reliability of the vehicle.
In some cases scopes and intervals may vary
according to the country-specific version. Re‐
placement work, spare parts, fuels and lubri‐
cants and wear materials are calculated sepa‐
rately. Further information is available from a
dealer’s service center or another qualified
service center or repair shop.
Condition Based ServiceCBS
Sensors and special algorithms take into ac‐
count the driving conditions of your vehicle.
Based on this, Condition Based Service recog‐
nizes the maintenance requirements.
The system makes it possible to adapt the
amount of maintenance corresponding to your
user profile.
Detailed information on service requirements,
refer to page 87, can be displayed on the Con‐
trol Display.Service data in the remote control
Information on the required maintenance is
continuously stored in the remote control. The dealer’s service center can read this data out
and suggest an optimized maintenance scope
for your vehicle.
Therefore, hand the service advisor the remote
control with which the vehicle was driven most
recently.
Storage periods Storage periods during which the vehicle bat‐
tery was disconnected are not taken into ac‐
count.
If this occurs, have a dealer's service center or
another qualified service center or repair shop
update the time-dependent maintenance pro‐
cedures, such as checking brake fluid and, if
necessary, changing the engine oil and the mi‐
crofilter/activated-charcoal filter.
Service and WarrantyInformation Booklet for US
models and Warranty and
Service Guide Booklet for
Canadian models
Please consult your Service and Warranty In‐
formation Booklet for US models and Warranty
and Service Guide Booklet for Canadian mod‐
els for additional information on service re‐
quirements.
The manufacturer of your vehicle recommends
that maintenance and repair be performed by a
dealer’s service center or another qualified
service center or repair shop. Records of regu‐
lar maintenance and repair work should be re‐
tained.Seite 204MobilityMaintenance204
Online Edition for Part no. 01 40 2 964 303 - VI/15
Page 205 of 242
Socket for OBD Onboard
Diagnosis
Information CAUTION
Improper use of the socket for Onboard
Diagnosis can lead to vehicle malfunctions.
There is risk of property damage. The manu‐
facturer of your vehicle strongly recommends
access to the socket for Onboard Diagnosis be
limited to a dealer's service center, another
qualified service center or repair shop or other
authorized persons.◀
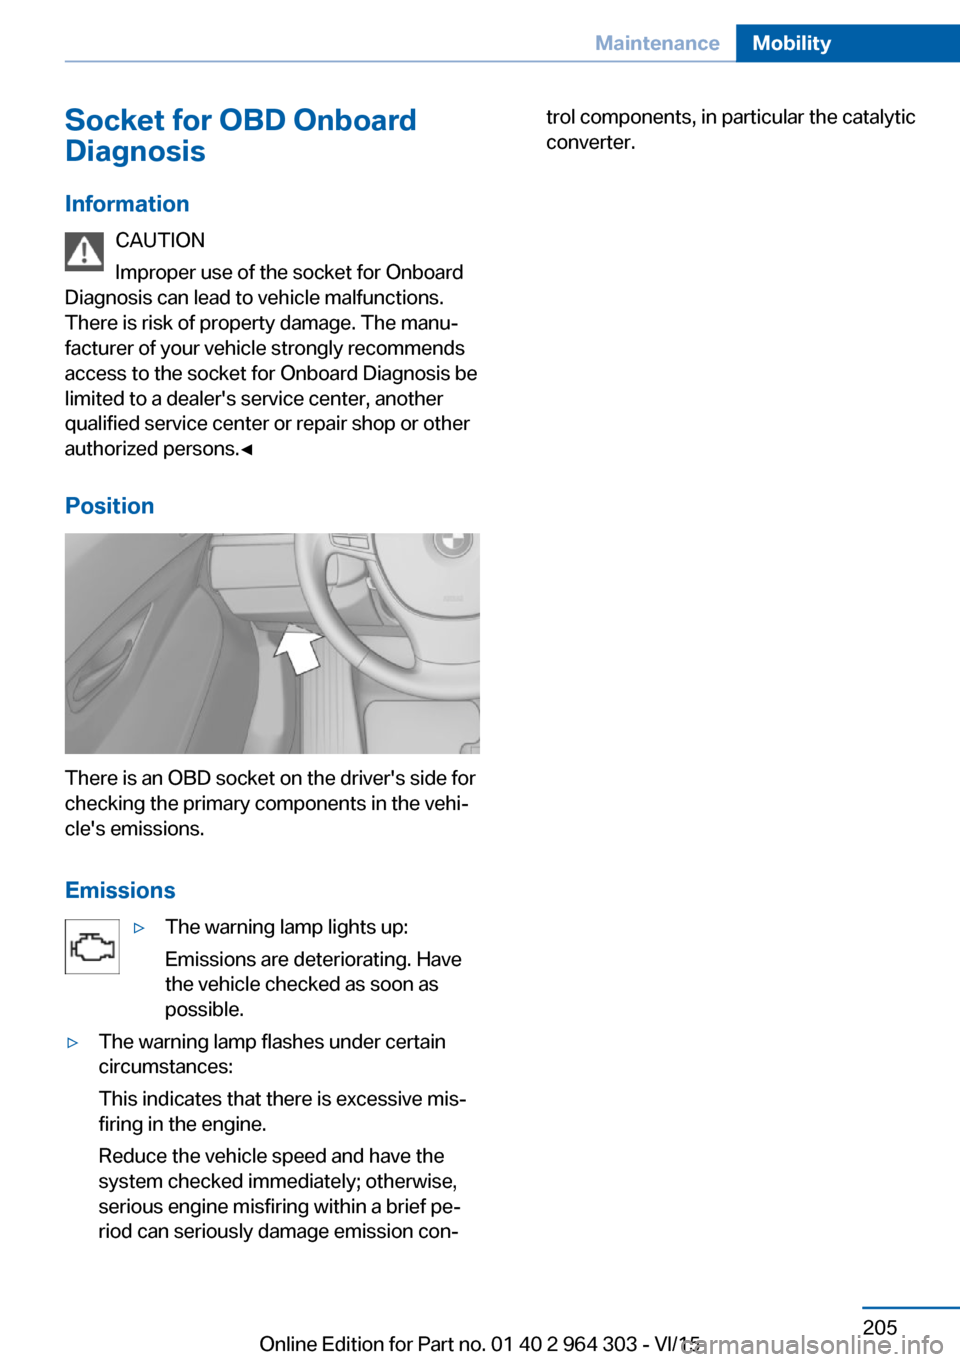
Position
There is an OBD socket on the driver's side for
checking the primary components in the vehi‐
cle's emissions.
Emissions
▷The warning lamp lights up:
Emissions are deteriorating. Have
the vehicle checked as soon as
possible.▷The warning lamp flashes under certain
circumstances:
This indicates that there is excessive mis‐
firing in the engine.
Reduce the vehicle speed and have the
system checked immediately; otherwise,
serious engine misfiring within a brief pe‐
riod can seriously damage emission con‐trol components, in particular the catalytic
converter.Seite 205MaintenanceMobility205
Online Edition for Part no. 01 40 2 964 303 - VI/15
Page 213 of 242
2.Press the nonworking bulb gently into the
socket, turn counterclockwise and remove.▷Upper bulb: reversing lamp▷Lower bulb: inner brake lamp
Only vehicles with halogen headlights:
▷Lower bulb, 5-watt: tail light
Installing the bulb holder
1.Proceed in the reverse order to insert the
new bulb and attach the bulb holder.
Connect the plug to the bulb holder.2.Make sure that the bulb holder is correctly
and firmly seated.
Central brake lamp and license plate
lamp
Follow general instructions, refer to page 206.
These lights are made using LED technology.
Contact a dealer’s service center or another
qualified service center or repair shop in the
event of a malfunction.
Changing wheels
Information When using run-flat tires or sealants, a tire
does not need to be changed immediately in
the event of pressure loss due to a flat tire.
Which is why no spare tire is available.
The tools for changing wheels are available as
accessories from your dealer’s service center
or another qualified service center or repair
shop.
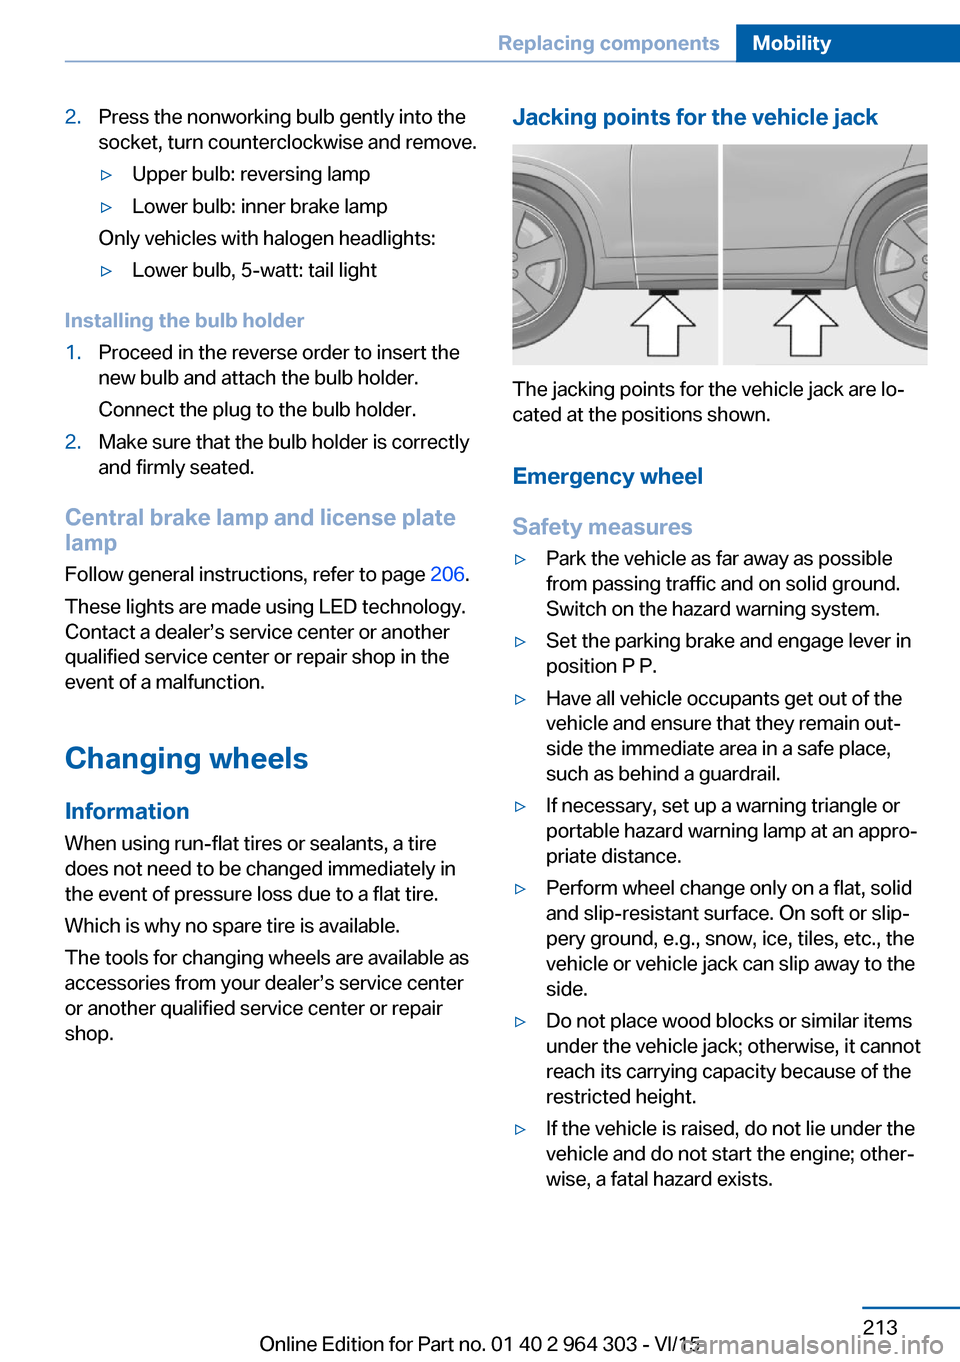
Jacking points for the vehicle jack
The jacking points for the vehicle jack are lo‐
cated at the positions shown.
Emergency wheel
Safety measures
▷Park the vehicle as far away as possible
from passing traffic and on solid ground.
Switch on the hazard warning system.▷Set the parking brake and engage lever in
position P P.▷Have all vehicle occupants get out of the
vehicle and ensure that they remain out‐
side the immediate area in a safe place,
such as behind a guardrail.▷If necessary, set up a warning triangle or
portable hazard warning lamp at an appro‐
priate distance.▷Perform wheel change only on a flat, solid
and slip-resistant surface. On soft or slip‐
pery ground, e.g., snow, ice, tiles, etc., the
vehicle or vehicle jack can slip away to the
side.▷Do not place wood blocks or similar items
under the vehicle jack; otherwise, it cannot
reach its carrying capacity because of the
restricted height.▷If the vehicle is raised, do not lie under the
vehicle and do not start the engine; other‐
wise, a fatal hazard exists.Seite 213Replacing componentsMobility213
Online Edition for Part no. 01 40 2 964 303 - VI/15
Page 215 of 242
Reset the Tire Pressure Monitor.5.Check to make sure the lug bolts are tight
with a calibrated torque wrench.6.Replace the damaged tires as soon as pos‐
sible.
Driving with emergency wheel
WARNING
The emergency wheel has particular di‐
mensions. When driving with an emergency
wheel, changed driving properties may occur
at higher speeds, e.g. reduced lane stability
when braking, longer braking distance and
changed self-steering properties in the limit
area. There is risk of an accident. Drive moder‐
ately and do not exceed a speed of
50 mph/80 km/h.◀
Vehicle battery Maintenance
The battery is maintenance-free.
The added amount of acid is sufficient for the
service life of the battery.
More information about the battery can be re‐
quested from a dealer’s service center or an‐
other qualified service center or repair shop.
Battery replacement CAUTION
Vehicle batteries that are not compatible
can damage vehicle systems and impair vehi‐
cle functions.There is risk of property damage.
Information on the compatible vehicle batteries
is available at your dealer's service center.◀
After a battery replacement, the manufacturer
of your vehicle recommends that the vehicle
battery be registered on the vehicle by a
dealer’s service center or another qualified
service center or repair shop to ensure that all
comfort features are fully available and that any
Check Control messages of these comfort fea‐
tures are no longer displayed.
Charging the battery
General information
Make sure that the battery is always suffi‐
ciently charged to guarantee that the battery
remains usable for its full service life.
The battery may need to be charged in the fol‐
lowing cases:▷When making frequent short-distance
drives.▷If the vehicle is not used for prolonged pe‐
riods, longer than a month.▷Steptronic transmission: when parked for
long periods of time in selector lever posi‐
tion D, R or N.
Information
CAUTION
Battery chargers for the vehicle battery
can work with high voltages and currents,
which means that the 12V on-board network
can be overloaded or damaged. There is risk of
property damage. Only connect battery charg‐
ers for the vehicle battery to the starting aid
terminals in the engine compartment.◀
Starting aid terminals
In the vehicle, only charge the battery via the
starting aid terminals, refer to page 219, in the
engine compartment with the engine off.
Power failure
After a temporary power loss, some equipment
needs to be newly initialized or individual set‐
tings updated, e. g.:
▷Seat and mirror memory: store the posi‐
tions again.▷Time: update.▷Date: update.Seite 215Replacing componentsMobility215
Online Edition for Part no. 01 40 2 964 303 - VI/15
Page 218 of 242
steps to help you under certain circum‐
stances.
For this, data are transmitted to the BMW
Response Center which serve to deter‐
mine the necessary rescue measures. E. g.
the current position of the vehicle, if it can
be established.▷If the LED is flashing green, but the BMW
Response Center can no longer be heard
via the speaker, you can nevertheless still
be heard at the BMW Response Center.
Initiating an Emergency Request
automatically
Under certain conditions, an Emergency Re‐
quest is automatically initiated immediately af‐
ter a severe accident. Automatic Collision Noti‐
fication is not affected by pressing the SOS
button.
Warning triangle
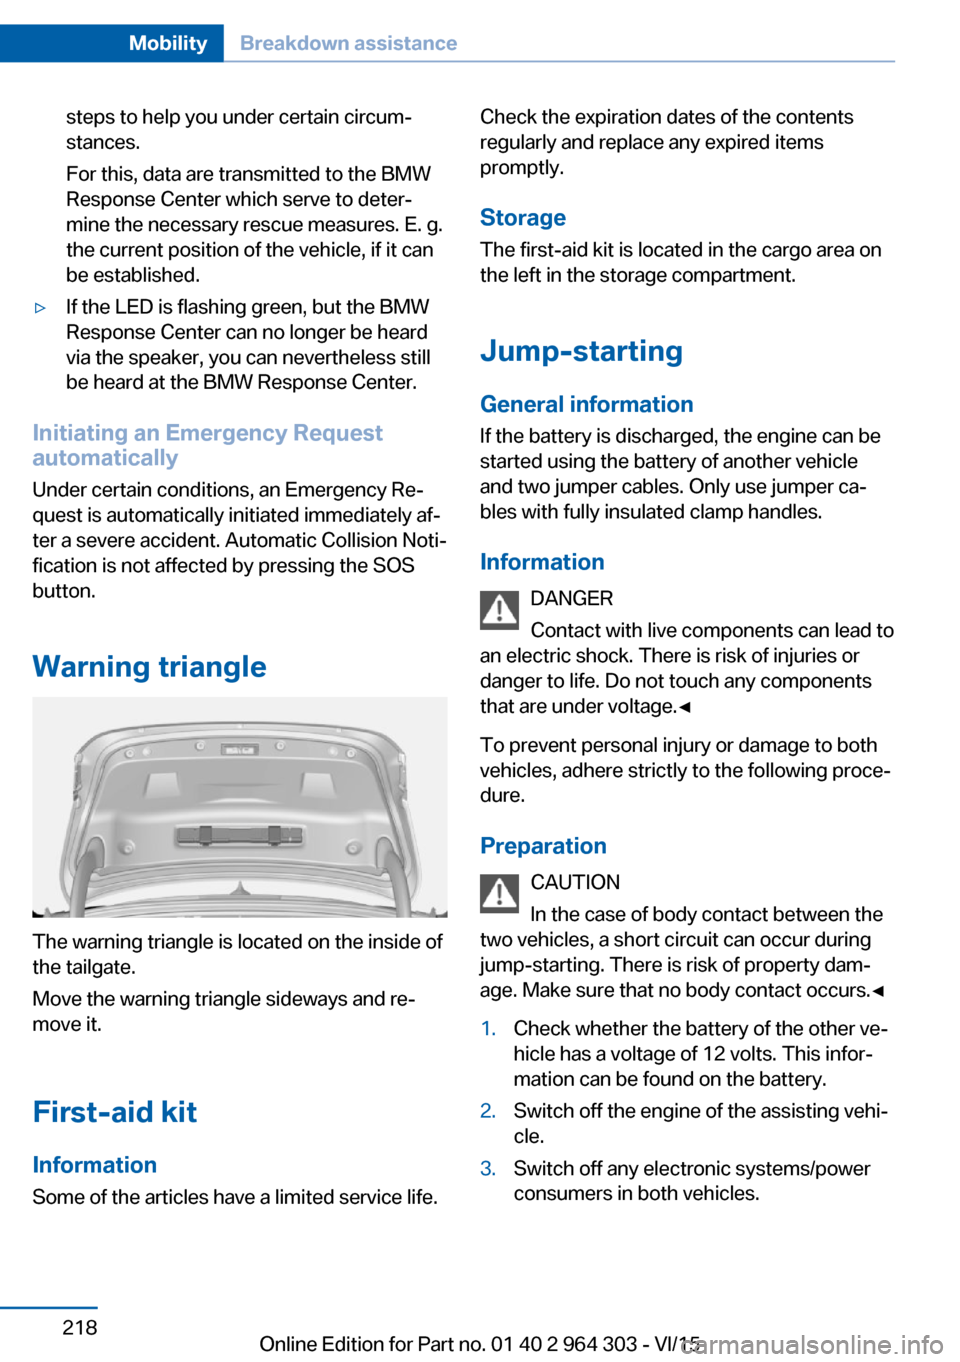
The warning triangle is located on the inside of
the tailgate.
Move the warning triangle sideways and re‐
move it.
First-aid kit InformationSome of the articles have a limited service life.
Check the expiration dates of the contents
regularly and replace any expired items
promptly.
Storage The first-aid kit is located in the cargo area on
the left in the storage compartment.
Jump-starting
General information
If the battery is discharged, the engine can be
started using the battery of another vehicle
and two jumper cables. Only use jumper ca‐
bles with fully insulated clamp handles.
Information DANGER
Contact with live components can lead to
an electric shock. There is risk of injuries or
danger to life. Do not touch any components
that are under voltage.◀
To prevent personal injury or damage to both
vehicles, adhere strictly to the following proce‐
dure.
Preparation CAUTION
In the case of body contact between the
two vehicles, a short circuit can occur during
jump-starting. There is risk of property dam‐
age. Make sure that no body contact occurs.◀1.Check whether the battery of the other ve‐
hicle has a voltage of 12 volts. This infor‐
mation can be found on the battery.2.Switch off the engine of the assisting vehi‐
cle.3.Switch off any electronic systems/power
consumers in both vehicles.Seite 218MobilityBreakdown assistance218
Online Edition for Part no. 01 40 2 964 303 - VI/15
Page 219 of 242
Starting aid terminalsWARNING
If the jumper cables are connected in the
incorrect order, sparks formation can occur.
There is risk of injuries. Pay attention to the
correct order during connection.◀
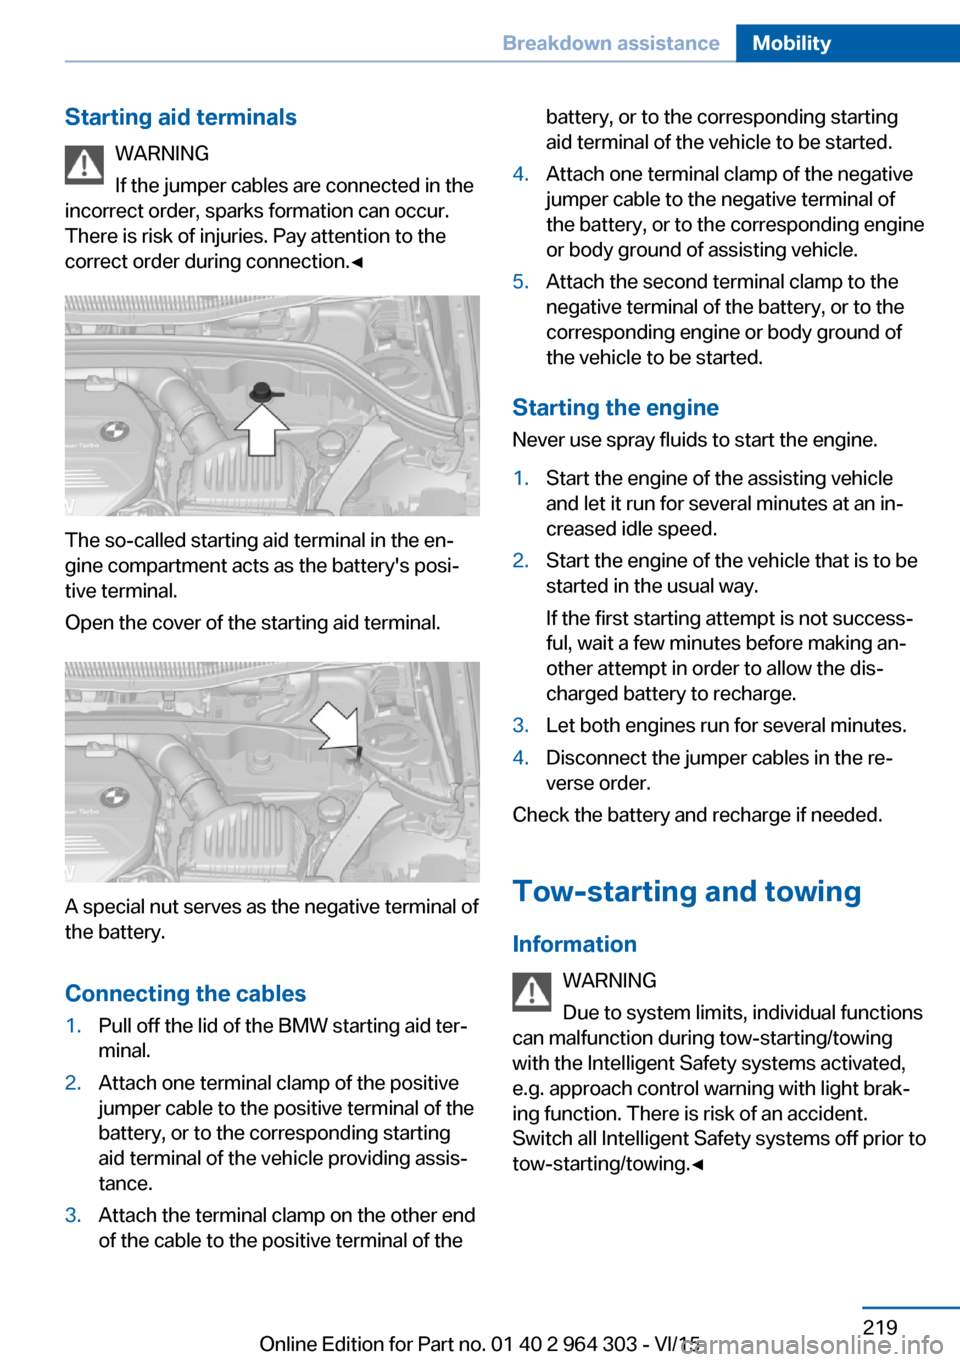
The so-called starting aid terminal in the en‐
gine compartment acts as the battery's posi‐
tive terminal.
Open the cover of the starting aid terminal.
A special nut serves as the negative terminal of
the battery.
Connecting the cables
1.Pull off the lid of the BMW starting aid ter‐
minal.2.Attach one terminal clamp of the positive
jumper cable to the positive terminal of the
battery, or to the corresponding starting
aid terminal of the vehicle providing assis‐
tance.3.Attach the terminal clamp on the other end
of the cable to the positive terminal of thebattery, or to the corresponding starting
aid terminal of the vehicle to be started.4.Attach one terminal clamp of the negative
jumper cable to the negative terminal of
the battery, or to the corresponding engine
or body ground of assisting vehicle.5.Attach the second terminal clamp to the
negative terminal of the battery, or to the
corresponding engine or body ground of
the vehicle to be started.
Starting the engine
Never use spray fluids to start the engine.
1.Start the engine of the assisting vehicle
and let it run for several minutes at an in‐
creased idle speed.2.Start the engine of the vehicle that is to be
started in the usual way.
If the first starting attempt is not success‐
ful, wait a few minutes before making an‐
other attempt in order to allow the dis‐
charged battery to recharge.3.Let both engines run for several minutes.4.Disconnect the jumper cables in the re‐
verse order.
Check the battery and recharge if needed.
Tow-starting and towing Information WARNING
Due to system limits, individual functions
can malfunction during tow-starting/towing
with the Intelligent Safety systems activated,
e.g. approach control warning with light brak‐
ing function. There is risk of an accident.
Switch all Intelligent Safety systems off prior to
tow-starting/towing.◀
Seite 219Breakdown assistanceMobility219
Online Edition for Part no. 01 40 2 964 303 - VI/15
Page 221 of 242
a sign or a warning triangle in the rear win‐
dow.
Tow bar
The tow fittings used should be on the same
side on both vehicles.
Should it prove impossible to avoid mounting
the tow bar at an offset angle, please observe
the following:
▷Maneuvering capability is limited going
around corners.▷The tow bar will generate lateral forces if it
is secured with an offset.
Tow rope
When starting to tow the vehicle, make sure
that the tow rope is taut.
To avoid jerking and the associated stresses
on the vehicle components when towing, al‐
ways use nylon ropes or nylon straps.
Tow fitting
General information
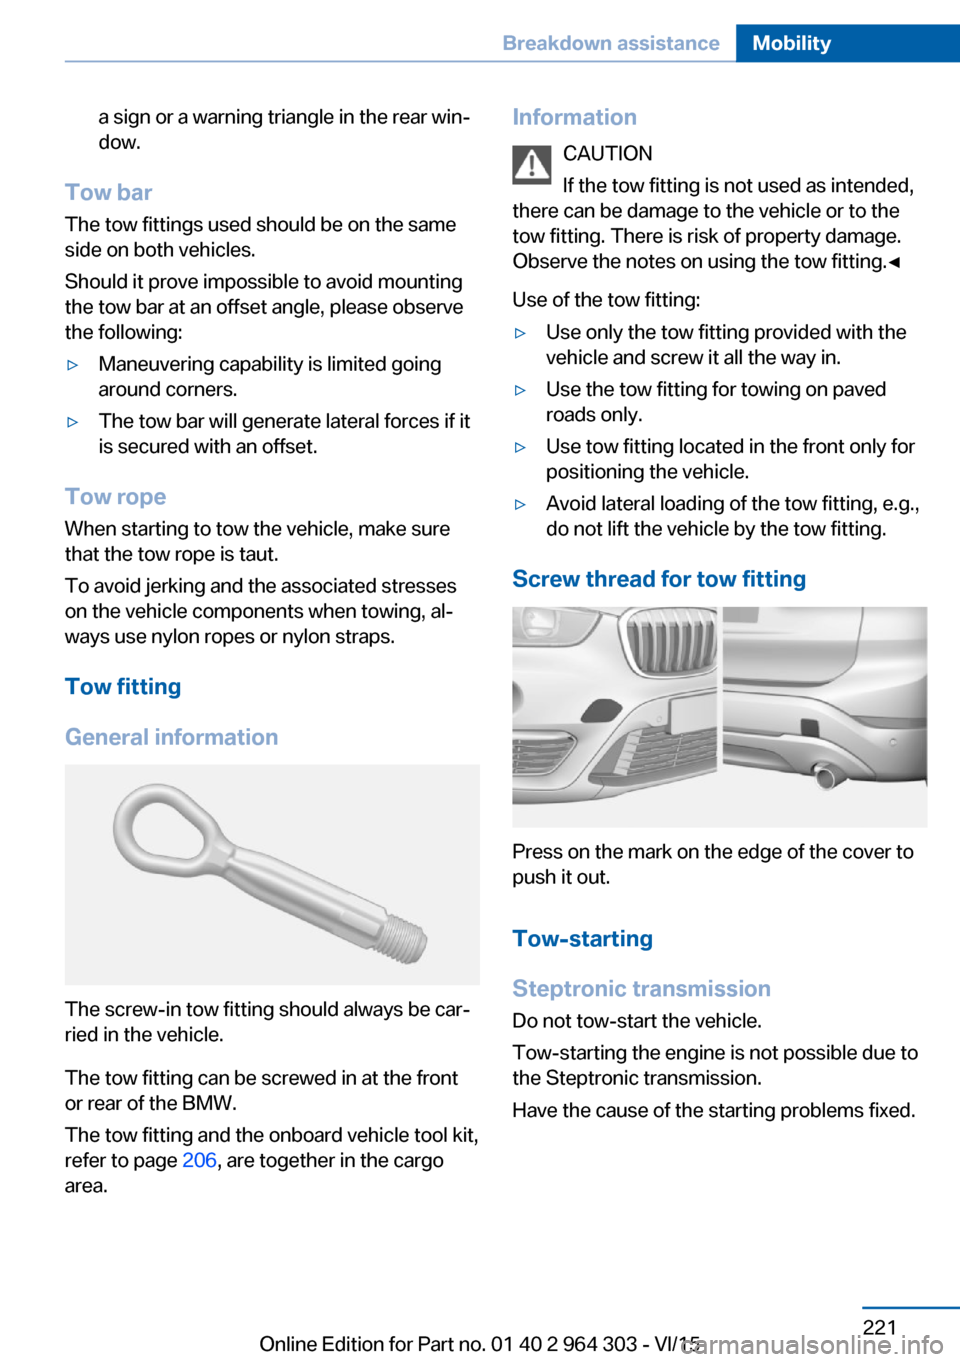
The screw-in tow fitting should always be car‐
ried in the vehicle.
The tow fitting can be screwed in at the front
or rear of the BMW.
The tow fitting and the onboard vehicle tool kit,
refer to page 206, are together in the cargo
area.
Information
CAUTION
If the tow fitting is not used as intended,
there can be damage to the vehicle or to the
tow fitting. There is risk of property damage.
Observe the notes on using the tow fitting.◀
Use of the tow fitting:▷Use only the tow fitting provided with the
vehicle and screw it all the way in.▷Use the tow fitting for towing on paved
roads only.▷Use tow fitting located in the front only for
positioning the vehicle.▷Avoid lateral loading of the tow fitting, e.g.,
do not lift the vehicle by the tow fitting.
Screw thread for tow fitting
Press on the mark on the edge of the cover to
push it out.
Tow-starting
Steptronic transmission
Do not tow-start the vehicle.
Tow-starting the engine is not possible due to
the Steptronic transmission.
Have the cause of the starting problems fixed.
Seite 221Breakdown assistanceMobility221
Online Edition for Part no. 01 40 2 964 303 - VI/15
Page 222 of 242
CareVehicle features and optionsThis chapter describes all standard, country-
specific and optional features offered with the
series. It also describes features that are not
necessarily available in your car, e. g., due to
the selected options or country versions. This
also applies to safety-related functions and
systems. The respectively applicable country
provisions must be observed when using the
respective features and systems.
Car washes General information
Regularly remove foreign objects such as
leaves in the area below the windshield when
the hood is raised.
Wash your vehicle frequently, particularly in
winter. Intense soiling and road salt can dam‐
age the vehicle.
Steam blaster and high-pressure
washer
Information CAUTION
When cleaning with high-pressure wash‐
ers, components can be damaged due to the
pressure or temperatures being too high.
There is risk of property damage. Maintain suf‐
ficient distance and do not spray too long con‐
tinuously. Follow the user's manual for the
high-pressure washer.◀
Distances and temperature▷Maximum temperature: 140 ℉/60 ℃.▷Minimum distance from sensors, cameras,
seals: 12 in/30 cm.▷Minimum distance from glass sunroof:
31.5 inches/80 cm.
Automatic car washes
Information
▷Give preference to cloth car washes or
those that use soft brushes in order to
avoid paint damage.▷Make sure that the wheels and tires are not
damaged by the transport mechanisms.▷Fold in the exterior mirrors; otherwise, they
may be damaged, depending on the width
of the vehicle.▷Deactivate the rain sensor, refer to
page 75, to avoid unintentional wiper acti‐
vation.▷In some cases, an unintentional alarm can
be triggered by the interior motion sensor
of the alarm system. Follow the instruc‐
tions on avoiding an unintentional alarm,
refer to page 47.
CAUTION
Too high guide rails in car washes can
damage body parts. There is risk of property
damage. Avoid car washes with guide rails
higher than 4 in/10 cm.◀
Before driving into a car wash In order to ensure that the vehicle can roll in a
car wash, take the following steps:
Steptronic transmission:
1.Drive into the car wash.2.Engage selector lever position N.3.Make sure that the parking brake is re‐
leased.4.Switch the engine off.Seite 222MobilityCare222
Online Edition for Part no. 01 40 2 964 303 - VI/15
Page 223 of 242
In this way, the ignition remains switched
on, and two Check-Control messages are
displayed.
The vehicle cannot be locked from the outside
when in selector lever position N. A signal
sounds when an attempt is made to lock the
vehicle.
To start the engine with Steptronic transmis‐
sion:
1.Depress the brake pedal.2.Press the Start/Stop button.
Headlights
▷Do not rub dry and do not use abrasive or
acidic cleansers.▷Soak areas that have been dirtied e. g.,
from insects, with shampoo and wash off
with water.▷Thaw ice with de-icing spray; do not use an
ice scraper.
After washing the vehicle
After washing the vehicle, apply the brakes
briefly to dry them; otherwise, braking action
can be reduced and corrosion of the brake
discs can occur.
Completely remove all residues on the win‐
dows, to minimize loss of visibility due to
smearing and to reduce wiper noises and
wiper blade wear.
Vehicle care
Car care products The manufacturer of your vehicle recommends
using car care and cleaning products from
BMW.
WARNING
Cleansers can contain substances that
are dangerous and harmful to your health.
There is risk of injuries. When cleaning the in‐
terior, open the doors or windows. Only use
products intended for cleaning vehicles. Fol‐
low the instructions on the container.◀
Vehicle paint
Regular care contributes to driving safety and
value retention. Environmental influences in
areas with elevated air pollution or natural con‐
taminants, such as tree resin or pollen can af‐
fect the vehicle's paintwork. Tailor the fre‐
quency and extent of your car care to these
influences.
Aggressive substances such as spilled fuel, oil,
grease or bird droppings, must be removed im‐
mediately to prevent the finish from being al‐
tered or discolored.
Leather care
Remove dust from the leather often, using a
cloth or vacuum cleaner.
Otherwise, particles of dust and road grime
chafe in pores and folds, and lead to increased
wear and premature degradation of the leather
surface.
To guard against discoloration, such as from
clothing, provide leather care roughly every
two months.
Clean light-colored leather more frequently be‐
cause soiling on such surfaces is substantially
more visible.
Use leather care products; otherwise, dirt and
grease will gradually break down the protective
layer of the leather surface.
Suitable care products are available from a
dealer’s service center or another qualified
service center or repair shop.
Upholstery material care Vacuum regularly with a vacuum cleaner.
If upholstery is very dirty, e.g., with beverage stains, use a soft sponge or microfiber clothwith a suitable interior cleaner.Seite 223CareMobility223
Online Edition for Part no. 01 40 2 964 303 - VI/15
Page 234 of 242
Cruise control, refer to cam‐era-based cruise con‐
trol 126
Cruising range 86
Cupholder 162
Current fuel consumption 87
D
Damage, tires 190
Damping control, dy‐ namic 123
Data, technical 228
Date 86
Daytime running lights 99
Defrosting, refer to defrosting the windows 145
Defrosting, see Windows, de‐ frosting 148
Defrosting the windows 145
Dehumidifying, air 145, 147
Deleting personal data 24
Deletion of personal data 24
Destination distance 91
Digital clock 86
Digital compass 153
Dimensions 228
Dimmable exterior mirrors 62
Dimmable interior rearview mirror 62
Direction indicator, see Turn signals 73
Display, electronic, instru‐ ment cluster 81
Display, engine tempera‐ ture 91
Display lighting, see Instru‐ ment lighting 100
Displays, cleaning 225
Disposal, coolant 203
Disposal, vehicle battery 216
Distance control, see PDC 135
Distance to destination 91
Divided screen view, split screen 23 Door lock 39
Door lock, see Remote con‐ trol 34
Downhill control 122
Drive-off assistant 125
Drive-off assistant, see DSC 120
Driving Dynamics Con‐ trol 124
Driving Excitement, SPORT 92
Driving instructions, break- in 168
Driving mode 124
Driving notes, general 169
Driving on bad roads 168
Driving stability control sys‐ tems 120
Driving tips 169
DSC Dynamic Stability Con‐ trol 120
DTC Dynamic Traction Con‐ trol 121
Dynamic Damping Con‐ trol 123
Dynamic Stability Control DSC 120
Dynamic Traction Control DTC 121
E
ECO PRO 176
ECO PRO, bonus range 177
ECO PRO display 176
ECO PRO driving mode 176
ECO PRO mode 176
ECO PRO program, driving dynamics 124
Electronic displays, instru‐ ment cluster 81
Electronic oil measure‐ ment 199
Electronic Stability Program ESP, see DSC 120 Emergency detection, remote
control 35
Emergency release, fuel filler flap 182
Emergency Request 217
Emergency start function, en‐ gine start 35
Emergency wheel 213
Energy Control 87
Energy recovery 87
Engine, automatic Start/Stop function 70
Engine, automatic switch- off 70
Engine compartment 197
Engine compartment, work‐ ing in 197
Engine coolant 202
Engine oil 199
Engine oil, adding 200
Engine oil additives 201
Engine oil change 201
Engine oil filler neck 200
Engine oil types, alterna‐ tive 201
Engine oil types, suitable 201
Engine start during malfunc‐ tion 35
Engine start, jump-start‐ ing 218
Engine start, refer to Starting the engine 69
Engine stop 69
Engine temperature, dis‐ play 91
Entering a car wash 222
Equipment, interior 151
Error displays, see Check Control 82
ESP Electronic Stability Pro‐ gram, see DSC 120
Exchanging wheels/tires 190
Exhaust system 169
Exterior mirror, automatic dimming feature 62
Exterior mirrors 60 Seite 234ReferenceEverything from A to Z234
Online Edition for Part no. 01 40 2 964 303 - VI/15