Led tail light BMW X1 2016 F48 Owner's Manual
[x] Cancel search | Manufacturer: BMW, Model Year: 2016, Model line: X1, Model: BMW X1 2016 F48Pages: 242, PDF Size: 7.12 MB
Page 38 of 242
▷The alarm system, refer to page 46, is
disarmed.
Convenient opening
Press and hold this button on the re‐
mote control after unlocking.
The windows and the glass sunroof are
opened, as long as the button on the remote
control is pressed.
Locking WARNING
Unlocking from the inside is only possi‐
ble with special knowledge.
If people must spend a longer time in the vehi‐
cle while it is very hot or cold outside, there is
risk of injuries or danger to life. Do not lock the
vehicle from the outside when there are people
in it.◀
The driver's door must be closed. Press button on the remote control.
All doors, the tailgate, and the fuel filler flap are
being locked.
The alarm system, refer to page 46, is armed.
Switching on interior lights and
courtesy lights
Press button on the remote control with
the vehicle locked.
The courtesy lamps are only switched on when
it is dark outside. This function is not available,
if the interior lamps were switched off man‐ ually.
If the button is pressed again within 10 sec‐
onds after vehicle was locked, the interior mo‐
tion sensor and tilt alarm sensor of the anti-
theft warning system, refer to page 47, are
turned off. After locking, wait 10 seconds be‐
fore pressing the button again.
Panic mode
You can trigger the alarm system if you find
yourself in a dangerous situation.
Press button on the remote control for
at least 3 seconds.
To switch off the alarm: press any button.
Unlocking the tailgate
With automatic tailgate operation:
To avoid locking it into the vehicle, do not
place the remote control in the cargo area.
Press button on the remote control for
approx. 1 second.
The tailgate opens slightly, regardless of
whether the vehicle was previously locked or
unlocked.
With automatic tailgate operation, the closed
tailgate is automatically opened.
Depending on the features and the country
version, it is also possible to have door un‐
locked. Create the settings, refer to page 45.
If the doors were not unlocked, the tailgate is
locked again as soon as it closes. Take the re‐
mote control with you and do not leave it in the
cargo area; otherwise, the remote control is
locked inside the vehicle when the tailgate is
closed.
CAUTION
Sharp-edged or pointed objects can hit
the rear window and heat conductors while
driving. There is risk of property damage.
Cover the edges and ensure that pointed ob‐
jects do not hit the rear window.◀
Malfunction Remote control detection by the vehicle can
among others be malfunctioning under the fol‐
lowing circumstances:▷The battery of the remote control is dis‐
charged. Replace the battery, refer to
page 35.Seite 38ControlsOpening and closing38
Online Edition for Part no. 01 40 2 964 303 - VI/15
Page 60 of 242
WARNING
There is risk of jamming when moving
the seats. There is risk of injuries or risk of
property damage. Make sure that the area of
movement of the seat is clear prior to any ad‐
justment.◀
The concept Two driver's seat and exterior mirror positions
can be stored per profile, refer to page 35, and
called up. Settings for the backrest width and
lumbar support are not stored in memory.
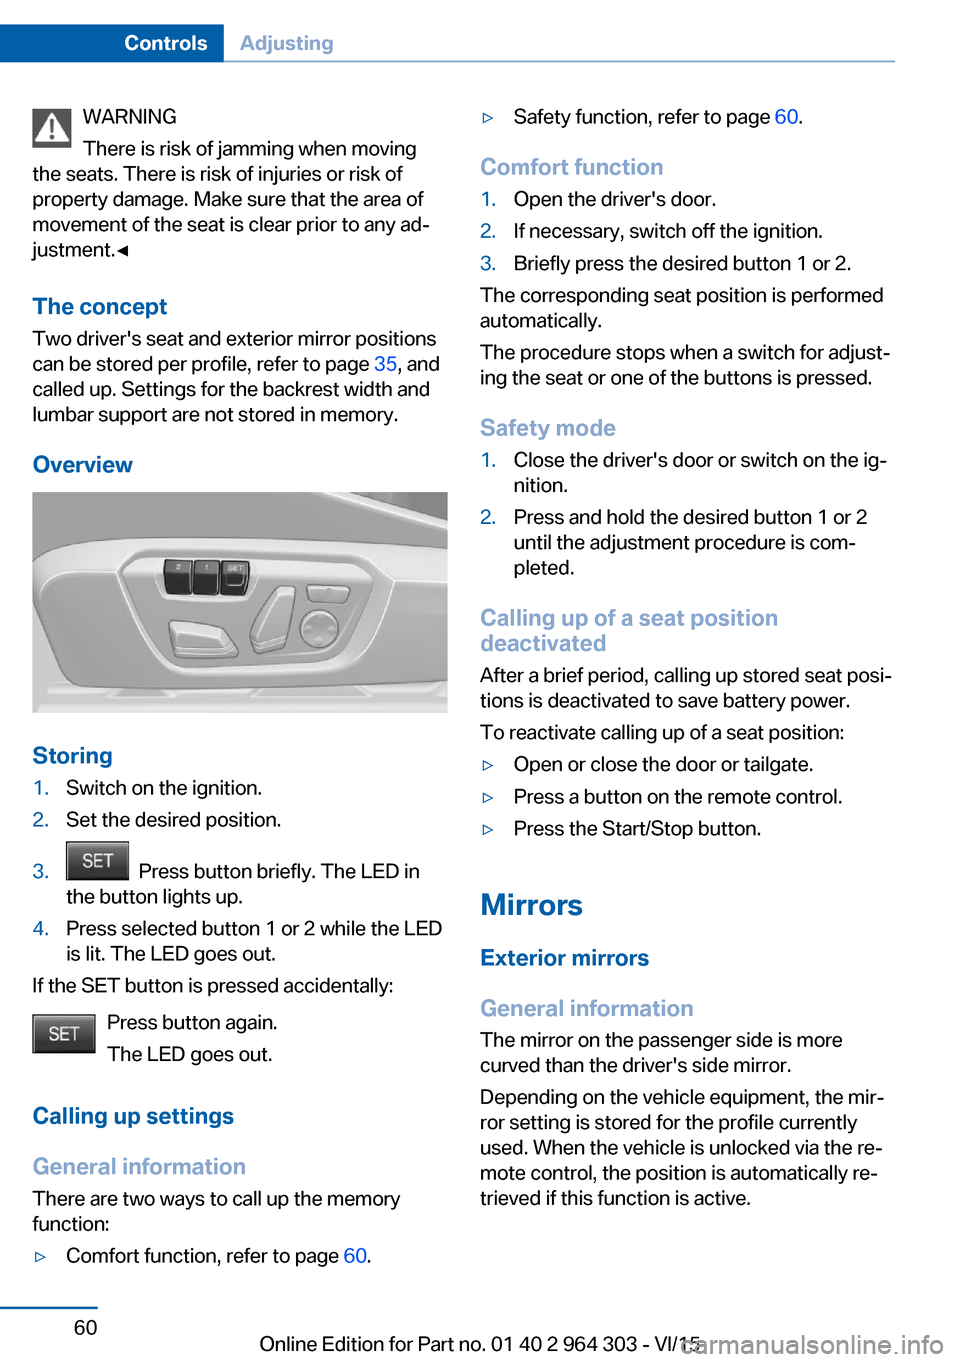
Overview
Storing
1.Switch on the ignition.2.Set the desired position.3. Press button briefly. The LED in
the button lights up.4.Press selected button 1 or 2 while the LED
is lit. The LED goes out.
If the SET button is pressed accidentally:
Press button again.
The LED goes out.
Calling up settings
General information There are two ways to call up the memory
function:
▷Comfort function, refer to page 60.▷Safety function, refer to page 60.
Comfort function
1.Open the driver's door.2.If necessary, switch off the ignition.3.Briefly press the desired button 1 or 2.
The corresponding seat position is performed
automatically.
The procedure stops when a switch for adjust‐
ing the seat or one of the buttons is pressed.
Safety mode
1.Close the driver's door or switch on the ig‐
nition.2.Press and hold the desired button 1 or 2
until the adjustment procedure is com‐
pleted.
Calling up of a seat position
deactivated
After a brief period, calling up stored seat posi‐
tions is deactivated to save battery power.
To reactivate calling up of a seat position:
▷Open or close the door or tailgate.▷Press a button on the remote control.▷Press the Start/Stop button.
Mirrors
Exterior mirrors
General information The mirror on the passenger side is more
curved than the driver's side mirror.
Depending on the vehicle equipment, the mir‐
ror setting is stored for the profile currently
used. When the vehicle is unlocked via the re‐
mote control, the position is automatically re‐
trieved if this function is active.
Seite 60ControlsAdjusting60
Online Edition for Part no. 01 40 2 964 303 - VI/15
Page 138 of 242
Overview
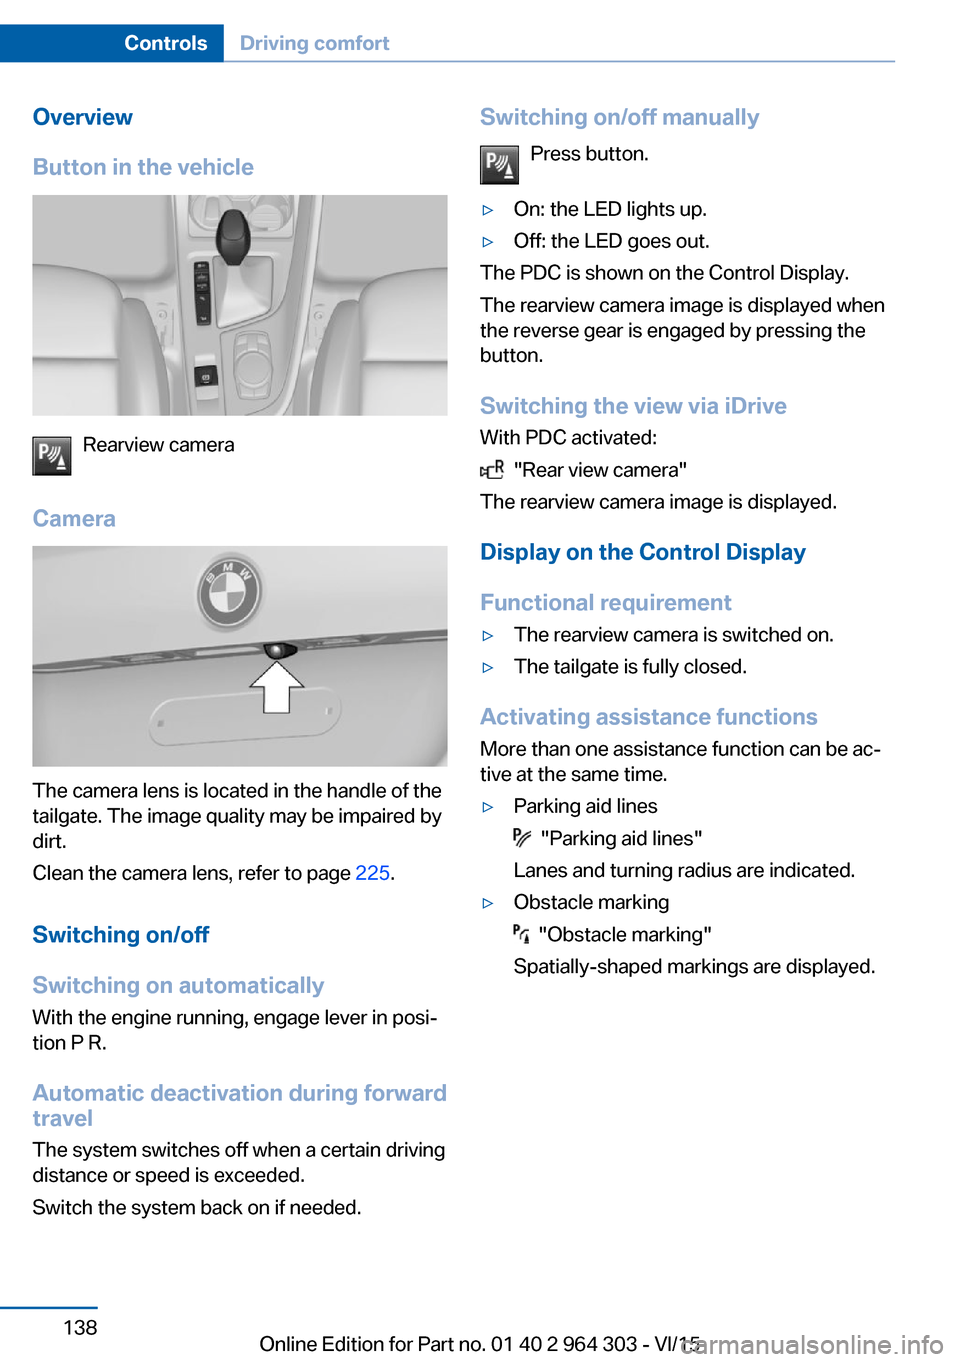
Button in the vehicle
Rearview camera
Camera
The camera lens is located in the handle of the
tailgate. The image quality may be impaired by
dirt.
Clean the camera lens, refer to page 225.
Switching on/off
Switching on automatically With the engine running, engage lever in posi‐
tion P R.
Automatic deactivation during forward travel
The system switches off when a certain driving
distance or speed is exceeded.
Switch the system back on if needed.
Switching on/off manually
Press button.▷On: the LED lights up.▷Off: the LED goes out.
The PDC is shown on the Control Display.
The rearview camera image is displayed when
the reverse gear is engaged by pressing the
button.
Switching the view via iDrive With PDC activated:
"Rear view camera"
The rearview camera image is displayed.
Display on the Control Display
Functional requirement
▷The rearview camera is switched on.▷The tailgate is fully closed.
Activating assistance functions
More than one assistance function can be ac‐
tive at the same time.
▷Parking aid lines
"Parking aid lines"
Lanes and turning radius are indicated.
▷Obstacle marking
"Obstacle marking"
Spatially-shaped markings are displayed.
Seite 138ControlsDriving comfort138
Online Edition for Part no. 01 40 2 964 303 - VI/15
Page 141 of 242
Overview
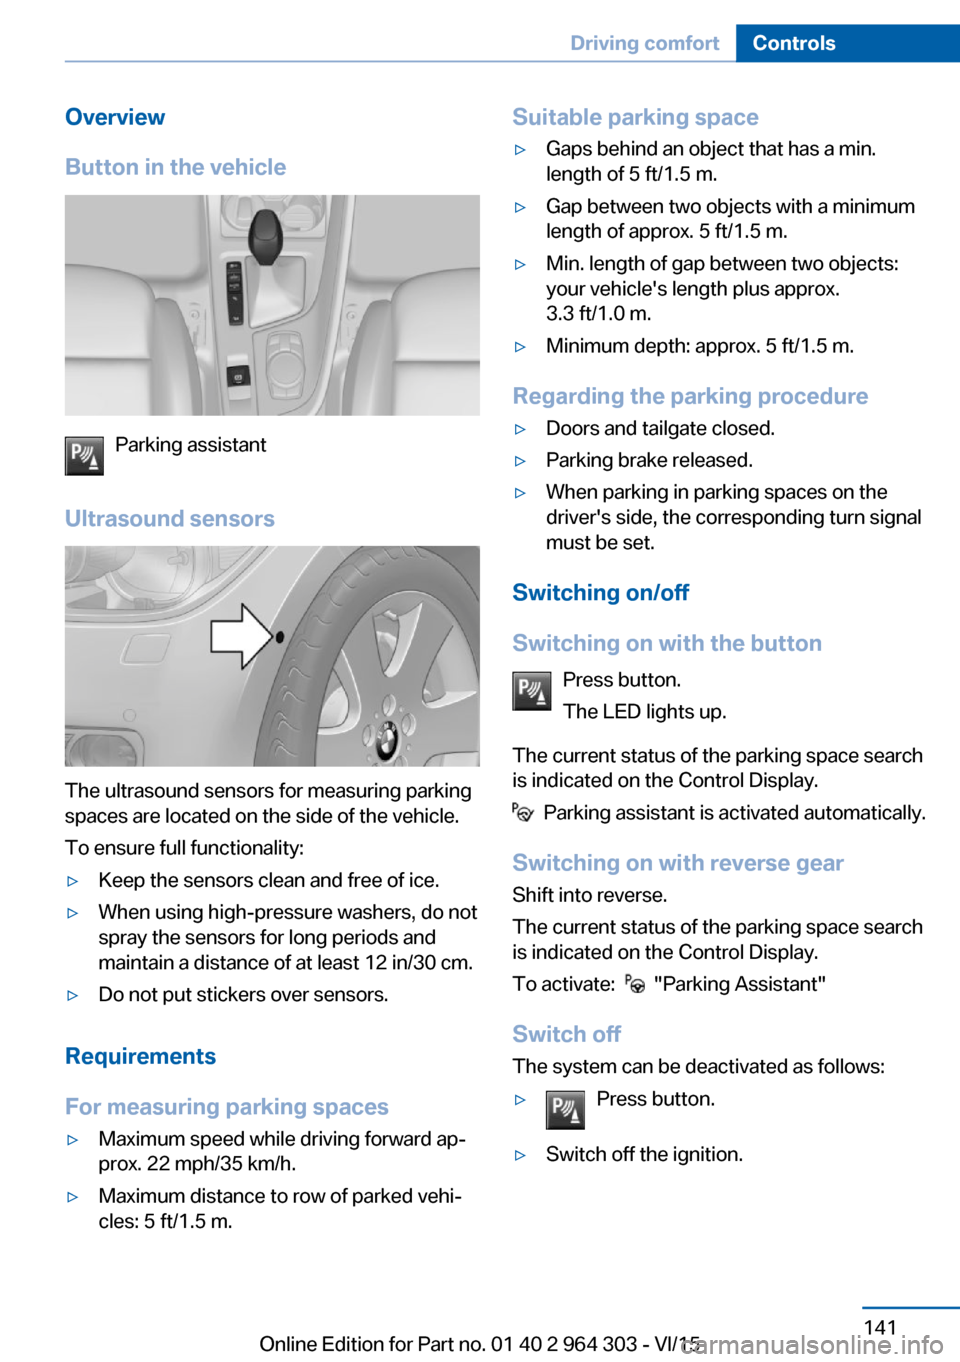
Button in the vehicle
Parking assistant
Ultrasound sensors
The ultrasound sensors for measuring parking
spaces are located on the side of the vehicle.
To ensure full functionality:
▷Keep the sensors clean and free of ice.▷When using high-pressure washers, do not
spray the sensors for long periods and
maintain a distance of at least 12 in/30 cm.▷Do not put stickers over sensors.
Requirements
For measuring parking spaces
▷Maximum speed while driving forward ap‐
prox. 22 mph/35 km/h.▷Maximum distance to row of parked vehi‐
cles: 5 ft/1.5 m.Suitable parking space▷Gaps behind an object that has a min.
length of 5 ft/1.5 m.▷Gap between two objects with a minimum
length of approx. 5 ft/1.5 m.▷Min. length of gap between two objects:
your vehicle's length plus approx.
3.3 ft/1.0 m.▷Minimum depth: approx. 5 ft/1.5 m.
Regarding the parking procedure
▷Doors and tailgate closed.▷Parking brake released.▷When parking in parking spaces on the
driver's side, the corresponding turn signal
must be set.
Switching on/off
Switching on with the button Press button.
The LED lights up.
The current status of the parking space search
is indicated on the Control Display.
Parking assistant is activated automatically.
Switching on with reverse gear
Shift into reverse.
The current status of the parking space search
is indicated on the Control Display.
To activate:
"Parking Assistant"
Switch off
The system can be deactivated as follows:
▷Press button.▷Switch off the ignition.Seite 141Driving comfortControls141
Online Edition for Part no. 01 40 2 964 303 - VI/15
Page 211 of 242
Turn signal in exterior mirrorThe turn signals in the exterior mirrors feature
LED technology. Contact a dealer’s service
center or another qualified service center or re‐
pair shop in the event of a malfunction.
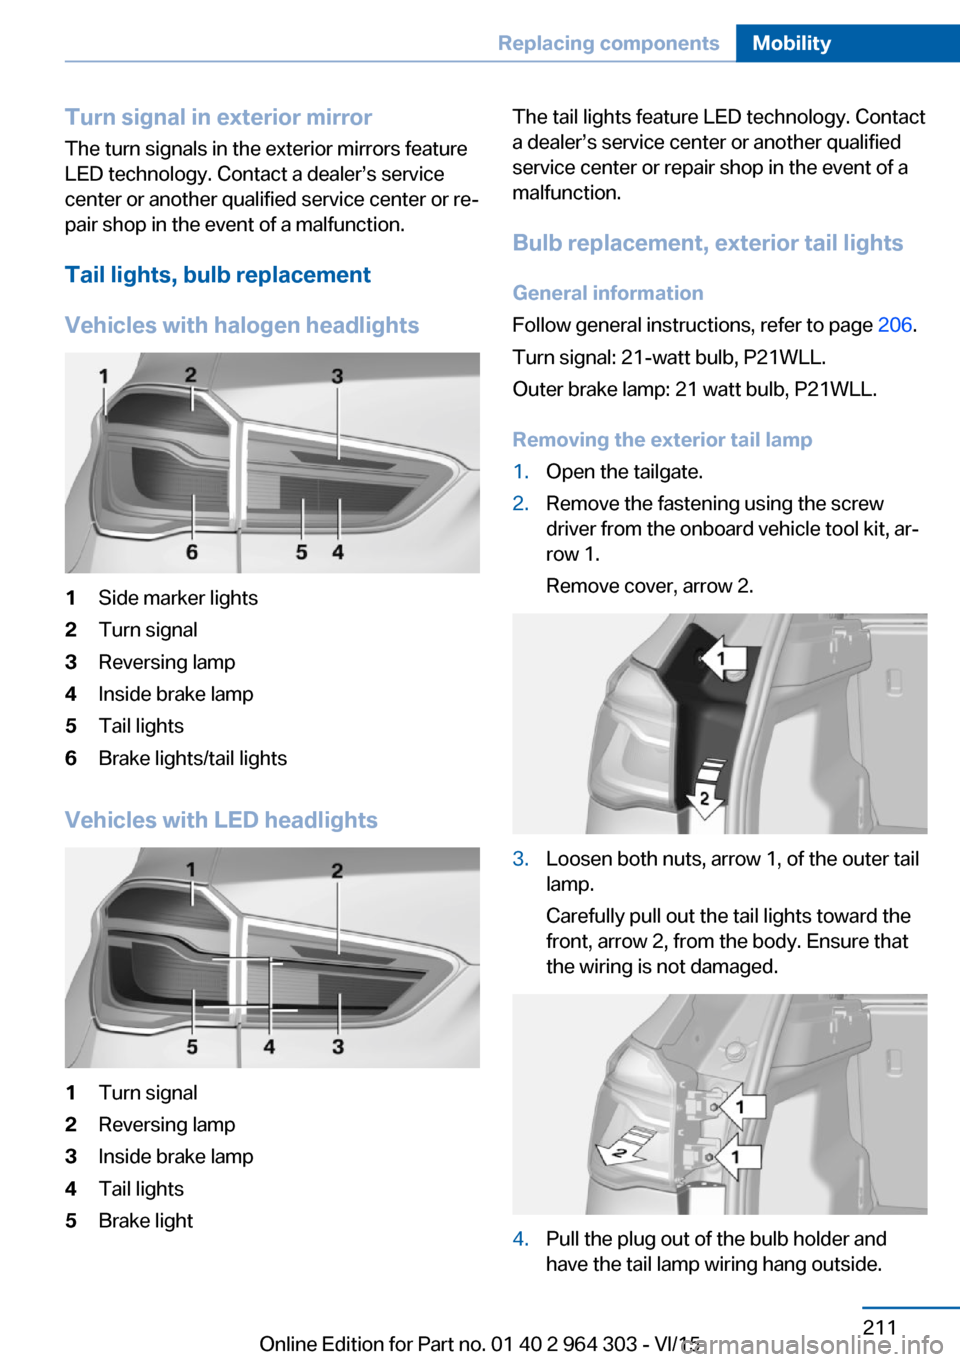
Tail lights, bulb replacement
Vehicles with halogen headlights1Side marker lights2Turn signal3Reversing lamp4Inside brake lamp5Tail lights6Brake lights/tail lights
Vehicles with LED headlights
1Turn signal2Reversing lamp3Inside brake lamp4Tail lights5Brake lightThe tail lights feature LED technology. Contact
a dealer’s service center or another qualified
service center or repair shop in the event of a
malfunction.
Bulb replacement, exterior tail lights
General information
Follow general instructions, refer to page 206.
Turn signal: 21-watt bulb, P21WLL.
Outer brake lamp: 21 watt bulb, P21WLL.
Removing the exterior tail lamp1.Open the tailgate.2.Remove the fastening using the screw
driver from the onboard vehicle tool kit, ar‐
row 1.
Remove cover, arrow 2.3.Loosen both nuts, arrow 1, of the outer tail
lamp.
Carefully pull out the tail lights toward the
front, arrow 2, from the body. Ensure that
the wiring is not damaged.4.Pull the plug out of the bulb holder and
have the tail lamp wiring hang outside.Seite 211Replacing componentsMobility211
Online Edition for Part no. 01 40 2 964 303 - VI/15
Page 212 of 242
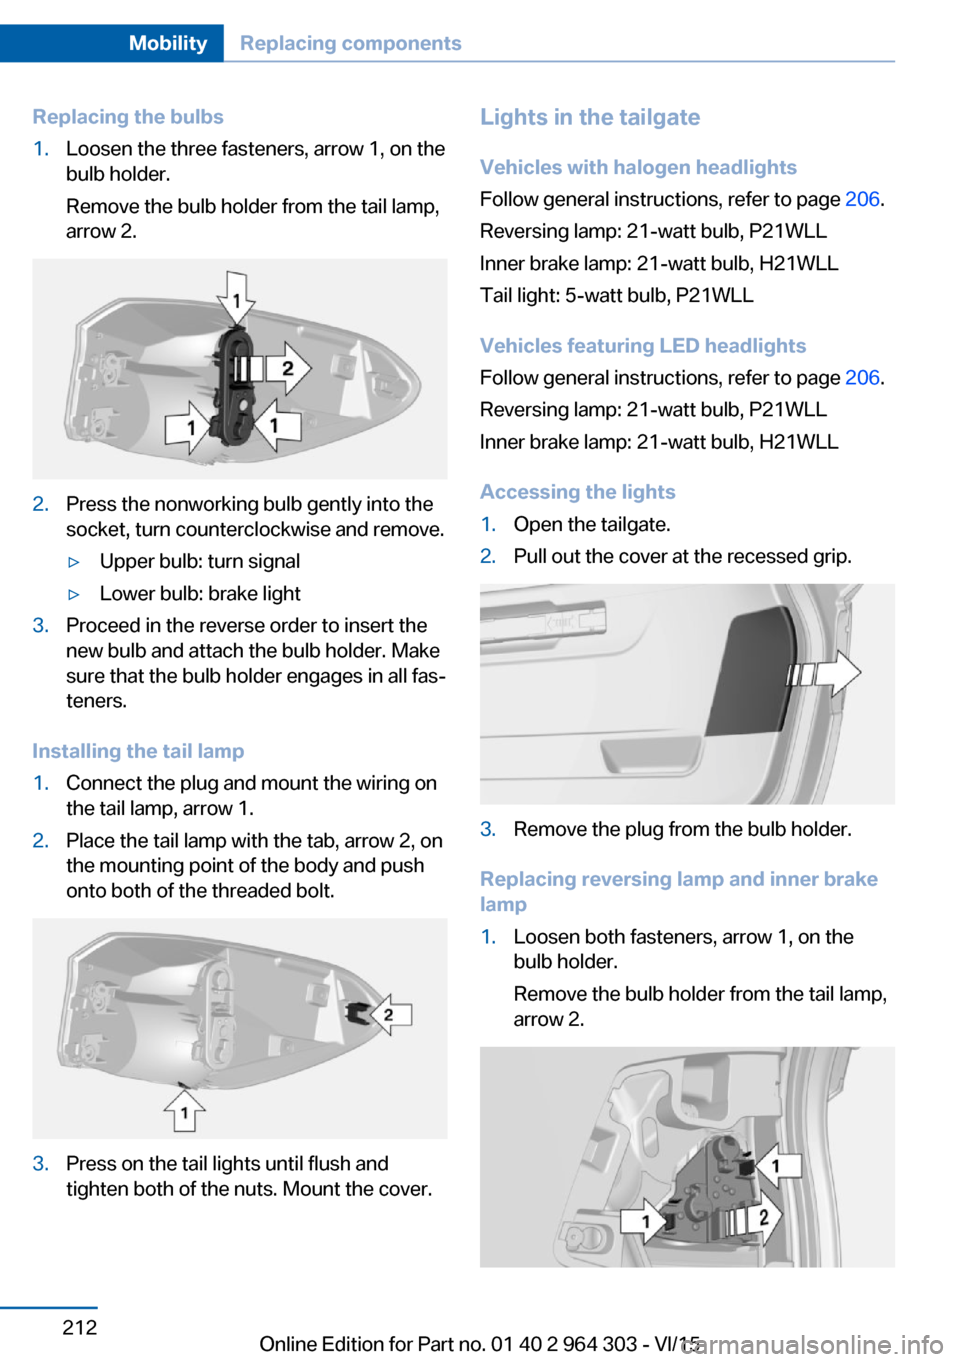
Replacing the bulbs1.Loosen the three fasteners, arrow 1, on the
bulb holder.
Remove the bulb holder from the tail lamp,
arrow 2.2.Press the nonworking bulb gently into the
socket, turn counterclockwise and remove.▷Upper bulb: turn signal▷Lower bulb: brake light3.Proceed in the reverse order to insert the
new bulb and attach the bulb holder. Make
sure that the bulb holder engages in all fas‐
teners.
Installing the tail lamp
1.Connect the plug and mount the wiring on
the tail lamp, arrow 1.2.Place the tail lamp with the tab, arrow 2, on
the mounting point of the body and push
onto both of the threaded bolt.3.Press on the tail lights until flush and
tighten both of the nuts. Mount the cover.Lights in the tailgate
Vehicles with halogen headlights
Follow general instructions, refer to page 206.
Reversing lamp: 21-watt bulb, P21WLL
Inner brake lamp: 21-watt bulb, H21WLL
Tail light: 5-watt bulb, P21WLL
Vehicles featuring LED headlights
Follow general instructions, refer to page 206.
Reversing lamp: 21-watt bulb, P21WLL
Inner brake lamp: 21-watt bulb, H21WLL
Accessing the lights1.Open the tailgate.2.Pull out the cover at the recessed grip.3.Remove the plug from the bulb holder.
Replacing reversing lamp and inner brake
lamp
1.Loosen both fasteners, arrow 1, on the
bulb holder.
Remove the bulb holder from the tail lamp,
arrow 2.Seite 212MobilityReplacing components212
Online Edition for Part no. 01 40 2 964 303 - VI/15
Page 213 of 242
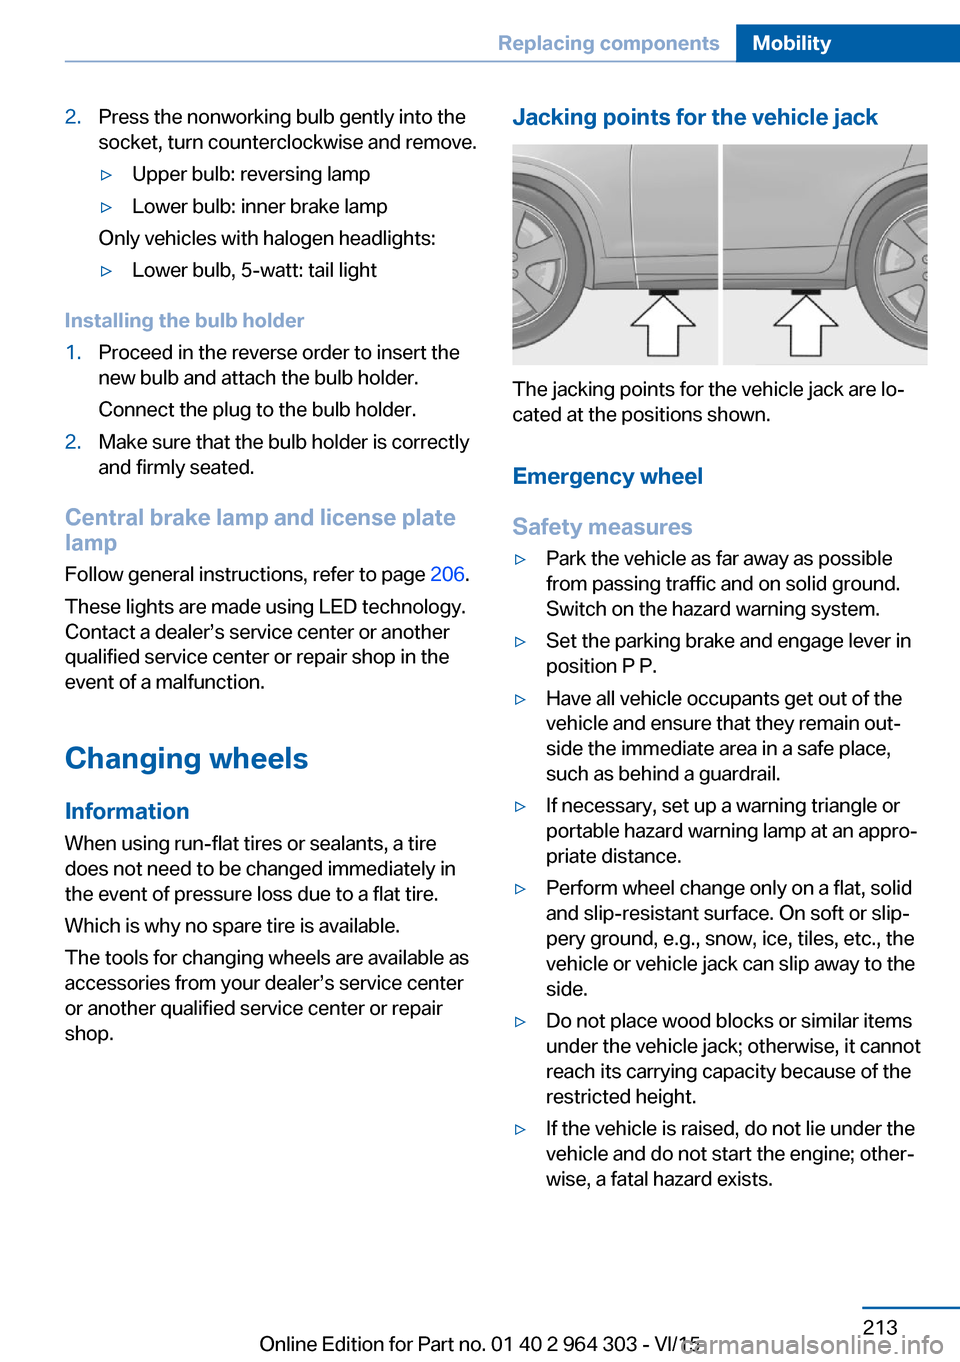
2.Press the nonworking bulb gently into the
socket, turn counterclockwise and remove.▷Upper bulb: reversing lamp▷Lower bulb: inner brake lamp
Only vehicles with halogen headlights:
▷Lower bulb, 5-watt: tail light
Installing the bulb holder
1.Proceed in the reverse order to insert the
new bulb and attach the bulb holder.
Connect the plug to the bulb holder.2.Make sure that the bulb holder is correctly
and firmly seated.
Central brake lamp and license plate
lamp
Follow general instructions, refer to page 206.
These lights are made using LED technology.
Contact a dealer’s service center or another
qualified service center or repair shop in the
event of a malfunction.
Changing wheels
Information When using run-flat tires or sealants, a tire
does not need to be changed immediately in
the event of pressure loss due to a flat tire.
Which is why no spare tire is available.
The tools for changing wheels are available as
accessories from your dealer’s service center
or another qualified service center or repair
shop.
Jacking points for the vehicle jack
The jacking points for the vehicle jack are lo‐
cated at the positions shown.
Emergency wheel
Safety measures
▷Park the vehicle as far away as possible
from passing traffic and on solid ground.
Switch on the hazard warning system.▷Set the parking brake and engage lever in
position P P.▷Have all vehicle occupants get out of the
vehicle and ensure that they remain out‐
side the immediate area in a safe place,
such as behind a guardrail.▷If necessary, set up a warning triangle or
portable hazard warning lamp at an appro‐
priate distance.▷Perform wheel change only on a flat, solid
and slip-resistant surface. On soft or slip‐
pery ground, e.g., snow, ice, tiles, etc., the
vehicle or vehicle jack can slip away to the
side.▷Do not place wood blocks or similar items
under the vehicle jack; otherwise, it cannot
reach its carrying capacity because of the
restricted height.▷If the vehicle is raised, do not lie under the
vehicle and do not start the engine; other‐
wise, a fatal hazard exists.Seite 213Replacing componentsMobility213
Online Edition for Part no. 01 40 2 964 303 - VI/15
Page 223 of 242
In this way, the ignition remains switched
on, and two Check-Control messages are
displayed.
The vehicle cannot be locked from the outside
when in selector lever position N. A signal
sounds when an attempt is made to lock the
vehicle.
To start the engine with Steptronic transmis‐
sion:
1.Depress the brake pedal.2.Press the Start/Stop button.
Headlights
▷Do not rub dry and do not use abrasive or
acidic cleansers.▷Soak areas that have been dirtied e. g.,
from insects, with shampoo and wash off
with water.▷Thaw ice with de-icing spray; do not use an
ice scraper.
After washing the vehicle
After washing the vehicle, apply the brakes
briefly to dry them; otherwise, braking action
can be reduced and corrosion of the brake
discs can occur.
Completely remove all residues on the win‐
dows, to minimize loss of visibility due to
smearing and to reduce wiper noises and
wiper blade wear.
Vehicle care
Car care products The manufacturer of your vehicle recommends
using car care and cleaning products from
BMW.
WARNING
Cleansers can contain substances that
are dangerous and harmful to your health.
There is risk of injuries. When cleaning the in‐
terior, open the doors or windows. Only use
products intended for cleaning vehicles. Fol‐
low the instructions on the container.◀
Vehicle paint
Regular care contributes to driving safety and
value retention. Environmental influences in
areas with elevated air pollution or natural con‐
taminants, such as tree resin or pollen can af‐
fect the vehicle's paintwork. Tailor the fre‐
quency and extent of your car care to these
influences.
Aggressive substances such as spilled fuel, oil,
grease or bird droppings, must be removed im‐
mediately to prevent the finish from being al‐
tered or discolored.
Leather care
Remove dust from the leather often, using a
cloth or vacuum cleaner.
Otherwise, particles of dust and road grime
chafe in pores and folds, and lead to increased
wear and premature degradation of the leather
surface.
To guard against discoloration, such as from
clothing, provide leather care roughly every
two months.
Clean light-colored leather more frequently be‐
cause soiling on such surfaces is substantially
more visible.
Use leather care products; otherwise, dirt and
grease will gradually break down the protective
layer of the leather surface.
Suitable care products are available from a
dealer’s service center or another qualified
service center or repair shop.
Upholstery material care Vacuum regularly with a vacuum cleaner.
If upholstery is very dirty, e.g., with beverage stains, use a soft sponge or microfiber clothwith a suitable interior cleaner.Seite 223CareMobility223
Online Edition for Part no. 01 40 2 964 303 - VI/15
Page 236 of 242
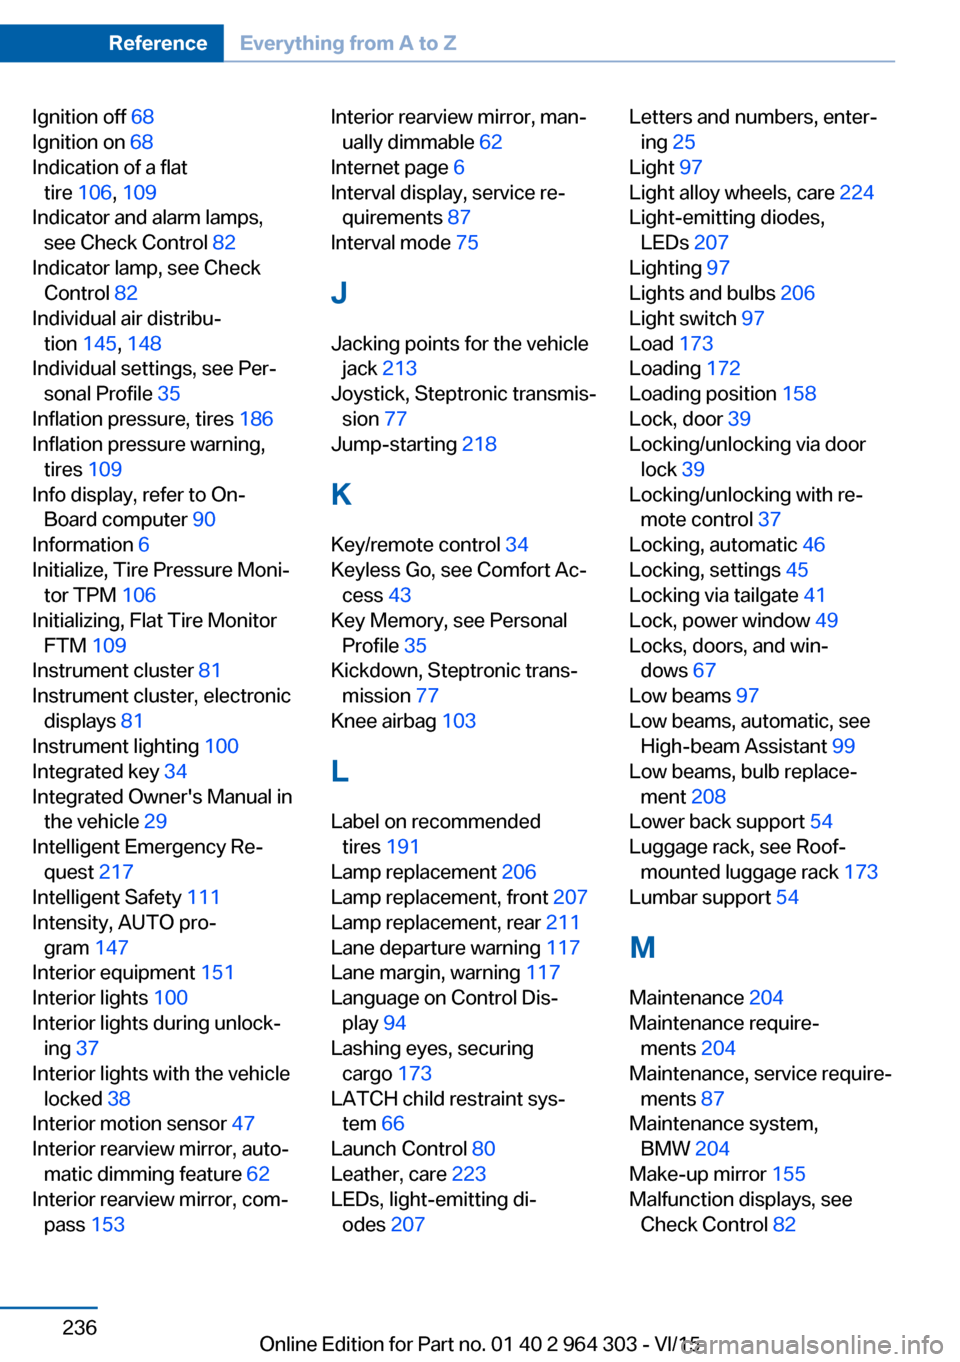
Ignition off 68
Ignition on 68
Indication of a flat tire 106 , 109
Indicator and alarm lamps, see Check Control 82
Indicator lamp, see Check Control 82
Individual air distribu‐ tion 145, 148
Individual settings, see Per‐ sonal Profile 35
Inflation pressure, tires 186
Inflation pressure warning, tires 109
Info display, refer to On- Board computer 90
Information 6
Initialize, Tire Pressure Moni‐ tor TPM 106
Initializing, Flat Tire Monitor FTM 109
Instrument cluster 81
Instrument cluster, electronic displays 81
Instrument lighting 100
Integrated key 34
Integrated Owner's Manual in the vehicle 29
Intelligent Emergency Re‐ quest 217
Intelligent Safety 111
Intensity, AUTO pro‐ gram 147
Interior equipment 151
Interior lights 100
Interior lights during unlock‐ ing 37
Interior lights with the vehicle locked 38
Interior motion sensor 47
Interior rearview mirror, auto‐ matic dimming feature 62
Interior rearview mirror, com‐ pass 153 Interior rearview mirror, man‐
ually dimmable 62
Internet page 6
Interval display, service re‐ quirements 87
Interval mode 75
J Jacking points for the vehicle jack 213
Joystick, Steptronic transmis‐ sion 77
Jump-starting 218
K
Key/remote control 34
Keyless Go, see Comfort Ac‐ cess 43
Key Memory, see Personal Profile 35
Kickdown, Steptronic trans‐ mission 77
Knee airbag 103
L Label on recommended tires 191
Lamp replacement 206
Lamp replacement, front 207
Lamp replacement, rear 211
Lane departure warning 117
Lane margin, warning 117
Language on Control Dis‐ play 94
Lashing eyes, securing cargo 173
LATCH child restraint sys‐ tem 66
Launch Control 80
Leather, care 223
LEDs, light-emitting di‐ odes 207 Letters and numbers, enter‐
ing 25
Light 97
Light alloy wheels, care 224
Light-emitting diodes, LEDs 207
Lighting 97
Lights and bulbs 206
Light switch 97
Load 173
Loading 172
Loading position 158
Lock, door 39
Locking/unlocking via door lock 39
Locking/unlocking with re‐ mote control 37
Locking, automatic 46
Locking, settings 45
Locking via tailgate 41
Lock, power window 49
Locks, doors, and win‐ dows 67
Low beams 97
Low beams, automatic, see High-beam Assistant 99
Low beams, bulb replace‐ ment 208
Lower back support 54
Luggage rack, see Roof- mounted luggage rack 173
Lumbar support 54
M
Maintenance 204
Maintenance require‐ ments 204
Maintenance, service require‐ ments 87
Maintenance system, BMW 204
Make-up mirror 155
Malfunction displays, see Check Control 82 Seite 236ReferenceEverything from A to Z236
Online Edition for Part no. 01 40 2 964 303 - VI/15