windshield BMW X1 2016 F48 Owner's Manual
[x] Cancel search | Manufacturer: BMW, Model Year: 2016, Model line: X1, Model: BMW X1 2016 F48Pages: 242, PDF Size: 7.12 MB
Page 10 of 242
Vehicle identification
number
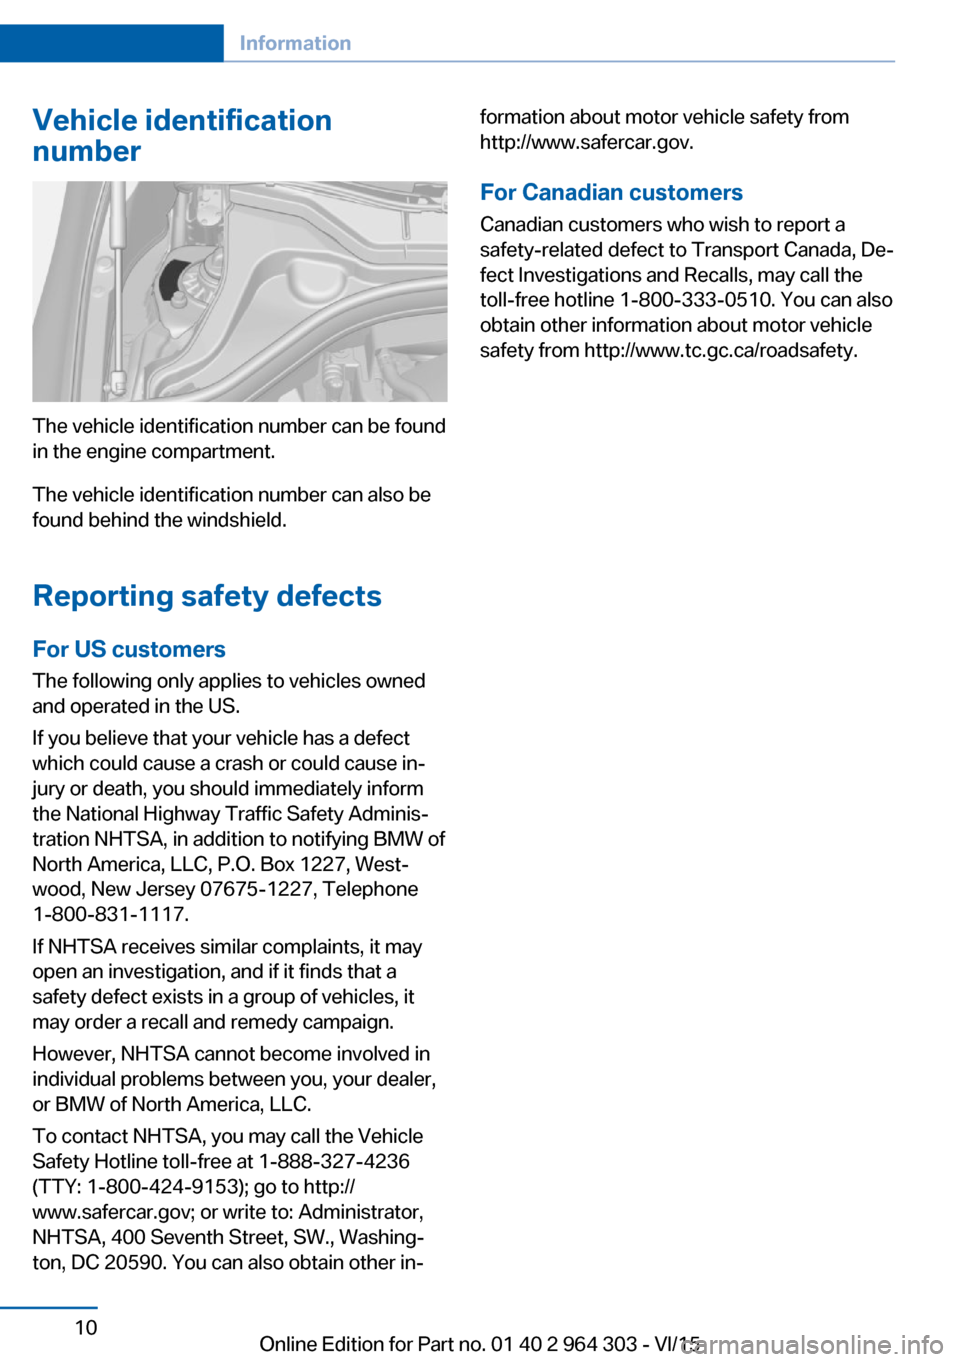
The vehicle identification number can be found
in the engine compartment.
The vehicle identification number can also be
found behind the windshield.
Reporting safety defects
For US customers The following only applies to vehicles owned
and operated in the US.
If you believe that your vehicle has a defect
which could cause a crash or could cause in‐
jury or death, you should immediately inform
the National Highway Traffic Safety Adminis‐
tration NHTSA, in addition to notifying BMW of
North America, LLC, P.O. Box 1227, West‐
wood, New Jersey 07675-1227, Telephone
1-800-831-1117.
If NHTSA receives similar complaints, it may
open an investigation, and if it finds that a
safety defect exists in a group of vehicles, it
may order a recall and remedy campaign.
However, NHTSA cannot become involved in
individual problems between you, your dealer,
or BMW of North America, LLC.
To contact NHTSA, you may call the Vehicle
Safety Hotline toll-free at 1-888-327-4236
(TTY: 1-800-424-9153); go to http://
www.safercar.gov; or write to: Administrator,
NHTSA, 400 Seventh Street, SW., Washing‐
ton, DC 20590. You can also obtain other in‐
formation about motor vehicle safety from
http://www.safercar.gov.
For Canadian customers
Canadian customers who wish to report a
safety-related defect to Transport Canada, De‐
fect Investigations and Recalls, may call the
toll-free hotline 1-800-333-0510. You can also
obtain other information about motor vehicle
safety from http://www.tc.gc.ca/roadsafety.Seite 10Information10
Online Edition for Part no. 01 40 2 964 303 - VI/15
Page 15 of 242
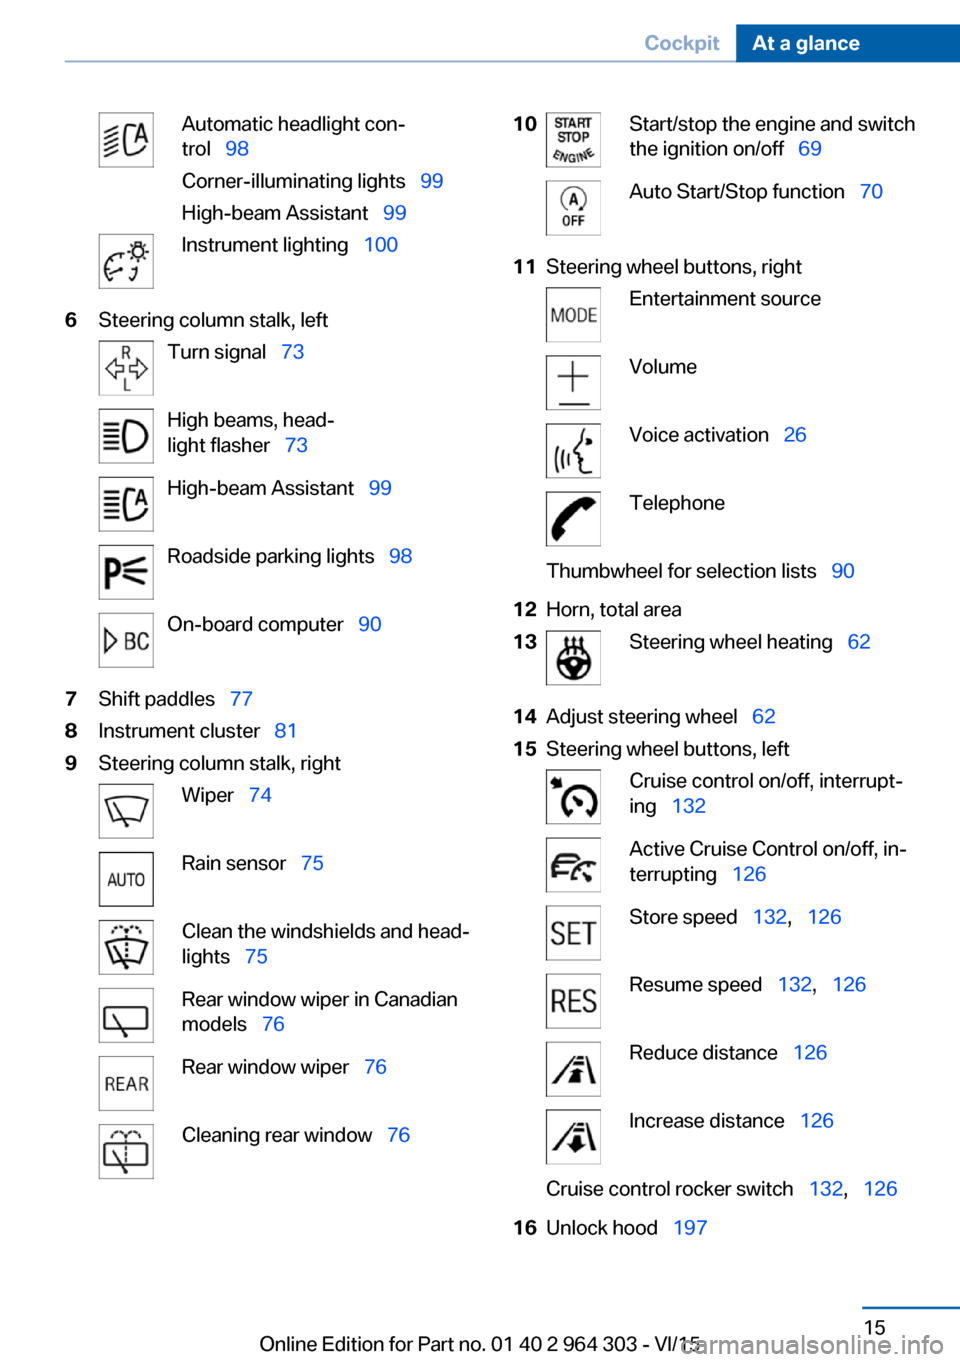
Automatic headlight con‐
trol 98
Corner-illuminating lights 99
High-beam Assistant 99Instrument lighting 1006Steering column stalk, leftTurn signal 73High beams, head‐
light flasher 73High-beam Assistant 99Roadside parking lights 98On-board computer 907Shift paddles 778Instrument cluster 819Steering column stalk, rightWiper 74Rain sensor 75Clean the windshields and head‐
lights 75Rear window wiper in Canadian
models 76Rear window wiper 76Cleaning rear window 7610Start/stop the engine and switch
the ignition on/off 69Auto Start/Stop function 7011Steering wheel buttons, rightEntertainment sourceVolumeVoice activation 26TelephoneThumbwheel for selection lists 9012Horn, total area13Steering wheel heating 6214Adjust steering wheel 6215Steering wheel buttons, leftCruise control on/off, interrupt‐
ing 132Active Cruise Control on/off, in‐
terrupting 126Store speed 132, 126Resume speed 132, 126Reduce distance 126Increase distance 126Cruise control rocker switch 132, 12616Unlock hood 197Seite 15CockpitAt a glance15
Online Edition for Part no. 01 40 2 964 303 - VI/15
Page 62 of 242
Automatic dimming featureBoth exterior mirrors are automatically dim‐
med. Photocells are used to control the Interior
rearview mirror, refer to page 62.
Interior rearview mirror, manually
dimmable
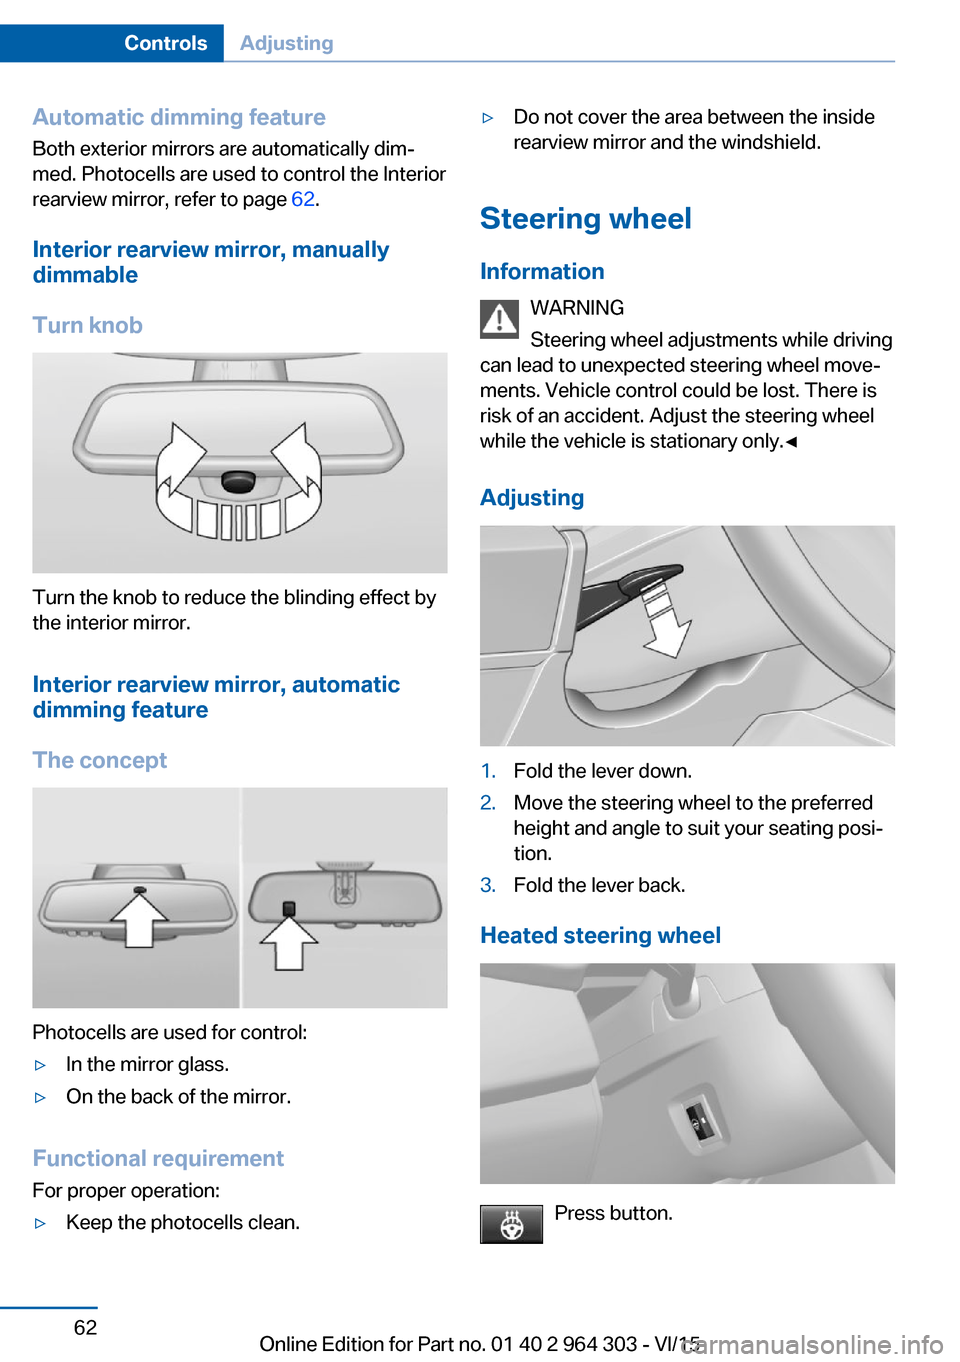
Turn knob
Turn the knob to reduce the blinding effect by
the interior mirror.
Interior rearview mirror, automaticdimming feature
The concept
Photocells are used for control:
▷In the mirror glass.▷On the back of the mirror.
Functional requirement For proper operation:
▷Keep the photocells clean.▷Do not cover the area between the inside
rearview mirror and the windshield.
Steering wheel
Information WARNING
Steering wheel adjustments while driving
can lead to unexpected steering wheel move‐
ments. Vehicle control could be lost. There is
risk of an accident. Adjust the steering wheel
while the vehicle is stationary only.◀
Adjusting
1.Fold the lever down.2.Move the steering wheel to the preferred
height and angle to suit your seating posi‐
tion.3.Fold the lever back.
Heated steering wheel
Press button.
Seite 62ControlsAdjusting62
Online Edition for Part no. 01 40 2 964 303 - VI/15
Page 74 of 242
Signaling briefly
Press the lever to the resistance point and hold
it there for as long as you want the turn signal
to flash.
Malfunction Unusually rapid flashing of the indicator lamp
indicates that a turn signal bulb has failed.
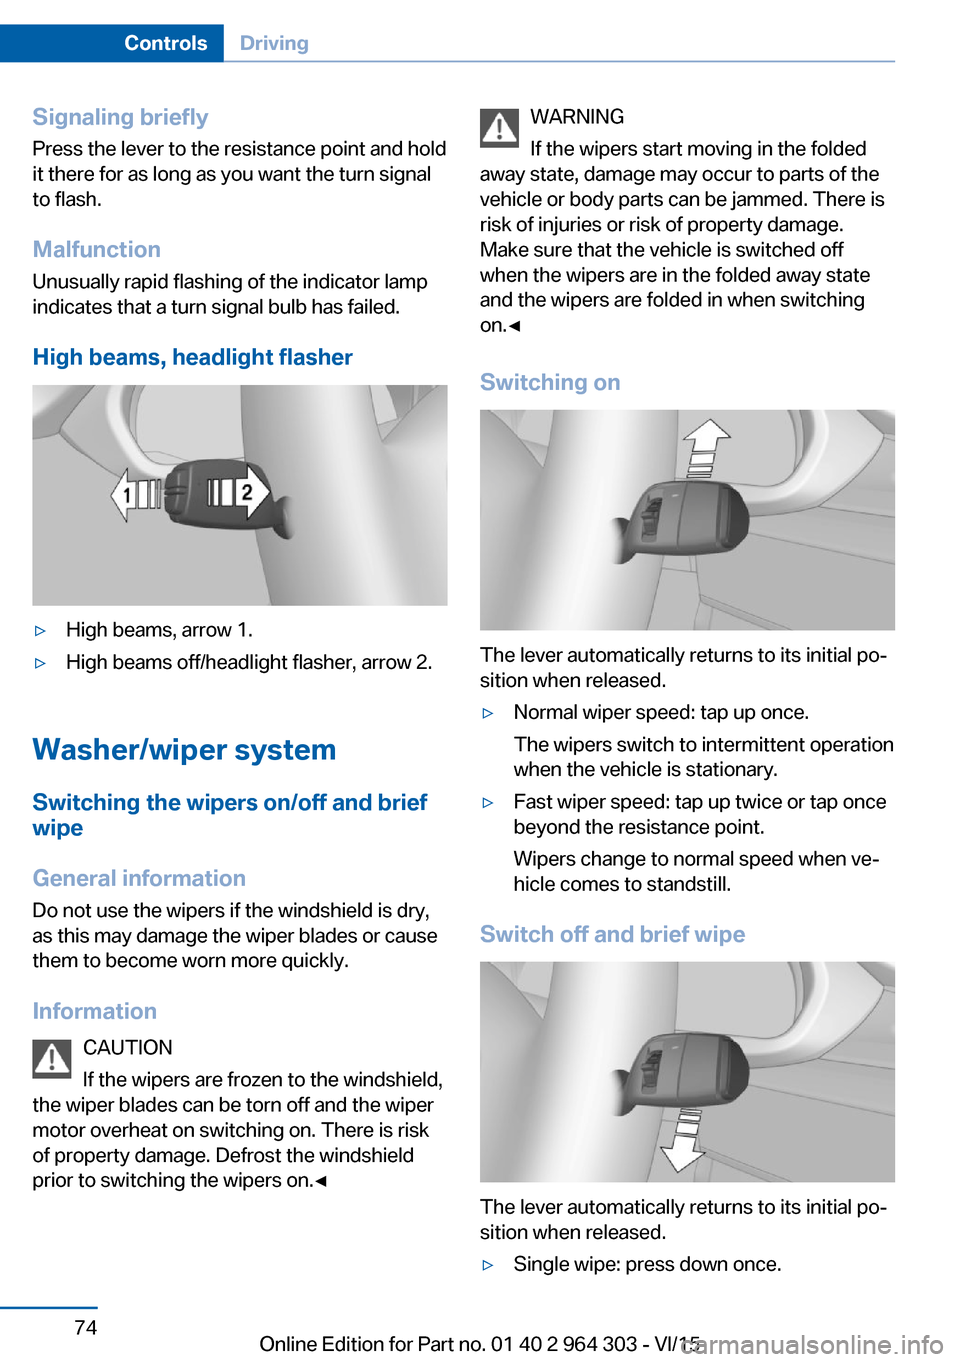
High beams, headlight flasher▷High beams, arrow 1.▷High beams off/headlight flasher, arrow 2.
Washer/wiper system Switching the wipers on/off and brief
wipe
General information
Do not use the wipers if the windshield is dry,
as this may damage the wiper blades or cause them to become worn more quickly.
Information CAUTION
If the wipers are frozen to the windshield,
the wiper blades can be torn off and the wiper
motor overheat on switching on. There is risk of property damage. Defrost the windshield
prior to switching the wipers on.◀
WARNING
If the wipers start moving in the folded
away state, damage may occur to parts of the
vehicle or body parts can be jammed. There is
risk of injuries or risk of property damage.
Make sure that the vehicle is switched off
when the wipers are in the folded away state
and the wipers are folded in when switching
on.◀
Switching on
The lever automatically returns to its initial po‐
sition when released.
▷Normal wiper speed: tap up once.
The wipers switch to intermittent operation
when the vehicle is stationary.▷Fast wiper speed: tap up twice or tap once
beyond the resistance point.
Wipers change to normal speed when ve‐
hicle comes to standstill.
Switch off and brief wipe
The lever automatically returns to its initial po‐
sition when released.
▷Single wipe: press down once.Seite 74ControlsDriving74
Online Edition for Part no. 01 40 2 964 303 - VI/15
Page 75 of 242
▷To switch off from normal wiper speed:
press down once.▷To switch off from fast wiper speed: press
down twice.
Interval mode or rain sensor
The concept Without the rain sensor, the frequency of the
wiper operation is preset.
The rain sensor automatically controls the time
between wipes depending on the intensity of the rainfall. The sensor is located on the wind‐
shield, directly behind the interior rearview mir‐
ror.
Activating/deactivating
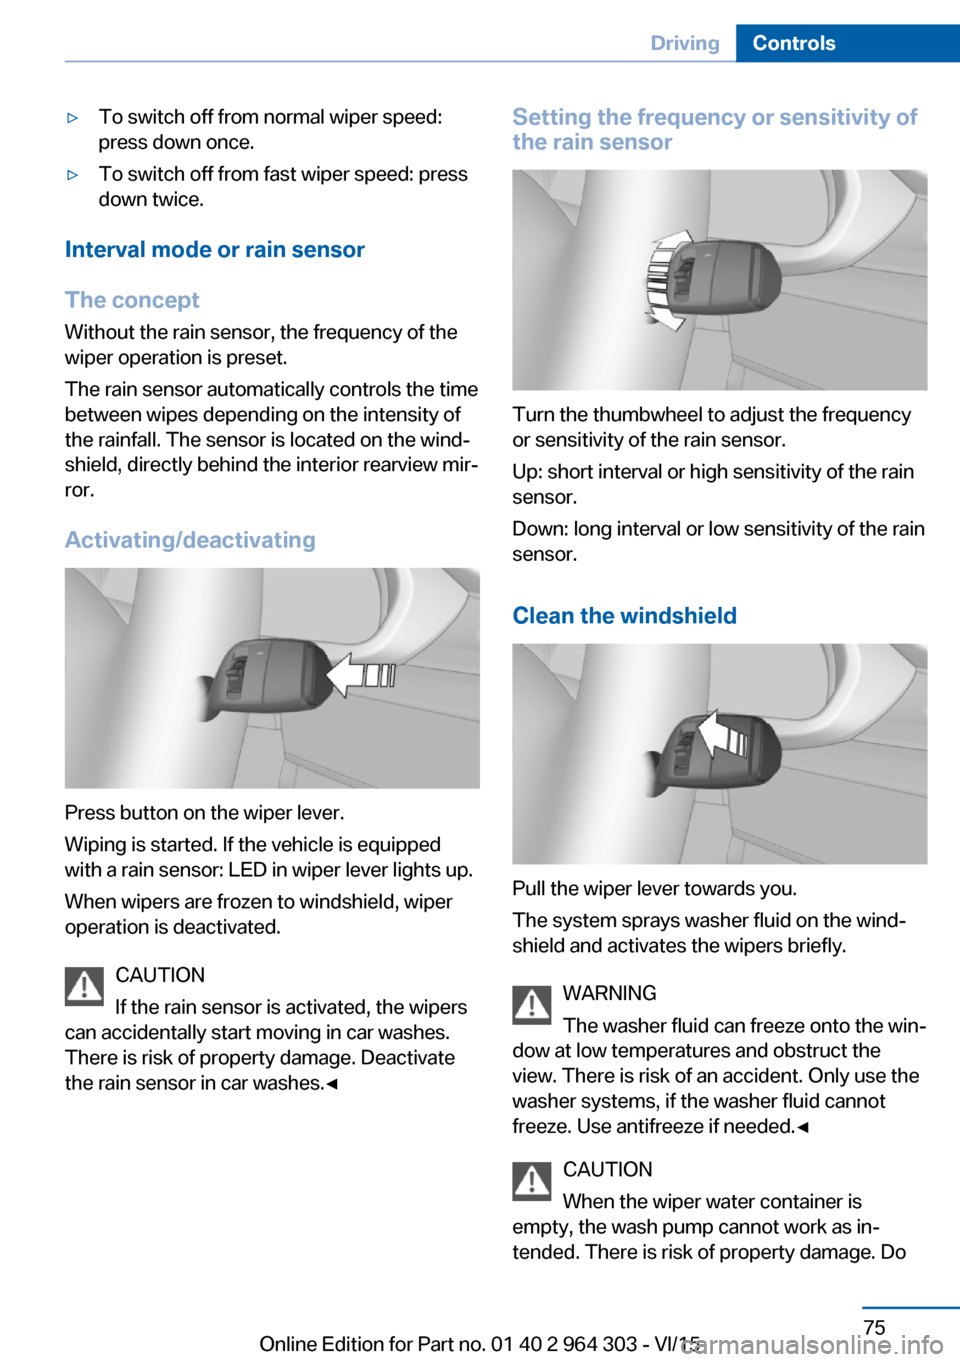
Press button on the wiper lever.
Wiping is started. If the vehicle is equipped
with a rain sensor: LED in wiper lever lights up.
When wipers are frozen to windshield, wiper
operation is deactivated.
CAUTION
If the rain sensor is activated, the wipers
can accidentally start moving in car washes.
There is risk of property damage. Deactivate
the rain sensor in car washes.◀
Setting the frequency or sensitivity of
the rain sensor
Turn the thumbwheel to adjust the frequency
or sensitivity of the rain sensor.
Up: short interval or high sensitivity of the rain
sensor.
Down: long interval or low sensitivity of the rain
sensor.
Clean the windshield
Pull the wiper lever towards you.
The system sprays washer fluid on the wind‐
shield and activates the wipers briefly.
WARNING
The washer fluid can freeze onto the win‐
dow at low temperatures and obstruct the
view. There is risk of an accident. Only use the
washer systems, if the washer fluid cannot
freeze. Use antifreeze if needed.◀
CAUTION
When the wiper water container is
empty, the wash pump cannot work as in‐
tended. There is risk of property damage. Do
Seite 75DrivingControls75
Online Edition for Part no. 01 40 2 964 303 - VI/15
Page 76 of 242
not use the washer system when the wash wa‐
ter container is empty.◀
Windshield washer nozzles
The windshield washer nozzles are automati‐
cally heated while the ignition is switched on.
Rear window wiper
Switching on the rear window wiper
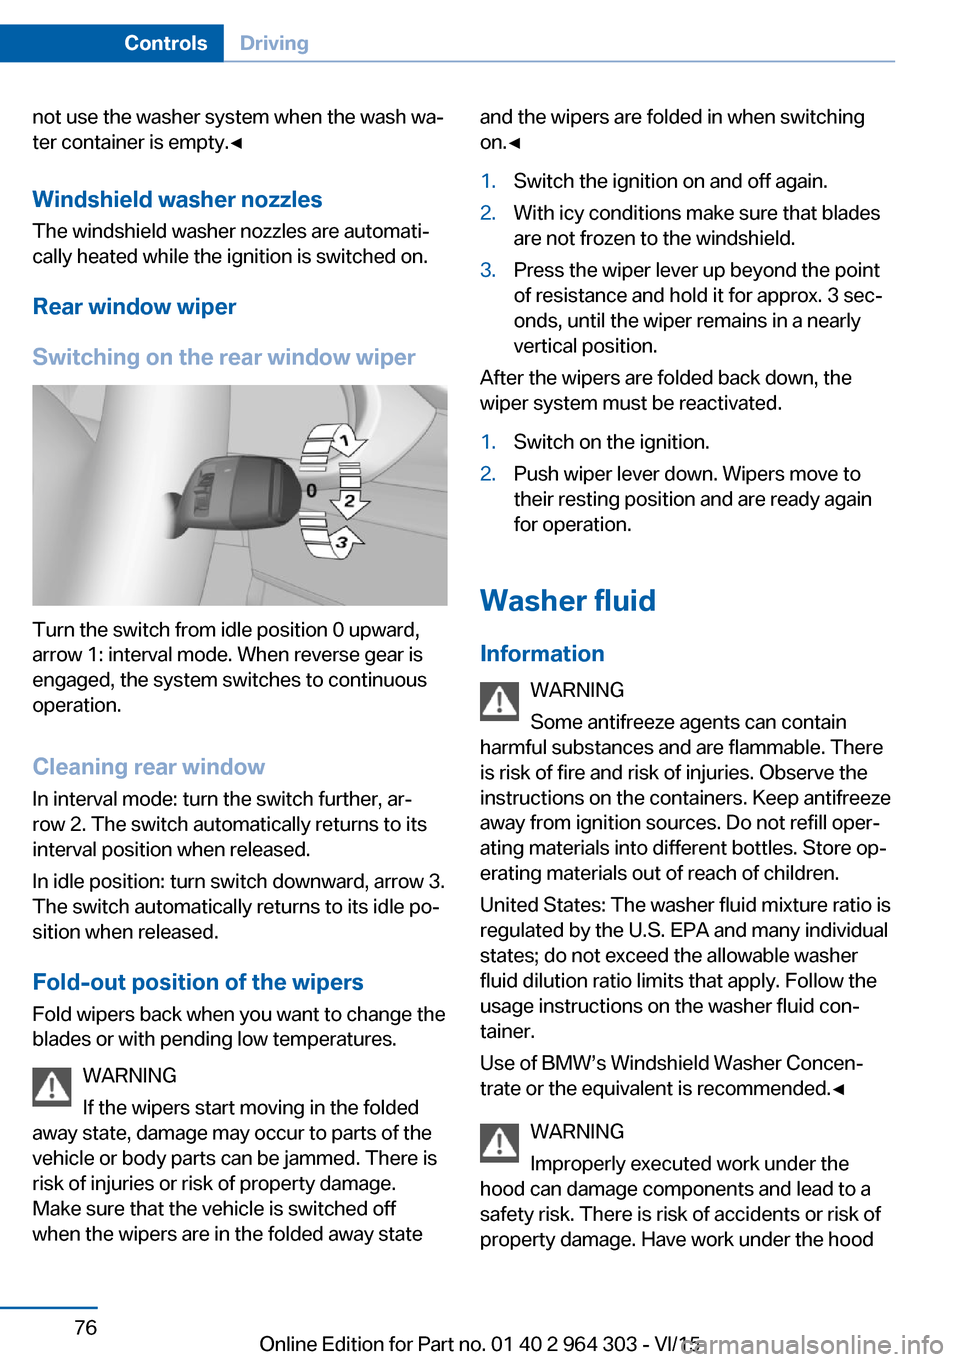
Turn the switch from idle position 0 upward,
arrow 1: interval mode. When reverse gear is
engaged, the system switches to continuous
operation.
Cleaning rear window
In interval mode: turn the switch further, ar‐
row 2. The switch automatically returns to its
interval position when released.
In idle position: turn switch downward, arrow 3.
The switch automatically returns to its idle po‐
sition when released.
Fold-out position of the wipers
Fold wipers back when you want to change the
blades or with pending low temperatures.
WARNING
If the wipers start moving in the folded
away state, damage may occur to parts of the
vehicle or body parts can be jammed. There is
risk of injuries or risk of property damage.
Make sure that the vehicle is switched off
when the wipers are in the folded away state
and the wipers are folded in when switching
on.◀1.Switch the ignition on and off again.2.With icy conditions make sure that blades
are not frozen to the windshield.3.Press the wiper lever up beyond the point
of resistance and hold it for approx. 3 sec‐
onds, until the wiper remains in a nearly
vertical position.
After the wipers are folded back down, the
wiper system must be reactivated.
1.Switch on the ignition.2.Push wiper lever down. Wipers move to
their resting position and are ready again
for operation.
Washer fluid
Information WARNING
Some antifreeze agents can contain
harmful substances and are flammable. There
is risk of fire and risk of injuries. Observe the
instructions on the containers. Keep antifreeze
away from ignition sources. Do not refill oper‐
ating materials into different bottles. Store op‐
erating materials out of reach of children.
United States: The washer fluid mixture ratio is
regulated by the U.S. EPA and many individual
states; do not exceed the allowable washer
fluid dilution ratio limits that apply. Follow the
usage instructions on the washer fluid con‐
tainer.
Use of BMW’s Windshield Washer Concen‐
trate or the equivalent is recommended.◀
WARNING
Improperly executed work under the
hood can damage components and lead to a
safety risk. There is risk of accidents or risk of
property damage. Have work under the hood
Seite 76ControlsDriving76
Online Edition for Part no. 01 40 2 964 303 - VI/15
Page 77 of 242
be executed by a dealer’s service center or an‐
other qualified service center or repair shop.◀
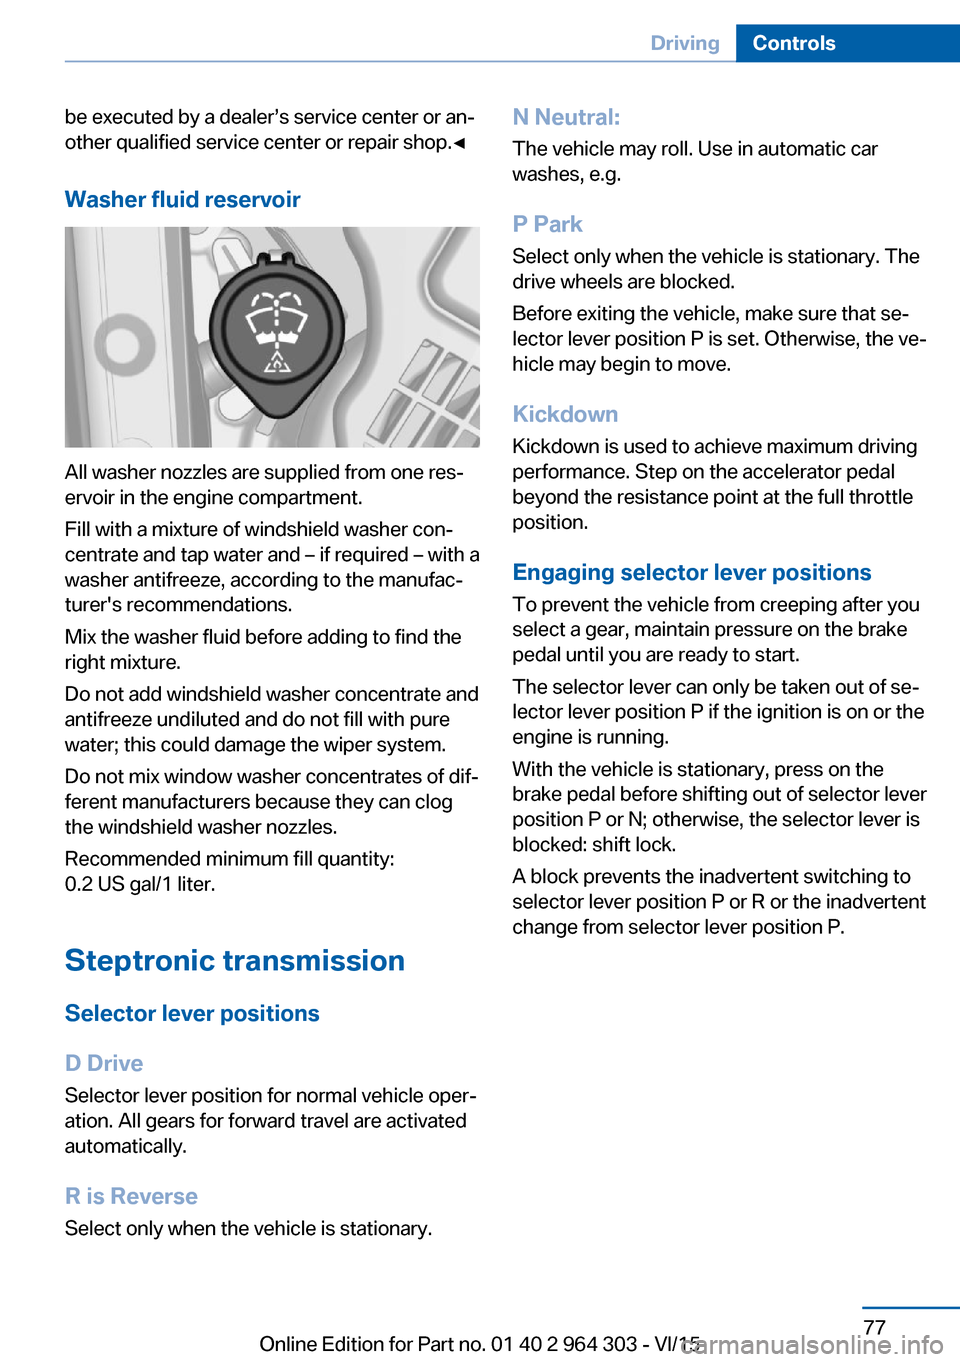
Washer fluid reservoir
All washer nozzles are supplied from one res‐
ervoir in the engine compartment.
Fill with a mixture of windshield washer con‐
centrate and tap water and – if required – with a
washer antifreeze, according to the manufac‐
turer's recommendations.
Mix the washer fluid before adding to find the
right mixture.
Do not add windshield washer concentrate and
antifreeze undiluted and do not fill with pure
water; this could damage the wiper system.
Do not mix window washer concentrates of dif‐
ferent manufacturers because they can clog
the windshield washer nozzles.
Recommended minimum fill quantity:
0.2 US gal/1 liter.
Steptronic transmission
Selector lever positions
D Drive
Selector lever position for normal vehicle oper‐
ation. All gears for forward travel are activated
automatically.
R is Reverse
Select only when the vehicle is stationary.
N Neutral: The vehicle may roll. Use in automatic car
washes, e.g.
P Park Select only when the vehicle is stationary. The
drive wheels are blocked.
Before exiting the vehicle, make sure that se‐
lector lever position P is set. Otherwise, the ve‐
hicle may begin to move.
Kickdown Kickdown is used to achieve maximum driving
performance. Step on the accelerator pedal
beyond the resistance point at the full throttle
position.
Engaging selector lever positions To prevent the vehicle from creeping after you
select a gear, maintain pressure on the brake
pedal until you are ready to start.
The selector lever can only be taken out of se‐
lector lever position P if the ignition is on or the
engine is running.
With the vehicle is stationary, press on the
brake pedal before shifting out of selector lever
position P or N; otherwise, the selector lever is
blocked: shift lock.
A block prevents the inadvertent switching to
selector lever position P or R or the inadvertent
change from selector lever position P.Seite 77DrivingControls77
Online Edition for Part no. 01 40 2 964 303 - VI/15
Page 89 of 242
With the navigation system, the system takes
into account the information stored in the navi‐
gation data and also displays speed limits
present on routes without signs.
Without a navigation system, the system is
subject to limitations imposed by technology.
Speed limits with extra text characters are al‐
ways displayed.
Information WARNING
The system does not relieve from the
personal responsibility to correctly assess visi‐
bility and traffic situation. There is risk of an ac‐
cident. Adjust the driving style to the traffic
conditions. Watch traffic closely and actively
interfere in the respective situations.◀
Overview
Camera
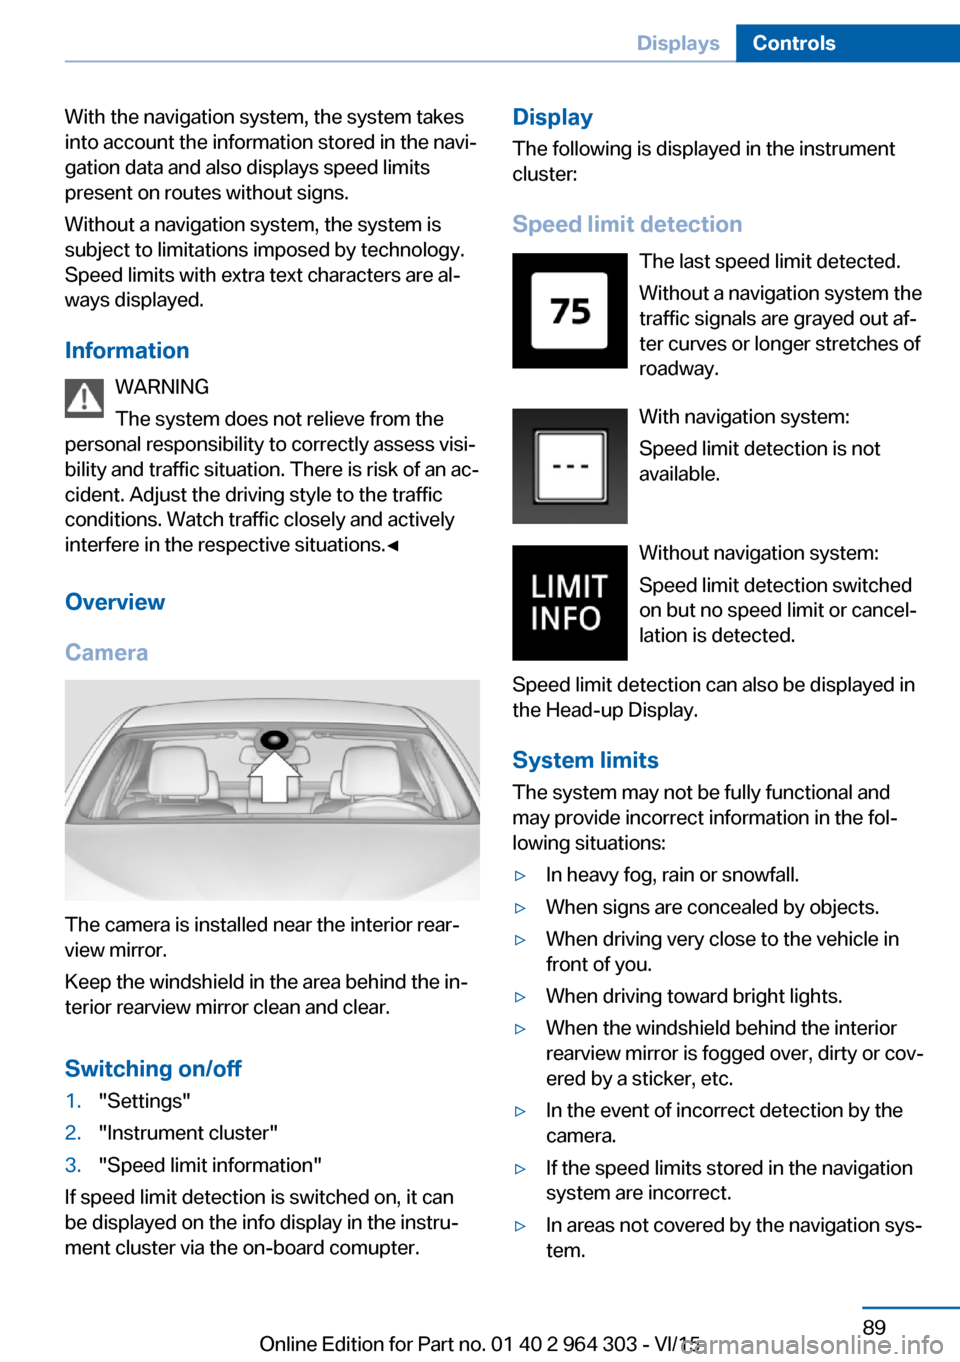
The camera is installed near the interior rear‐
view mirror.
Keep the windshield in the area behind the in‐
terior rearview mirror clean and clear.
Switching on/off
1."Settings"2."Instrument cluster"3."Speed limit information"
If speed limit detection is switched on, it can
be displayed on the info display in the instru‐
ment cluster via the on-board comupter.
Display
The following is displayed in the instrument
cluster:
Speed limit detection The last speed limit detected.
Without a navigation system the
traffic signals are grayed out af‐
ter curves or longer stretches of
roadway.
With navigation system:
Speed limit detection is not
available.
Without navigation system:
Speed limit detection switched
on but no speed limit or cancel‐
lation is detected.
Speed limit detection can also be displayed in
the Head-up Display.
System limits
The system may not be fully functional and
may provide incorrect information in the fol‐
lowing situations:▷In heavy fog, rain or snowfall.▷When signs are concealed by objects.▷When driving very close to the vehicle in
front of you.▷When driving toward bright lights.▷When the windshield behind the interior
rearview mirror is fogged over, dirty or cov‐
ered by a sticker, etc.▷In the event of incorrect detection by the
camera.▷If the speed limits stored in the navigation
system are incorrect.▷In areas not covered by the navigation sys‐
tem.Seite 89DisplaysControls89
Online Edition for Part no. 01 40 2 964 303 - VI/15
Page 96 of 242
Setting the rotation
The screen of the Head-up Display can be ro‐
tated around its own axis.
On the Control Display:1."Settings"2."Head-Up Display"3."Rotation"4.Turn the controller until the desired setting
is selected.5.Press the controller.
Settings are stored for the profile currently
used.
Special windshield
The windshield is part of the system.
The shape of the windshield makes it possible
to display a precise image.
A film in the windshield prevents double im‐
ages from being displayed.
For this reason, it is strongly suggested to
have the special windshield replaced by a
dealer’s service center or another qualified
service center or repair shop.
Seite 96ControlsDisplays96
Online Edition for Part no. 01 40 2 964 303 - VI/15
Page 100 of 242
To reactivate the high-beam Assistant, press
the button on the turn signal lever, refer to
page 99.
System limits
The High-beam Assistant cannot serve as a
substitute for the driver's personal judgment of
when to use the high beams. In situation that
require this, therefore switch off manually.
The system is not fully functional in situations
such as the following, and driver intervention
may be necessary:▷In very unfavorable weather conditions,
such as fog or heavy precipitation.▷When detecting poorly-lit road users such
as pedestrians, cyclists, horseback riders
and wagons; when driving close to train or
ship traffic; and at animal crossings.▷In tight curves, on hilltops or in depres‐
sions, in cross traffic or half-obscured on‐
coming traffic on freeways.▷In poorly-lit towns and cities and in the
presence of highly reflective signs.▷When the windshield behind the interior
rearview mirror is fogged over, dirty or cov‐
ered with stickers, etc.
Fog lights
Front fog lights
The low beams must be switched on.
Press button. The green indicator
lamp lights up.
If the automatic headlight control, refer to
page 98, is activated, the low beams will come
on automatically when you switch on the front
fog lights.
When the high beams or headlight flasher are
activated, the front fog lights are not switched
on.
Instrument lighting
Adjusting The parking lights or low beams
must be switched on to adjust
the brightness.
Adjust the brightness with the
thumbwheel.
Interior lights
General information
The interior lights, footwell lights, access lights
and courtesy lights are controlled automati‐
cally.
Thumb wheel for the instrument lighting con‐
trols brightness of some of these features.
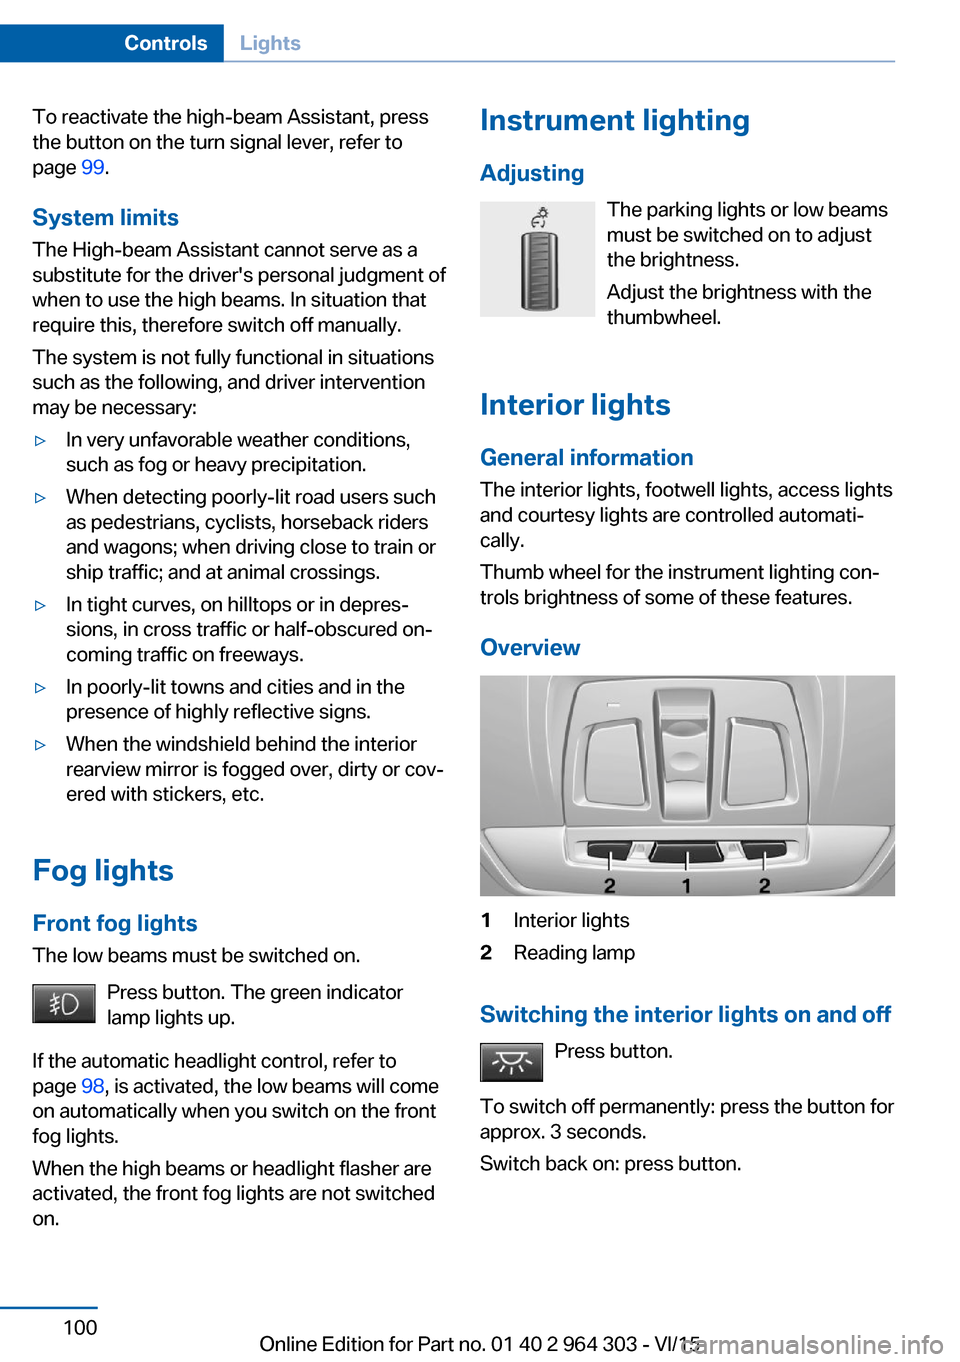
Overview1Interior lights2Reading lamp
Switching the interior lights on and off Press button.
To switch off permanently: press the button for
approx. 3 seconds.
Switch back on: press button.
Seite 100ControlsLights100
Online Edition for Part no. 01 40 2 964 303 - VI/15