park assist BMW X1 XDRIVE 28I 2013 Owners Manual
[x] Cancel search | Manufacturer: BMW, Model Year: 2013, Model line: X1 XDRIVE 28I, Model: BMW X1 XDRIVE 28I 2013Pages: 291, PDF Size: 6.58 MB
Page 12 of 291
CockpitVehicle equipment
This chapter describes all series equipment as
well as country-specific and special equipment
offered for this model series.Therefore, it alsodescribes equipment that may not be found in
your vehicle, for instance due to the selected
special equipment or the country version. This
also applies to safety-related functions and sys‐
tems.
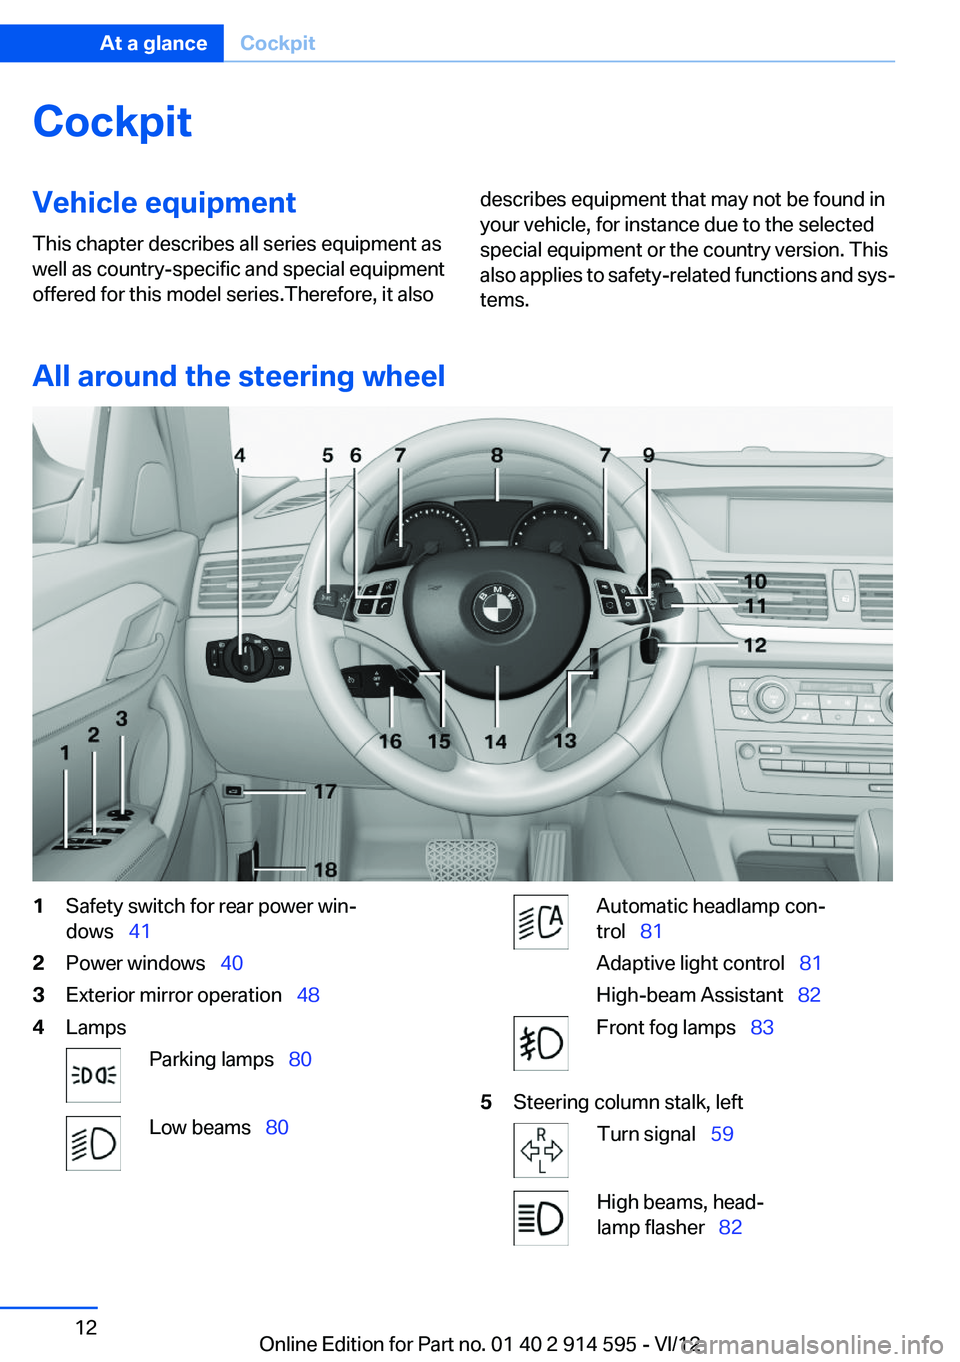
All around the steering wheel
1Safety switch for rear power win‐
dows 412Power windows 403Exterior mirror operation 484LampsParking lamps 80Low beams 80Automatic headlamp con‐
trol 81
Adaptive light control 81
High-beam Assistant 82Front fog lamps 835Steering column stalk, leftTurn signal 59High beams, head‐
lamp flasher 82Seite 12At a glanceCockpit12
Online Edition for Part no. 01 40 2 914 595 - VI/12
Page 13 of 291
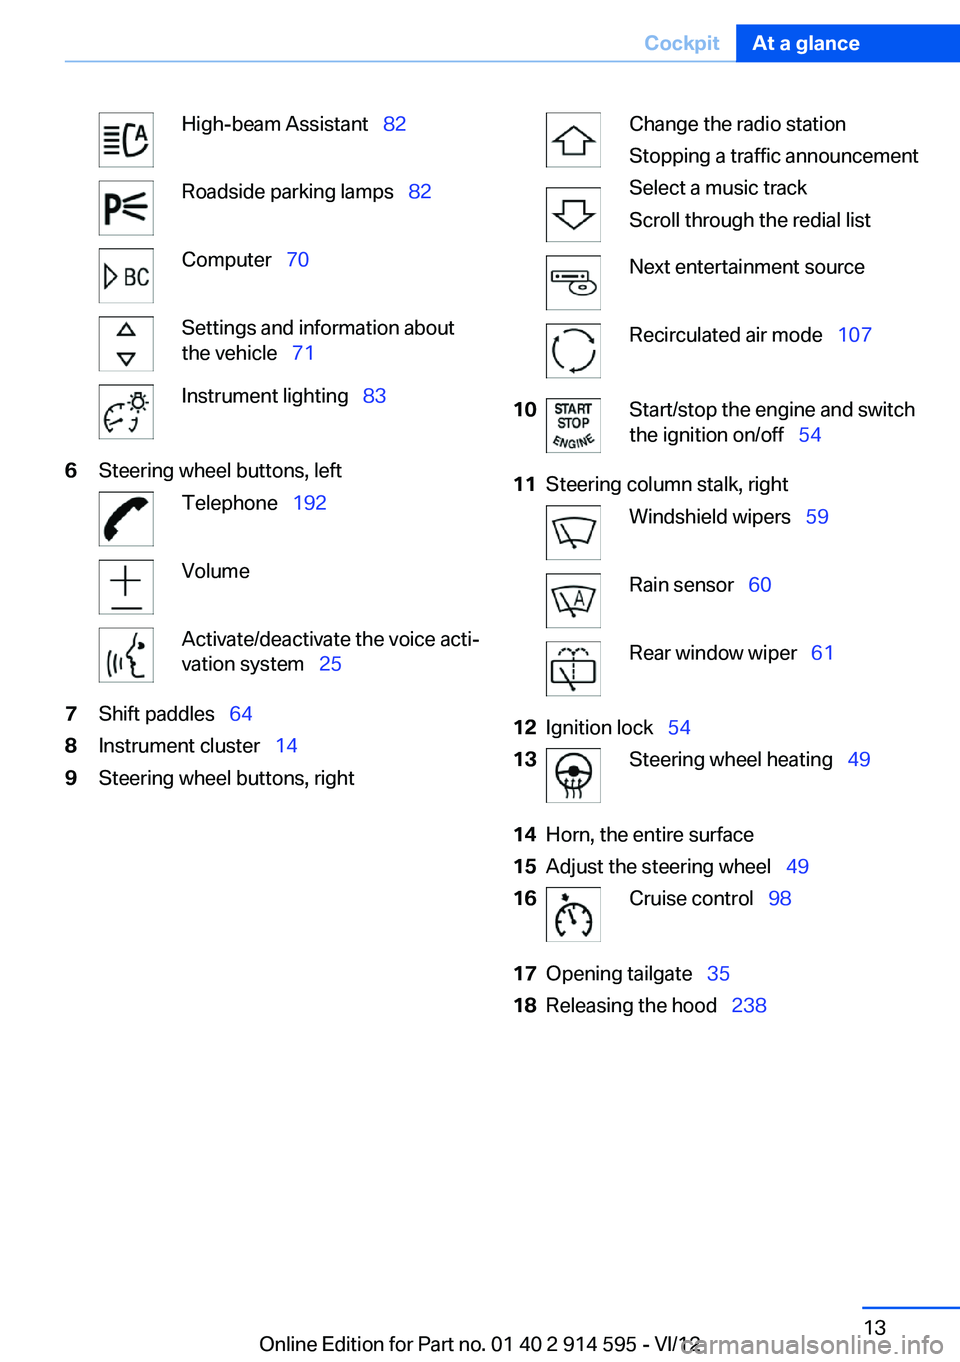
High-beam Assistant 82Roadside parking lamps 82Computer 70Settings and information about
the vehicle 71Instrument lighting 836Steering wheel buttons, leftTelephone 192VolumeActivate/deactivate the voice acti‐
vation system 257Shift paddles 648Instrument cluster 149Steering wheel buttons, rightChange the radio station
Stopping a traffic announcement
Select a music track
Scroll through the redial listNext entertainment sourceRecirculated air mode 10710Start/stop the engine and switch
the ignition on/off 5411Steering column stalk, rightWindshield wipers 59Rain sensor 60Rear window wiper 6112Ignition lock 5413Steering wheel heating 4914Horn, the entire surface15Adjust the steering wheel 4916Cruise control 9817Opening tailgate 3518Releasing the hood 238Seite 13CockpitAt a glance13
Online Edition for Part no. 01 40 2 914 595 - VI/12
Page 31 of 291
▷The remote control used is detected when
the vehicle is unlocked and the stored profile
is called up.▷Your personal settings will be recognized
and called up again even if the vehicle has
been used in the meantime by someone else
with another remote control.
The individual settings are stored for a maximum
of four remote controls. They are stored for two
remote controls if Comfort Access is in use.
Personal Profile settings
The following functions and settings can be
stored in a profile.
More information on the settings can be found
under:
▷Assigning the programmable memory but‐
tons, refer to page 23.▷Response of the central locking system
when the car is being unlocked, refer to
page 32.▷Automatic locking of the vehicle, refer to
page 35.▷Automatic call-up of the driver's seat posi‐
tion after unlocking, refer to page 33.▷Settings for the display on the Control Dis‐
play and in the instrument cluster:▷12h/24h clock format, refer to
page 73.▷Date format, refer to page 74.▷Brightness of the Control Display, refer
to page 75.▷Language on the Control Display, refer
to page 74.▷Units of measure for fuel consumption,
distance covered/remaining distances,
and temperature, refer to page 72.▷Show visual warning for the Park Distance
Control PDC, refer to page 101.▷Backup camera:▷Function selection, refer to page 102.▷Type of display, refer to page 104.▷Light settings:▷Triple turn signal activation, refer to
page 59.▷Welcome lamps, refer to page 80.▷Headlamp courtesy delay feature, refer
to page 81.▷Daytime running lights, refer to
page 81.▷High-beam Assistant, refer to
page 82.▷Automatic climate control: AUTO program,
cooling function and automatic recirculated
air control activated/deactivated, tempera‐
ture, air flow rate and distribution, refer to
page 105.▷Navigation:▷Voice activation, refer to page 151.▷Route criteria, refer to page 149.▷Map view settings, refer to page 152.▷Entertainment:▷Tone control, refer to page 160.▷Radio, stored stations, refer to
page 168.▷CD/multimedia, audio source listened to
last, refer to page 170.▷Telephone: volume, refer to page 196.
Central locking system
The concept
The central locking system becomes active
when the driver's door is closed.
The system simultaneously engages and re‐
leases the locks on the following:
▷Doors.▷Tailgate.▷Fuel filler flap.Seite 31Opening and closingControls31
Online Edition for Part no. 01 40 2 914 595 - VI/12
Page 80 of 291
LampsVehicle equipment
This chapter describes all series equipment as
well as country-specific and special equipment
offered for this model series.Therefore, it also
describes equipment that may not be found in
your vehicle, for instance due to the selected
special equipment or the country version. This
also applies to safety-related functions and sys‐
tems.
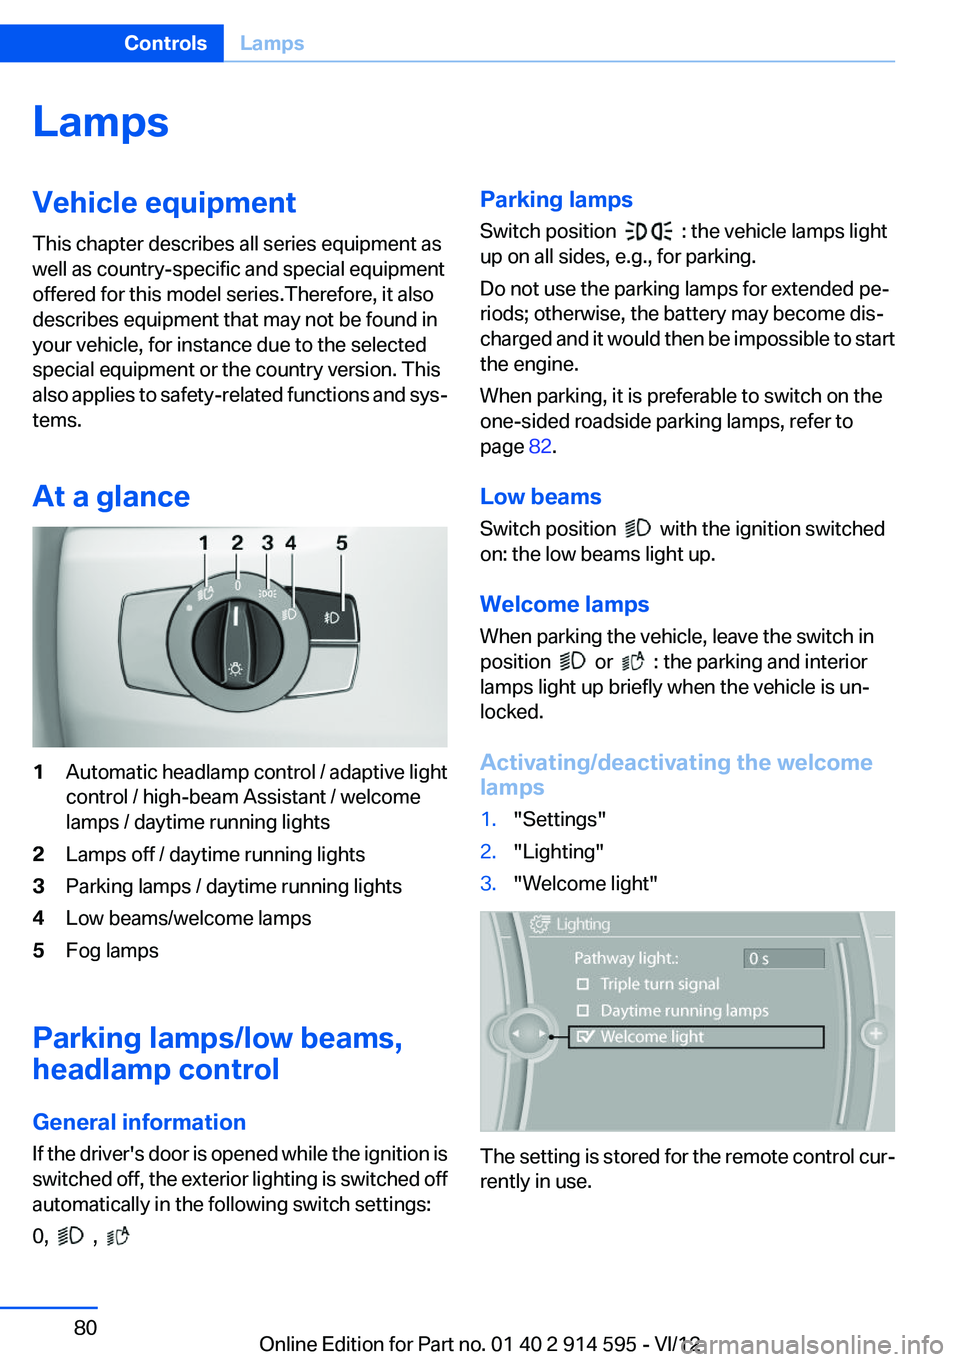
At a glance1Automatic headlamp control / adaptive light
control / high-beam Assistant / welcome
lamps / daytime running lights2Lamps off / daytime running lights3Parking lamps / daytime running lights4Low beams/welcome lamps5Fog lamps
Parking lamps/low beams,
headlamp control
General information
If the driver's door is opened while the ignition is
switched off, the exterior lighting is switched off
automatically in the following switch settings:
0,
,
Parking lamps
Switch position
: the vehicle lamps light
up on all sides, e.g., for parking.
Do not use the parking lamps for extended pe‐
riods; otherwise, the battery may become dis‐
charged and it would then be impossible to start
the engine.
When parking, it is preferable to switch on the
one-sided roadside parking lamps, refer to
page 82.
Low beams
Switch position
with the ignition switched
on: the low beams light up.
Welcome lamps
When parking the vehicle, leave the switch in
position
or : the parking and interior
lamps light up briefly when the vehicle is un‐
locked.
Activating/deactivating the welcome
lamps
1."Settings"2."Lighting"3."Welcome light"
The setting is stored for the remote control cur‐
rently in use.
Seite 80ControlsLamps80
Online Edition for Part no. 01 40 2 914 595 - VI/12
Page 82 of 291
The turning lamps are automatically switched
on depending on the steering angle or the use
of turn signals.
To avoid blinding oncoming traffic, the Adaptive
Light Control does not swivel to the driver's side
when the vehicle is at a standstill.
When driving in reverse, both turning lamps are
active.
Malfunction The warning lamp lights up.A mes‐
sage appears on the Control Display.
Adaptive light control is malfunction‐
ing or has failed. Have the system checked as
soon as possible.
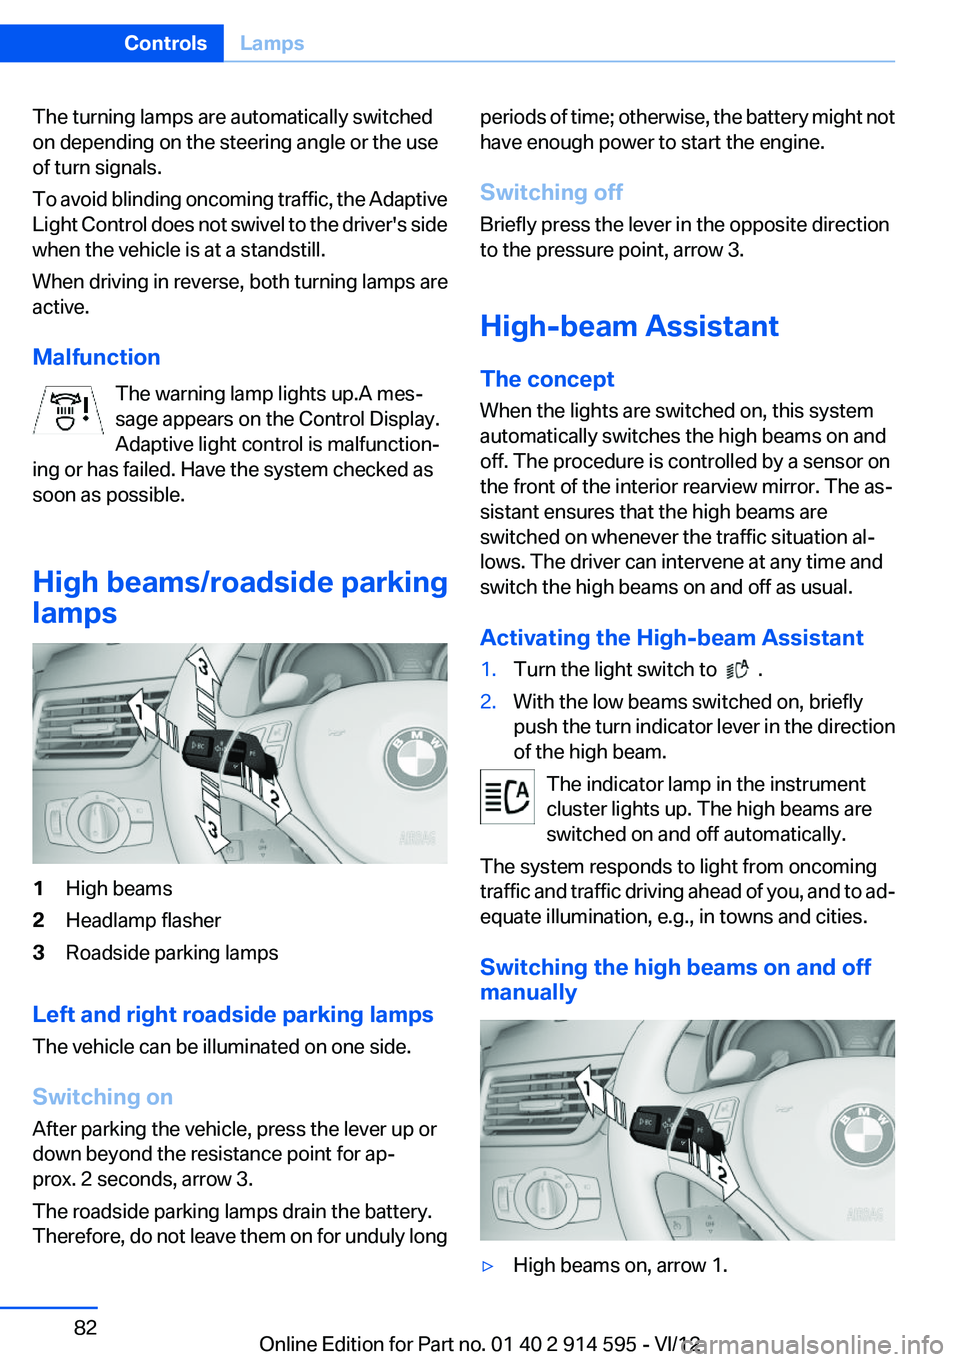
High beams/roadside parking
lamps1High beams2Headlamp flasher3Roadside parking lamps
Left and right roadside parking lamps
The vehicle can be illuminated on one side.
Switching on
After parking the vehicle, press the lever up or
down beyond the resistance point for ap‐
prox. 2 seconds, arrow 3.
The roadside parking lamps drain the battery.
Therefore, do not leave them on for unduly long
periods of time; otherwise, the battery might not
have enough power to start the engine.
Switching off
Briefly press the lever in the opposite direction
to the pressure point, arrow 3.
High-beam Assistant
The concept
When the lights are switched on, this system
automatically switches the high beams on and
off. The procedure is controlled by a sensor on
the front of the interior rearview mirror. The as‐
sistant ensures that the high beams are
switched on whenever the traffic situation al‐
lows. The driver can intervene at any time and
switch the high beams on and off as usual.
Activating the High-beam Assistant1.Turn the light switch to .2.With the low beams switched on, briefly
push the turn indicator lever in the direction
of the high beam.
The indicator lamp in the instrument
cluster lights up. The high beams are
switched on and off automatically.
The system responds to light from oncoming
traffic and traffic driving ahead of you, and to ad‐
equate illumination, e.g., in towns and cities.
Switching the high beams on and off
manually
▷High beams on, arrow 1.Seite 82ControlsLamps82
Online Edition for Part no. 01 40 2 914 595 - VI/12
Page 83 of 291
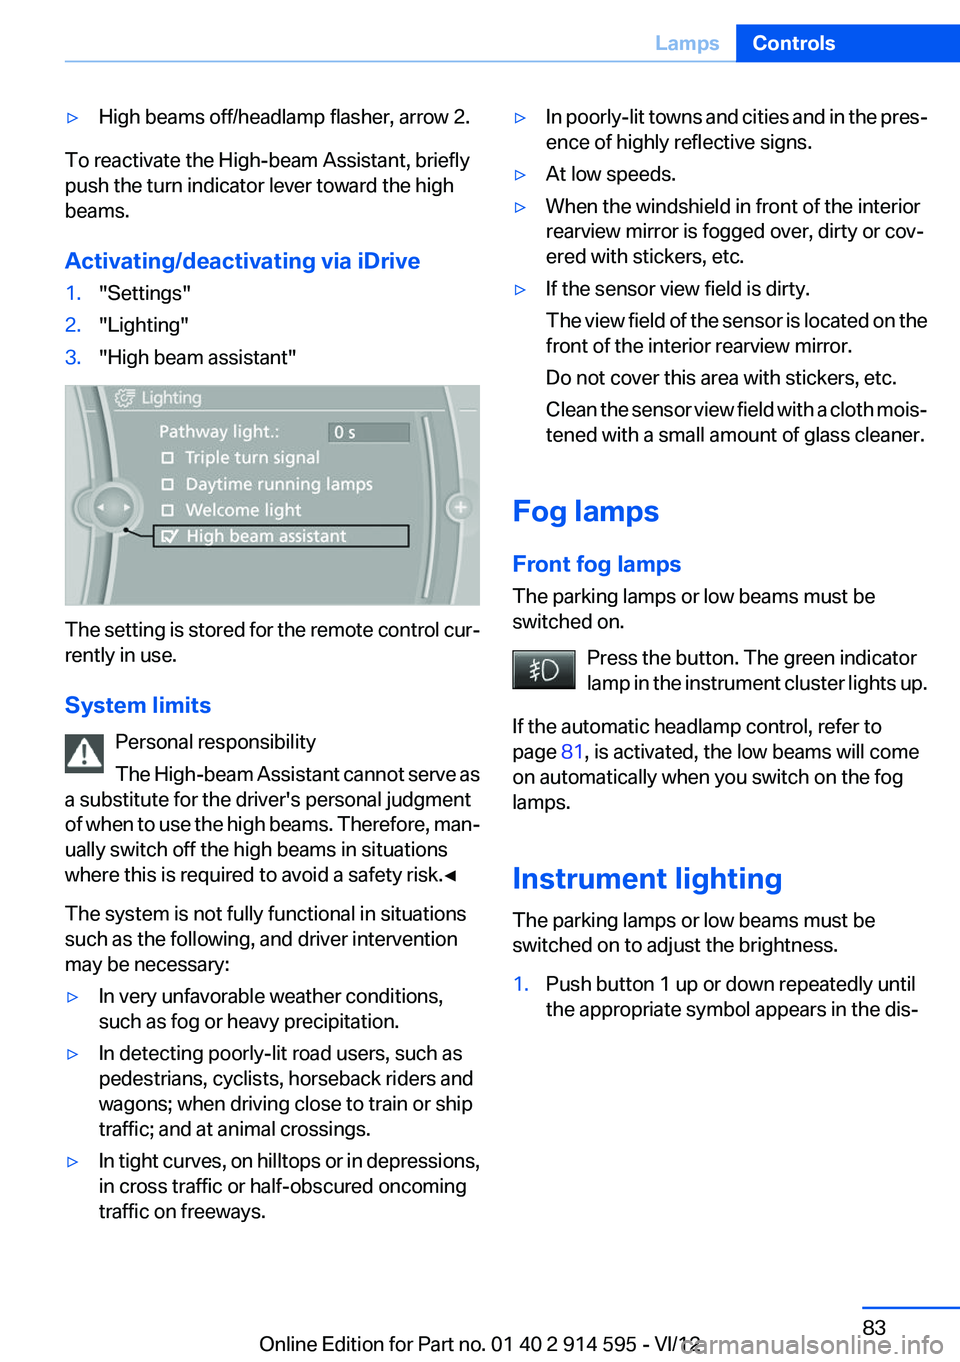
▷High beams off/headlamp flasher, arrow 2.
To reactivate the High-beam Assistant, briefly
push the turn indicator lever toward the high
beams.
Activating/deactivating via iDrive
1."Settings"2."Lighting"3."High beam assistant"
The setting is stored for the remote control cur‐
rently in use.
System limits Personal responsibility
The High-beam Assistant cannot serve as
a substitute for the driver's personal judgment
of when to use the high beams. Therefore, man‐
ually switch off the high beams in situations
where this is required to avoid a safety risk.◀
The system is not fully functional in situations
such as the following, and driver intervention
may be necessary:
▷In very unfavorable weather conditions,
such as fog or heavy precipitation.▷In detecting poorly-lit road users, such as
pedestrians, cyclists, horseback riders and
wagons; when driving close to train or ship
traffic; and at animal crossings.▷In tight curves, on hilltops or in depressions,
in cross traffic or half-obscured oncoming
traffic on freeways.▷In poorly-lit towns and cities and in the pres‐
ence of highly reflective signs.▷At low speeds.▷When the windshield in front of the interior
rearview mirror is fogged over, dirty or cov‐
ered with stickers, etc.▷If the sensor view field is dirty.
The view field of the sensor is located on the
front of the interior rearview mirror.
Do not cover this area with stickers, etc.
Clean the sensor view field with a cloth mois‐
tened with a small amount of glass cleaner.
Fog lamps
Front fog lamps
The parking lamps or low beams must be
switched on.
Press the button. The green indicator
lamp in the instrument cluster lights up.
If the automatic headlamp control, refer to
page 81, is activated, the low beams will come
on automatically when you switch on the fog
lamps.
Instrument lighting
The parking lamps or low beams must be
switched on to adjust the brightness.
1.Push button 1 up or down repeatedly until
the appropriate symbol appears in the dis‐Seite 83LampsControls83
Online Edition for Part no. 01 40 2 914 595 - VI/12
Page 102 of 291
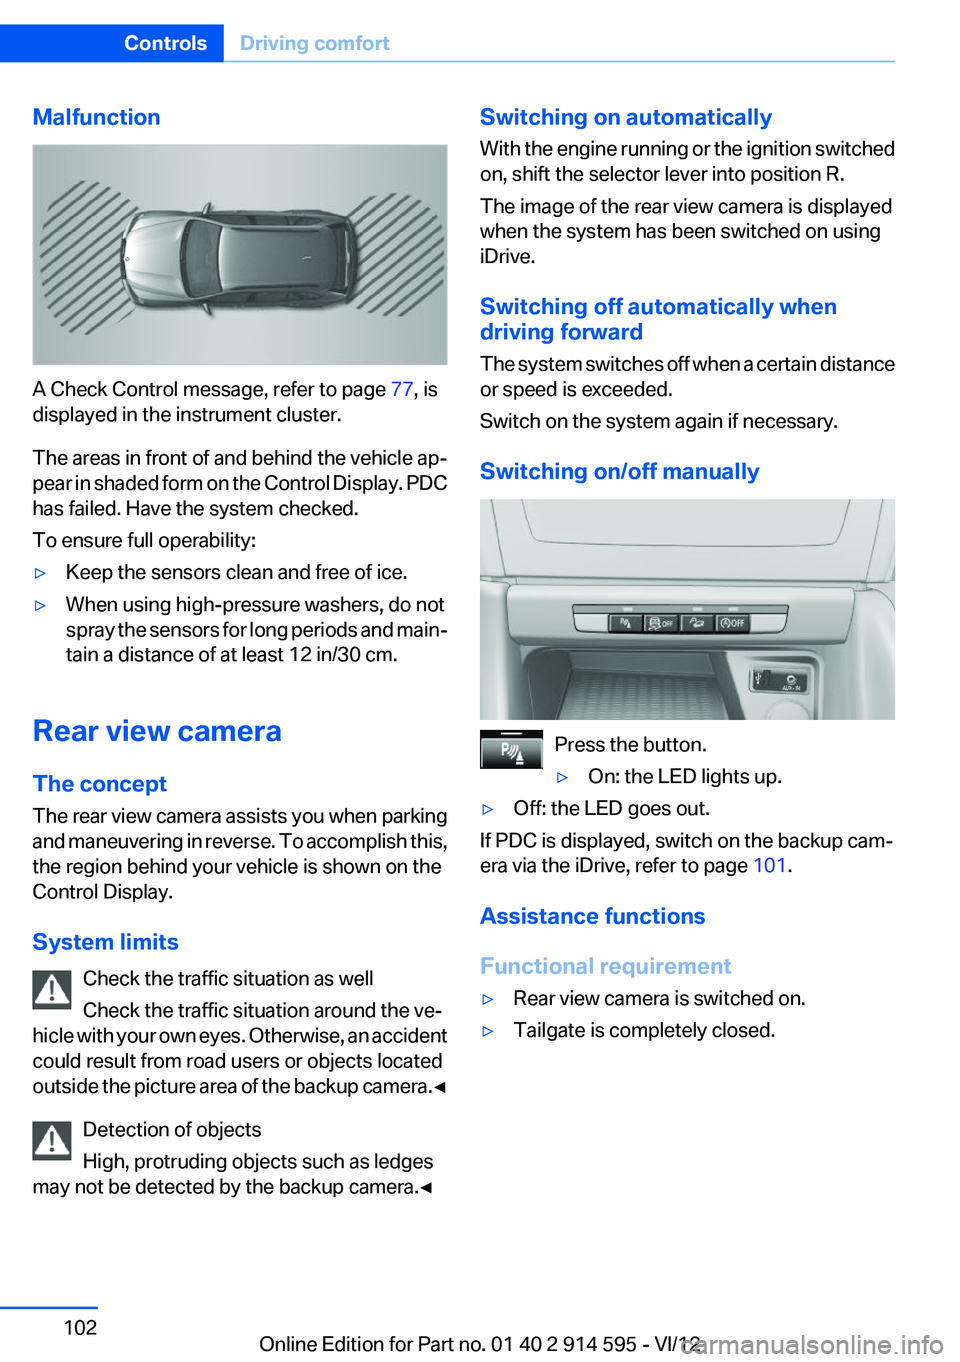
Malfunction
A Check Control message, refer to page 77, is
displayed in the instrument cluster.
The areas in front of and behind the vehicle ap‐
pear in shaded form on the Control Display. PDC
has failed. Have the system checked.
To ensure full operability:
▷Keep the sensors clean and free of ice.▷When using high-pressure washers, do not
spray the sensors for long periods and main‐
tain a distance of at least 12 in/30 cm.
Rear view camera
The concept
The rear view camera assists you when parking
and maneuvering in reverse. To accomplish this,
the region behind your vehicle is shown on the
Control Display.
System limits Check the traffic situation as well
Check the traffic situation around the ve‐
hicle with your own eyes. Otherwise, an accident
could result from road users or objects located
outside the picture area of the backup camera. ◀
Detection of objects
High, protruding objects such as ledges
may not be detected by the backup camera.◀
Switching on automatically
With the engine running or the ignition switched
on, shift the selector lever into position R.
The image of the rear view camera is displayed
when the system has been switched on using
iDrive.
Switching off automatically when
driving forward
The system switches off when a certain distance
or speed is exceeded.
Switch on the system again if necessary.
Switching on/off manually
Press the button.
▷On: the LED lights up.▷Off: the LED goes out.
If PDC is displayed, switch on the backup cam‐
era via the iDrive, refer to page 101.
Assistance functions
Functional requirement
▷Rear view camera is switched on.▷Tailgate is completely closed.Seite 102ControlsDriving comfort102
Online Edition for Part no. 01 40 2 914 595 - VI/12
Page 104 of 291
Show the obstacle marking via the iDrive, refer
to page 104.
Activating assistance functions
Several assistance functions can be active at the
same time.
Showing the parking aid lines
"Parking aid lines"
Pathway and turning lines are displayed.
Showing the obstacle marking
"Obstacle marking"
Three-dimensionally-shaped markings are dis‐
played.
Image on the Control Display
Switching on the rear view camera
using iDrive
With PDC activated:
"Rear view camera"
The image of the rear view camera is displayed.
The setting is stored for the remote control cur‐
rently in use.
Brightness
With the rear view camera switched on:
1. Select the symbol.2.Turn the controller until the desired setting
is reached and press the controller.
Contrast
With the rear view camera switched on:
1. Select the symbol.2.Turn the controller until the desired setting
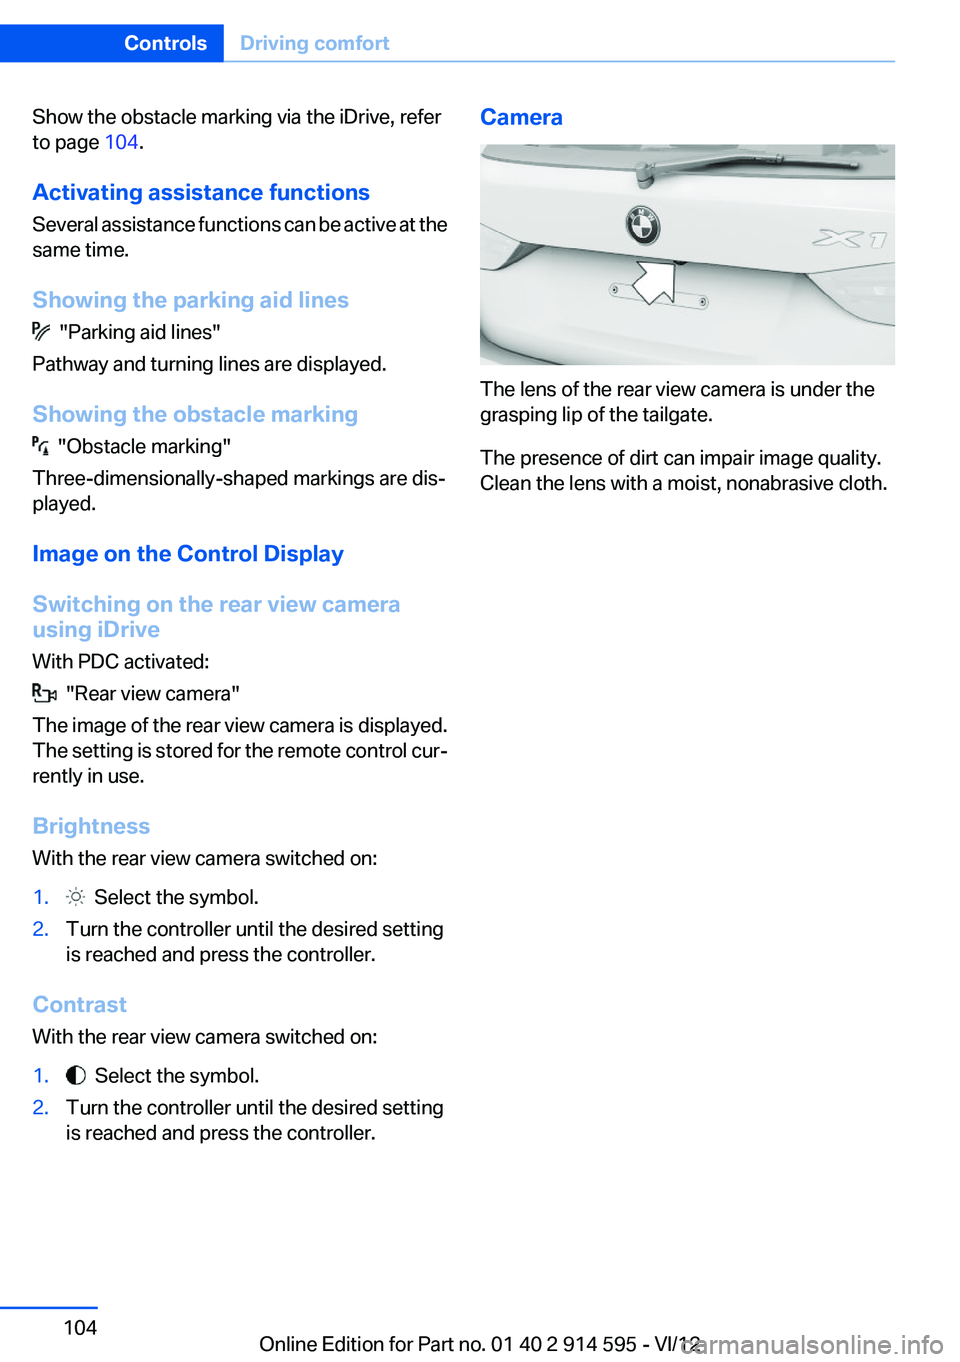
is reached and press the controller.Camera
The lens of the rear view camera is under the
grasping lip of the tailgate.
The presence of dirt can impair image quality.
Clean the lens with a moist, nonabrasive cloth.
Seite 104ControlsDriving comfort104
Online Edition for Part no. 01 40 2 914 595 - VI/12
Page 128 of 291
Ensure that the floor mats are securely fastened
again when they are returned after being re‐
moved, such as for cleaning.◀
Driving in wet conditions
When roads are wet or there is heavy rain, briefly
exert gentle pressure on the brake pedal every
few miles.
Ensure that this action does not endanger other
road users.
The heat generated in this process helps dry the
brake discs and pads.
In this way braking efficiency will be available
when you need it.
Hills
Drive long or steep downhill gradients in the gear
in which the least braking is required. Otherwise,
the brake system may overheat, resulting in a
reduction in the brake system efficiency.
You can increase the engine's braking effect by
shifting down, going all the way to first gear, if
necessary.
Downshifting in manual mode of the automatic
transmission, refer to page 63.
Avoid load on the brakes
Avoid placing excessive load on the brake
system. Light but consistent brake pressure can
lead to high temperatures, brake wear and pos‐
sibly even brake failure.◀
Do not drive in neutral
Do not drive in neutral or with the engine
stopped, as doing so disables engine braking. In
addition, steering and brake assist is unavailable
with the engine stopped.◀
Brake disc corrosion
Corrosion on the brake discs and contamination
on the brake pads are furthered by:▷Low mileage.▷Extended periods when the vehicle is not
used at all.▷Infrequent use of the brakes.
Corrosion occurs when the minimum pressure
that must be exerted by the pads during brake
applications to clean the discs is not reached.
Should corrosion form on the brake discs, the
brakes will tend to respond with a pulsating ef‐
fect that generally cannot be corrected.
Condensation under the parked vehicle
When using the automatic climate control, con‐
densation water develops that exits underneath
the vehicle.
Therefore, traces of condensed water under the
vehicle are normal.
Driving on poor roads
BMW X1 combines an all-wheel drive system
with the advantages of a normal passenger car.
Do not drive on unpaved terrain
Do not drive on unpaved terrain, as other‐
wise the vehicle may be damaged.◀
For your own safety and the safety of passen‐
gers and the vehicle, adhere to the following
points:
▷Familiarize yourself with the vehicle before
driving; never take risks.▷Adjust speeds according to road conditions.
The steeper and rougher the road surface is,
the lower the speed should be.▷When driving on steep uphill and downhill
grades: the engine oil and coolant should be
filled nearly to the MAX mark.▷Use Hill Descent Control HDC, refer to
page 96, on steep downhill grades.▷Watch for stones, holes, and other obstacles
and drive around these where possible.Seite 128Driving tipsThings to remember when driving128
Online Edition for Part no. 01 40 2 914 595 - VI/12
Page 255 of 291
Jump-starting
Notes
If the battery is discharged, an engine can be
started using the battery of another vehicle and
two jumper cables. Only use jumper cables with
fully insulated clamp handles.
To prevent personal injury or damage to both
vehicles, adhere strictly to the following proce‐
dure.
Do not touch live parts
To avoid the risk of potentially fatal injury,
always avoid all contact with electrical compo‐
nents while the engine is running.◀
Preparation1.Check whether the battery of the other ve‐
hicle has a voltage of 12 volts and approxi‐
mately the same capacitance in Ah. This in‐
formation can be found on the battery.2.Switch off the engine of the assisting vehi‐
cle.3.Switch off any electronic systems/power
consumers in both vehicles.
Bodywork contact between vehicles
There must not be any contact between
the bodies of the two vehicles, otherwise there
is a danger of shorting.◀
Starting aid terminals Connecting order
Connect the jumper cables in the correct
order; otherwise, there is the danger of injury
from sparking.◀
The so-called starting aid terminal in the engine
compartment acts as the battery's positive ter‐
minal. Pull the cover up and off.
The body ground or a special nut acts as the
negative terminal.
Connecting jumper cables
1.Pull off the cap of the BMW starting aid ter‐
minal.2.Attach one terminal clamp of the positive
jumper cable to the positive terminal of the
battery, or to the corresponding starting aid
terminal of the vehicle providing assistance.3.Attach the other end of the cable to the pos‐
itive terminal of the battery, or to the corre‐
sponding starting aid terminal of the vehicle
to be started.4.Attach one terminal clamp of the negative
jumper cable to the negative terminal of the
battery, or to the corresponding engine or
body ground of the vehicle providing assis‐
tance.5.Attach the other end of the cable to the neg‐
ative terminal of the battery, or to the corre‐Seite 255Breakdown assistanceMobility255
Online Edition for Part no. 01 40 2 914 595 - VI/12