warning light BMW X3 2.5I 2005 E83 User Guide
[x] Cancel search | Manufacturer: BMW, Model Year: 2005, Model line: X3 2.5I, Model: BMW X3 2.5I 2005 E83Pages: 126, PDF Size: 4.65 MB
Page 50 of 126
Reference
At a glance
Controls
Driving tips
Mobility
49
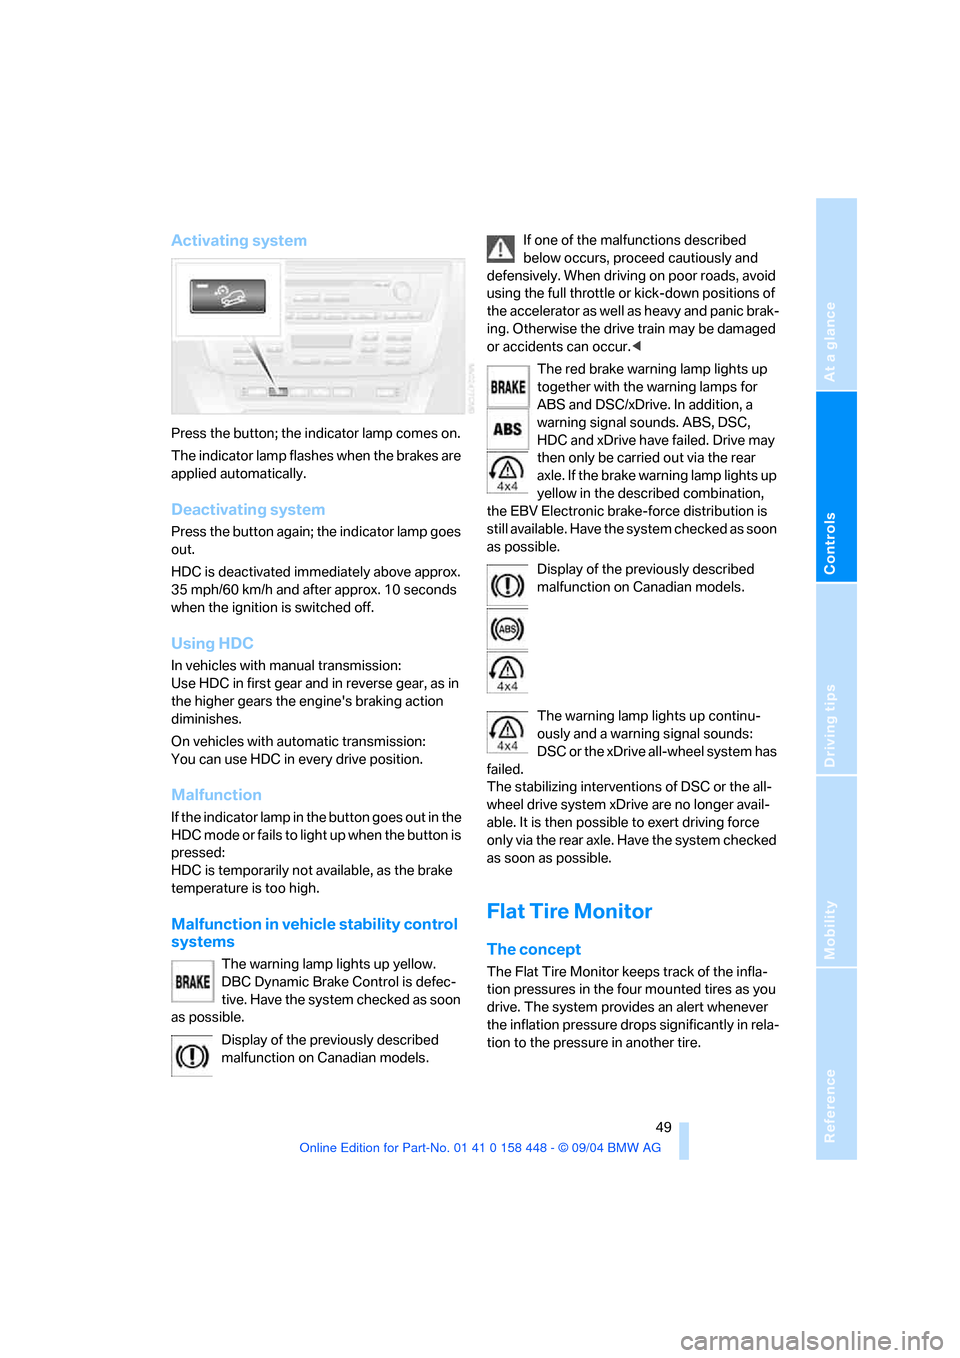
Activating system
Press the button; the indicator lamp comes on.
The indicator lamp flashes when the brakes are
applied automatically.
Deactivating system
Press the button again; the indicator lamp goes
out.
HDC is deactivated immediately above approx.
35 mph/60 km/h and after approx. 10 seconds
when the ignition is switched off.
Using HDC
In vehicles with manual transmission:
Use HDC in first gear and in reverse gear, as in
the higher gears the engine's braking action
diminishes.
On vehicles with automatic transmission:
You can use HDC in every drive position.
Malfunction
If the indicator lamp in the button goes out in the
HDC mode or fails to light up when the button is
pressed:
HDC is temporarily not available, as the brake
temperature is too high.
Malfunction in vehicle stability control
systems
The warning lamp lights up yellow.
DBC Dynamic Brake Control is defec-
tive. Have the system checked as soon
as possible.
Display of the previously described
malfunction on Canadian models.If one of the malfunctions described
below occurs, proceed cautiously and
defensively. When driving on poor roads, avoid
using the full throttle or kick-down positions of
the accelerator as well as heavy and panic brak-
ing. Otherwise the drive train may be damaged
or accidents can occur.<
The red brake warning lamp lights up
together with the warning lamps for
ABS and DSC/xDrive. In addition, a
warning signal sounds. ABS, DSC,
HDC and xDrive have failed. Drive may
then only be carried out via the rear
axle. If the brake warning lamp lights up
yellow in the described combination,
the EBV Electronic brake-force distribution is
still available. Have the system checked as soon
as possible.
Display of the previously described
malfunction on Canadian models.
The warning lamp lights up continu-
ously and a warning signal sounds:
DSC or the xDrive all-wheel system has
failed.
The stabilizing interventions of DSC or the all-
wheel drive system xDrive are no longer avail-
able. It is then possible to exert driving force
only via the rear axle. Have the system checked
as soon as possible.
Flat Tire Monitor
The concept
The Flat Tire Monitor keeps track of the infla-
tion pressures in the four mounted tires as you
drive. The system provides an alert whenever
the inflation pressure drops significantly in rela-
tion to the pressure in another tire.
Page 51 of 126
Technology for comfort, convenience and safety
50 The check of the tire inflation pressure is based
on monitoring the relative speeds of the wheels.
A flat tire is detected and reported on the basis
of a deviation in certain speed ratios.
Functional requirement
So that the Flat Tire Monitor can learn the cor-
rect inflation pressure, please perform the fol-
lowing steps:
1.Check the inflation pressures in all tires
2.Compare with the inflation pressure table
on page83 and correct if necessary
3.Initialize the system.
System limits
The Flat Tire Monitor cannot indicate
sudden severe tire damage caused by
outside factors and does not detect a natural,
even pressure drop in all four tires.<
In the following situations, on the other hand,
there can be delays in detecting tire pressure
losses, and even system failure:
>When driving on snow-covered or slippery
road surfaces.
>In the case of performance-oriented driving:
slip in the drive wheels, high lateral acceler-
ation.
>False alarms and undetected loss of pres-
sure may occur when you are driving with
snow chains fitted.
>When driving with a compact wheel, the Flat
Tire Monitor cannot operate.
Initializing system
Perform the initialization immediately
every time you correct the inflation pres-
sure, change a tire or change a wheel or all
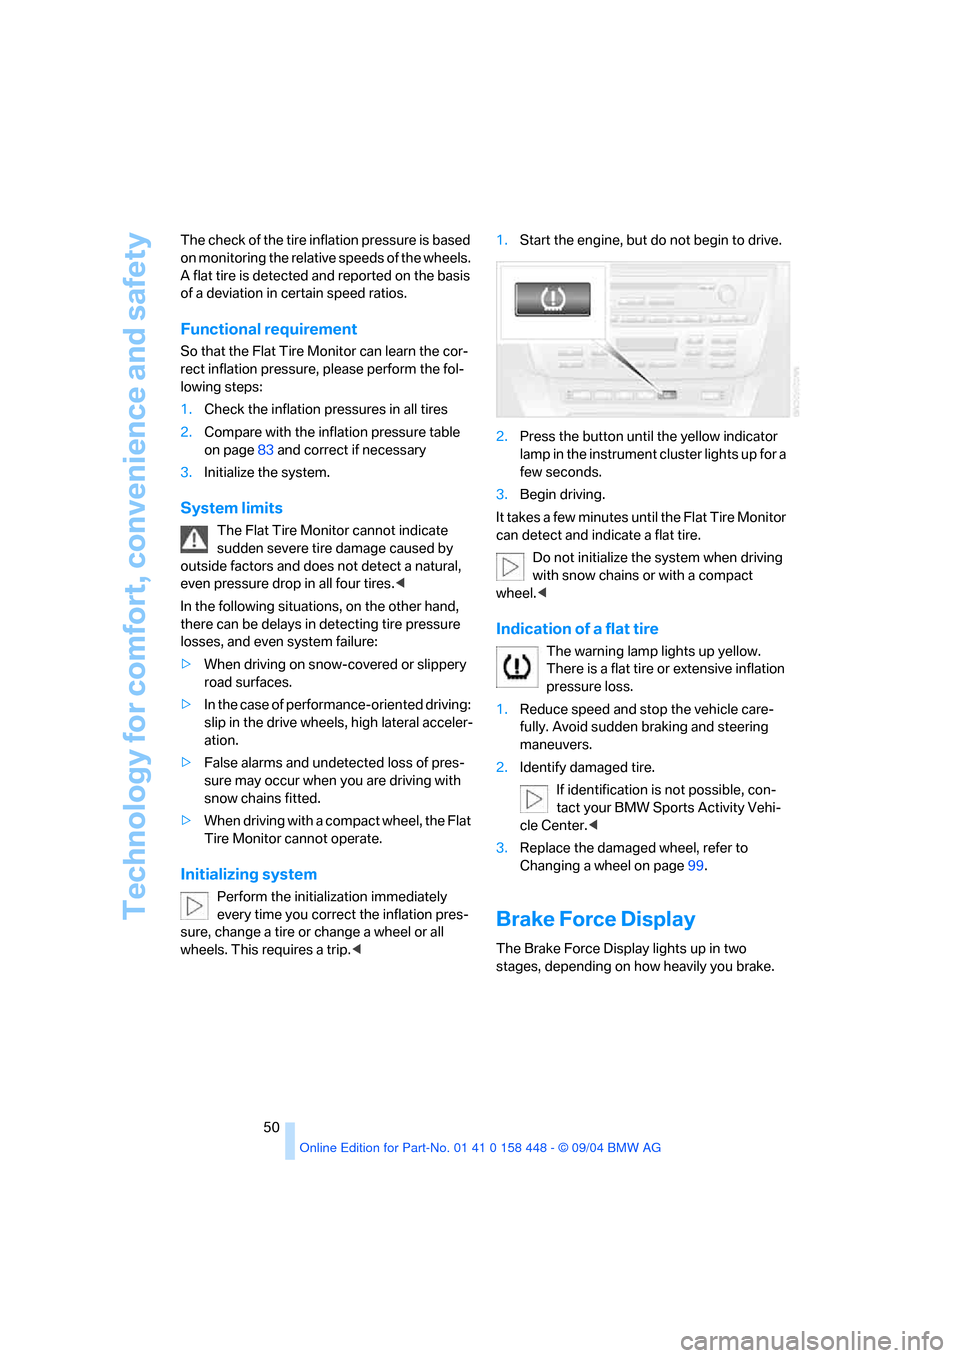
wheels. This requires a trip.<1.Start the engine, but do not begin to drive.
2.Press the button until the yellow indicator
lamp in the instrument cluster lights up for a
few seconds.
3.Begin driving.
It takes a few minutes until the Flat Tire Monitor
can detect and indicate a flat tire.
Do not initialize the system when driving
with snow chains or with a compact
wheel.<
Indication of a flat tire
The warning lamp lights up yellow.
There is a flat tire or extensive inflation
pressure loss.
1.Reduce speed and stop the vehicle care-
fully. Avoid sudden braking and steering
maneuvers.
2.Identify damaged tire.
If identification is not possible, con-
tact your BMW Sports Activity Vehi-
cle Center.<
3.Replace the damaged wheel, refer to
Changing a wheel on page99.
Brake Force Display
The Brake Force Display lights up in two
stages, depending on how heavily you brake.
Page 52 of 126
Reference
At a glance
Controls
Driving tips
Mobility
51
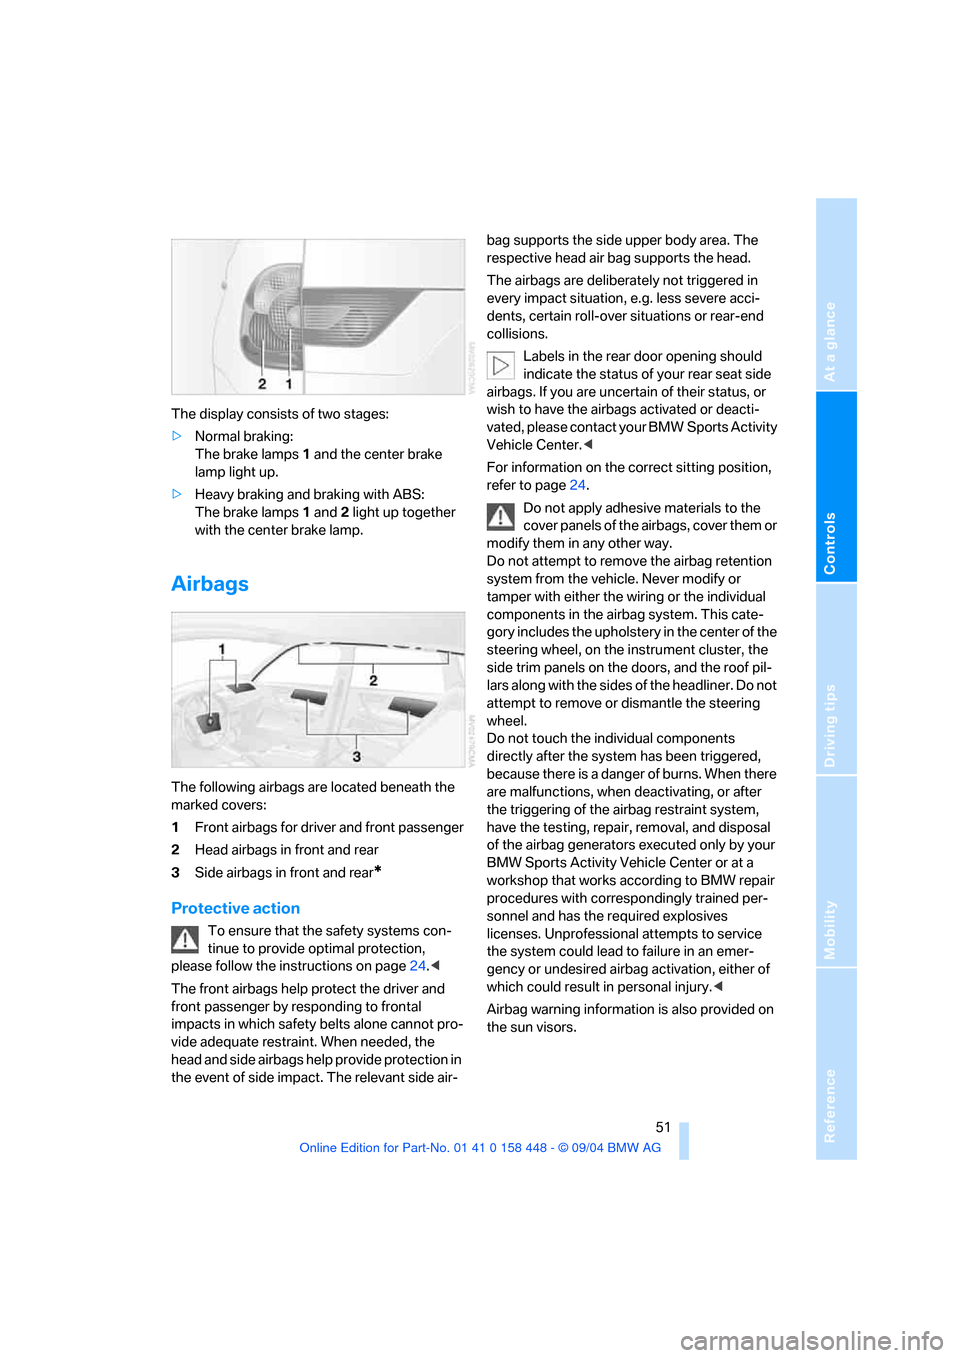
The display consists of two stages:
>Normal braking:
The brake lamps 1 and the center brake
lamp light up.
>Heavy braking and braking with ABS:
The brake lamps 1 and 2 light up together
with the center brake lamp.
Airbags
The following airbags are located beneath the
marked covers:
1Front airbags for driver and front passenger
2Head airbags in front and rear
3Side airbags in front and rear
*
Protective action
To ensure that the safety systems con-
tinue to provide optimal protection,
please follow the instructions on page24.<
The front airbags help protect the driver and
front passenger by responding to frontal
impacts in which safety belts alone cannot pro-
vide adequate restraint. When needed, the
head and side airbags help provide protection in
the event of side impact. The relevant side air-bag supports the side upper body area. The
respective head air bag supports the head.
The airbags are deliberately not triggered in
every impact situation, e.g. less severe acci-
dents, certain roll-over situations or rear-end
collisions.
Labels in the rear door opening should
indicate the status of your rear seat side
airbags. If you are uncertain of their status, or
wish to have the airbags activated or deacti-
vated, please contact your BMW Sports Activity
Vehicle Center.<
For information on the correct sitting position,
refer to page24.
Do not apply adhesive materials to the
cover panels of the airbags, cover them or
modify them in any other way.
Do not attempt to remove the airbag retention
system from the vehicle. Never modify or
tamper with either the wiring or the individual
components in the airbag system. This cate-
gory includes the upholstery in the center of the
steering wheel, on the instrument cluster, the
side trim panels on the doors, and the roof pil-
lars along with the sides of the headliner. Do not
attempt to remove or dismantle the steering
wheel.
Do not touch the individual components
directly after the system has been triggered,
because there is a danger of burns. When there
are malfunctions, when deactivating, or after
the triggering of the airbag restraint system,
have the testing, repair, removal, and disposal
of the airbag generators executed only by your
BMW Sports Activity Vehicle Center or at a
workshop that works according to BMW repair
procedures with correspondingly trained per-
sonnel and has the required explosives
licenses. Unprofessional attempts to service
the system could lead to failure in an emer-
gency or undesired airbag activation, either of
which could result in personal injury.<
Airbag warning information is also provided on
the sun visors.
Page 53 of 126
Technology for comfort, convenience and safety
52
Automatic deactivation of front
passenger airbags
Your BMW has a seat occupation detection
system. By evaluating the weight on the front
passenger's seat, the system detects whether
or not the seat is occupied by a child in the
child-restraint system or an adult.
>When a child is seated in the child-restraint
system or with an empty seat, the front and
side airbags are deactivated on the passen-
ger side.
>When an adult is traveling in the front seat,
the front and side airbags remain active on
the passenger side.
Although not desired, it can occur in the
case of heavier children that the front
passenger airbags remain active or in the case
of very light adults or young persons that the
front passenger airbags are deactivated. In
these cases, have the person ride in the rear
seat, refer to Passenger airbag status lamp
below. Do not load the passenger seat with any
items in addition to the person to be trans-
ported. Do not fit seat covers, seat cushion pad-
ding, ball mats or other items onto the front pas-
senger seat unless they are specifically
r e c o m m e n d e d b y B M W . D o n o t p l a c e a n y i t e m s
under the seat. Otherwise, the function of the
seat occupation detection could be impaired.<
Operational readiness of airbag system
As of ignition key position 1, the warning lamp
lights up briefly, thus indicating the operational
readiness of the entire airbag system and the
safety belt tensioners.
Airbag system malfunction
>The warning lamp does not light up as of
ignition key position 1.
>The warning lamp lights up continuously.
Have the airbag system checked immedi-
ately if a malfunction occurs, as otherwise
there is a danger of the system failing to
respond in the expected manner to an impact
occurring within its normal response range.<
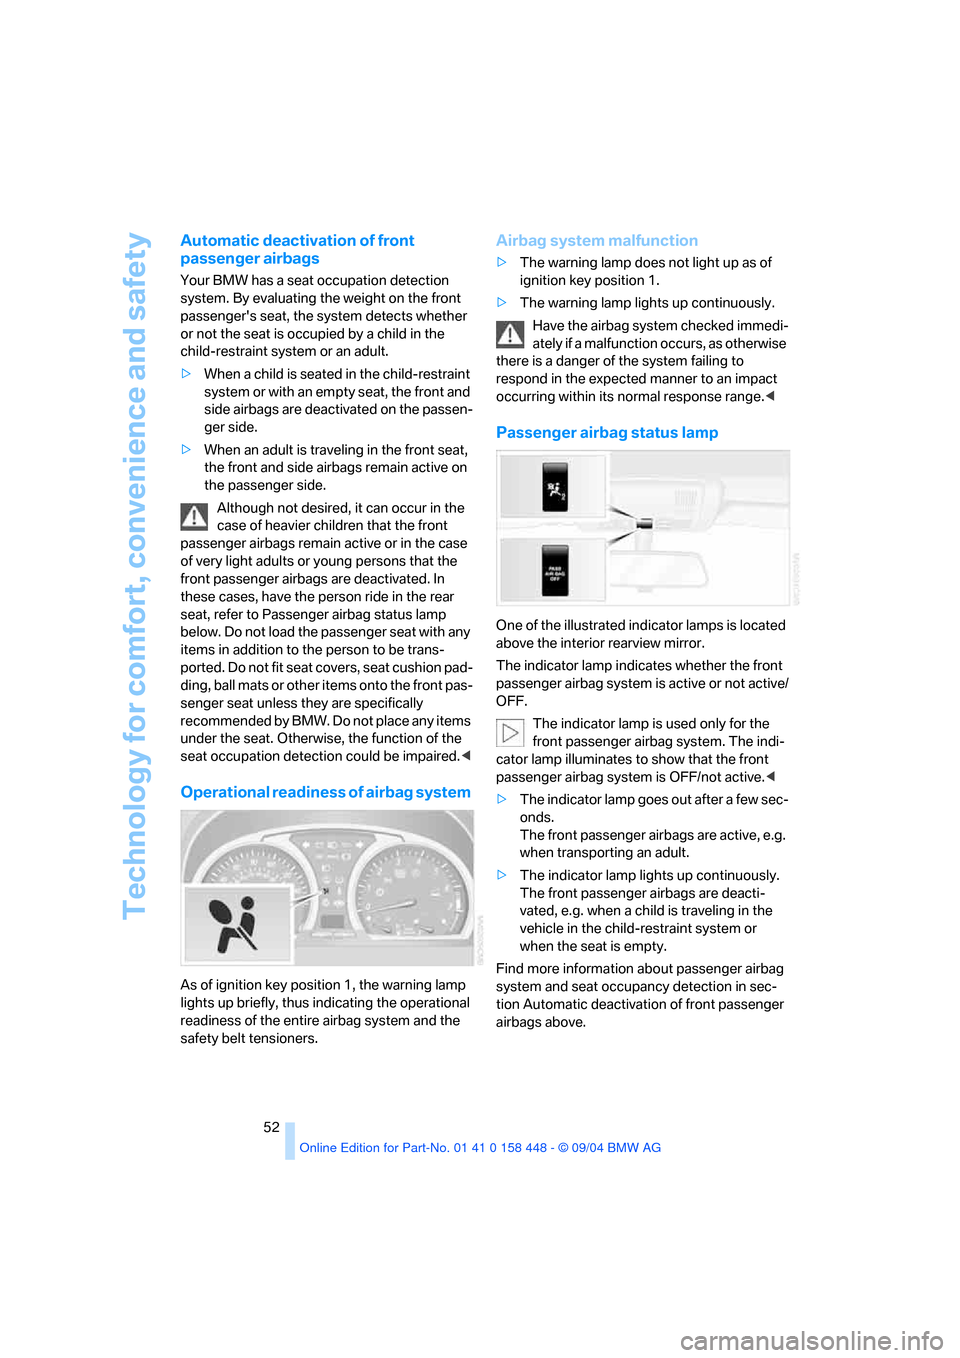
Passenger airbag status lamp
One of the illustrated indicator lamps is located
above the interior rearview mirror.
The indicator lamp indicates whether the front
passenger airbag system is active or not active/
OFF.
The indicator lamp is used only for the
front passenger airbag system. The indi-
cator lamp illuminates to show that the front
passenger airbag system is OFF/not active.<
>The indicator lamp goes out after a few sec-
onds.
The front passenger airbags are active, e.g.
when transporting an adult.
>The indicator lamp lights up continuously.
The front passenger airbags are deacti-
vated, e.g. when a child is traveling in the
vehicle in the child-restraint system or
when the seat is empty.
Find more information about passenger airbag
system and seat occupancy detection in sec-
tion Automatic deactivation of front passenger
airbags above.
Page 54 of 126
Reference
At a glance
Controls
Driving tips
Mobility
53
Lamps
Parking lamps/low beams
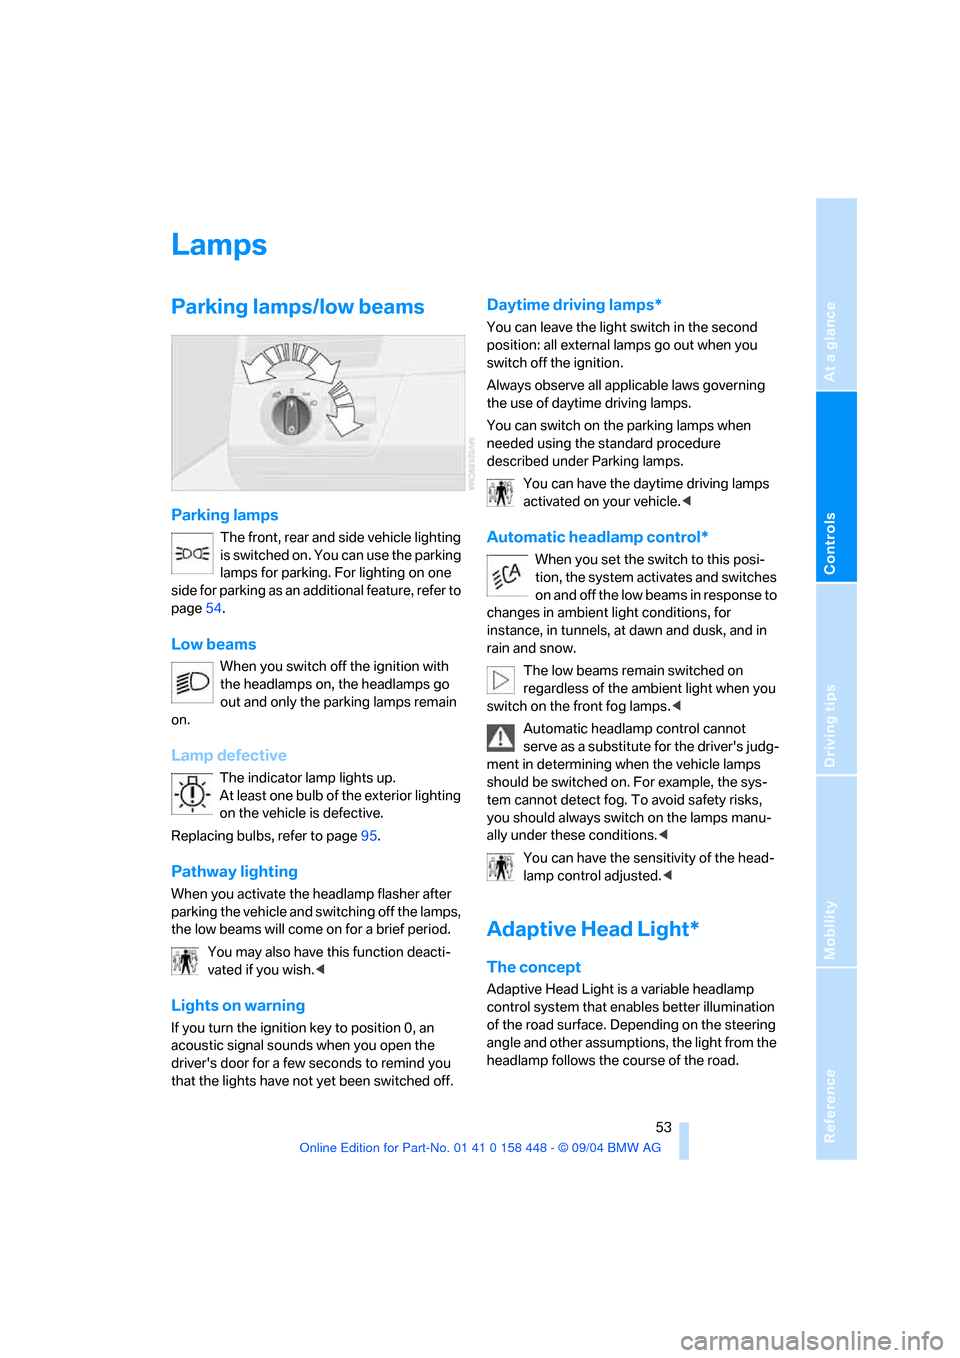
Parking lamps
The front, rear and side vehicle lighting
is switched on. You can use the parking
lamps for parking. For lighting on one
side for parking as an additional feature, refer to
page54.
Low beams
When you switch off the ignition with
the headlamps on, the headlamps go
out and only the parking lamps remain
on.
Lamp defective
The indicator lamp lights up.
At least one bulb of the exterior lighting
on the vehicle is defective.
Replacing bulbs, refer to page95.
Pathway lighting
When you activate the headlamp flasher after
parking the vehicle and switching off the lamps,
the low beams will come on for a brief period.
You may also have this function deacti-
vated if you wish.<
Lights on warning
If you turn the ignition key to position 0, an
acoustic signal sounds when you open the
driver's door for a few seconds to remind you
that the lights have not yet been switched off
.
Daytime driving lamps*
You can leave the light switch in the second
position: all external lamps go out when you
switch off the ignition.
Always observe all applicable laws governing
the use of daytime driving lamps.
You can switch on the parking lamps when
needed using the standard procedure
described under Parking lamps.
You can have the daytime driving lamps
activated on your vehicle.<
Automatic headlamp control*
When you set the switch to this posi-
tion, the system activates and switches
on and off the low beams in response to
changes in ambient light conditions, for
instance, in tunnels, at dawn and dusk, and in
rain and snow.
The low beams remain switched on
regardless of the ambient light when you
switch on the front fog lamps.<
Automatic headlamp control cannot
serve as a substitute for the driver's judg-
ment in determining when the vehicle lamps
should be switched on. For example, the sys-
tem cannot detect fog. To avoid safety risks,
you should always switch on the lamps manu-
ally under these conditions.<
You can have the sensitivity of the head-
lamp control adjusted.<
Adaptive Head Light*
The concept
Adaptive Head Light is a variable headlamp
control system that enables better illumination
of the road surface. Depending on the steering
angle and other assumptions, the light from the
headlamp follows the course of the road.
Page 68 of 126
Reference
At a glance
Controls
Driving tips
Mobility
67
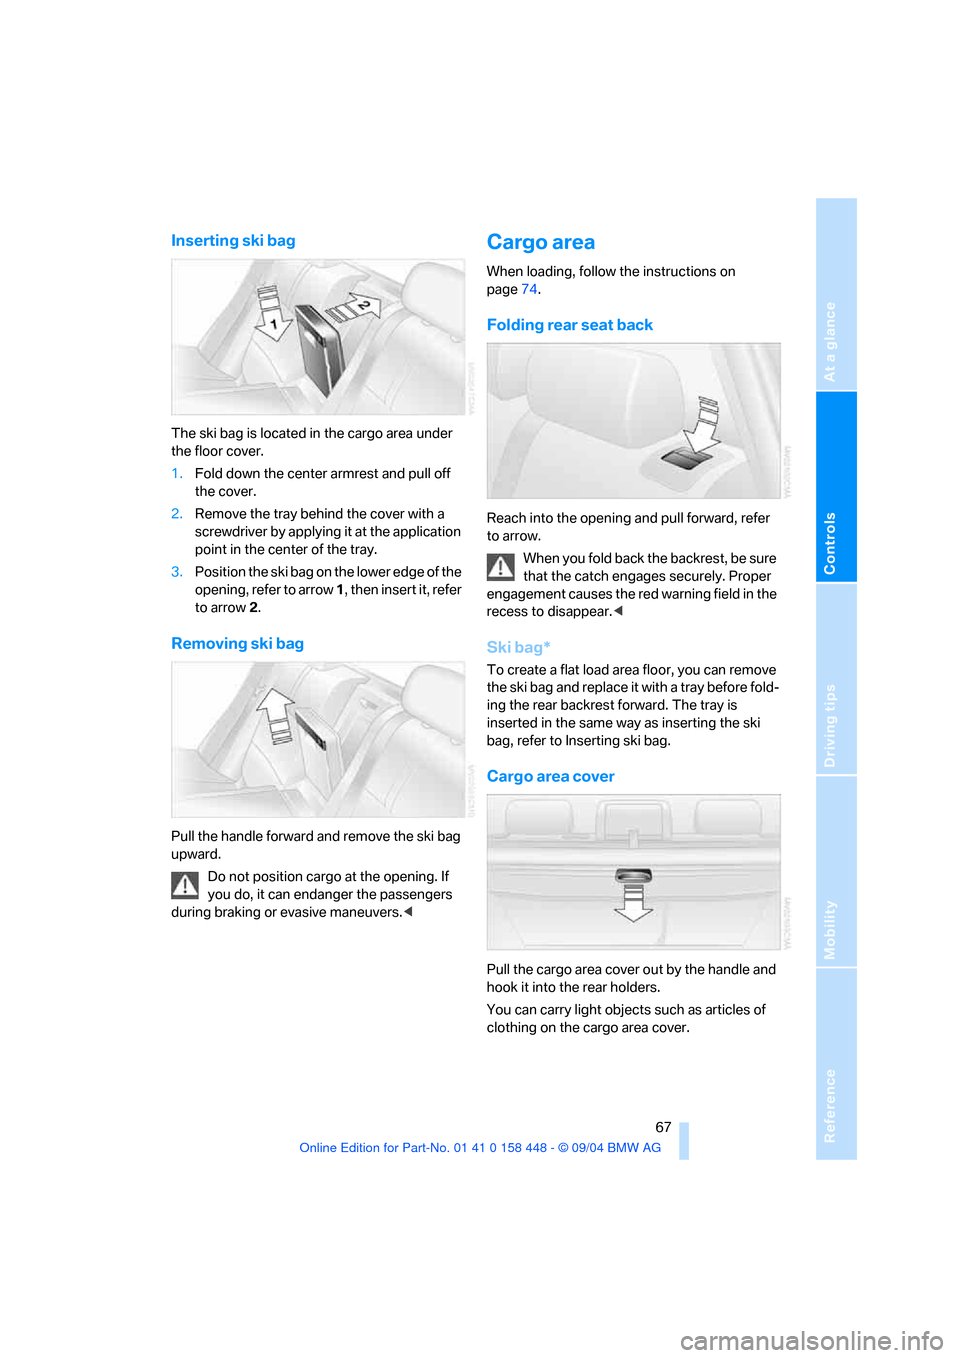
Inserting ski bag
The ski bag is located in the cargo area under
the floor cover.
1.Fold down the center armrest and pull off
the cover.
2.Remove the tray behind the cover with a
screwdriver by applying it at the application
point in the center of the tray.
3.Position the ski bag on the lower edge of the
opening, refer to arrow 1, then insert it, refer
to arrow 2.
Removing ski bag
Pull the handle forward and remove the ski bag
upward.
Do not position cargo at the opening. If
you do, it can endanger the passengers
during braking or evasive maneuvers.<
Cargo area
When loading, follow the instructions on
page74.
Folding rear seat back
Reach into the opening and pull forward, refer
to arrow.
When you fold back the backrest, be sure
that the catch engages securely. Proper
engagement causes the red warning field in the
recess to disappear.<
Ski bag*
To create a flat load area floor, you can remove
the ski bag and replace it with a tray before fold-
ing the rear backrest forward. The tray is
inserted in the same way as inserting the ski
bag, refer to Inserting ski bag.
Cargo area cover
Pull the cargo area cover out by the handle and
hook it into the rear holders.
You can carry light objects such as articles of
clothing on the cargo area cover.
Page 81 of 126
Refueling
80
Refueling
Fuel filler door
Always switch off the engine before refu-
eling, as it is not possible to add fuel with
the engine running, and attempts to do so may
also trigger the Service Engine Soon lamp.<
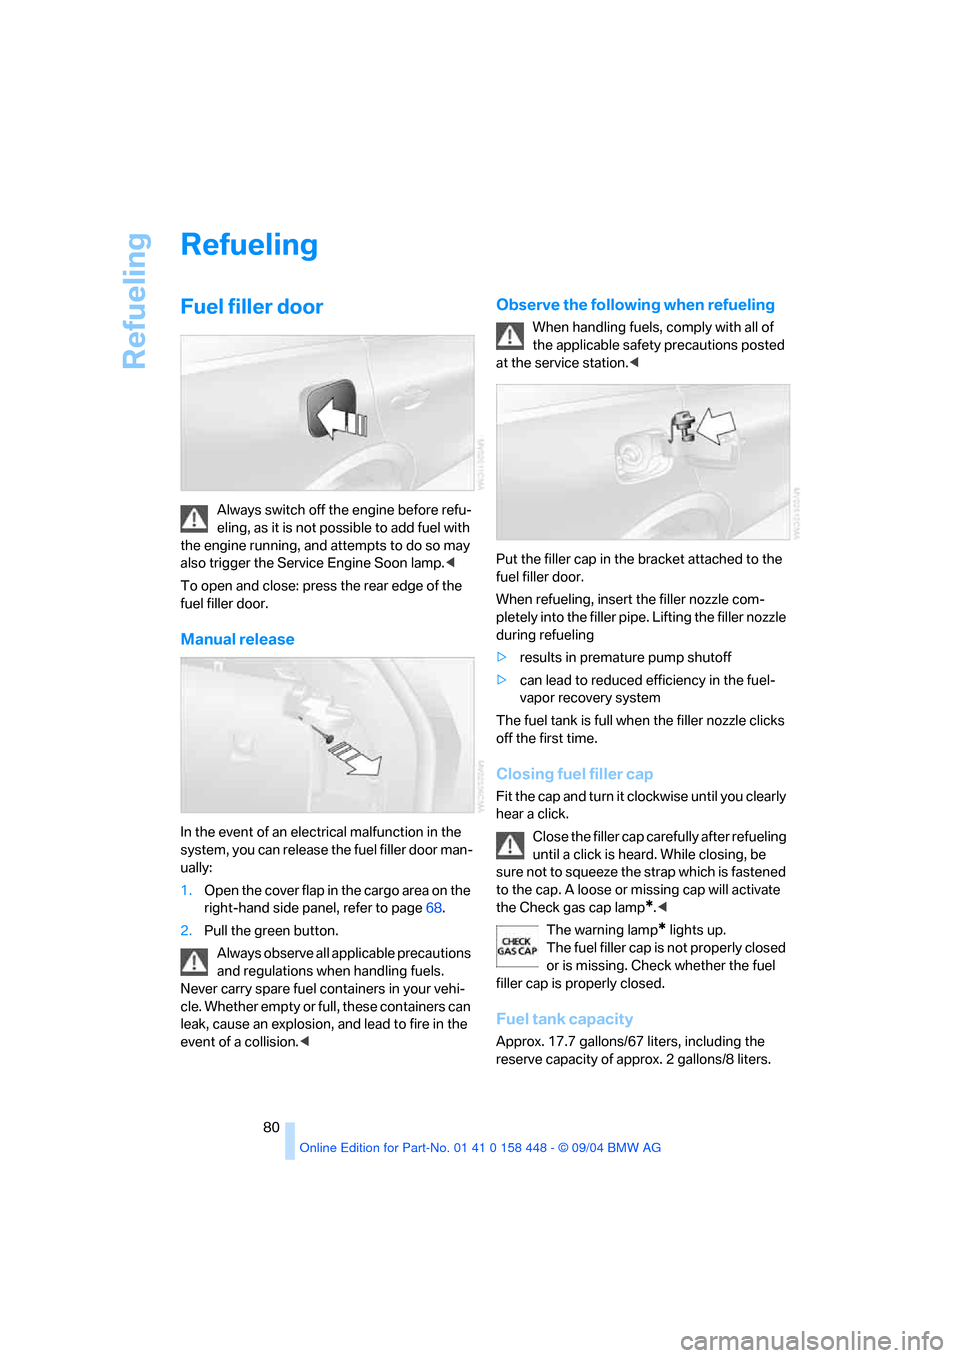
To open and close: press the rear edge of the
fuel filler door.
Manual release
In the event of an electrical malfunction in the
system, you can release the fuel filler door man-
ually:
1.Open the cover flap in the cargo area on the
right-hand side panel, refer to page68.
2.Pull the green button.
Always observe all applicable precautions
and regulations when handling fuels.
Never carry spare fuel containers in your vehi-
cle. Whether empty or full, these containers can
leak, cause an explosion, and lead to fire in the
event of a collision.<
Observe the following when refueling
When handling fuels, comply with all of
the applicable safety precautions posted
at the service station.<
Put the filler cap in the bracket attached to the
fuel filler door.
When refueling, insert the filler nozzle com-
pletely into the filler pipe. Lifting the filler nozzle
during refueling
>results in premature pump shutoff
>can lead to reduced efficiency in the fuel-
vapor recovery system
The fuel tank is full when the filler nozzle clicks
off the first time.
Closing fuel filler cap
Fit the cap and turn it clockwise until you clearly
hear a click.
Close the filler cap carefully after refueling
until a click is heard. While closing, be
sure not to squeeze the strap which is fastened
to the cap. A loose or missing cap will activate
the Check gas cap lamp
*.<
The warning lamp
* lights up.
The fuel filler cap is not properly closed
or is missing. Check whether the fuel
filler cap is properly closed.
Fuel tank capacity
Approx. 17.7 gallons/67 liters, including the
reserve capacity of approx. 2 gallons/8 liters.
Page 91 of 126
Under the hood
90
Washer fluid
Headlamp* and windshield washer
system
The antifreeze for the washer systems is
flammable. For this reason, keep it away
from sources of flame and store it only in its
original containers. Store it so that it is inacces-
sible to children. Always observe the instruc-
tions for use provided on the containers.<
We recommend that you mix the washer
fluid before adding it to the reservoir.<
Capacity of the windshield washer system:
approx. 3.2 US quarts/3 liters.
Capacity for equipment with headlamp washer
system: approx. 6.9 US quarts/6.5 liters.
Fill with water and, if required, with an antifreeze
additive according to manufacturer's recom-
mendations.
Engine oil
Engine oil consumption depends on driving
style and operating conditions.
Warning lamp
Engine oil pressure
The warning lamp lights up red:
Stop the vehicle immediately and
switch off the engine. Check the engine
oil level; top off as required. If the oil level is cor-
rect: have the system checked immediately.
Do not continue driving. The engine could
be damaged because of inadequate lubri-
cation.<
Engine oil level
The warning lamp lights up yellow while
driving:
The oil level is at the absolute mini-
mum. Add engine oil as soon as possible. Until
then, do not drive more than approx. 30 miles/
50 km.
The warning lamp lights up yellow after
the engine is switched off:
Top off engine oil at the earliest oppor-
tunity, e.g. when refueling.
Engine oil sensor
The warning lamp lights up yellow
within 20 seconds after starting the
engine:
The oil level sensor is defective. Have checked
as soon as possible.
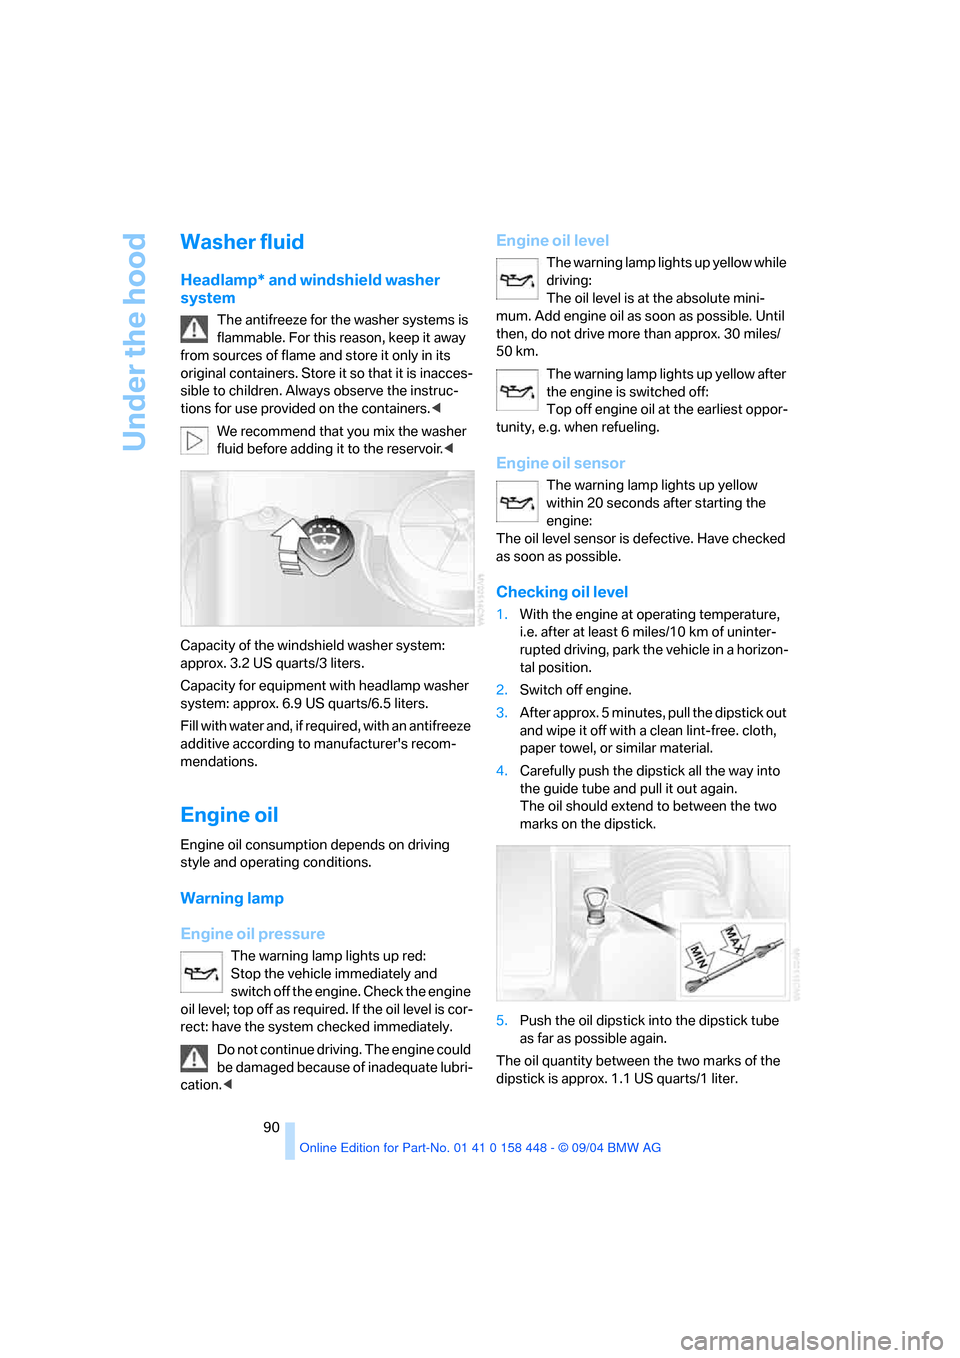
Checking oil level
1.With the engine at operating temperature,
i.e. after at least 6 miles/10 km of uninter-
rupted driving, park the vehicle in a horizon-
tal position.
2.Switch off engine.
3.After approx. 5 minutes, pull the dipstick out
and wipe it off with a clean lint-free. cloth,
paper towel, or similar material.
4.Carefully push the dipstick all the way into
the guide tube and pull it out again.
The oil should extend to between the two
marks on the dipstick.
5.Push the oil dipstick into the dipstick tube
as far as possible again.
The oil quantity between the two marks of the
dipstick is approx. 1.1 US quarts/1 liter.
Page 92 of 126
Reference
At a glance
Controls
Driving tips
Mobility
91
Do not fill beyond the upper mark on the
dipstick. Excess oil can damage the
engine.<
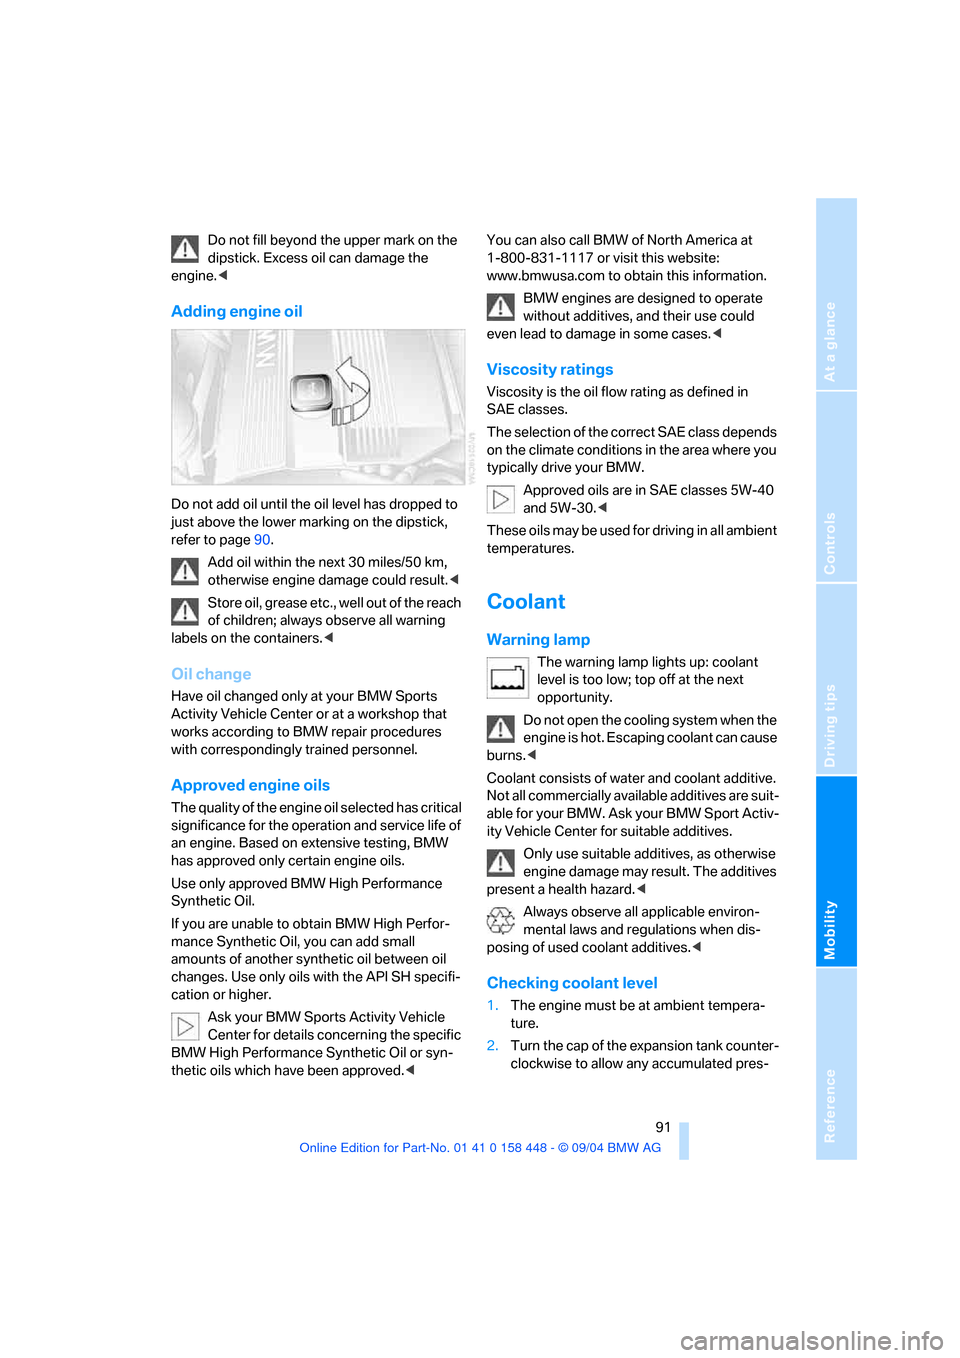
Adding engine oil
Do not add oil until the oil level has dropped to
just above the lower marking on the dipstick,
refer to page90.
Add oil within the next 30 miles/50 km,
otherwise engine damage could result.<
Store oil, grease etc., well out of the reach
of children; always observe all warning
labels on the containers.<
Oil change
Have oil changed only at your BMW Sports
Activity Vehicle Center or at a workshop that
works according to BMW repair procedures
with correspondingly trained personnel.
Approved engine oils
The quality of the engine oil selected has critical
significance for the operation and service life of
an engine. Based on extensive testing, BMW
has approved only certain engine oils.
Use only approved BMW High Performance
Synthetic Oil.
If you are unable to obtain BMW High Perfor-
mance Synthetic Oil, you can add small
amounts of another synthetic oil between oil
changes. Use only oils with the API SH specifi-
cation or higher.
Ask your BMW Sports Activity Vehicle
Center for details concerning the specific
BMW High Performance Synthetic Oil or syn-
thetic oils which have been approved.
www.bmwusa.com to obtain this information.
BMW engines are designed to operate
without additives, and their use could
even lead to damage in some cases.<
Viscosity ratings
Viscosity is the oil flow rating as defined in
SAE classes.
The selection of the correct SAE class depends
on the climate conditions in the area where you
typically drive your BMW.
Approved oils are in SAE classes 5W-40
and 5W-30.<
These oils may be used for driving in all ambient
temperatures.
Coolant
Warning lamp
The warning lamp lights up: coolant
level is too low; top off at the next
opportunity.
Do not open the cooling system when the
engine is hot. Escaping coolant can cause
burns.<
Coolant consists of water and coolant additive.
Not all commercially available additives are suit-
able for your BMW. Ask your BMW Sport Activ-
ity Vehicle Center for suitable additives.
Only use suitable additives, as otherwise
engine damage may result. The additives
present a health hazard.<
Always observe all applicable environ-
mental laws and regulations when dis-
posing of used coolant additives.<
Checking coolant level
1.The engine must be at ambient tempera-
ture.
2.Turn the cap of the expansion tank counter-
clockwise to allow any accumulated pres-
Page 93 of 126
Under the hood
92 sure to escape, then continue turning to
open.
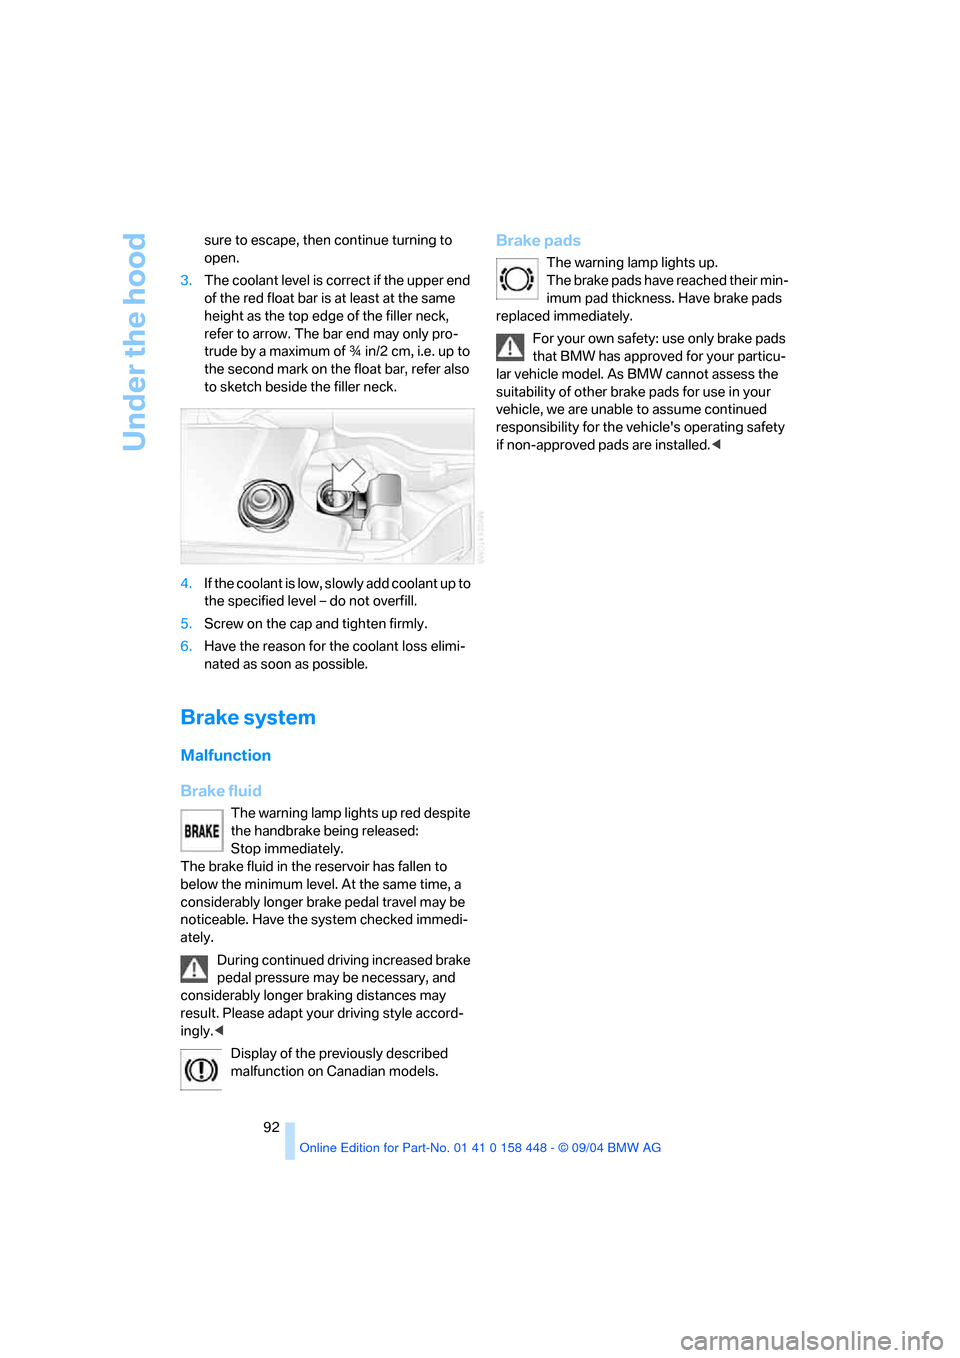
3.The coolant level is correct if the upper end
of the red float bar is at least at the same
height as the top edge of the filler neck,
refer to arrow. The bar end may only pro-
trude by a maximum of ιin/2 cm, i.e. up to
the second mark on the float bar, refer also
to sketch beside the filler neck.
4.If the coolant is low, slowly add coolant up to
the specified level – do not overfill.
5.Screw on the cap and tighten firmly.
6.Have the reason for the coolant loss elimi-
nated as soon as possible.
Brake system
Malfunction
Brake fluid
The warning lamp lights up red despite
the handbrake being released:
Stop immediately.
The brake fluid in the reservoir has fallen to
below the minimum level. At the same time, a
considerably longer brake pedal travel may be
noticeable. Have the system checked immedi-
ately.
During continued driving increased brake
pedal pressure may be necessary, and
considerably longer braking distances may
result. Please adapt your driving style accord-
ingly.<
Display of the previously described
malfunction on Canadian models.
Brake pads
The warning lamp lights up.
The brake pads have reached their min-
imum pad thickness. Have brake pads
replaced immediately.
For your own safety: use only brake pads
that BMW has approved for your particu-
lar vehicle model. As BMW cannot assess the
suitability of other brake pads for use in your
vehicle, we are unable to assume continued
responsibility for the vehicle's operating safety
if non-approved pads are installed.<