Head rest BMW X3 2011 F25 Owner's Manual
[x] Cancel search | Manufacturer: BMW, Model Year: 2011, Model line: X3, Model: BMW X3 2011 F25Pages: 262, PDF Size: 11.2 MB
Page 47 of 262
AdjustingSitting safely
The ideal seating position can make a vital con‐
tribution to relaxed, fatigue-free driving.
The seating position plays an important role in
an accident in combination with:▷Safety belts, refer to page 50.▷Head restraints, refer to page 51.▷Airbags, refer to page 80.
Seats
Adjusting
General information Do not adjust the seat while driving
Never attempt to adjust the driver's seat
while driving.
The seat could respond with unexpected move‐
ment and the ensuing loss of vehicle control
could lead to an accident.◀
Do not incline the backrest too far to the
rear
Do not incline the backrest on the front passen‐
ger side too far to the rear during driving. Oth‐
erwise, there is the danger of sliding under the
safety belt in an accident. This would eliminate
the protection normally provided by the belt.◀
The seat setting is stored for the remote control
currently in use. When the vehicle is unlocked
via the remote control, the position is automati‐
cally retrieved if the setting, refer to page 37, for
this function is active.
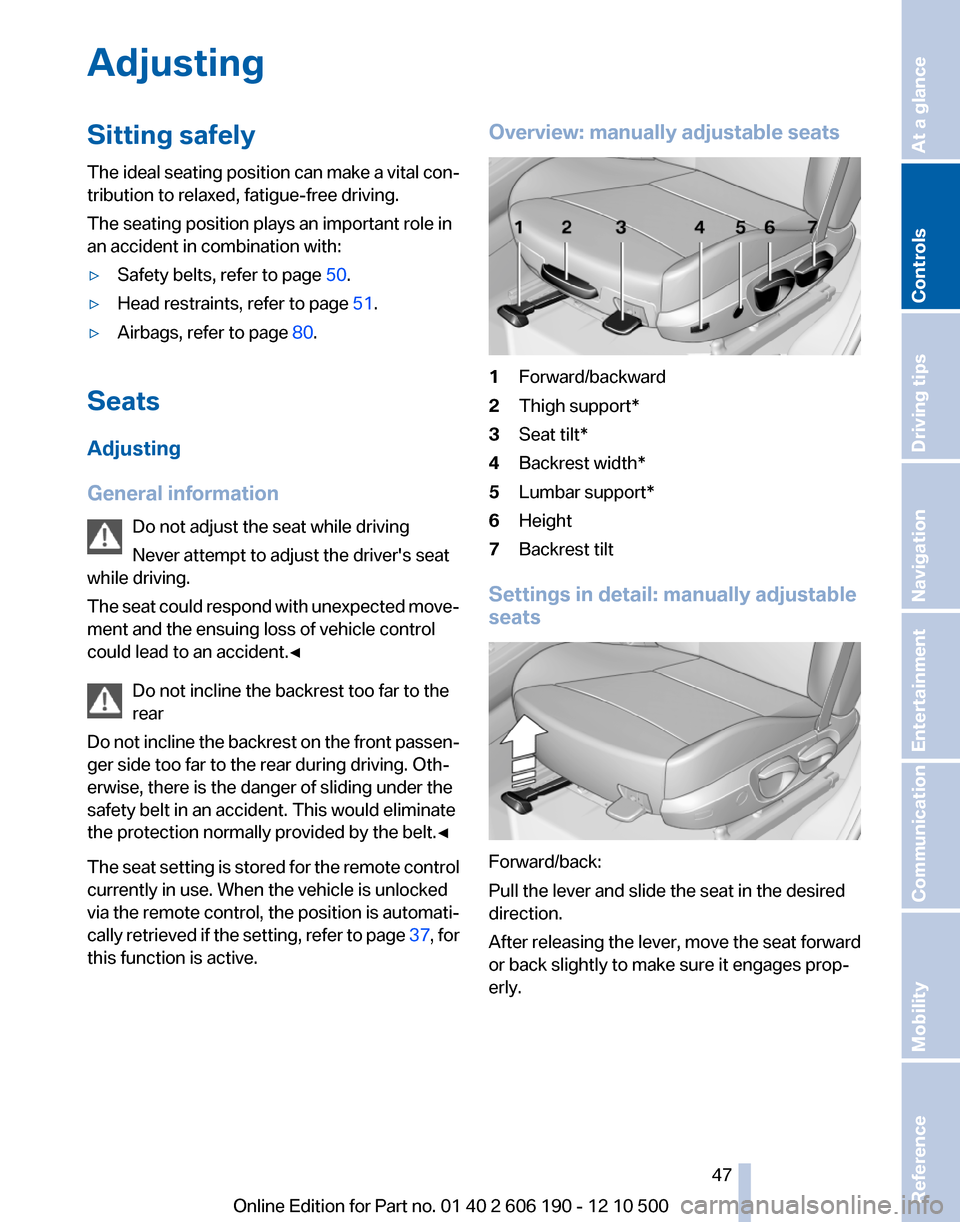
Overview: manually adjustable seats1Forward/backward2Thigh support*3Seat tilt*4Backrest width*5Lumbar support*6Height7Backrest tilt
Settings in detail: manually adjustable
seats
Forward/back:
Pull the lever and slide the seat in the desired
direction.
After releasing the lever, move the seat forward
or back slightly to make sure it engages prop‐
erly.
Seite 4747
Online Edition for Part no. 01 40 2 606 190 - 12 10 500
ReferenceMobilityCommunicationEntertainmentNavigationDriving tipsControlsAt a glance
Page 51 of 262
Unbuckling the belt1.Hold the belt firmly.2.Press the red button in the belt buckle.3.Guide the belt back into its reel.
Safety belt reminder for the driver's and
front passenger seat
The indicator lamp flashes or lights up
and a signal sounds. Make sure that the
safety belts are positioned correctly.
The safety belt reminder is active at speeds
above approx. 5 mph/8 km/h. It can also be ac‐
tivated if objects are placed on the front pas‐
senger seat.
Damage to safety belts
In the case of strain caused by accidents or
damage:
Have the safety belts, including the safety belt
tensioners, replaced and have the belt anchors
checked.
Checking and replacing safety belts
Have the work performed only by your
service center; otherwise, it cannot be ensured
that this safety feature will function properly.◀
Front head restraints
Correctly adjusted head restraint
A correctly adjusted head restraint reduces the
risk of injury to cervical vertebrae in the event of
an accident.
Adjusting the head restraint
Correctly adjust the head restraints of all
occupied seats; otherwise, there is an increased
risk of injury in an accident.◀
Height
Adjust the head restraint so that its center is ap‐
proximately at ear level.
Distance
Adjust the distance so that the head restraint is
as close as possible to the back of the head.
If necessary, adjust the distance by adjusting
the tilt of the backrest.
Active head restraint
In the event of a rear-end collision with a certain
severity, the active head restraint automatically
reduces the distance from the head.
Reduced protective function▷Do not use seat or head restraint cov‐
ers.▷Do not hang objects, e.g., clothes hangers,
on the head restraints.▷Only attach accessories approved by BMW
to the seat or head restraint.
Otherwise, the protective function of the active
head restraint will be impaired and the personal
safety of the occupants will be endangered.◀
Removing
The head restraints cannot be removed.
Rear head restraints
Correctly adjusted head restraint
A correctly adjusted head restraint reduces the
risk of injury to cervical vertebrae in the event of
an accident.
Adjusting the head restraint
Correctly adjust the head restraints of all
occupied seats; otherwise, there is an increased
risk of injury in an accident.◀
Height
Adjust the head restraint so that its center is ap‐
proximately at ear level.
Seite 5151
Online Edition for Part no. 01 40 2 606 190 - 12 10 500
ReferenceMobilityCommunicationEntertainmentNavigationDriving tipsControlsAt a glance
Page 52 of 262
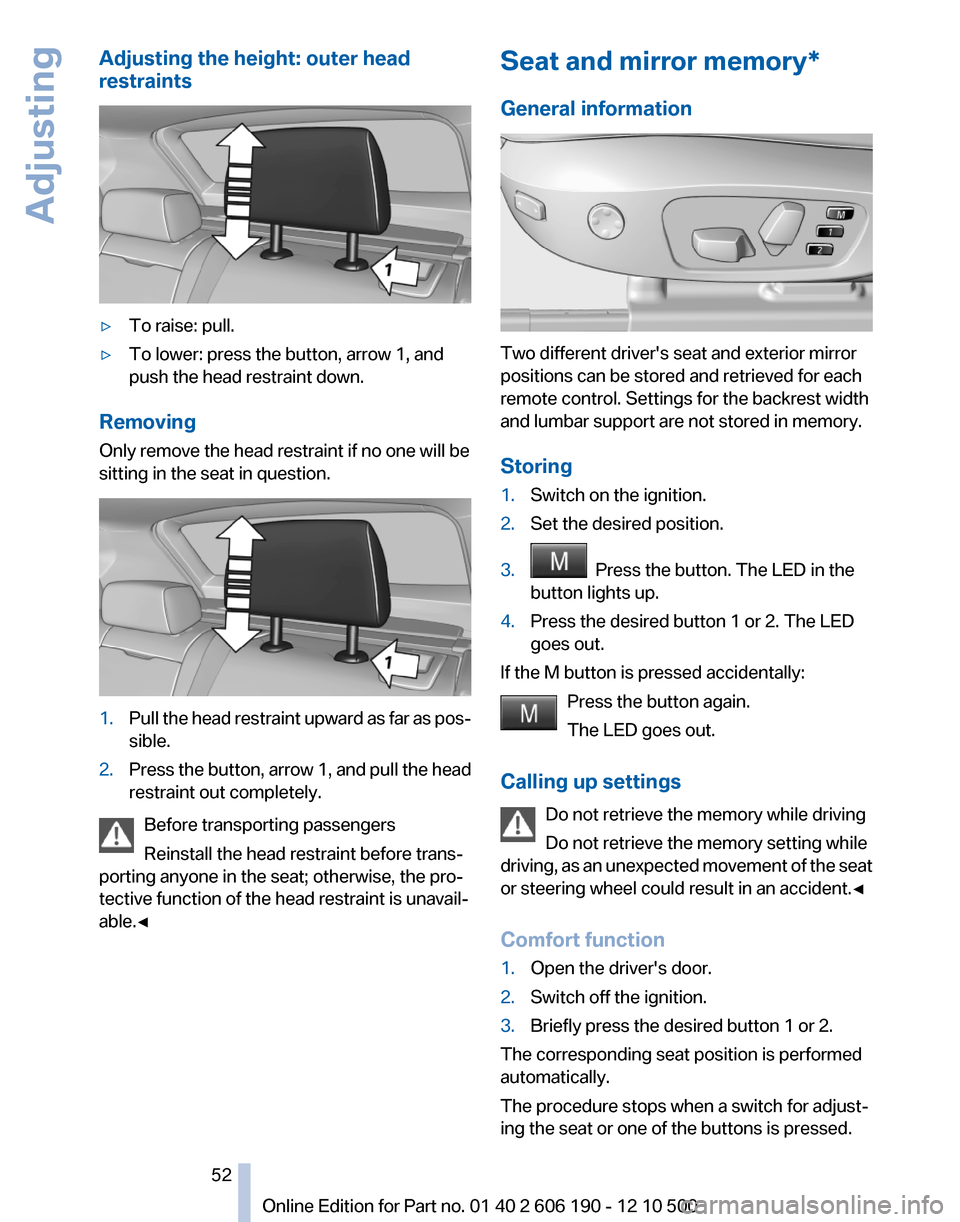
Adjusting the height: outer head
restraints▷To raise: pull.▷To lower: press the button, arrow 1, and
push the head restraint down.
Removing
Only remove the head restraint if no one will be
sitting in the seat in question.
1.Pull the head restraint upward as far as pos‐
sible.2.Press the button, arrow 1, and pull the head
restraint out completely.
Before transporting passengers
Reinstall the head restraint before trans‐
porting anyone in the seat; otherwise, the pro‐
tective function of the head restraint is unavail‐
able.◀
Seat and mirror memory*
General information
Two different driver's seat and exterior mirror
positions can be stored and retrieved for each
remote control. Settings for the backrest width
and lumbar support are not stored in memory.
Storing
1.Switch on the ignition.2.Set the desired position.3. Press the button. The LED in the
button lights up.4.Press the desired button 1 or 2. The LED
goes out.
If the M button is pressed accidentally:
Press the button again.
The LED goes out.
Calling up settings Do not retrieve the memory while driving
Do not retrieve the memory setting while
driving, as an unexpected movement of the seat
or steering wheel could result in an accident.◀
Comfort function
1.Open the driver's door.2.Switch off the ignition.3.Briefly press the desired button 1 or 2.
The corresponding seat position is performed
automatically.
The procedure stops when a switch for adjust‐
ing the seat or one of the buttons is pressed.
Seite 5252
Online Edition for Part no. 01 40 2 606 190 - 12 10 500Adjusting
Page 57 of 262
Child restraint fixing system with a
tether strap
Mounting points
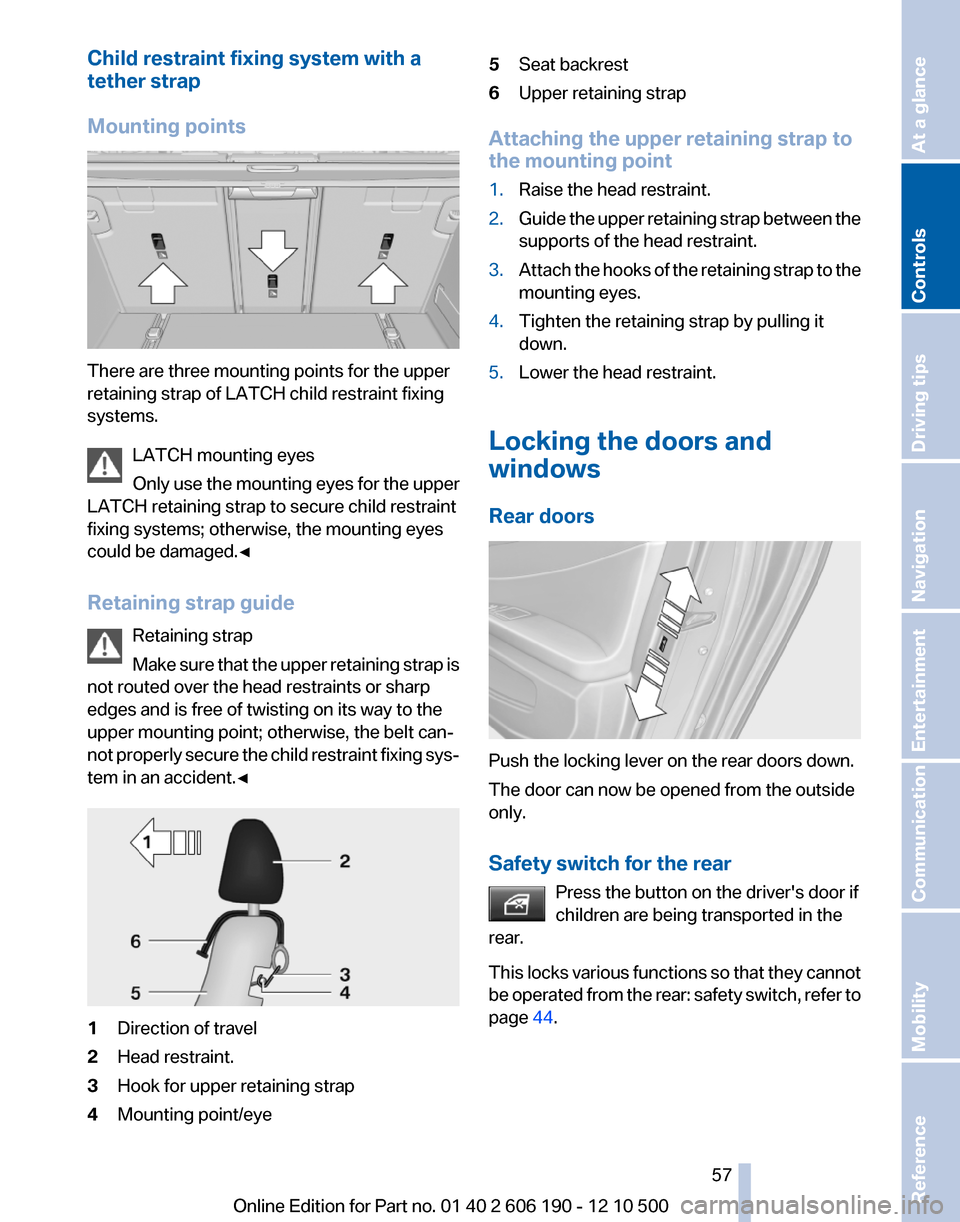
There are three mounting points for the upper
retaining strap of LATCH child restraint fixing
systems.
LATCH mounting eyes
Only use the mounting eyes for the upper
LATCH retaining strap to secure child restraint
fixing systems; otherwise, the mounting eyes
could be damaged.◀
Retaining strap guide Retaining strap
Make sure that the upper retaining strap is
not routed over the head restraints or sharp
edges and is free of twisting on its way to the
upper mounting point; otherwise, the belt can‐
not properly secure the child restraint fixing sys‐
tem in an accident.◀
1Direction of travel2Head restraint.3Hook for upper retaining strap4Mounting point/eye5Seat backrest6Upper retaining strap
Attaching the upper retaining strap to
the mounting point
1.Raise the head restraint.2.Guide the upper retaining strap between the
supports of the head restraint.3.Attach the hooks of the retaining strap to the
mounting eyes.4.Tighten the retaining strap by pulling it
down.5.Lower the head restraint.
Locking the doors and
windows
Rear doors
Push the locking lever on the rear doors down.
The door can now be opened from the outside
only.
Safety switch for the rear Press the button on the driver's door if
children are being transported in the
rear.
This locks various functions so that they cannot
be operated from the rear: safety switch, refer to
page 44.
Seite 5757
Online Edition for Part no. 01 40 2 606 190 - 12 10 500
ReferenceMobilityCommunicationEntertainmentNavigationDriving tipsControlsAt a glance
Page 80 of 262
Safety
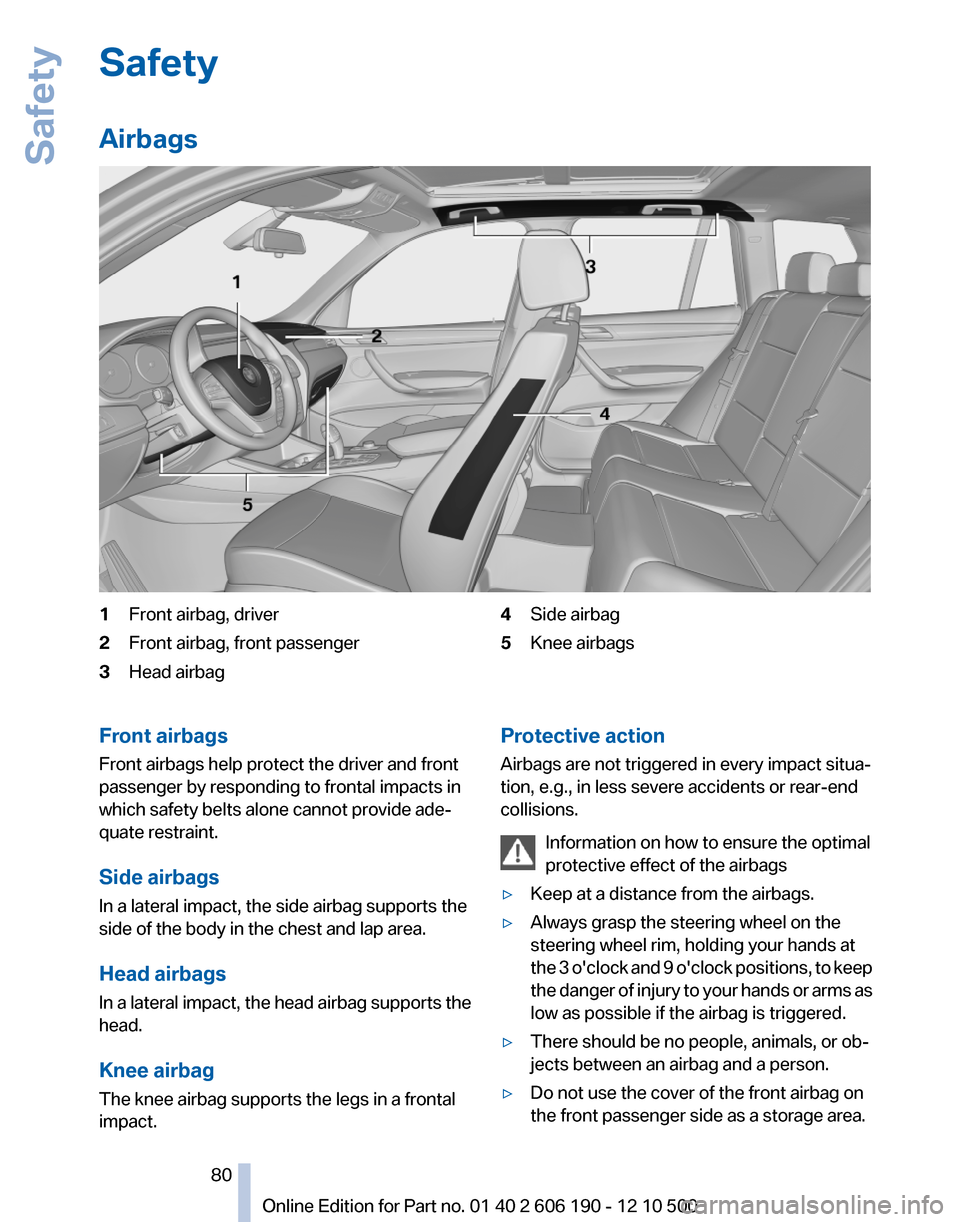
Airbags1Front airbag, driver2Front airbag, front passenger3Head airbag4Side airbag5Knee airbagsFront airbags
Front airbags help protect the driver and front
passenger by responding to frontal impacts in
which safety belts alone cannot provide ade‐
quate restraint.
Side airbags
In a lateral impact, the side airbag supports the
side of the body in the chest and lap area.
Head airbags
In a lateral impact, the head airbag supports the
head.
Knee airbag
The knee airbag supports the legs in a frontal
impact.Protective action
Airbags are not triggered in every impact situa‐
tion, e.g., in less severe accidents or rear-end
collisions.
Information on how to ensure the optimal
protective effect of the airbags▷Keep at a distance from the airbags.▷Always grasp the steering wheel on the
steering wheel rim, holding your hands at
the 3 o'clock and 9 o'clock positions, to keep
the danger of injury to your hands or arms as
low as possible if the airbag is triggered.▷There should be no people, animals, or ob‐
jects between an airbag and a person.▷Do not use the cover of the front airbag on
the front passenger side as a storage area.Seite 8080
Online Edition for Part no. 01 40 2 606 190 - 12 10 500Safety
Page 81 of 262
▷Keep the dashboard and window on the
front passenger side clear, i.e., do not cover
with adhesive labels or coverings, and do not
attach holders such as for navigation instru‐
ments and mobile phones.▷Make sure that the front passenger is sitting
correctly, i.e., keeps his or her feet and legs
in the footwell; otherwise, leg injuries can
occur if the front airbag is triggered.▷Do not place slip covers, seat cushions or
other objects on the front passenger seat
that are not approved specifically for seats
with integrated side airbags.▷Do not hang pieces of clothing, such as jack‐
ets, over the backrests.▷Make sure that occupants keep their heads
away from the side airbag and do not rest
against the head airbag; otherwise, injuries
can occur if the airbags are triggered.▷Do not remove the airbag restraint system.▷Do not remove the steering wheel.▷Do not apply adhesive materials to the air‐
bag cover panels, cover them or modify
them in any way.▷Never modify either the individual compo‐
nents or the wiring in the airbag system. This
also applies to steering wheel covers, the
dashboard, the seats, the roof pillars and the
sides of the headliner.◀
Even when all instructions are followed closely,
injury from contact with the airbags cannot be
ruled out in certain situations.
The ignition and inflation noise may lead to
short-term and, in most cases, temporary hear‐
ing impairment in sensitive individuals.
In the case of a malfunction, deactivation
and after triggering of the airbags
Do not touch the individual components imme‐
diately after the system has been triggered; oth‐
erwise, there is the danger of burns.
Only have the airbags checked, repaired or dis‐
mantled and the airbag generator scrapped by
your service center or a workshop that has the
necessary authorization for handling explosives.
Non-professional attempts to service the sys‐
tem could lead to failure in an emergency or un‐
desired triggering of the airbag, either of which
could result in injury.◀
Warnings and information on the airbags are
also found on the sun visors.
Automatic deactivation of the front
passenger airbags
The system determines whether the front pas‐
senger seat is occupied by measuring the re‐
sistance of the human body.
The front, knee, and side airbag on the front
passenger side are activated or deactivated ac‐
cordingly.
Leave feet in the footwell
Make sure that the front passenger keeps
his or her feet in the footwell; otherwise, the front
passenger airbags may not function properly.◀
Child restraint fixing system in the front
passenger seat
Before transporting a child on the front passen‐
ger seat, see the safety notes and instructions
under Children on the front passenger seat.◀
Malfunction of the automatic
deactivation system
When transporting older children and adults, the
front passenger airbags may be deactivated in
certain sitting positions. In this case, the indica‐
tor lamp for the front passenger airbags lights
up.
In this case, change the sitting position so that
the front passenger airbags are activated and
the indicator lamp goes out.
If it is not possible to activate the airbags, have
the person sit in the rear.
To make sure that the occupied seat cushion
can be evaluated correctly▷Do not attach covers, cushions, ball mats or
other items to the front passenger seat un‐
less they are specifically recommended by
the manufacturer of your vehicle.Seite 8181
Online Edition for Part no. 01 40 2 606 190 - 12 10 500
ReferenceMobilityCommunicationEntertainmentNavigationDriving tipsControlsAt a glance
Page 112 of 262
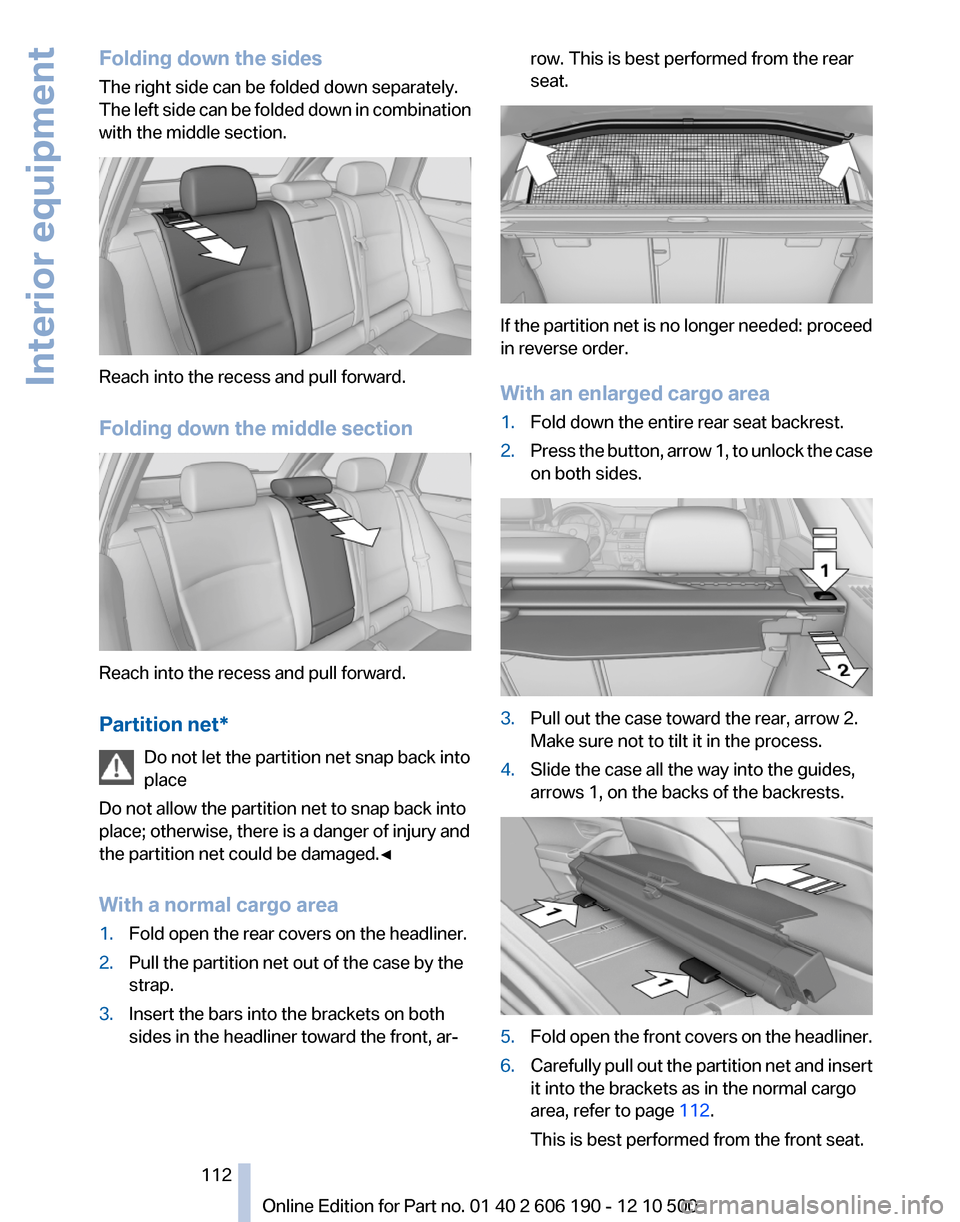
Folding down the sides
The right side can be folded down separately.
The left side can be folded down in combination
with the middle section.
Reach into the recess and pull forward.
Folding down the middle section
Reach into the recess and pull forward.
Partition net* Do not let the partition net snap back into
place
Do not allow the partition net to snap back into
place; otherwise, there is a danger of injury and
the partition net could be damaged.◀
With a normal cargo area
1.Fold open the rear covers on the headliner.2.Pull the partition net out of the case by the
strap.3.Insert the bars into the brackets on both
sides in the headliner toward the front, ar‐row. This is best performed from the rear
seat.
If the partition net is no longer needed: proceed
in reverse order.
With an enlarged cargo area
1.Fold down the entire rear seat backrest.2.Press the button, arrow 1, to unlock the case
on both sides.3.Pull out the case toward the rear, arrow 2.
Make sure not to tilt it in the process.4.Slide the case all the way into the guides,
arrows 1, on the backs of the backrests.5.Fold open the front covers on the headliner.6.Carefully pull out the partition net and insert
it into the brackets as in the normal cargo
area, refer to page 112.
This is best performed from the front seat.Seite 112112
Online Edition for Part no. 01 40 2 606 190 - 12 10 500Interior equipment
Page 167 of 262
Connect the headphones or line-out connector
of the device to the jack plug.
Playback1.Connect the audio device, switch it on and
select a track on the audio device.2."CD/Multimedia"3.If necessary. "External devices".4. "AUX front"
The sound is played back on the vehicle loud‐
speakers.
Volume
The volume of the sound output is dependent
on the audio device. If this volume differs mark‐
edly from the volume of the other audio sources,
it is advisable to adjust the volumes.
Adjusting the volume
1."CD/Multimedia"2.If necessary. "External devices".3. "AUX front"4."Volume"5.Turn the controller until the desired volume
is set and press the controller.
USB audio interface*/mobile phone
audio interface*
At a glance
It is possible to connect external audio devices.
They can be operated via iDrive. The sound is
output on the vehicle loudspeakers.
Connectors for external devices▷Connection via USB audio interface: Apple
iPod/iPhone, USB devices, e.g., MP3 play‐
ers, USB flash drives, or mobile phones that
are supported by the USB audio interface.▷Connection via snap-in adapter when equip‐
ped with extended connectivity of the music
player in the mobile phone: Apple iPhone or
mobile phones.
Playback might only be possible if no con‐
nector is plugged into the USB audio inter‐
face.
Due to the large number of different audio devi‐
ces available on the market, it cannot be ensured
that every audio device/mobile phone is opera‐
ble on the vehicle.
Ask your service center about suitable audio de‐
vices/mobile phones.
Audio files
Standard audio files can be played back:
▷MP3.▷WMA.▷WAV (PCM).▷AAC*, M4A*.▷Playback lists: M3U, WPL*, PLS*.
Connection of Apple iPod/iPhone via
USB audio interface
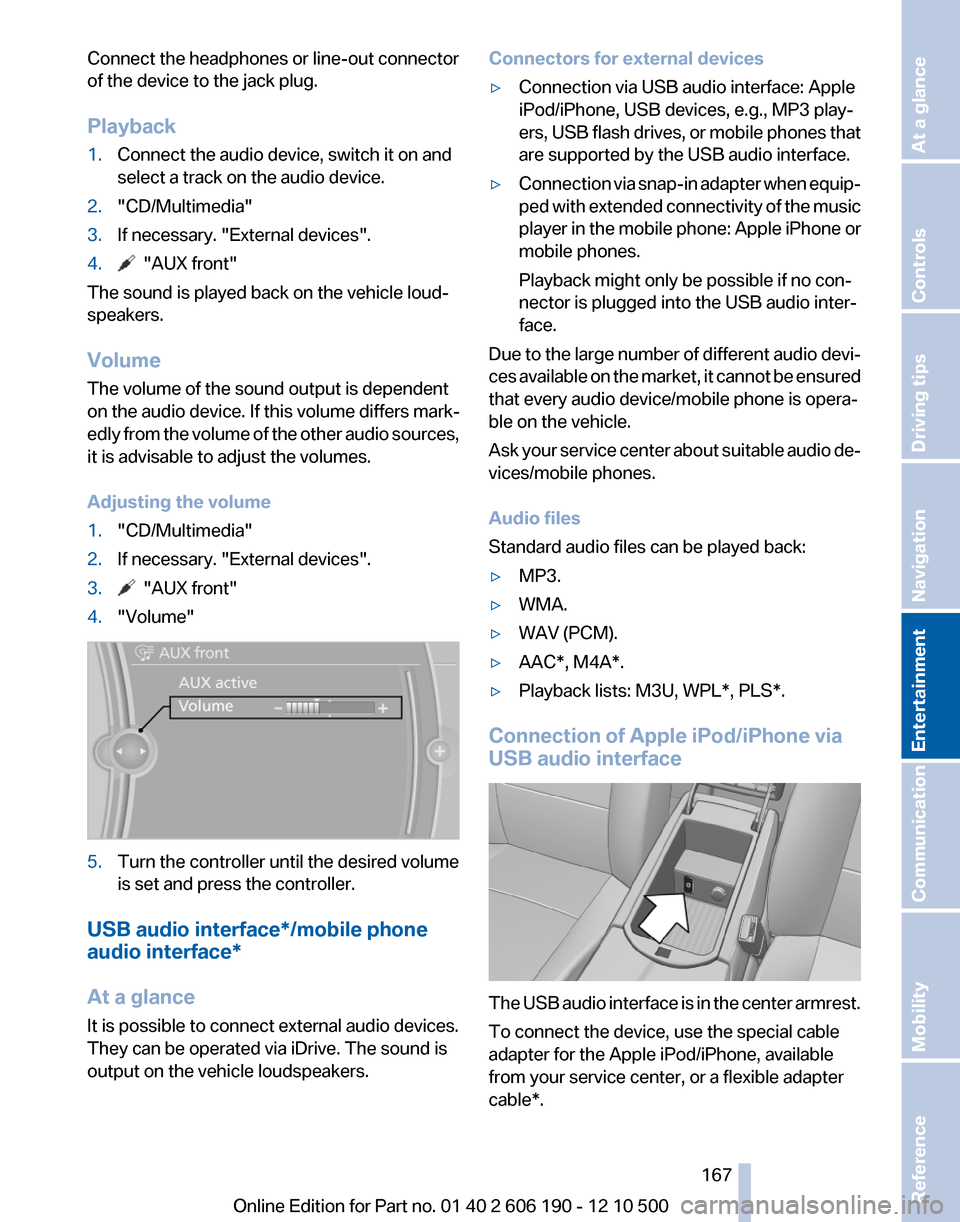
The USB audio interface is in the center armrest.
To connect the device, use the special cable
adapter for the Apple iPod/iPhone, available
from your service center, or a flexible adapter
cable*.
Seite 167167
Online Edition for Part no. 01 40 2 606 190 - 12 10 500
ReferenceMobilityCommunicationEntertainmentNavigationDriving tipsControlsAt a glance
Page 252 of 262
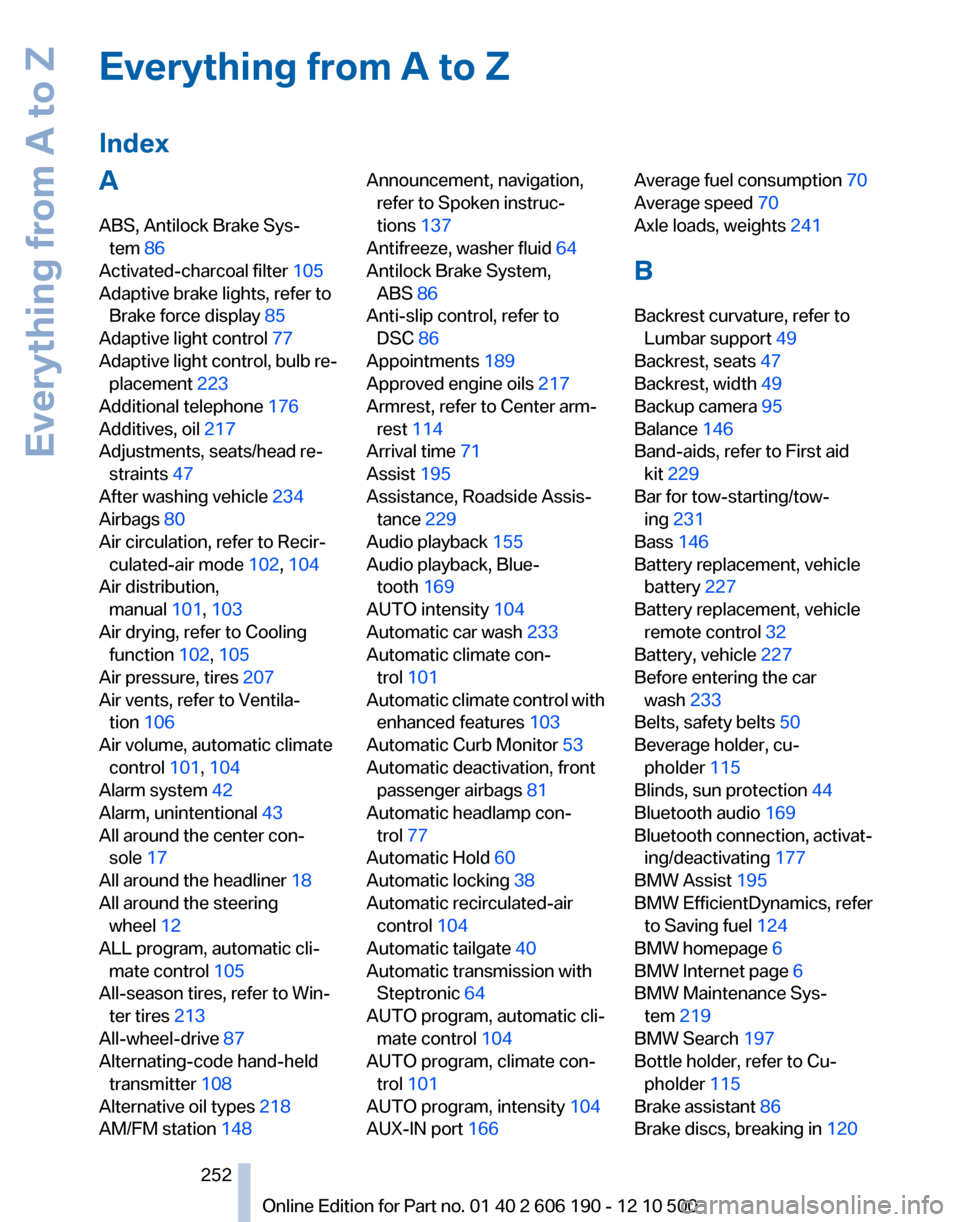
Everything from A to Z
IndexA
ABS, Antilock Brake Sys‐ tem 86
Activated-charcoal filter 105
Adaptive brake lights, refer to Brake force display 85
Adaptive light control 77
Adaptive light control, bulb re‐ placement 223
Additional telephone 176
Additives, oil 217
Adjustments, seats/head re‐ straints 47
After washing vehicle 234
Airbags 80
Air circulation, refer to Recir‐ culated-air mode 102, 104
Air distribution, manual 101, 103
Air drying, refer to Cooling function 102, 105
Air pressure, tires 207
Air vents, refer to Ventila‐ tion 106
Air volume, automatic climate control 101, 104
Alarm system 42
Alarm, unintentional 43
All around the center con‐ sole 17
All around the headliner 18
All around the steering wheel 12
ALL program, automatic cli‐ mate control 105
All-season tires, refer to Win‐ ter tires 213
All-wheel-drive 87
Alternating-code hand-held transmitter 108
Alternative oil types 218
AM/FM station 148 Announcement, navigation,
refer to Spoken instruc‐
tions 137
Antifreeze, washer fluid 64
Antilock Brake System, ABS 86
Anti-slip control, refer to DSC 86
Appointments 189
Approved engine oils 217
Armrest, refer to Center arm‐ rest 114
Arrival time 71
Assist 195
Assistance, Roadside Assis‐ tance 229
Audio playback 155
Audio playback, Blue‐ tooth 169
AUTO intensity 104
Automatic car wash 233
Automatic climate con‐ trol 101
Automatic climate control with enhanced features 103
Automatic Curb Monitor 53
Automatic deactivation, front passenger airbags 81
Automatic headlamp con‐ trol 77
Automatic Hold 60
Automatic locking 38
Automatic recirculated-air control 104
Automatic tailgate 40
Automatic transmission with Steptronic 64
AUTO program, automatic cli‐ mate control 104
AUTO program, climate con‐ trol 101
AUTO program, intensity 104
AUX-IN port 166 Average fuel consumption 70
Average speed 70
Axle loads, weights 241
B
Backrest curvature, refer to Lumbar support 49
Backrest, seats 47
Backrest, width 49
Backup camera 95
Balance 146
Band-aids, refer to First aid kit 229
Bar for tow-starting/tow‐ ing 231
Bass 146
Battery replacement, vehicle battery 227
Battery replacement, vehicle remote control 32
Battery, vehicle 227
Before entering the car wash 233
Belts, safety belts 50
Beverage holder, cu‐ pholder 115
Blinds, sun protection 44
Bluetooth audio 169
Bluetooth connection, activat‐ ing/deactivating 177
BMW Assist 195
BMW EfficientDynamics, refer to Saving fuel 124
BMW homepage 6
BMW Internet page 6
BMW Maintenance Sys‐ tem 219
BMW Search 197
Bottle holder, refer to Cu‐ pholder 115
Brake assistant 86
Brake discs, breaking in 120 Seite 252252
Online Edition for Part no. 01 40 2 606 190 - 12 10 500Everything from A to Z
Page 255 of 262
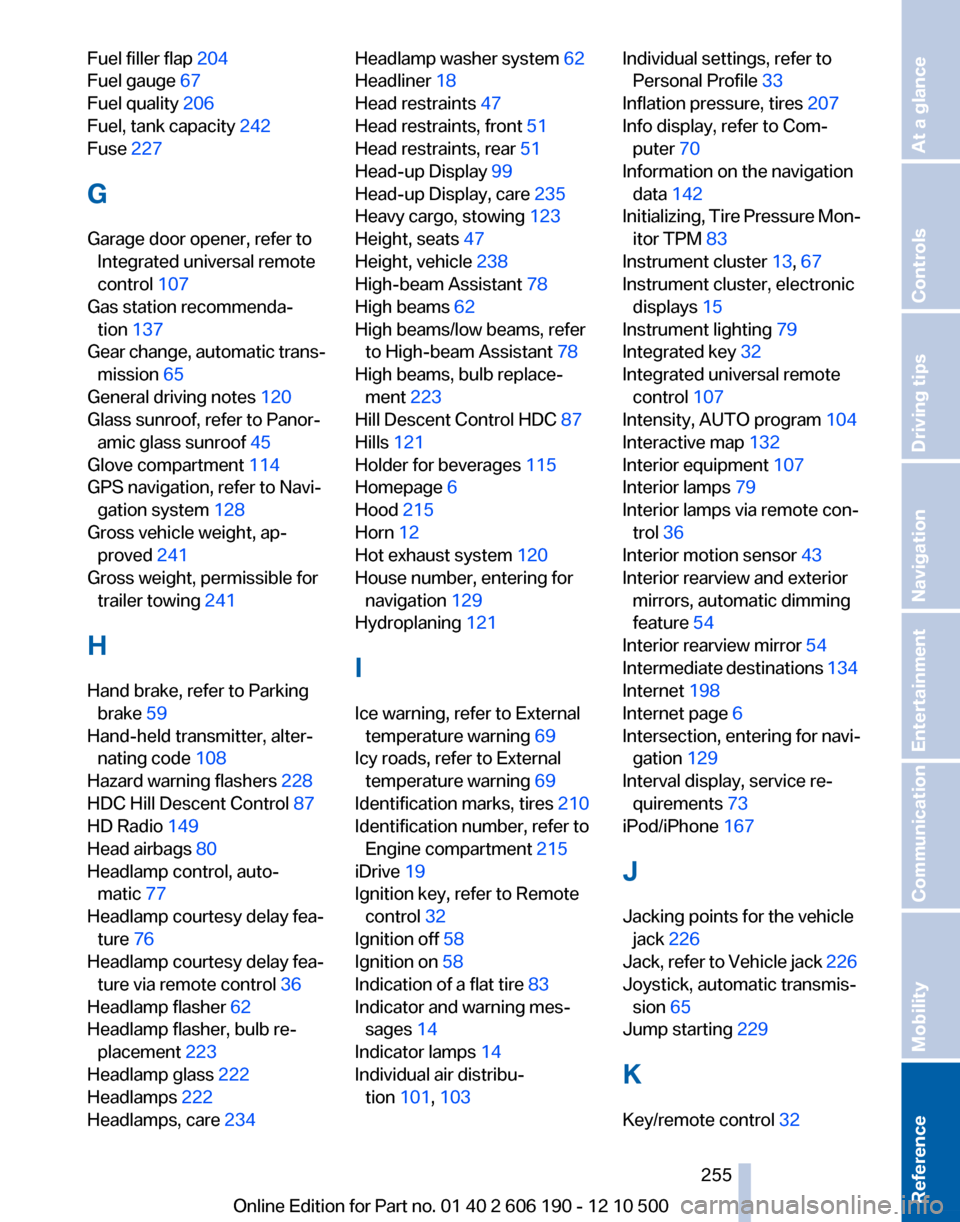
Fuel filler flap 204
Fuel gauge 67
Fuel quality 206
Fuel, tank capacity 242
Fuse 227
G
Garage door opener, refer to Integrated universal remote
control 107
Gas station recommenda‐ tion 137
Gear change, automatic trans‐ mission 65
General driving notes 120
Glass sunroof, refer to Panor‐ amic glass sunroof 45
Glove compartment 114
GPS navigation, refer to Navi‐ gation system 128
Gross vehicle weight, ap‐ proved 241
Gross weight, permissible for trailer towing 241
H
Hand brake, refer to Parking brake 59
Hand-held transmitter, alter‐ nating code 108
Hazard warning flashers 228
HDC Hill Descent Control 87
HD Radio 149
Head airbags 80
Headlamp control, auto‐ matic 77
Headlamp courtesy delay fea‐ ture 76
Headlamp courtesy delay fea‐ ture via remote control 36
Headlamp flasher 62
Headlamp flasher, bulb re‐ placement 223
Headlamp glass 222
Headlamps 222
Headlamps, care 234 Headlamp washer system 62
Headliner 18
Head restraints 47
Head restraints, front 51
Head restraints, rear 51
Head-up Display 99
Head-up Display, care 235
Heavy cargo, stowing 123
Height, seats 47
Height, vehicle 238
High-beam Assistant 78
High beams 62
High beams/low beams, refer to High-beam Assistant 78
High beams, bulb replace‐ ment 223
Hill Descent Control HDC 87
Hills 121
Holder for beverages 115
Homepage 6
Hood 215
Horn 12
Hot exhaust system 120
House number, entering for navigation 129
Hydroplaning 121
I
Ice warning, refer to External temperature warning 69
Icy roads, refer to External temperature warning 69
Identification marks, tires 210
Identification number, refer to Engine compartment 215
iDrive 19
Ignition key, refer to Remote control 32
Ignition off 58
Ignition on 58
Indication of a flat tire 83
Indicator and warning mes‐ sages 14
Indicator lamps 14
Individual air distribu‐ tion 101, 103 Individual settings, refer to
Personal Profile 33
Inflation pressure, tires 207
Info display, refer to Com‐ puter 70
Information on the navigation data 142
Initializing, Tire Pressure Mon‐ itor TPM 83
Instrument cluster 13, 67
Instrument cluster, electronic displays 15
Instrument lighting 79
Integrated key 32
Integrated universal remote control 107
Intensity, AUTO program 104
Interactive map 132
Interior equipment 107
Interior lamps 79
Interior lamps via remote con‐ trol 36
Interior motion sensor 43
Interior rearview and exterior mirrors, automatic dimming
feature 54
Interior rearview mirror 54
Intermediate destinations 134
Internet 198
Internet page 6
Intersection, entering for navi‐ gation 129
Interval display, service re‐ quirements 73
iPod/iPhone 167
J
Jacking points for the vehicle jack 226
Jack, refer to Vehicle jack 226
Joystick, automatic transmis‐ sion 65
Jump starting 229
K
Key/remote control 32 Seite 255255
Online Edition for Part no. 01 40 2 606 190 - 12 10 500
ReferenceMobilityCommunicationEntertainmentNavigationDriving tipsControlsAt a glance