language BMW X3 2011 F25 Owner's Manual
[x] Cancel search | Manufacturer: BMW, Model Year: 2011, Model line: X3, Model: BMW X3 2011 F25Pages: 262, PDF Size: 11.2 MB
Page 24 of 262
Deleting the button assignments1.Press buttons 1 and 8 simultaneously for
approx. five seconds.2."OK"
Entering letters and numbers
1.Turn the controller: select letters or num‐
bers.2.Select additional letters or numbers if
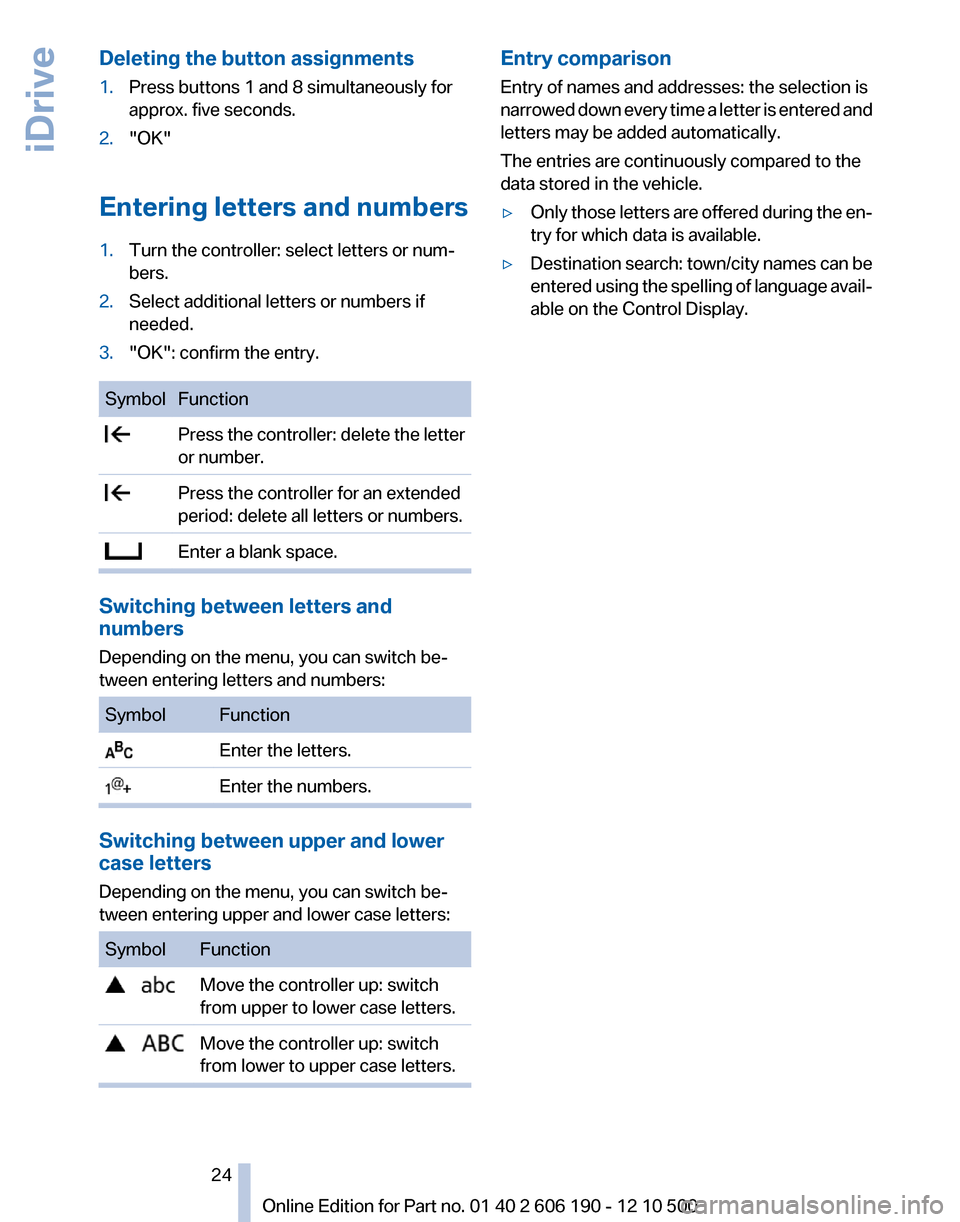
needed.3."OK": confirm the entry.SymbolFunction Press the controller: delete the letter
or number. Press the controller for an extended
period: delete all letters or numbers. Enter a blank space.
Switching between letters and
numbers
Depending on the menu, you can switch be‐
tween entering letters and numbers:
SymbolFunction Enter the letters. Enter the numbers.
Switching between upper and lower
case letters
Depending on the menu, you can switch be‐
tween entering upper and lower case letters:
SymbolFunction Move the controller up: switch
from upper to lower case letters. Move the controller up: switch
from lower to upper case letters.Entry comparison
Entry of names and addresses: the selection is
narrowed down every time a letter is entered and
letters may be added automatically.
The entries are continuously compared to the
data stored in the vehicle.▷Only those letters are offered during the en‐
try for which data is available.▷Destination search: town/city names can be
entered using the spelling of language avail‐
able on the Control Display.Seite 2424
Online Edition for Part no. 01 40 2 606 190 - 12 10 500iDrive
Page 25 of 262
Voice activation system*The concept▷The voice activation system can be used to
operate functions by means of spoken com‐
mands.▷Most menu items on the Control Display can
be voiced as commands. The system
prompts you to make your entries.▷Functions that can only be used when the
vehicle is stationary cannot be operated us‐
ing the voice activation system.▷The system uses a special microphone on
the driver's side.▷›...‹ Verbal instructions in the Owner's
Manual to use with the voice activation sys‐
tem.
Requirements
Via the Control Display, set a language that is
also supported by the voice activation system
so that the spoken commands can be identified.
Set the language, refer to page 73.
Using voice activation
Activating the voice activation system
1. Press the button on the steering
wheel.2.Wait for the signal.3.Say the command.
The command is displayed in the instrument
cluster.
This symbol in the instrument cluster indi‐
cates that the voice activation system is active.
If no other commands are available, continue
operating the function via iDrive.
Terminating the voice activation
system
Briefly press the button on the steering wheel
or ›Cancel‹.
Possible commands
Having possible commands read aloud
The commands available in each case depend
on the menu item selected on the Control Dis‐
play.
To have the available commands read out
loud: ›Voice commands‹
For example, if the "Settings" menu is displayed,
the commands for the settings are read out loud.
Help on the voice activation system
To have the information in the help system read
out loud: ›Help‹
Executing functions using short
commands
Functions on the main menu can be performed
directly by means of short commands, irrespec‐
tive of which menu item is currently selected,
e.g., ›Vehicle status‹.
List of short commands of the voice activation
system, refer to page 243.
Example: playing back a CD1.Switch on the Entertainment sound output
if necessary.2. Press the button on the steering
wheel.3.›C D and multimedia‹
The medium last played is played back.Seite 2525
Online Edition for Part no. 01 40 2 606 190 - 12 10 500
ReferenceMobilityCommunicationEntertainmentNavigationDriving tipsControlsAt a glance
Page 26 of 262
4. Press the button on the steering
wheel.5.›C D track ...‹ e.g., CD track 4.
Setting the voice dialog
You can set whether the system should use the
standard dialog or a shorter version.
In the shorter variant of the voice dialog, the an‐
nouncements from the system are issued in an
abbreviated form.
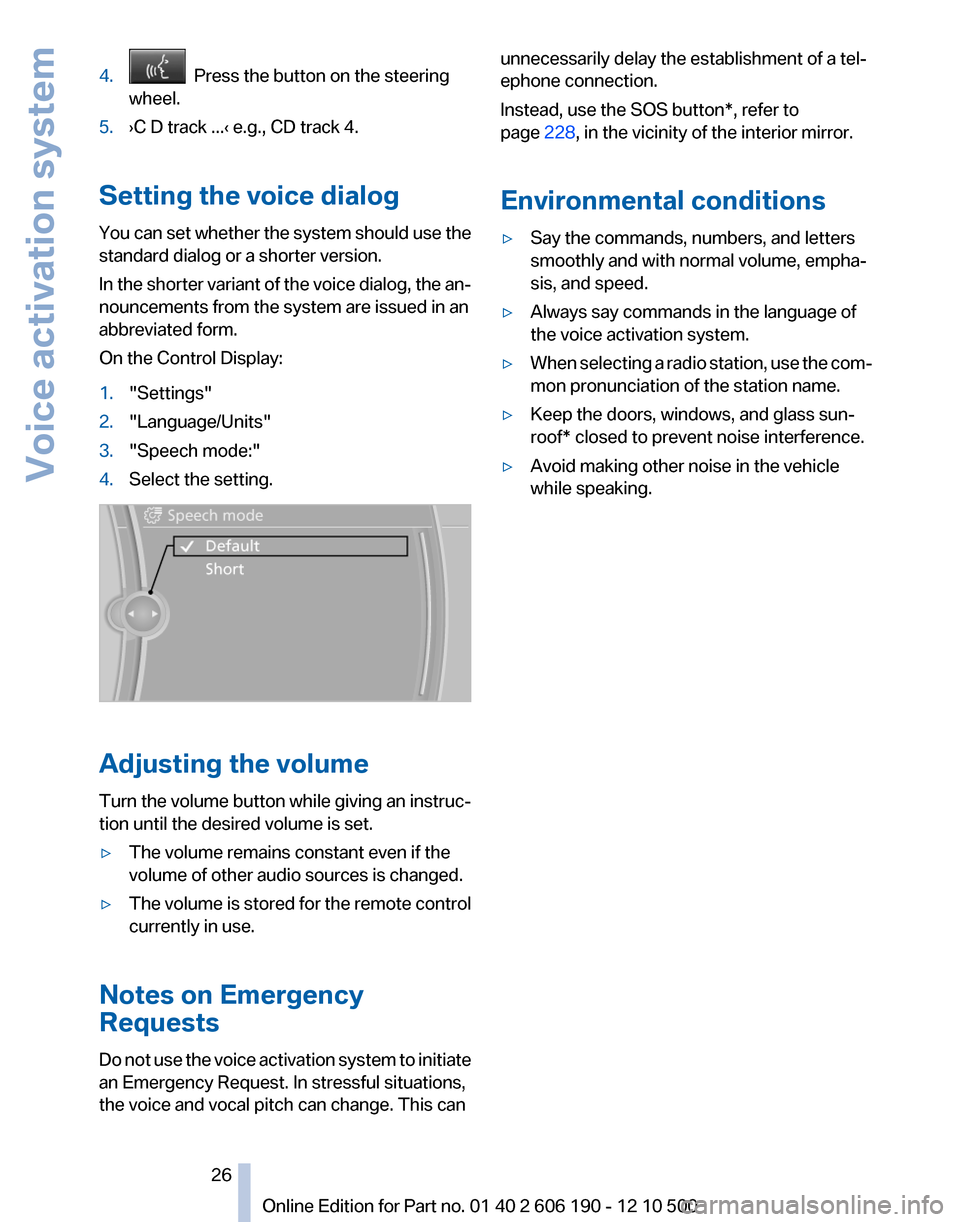
On the Control Display:
1."Settings"2."Language/Units"3."Speech mode:"4.Select the setting.
Adjusting the volume
Turn the volume button while giving an instruc‐
tion until the desired volume is set.
▷The volume remains constant even if the
volume of other audio sources is changed.▷The volume is stored for the remote control
currently in use.
Notes on Emergency
Requests
Do not use the voice activation system to initiate
an Emergency Request. In stressful situations,
the voice and vocal pitch can change. This can
unnecessarily delay the establishment of a tel‐
ephone connection.
Instead, use the SOS button*, refer to
page 228, in the vicinity of the interior mirror.
Environmental conditions▷Say the commands, numbers, and letters
smoothly and with normal volume, empha‐
sis, and speed.▷Always say commands in the language of
the voice activation system.▷When selecting a radio station, use the com‐
mon pronunciation of the station name.▷Keep the doors, windows, and glass sun‐
roof* closed to prevent noise interference.▷Avoid making other noise in the vehicle
while speaking.Seite 2626
Online Edition for Part no. 01 40 2 606 190 - 12 10 500Voice activation system
Page 35 of 262
▷Driver's seat position, refer to page 37: au‐
tomatically retrieved after unlocking.▷Programmable memory buttons, refer to
page 23: assignment.▷Head-up Display*, refer to page 99: selec‐
tion, brightness and position of the display.▷Headlamp courtesy delay feature, refer to
page 76: time setting.▷Tone, refer to page 146: tone settings.▷Automatic climate control/Automatic cli‐
mate control with enhanced features *, refer
to page 101: settings.▷Navigation*, refer to page 128: map views,
route criteria, voice output on/off.▷PDC Park Distance Control*: adjusting the
volume of the signal tone, refer to
page 93.▷Radio: stored stations, station listened to
last, special settings, refer to page 148.▷Backup camera*, refer to page 95: selec‐
tion of functions and type of display.▷Language on the Control Display, refer to
page 73.▷Triple turn signal activation, refer to
page 62.▷Daytime running lights*, refer to page 77:
current setting.▷Locking the vehicle, refer to page 36: after
a brief period or after starting to drive.
Central locking system
The concept
The central locking system becomes active
when the driver's door is closed.
The system simultaneously engages and re‐
leases the locks on the following:
▷Doors.▷Tailgate.▷Fuel filler flap.Operating from the outside▷Via the remote control.▷Via the driver's door lock*.▷Via the door handles of the driver's and front
passenger doors*.▷Via the button on the tailgate*.
The following takes place simultaneously when
locking/unlocking the vehicle via the remote
control:
▷Anti-theft protection is switched on/off.
Doors cannot be unlocked using the lock
buttons or the door opener.▷The welcome lamps, interior lamps and
courtesy lamps* are switched on and off.▷The alarm system*, refer to page 42, is
armed or disarmed.
Operating from the inside
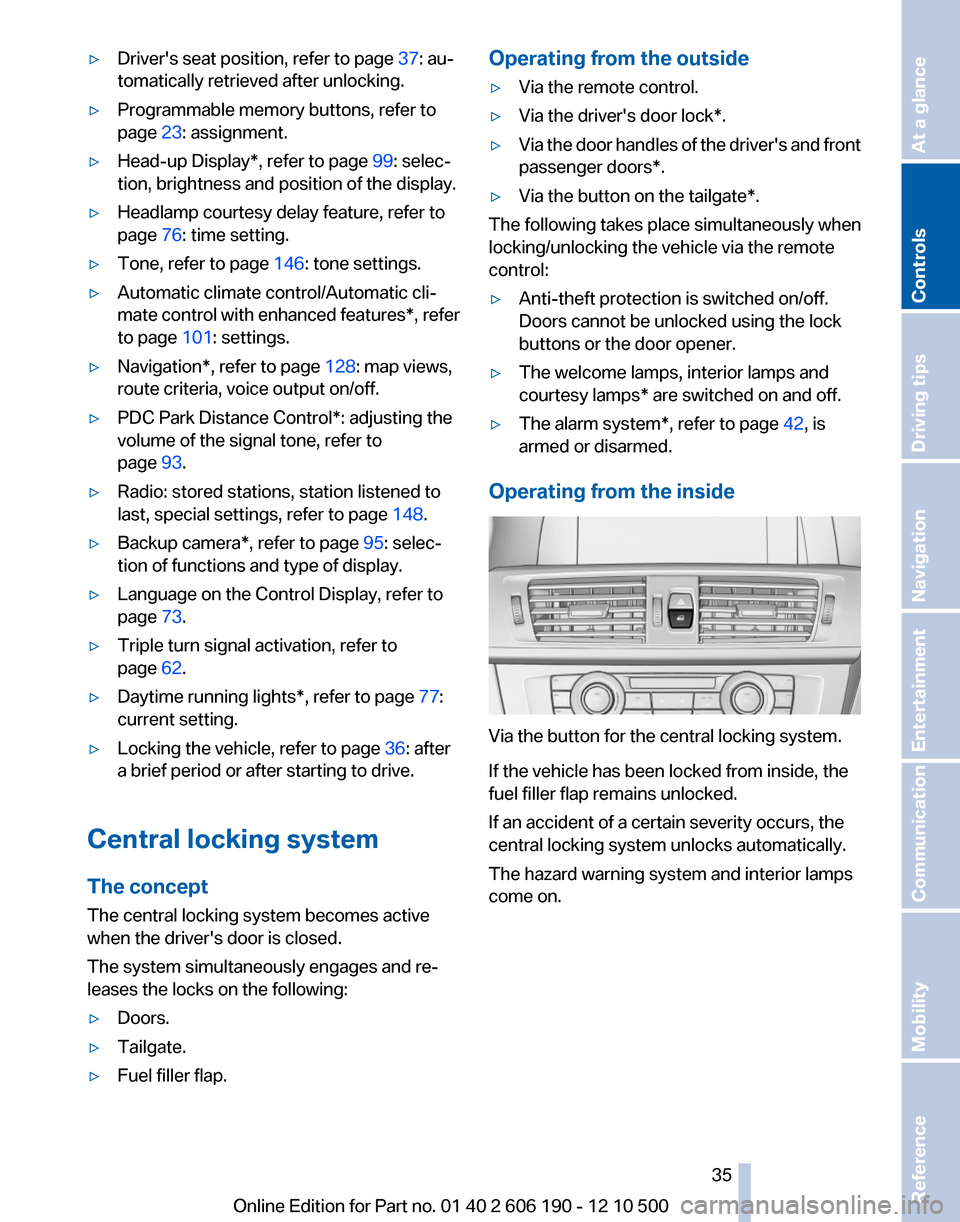
Via the button for the central locking system.
If the vehicle has been locked from inside, the
fuel filler flap remains unlocked.
If an accident of a certain severity occurs, the
central locking system unlocks automatically.
The hazard warning system and interior lamps
come on.
Seite 3535
Online Edition for Part no. 01 40 2 606 190 - 12 10 500
ReferenceMobilityCommunicationEntertainmentNavigationDriving tipsControlsAt a glance
Page 73 of 262
The date format is stored.
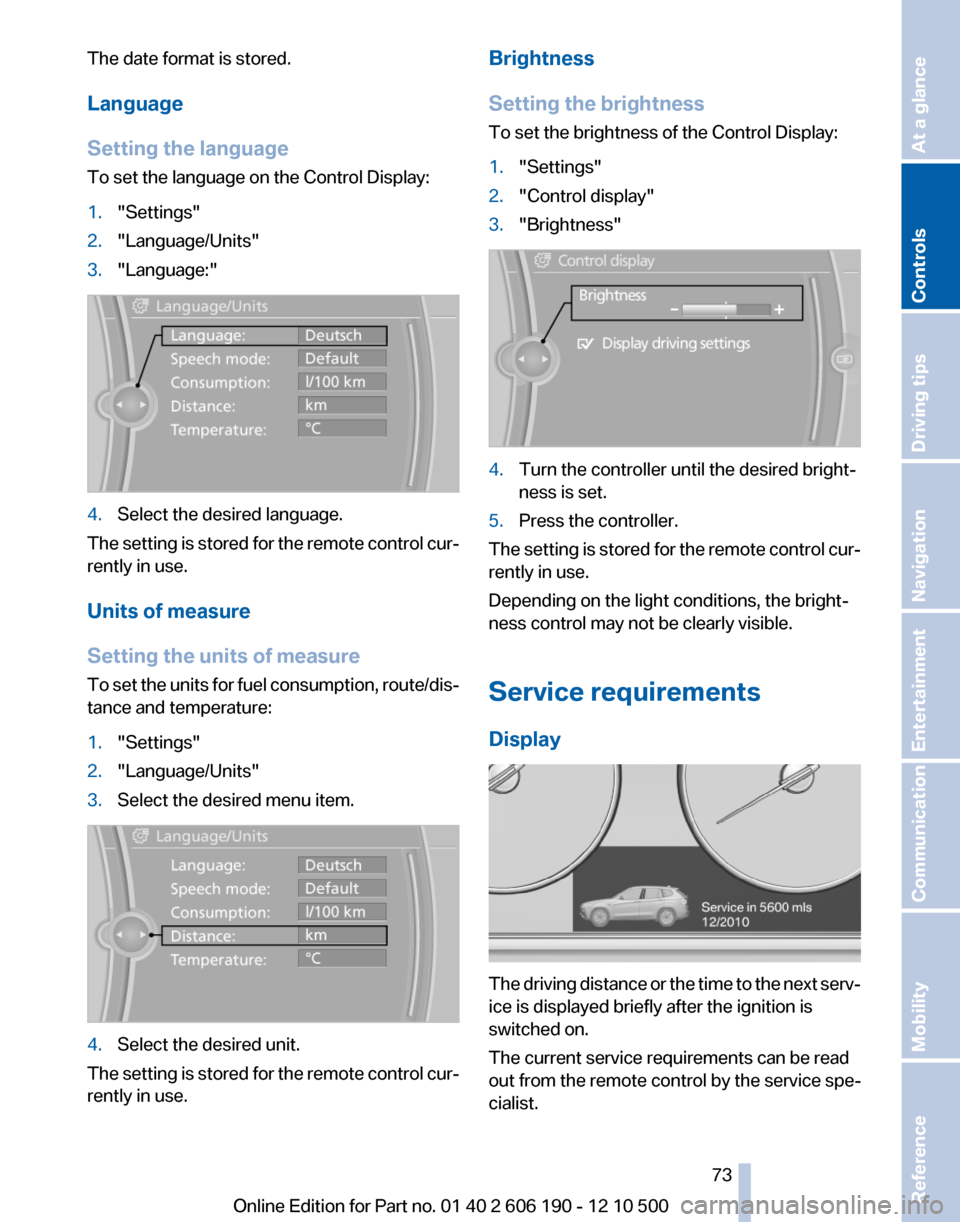
Language
Setting the language
To set the language on the Control Display:1."Settings"2."Language/Units"3."Language:"4.Select the desired language.
The setting is stored for the remote control cur‐
rently in use.
Units of measure
Setting the units of measure
To set the units for fuel consumption, route/dis‐
tance and temperature:
1."Settings"2."Language/Units"3.Select the desired menu item.4.Select the desired unit.
The setting is stored for the remote control cur‐
rently in use.
Brightness
Setting the brightness
To set the brightness of the Control Display:1."Settings"2."Control display"3."Brightness"4.Turn the controller until the desired bright‐
ness is set.5.Press the controller.
The setting is stored for the remote control cur‐
rently in use.
Depending on the light conditions, the bright‐
ness control may not be clearly visible.
Service requirements
Display
The driving distance or the time to the next serv‐
ice is displayed briefly after the ignition is
switched on.
The current service requirements can be read
out from the remote control by the service spe‐
cialist.
Seite 7373
Online Edition for Part no. 01 40 2 606 190 - 12 10 500
ReferenceMobilityCommunicationEntertainmentNavigationDriving tipsControlsAt a glance
Page 133 of 262
▷To change the scale: turn the controller.▷To shift the map: move the controller in
the required direction.▷To shift the map diagonally: move the
controller in the required direction and
turn it.
Specifying the street
If the system does not recognize a street, one of
the following is displayed:
▷The name of a street in the vicinity.▷The county.▷The coordinates of the destination.
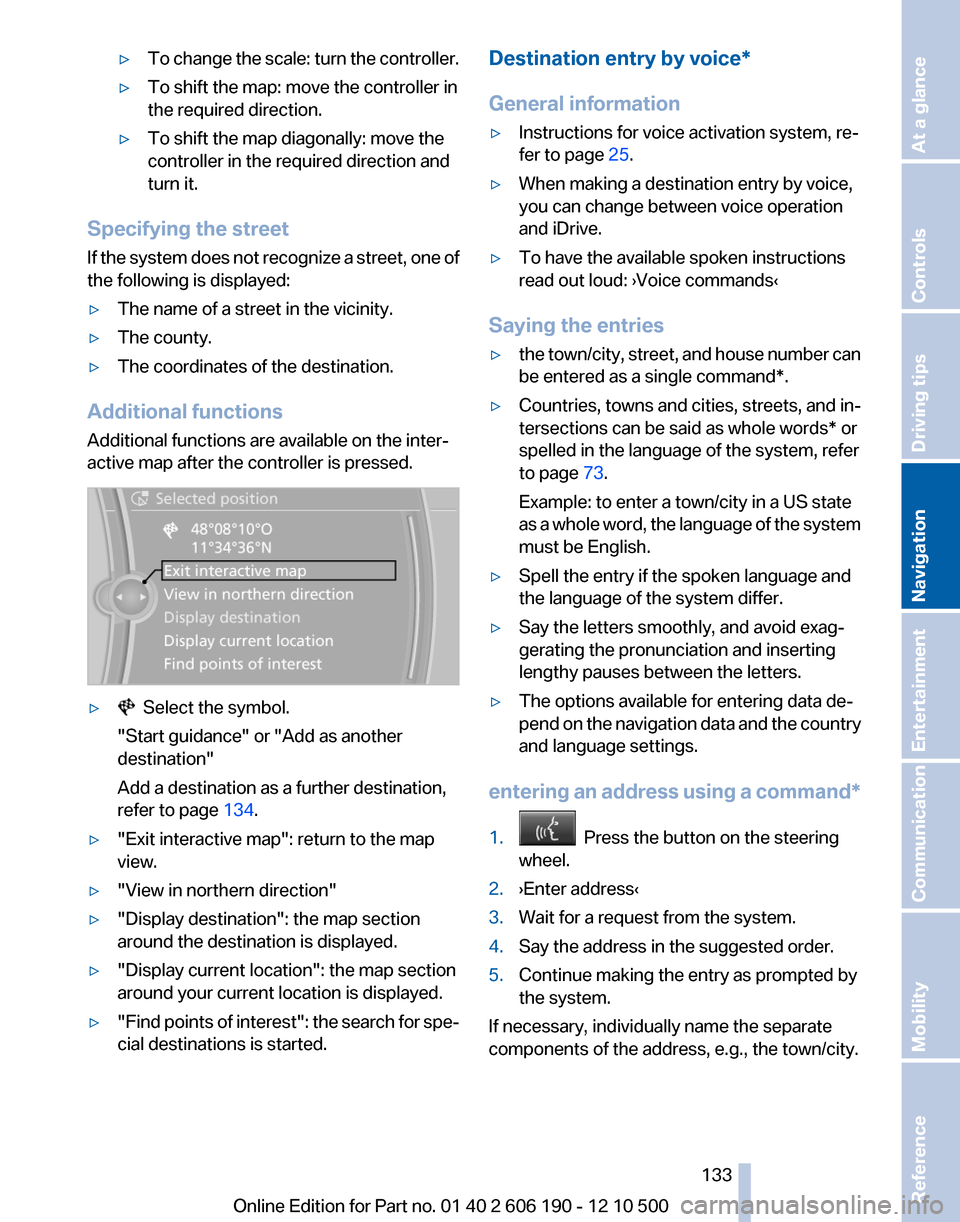
Additional functions
Additional functions are available on the inter‐
active map after the controller is pressed.
▷ Select the symbol.
"Start guidance" or "Add as another
destination"
Add a destination as a further destination,
refer to page 134.▷"Exit interactive map": return to the map
view.▷"View in northern direction"▷"Display destination": the map section
around the destination is displayed.▷"Display current location": the map section
around your current location is displayed.▷" Find points of interest": the search for spe‐
cial destinations is started.Destination entry by voice*
General information▷Instructions for voice activation system, re‐
fer to page 25.▷When making a destination entry by voice,
you can change between voice operation
and iDrive.▷To have the available spoken instructions
read out loud: ›Voice commands‹
Saying the entries
▷the town/city, street, and house number can
be entered as a single command*.▷Countries, towns and cities, streets, and in‐
tersections can be said as whole words* or
spelled in the language of the system, refer
to page 73.
Example: to enter a town/city in a US state
as a whole word, the language of the system
must be English.▷Spell the entry if the spoken language and
the language of the system differ.▷Say the letters smoothly, and avoid exag‐
gerating the pronunciation and inserting
lengthy pauses between the letters.▷The options available for entering data de‐
pend on the navigation data and the country
and language settings.
entering an address using a command*
1. Press the button on the steering
wheel.2.›Enter address‹3.Wait for a request from the system.4.Say the address in the suggested order.5.Continue making the entry as prompted by
the system.
If necessary, individually name the separate
components of the address, e.g., the town/city.
Seite 133133
Online Edition for Part no. 01 40 2 606 190 - 12 10 500
ReferenceMobilityCommunicationEntertainmentNavigationDriving tipsControlsAt a glance
Page 158 of 262
2. "DVD menu"
The DVD menu is displayed. The display de‐
pends on the contents of the DVD.3.To select menu items: move the controller
and press it.
To change to the video menu: turn the controller
and press it.
DVD/VCD settings
For some DVDs, settings can only be made via
the DVD menu; refer also to the information on
the DVD.
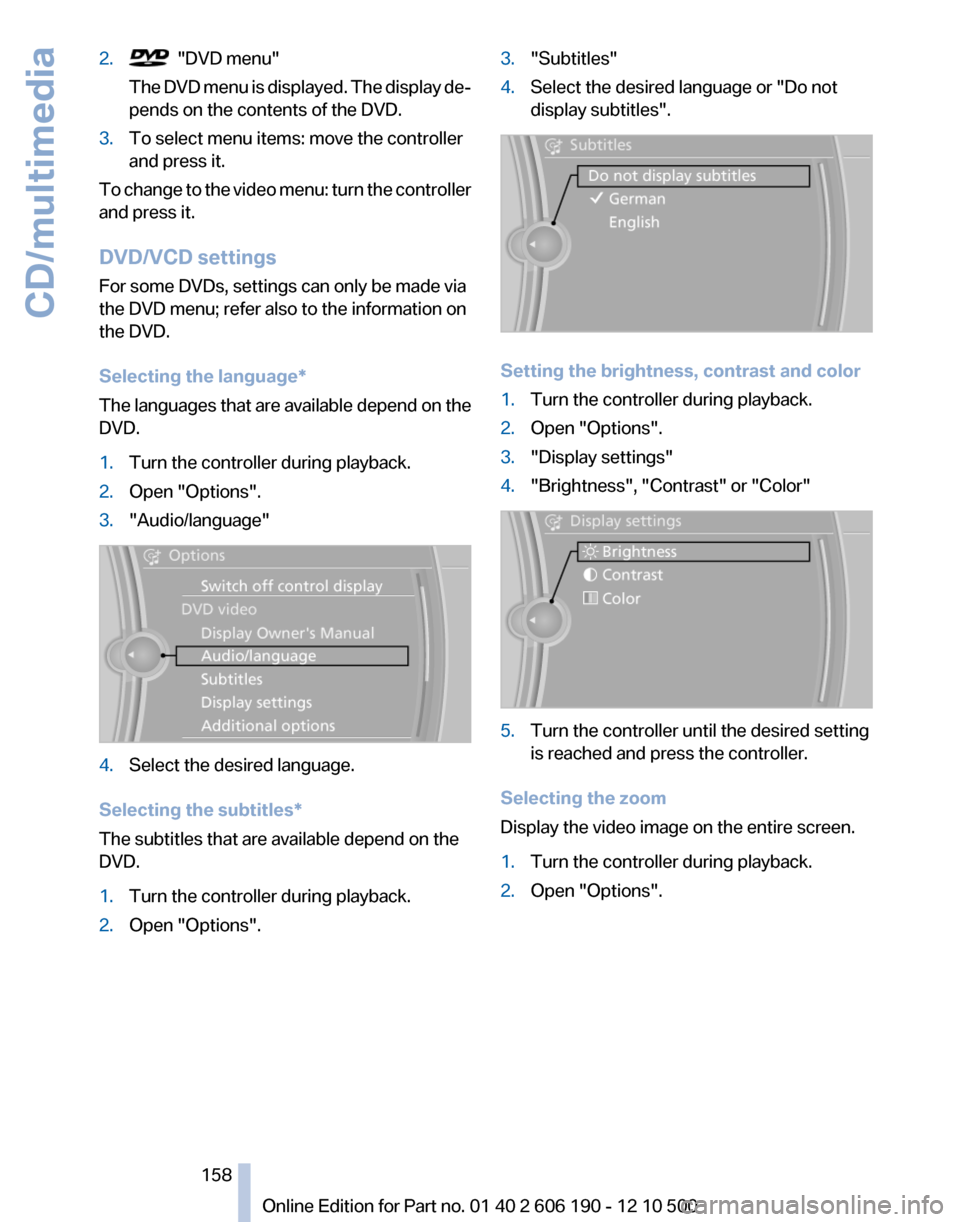
Selecting the language*
The languages that are available depend on the
DVD.
1.Turn the controller during playback.2.Open "Options".3."Audio/language"4.Select the desired language.
Selecting the subtitles*
The subtitles that are available depend on the
DVD.
1.Turn the controller during playback.2.Open "Options".3."Subtitles"4.Select the desired language or "Do not
display subtitles".
Setting the brightness, contrast and color
1.Turn the controller during playback.2.Open "Options".3."Display settings"4."Brightness", "Contrast" or "Color"5.Turn the controller until the desired setting
is reached and press the controller.
Selecting the zoom
Display the video image on the entire screen.
1.Turn the controller during playback.2.Open "Options".Seite 158158
Online Edition for Part no. 01 40 2 606 190 - 12 10 500CD/multimedia
Page 160 of 262
Sliding in CDs/DVDs
Do not insert the CD/DVD until the LEDs
on the DVD slot are flashing; otherwise, the CD/
DVD or the DVD changer could be damaged.
Do not continue to push on the CD/DVD; this
may cause it to jam and prevent it from being
able to eject again.◀
Filling all empty DVD compartments1. Hold the button down.
The LEDs on the empty CD compartments
flash.2.Wait for the LEDs on the DVD slot to begin
flashing and then insert each CD or DVD into
the center of the slot.
The CDs/DVDs are drawn in automatically
and placed into the vacant compartments.
Sliding in CDs/DVDs
Do not insert the CD/DVD until the LEDs
on the DVD slot are flashing; otherwise, the CD/
DVD or the DVD changer could be damaged.
Do not continue to push on the CD/DVD; this
may cause it to jam and prevent it from being
able to eject again.◀
After they are inserted, it may take several mi‐
nutes for the CDs/DVDs to be read in.
Removing a single CD/DVD
1. Press the button.2.Select the DVD compartment.
The CD/DVD is partially ejected.3.Remove the CD/DVD.
Removing all CDs/DVDs
1. Hold the button down.2.Remove the CDs/DVDs.
Malfunctions
If all LEDs on the DVD changer are flashing rap‐
idly, a malfunction has occurred.
To eliminate the malfunction:1.Press one of the buttons:▷▷
The CD/DVD last inserted is ejected.
2.Remove the CD/DVD.
The DVD changer is functional again after the
LEDs stop flashing rapidly.
Audio playback*
The audio track of a DVD can be played back
even if video playback is not possible in the ve‐
hicle.
Only the main film without the previews or extras
can be played back.
Starting playback
A DVD is located in the DVD changer.
1."CD/Multimedia"2."CD/DVD"3.Select the desired DVD.
Selecting a chapter using the button Press the button repeatedly until the
desired chapter is played.
Selecting a chapter using iDrive
1."CD/Multimedia"2."CD/DVD"3.Select the desired DVD.4.Select the desired chapter.
Fast forward/reverse Press and hold the button.
Selecting the language*
The languages that are available depend on the
DVD.
Seite 160160
Online Edition for Part no. 01 40 2 606 190 - 12 10 500CD/multimedia
Page 161 of 262
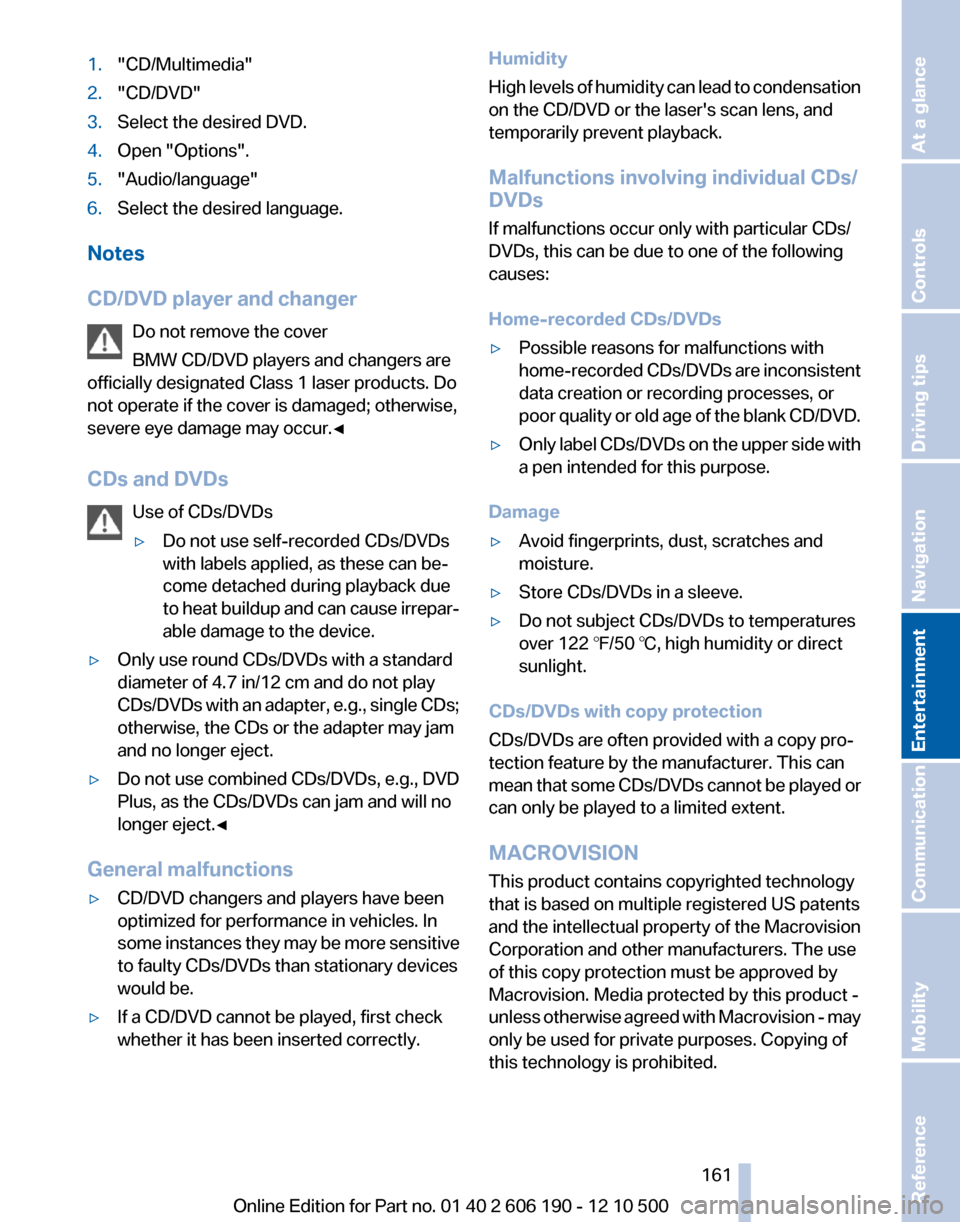
1."CD/Multimedia"2."CD/DVD"3.Select the desired DVD.4.Open "Options".5."Audio/language"6.Select the desired language.
Notes
CD/DVD player and changer Do not remove the cover
BMW CD/DVD players and changers are
officially designated Class 1 laser products. Do
not operate if the cover is damaged; otherwise,
severe eye damage may occur.◀
CDs and DVDs Use of CDs/DVDs
▷Do not use self-recorded CDs/DVDs
with labels applied, as these can be‐
come detached during playback due
to heat buildup and can cause irrepar‐
able damage to the device.▷Only use round CDs/DVDs with a standard
diameter of 4.7 in/12 cm and do not play
CDs/DVDs with an adapter, e.g., single CDs;
otherwise, the CDs or the adapter may jam
and no longer eject.▷Do not use combined CDs/DVDs, e.g., DVD
Plus, as the CDs/DVDs can jam and will no
longer eject.◀
General malfunctions
▷CD/DVD changers and players have been
optimized for performance in vehicles. In
some instances they may be more sensitive
to faulty CDs/DVDs than stationary devices
would be.▷If a CD/DVD cannot be played, first check
whether it has been inserted correctly.Humidity
High levels of humidity can lead to condensation
on the CD/DVD or the laser's scan lens, and
temporarily prevent playback.
Malfunctions involving individual CDs/
DVDs
If malfunctions occur only with particular CDs/
DVDs, this can be due to one of the following
causes:
Home-recorded CDs/DVDs▷Possible reasons for malfunctions with
home-recorded CDs/DVDs are inconsistent
data creation or recording processes, or
poor quality or old age of the blank CD/DVD.▷Only label CDs/DVDs on the upper side with
a pen intended for this purpose.
Damage
▷Avoid fingerprints, dust, scratches and
moisture.▷Store CDs/DVDs in a sleeve.▷Do not subject CDs/DVDs to temperatures
over 122 ℉/50 ℃, high humidity or direct
sunlight.
CDs/DVDs with copy protection
CDs/DVDs are often provided with a copy pro‐
tection feature by the manufacturer. This can
mean that some CDs/DVDs cannot be played or
can only be played to a limited extent.
MACROVISION
This product contains copyrighted technology
that is based on multiple registered US patents
and the intellectual property of the Macrovision
Corporation and other manufacturers. The use
of this copy protection must be approved by
Macrovision. Media protected by this product -
unless otherwise agreed with Macrovision - may
only be used for private purposes. Copying of
this technology is prohibited.
Seite 161161
Online Edition for Part no. 01 40 2 606 190 - 12 10 500
ReferenceMobilityCommunicationEntertainmentNavigationDriving tipsControlsAt a glance
Page 243 of 262
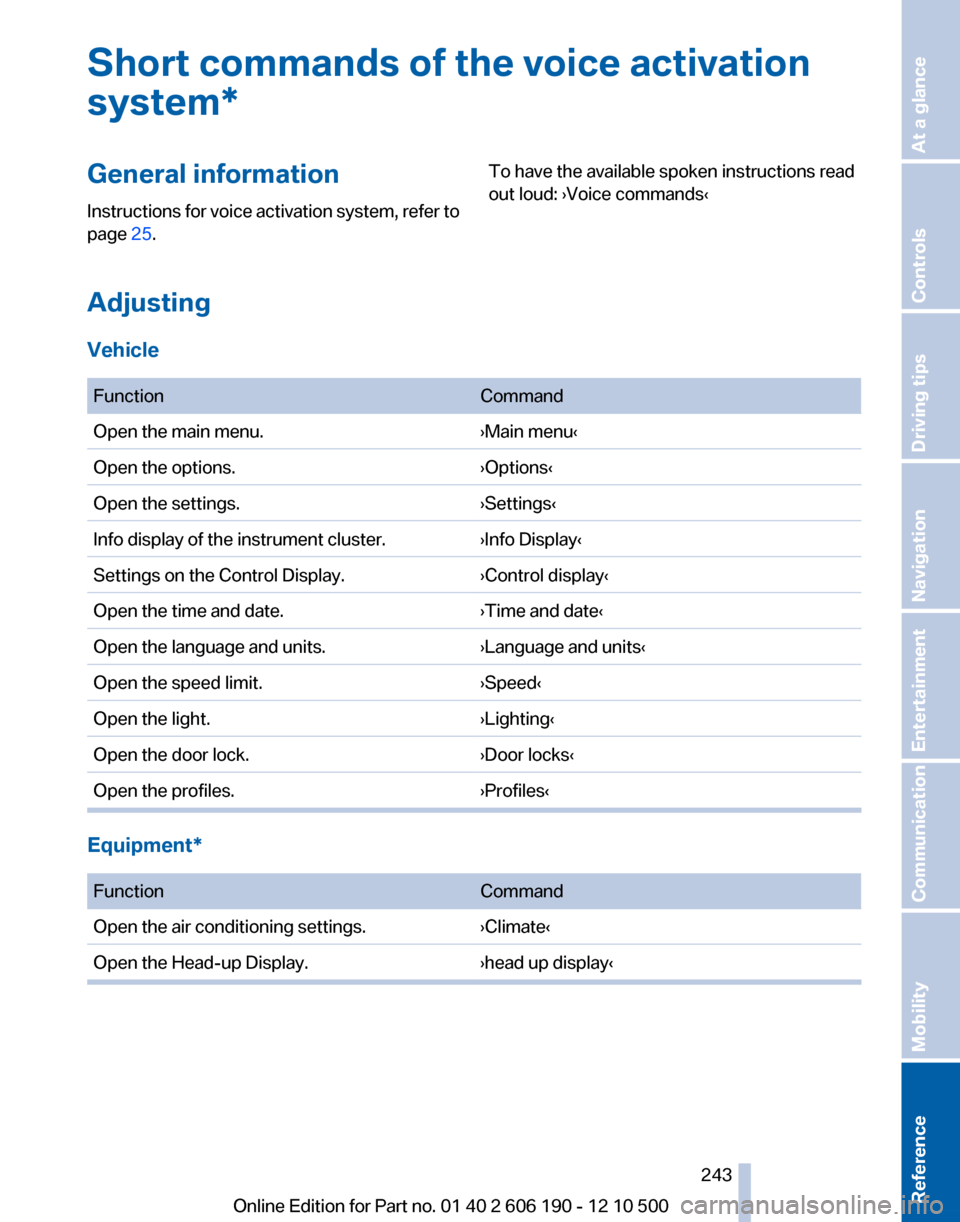
Short commands of the voice activation
system*General information
Instructions for voice activation system, refer to
page 25.To have the available spoken instructions read
out loud: ›Voice commands‹
Adjusting
Vehicle
FunctionCommandOpen the main menu.›Main menu‹Open the options.›Options‹Open the settings.›Settings‹Info display of the instrument cluster.›Info Display‹Settings on the Control Display.›Control display‹Open the time and date.›Time and date‹Open the language and units.›Language and units‹Open the speed limit.›Speed‹Open the light.›Lighting‹Open the door lock.›Door locks‹Open the profiles.›Profiles‹
Equipment*
FunctionCommandOpen the air conditioning settings.›Climate‹Open the Head-up Display.›head up display‹Seite 243243
Online Edition for Part no. 01 40 2 606 190 - 12 10 500
ReferenceMobilityCommunicationEntertainmentNavigationDriving tipsControlsAt a glance