park assist BMW X3 2011 F25 Owner's Manual
[x] Cancel search | Manufacturer: BMW, Model Year: 2011, Model line: X3, Model: BMW X3 2011 F25Pages: 262, PDF Size: 11.2 MB
Page 12 of 262
Cockpit
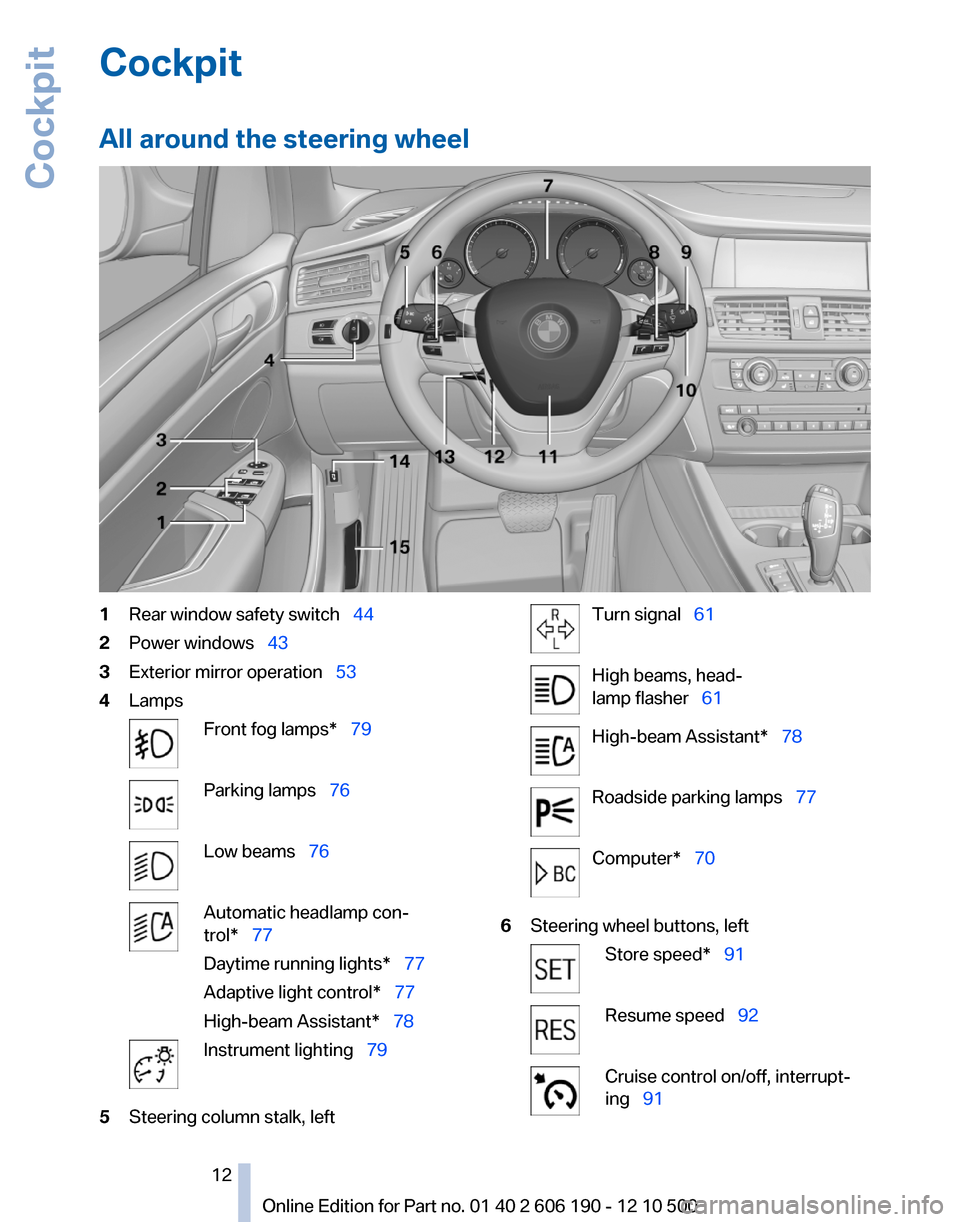
All around the steering wheel1Rear window safety switch 442Power windows 433Exterior mirror operation 534LampsFront fog lamps* 79Parking lamps 76Low beams 76Automatic headlamp con‐
trol* 77
Daytime running lights* 77
Adaptive light control* 77
High-beam Assistant* 78Instrument lighting 795Steering column stalk, leftTurn signal 61High beams, head‐
lamp flasher 61High-beam Assistant* 78Roadside parking lamps 77Computer* 706Steering wheel buttons, leftStore speed* 91Resume speed 92Cruise control on/off, interrupt‐
ing 91Seite 1212
Online Edition for Part no. 01 40 2 606 190 - 12 10 500Cockpit
Page 14 of 262
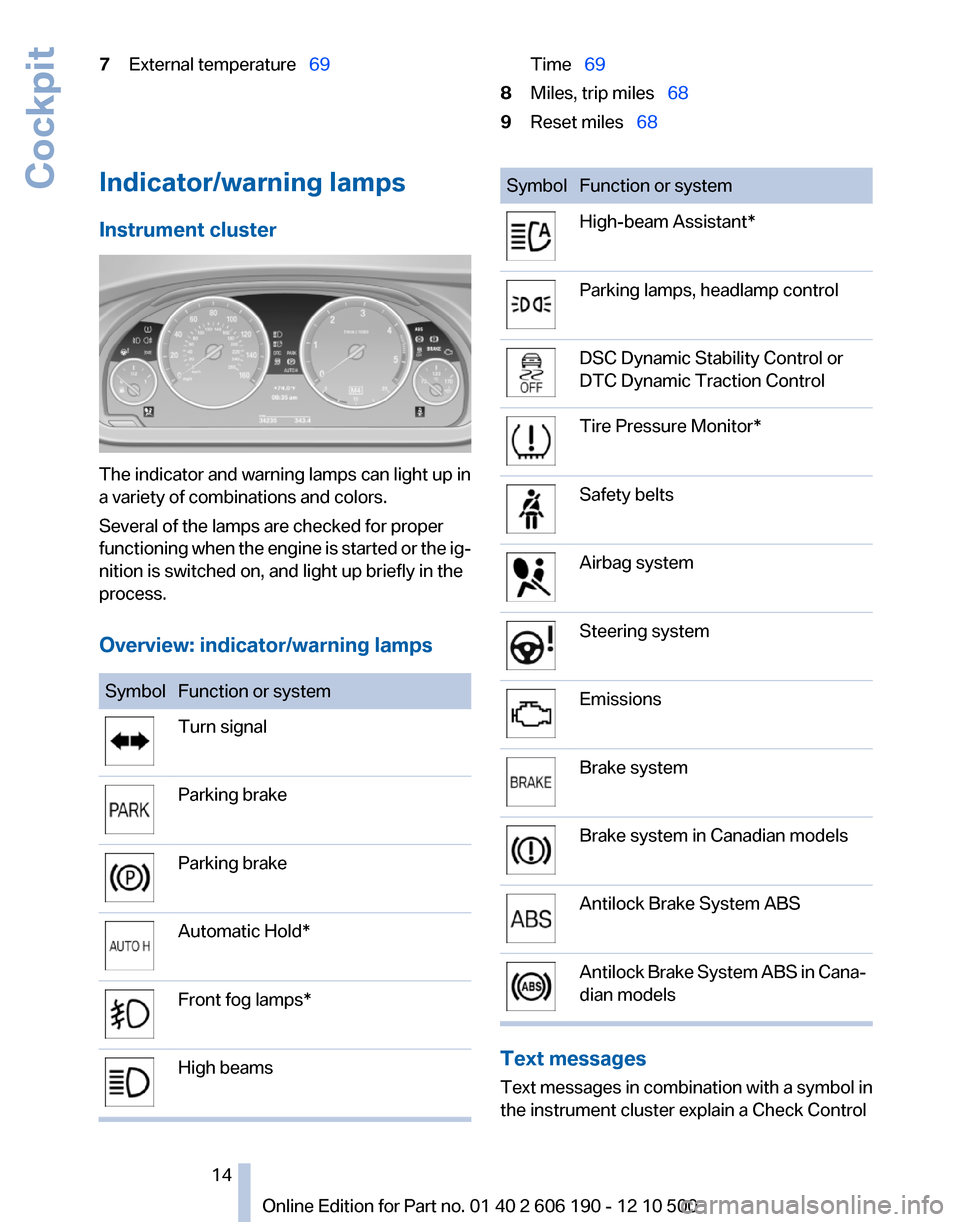
7External temperature 69Time 698Miles, trip miles 689Reset miles 68Indicator/warning lamps
Instrument cluster
The indicator and warning lamps can light up in
a variety of combinations and colors.
Several of the lamps are checked for proper
functioning when the engine is started or the ig‐
nition is switched on, and light up briefly in the
process.
Overview: indicator/warning lamps
SymbolFunction or systemTurn signalParking brakeParking brakeAutomatic Hold*Front fog lamps*High beamsSymbolFunction or systemHigh-beam Assistant*Parking lamps, headlamp controlDSC Dynamic Stability Control or
DTC Dynamic Traction ControlTire Pressure Monitor*Safety beltsAirbag systemSteering systemEmissionsBrake systemBrake system in Canadian modelsAntilock Brake System ABSAntilock Brake System ABS in Cana‐
dian models
Text messages
Text messages in combination with a symbol in
the instrument cluster explain a Check Control
Seite 1414
Online Edition for Part no. 01 40 2 606 190 - 12 10 500Cockpit
Page 60 of 262
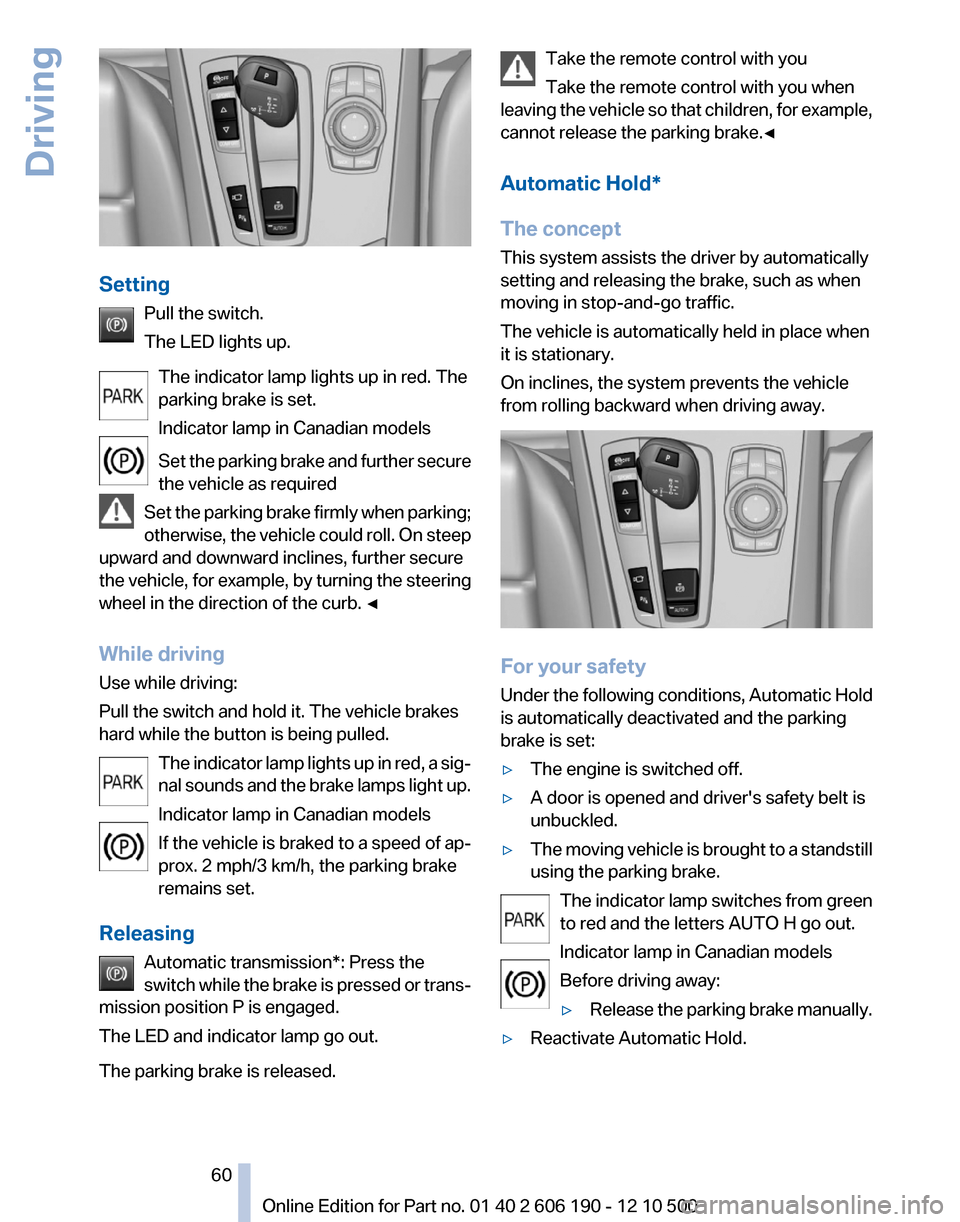
SettingPull the switch.
The LED lights up.
The indicator lamp lights up in red. The
parking brake is set.
Indicator lamp in Canadian models
Set the parking brake and further secure
the vehicle as required
Set the parking brake firmly when parking;
otherwise, the vehicle could roll. On steep
upward and downward inclines, further secure
the vehicle, for example, by turning the steering
wheel in the direction of the curb. ◀
While driving
Use while driving:
Pull the switch and hold it. The vehicle brakes
hard while the button is being pulled.
The indicator lamp lights up in red, a sig‐
nal sounds and the brake lamps light up.
Indicator lamp in Canadian models
If the vehicle is braked to a speed of ap‐
prox. 2 mph/3 km/h, the parking brake
remains set.
Releasing Automatic transmission*: Press the
switch while the brake is pressed or trans‐
mission position P is engaged.
The LED and indicator lamp go out.
The parking brake is released.
Take the remote control with you
Take the remote control with you when
leaving the vehicle so that children, for example,
cannot release the parking brake.◀
Automatic Hold*
The concept
This system assists the driver by automatically
setting and releasing the brake, such as when
moving in stop-and-go traffic.
The vehicle is automatically held in place when
it is stationary.
On inclines, the system prevents the vehicle
from rolling backward when driving away.
For your safety
Under the following conditions, Automatic Hold
is automatically deactivated and the parking
brake is set:
▷The engine is switched off.▷A door is opened and driver's safety belt is
unbuckled.▷The moving vehicle is brought to a standstill
using the parking brake.
The indicator lamp switches from green
to red and the letters AUTO H go out.
Indicator lamp in Canadian models
Before driving away:
▷Release the parking brake manually.▷Reactivate Automatic Hold.Seite 6060
Online Edition for Part no. 01 40 2 606 190 - 12 10 500Driving
Page 76 of 262
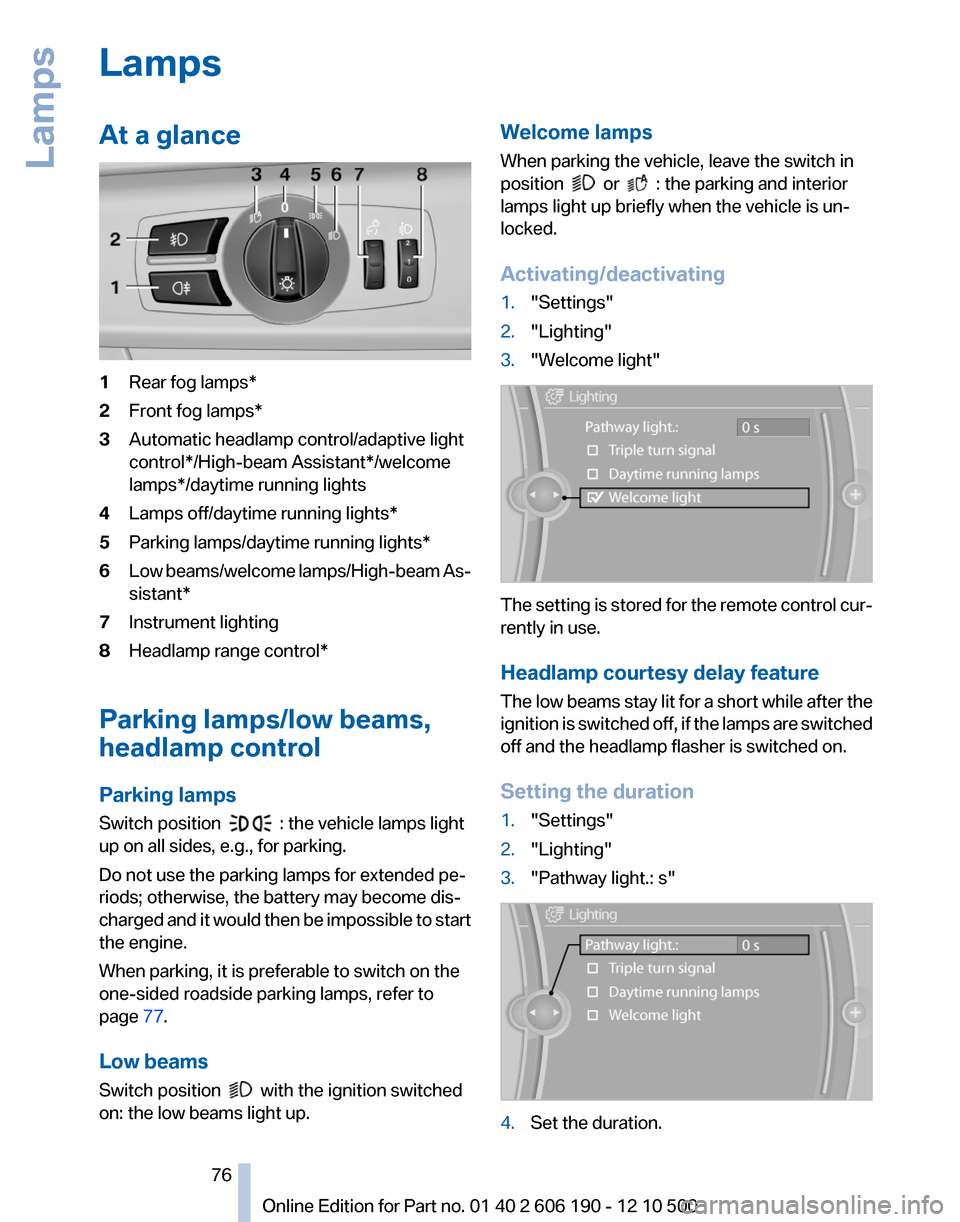
LampsAt a glance1Rear fog lamps*2Front fog lamps*3Automatic headlamp control/adaptive light
control*/High-beam Assistant*/welcome
lamps*/daytime running lights4Lamps off/daytime running lights*5Parking lamps/daytime running lights*6Low beams/welcome lamps/High-beam As‐
sistant*7Instrument lighting8Headlamp range control*
Parking lamps/low beams,
headlamp control
Parking lamps
Switch position
: the vehicle lamps light
up on all sides, e.g., for parking.
Do not use the parking lamps for extended pe‐
riods; otherwise, the battery may become dis‐
charged and it would then be impossible to start
the engine.
When parking, it is preferable to switch on the
one-sided roadside parking lamps, refer to
page 77.
Low beams
Switch position
with the ignition switched
on: the low beams light up.
Welcome lamps
When parking the vehicle, leave the switch in
position
or : the parking and interior
lamps light up briefly when the vehicle is un‐
locked.
Activating/deactivating
1."Settings"2."Lighting"3."Welcome light"
The setting is stored for the remote control cur‐
rently in use.
Headlamp courtesy delay feature
The low beams stay lit for a short while after the
ignition is switched off, if the lamps are switched
off and the headlamp flasher is switched on.
Setting the duration
1."Settings"2."Lighting"3."Pathway light.: s"4.Set the duration.Seite 7676
Online Edition for Part no. 01 40 2 606 190 - 12 10 500Lamps
Page 95 of 262
Display on the Control Display
Switching on the backup camera via
iDrive
With PDC activated:
"Rear view camera"
The backup camera image is displayed. The set‐
ting is stored for the remote control currently in
use.
Malfunction
A Check Control message, refer to page 74, is
displayed in the instrument cluster.
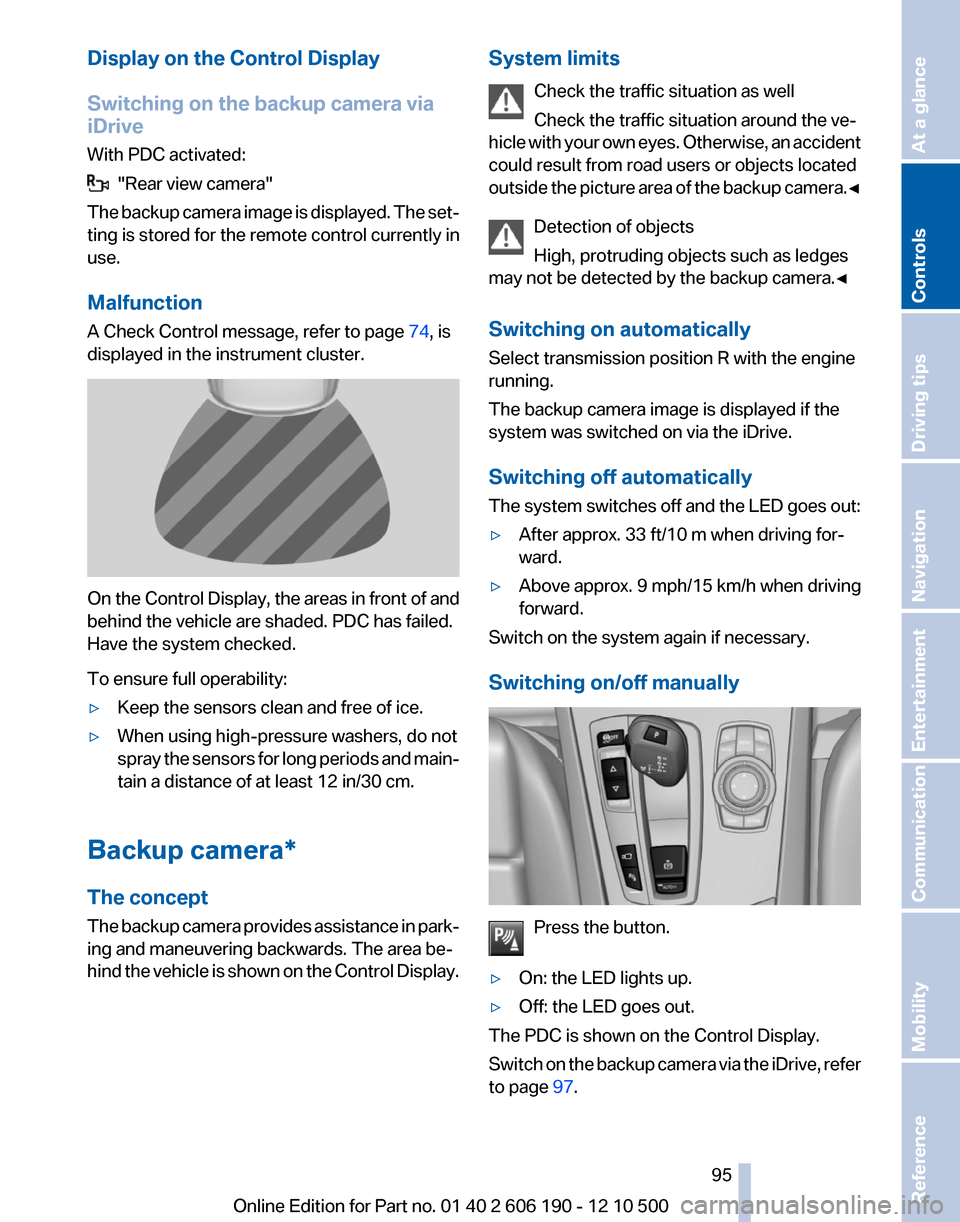
On the Control Display, the areas in front of and
behind the vehicle are shaded. PDC has failed.
Have the system checked.
To ensure full operability:
▷Keep the sensors clean and free of ice.▷When using high-pressure washers, do not
spray the sensors for long periods and main‐
tain a distance of at least 12 in/30 cm.
Backup camera*
The concept
The backup camera provides assistance in park‐
ing and maneuvering backwards. The area be‐
hind the vehicle is shown on the Control Display.
System limits
Check the traffic situation as well
Check the traffic situation around the ve‐
hicle with your own eyes. Otherwise, an accident
could result from road users or objects located
outside the picture area of the backup camera. ◀
Detection of objects
High, protruding objects such as ledges
may not be detected by the backup camera.◀
Switching on automatically
Select transmission position R with the engine
running.
The backup camera image is displayed if the
system was switched on via the iDrive.
Switching off automatically
The system switches off and the LED goes out:▷After approx. 33 ft/10 m when driving for‐
ward.▷Above approx. 9 mph/15 km/h when driving
forward.
Switch on the system again if necessary.
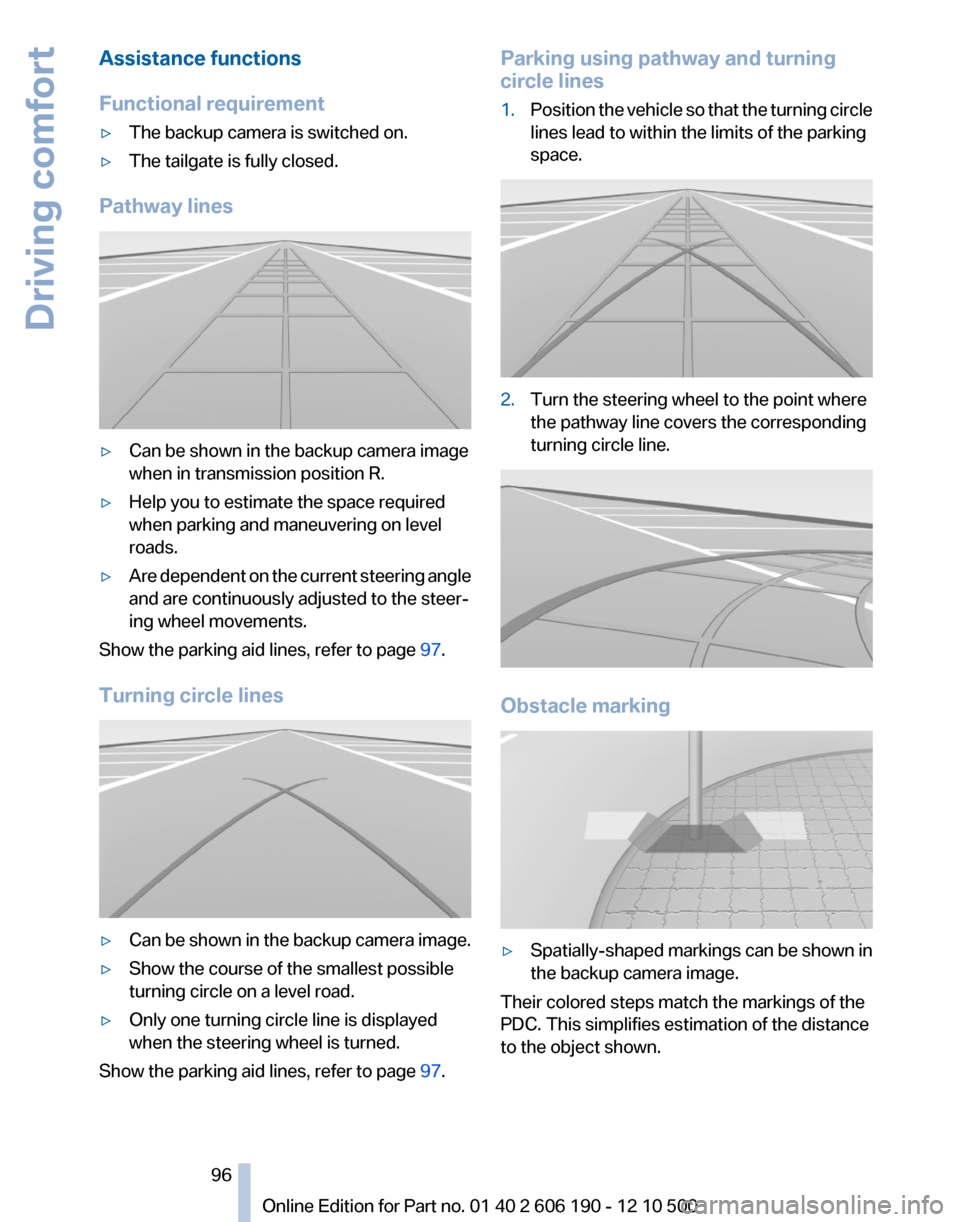
Switching on/off manually
Press the button.
▷On: the LED lights up.▷Off: the LED goes out.
The PDC is shown on the Control Display.
Switch on the backup camera via the iDrive, refer
to page 97.
Seite 9595
Online Edition for Part no. 01 40 2 606 190 - 12 10 500
ReferenceMobilityCommunicationEntertainmentNavigationDriving tipsControlsAt a glance
Page 96 of 262
Assistance functions
Functional requirement▷The backup camera is switched on.▷The tailgate is fully closed.
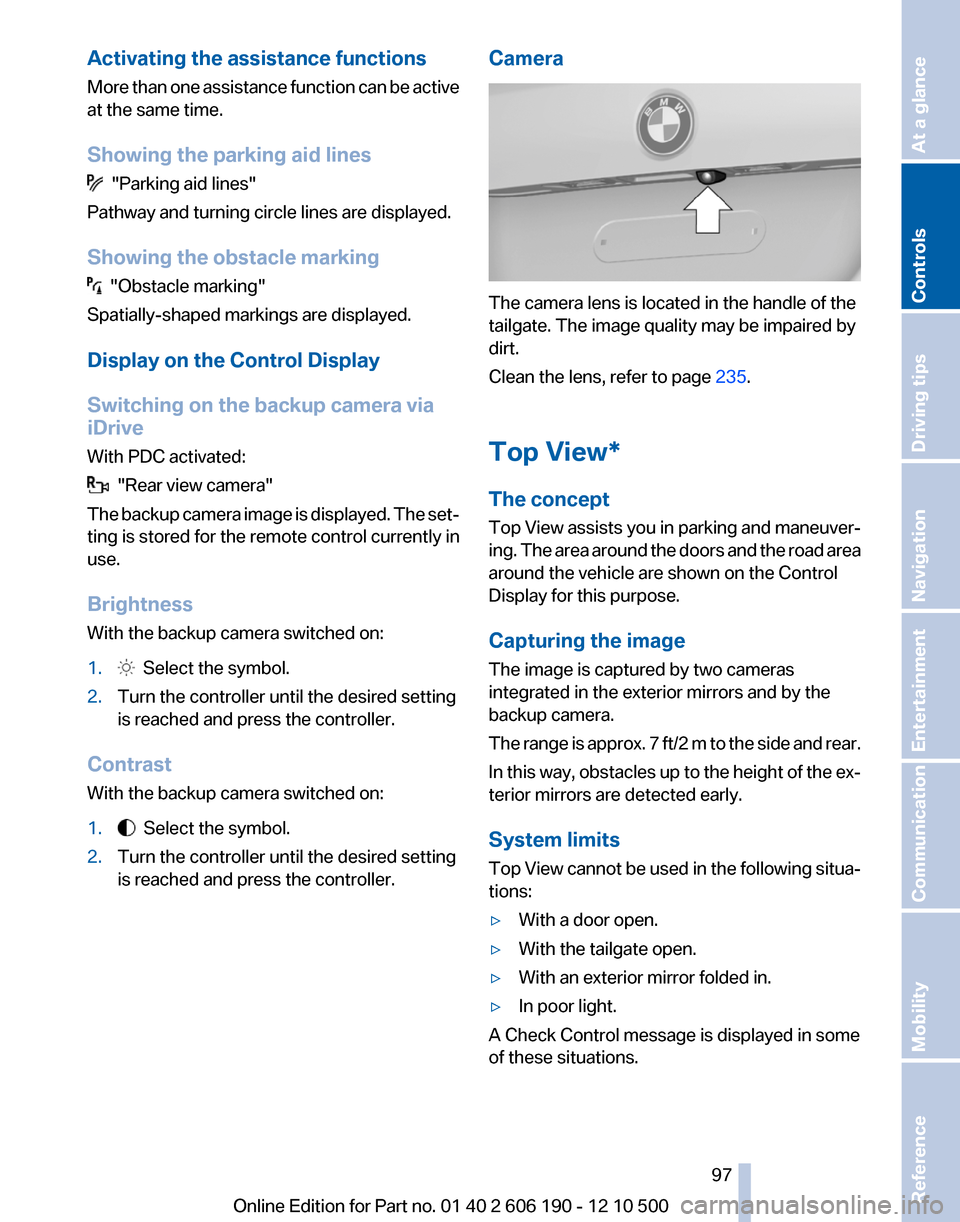
Pathway lines
▷Can be shown in the backup camera image
when in transmission position R.▷Help you to estimate the space required
when parking and maneuvering on level
roads.▷Are dependent on the current steering angle
and are continuously adjusted to the steer‐
ing wheel movements.
Show the parking aid lines, refer to page 97.
Turning circle lines
▷Can be shown in the backup camera image.▷Show the course of the smallest possible
turning circle on a level road.▷Only one turning circle line is displayed
when the steering wheel is turned.
Show the parking aid lines, refer to page 97.
Parking using pathway and turning
circle lines1.Position the vehicle so that the turning circle
lines lead to within the limits of the parking
space.2.Turn the steering wheel to the point where
the pathway line covers the corresponding
turning circle line.
Obstacle marking
▷Spatially-shaped markings can be shown in
the backup camera image.
Their colored steps match the markings of the
PDC. This simplifies estimation of the distance
to the object shown.
Seite 9696
Online Edition for Part no. 01 40 2 606 190 - 12 10 500Driving comfort
Page 97 of 262
Activating the assistance functions
More than one assistance function can be active
at the same time.
Showing the parking aid lines
"Parking aid lines"
Pathway and turning circle lines are displayed.
Showing the obstacle marking
"Obstacle marking"
Spatially-shaped markings are displayed.
Display on the Control Display
Switching on the backup camera via
iDrive
With PDC activated:
"Rear view camera"
The backup camera image is displayed. The set‐
ting is stored for the remote control currently in
use.
Brightness
With the backup camera switched on:
1. Select the symbol.2.Turn the controller until the desired setting
is reached and press the controller.
Contrast
With the backup camera switched on:
1. Select the symbol.2.Turn the controller until the desired setting
is reached and press the controller.Camera
The camera lens is located in the handle of the
tailgate. The image quality may be impaired by
dirt.
Clean the lens, refer to page 235.
Top View*
The concept
Top View assists you in parking and maneuver‐
ing. The area around the doors and the road area
around the vehicle are shown on the Control
Display for this purpose.
Capturing the image
The image is captured by two cameras
integrated in the exterior mirrors and by the
backup camera.
The range is approx. 7 ft/2 m to the side and rear.
In this way, obstacles up to the height of the ex‐
terior mirrors are detected early.
System limits
Top View cannot be used in the following situa‐
tions:
▷With a door open.▷With the tailgate open.▷With an exterior mirror folded in.▷In poor light.
A Check Control message is displayed in some
of these situations.
Seite 9797
Online Edition for Part no. 01 40 2 606 190 - 12 10 500
ReferenceMobilityCommunicationEntertainmentNavigationDriving tipsControlsAt a glance
Page 99 of 262
Displaying the turning circle and
pathway lines▷The static, red turning circle line shows the
space needed to the side of the vehicle
when the steering wheel is turned all the
way.▷The variable, green pathway line assists you
in assessing the amount of space actually
needed to the side of the vehicle.
The pathway line is dependent on the cur‐
rent steering angle and is continuously ad‐
justed with the steering wheel movement.
"Parking aid lines"
Turning circle and pathway lines are displayed.
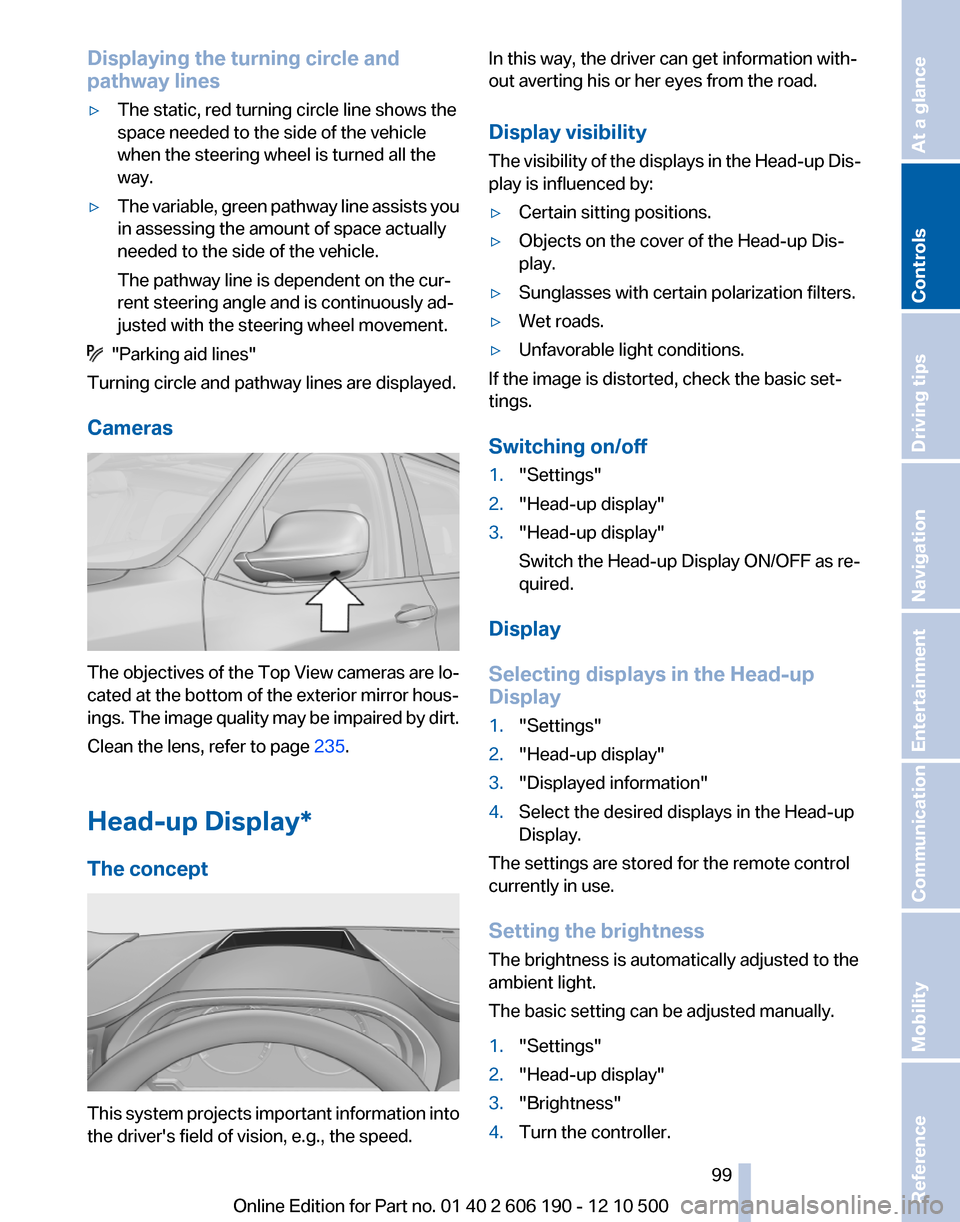
Cameras
The objectives of the Top View cameras are lo‐
cated at the bottom of the exterior mirror hous‐
ings. The image quality may be impaired by dirt.
Clean the lens, refer to page 235.
Head-up Display*
The concept
This system projects important information into
the driver's field of vision, e.g., the speed.
In this way, the driver can get information with‐
out averting his or her eyes from the road.
Display visibility
The visibility of the displays in the Head-up Dis‐
play is influenced by:▷Certain sitting positions.▷Objects on the cover of the Head-up Dis‐
play.▷Sunglasses with certain polarization filters.▷Wet roads.▷Unfavorable light conditions.
If the image is distorted, check the basic set‐
tings.
Switching on/off
1."Settings"2."Head-up display"3."Head-up display"
Switch the Head-up Display ON/OFF as re‐
quired.
Display
Selecting displays in the Head-up
Display
1."Settings"2."Head-up display"3."Displayed information"4.Select the desired displays in the Head-up
Display.
The settings are stored for the remote control
currently in use.
Setting the brightness
The brightness is automatically adjusted to the
ambient light.
The basic setting can be adjusted manually.
1."Settings"2."Head-up display"3."Brightness"4.Turn the controller.Seite 9999
Online Edition for Part no. 01 40 2 606 190 - 12 10 500
ReferenceMobilityCommunicationEntertainmentNavigationDriving tipsControlsAt a glance
Page 122 of 262
Avoid load on the brakes
Avoid placing excessive load on the brake
system. Light but consistent brake pressure can
lead to high temperatures, brake wear and pos‐
sibly even brake failure.◀
Do not drive in neutral
Do not drive in neutral or with the engine
stopped, as doing so disables engine braking. In
addition, steering and brake assist is unavailable
with the engine stopped.◀
Brake disc corrosion
Corrosion on the brake discs and contamination
on the brake pads are furthered by:▷Low mileage.▷Extended periods when the vehicle is not
used at all.▷Infrequent use of the brakes.
Corrosion occurs when the minimum pressure
that must be exerted by the pads during brake
applications to clean the discs is not reached.
Should corrosion form on the brake discs, the
brakes will tend to respond with a pulsating ef‐
fect that generally cannot be corrected.
Condensation under the parked vehicle
When using the automatic climate control, con‐
densation water develops that exits underneath
the vehicle.
Therefore, traces of condensed water under the
vehicle are normal.
Loading Overloading the vehicle
To avoid exceeding the approved carrying
capacity of the tires, never overload the vehicle.
Overloading can lead to overheating and in‐
creases the rate at which damage develops in‐
side the tires. This could result in a sudden loss
of tire inflation pressure.◀
No fluids in the trunk
Make sure that fluids do not leak into the
trunk; otherwise, the vehicle may be damaged. ◀
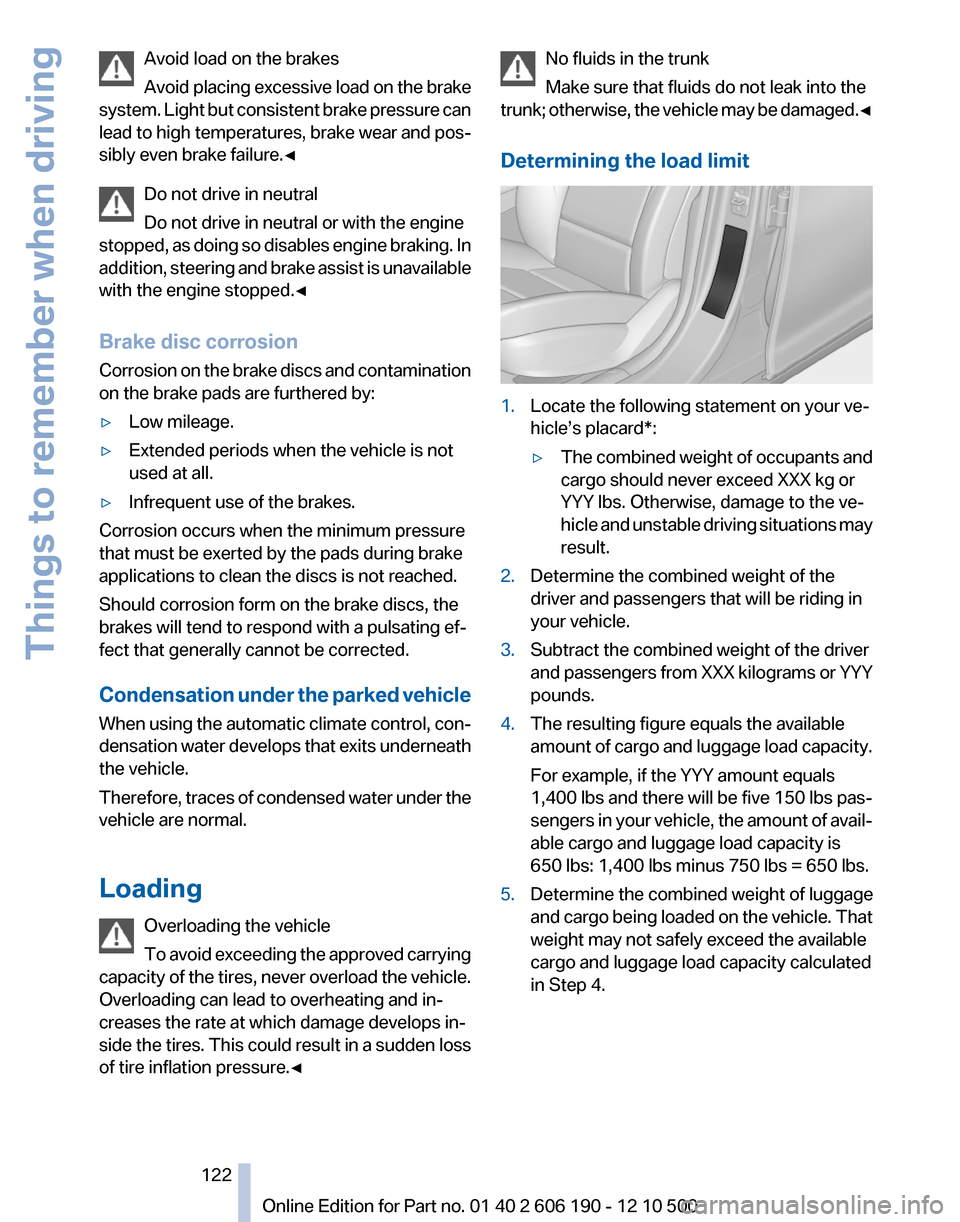
Determining the load limit1.Locate the following statement on your ve‐
hicle’s placard*:▷The combined weight of occupants and
cargo should never exceed XXX kg or
YYY lbs. Otherwise, damage to the ve‐
hicle and unstable driving situations may
result.2.Determine the combined weight of the
driver and passengers that will be riding in
your vehicle.3.Subtract the combined weight of the driver
and passengers from XXX kilograms or YYY
pounds.4.The resulting figure equals the available
amount of cargo and luggage load capacity.
For example, if the YYY amount equals
1,400 lbs and there will be five 150 lbs pas‐
sengers in your vehicle, the amount of avail‐
able cargo and luggage load capacity is
650 lbs: 1,400 lbs minus 750 lbs = 650 lbs.5.Determine the combined weight of luggage
and cargo being loaded on the vehicle. That
weight may not safely exceed the available
cargo and luggage load capacity calculated
in Step 4.Seite 122122
Online Edition for Part no. 01 40 2 606 190 - 12 10 500Things to remember when driving
Page 197 of 262
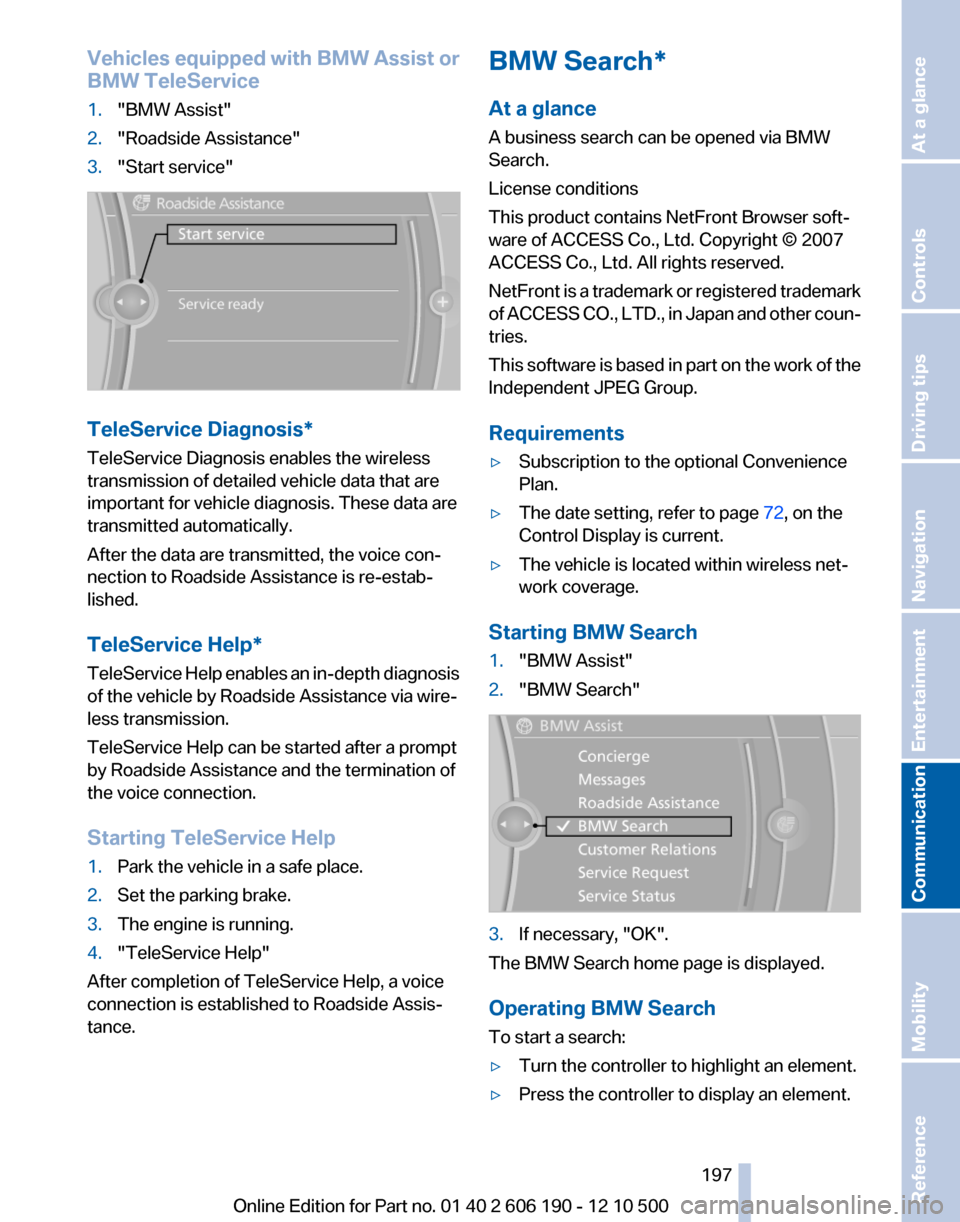
Vehicles equipped with BMW Assist or
BMW TeleService1."BMW Assist"2."Roadside Assistance"3."Start service"
TeleService Diagnosis*
TeleService Diagnosis enables the wireless
transmission of detailed vehicle data that are
important for vehicle diagnosis. These data are
transmitted automatically.
After the data are transmitted, the voice con‐
nection to Roadside Assistance is re-estab‐
lished.
TeleService Help*
TeleService Help enables an in-depth diagnosis
of the vehicle by Roadside Assistance via wire‐
less transmission.
TeleService Help can be started after a prompt
by Roadside Assistance and the termination of
the voice connection.
Starting TeleService Help
1.Park the vehicle in a safe place.2.Set the parking brake.3.The engine is running.4."TeleService Help"
After completion of TeleService Help, a voice
connection is established to Roadside Assis‐
tance.
BMW Search*
At a glance
A business search can be opened via BMW
Search.
License conditions
This product contains NetFront Browser soft‐
ware of ACCESS Co., Ltd. Copyright © 2007
ACCESS Co., Ltd. All rights reserved.
NetFront is a trademark or registered trademark
of ACCESS CO., LTD., in Japan and other coun‐
tries.
This software is based in part on the work of the
Independent JPEG Group.
Requirements▷Subscription to the optional Convenience
Plan.▷The date setting, refer to page 72, on the
Control Display is current.▷The vehicle is located within wireless net‐
work coverage.
Starting BMW Search
1."BMW Assist"2."BMW Search"3.If necessary, "OK".
The BMW Search home page is displayed.
Operating BMW Search
To start a search:
▷Turn the controller to highlight an element.▷Press the controller to display an element.Seite 197197
Online Edition for Part no. 01 40 2 606 190 - 12 10 500
ReferenceMobilityCommunicationEntertainmentNavigationDriving tipsControlsAt a glance