Comfort BMW X3 2013 F25 Owner's Manual
[x] Cancel search | Manufacturer: BMW, Model Year: 2013, Model line: X3, Model: BMW X3 2013 F25Pages: 212, PDF Size: 4.8 MB
Page 8 of 212
![BMW X3 2013 F25 Owners Manual Addendum
text that follows, where it reads:
“[h]ave any work on the xenon
lighting system . . . ,” the following
words should be read as preceding
that passage: “It is strongly
suggested that yo BMW X3 2013 F25 Owners Manual Addendum
text that follows, where it reads:
“[h]ave any work on the xenon
lighting system . . . ,” the following
words should be read as preceding
that passage: “It is strongly
suggested that yo](/img/1/2647/w960_2647-7.png)
Addendum
text that follows, where it reads:
“[h]ave any work on the xenon
lighting system . . . ,” the following
words should be read as preceding
that passage: “It is strongly
suggested that you . . . .”
19.At page 180, under the “Battery
replacement” section, the text
should be disregarded and in lieu
thereof the following text should be
read:
Use of recommended vehicle
batteries
The manufacturer of your vehicle
recommends that you use vehicle
batteries that it has tested and
recommends for use in your vehicle;
otherwise the vehicle could be
damaged and systems or functions
may not be fully available.
After a battery replacement, the
manufacturer of your vehicle
recommends that you have the
battery registered on your vehicle
by a service center to ensure that all
comfort functions are fully available,
and that any “check control”
messages of these comfort
functions are no longer displayed.
Page 9 of 212
ContentsThe fastest way to find information on a partic‐
ular topic or item is by using the index, refer to
page 198.6Notes
At a glance
12Cockpit16iDrive24Voice activation system27Integrated Owner's Manual in the vehicle
Controls
32Opening and closing48Adjusting57Transporting children safely61Driving74Displays89Lamps94Safety107Driving stability control systems113Driving comfort124Climate control131Interior equipment138Storage compartments
Driving tips
144Things to remember when driving147Loading150Saving fuelMobility156Refueling158Fuel159Wheels and tires167Engine compartment169Engine oil171Coolant172Maintenance174Replacing components182Breakdown assistance187Care
Reference
194Technical data198Everything from A to Z
Online Edition for Part no. 01 40 2 911 041 - VI/13
Page 35 of 212
Controls
This chapter is intended to provide you with
information that will give you complete control of your vehicle. All features and accessories thatare useful for driving and your safety, comfort and convenience are described here.Online Edition for Part no. 01 40 2 911 041 - VI/13
Page 43 of 212
Do not place the remote control in the
cargo area
Take the remote control with you and do not
leave it in the cargo area; otherwise, the re‐
mote control is locked inside the vehicle when
the tailgate is closed.◀
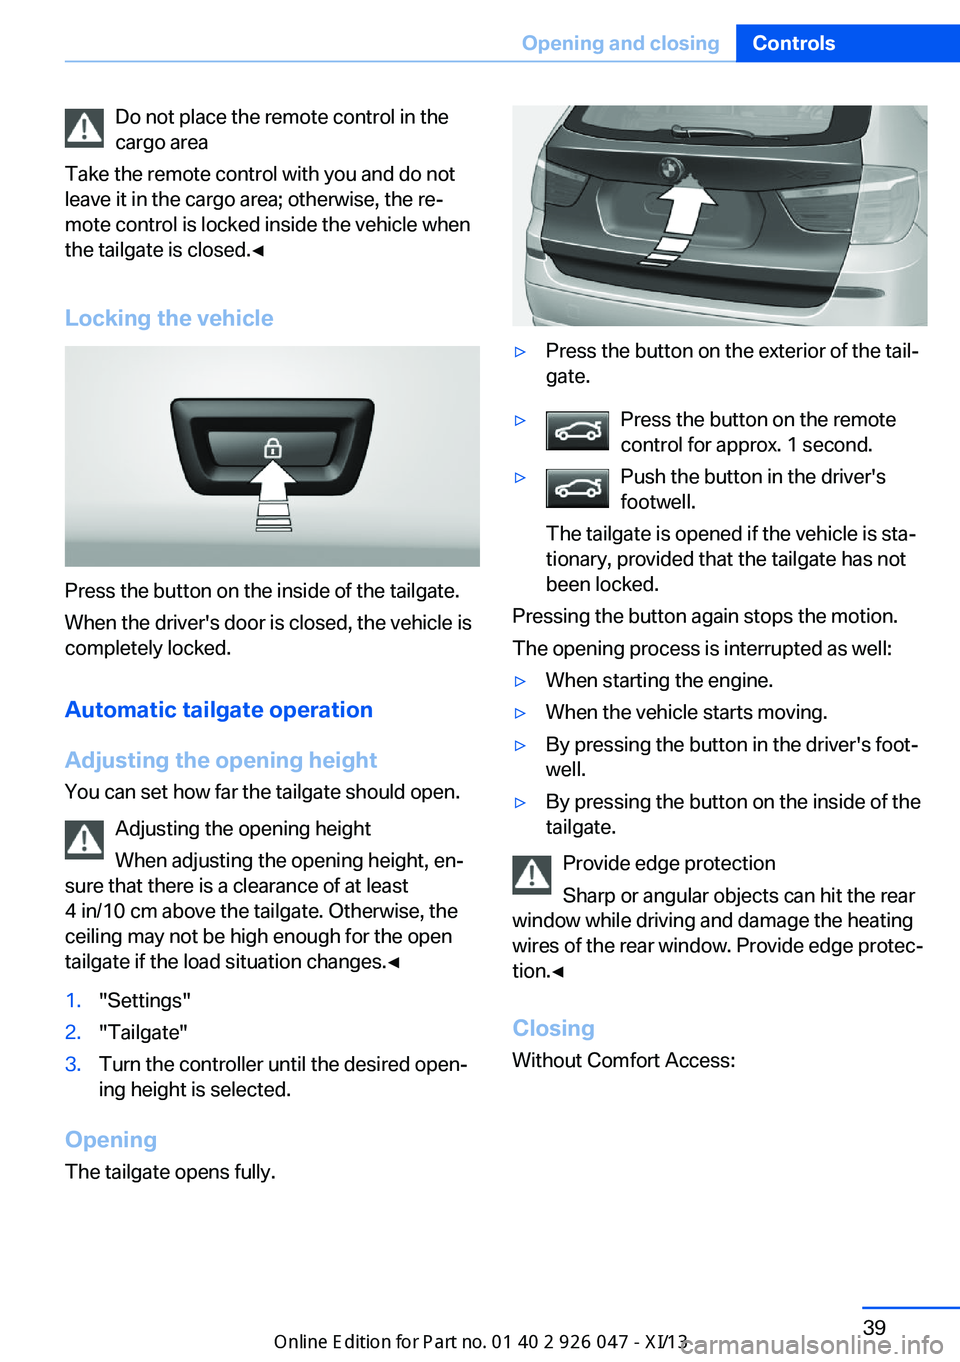
Locking the vehicle
Press the button on the inside of the tailgate.
When the driver's door is closed, the vehicle is
completely locked.
Automatic tailgate operation
Adjusting the opening height
You can set how far the tailgate should open.
Adjusting the opening height
When adjusting the opening height, en‐
sure that there is a clearance of at least
4 in/10 cm above the tailgate. Otherwise, the
ceiling may not be high enough for the open tailgate if the load situation changes.◀
1."Settings"2."Tailgate"3.Turn the controller until the desired open‐
ing height is selected.
Opening
The tailgate opens fully.
▷Press the button on the exterior of the tail‐
gate.▷Press the button on the remote
control for approx. 1 second.▷Push the button in the driver's
footwell.
The tailgate is opened if the vehicle is sta‐
tionary, provided that the tailgate has not
been locked.
Pressing the button again stops the motion.
The opening process is interrupted as well:
▷When starting the engine.▷When the vehicle starts moving.▷By pressing the button in the driver's foot‐
well.▷By pressing the button on the inside of the
tailgate.
Provide edge protection
Sharp or angular objects can hit the rear
window while driving and damage the heating
wires of the rear window. Provide edge protec‐
tion.◀
ClosingWithout Comfort Access:
Seite 39Opening and closingControls39
Online Edition for Part no. 01 40 2 911 041 - VI/13
Page 44 of 212
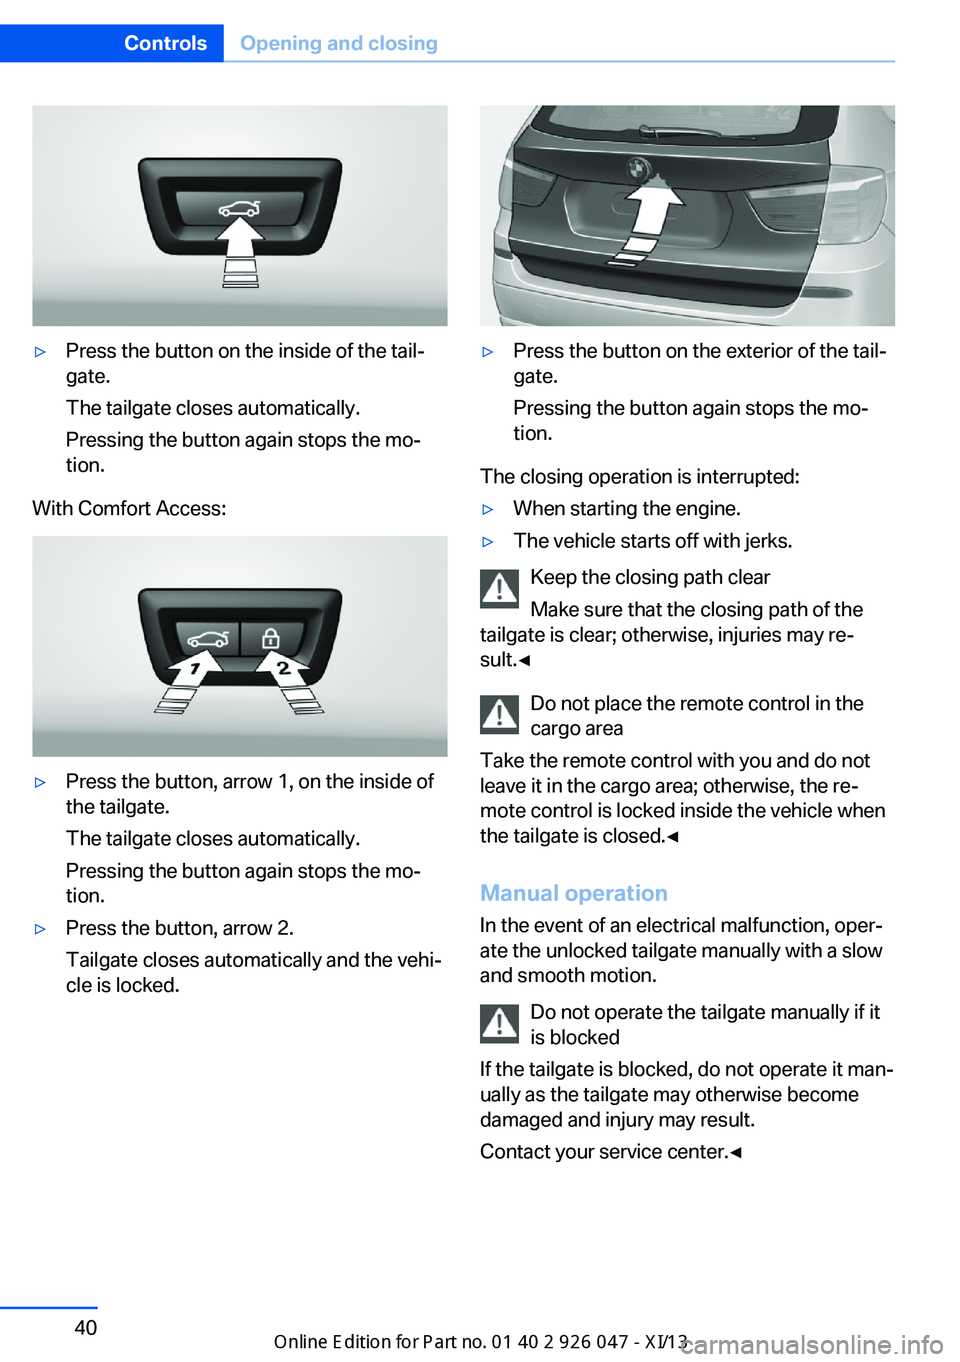
▷Press the button on the inside of the tail‐
gate.
The tailgate closes automatically.
Pressing the button again stops the mo‐
tion.
With Comfort Access:
▷Press the button, arrow 1, on the inside of
the tailgate.
The tailgate closes automatically.
Pressing the button again stops the mo‐
tion.▷Press the button, arrow 2.
Tailgate closes automatically and the vehi‐
cle is locked.▷Press the button on the exterior of the tail‐
gate.
Pressing the button again stops the mo‐
tion.
The closing operation is interrupted:
▷When starting the engine.▷The vehicle starts off with jerks.
Keep the closing path clear
Make sure that the closing path of the
tailgate is clear; otherwise, injuries may re‐
sult.◀
Do not place the remote control in the
cargo area
Take the remote control with you and do not
leave it in the cargo area; otherwise, the re‐
mote control is locked inside the vehicle when
the tailgate is closed.◀
Manual operation
In the event of an electrical malfunction, oper‐
ate the unlocked tailgate manually with a slow
and smooth motion.
Do not operate the tailgate manually if it
is blocked
If the tailgate is blocked, do not operate it man‐
ually as the tailgate may otherwise become
damaged and injury may result.
Contact your service center.◀
Seite 40ControlsOpening and closing40
Online Edition for Part no. 01 40 2 911 041 - VI/13
Page 45 of 212
Comfort AccessThe concept
The vehicle can be accessed without activat‐
ing the remote control.
All you need to do is to have the remote con‐
trol with you, e.g., in your jacket pocket.
The vehicle automatically detects the remote
control when it is nearby or in the passenger
compartment.
Comfort Access supports the following func‐
tions:▷Unlocking/locking of the vehicle.▷Convenient closing.▷Unlocking of the tailgate separately.▷Start the engine.
Functional requirements
▷There are no external sources of interfer‐
ence nearby.▷To lock the vehicle, the remote control
must be located outside of the vehicle.▷The next unlocking and locking cycle is not
possible until after approx. 2 seconds.▷The engine can only be started if the re‐
mote control is inside the vehicle.
Comparison with ordinary remote
control
The functions can be controlled by pressing the buttons of the remote control or Comfort
Access.
Unlocking
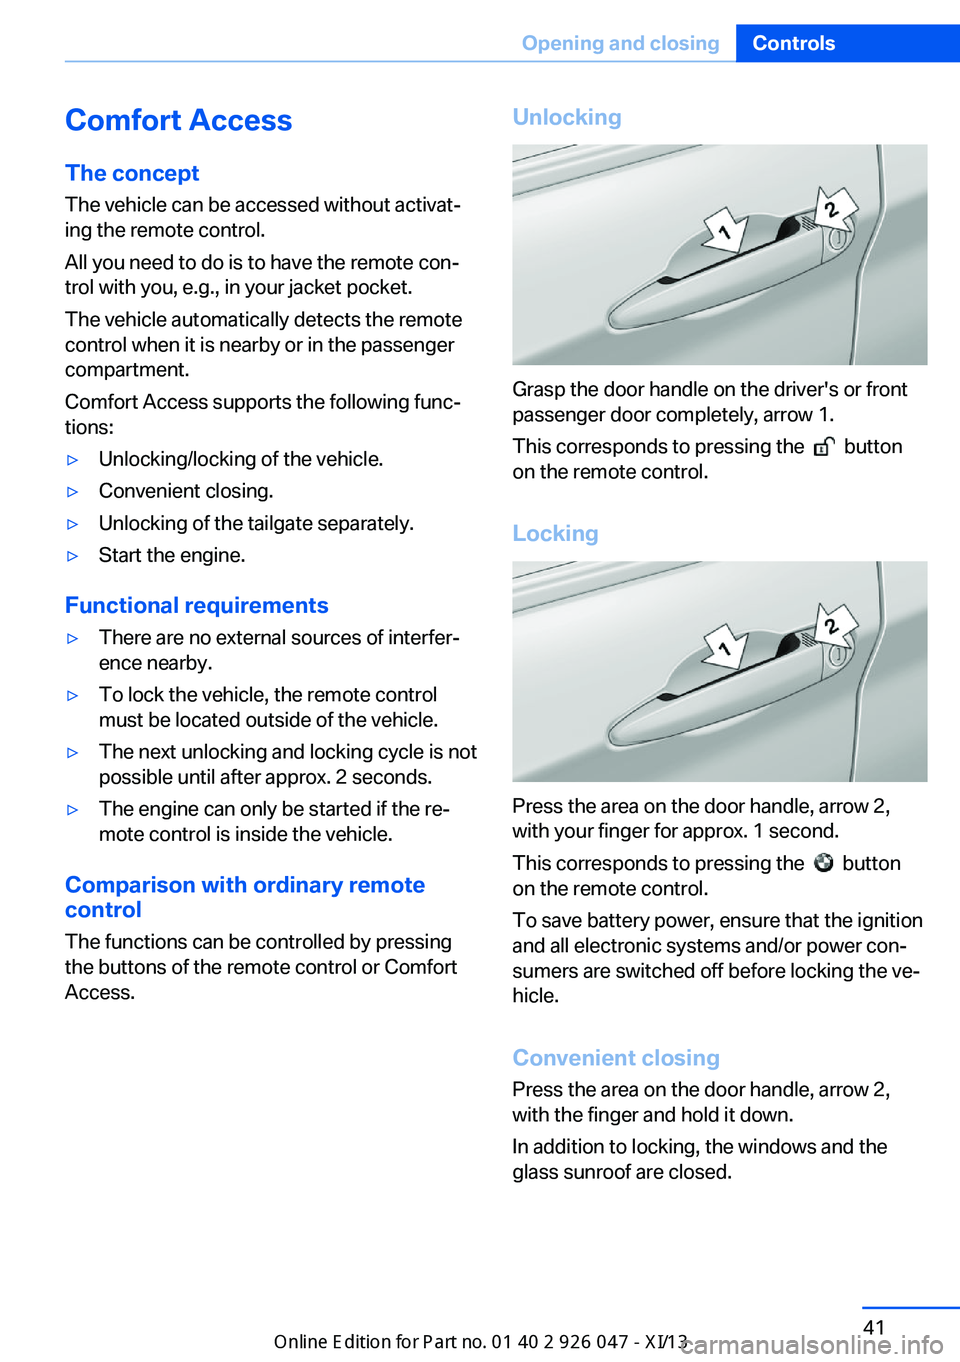
Grasp the door handle on the driver's or front
passenger door completely, arrow 1.
This corresponds to pressing the
button
on the remote control.
Locking
Press the area on the door handle, arrow 2,
with your finger for approx. 1 second.
This corresponds to pressing the
button
on the remote control.
To save battery power, ensure that the ignition
and all electronic systems and/or power con‐
sumers are switched off before locking the ve‐
hicle.
Convenient closing Press the area on the door handle, arrow 2,
with the finger and hold it down.
In addition to locking, the windows and the
glass sunroof are closed.
Seite 41Opening and closingControls41
Online Edition for Part no. 01 40 2 911 041 - VI/13
Page 46 of 212
Monitor the closing process
Monitor the closing process to ensure
that no one becomes trapped.◀
Unlocking the tailgate separately
Press the button on the exterior of the tailgate.
This corresponds to pressing the
but‐
ton on the remote control.
Do not place the remote control in the
cargo area
Take the remote control with you and do not
leave it in the cargo area; otherwise, the re‐
mote control is locked inside the vehicle when
the tailgate is closed.◀
Malfunction
Comfort Access may not function properly if it
experiences interference from external sour‐
ces such as mobile phones, metal objects,
overhead power lines, transmission towers,
etc.
In this case, open or close the vehicle using the
buttons on the remote control or use the
integrated key in the door lock.
Adjusting
Unlocking The setting is stored for the remote control
currently in use.
1."Settings"2."Doors/key"3. Select symbol or "Unlock button:".4.Select the desired function:▷"Driver's door only"
Only the driver's door and the fuel filler
flap are unlocked. Pressing again un‐
locks the entire vehicle.▷"All doors"
The entire vehicle is unlocked.Depending on how the vehicle is equipped
or the country-specific variant, you can set
whether the doors are also unlocked with
the
button on the remote control.
Confirmation signals from the vehicle
1."Settings"2."Doors/key"3.Deactivate or activate the desired confir‐
mation signals.▷"Acoustic sig. lock/unlock"▷"Flash when lock/unlock"
Automatic locking
The setting is stored for the remote control
currently in use.
1."Settings"2."Doors/key"3.Select the desired function:▷"Lock if no door opened"
The vehicle locks automatically after a
short period of time if a door is not
opened.▷"Lock after start driving"
The vehicle locks automatically after
you drive away.
Retrieving the seat and mirror settings
The driver's seat and exterior mirror positions
used last are stored for the remote control cur‐
rently in use.
When the vehicle is unlocked, these positions
are automatically retrieved if this function was
activated.
Pinch hazard when moving back the seat
If this function is used, first make sure
that the footwell behind the driver's seat is
empty. Otherwise, people can be injured or ob‐
jects damaged when the seat is moved back.◀
The adjustment procedure is interrupted:
Seite 42ControlsOpening and closing42
Online Edition for Part no. 01 40 2 911 041 - VI/13
Page 47 of 212
▷When a seat position switch is pressed.▷When a button of the seat and mirror mem‐
ory is pressed.
Activating the setting
1."Settings"2."Doors/key"3."Last seat position autom."
Alarm system
The conceptThe vehicle alarm system responds to:
▷Opening of a door, the hood or the tailgate.▷Movements in the vehicle.▷Changes in the vehicle tilt, e.g., during at‐
tempts to steal a wheel or when towing the
car.▷Interruptions in battery voltage.
The alarm system briefly indicates tampering:
▷By sounding an acoustic alarm.▷By switching on the hazard warning sys‐
tem.▷By flashing the high beams.
Arming and disarming the alarm
system
General information
When you lock or unlock the vehicle, either
with the remote control or via the Comfort Ac‐
cess at the door lock, the alarm system is
armed or disarmed at the same time.
Door lock and armed alarm systemThe alarm system is triggered when the door is
opened, if the vehicle is unlocked via the door
lock.
In order to terminate this alarm, unlock vehicle
with the remote control or switch on the igni‐
tion, if necessary, by emergency detection of
the remote control.
Tailgate and armed alarm system
The tailgate can be opened even when the
alarm system is armed.
Press the button on the remote con‐
trol for approx. 1 second.
After the tailgate is closed, it is locked and
monitored again if the doors are locked. The
hazard warning system flashes once.
In some vehicle equipment variants, the tail‐
gate can only be opened using the remote
control if the vehicle was unlocked first.
Panic mode
You can trigger the alarm system if you find
yourself in a dangerous situation.
Press the button on the remote con‐
trol for at least 3 seconds.
To switch off the alarm: press any button.
Switching off the alarm▷Unlock the vehicle using the remote con‐
trol.▷With Comfort Access: If you are carrying
the remote control with you, pull on the
driver side or front passenger side door
handle.Seite 43Opening and closingControls43
Online Edition for Part no. 01 40 2 911 041 - VI/13
Page 49 of 212
Opening▷ Press the switch to the resistance
point.
The window opens while the switch is held.▷ Press the switch beyond the resist‐
ance point.
The window opens automatically.
Pressing the switch again stops the motion.
Convenient opening, refer to page 36, via the
remote control.
Closing Keep the closing path clear
Monitor the closing process and make
sure that the closing path of the window is
clear; otherwise, injuries may result.◀
▷ Pull the switch to the resistance
point.
The window closes while the switch is
held.▷ Pull the switch beyond the resistance
point.
The window closes automatically.
Pressing the switch stops the motion.
Convenient closing, refer to page 41, with
Comfort Access.
Pinch protection system If the closing force exceeds a specific value as
a window closes, the closing action is inter‐
rupted.
The window reopens slightly.
Danger of pinching even with pinch pro‐
tection
Even with the pinch protection system, check
that the window's closing path is clear; other‐
wise, the closing action may not stop in certain
situations, e.g., if thin objects are present.◀
No window accessories
Do not install any accessories in the
range of movement of the windows; otherwise,
the pinch protection system will be impaired.◀
Closing without the pinch protection
system
Keep the closing path clear
Monitor the closing process and make
sure that the closing path of the window is clear; otherwise, injuries may result.◀
For example, if there is an external danger or if
ice on the windows prevents a window from
closing normally, proceed as follows:1.Pull the switch past the resistance point
and hold it there.
The pinch protection is limited and the
window reopens slightly if the closing force
exceeds a certain value.2.Pull the switch past the resistance point
again within approx. 4 seconds and hold it
there.
The window closes without pinch protec‐
tion.
Safety switch
The safety switch in the driver's door can be
used to prevent children, for example, from
opening and closing the rear windows using
the switches in the rear.
Switching on and off Press the button.
The LED lights up if the safety func‐
tion is switched on.
Seite 45Opening and closingControls45
Online Edition for Part no. 01 40 2 911 041 - VI/13
Page 51 of 212
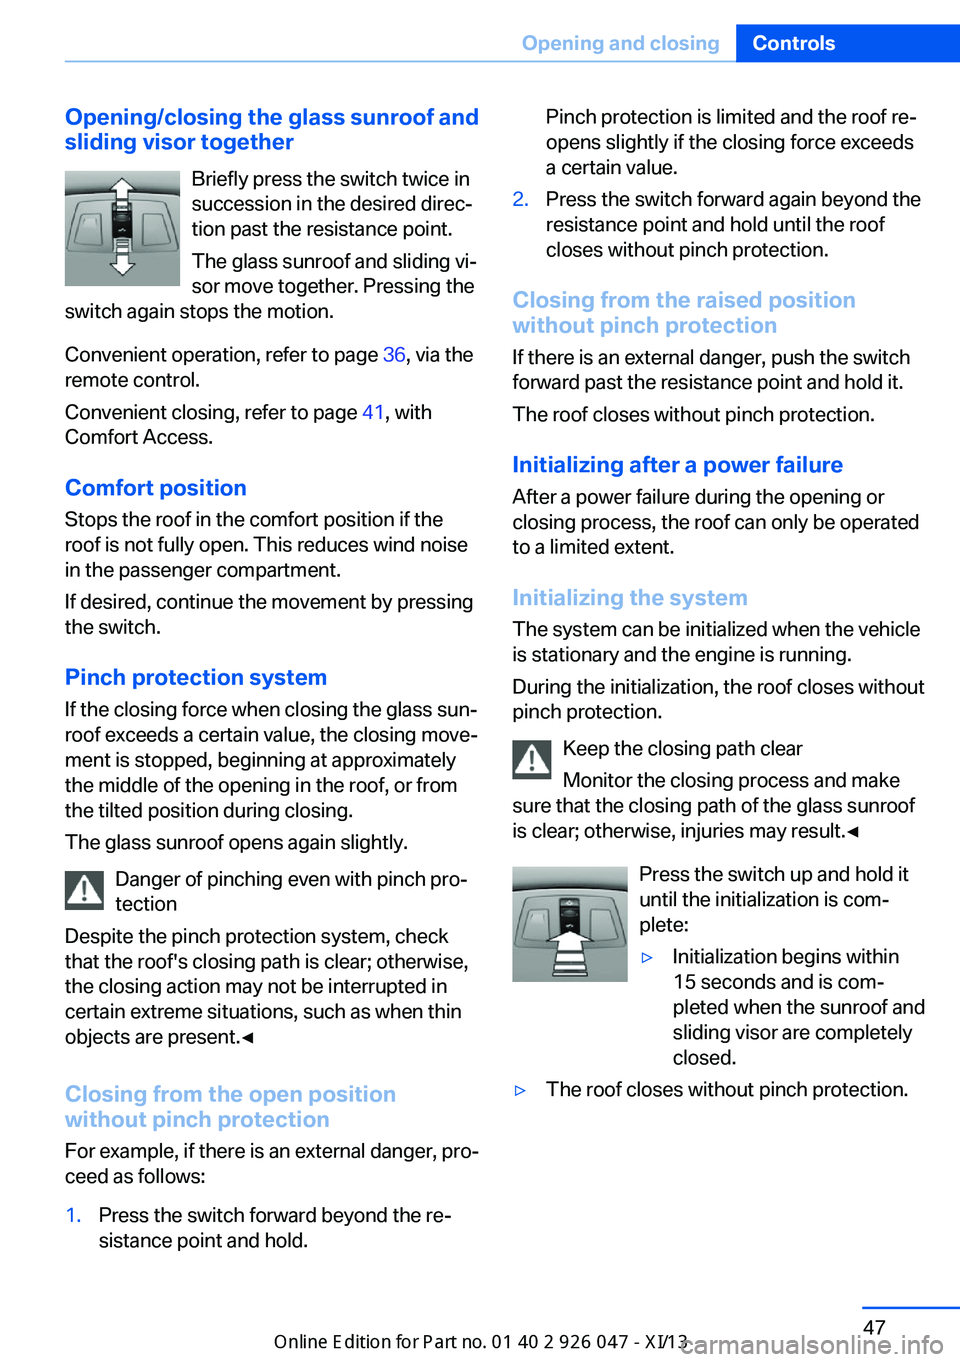
Opening/closing the glass sunroof and
sliding visor together
Briefly press the switch twice insuccession in the desired direc‐
tion past the resistance point.
The glass sunroof and sliding vi‐
sor move together. Pressing the
switch again stops the motion.
Convenient operation, refer to page 36, via the
remote control.
Convenient closing, refer to page 41, with
Comfort Access.
Comfort position
Stops the roof in the comfort position if the roof is not fully open. This reduces wind noise
in the passenger compartment.
If desired, continue the movement by pressing
the switch.
Pinch protection system If the closing force when closing the glass sun‐
roof exceeds a certain value, the closing move‐
ment is stopped, beginning at approximately
the middle of the opening in the roof, or from
the tilted position during closing.
The glass sunroof opens again slightly.
Danger of pinching even with pinch pro‐
tection
Despite the pinch protection system, check
that the roof's closing path is clear; otherwise,
the closing action may not be interrupted in
certain extreme situations, such as when thin
objects are present.◀
Closing from the open position
without pinch protection
For example, if there is an external danger, pro‐
ceed as follows:1.Press the switch forward beyond the re‐
sistance point and hold.Pinch protection is limited and the roof re‐
opens slightly if the closing force exceeds
a certain value.2.Press the switch forward again beyond the
resistance point and hold until the roof
closes without pinch protection.
Closing from the raised position
without pinch protection
If there is an external danger, push the switch
forward past the resistance point and hold it.
The roof closes without pinch protection.
Initializing after a power failure After a power failure during the opening or
closing process, the roof can only be operated
to a limited extent.
Initializing the system
The system can be initialized when the vehicle
is stationary and the engine is running.
During the initialization, the roof closes without
pinch protection.
Keep the closing path clear
Monitor the closing process and make
sure that the closing path of the glass sunroof
is clear; otherwise, injuries may result.◀
Press the switch up and hold it
until the initialization is com‐
plete:
▷Initialization begins within
15 seconds and is com‐
pleted when the sunroof and
sliding visor are completely
closed.▷The roof closes without pinch protection.Seite 47Opening and closingControls47
Online Edition for Part no. 01 40 2 911 041 - VI/13