Lamp BMW X3 2014 F25 Owner's Manual
[x] Cancel search | Manufacturer: BMW, Model Year: 2014, Model line: X3, Model: BMW X3 2014 F25Pages: 251, PDF Size: 5.79 MB
Page 7 of 251
Addendum
13.At page 202, under the heading:
“Fine-link snow chains,” the text
should be disregarded and the
following text should be read in lieu
thereof:
Only certain types of fine-link snow
chains have been tested by the
manufacturer of your vehicle and
are determined by the manufacturer
of your vehicle to be road safe and
are recommended by the
manufacturer of your vehicle.
Information about recommended
snow chains is available from a
service center.
14.At page 203, under the heading
“Hood,” the sentence beginning, “If
you are unfamiliar” should be
disregarded.
15.At page 207, under the heading:
“Approved oil types,” the references
to “Approved” should be read as
“Suitable.” Where it reads: You
can add oils with the following
specifications,” that text should be
disregarded, and the following text
read in lieu thereof: “Add engine
oils that meet the following oil rating
standards: . . .” At page 207, under
the heading: “Alternative oil types,”
the text preceding the chart should
be disregarded, and in lieu thereof
should be read as follows: “If an
engine oil suitable for continuous
use is not available, up to 1 US
quart/liter of an engine oil with the
following oil rating can be
added: . . .” The reference to
“specification” should be read as
“rating.”
16.At page 207, under the heading:
“Engine oil change,” the text should
be disregarded and in lieu thereof
should be read as follows:
BMW recommends that you have
the oil changed at your BMW
dealer’s service center or at another
service center that has trained
personnel that can perform the work
in accordance with BMW
specifications.
17.At page 210, under the heading:
“Service and Warranty Information
Booklet for US models and
Warranty and Service Guide
Booklet for Canadian models,” the
second paragraph should be
disregarded and the following text
read in lieu thereof:
The manufacturer of your vehicle
recommends that you have
maintenance and repair performed
by your BMW dealer’s service
center or another service center or
repair shop that employs trained
personnel that can perform
maintenance and repair work on
your vehicle in accordance with
BMW specifications. The
manufacturer of your vehicle
recommends that you maintain
records of all maintenance and
repair work performed on your
vehicle.
18.At page 213 and page 215, where it
reads: “Do not perform work/bulb
replacement on xenon headlamps,”
that text should be disregarded and
in lieu thereof the following text
should be read: “Xenon headlamp
Page 21 of 251
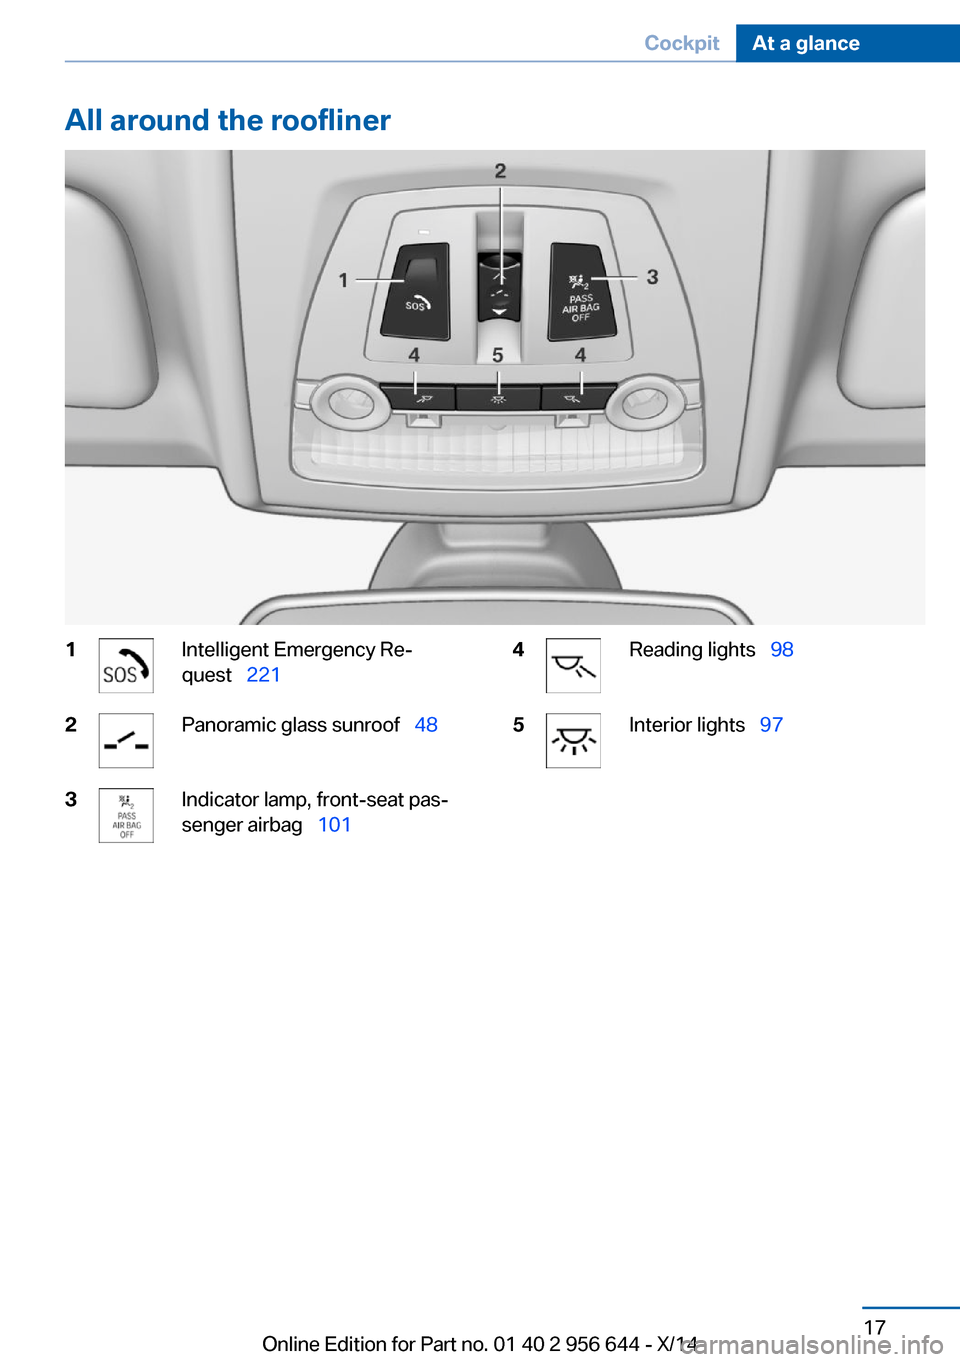
All around the roofliner1Intelligent Emergency Re‐
quest 2212Panoramic glass sunroof 483Indicator lamp, front-seat pas‐
senger airbag 1014Reading lights 985Interior lights 97Seite 17CockpitAt a glance17
Online Edition for Part no. 01 40 2 956 644 - X/14
Page 41 of 251
USB interface: "USB device"
Using the guest profile
The guest profile is for individual settings that
are saved in none of the three personal pro‐
files.
This can be useful for drivers who are using
the vehicle temporarily and do not have their
own profile.
1."Settings"2."Profiles"3."Guest"
The guest profile cannot be renamed. It is not
assigned to the current remote control.
Display profile list during start
The profile list can be displayed during each
start to select the desired profile.
1."Settings"2."Profiles"3."Options"4."Display user list at startup"
Using the remote control
Note Take the remote control with youPeople or animals left unattended in a
parked vehicle can lock the doors from the in‐
side. Always take the remote control with you
when leaving the vehicle so that the vehicle
can then be opened from the outside.◀
Unlocking Press button on the remote control.
▷All doors and the tailgate are unlocked.▷Interior lamps and courtesy lamps are acti‐
vated. This function is not available, if the
interior lamps were switched off manually.▷The welcome lamps are switched on, if this
function was activated.▷Exterior mirrors folded through convenient
closing are folded open.
You can set how the vehicle is to be unlocked.
For Settings, refer to page 45.
The alarm system, refer to page 46, is dis‐
armed.
Convenient opening Press and hold this button on the re‐mote control after unlocking.
The windows and the glass sunroof are
opened, as long as the button on the remote
control is pressed.
Locking Locking from the outside
Do not lock the vehicle from the outside
with people inside the car, as the vehicle can‐
not be unlocked from inside without special knowledge.◀
Press button on the remote control.
All doors and the tailgate are locked.
The alarm system, refer to page 46, is armed.
Switching on interior lights and
courtesy lights
Press button on the remote control with
the vehicle locked.
This function is not available, if the interior
lamps were switched off manually.
If the button is pressed again within 10 sec‐
onds after vehicle was locked, the interior mo‐
tion sensor and tilt alarm sensor of the anti-
theft warning system, refer to page 47, are
turned off. After locking, wait 10 seconds be‐
fore pressing the button again.
Seite 37Opening and closingControls37
Online Edition for Part no. 01 40 2 956 644 - X/14
Page 50 of 251
3."Last seat position autom."
Alarm systemThe conceptWhen the vehicle is locked, the vehicle alarm
system responds to:
▷Opening a door, the hood or the tailgate.▷Movements in the interior.▷Changes in the vehicle tilt, e. g., during at‐
tempts at stealing a wheel or when towing
the car.▷Disconnected battery voltage.
The alarm system briefly signals tampering:
▷By sounding an acoustic alarm.▷By switching on the hazard warning sys‐
tem.▷By flashing the daytime running lights.
Arming and disarming the alarm
system
When you unlock or lock the vehicle, either
with the remote control or via the Comfort Ac‐
cess, the alarm system is disarmed or armed at
the same time.
Door lock and armed alarm systemThe alarm system is triggered when the door is
opened, when the vehicle is unlocked via the
door lock.
Tailgate and armed alarm system
The tailgate can be opened even when the
alarm system is armed.
After the tailgate is closed, it is locked and
monitored again when the doors are locked.
The hazard warning system flashes once.
Panic mode You can trigger the alarm system if you find
yourself in a dangerous situation.
Press button on the remote control for
at least 3 seconds.
To reel off the alarm: press any button.
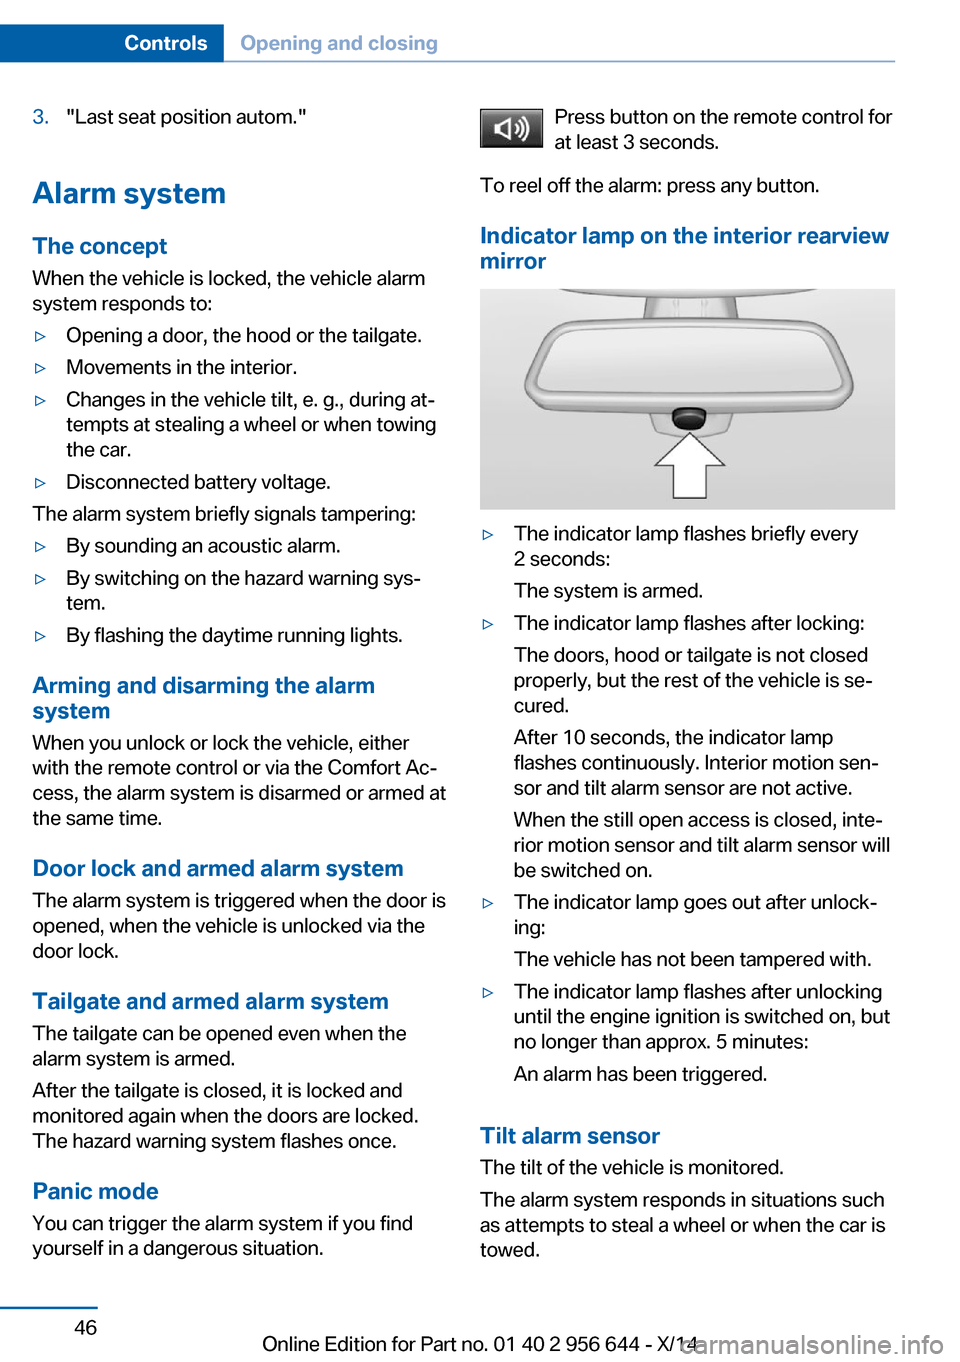
Indicator lamp on the interior rearview
mirror▷The indicator lamp flashes briefly every
2 seconds:
The system is armed.▷The indicator lamp flashes after locking:
The doors, hood or tailgate is not closed
properly, but the rest of the vehicle is se‐
cured.
After 10 seconds, the indicator lamp
flashes continuously. Interior motion sen‐
sor and tilt alarm sensor are not active.
When the still open access is closed, inte‐
rior motion sensor and tilt alarm sensor will
be switched on.▷The indicator lamp goes out after unlock‐
ing:
The vehicle has not been tampered with.▷The indicator lamp flashes after unlocking
until the engine ignition is switched on, but
no longer than approx. 5 minutes:
An alarm has been triggered.
Tilt alarm sensor The tilt of the vehicle is monitored.
The alarm system responds in situations such
as attempts to steal a wheel or when the car is
towed.
Seite 46ControlsOpening and closing46
Online Edition for Part no. 01 40 2 956 644 - X/14
Page 51 of 251
Interior motion sensorThe windows and glass sunroof must be
closed for the system to function properly.
Avoiding unintentional alarms
The tilt alarm sensor and interior motion sen‐
sor can be switched off together, such as in
the following situations:▷In automatic car washes.▷In duplex garages.▷During transport on trains carrying vehi‐
cles, at sea or on a trailer.▷With animals in the vehicle.
Switching off the tilt alarm sensor and
interior motion sensor
Press the remote control button again
within 10 seconds as soon as the vehicle
is locked.
The indicator lamp lights up for approx. 2 sec‐
onds and then continues to flash.
The tilt alarm sensor and interior motion sen‐
sor are turned off, until the vehicle is locked again.
Switching off the alarm
▷Unlock vehicle with the remote control or
reel on the ignition, if needed through
emergency detection of remote control, re‐
fer to page 35.▷With Comfort Access: If you are carrying
the remote control on your person, grasp
the driver side or front passenger side door
handle completely.Power windows
General information Take the remote control with you
Take the remote control with you when
leaving the vehicle so that children, e.g., can‐
not operate the power windows and injure
themselves.◀
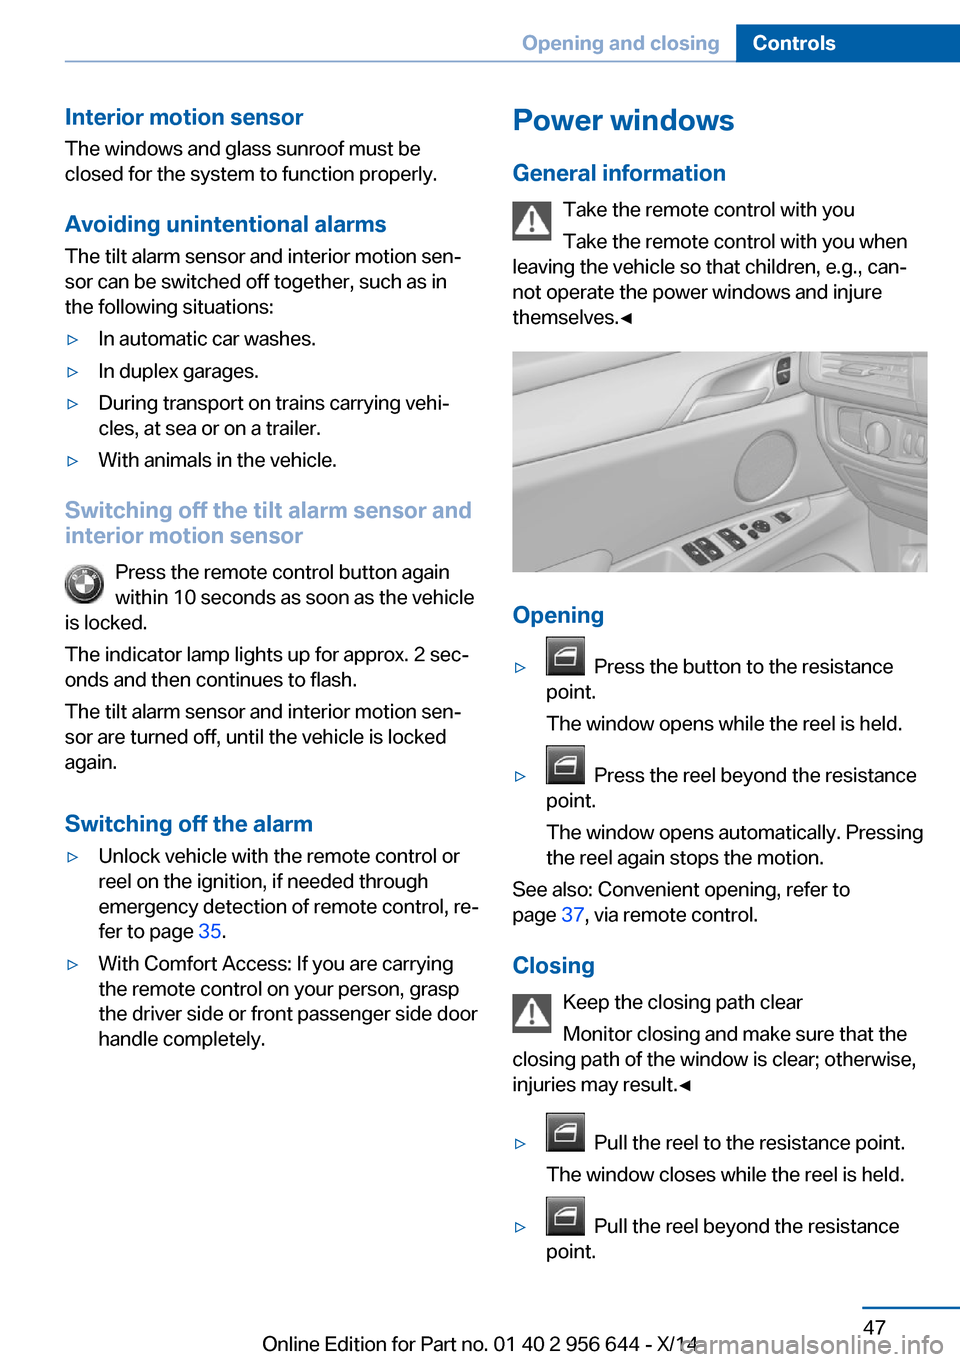
Opening
▷ Press the button to the resistance
point.
The window opens while the reel is held.▷ Press the reel beyond the resistance
point.
The window opens automatically. Pressing
the reel again stops the motion.
See also: Convenient opening, refer to
page 37, via remote control.
Closing Keep the closing path clear
Monitor closing and make sure that the
closing path of the window is clear; otherwise,
injuries may result.◀
▷ Pull the reel to the resistance point.
The window closes while the reel is held.▷ Pull the reel beyond the resistance
point.
Seite 47Opening and closingControls47
Online Edition for Part no. 01 40 2 956 644 - X/14
Page 59 of 251
HintsOne person per safety belt
Never allow more than one person to
wear a single safety belt. Never allow infants or
small children to ride on a passenger's lap.◀
Putting on the belt
Lay the belt, without twisting, snugly
across the lap and shoulders, as close to the
body as possible. Make sure that the belt lies
low around the hips in the lap area and does
not press on the abdomen. Otherwise, the belt
can slip over the hips in a frontal impact and in‐
jure the abdomen.
The safety belt must not lie across the neck,
rub on sharp edges, be routed over breakable
objects, or be pinched.◀
What reduces the restraining effect
Avoid wearing bulky clothing, and pull
the shoulder belt periodically to readjust the
tension. Make sure that the belt is not jammed;
otherwise, the belt can be damaged and the
restraining effect is reduced.◀
Buckling the belt
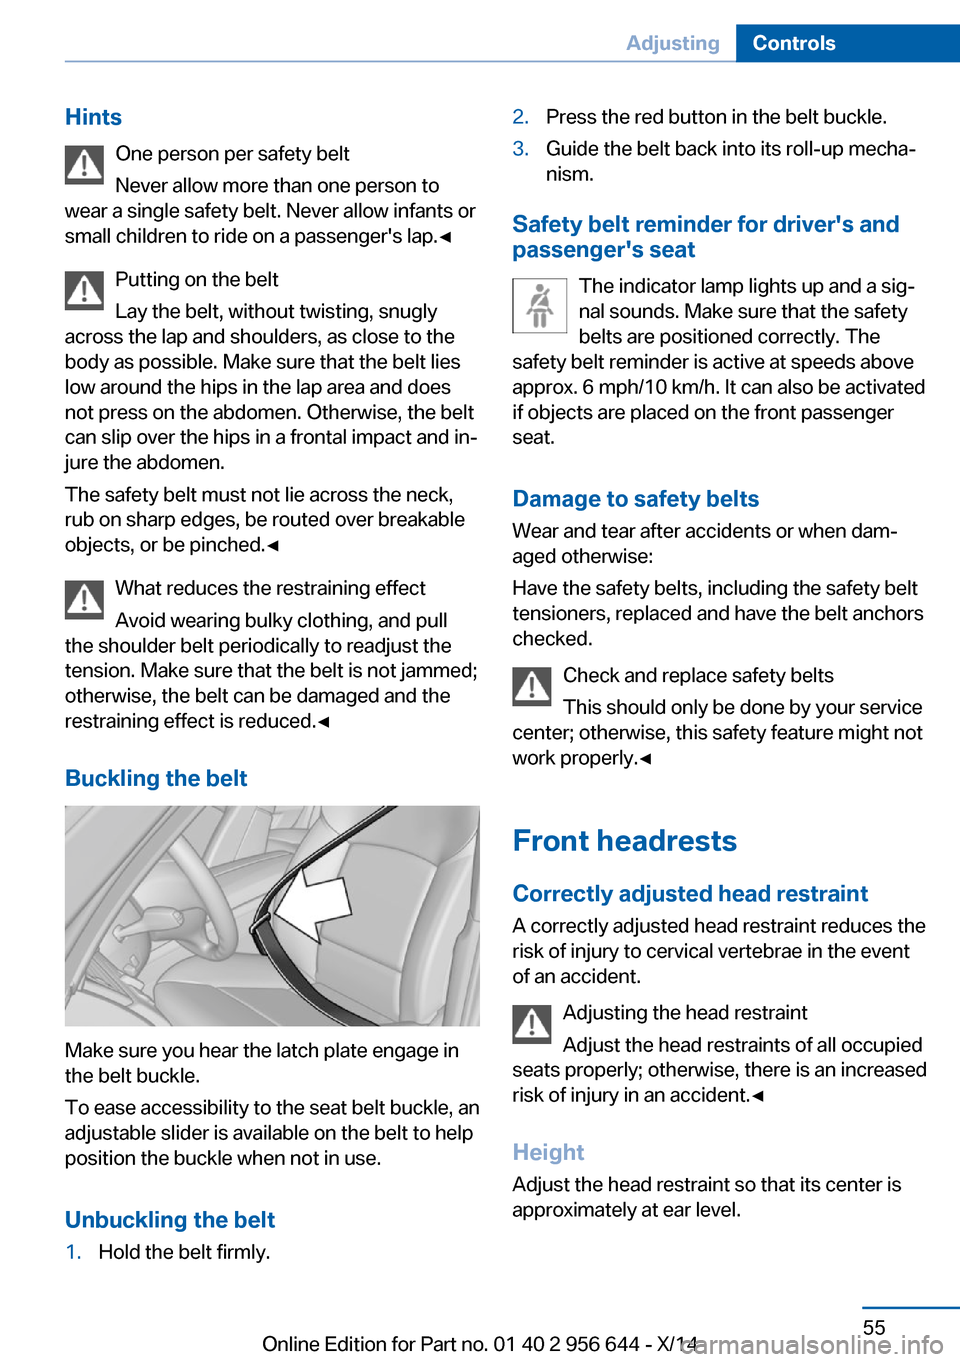
Make sure you hear the latch plate engage in
the belt buckle.
To ease accessibility to the seat belt buckle, an
adjustable slider is available on the belt to help
position the buckle when not in use.
Unbuckling the belt
1.Hold the belt firmly.2.Press the red button in the belt buckle.3.Guide the belt back into its roll-up mecha‐
nism.
Safety belt reminder for driver's and
passenger's seat
The indicator lamp lights up and a sig‐
nal sounds. Make sure that the safety
belts are positioned correctly. The
safety belt reminder is active at speeds above
approx. 6 mph/10 km/h. It can also be activated
if objects are placed on the front passenger
seat.
Damage to safety belts Wear and tear after accidents or when dam‐
aged otherwise:
Have the safety belts, including the safety belt
tensioners, replaced and have the belt anchors
checked.
Check and replace safety belts
This should only be done by your service
center; otherwise, this safety feature might not
work properly.◀
Front headrests Correctly adjusted head restraint
A correctly adjusted head restraint reduces the
risk of injury to cervical vertebrae in the event
of an accident.
Adjusting the head restraint
Adjust the head restraints of all occupied
seats properly; otherwise, there is an increased
risk of injury in an accident.◀
Height
Adjust the head restraint so that its center is
approximately at ear level.
Seite 55AdjustingControls55
Online Edition for Part no. 01 40 2 956 644 - X/14
Page 73 of 251
Malfunction
The Auto Start/Stop function no longer
switches off the engine automatically. A Check Control message is displayed. It is possible to
continue driving. Have the system checked.
Parking brake The conceptThe parking brake is used to prevent the vehi‐
cle from rolling when it is parked.
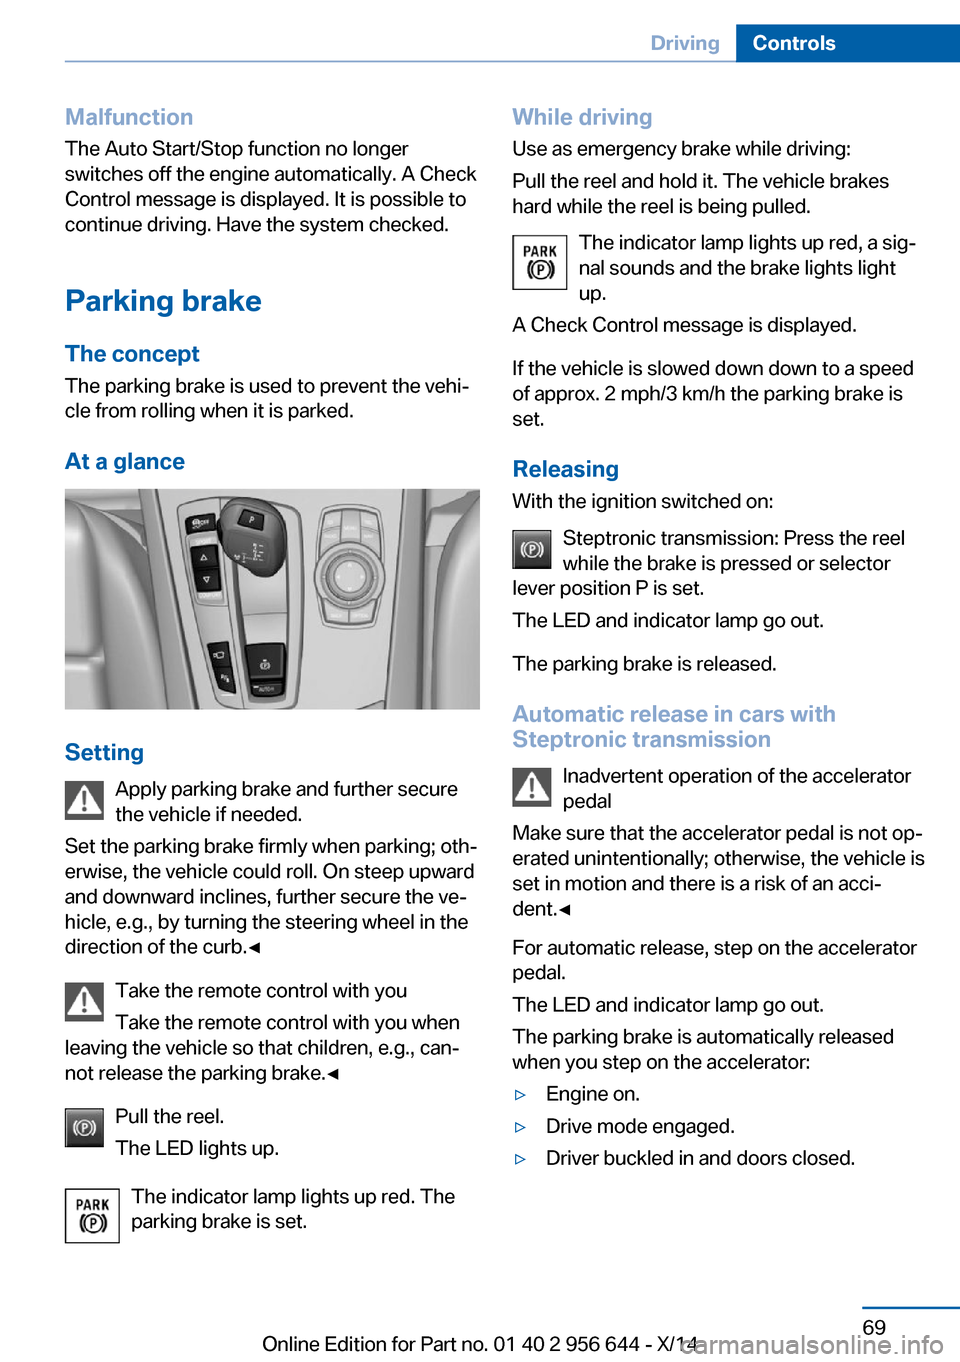
At a glance
Setting Apply parking brake and further secure
the vehicle if needed.
Set the parking brake firmly when parking; oth‐
erwise, the vehicle could roll. On steep upward
and downward inclines, further secure the ve‐
hicle, e.g., by turning the steering wheel in the
direction of the curb.◀
Take the remote control with you
Take the remote control with you when
leaving the vehicle so that children, e.g., can‐
not release the parking brake.◀
Pull the reel.
The LED lights up.
The indicator lamp lights up red. The
parking brake is set.
While driving
Use as emergency brake while driving:
Pull the reel and hold it. The vehicle brakes
hard while the reel is being pulled.
The indicator lamp lights up red, a sig‐
nal sounds and the brake lights light
up.
A Check Control message is displayed.
If the vehicle is slowed down down to a speed
of approx. 2 mph/3 km/h the parking brake is
set.
Releasing
With the ignition switched on:
Steptronic transmission: Press the reel
while the brake is pressed or selector
lever position P is set.
The LED and indicator lamp go out.
The parking brake is released.
Automatic release in cars with
Steptronic transmission
Inadvertent operation of the accelerator
pedal
Make sure that the accelerator pedal is not op‐
erated unintentionally; otherwise, the vehicle is
set in motion and there is a risk of an acci‐
dent.◀
For automatic release, step on the accelerator
pedal.
The LED and indicator lamp go out.
The parking brake is automatically released
when you step on the accelerator:▷Engine on.▷Drive mode engaged.▷Driver buckled in and doors closed.Seite 69DrivingControls69
Online Edition for Part no. 01 40 2 956 644 - X/14
Page 74 of 251
Automatic Hold
The concept This system assists the driver by automatically
setting and releasing the brake, such as when
moving in stop-and-go traffic.
The vehicle is automatically held in place when
it is stationary.
On inclines, the system prevents the vehicle
from rolling backward when driving off.
Safety information
Secure the vehicle against rolling
Before leaving the vehicle with the en‐
gine running, engage position P of the Step‐
tronic transmission and ensure that the park‐
ing brake is set. Otherwise, the vehicle may
begin to move.◀
Under the following conditions, Automatic
Hold is automatically deactivated and the park‐
ing brake is set:
▷The engine is switched off.▷A door is opened and driver's safety belt is
unbuckled while the vehicle is stationary.▷The moving vehicle is brought to a stand‐
still using the parking brake.
The indicator lamp switches from
green to red and the letters AUTO H go out.
Activating
This function can be activated when the driv‐
er's door is closed, the safety belt is fastened
and the engine is running.
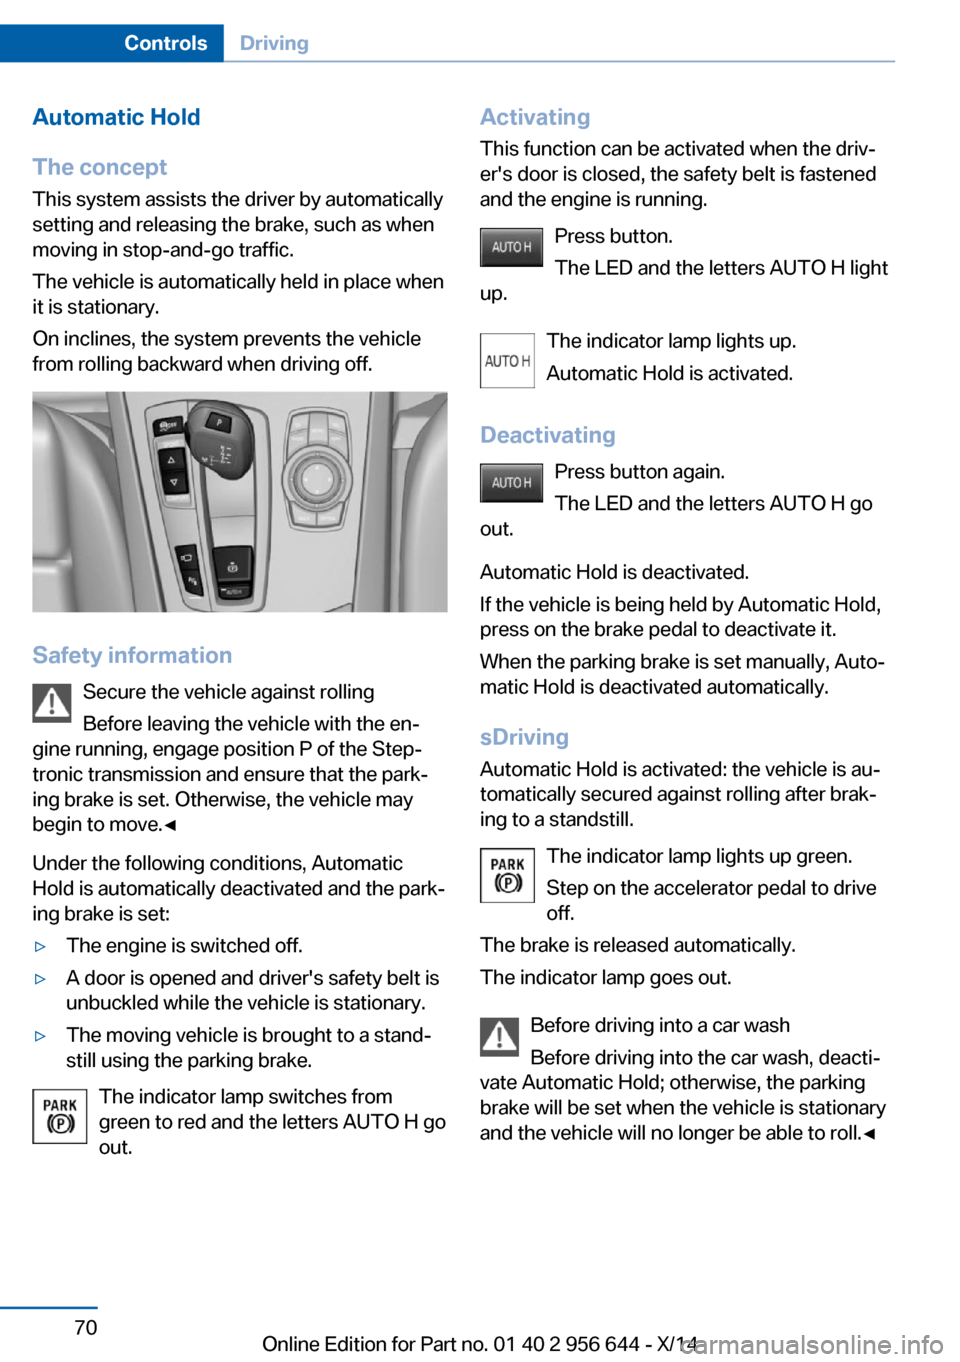
Press button.
The LED and the letters AUTO H light
up.
The indicator lamp lights up.
Automatic Hold is activated.
Deactivating Press button again.
The LED and the letters AUTO H go
out.
Automatic Hold is deactivated.
If the vehicle is being held by Automatic Hold,
press on the brake pedal to deactivate it.
When the parking brake is set manually, Auto‐
matic Hold is deactivated automatically.
sDriving Automatic Hold is activated: the vehicle is au‐
tomatically secured against rolling after brak‐
ing to a standstill.
The indicator lamp lights up green.
Step on the accelerator pedal to drive
off.
The brake is released automatically.
The indicator lamp goes out.
Before driving into a car wash
Before driving into the car wash, deacti‐
vate Automatic Hold; otherwise, the parking
brake will be set when the vehicle is stationary
and the vehicle will no longer be able to roll.◀Seite 70ControlsDriving70
Online Edition for Part no. 01 40 2 956 644 - X/14
Page 75 of 251
Parking
The parking brake is automatically set if the
engine is switched off while the vehicle is be‐
ing held by Automatic Hold.
The indicator lamp changes from green
to red.
The parking brake is not set if the en‐
gine is switched off while the vehicle is coast‐
ing to a halt. Automatic Hold is deactivated.
Automatic Hold remains activated during the
engine stop brought about by the Auto Start/
Stop function.
Take the remote control with you
Take the remote control with you when
leaving the vehicle so that children, e.g., can‐
not release the parking brake.◀
Malfunction In the event of a failure or malfunction of the
parking brake, secure the vehicle against roll‐
ing using a wheel chock, e.g., when leaving it.
After a power failure
Putting the parking brake into
operation1.Switch on the ignition.2. Press the reel while stepping on the
brake pedal or selector lever position P is
set.
It may take several seconds for the brake to be
put into operation. Any sounds associated with
this are normal.
The indicator lamp in the instrument
cluster goes out as soon as the parking
brake is ready for operation.
Turn signal, high beams,
headlight flasher
Turn signal Do not adjust the exterior mirrors
Do not adjust the exterior mirror while
driving and when blinker/hazards are on, or
else the additional blinker lights in the exterior
mirror are out of position and can't be seen.◀
Using turn signals
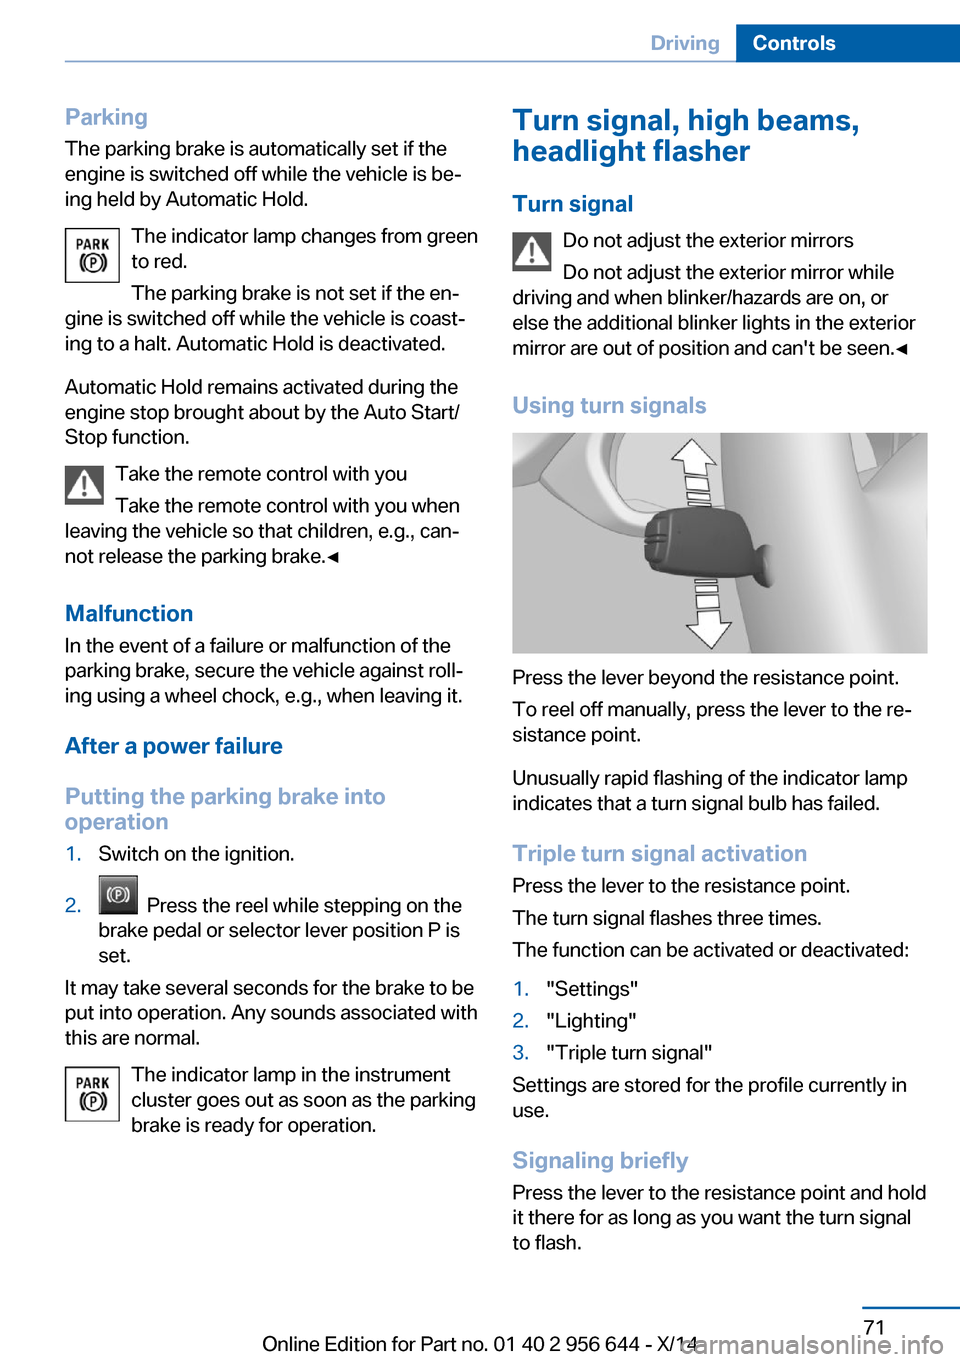
Press the lever beyond the resistance point.
To reel off manually, press the lever to the re‐
sistance point.
Unusually rapid flashing of the indicator lamp
indicates that a turn signal bulb has failed.
Triple turn signal activation Press the lever to the resistance point.
The turn signal flashes three times.
The function can be activated or deactivated:
1."Settings"2."Lighting"3."Triple turn signal"
Settings are stored for the profile currently in
use.
Signaling briefly
Press the lever to the resistance point and hold
it there for as long as you want the turn signal
to flash.
Seite 71DrivingControls71
Online Edition for Part no. 01 40 2 956 644 - X/14
Page 82 of 251
4.Press the selector lever again into posi‐
tion N within approx. 6 seconds.
Position N is displayed in the instrument
cluster.5.Release brake, as soon as the starter
stops.6.Maneuver the vehicle from the danger area
and secure it against moving on its own.
Steptronic Sport transmission:
Launch Control
The concept Launch Control enables optimum accelerationon surfaces with good traction.
Hints Component wear
Do not use Launch Control too often;
otherwise, this may result in premature wear of
components due to the high stress placed on
the vehicle.◀
Do not use Launch Control during the break-in,
refer to page 172, period.
To increase vehicle stability, activate DSC
again as soon as possible.
An experienced driver may be able to achieve
better acceleration values in DSC OFF mode.
Requirements Launch Control is available when the engine is
warmed up, that is, after uninterrupted driving
of at least 6 miles/10 km.
To start with Launch Control do not steer the
steering wheel.
Start with launch controlWhile the engine is running:
1. Press button or select Sport+ with
the Driving Dynamics Control.TRACTION is displayed in the instrument
cluster and the indicator lamp for DSC OFF
lights up.2.Engage selector lever position S.3.With the left foot, forcefully press down on
the brake.4.Press and hold down the accelerator pedal
beyond the resistance point at the full
throttle position.
A flag symbol is displayed in the instru‐
ment cluster.5.The starting engine speed adjusts. Within
3 seconds, release the brake.
Before using Launch Control, allow the trans‐
mission to cool down for approx. 5 minutes.
Launch Control adjusts to the surrounding
conditions, e.g., wet pavement, when used
again.
Seite 78ControlsDriving78
Online Edition for Part no. 01 40 2 956 644 - X/14