change time BMW X3 3.0I 2005 E83 Owner's Manual
[x] Cancel search | Manufacturer: BMW, Model Year: 2005, Model line: X3 3.0I, Model: BMW X3 3.0I 2005 E83Pages: 126, PDF Size: 4.65 MB
Page 19 of 126
Opening and closing
18 LX8FZVE
Compliance statement:
This device complies with part 15 of the FCC
Rules. Operation is subject to the following two
conditions:
>This device may not cause harmful interfer-
ence.
and
>This device must accept any interference
received, including interference that may
cause undesired operation.
Any unauthorized modifications or
changes to these devices could void the
user's authority to operate the equipment.<
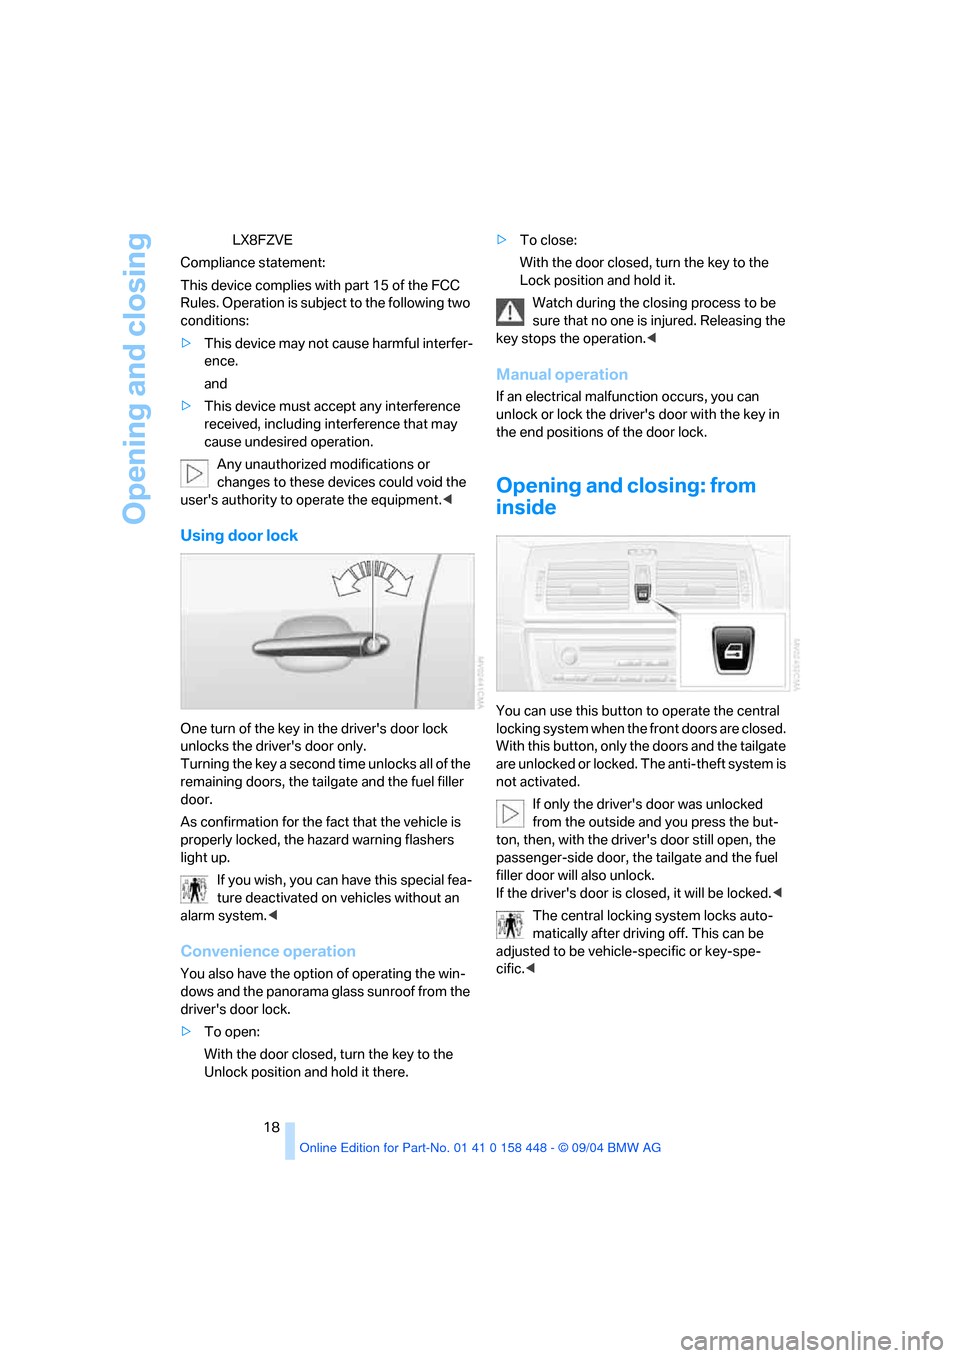
Using door lock
One turn of the key in the driver's door lock
unlocks the driver's door only.
Turning the key a second time unlocks all of the
remaining doors, the tailgate and the fuel filler
door.
As confirmation for the fact that the vehicle is
properly locked, the hazard warning flashers
light up.
If you wish, you can have this special fea-
ture deactivated on vehicles without an
alarm system.<
Convenience operation
You also have the option of operating the win-
dows and the panorama glass sunroof from the
driver's door lock.
>To open:
With the door closed, turn the key to the
Unlock position and hold it there. >To close:
With the door closed, turn the key to the
Lock position and hold it.
Watch during the closing process to be
sure that no one is injured. Releasing the
key stops the operation.<
Manual operation
If an electrical malfunction occurs, you can
unlock or lock the driver's door with the key in
the end positions of the door lock.
Opening and closing: from
inside
You can use this button to operate the central
locking system when the front doors are closed.
With this button, only the doors and the tailgate
are unlocked or locked. The anti-theft system is
not activated.
If only the driver's door was unlocked
from the outside and you press the but-
ton, then, with the driver's door still open, the
passenger-side door, the tailgate and the fuel
filler door will also unlock.
If the driver's door is closed, it will be locked.<
The central locking system locks auto-
matically after driving off. This can be
adjusted to be vehicle-specific or key-spe-
cific.<
Page 23 of 126
Opening and closing
22
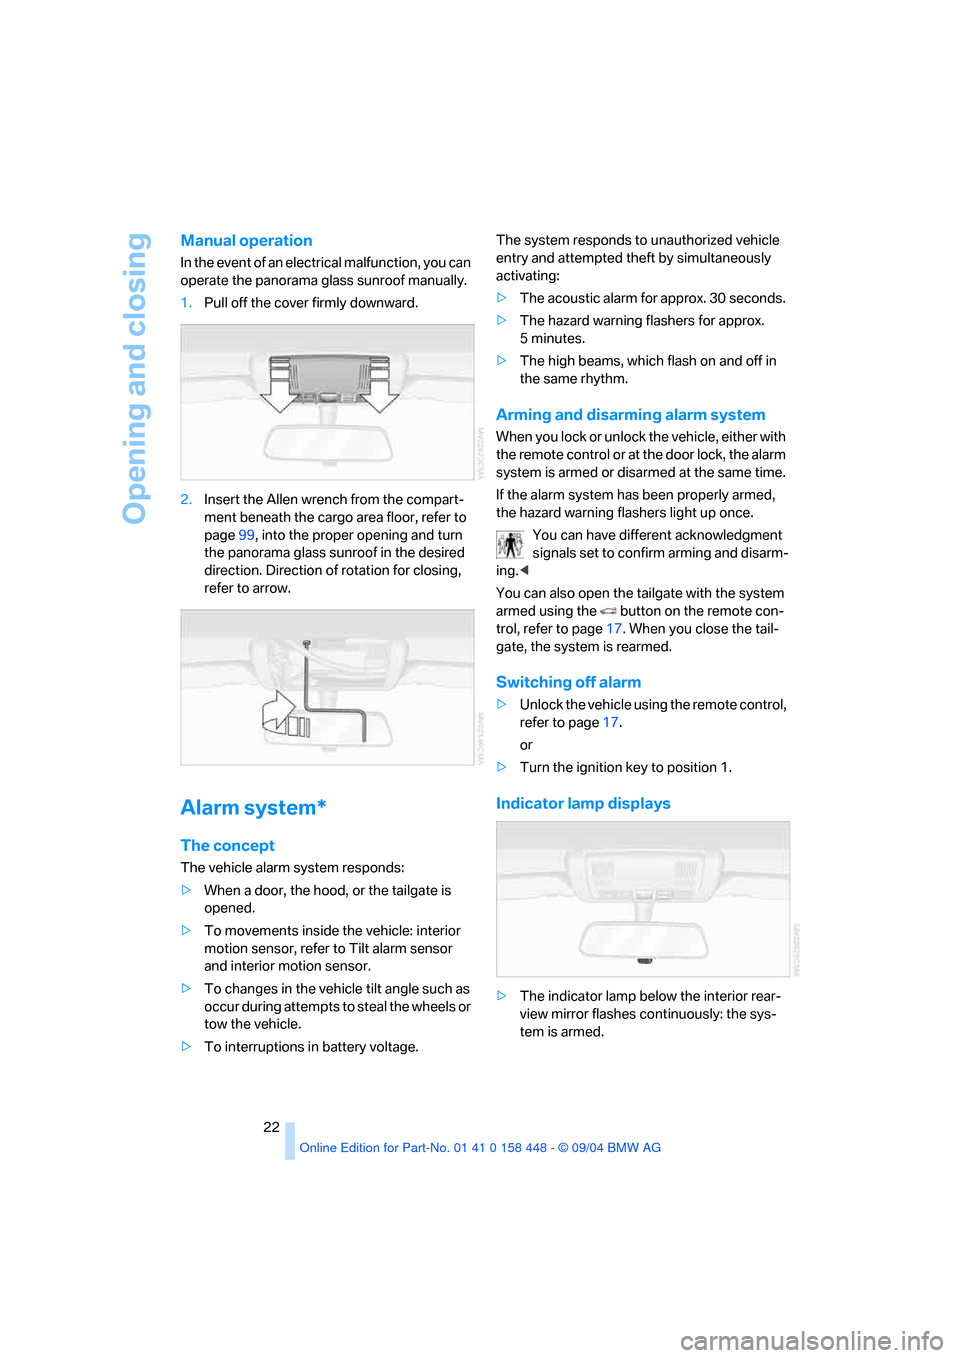
Manual operation
In the event of an electrical malfunction, you can
operate the panorama glass sunroof manually.
1.Pull off the cover firmly downward.
2.Insert the Allen wrench from the compart-
ment beneath the cargo area floor, refer to
page99, into the proper opening and turn
the panorama glass sunroof in the desired
direction. Direction of rotation for closing,
refer to arrow.
Alarm system*
The concept
The vehicle alarm system responds:
>When a door, the hood, or the tailgate is
opened.
>To movements inside the vehicle: interior
motion sensor, refer to Tilt alarm sensor
and interior motion sensor.
>To changes in the vehicle tilt angle such as
occur during attempts to steal the wheels or
tow the vehicle.
>To interruptions in battery voltage.The system responds to unauthorized vehicle
entry and attempted theft by simultaneously
activating:
>The acoustic alarm for approx. 30 seconds.
>The hazard warning flashers for approx.
5minutes.
>The high beams, which flash on and off in
the same rhythm.
Arming and disarming alarm system
When you lock or unlock the vehicle, either with
the remote control or at the door lock, the alarm
system is armed or disarmed at the same time.
If the alarm system has been properly armed,
the hazard warning flashers light up once.
You can have different acknowledgment
signals set to confirm arming and disarm-
ing.<
You can also open the tailgate with the system
armed using the button on the remote con-
trol, refer to page17. When you close the tail-
gate, the system is rearmed.
Switching off alarm
>Unlock the vehicle using the remote control,
refer to page17.
or
>Turn the ignition key to position 1.
Indicator lamp displays
>The indicator lamp below the interior rear-
view mirror flashes continuously: the sys-
tem is armed.
Page 31 of 126
Adjustments
30
Vehicle Memory, Key Memory
How the system functions
You have probably frequently wished that you
could configure individual functions of your
vehicle to reflect your own personal require-
ments. In developing your vehicle, BMW has
incorporated a number of options for personal
adjustment. You can have these programmed
at your BMW Sports Activity Vehicle Center.
There are vehicle-related and person-related
adjustments: Vehicle Memory and Key Mem-
ory. You can configure up to four different basic
adjustments for four different persons. The only
requirement is that each person uses his or her
own master key with remote control.
When your vehicle is unlocked with the remote
control, the vehicle recognizes the individual
user by means of a data exchange with the key,
and makes adjustments accordingly.
In order for you to distinguish between the mas-
ter keys with remote control, color-coded
decals are supplied together with the keys.
What the system can do
Your BMW Sports Activity Vehicle Center can
provide you with details on the capabilities of
the Vehicle Memory and Key Memory systems.
You will see this symbol throughout the
Owner's Manual. It is to remind you at
appropriate places of the settings that are avail-
able to you.<
Following configuration of memory func-
tions, vehicle operation may differ from
the description in the Owner's Manual. Should
you want to sell your BMW some day, please
remember to have the memory functions reset
to the factory default settings.<
Examples of Vehicle Memory functions
>Different acknowledgment signals to con-
firm locking/unlocking of the vehicle, refer
to page16.
>Activating/deactivating function for path-
way lighting, refer to page53.
>Activating/deactivating daytime driving
lamps, refer to page53.
>Setting measurement units for displays in
the instrument cluster for time, outside
temperature, distance driven and fuel con-
sumption, refer to page44.
>Active PDC Park Distance Control is indi-
cated by an acoustic sound signal when
reverse gear or selector lever position R is
engaged, refer to page46.
>The rear window defroster switches on
automatically, refer to page57.
>Different acknowledgment signals to con-
firm arming/disarming the alarm system,
refer to page22.
>After an ice warning has been issued, the
computer display returns to the previous
adjustment, refer to page44.
>Acoustic warning if the ignition key remains
in the ignition lock after the driver's door has
been opened, refer to page19.
Examples of Key Memory functions
>When unlocking, first unlock the driver's
door, then the entire vehicle, refer to
page17.
>Locking the vehicle after moving off, refer to
page18.
>Automatic adjustment of the driver's seat
and exterior mirror position for each person
when unlocking the vehicle, refer to
page27.
>Angle of downward tilt of mirror on passen-
ger side, refer to page29.
Page 41 of 126
Driving
40 3.Move the wiper lever from position 0 to
position 2 again
To change the wiper blades, refer to page95.
Cruise control*
The vehicle maintains and stores the speed
that you set as of a speed of approx. 20 mph/
30 km/h.
You can use cruise control whenever the sys-
tem is active while the engine is running.
On the sports steering-wheel
* the buttons +/–
for the cruise control are located on the right-
hand side of the steering wheel.
Indicator lamp
The indicator lamp lights up green:
System ready for operation using the
buttons on the steering wheel.
Activating system
As of ignition key position 2:
Press button on steering wheel; the indicator
lamp in the instrument cluster comes on. You
are able to use the cruise control.
Do not use the cruise control under unfa-
vorable conditions that do not permit a
constant speed, e.g. when driving on winding
roads or in heavy traffic or when negotiating
poor road conditions such as snow, rain, ice, or
a loose road surface.<
Deactivating system
Press the button repeatedly until the indicator
lamp in the instrument cluster goes out.
The cruise control is also deactivated when the
ignition key is turned to position 0. The speed
stored in the memory is deleted in the process.
Maintaining speed, storing, and
accelerating
Briefly press + button:
The system maintains and stores the current
vehicle speed. Every time you briefly press the
button, the vehicle's speed increases by
roughly 1 mph/1 km/h.
Press and hold
+ button:
The vehicle accelerates without pressure on
the accelerator pedal. When you release the
button, the system maintains and stores the
current speed.
If, on a downhill gradient, the engine's
braking effect is not sufficient, the con-
trolled speed can be exceeded. Speed can drop
on uphill grades if the engine output is insuffi-
cient.<
Decelerating
Briefly press – button:
Every time you briefly press the button, the
vehicle's speed decreases by roughly 1 mph/
1 km/h provided that you have already activated
the cruise control.
Press and hold
– button:
With the cruise control active, the system auto-
matically reduces the fuel supply to slow the
vehicle. When you release the button, the sys-
tem maintains and stores the current speed.
Interrupting cruise control
When the system is activated, press button 1.
The indicator lamp stays on. You can use the
cruise control again whenever required by
requesting the speed that was stored last.
Page 44 of 126
Reference
At a glance
Controls
Driving tips
Mobility
43
Between blue and red fields
Normal operating range. It is permissible for the
dial to drift up to the red field.
Red
Comes on while driving:
The engine is overheated. Switch off the engine
immediately and allow it to cool down.
Checking coolant level, refer to page91.
When you switch on the ignition, the warning
lamp1 comes on briefly to confirm that the sys-
tem is operational.
Service Interval Display
Remaining distance until next service
due
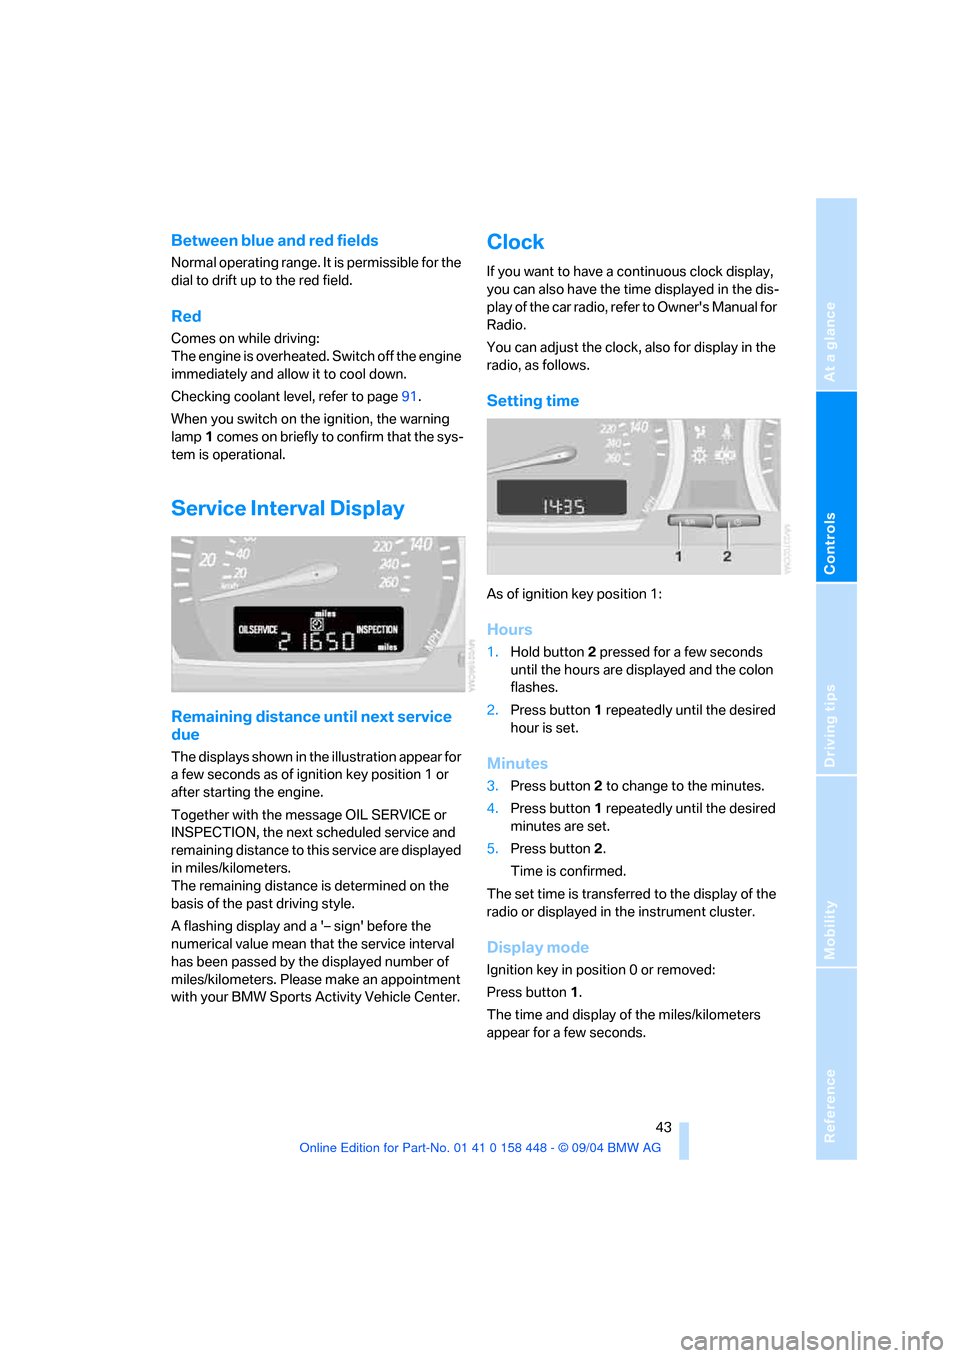
The displays shown in the illustration appear for
a few seconds as of ignition key position 1 or
after starting the engine.
Together with the message OIL SERVICE or
INSPECTION, the next scheduled service and
remaining distance to this service are displayed
in miles/kilometers.
The remaining distance is determined on the
basis of the past driving style.
A flashing display and a '– sign' before the
numerical value mean that the service interval
has been passed by the displayed number of
miles/kilometers. Please make an appointment
with your BMW Sports Activity Vehicle Center.
Clock
If you want to have a continuous clock display,
you can also have the time displayed in the dis-
play of the car radio, refer to Owner's Manual for
Radio.
You can adjust the clock, also for display in the
radio, as follows.
Setting time
As of ignition key position 1:
Hours
1.Hold button2 pressed for a few seconds
until the hours are displayed and the colon
flashes.
2.Press button1 repeatedly until the desired
hour is set.
Minutes
3.Press button2 to change to the minutes.
4.Press button1 repeatedly until the desired
minutes are set.
5.Press button2.
Time is confirmed.
The set time is transferred to the display of the
radio or displayed in the instrument cluster.
Display mode
Ignition key in position 0 or removed:
Press button1.
The time and display of the miles/kilometers
appear for a few seconds.
Page 45 of 126
Everything under control
44
Computer*
Mode selection
As of ignition key position 1, you can call up
information from the computer using the com-
puter button in the turn signal lever.
A new function appears each time you briefly
press the computer button.
The displays appear in the following order:
Time, outside temperature, average fuel con-
sumption, cruising range, average speed.
As of ignition key position 1, the last active set-
ting is displayed.
If you desire, you can display the following
functions in a different unit of measure.<
Outside temperature
Changing unit of measure 7/6
During the display, hold down the button in the
turn signal lever until the display changes.
Ice warning
If the outside temperature falls below approx.
+37.57/+36, the computer switches auto-
matically to the outside temperature display. In
addition, an acoustic signal sounds and the dis-
play flashes for a short time.After an ice warning has been issued, the
display returns to the previous setting.
You can have this activated/deactivated.<
Please bear in mind that the ice warning
does nothing to alter the fact that black
ice may be present on roads at temperatures
higher than +37.57/+36, for instance, on
bridges and shaded roads.<
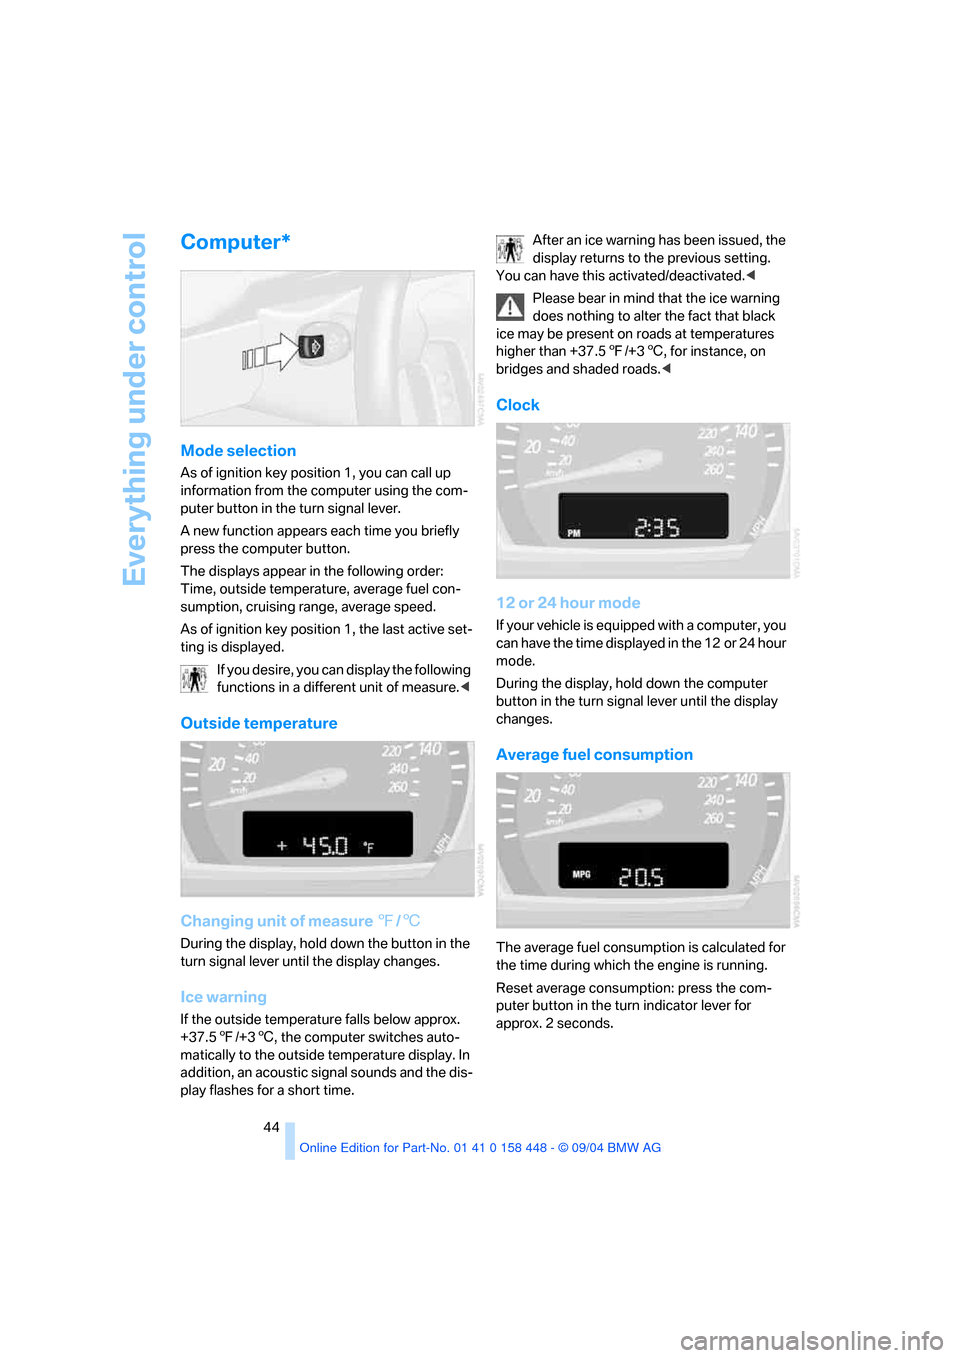
Clock
12 or 24 hour mode
If your vehicle is equipped with a computer, you
can have the time displayed in the 12 or 24 hour
mode.
During the display, hold down the computer
button in the turn signal lever until the display
changes.
Average fuel consumption
The average fuel consumption is calculated for
the time during which the engine is running.
Reset average consumption: press the com-
puter button in the turn indicator lever for
approx. 2 seconds.
Page 51 of 126
Technology for comfort, convenience and safety
50 The check of the tire inflation pressure is based
on monitoring the relative speeds of the wheels.
A flat tire is detected and reported on the basis
of a deviation in certain speed ratios.
Functional requirement
So that the Flat Tire Monitor can learn the cor-
rect inflation pressure, please perform the fol-
lowing steps:
1.Check the inflation pressures in all tires
2.Compare with the inflation pressure table
on page83 and correct if necessary
3.Initialize the system.
System limits
The Flat Tire Monitor cannot indicate
sudden severe tire damage caused by
outside factors and does not detect a natural,
even pressure drop in all four tires.<
In the following situations, on the other hand,
there can be delays in detecting tire pressure
losses, and even system failure:
>When driving on snow-covered or slippery
road surfaces.
>In the case of performance-oriented driving:
slip in the drive wheels, high lateral acceler-
ation.
>False alarms and undetected loss of pres-
sure may occur when you are driving with
snow chains fitted.
>When driving with a compact wheel, the Flat
Tire Monitor cannot operate.
Initializing system
Perform the initialization immediately
every time you correct the inflation pres-
sure, change a tire or change a wheel or all
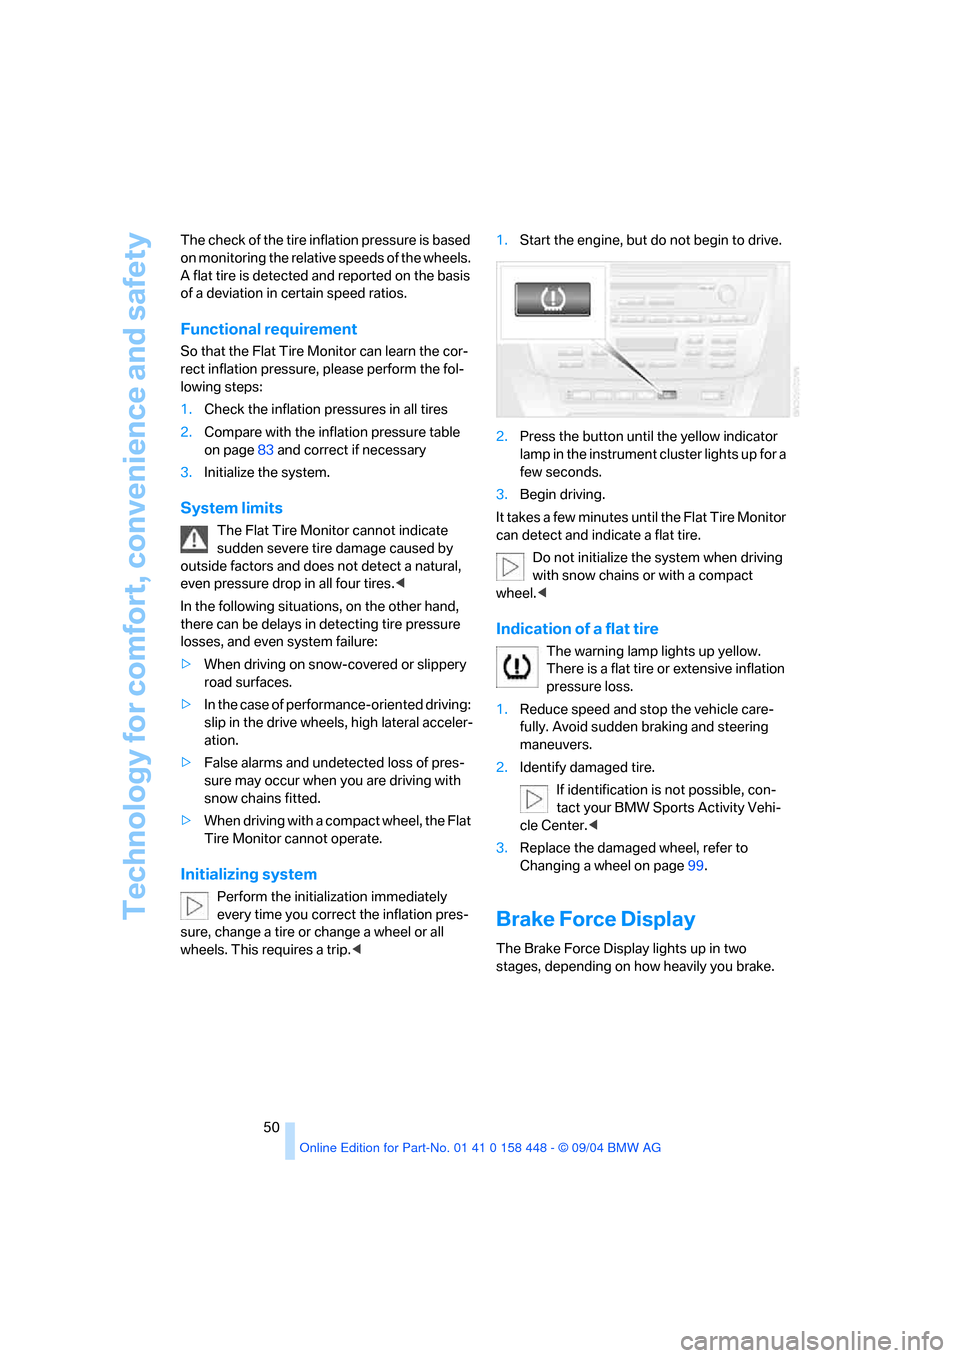
wheels. This requires a trip.<1.Start the engine, but do not begin to drive.
2.Press the button until the yellow indicator
lamp in the instrument cluster lights up for a
few seconds.
3.Begin driving.
It takes a few minutes until the Flat Tire Monitor
can detect and indicate a flat tire.
Do not initialize the system when driving
with snow chains or with a compact
wheel.<
Indication of a flat tire
The warning lamp lights up yellow.
There is a flat tire or extensive inflation
pressure loss.
1.Reduce speed and stop the vehicle care-
fully. Avoid sudden braking and steering
maneuvers.
2.Identify damaged tire.
If identification is not possible, con-
tact your BMW Sports Activity Vehi-
cle Center.<
3.Replace the damaged wheel, refer to
Changing a wheel on page99.
Brake Force Display
The Brake Force Display lights up in two
stages, depending on how heavily you brake.
Page 54 of 126
Reference
At a glance
Controls
Driving tips
Mobility
53
Lamps
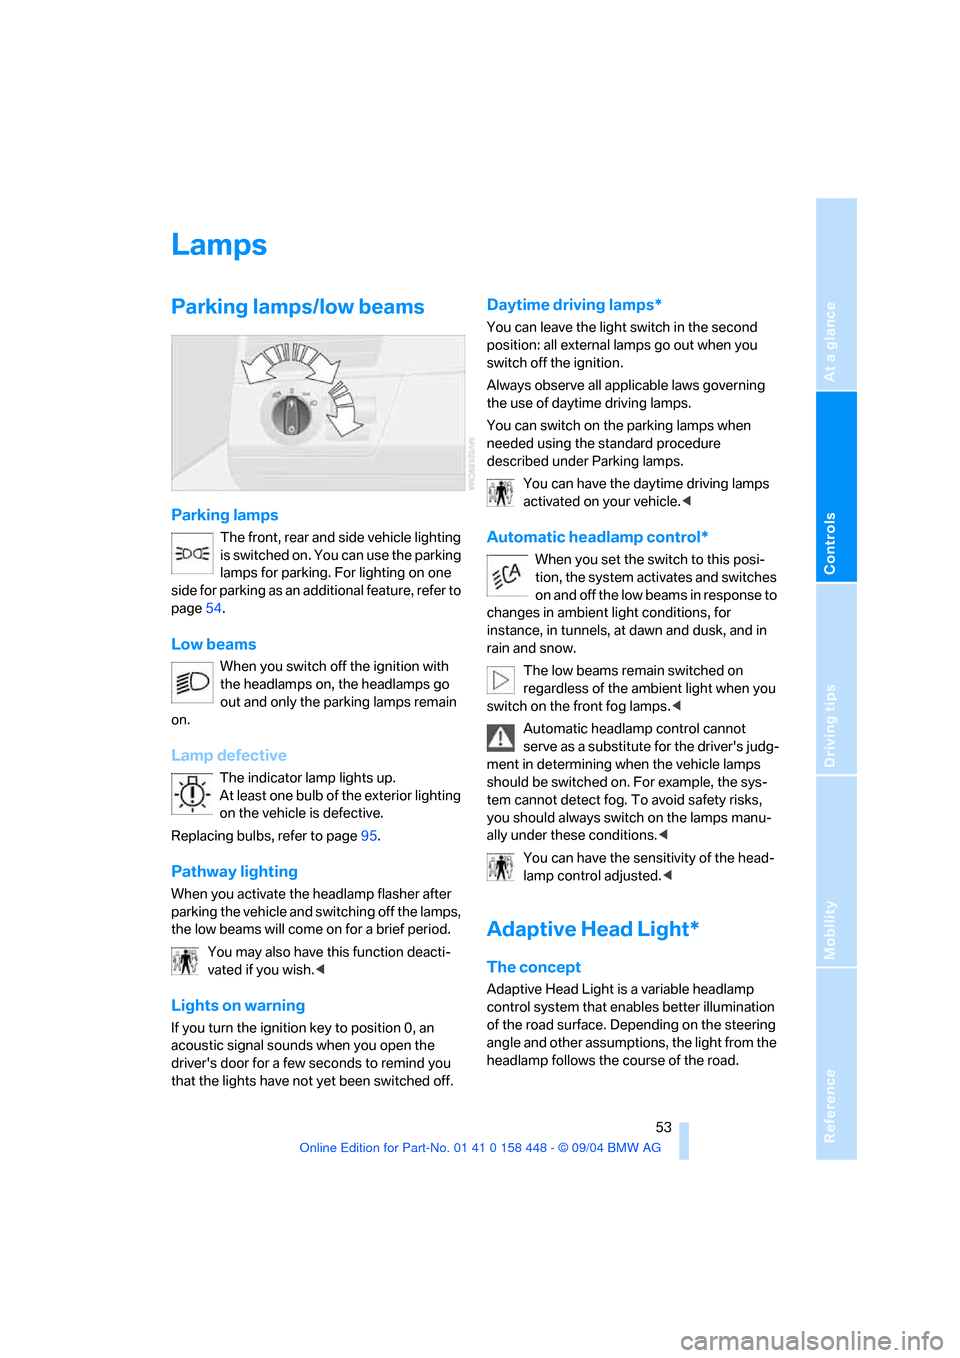
Parking lamps/low beams
Parking lamps
The front, rear and side vehicle lighting
is switched on. You can use the parking
lamps for parking. For lighting on one
side for parking as an additional feature, refer to
page54.
Low beams
When you switch off the ignition with
the headlamps on, the headlamps go
out and only the parking lamps remain
on.
Lamp defective
The indicator lamp lights up.
At least one bulb of the exterior lighting
on the vehicle is defective.
Replacing bulbs, refer to page95.
Pathway lighting
When you activate the headlamp flasher after
parking the vehicle and switching off the lamps,
the low beams will come on for a brief period.
You may also have this function deacti-
vated if you wish.<
Lights on warning
If you turn the ignition key to position 0, an
acoustic signal sounds when you open the
driver's door for a few seconds to remind you
that the lights have not yet been switched off
.
Daytime driving lamps*
You can leave the light switch in the second
position: all external lamps go out when you
switch off the ignition.
Always observe all applicable laws governing
the use of daytime driving lamps.
You can switch on the parking lamps when
needed using the standard procedure
described under Parking lamps.
You can have the daytime driving lamps
activated on your vehicle.<
Automatic headlamp control*
When you set the switch to this posi-
tion, the system activates and switches
on and off the low beams in response to
changes in ambient light conditions, for
instance, in tunnels, at dawn and dusk, and in
rain and snow.
The low beams remain switched on
regardless of the ambient light when you
switch on the front fog lamps.<
Automatic headlamp control cannot
serve as a substitute for the driver's judg-
ment in determining when the vehicle lamps
should be switched on. For example, the sys-
tem cannot detect fog. To avoid safety risks,
you should always switch on the lamps manu-
ally under these conditions.<
You can have the sensitivity of the head-
lamp control adjusted.<
Adaptive Head Light*
The concept
Adaptive Head Light is a variable headlamp
control system that enables better illumination
of the road surface. Depending on the steering
angle and other assumptions, the light from the
headlamp follows the course of the road.
Page 94 of 126
Reference
At a glance
Controls
Driving tips
Mobility
93
Maintenance
The BMW maintenance
system
The BMW maintenance system supports the
preservation of the traffic and operating safety
of your BMW.
Regular maintenance is not only required for
the safety of the vehicle, it also improves the
resale value.
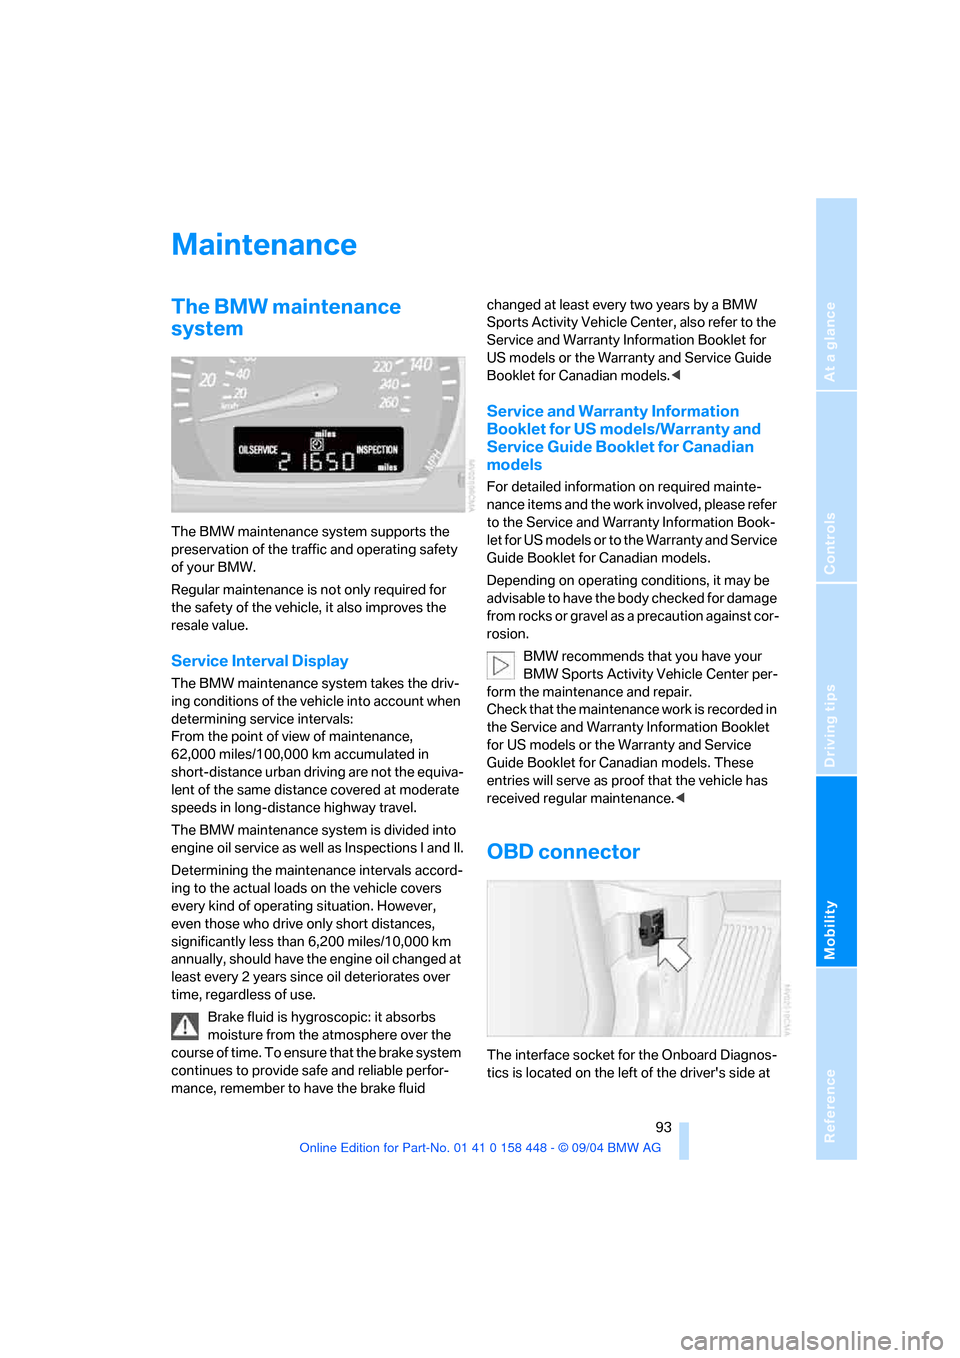
Service Interval Display
The BMW maintenance system takes the driv-
ing conditions of the vehicle into account when
determining service intervals:
From the point of view of maintenance,
62,000 miles/100,000 km accumulated in
short-distance urban driving are not the equiva-
lent of the same distance covered at moderate
speeds in long-distance highway travel.
The BMW maintenance system is divided into
engine oil service as well as Inspections I and II.
Determining the maintenance intervals accord-
ing to the actual loads on the vehicle covers
every kind of operating situation. However,
even those who drive only short distances,
significantly less than 6,200 miles/10,000 km
annually, should have the engine oil changed at
least every 2 years since oil deteriorates over
time, regardless of use.
Brake fluid is hygroscopic: it absorbs
moisture from the atmosphere over the
course of time. To ensure that the brake system
continues to provide safe and reliable perfor-
mance, remember to have the brake fluid changed at least every two years by a BMW
Sports Activity Vehicle Center, also refer to the
Service and Warranty Information Booklet for
US models or the Warranty and Service Guide
Booklet for Canadian models.<
Service and Warranty Information
Booklet for US models/Warranty and
Service Guide Booklet for Canadian
models
For detailed information on required mainte-
nance items and the work involved, please refer
to the Service and Warranty Information Book-
let for US models or to the Warranty and Service
Guide Booklet for Canadian models.
Depending on operating conditions, it may be
advisable to have the body checked for damage
from rocks or gravel as a precaution against cor-
rosion.
BMW recommends that you have your
BMW Sports Activity Vehicle Center per-
form the maintenance and repair.
Check that the maintenance work is recorded in
the Service and Warranty Information Booklet
for US models or the Warranty and Service
Guide Booklet for Canadian models. These
entries will serve as proof that the vehicle has
received regular maintenance.<
OBD connector
The interface socket for the Onboard Diagnos-
tics is located on the left of the driver's side at
Page 116 of 126
Reference
At a glance
Controls
Driving tips
Mobility
115
Circulation of air, refer to
Recirculated-air
mode57,60
Cleaning, vehicle, refer to the
Caring for your vehicle
brochure
Cleaning rear window39
Cleaning windows,
reservoir90
Cleaning windshield39
Clock43,44
– 12/24 hour mode44
– setting, also refer to Owner's
Manual for Radio/Onboard
Computer
– setting time43
Closing
– from inside18
– from outside16
Clothes hooks65
Clutch72
– breaking-in72
Cockpit10
Cold start, refer to Starting the
engine34
Combination of wheel/tire86
Compact wheel, wheel
changes99
Compartments, refer to
Storage compartments64
Computer44
– also refer to Owner's Manual
for Onboard Computer
– functions44
Condensation, refer to
– Air conditioner57,60
– Parking vehicle73
Connecting a car vacuum
cleaner, refer to Power
socket65
Consumption, refer to
Average fuel
consumption44
Consumption indicator, refer
to Fuel gage42
Controls, refer to Cockpit10Convenience operation
– from outside18
– panorama glass sunroof18
– windows18
Coolant91
– level91
– temperature gage42
– warning lamp91
Cooling, refer to
Temperature57,60
Cooling system filling
capacity, refer to Filling
capacities112
Copyright2
Cruise control40
– buttons on steering
wheel12
– indicator lamp40
Cruising range45
Cup holders63
Curb weight, refer to
Weights112
Cylinders, refer to Engine
data110
D
Dashboard lighting, refer to
Instrument lighting54
Dashboard system, refer to
Cockpit10
Data, technical110
– dimensions111
– engine110
– filling capacities112
– weights112
Daytime driving lamps53
DBC Dynamic Brake
Control47
– warning lamp49
Deactivating front passenger
airbags31,52
Decommissioning the vehicle,
refer to the Caring for your
vehicle brochure
Defective lamp53
Defects7Defrosting windows58,60
– air conditioner58
– automatic climate control60
Defrosting windows and
removing condensation
– air conditioner58
– automatic climate control60
Defrosting windshield, refer to
Defrosting windows58,60
Defrost position, refer to
Defrosting windows58,60
Digital clock43
Dimensions111
Dipstick, engine oil90
Directional indicators, refer to
Turn signals38
Disc brakes73
Displacement, refer to Engine
data110
Display illumination, refer to
Instrument lighting54
Display lighting, refer to
Instrument lighting54
Displays, refer to Instrument
cluster11
Disposal
– engine oil91
– vehicle battery101
Distance warning, refer to
PDC Park Distance
Control46
Door keys16
Door lock18
Doors, manual operation18
DOT Quality Grades84
Draft-free ventilation58,61
Driving lamps, refer to Parking
lamps/low beams53
Driving notes72
Driving on poor roads76
Driving stability control
systems47
Driving through water76
Drying the air, refer to Air
conditioner57,60
DSC Dynamic Stability
Control47
– indicator lamp47