page 1 BMW X3 3.0SI 2007 E83 Owner's Manual
[x] Cancel search | Manufacturer: BMW, Model Year: 2007, Model line: X3 3.0SI, Model: BMW X3 3.0SI 2007 E83Pages: 139, PDF Size: 4.74 MB
Page 5 of 139
Reference
At a glance
Controls
Driving tips
Mobility
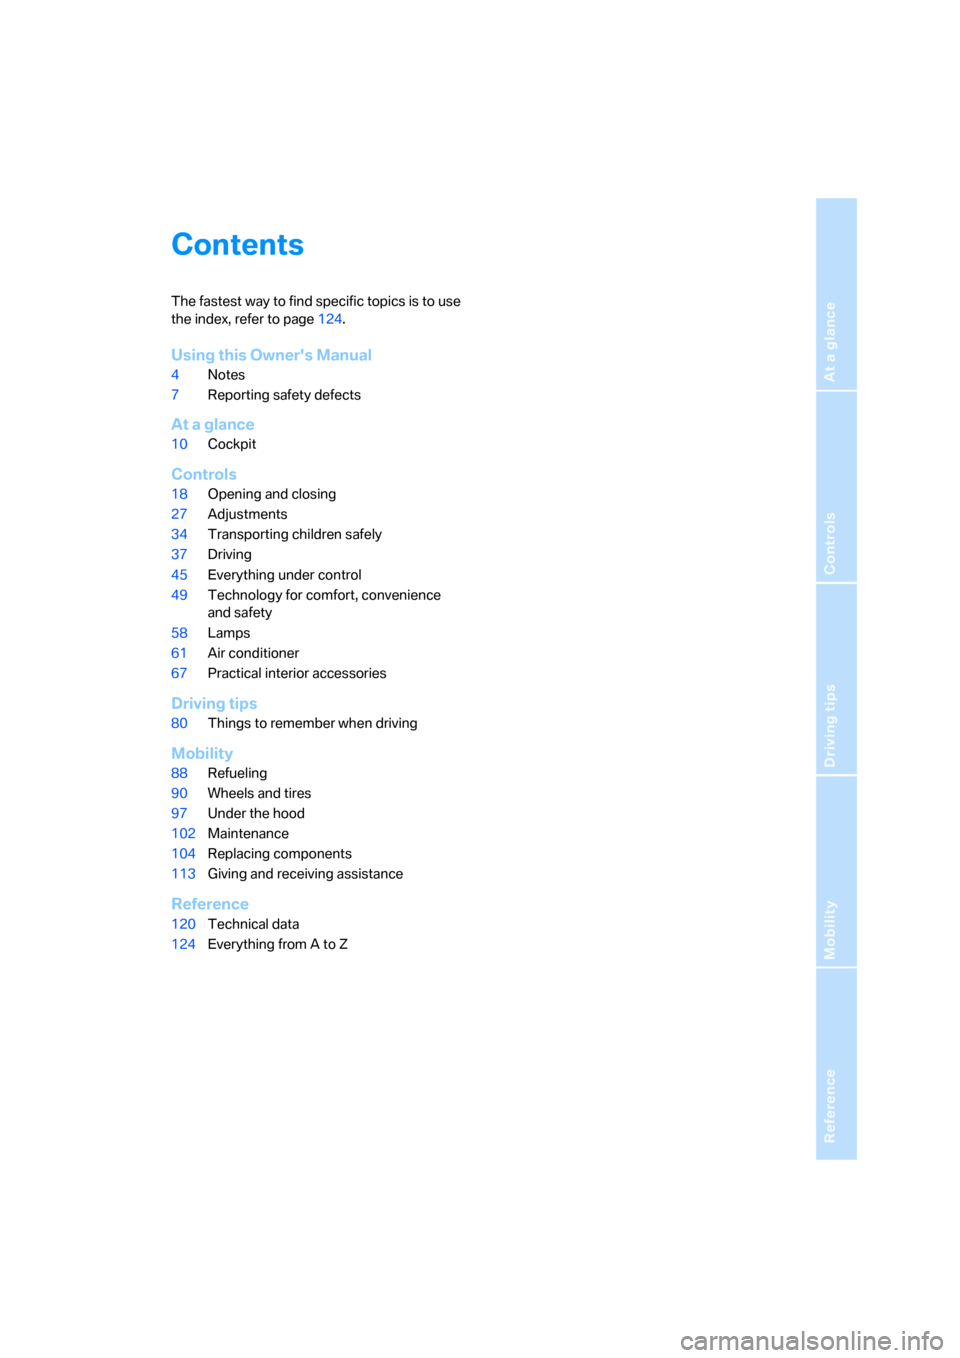
Contents
The fastest way to find specific topics is to use
the index, refer to page124.
Using this Owner's Manual
4Notes
7Reporting safety defects
At a glance
10Cockpit
Controls
18Opening and closing
27Adjustments
34Transporting children safely
37Driving
45Everything under control
49Technology for comfort, convenience
and safety
58Lamps
61Air conditioner
67Practical interior accessories
Driving tips
80Things to remember when driving
Mobility
88Refueling
90Wheels and tires
97Under the hood
102Maintenance
104Replacing components
113Giving and receiving assistance
Reference
120Technical data
124Everything from A to Z
Page 6 of 139
Notes
4
Notes
Using this Owner's Manual
We have made every effort to ensure that you
are easily able to find what you need in this
Owner's Manual. The fastest way to find certain
topics is by using the detailed index at the end.
For a brief initial overview of your vehicle, please
refer to the first chapter.
Should you sell your BMW some day, please
remember to pass on the Owner's Manual
as well; it is an important component of your
vehicle.
Additional sources of information
If you have additional questions, your BMW
Sports Activity Vehicle Center is always happy
to advise you.
You can find information on BMW, e.g. technol-
ogy, on the Internet at www.bmwusa.com.
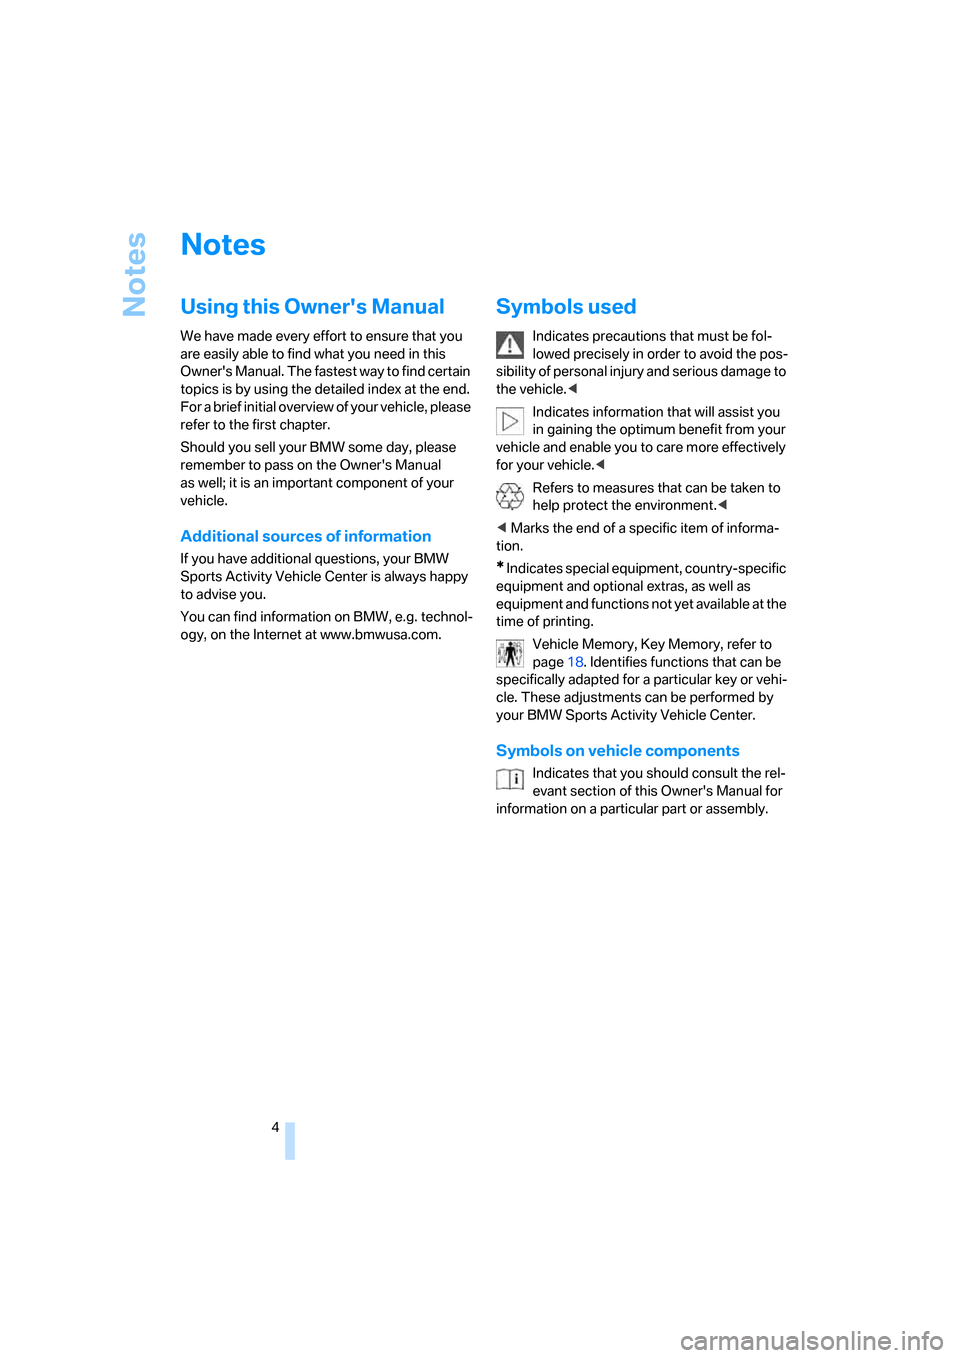
Symbols used
Indicates precautions that must be fol-
lowed precisely in order to avoid the pos-
sibility of personal injury and serious damage to
the vehicle.<
Indicates information that will assist you
in gaining the optimum benefit from your
vehicle and enable you to care more effectively
for your vehicle.<
Refers to measures that can be taken to
help protect the environment.<
< Marks the end of a specific item of informa-
tion.
* Indicates special equipment, country-specific
equipment and optional extras, as well as
equipment and functions not yet available at the
time of printing.
Vehicle Memory, Key Memory, refer to
page18. Identifies functions that can be
specifically adapted for a particular key or vehi-
cle. These adjustments can be performed by
your BMW Sports Activity Vehicle Center.
Symbols on vehicle components
Indicates that you should consult the rel-
evant section of this Owner's Manual for
information on a particular part or assembly.
Page 14 of 139
Cockpit
12
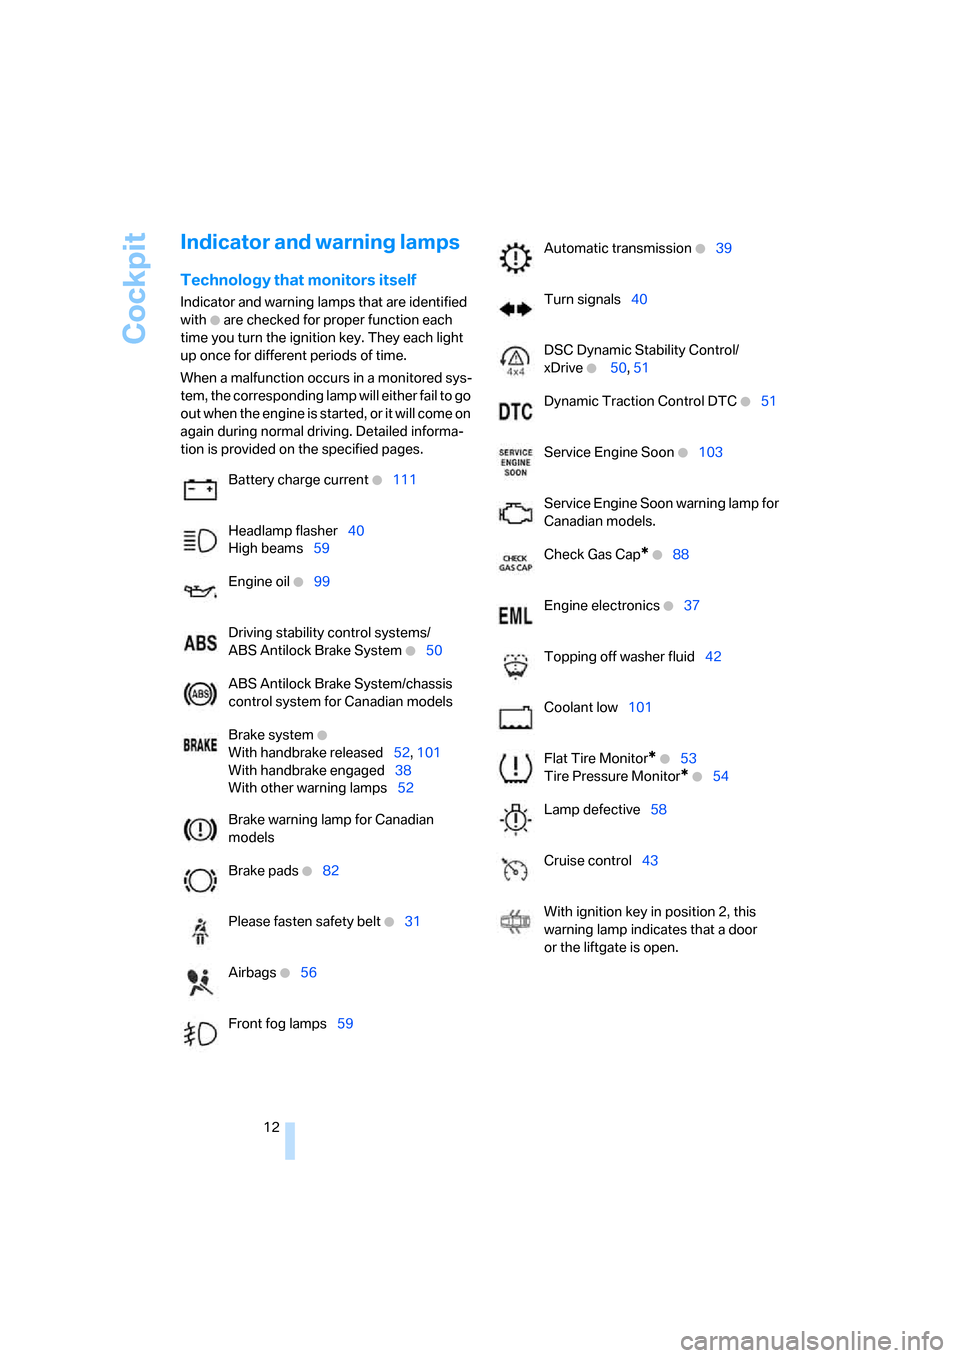
Indicator and warning lamps
Technology that monitors itself
Indicator and warning lamps that are identified
with
+ are checked for proper function each
time you turn the ignition key. They each light
up once for different periods of time.
When a malfunction occurs in a monitored sys-
tem, the corresponding lamp will either fail to go
o u t w h e n t h e e n g i n e i s s t a r t e d , o r i t w i l l c o m e o n
again during normal driving. Detailed informa-
tion is provided on the specified pages.
Battery charge current
+111
Headlamp flasher40
High beams59
Engine oil
+99
Driving stability control systems/
ABS Antilock Brake System
+50
ABS Antilock Brake System/chassis
control system for Canadian models
Brake system
+
With handbrake released52, 101
With handbrake engaged38
With other warning lamps52
Brake warning lamp for Canadian
models
Brake pads
+82
Please fasten safety belt
+31
Airbags
+56
Front fog lamps59
Automatic transmission +39
Turn signals40
DSC Dynamic Stability Control/
xDrive
+ 50, 51
Dynamic Traction Control DTC
+51
Service Engine Soon
+103
Service Engine Soon warning lamp for
Canadian models.
Check Gas Cap
* +88
Engine electronics
+37
Topping off washer fluid42
Coolant low101
Flat Tire Monitor
* +53
Tire Pressure Monitor
* +54
Lamp defective58
Cruise control43
With ignition key in position 2, this
warning lamp indicates that a door
or the liftgate is open.
Page 16 of 139
Cockpit
14
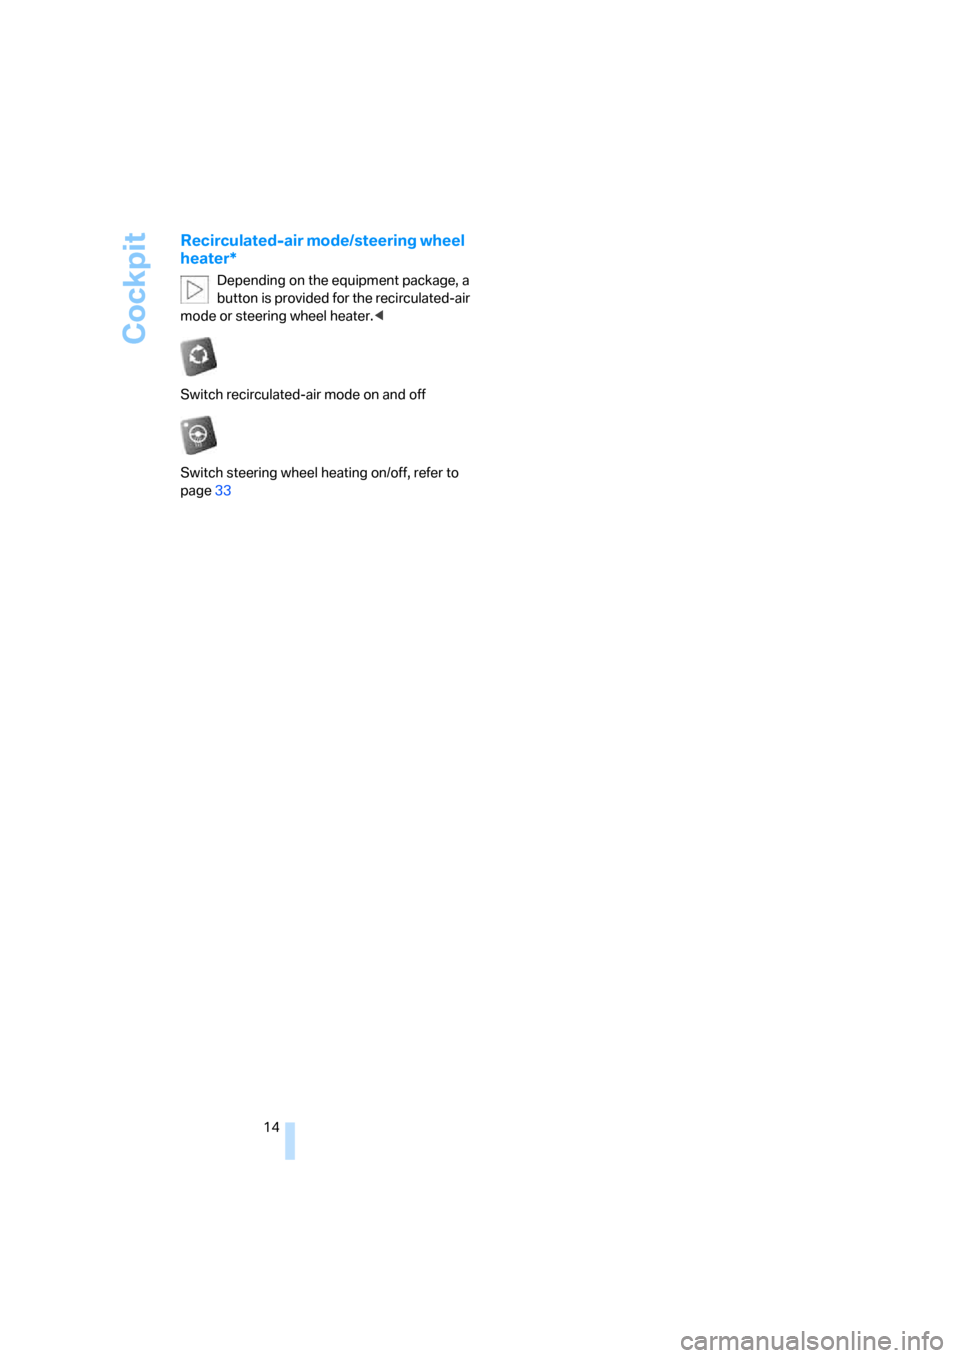
Recirculated-air mode/steering wheel
heater*
Depending on the equipment package, a
button is provided for the recirculated-air
mode or steering wheel heater.<
Switch recirculated-air mode on and off
Switch steering wheel heating on/off, refer to
page33
Page 21 of 139
Reference
At a glance
Controls
Driving tips
Mobility
19
Examples of Vehicle Memory
>Different confirmation signals to confirm
locking/unlocking of the vehicle, refer to
page19.
>Activating/deactivating function for path-
way lighting, refer to page58.
>Activating/deactivating daytime running
lamps, refer to page58.
>Active PDC Park Distance Control is acous-
tically indicated by a signal tone when you
shift into reverse or move the selector lever
into position R, refer to page49.
>Different confirmation signals to confirm
arming/disarming of alarm system, refer to
page25.
>After an outside temperature warning has
been issued, the computer display returns
to the previous setting, refer to page47.
>Acoustic warning if the ignition key remains
in the ignition lock after the driver's door has
been opened, refer to page19.
Examples of Key Memory functions
>Locking the vehicle after starting to drive,
refer to page21.
>Automatic adjustment of the driver's seat
and exterior mirror position for each person
when unlocking the vehicle, refer to
page30.
>Setting units of measure for instrument
cluster displays of time, outside tempera-
ture, distance driven, and fuel consumption,
refer to page47.
Central locking system
The concept
The central locking system is ready for opera-
tion whenever the driver's door is closed.
The system locks or unlocks:
>doors
>liftgate
>fuel filler door
Operating from outside
>via the remote control
>via the driver's door lock
The central locking system simultaneously
operates the antitheft alarm system. This pre-
vents the doors from being unlocked via the
lock buttons or door handles. The remote con-
trol also switches the interior lamps on and off.
The alarm system
* is also armed or disarmed.
For additional details on the alarm system, refer
to page25.
You can set an acoustic signal to remind
you if the ignition key is still in the ignition
lock after you open the driver's door.<
Operating from inside
Via the central locking system button, refer to
page21.
When the system is locked from inside, the fuel
filler door remains unlocked.
In the event of an accident of sufficient severity,
the central locking system unlocks automati-
cally. In addition, the hazard warning flashers
and interior lamps switch on.
Opening and closing:
Using the remote control
Persons or animals left unattended in a
parked vehicle can lock the doors from
the inside. For this reason, bring the remote
control with you whenever you leave the vehicle
so that you will always be able to unlock the
vehicle from outside.<
Unlocking
1.Press the button.
The driver's door and fuel filler door are
unlocked.
2.Press the button again.
All remaining doors and the liftgate are
unlocked.
Page 22 of 139
Opening and closing
20
Convenience opening mode
Press and hold the button.
The windows and the panorama glass sunroof
*
are opened.
If you wish, you can have this special fea-
ture activated/deactivated.<
Engaging locks
Press the button.
Hazard warning flashers flash once.
If you wish, you can have this special fea-
ture deactivated on vehicles without an
alarm system.<
Do not lock the vehicle from the outside
when people are in it since they will be
unable to unlock it from the inside if they do not
know the special procedure.<
If you unlock the vehicle, but do not open
any doors, the central locking system
automatically relocks the vehicle after a short
time. If you wish, you can have this special fea-
ture activated/deactivated.<
Switching off tilt alarm sensor* and
interior motion sensor*
Press the button again directly after
locking.
For details, refer to page26.
Switching on interior lamps
With the vehicle locked:
Press the button.
You can also use this function to locate your
vehicle in parking garages etc.
Panic mode*
You can also trigger the alarm system* in case
of danger:
Press the button for at least 3 seconds.
Deactivating alarm: press any button.
Unlocking liftgate
Press the button.
The liftgate will open slightly, regardless of
whether it was previously locked or unlocked.If you wish, you can have the liftgate open
only after the vehicle has been unlocked.
You may have this function activated/deacti-
vated.<
To avoid damage, make sure there is suf-
ficient space when opening the liftgate.
A previously locked liftgate is also locked again
after closing.
Before and after a drive, make sure that the lift-
gate has not been inadvertently released.<
Malfunction
The remote control may malfunction due to
local radio waves.
Should this occur, use the master key to unlock
and relock the vehicle via the door lock.
If it is no longer possible to lock the vehicle
using the remote control, its battery is dis-
charged. Use this remote control during an
extended drive; this will recharge the battery,
refer to page18.
For US owners only
The transmitter and receiver units comply with
part 15 of the FCC/Federal Communications
Commission regulations. Operation is gov-
erned by the following:
FCC ID:
LX8EWS
LX8FZVS
LX8FZVE
Compliance statement:
This device complies with part 15 of the FCC
Rules. Operation is subject to the following two
conditions:
>This device must not cause harmful inter-
ference, and
>this device must accept any interference
received, including interference that may
cause undesired operation.
Any unauthorized modifications or
changes to these devices could void the
user's authority to operate this equipment.<
Page 25 of 139
Reference
At a glance
Controls
Driving tips
Mobility
23
In the back, separate switches are provided in
the armrests.
For convenience operation using the remote
control or the door lock, refer to pages20, 21.
After switching off ignition
You can operate the windows for up to 1 minute
as long as no door has been opened.
Pinch protection system
If the closing force rises beyond a predefined
threshold when a window is being closed, the
system will interrupt the closing of the window
prior to lowering it slightly.
Despite the presence of the pinch protec-
tion system, inspect the window's travel
path prior to closing it, as the safety system
might fail to detect certain kinds of obstruc-
tions, such as very thin objects, and the window
would continue closing.
Do not install any accessories in the movement
range of the window as this could impair the
function of the pinch protection system.<
Closing without pinch protection
system
When there is danger outside or when, for
example, ice on the window prevents a normal
closing, press the switch past the resistance
point and hold it there. The window will close
without the pinch protection system.
Following interruptions in electrical
power supply
After disconnecting the battery, the pinch pro-
tection system must be reinitialized. To do this,
open and close the windows once and continue
pull the switch for longer than approx. 2 sec-
onds after closing.
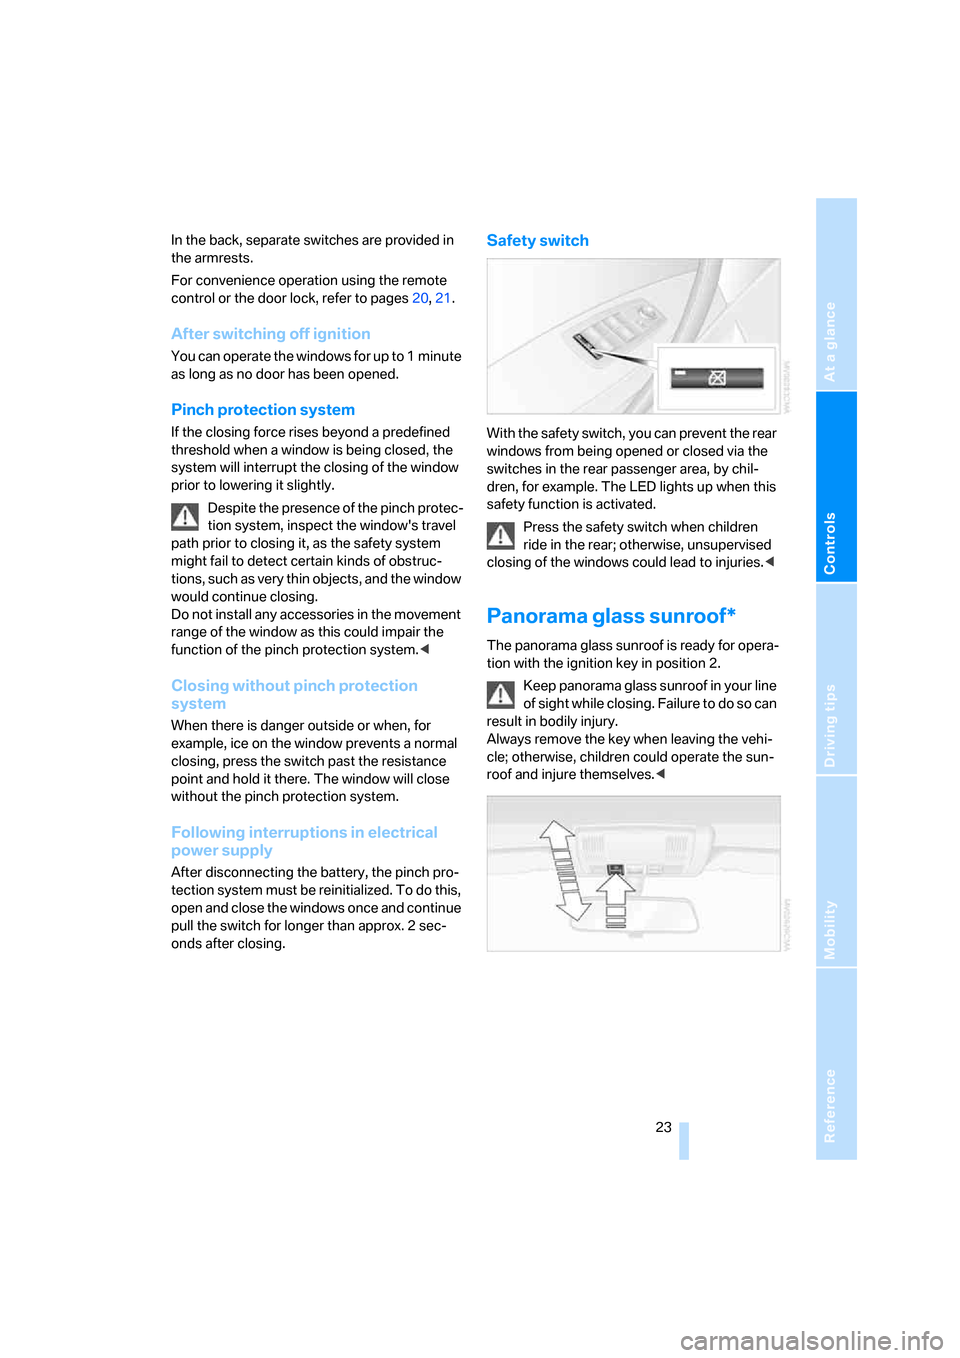
Safety switch
With the safety switch, you can prevent the rear
windows from being opened or closed via the
switches in the rear passenger area, by chil-
dren, for example. The LED lights up when this
safety function is activated.
Press the safety switch when children
ride in the rear; otherwise, unsupervised
closing of the windows could lead to injuries.<
Panorama glass sunroof*
The panorama glass sunroof is ready for opera-
tion with the ignition key in position 2.
Keep panorama glass sunroof in your line
of sight while closing. Failure to do so can
result in bodily injury.
Always remove the key when leaving the vehi-
cle; otherwise, children could operate the sun-
roof and injure themselves.<
Page 26 of 139
Opening and closing
24
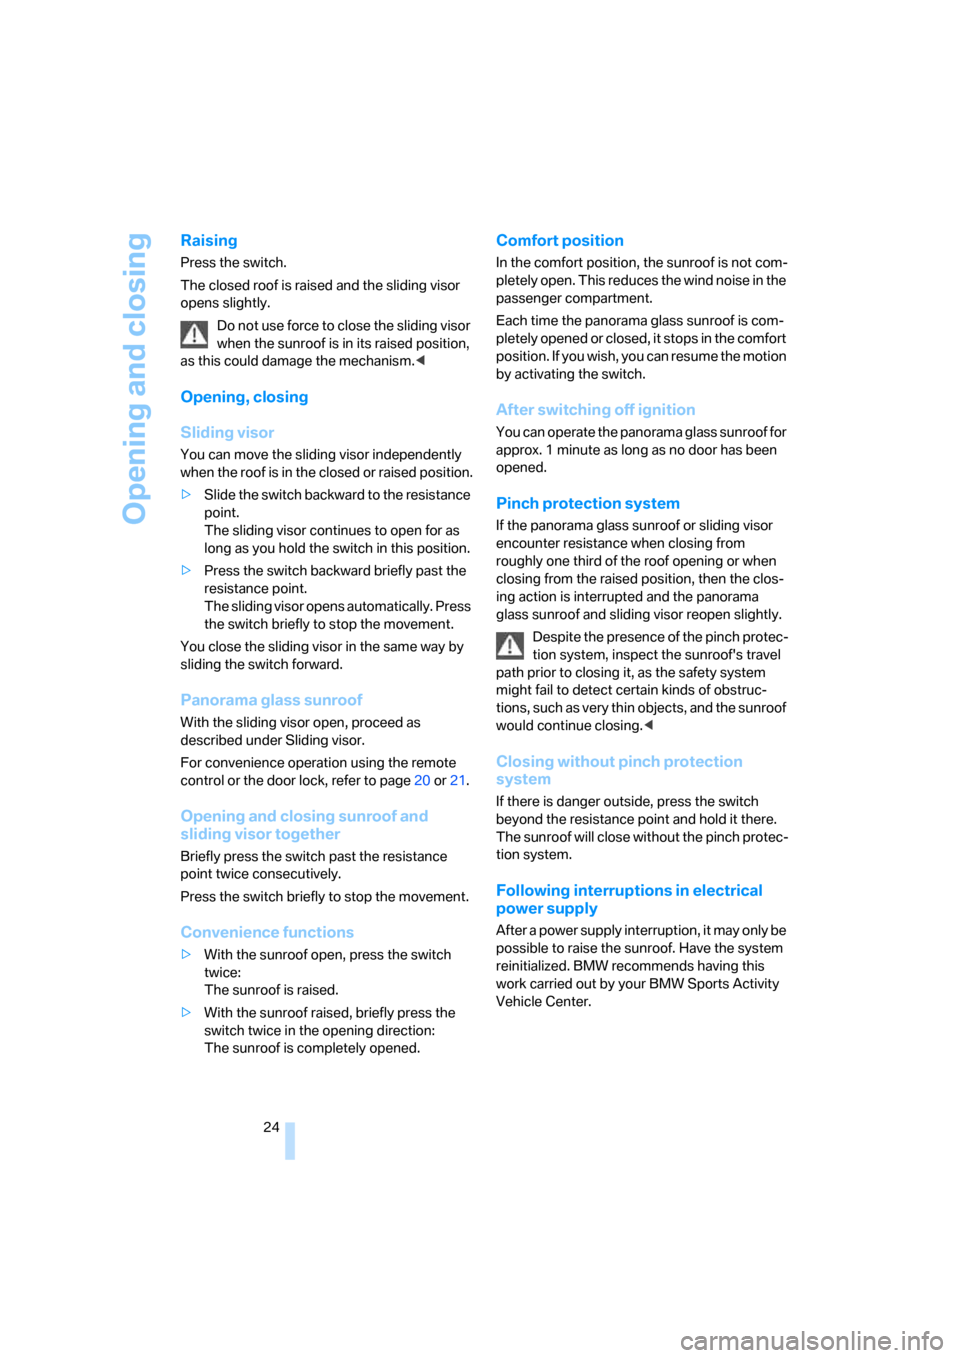
Raising
Press the switch.
The closed roof is raised and the sliding visor
opens slightly.
Do not use force to close the sliding visor
when the sunroof is in its raised position,
as this could damage the mechanism.<
Opening, closing
Sliding visor
You can move the sliding visor independently
when the roof is in the closed or raised position.
>Slide the switch backward to the resistance
point.
The sliding visor continues to open for as
long as you hold the switch in this position.
>Press the switch backward briefly past the
resistance point.
The sliding visor opens automatically. Press
the switch briefly to stop the movement.
You close the sliding visor in the same way by
sliding the switch forward.
Panorama glass sunroof
With the sliding visor open, proceed as
described under Sliding visor.
For convenience operation using the remote
control or the door lock, refer to page20 or21.
Opening and closing sunroof and
sliding visor together
Briefly press the switch past the resistance
point twice consecutively.
Press the switch briefly to stop the movement.
Convenience functions
>With the sunroof open, press the switch
twice:
The sunroof is raised.
>With the sunroof raised, briefly press the
switch twice in the opening direction:
The sunroof is completely opened.
Comfort position
In the comfort position, the sunroof is not com-
pletely open. This reduces the wind noise in the
passenger compartment.
Each time the panorama glass sunroof is com-
pletely opened or closed, it stops in the comfort
position. If you wish, you can resume the motion
by activating the switch.
After switching off ignition
You can operate the panorama glass sunroof for
approx. 1 minute as long as no door has been
opened.
Pinch protection system
If the panorama glass sunroof or sliding visor
encounter resistance when closing from
roughly one third of the roof opening or when
closing from the raised position, then the clos-
ing action is interrupted and the panorama
glass sunroof and sliding visor reopen slightly.
Despite the presence of the pinch protec-
tion system, inspect the sunroof's travel
path prior to closing it, as the safety system
might fail to detect certain kinds of obstruc-
tions, such as very thin objects, and the sunroof
would continue closing.<
Closing without pinch protection
system
If there is danger outside, press the switch
beyond the resistance point and hold it there.
The sunroof will close without the pinch protec-
tion system.
Following interruptions in electrical
power supply
After a power supply interruption, it may only be
possible to raise the sunroof. Have the system
reinitialized. BMW recommends having this
work carried out by your BMW Sports Activity
Vehicle Center.
Page 27 of 139
Reference
At a glance
Controls
Driving tips
Mobility
25
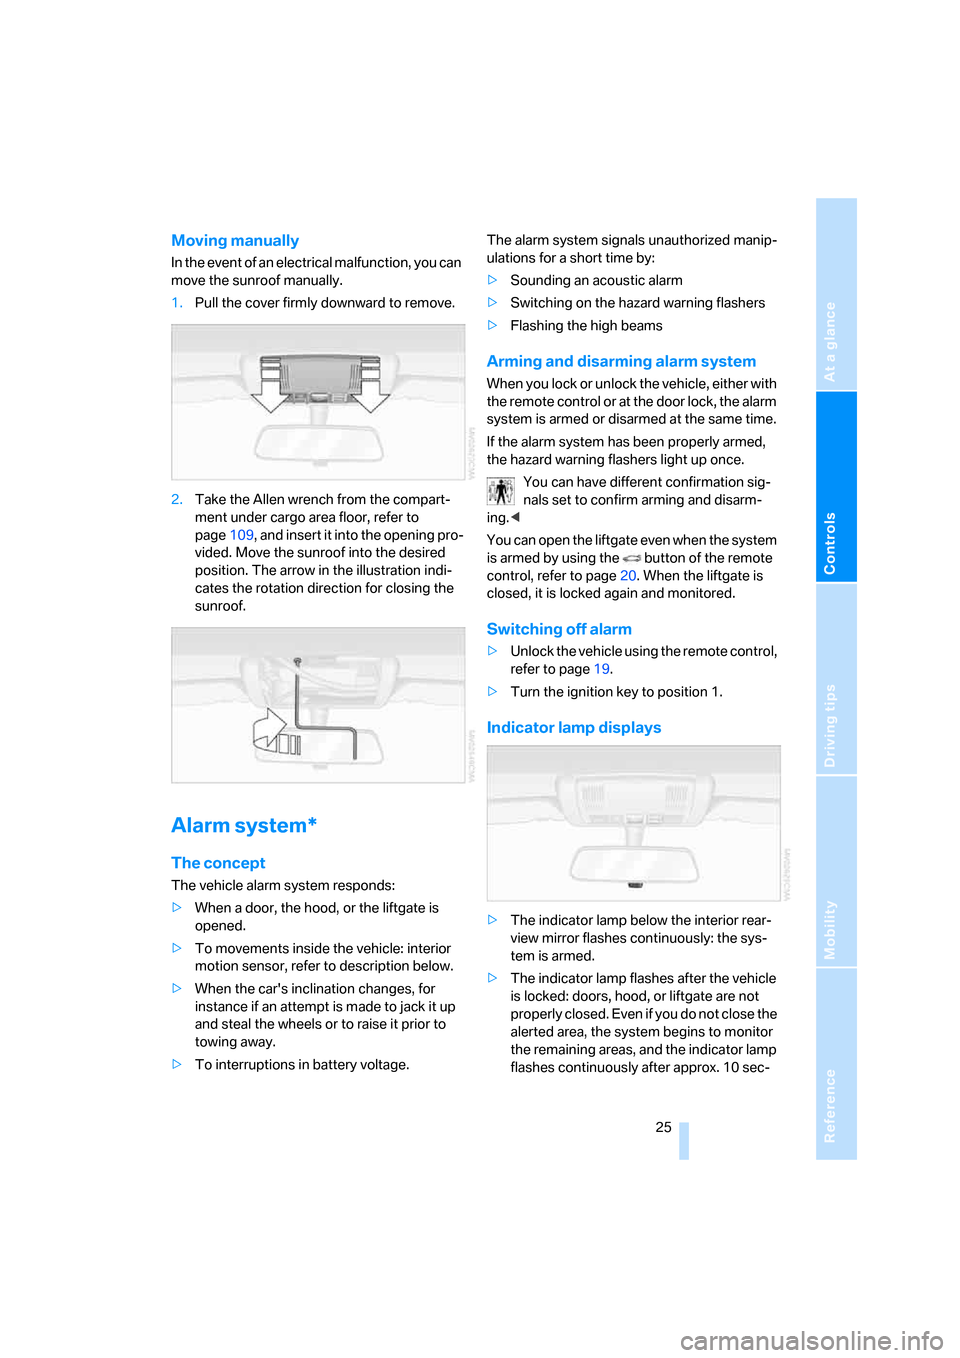
Moving manually
In the event of an electrical malfunction, you can
move the sunroof manually.
1.Pull the cover firmly downward to remove.
2.Take the Allen wrench from the compart-
ment under cargo area floor, refer to
page109, and insert it into the opening pro-
vided. Move the sunroof into the desired
position. The arrow in the illustration indi-
cates the rotation direction for closing the
sunroof.
Alarm system*
The concept
The vehicle alarm system responds:
>When a door, the hood, or the liftgate is
opened.
>To movements inside the vehicle: interior
motion sensor, refer to description below.
>When the car's inclination changes, for
instance if an attempt is made to jack it up
and steal the wheels or to raise it prior to
towing away.
>To interruptions in battery voltage.The alarm system signals unauthorized manip-
ulations for a short time by:
>Sounding an acoustic alarm
>Switching on the hazard warning flashers
>Flashing the high beams
Arming and disarming alarm system
When you lock or unlock the vehicle, either with
the remote control or at the door lock, the alarm
system is armed or disarmed at the same time.
If the alarm system has been properly armed,
the hazard warning flashers light up once.
You can have different confirmation sig-
nals set to confirm arming and disarm-
ing.<
You can open the liftgate even when the system
is armed by using the button of the remote
control, refer to page20. When the liftgate is
closed, it is locked again and monitored.
Switching off alarm
>Unlock the vehicle using the remote control,
refer to page19.
>Turn the ignition key to position 1.
Indicator lamp displays
>The indicator lamp below the interior rear-
view mirror flashes continuously: the sys-
tem is armed.
>The indicator lamp flashes after the vehicle
is locked: doors, hood, or liftgate are not
properly closed. Even if you do not close the
alerted area, the system begins to monitor
the remaining areas, and the indicator lamp
flashes continuously after approx. 10 sec-
Page 29 of 139
Reference
At a glance
Controls
Driving tips
Mobility
27
Adjustments
Sitting safely
The ideal sitting position can make a vital con-
tribution to relaxed driving that is as fatigue-free
as possible. Together with safety belts, head
restraints, and airbags, sitting position plays an
important role in an accident. Compliance with
the following instructions is important; failure to
do so could impair the protective function of the
safety systems.
For additional information on transporting chil-
dren safely, refer to page34.
Airbags
Always maintain an adequate distance
between yourself and the airbags. Always
hold the steering wheel by its rim with hands at
the 9 o'clock and 3 o'clock positions, to mini-
mize the risk of injuries to your hands and arms
in the event of airbag deployment.
No one and nothing is to come between the air-
bags and the seat occupant.
Do not use the cover of the front airbag on the
front passenger side as a storage area. Make
sure that the passenger sits correctly, e.g. does
not rest his feet or legs on the dashboard. Oth-
erwise, a triggering of the front airbag could
result in leg injuries. Make sure that passengers
do not lean their heads against side or head air-
bags. Otherwise, a triggering of the airbag could
result in injuries.<
Even if you adhere to all the instructions, inju-
ries resulting from contact with airbags cannot
be entirely ruled out, depending on the circum-
stances. The ignition and inflation noise may
provoke a mild – usually temporary – hearing
loss in extremely sensitive individuals.
For airbag locations and additional information
on airbags, refer to page56.
Head restraint
A correctly adjusted head restraint reduces the
risk of damage to the cervical vertebrae in acci-
dents.
Adjust the head restraint so that its mid-
dle lies approximately at the height of
your ears. Otherwise, there is an increased risk
of injury in the event of an accident.<
Head restraints, refer to page29.
Safety belts
Make sure the safety belts are worn in all occu-
pied seats every time you drive. Although air-
bags enhance safety by providing added pro-
tection, they are not a substitute for safety
belts.
Your vehicle has five seats that are each
equipped with a safety belt.
Never allow more than one person to
wear a single safety belt. Infants and chil-
dren must not ride on a lap. Make sure that the
belt in the lap area sits low against the hips and
does not press against the abdomen. The
safety belt must never rest against the throat,
rub against sharp edges, pass over hard or frag-
ile objects or be pinched. Fasten the safety belt
around your body snugly, making sure that it is
pulled taut across your lap and shoulder and
that it is not twisted; otherwise, the belt can
slide over the hips in the event of a frontal colli-
sion and injure your abdomen. Avoid wearing
clothing that prevents the belt from fitting prop-
erly and pull the shoulder belt upward periodi-
cally to readjust the tension across your lap in
order to avoid a reduction in the restraining
action of the safety belt.
If the middle safety belt is used, the larger part
of the backrest must be locked in position, refer
to page74; otherwise, the middle safety belt
cannot exert any restraining action.<
Safety belts, refer to page31.