tailgate BMW X3 XDRIVE 28I 2011 User Guide
[x] Cancel search | Manufacturer: BMW, Model Year: 2011, Model line: X3 XDRIVE 28I, Model: BMW X3 XDRIVE 28I 2011Pages: 262, PDF Size: 11.2 MB
Page 43 of 262
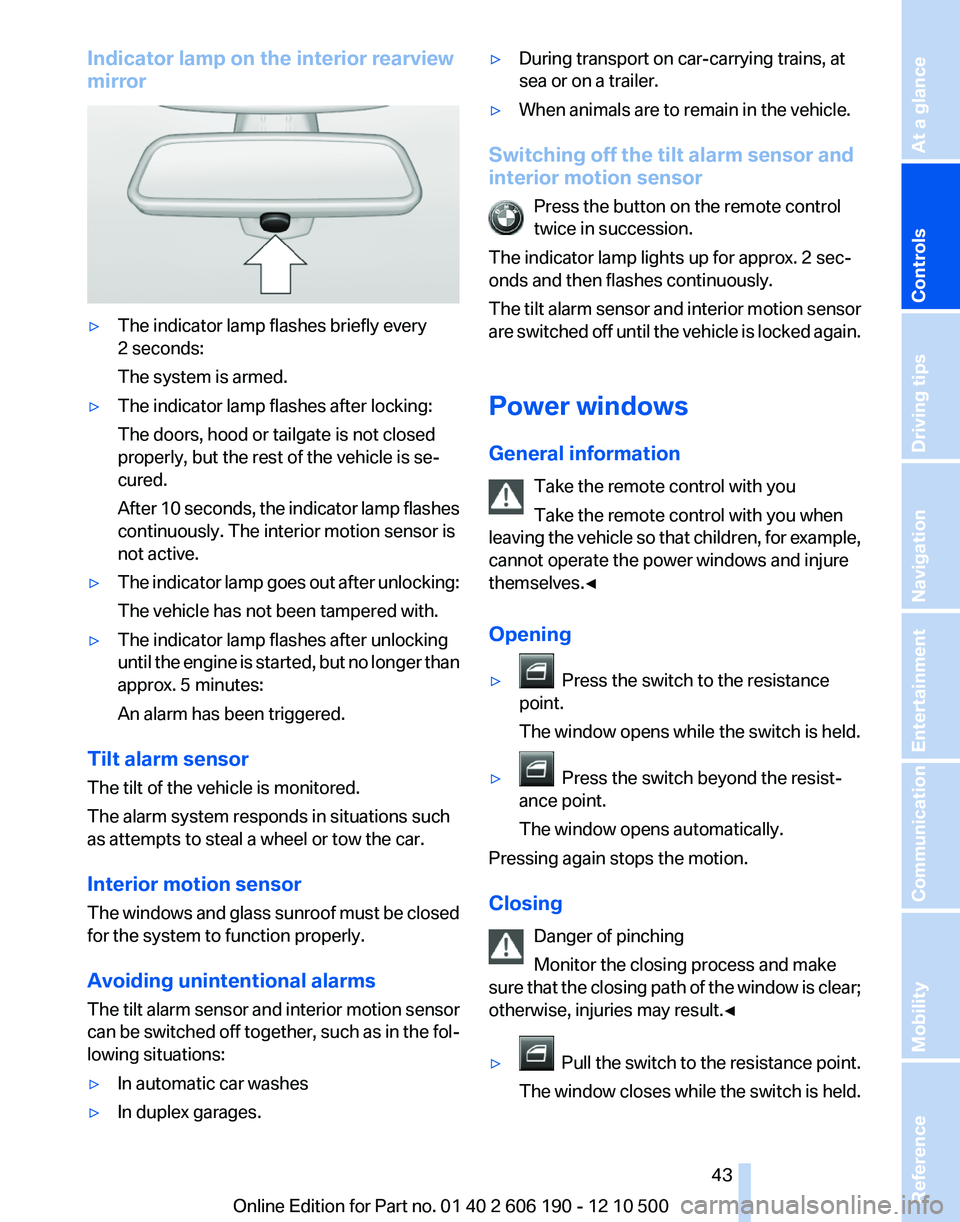
Indicator lamp on the interior rearview
mirror▷The indicator lamp flashes briefly every
2 seconds:
The system is armed.▷The indicator lamp flashes after locking:
The doors, hood or tailgate is not closed
properly, but the rest of the vehicle is se‐
cured.
After 10 seconds, the indicator lamp flashes
continuously. The interior motion sensor is
not active.▷The indicator lamp goes out after unlocking:
The vehicle has not been tampered with.▷The indicator lamp flashes after unlocking
until the engine is started, but no longer than
approx. 5 minutes:
An alarm has been triggered.
Tilt alarm sensor
The tilt of the vehicle is monitored.
The alarm system responds in situations such
as attempts to steal a wheel or tow the car.
Interior motion sensor
The windows and glass sunroof must be closed
for the system to function properly.
Avoiding unintentional alarms
The tilt alarm sensor and interior motion sensor
can be switched off together, such as in the fol‐
lowing situations:
▷In automatic car washes▷In duplex garages.▷During transport on car-carrying trains, at
sea or on a trailer.▷When animals are to remain in the vehicle.
Switching off the tilt alarm sensor and
interior motion sensor
Press the button on the remote control
twice in succession.
The indicator lamp lights up for approx. 2 sec‐
onds and then flashes continuously.
The tilt alarm sensor and interior motion sensor
are switched off until the vehicle is locked again.
Power windows
General information Take the remote control with you
Take the remote control with you when
leaving the vehicle so that children, for example,
cannot operate the power windows and injure
themselves.◀
Opening
▷ Press the switch to the resistance
point.
The window opens while the switch is held.▷ Press the switch beyond the resist‐
ance point.
The window opens automatically.
Pressing again stops the motion.
Closing Danger of pinching
Monitor the closing process and make
sure that the closing path of the window is clear;
otherwise, injuries may result.◀
▷ Pull the switch to the resistance point.
The window closes while the switch is held.
Seite 4343
Online Edition for Part no. 01 40 2 606 190 - 12 10 500
ReferenceMobilityCommunicationEntertainmentNavigationDriving tipsControlsAt a glance
Page 53 of 262
Safety mode1.Close the driver's door or switch on the ig‐
nition.2.Press and hold the desired button 1 or 2 until
the adjustment procedure is completed.
Calling up of a seat position
deactivated
After a brief period, the calling up of stored seat
positions is deactivated to save battery power.
To reactivate calling up of a seat position:
▷Open or close the door or tailgate.▷Press a button on the remote control.▷Press the Start/Stop button.
Mirrors
Exterior mirrors
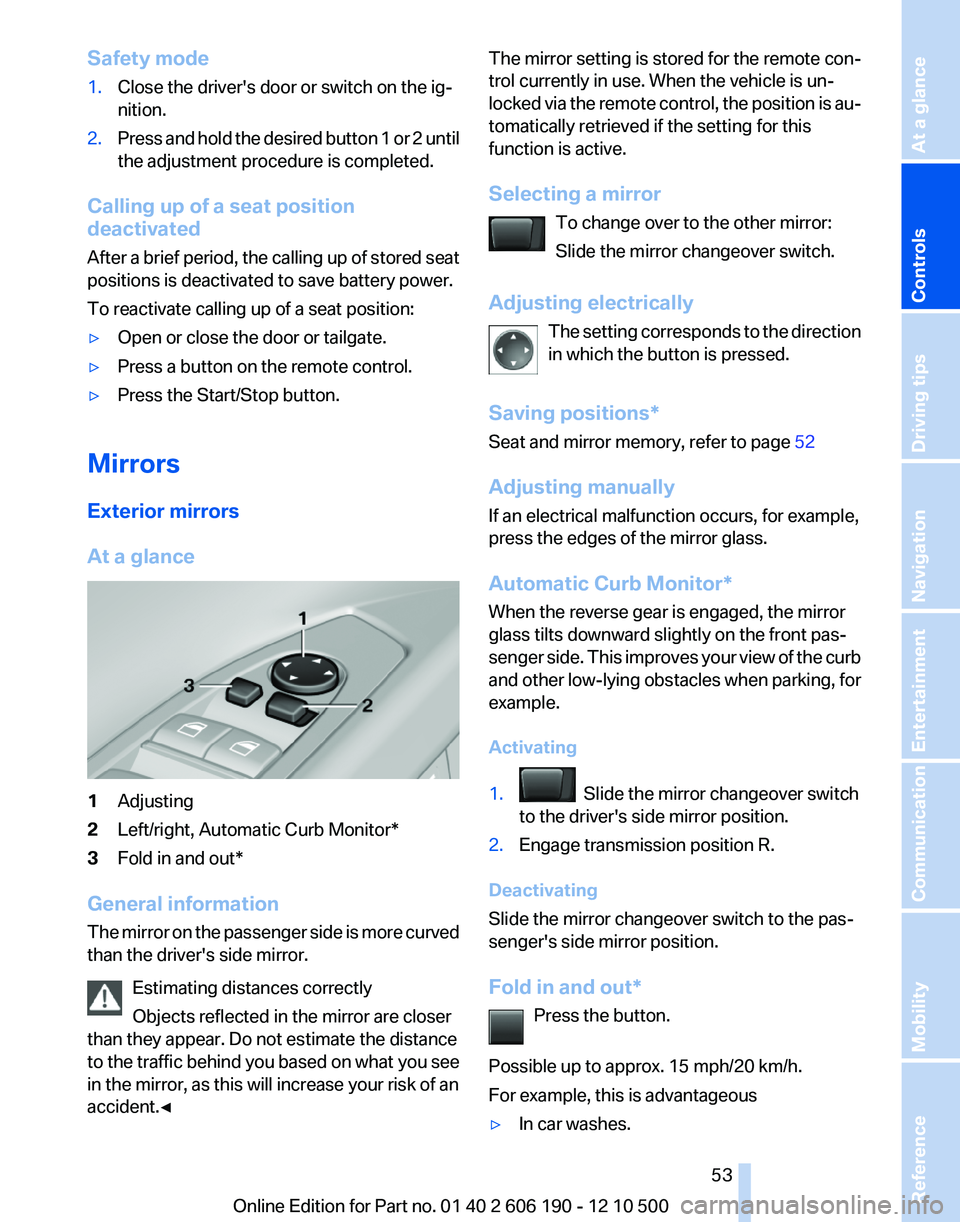
At a glance
1Adjusting2Left/right, Automatic Curb Monitor*3Fold in and out*
General information
The mirror on the passenger side is more curved
than the driver's side mirror.
Estimating distances correctly
Objects reflected in the mirror are closer
than they appear. Do not estimate the distance
to the traffic behind you based on what you see
in the mirror, as this will increase your risk of an
accident.◀
The mirror setting is stored for the remote con‐
trol currently in use. When the vehicle is un‐
locked via the remote control, the position is au‐
tomatically retrieved if the setting for this
function is active.
Selecting a mirror To change over to the other mirror:
Slide the mirror changeover switch.
Adjusting electrically The setting corresponds to the direction
in which the button is pressed.
Saving positions*
Seat and mirror memory, refer to page 52
Adjusting manually
If an electrical malfunction occurs, for example,
press the edges of the mirror glass.
Automatic Curb Monitor*
When the reverse gear is engaged, the mirror
glass tilts downward slightly on the front pas‐
senger side. This improves your view of the curb
and other low-lying obstacles when parking, for
example.
Activating1. Slide the mirror changeover switch
to the driver's side mirror position.2.Engage transmission position R.
Deactivating
Slide the mirror changeover switch to the pas‐
senger's side mirror position.
Fold in and out* Press the button.
Possible up to approx. 15 mph/20 km/h.
For example, this is advantageous
▷In car washes.Seite 5353
Online Edition for Part no. 01 40 2 606 190 - 12 10 500
ReferenceMobilityCommunicationEntertainmentNavigationDriving tipsControlsAt a glance
Page 96 of 262
Assistance functions
Functional requirement▷The backup camera is switched on.▷The tailgate is fully closed.
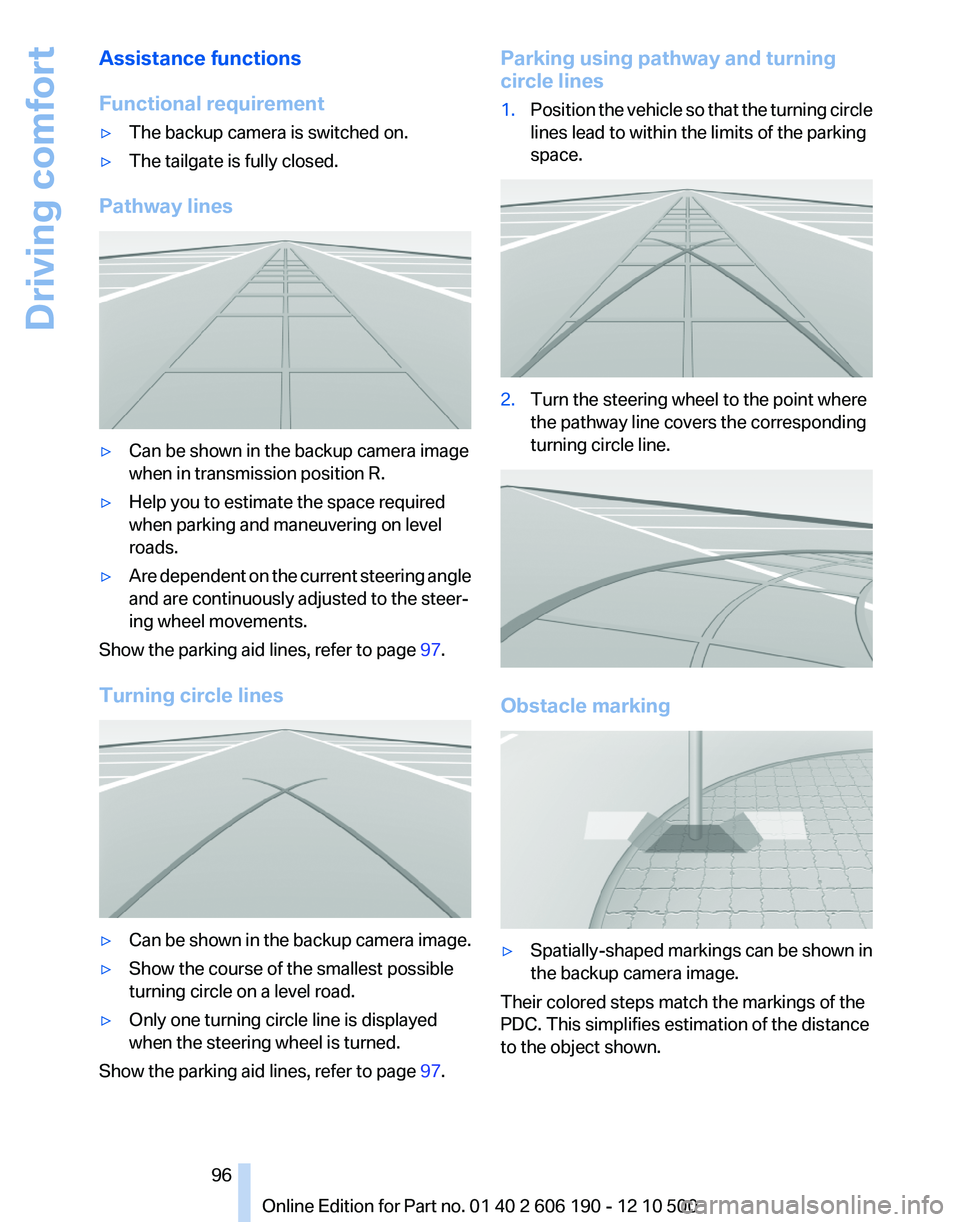
Pathway lines
▷Can be shown in the backup camera image
when in transmission position R.▷Help you to estimate the space required
when parking and maneuvering on level
roads.▷Are dependent on the current steering angle
and are continuously adjusted to the steer‐
ing wheel movements.
Show the parking aid lines, refer to page 97.
Turning circle lines
▷Can be shown in the backup camera image.▷Show the course of the smallest possible
turning circle on a level road.▷Only one turning circle line is displayed
when the steering wheel is turned.
Show the parking aid lines, refer to page 97.
Parking using pathway and turning
circle lines1.Position the vehicle so that the turning circle
lines lead to within the limits of the parking
space.2.Turn the steering wheel to the point where
the pathway line covers the corresponding
turning circle line.
Obstacle marking
▷Spatially-shaped markings can be shown in
the backup camera image.
Their colored steps match the markings of the
PDC. This simplifies estimation of the distance
to the object shown.
Seite 9696
Online Edition for Part no. 01 40 2 606 190 - 12 10 500Driving comfort
Page 97 of 262
Activating the assistance functions
More than one assistance function can be active
at the same time.
Showing the parking aid lines
"Parking aid lines"
Pathway and turning circle lines are displayed.
Showing the obstacle marking
"Obstacle marking"
Spatially-shaped markings are displayed.
Display on the Control Display
Switching on the backup camera via
iDrive
With PDC activated:
"Rear view camera"
The backup camera image is displayed. The set‐
ting is stored for the remote control currently in
use.
Brightness
With the backup camera switched on:
1. Select the symbol.2.Turn the controller until the desired setting
is reached and press the controller.
Contrast
With the backup camera switched on:
1. Select the symbol.2.Turn the controller until the desired setting
is reached and press the controller.Camera
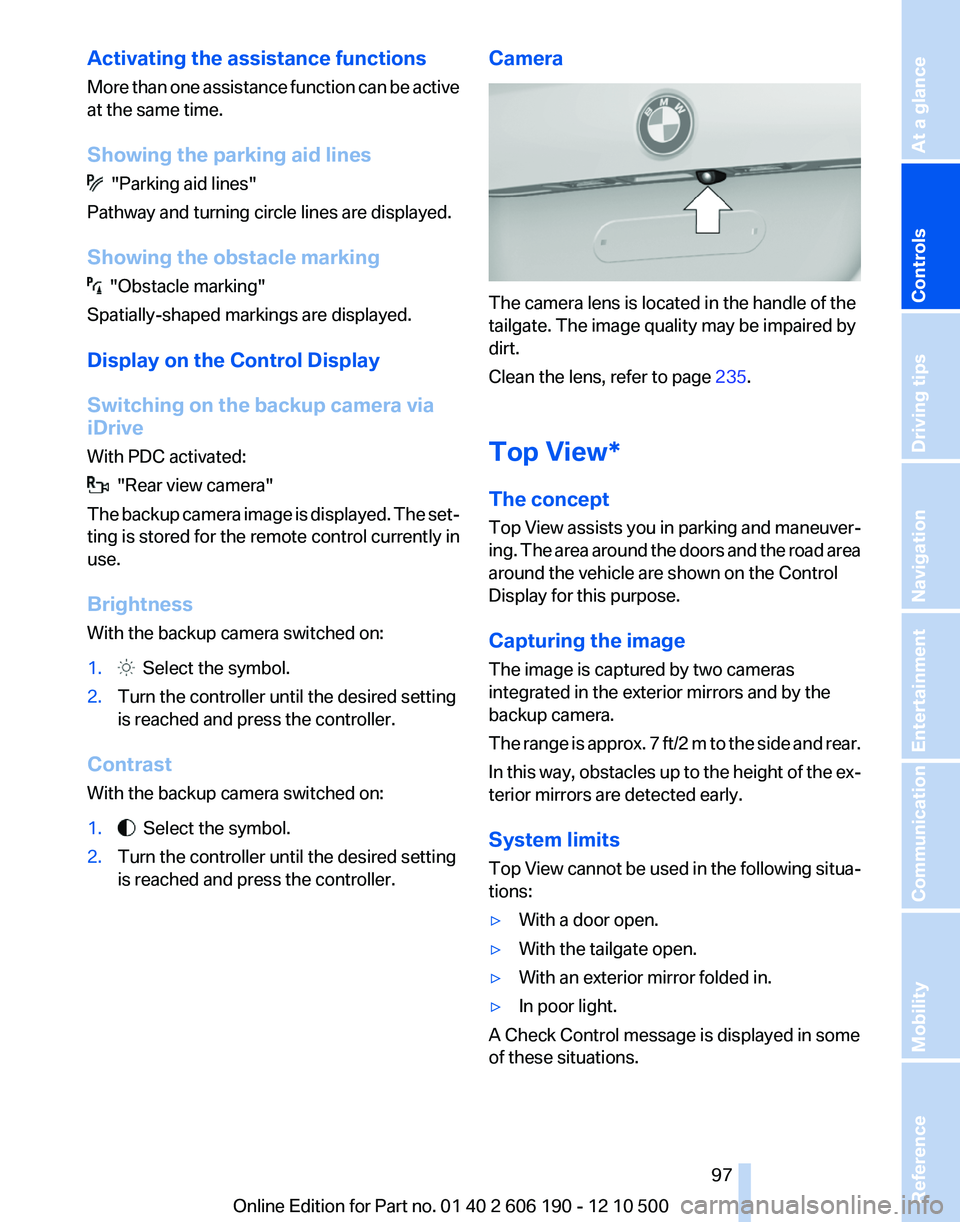
The camera lens is located in the handle of the
tailgate. The image quality may be impaired by
dirt.
Clean the lens, refer to page 235.
Top View*
The concept
Top View assists you in parking and maneuver‐
ing. The area around the doors and the road area
around the vehicle are shown on the Control
Display for this purpose.
Capturing the image
The image is captured by two cameras
integrated in the exterior mirrors and by the
backup camera.
The range is approx. 7 ft/2 m to the side and rear.
In this way, obstacles up to the height of the ex‐
terior mirrors are detected early.
System limits
Top View cannot be used in the following situa‐
tions:
▷With a door open.▷With the tailgate open.▷With an exterior mirror folded in.▷In poor light.
A Check Control message is displayed in some
of these situations.
Seite 9797
Online Edition for Part no. 01 40 2 606 190 - 12 10 500
ReferenceMobilityCommunicationEntertainmentNavigationDriving tipsControlsAt a glance
Page 120 of 262
Things to remember when drivingBreaking-in period
General information
Moving parts need to be broken in to adjust to
each other.
The following instructions will help achieve a
long vehicle life and good economy.
Engine and differential
Always obey the official speed limit.
Up to 1,200 miles/2,000 km
Do not exceed the maximum engine and road
speeds:▷For gasoline engine, 4500 rpm and
100 mph/160 km/h.
Avoid full-throttle operation and use of the
transmission's kickdown mode for the initial
miles.
From 1,200 miles/2,000 km
The engine and vehicle speed can gradually be
increased.
Tires
Due to technical factors associated with their
manufacture, tires do not achieve their full trac‐
tion potential until after an initial breaking-in pe‐
riod.
Drive conservatively for the first 200 miles/
300 km.
Brake system
Brakes require an initial break-in period of ap‐
prox. 300 miles/500 km to achieve optimized
contact and wear patterns between brake pads
and discs. Drive moderately during this break-in
period.
Following part replacement
The same breaking in procedures should be ob‐
served if any of the components mentioned
above have to be renewed in the course of the
vehicle's operating life.
General driving notes
Closing the tailgate Drive with the tailgate closed
Only drive with the tailgate closed; other‐
wise, in the event of an accident or braking or
evasive maneuvers, passengers or other road
users may be injured or the vehicle may be dam‐
aged. In addition, exhaust fumes may enter the
passenger compartment.◀
If driving with the tailgate open cannot be
avoided:1.Drive moderately.2.Close all windows and the glass sunroof*.3.Greatly increase the blower speed.
Hot exhaust system
Hot exhaust system
High temperatures are generated in the
exhaust system.
Do not remove the heat shields installed and
never apply undercoating to them. When driv‐
ing, standing at idle and while parking, take care
to avoid possible contact between the hot ex‐
haust system and any highly flammable materi‐
als such as hay, leaves, grass, etc. Such contact
could lead to a fire, and with it the risk of serious
personal injury as well as property damage.
Do not touch hot exhaust pipes; otherwise, there
is the danger of getting burned.◀
Seite 120120
Online Edition for Part no. 01 40 2 606 190 - 12 10 500Things to remember when driving
Page 124 of 262
Roof-mounted luggage rack
Note
Roof-mounted luggage racks are only available
for vehicles with roof rails*.
Special rack system as optional
accessory
A special rack system is available as an optional
accessory.
Follow the directions given in the installation in‐
structions.
Anchorage points
The roof rails* provide mounting points for the
roof-mounted luggage rack.
Follow the directions given in the installation in‐
structions.
Mounting
Be sure that adequate clearance is maintained
for raising and opening the glass sunroof*.
Loading
Because roof racks raise the vehicle's center of
gravity when loaded, they have a major effect on
vehicle handling and steering response.
Therefore, note the following when loading and
driving:▷Do not exceed the approved roof/axle loads
and the approved gross vehicle weight.▷Distribute the roof load uniformly.▷The roof load should not be too large in area.▷Always load the heaviest pieces on the bot‐
tom.▷Secure the roof luggage firmly, e. g., tie with
ratchet straps.▷Do not let objects project into the opening
path of the tailgate.▷Drive smoothly. Avoid sudden acceleration
and braking maneuvers. Take corners gen‐
tly.Saving fuel
General information
Your vehicle contains advanced technology for
the reduction of fuel consumption and emis‐
sions.
Fuel consumption depends on a number of dif‐
ferent factors.
The implementation of certain measures, driv‐
ing style and regular maintenance, refer to
page 219, can have an influence on fuel con‐
sumption and on the environmental impact.
Remove unnecessary cargo
Additional weight increases fuel consumption.
Remove attached parts following use
Remove auxiliary mirrors, roof or rear luggage
racks which are no longer required following
use.
Attached parts on the vehicle impair the aero‐
dynamics and increase the fuel consumption.
Close the windows and glass sunroof*
Driving with the glass sunroof and windows
open results in increased air resistance and
raises fuel consumption.
Check the tire inflation pressure
regularly
Check and, if necessary, correct the tire inflation
pressure, refer to page 207, at least twice a
month and before starting on a long trip.
Low tire inflation pressure increases rolling re‐
sistance and thus raises fuel consumption and
tire wear.
Drive away without delay
Do not wait for the engine to warm up while the
vehicle remains stationary. Start driving right
away, but at moderate engine speeds.
This is the fastest way for the cold engine to
reach its operating temperature.Seite 124124
Online Edition for Part no. 01 40 2 606 190 - 12 10 500Things to remember when driving
Page 225 of 262
Tail lamps, bulb replacement
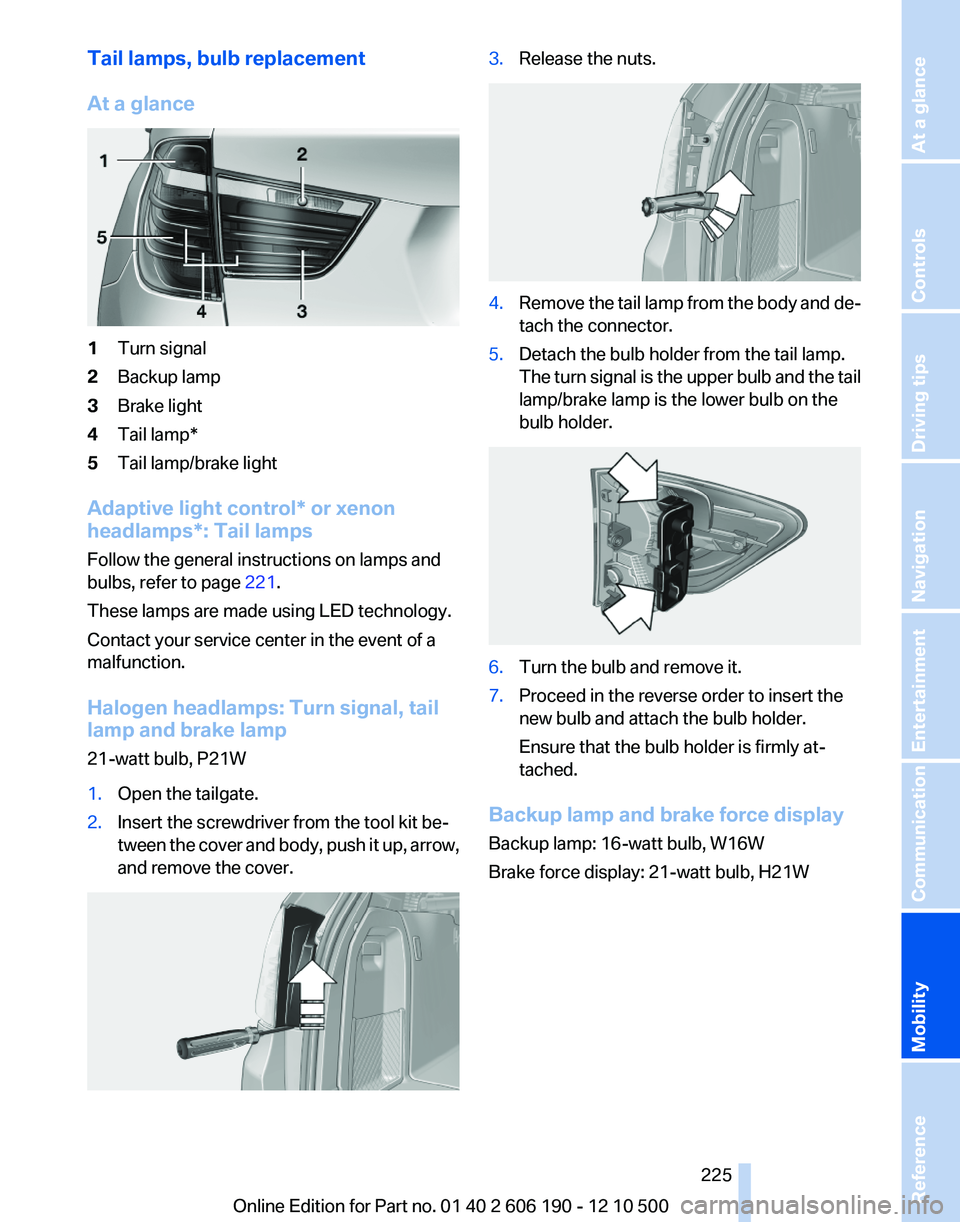
At a glance1Turn signal2Backup lamp3Brake light4Tail lamp*5Tail lamp/brake light
Adaptive light control* or xenon
headlamps*: Tail lamps
Follow the general instructions on lamps and
bulbs, refer to page 221.
These lamps are made using LED technology.
Contact your service center in the event of a
malfunction.
Halogen headlamps: Turn signal, tail
lamp and brake lamp
21-watt bulb, P21W
1.Open the tailgate.2.Insert the screwdriver from the tool kit be‐
tween the cover and body, push it up, arrow,
and remove the cover.3.Release the nuts.4.Remove the tail lamp from the body and de‐
tach the connector.5.Detach the bulb holder from the tail lamp.
The turn signal is the upper bulb and the tail
lamp/brake lamp is the lower bulb on the
bulb holder.6.Turn the bulb and remove it.7.Proceed in the reverse order to insert the
new bulb and attach the bulb holder.
Ensure that the bulb holder is firmly at‐
tached.
Backup lamp and brake force display
Backup lamp: 16-watt bulb, W16W
Brake force display: 21-watt bulb, H21W
Seite 225225
Online Edition for Part no. 01 40 2 606 190 - 12 10 500
ReferenceMobilityCommunicationEntertainmentNavigationDriving tipsControlsAt a glance
Page 226 of 262
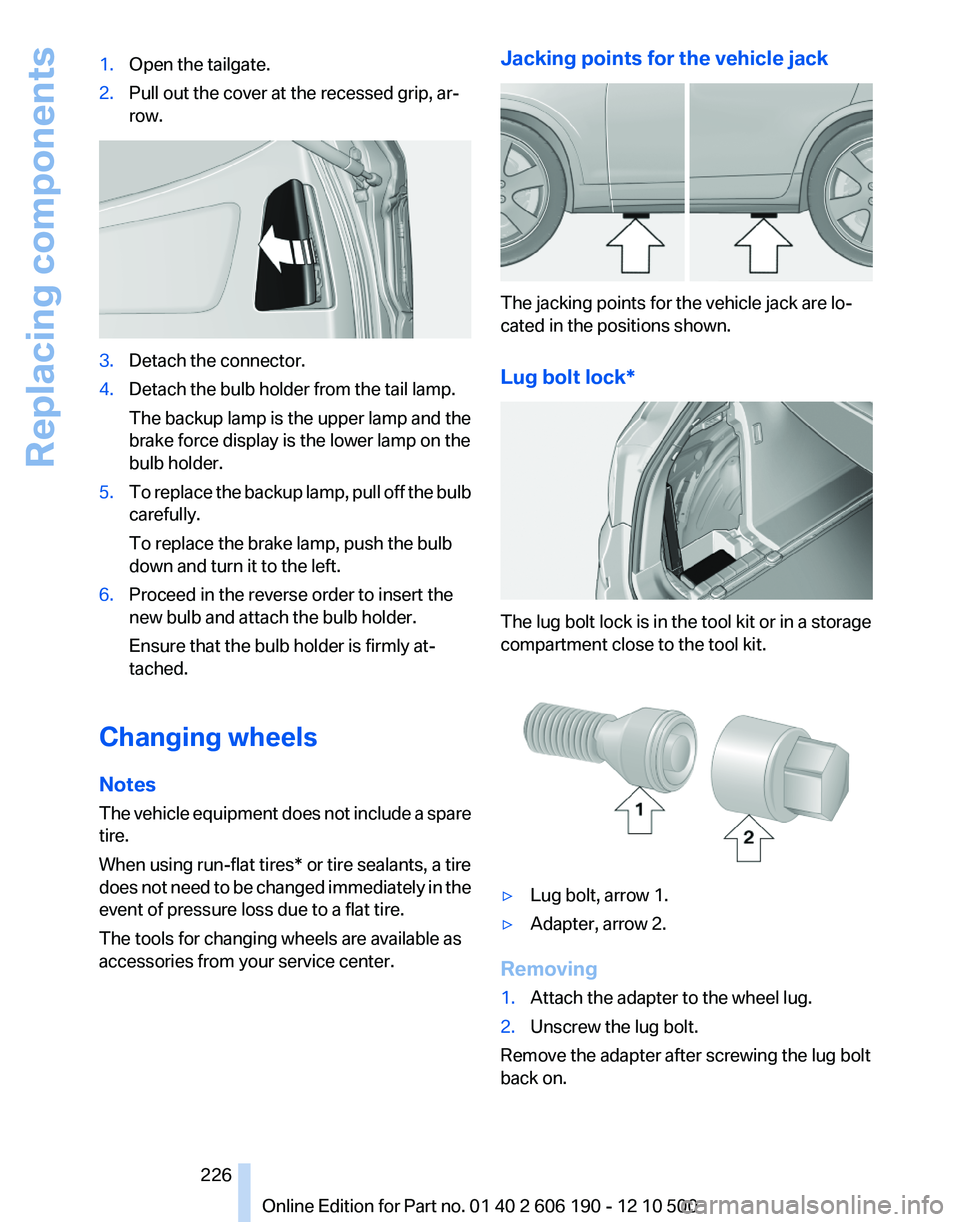
1.Open the tailgate.2.Pull out the cover at the recessed grip, ar‐
row.3.Detach the connector.4.Detach the bulb holder from the tail lamp.
The backup lamp is the upper lamp and the
brake force display is the lower lamp on the
bulb holder.5.To replace the backup lamp, pull off the bulb
carefully.
To replace the brake lamp, push the bulb
down and turn it to the left.6.Proceed in the reverse order to insert the
new bulb and attach the bulb holder.
Ensure that the bulb holder is firmly at‐
tached.
Changing wheels
Notes
The vehicle equipment does not include a spare
tire.
When using run-flat tires* or tire sealants, a tire
does not need to be changed immediately in the
event of pressure loss due to a flat tire.
The tools for changing wheels are available as
accessories from your service center.
Jacking points for the vehicle jack
The jacking points for the vehicle jack are lo‐
cated in the positions shown.
Lug bolt lock*
The lug bolt lock is in the tool kit or in a storage
compartment close to the tool kit.
▷Lug bolt, arrow 1.▷Adapter, arrow 2.
Removing
1.Attach the adapter to the wheel lug.2.Unscrew the lug bolt.
Remove the adapter after screwing the lug bolt
back on.
Seite 226226
Online Edition for Part no. 01 40 2 606 190 - 12 10 500Replacing components
Page 252 of 262
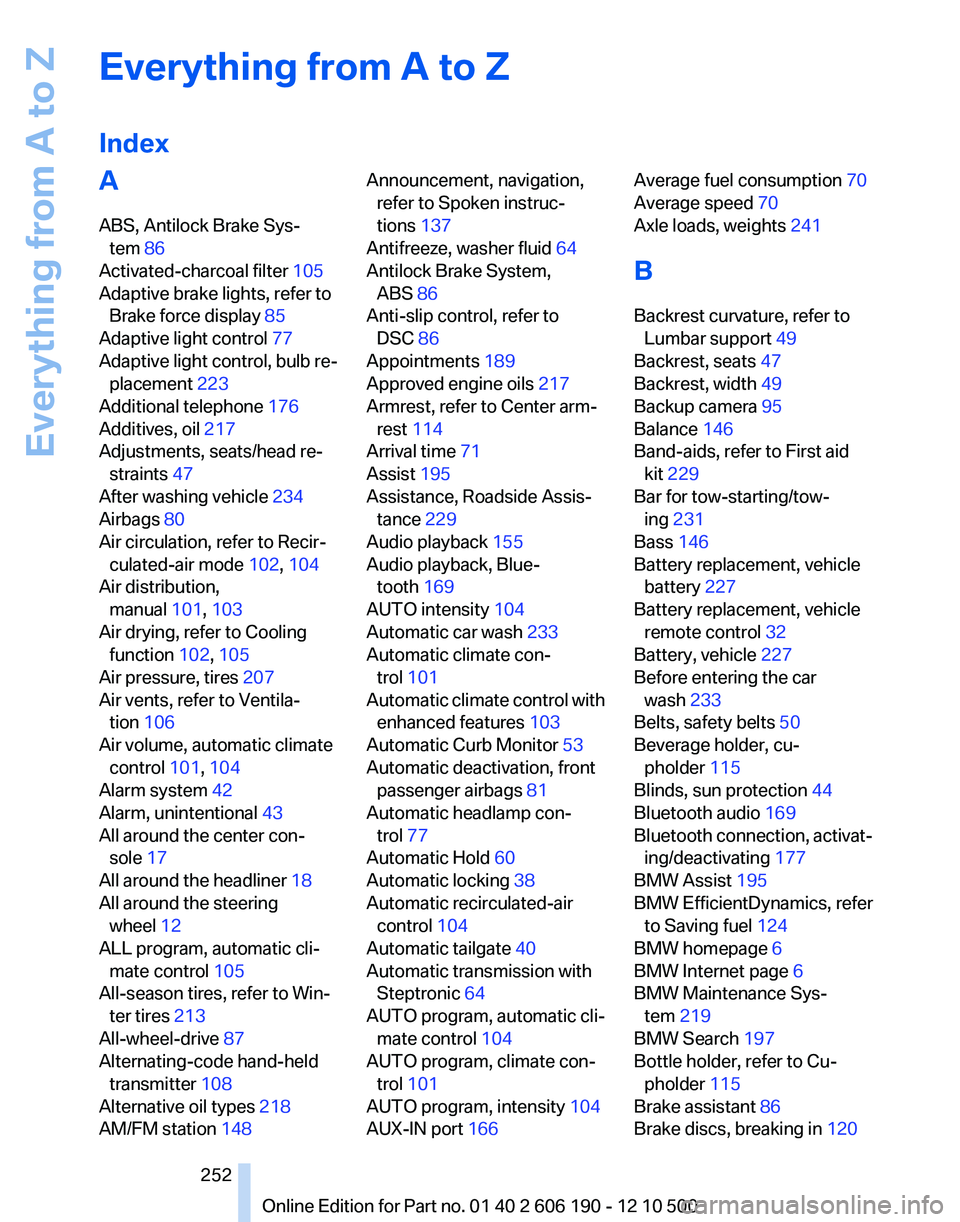
Everything from A to Z
IndexA
ABS, Antilock Brake Sys‐ tem 86
Activated-charcoal filter 105
Adaptive brake lights, refer to Brake force display 85
Adaptive light control 77
Adaptive light control, bulb re‐ placement 223
Additional telephone 176
Additives, oil 217
Adjustments, seats/head re‐ straints 47
After washing vehicle 234
Airbags 80
Air circulation, refer to Recir‐ culated-air mode 102, 104
Air distribution, manual 101, 103
Air drying, refer to Cooling function 102, 105
Air pressure, tires 207
Air vents, refer to Ventila‐ tion 106
Air volume, automatic climate control 101, 104
Alarm system 42
Alarm, unintentional 43
All around the center con‐ sole 17
All around the headliner 18
All around the steering wheel 12
ALL program, automatic cli‐ mate control 105
All-season tires, refer to Win‐ ter tires 213
All-wheel-drive 87
Alternating-code hand-held transmitter 108
Alternative oil types 218
AM/FM station 148 Announcement, navigation,
refer to Spoken instruc‐
tions 137
Antifreeze, washer fluid 64
Antilock Brake System, ABS 86
Anti-slip control, refer to DSC 86
Appointments 189
Approved engine oils 217
Armrest, refer to Center arm‐ rest 114
Arrival time 71
Assist 195
Assistance, Roadside Assis‐ tance 229
Audio playback 155
Audio playback, Blue‐ tooth 169
AUTO intensity 104
Automatic car wash 233
Automatic climate con‐ trol 101
Automatic climate control with enhanced features 103
Automatic Curb Monitor 53
Automatic deactivation, front passenger airbags 81
Automatic headlamp con‐ trol 77
Automatic Hold 60
Automatic locking 38
Automatic recirculated-air control 104
Automatic tailgate 40
Automatic transmission with Steptronic 64
AUTO program, automatic cli‐ mate control 104
AUTO program, climate con‐ trol 101
AUTO program, intensity 104
AUX-IN port 166 Average fuel consumption 70
Average speed 70
Axle loads, weights 241
B
Backrest curvature, refer to Lumbar support 49
Backrest, seats 47
Backrest, width 49
Backup camera 95
Balance 146
Band-aids, refer to First aid kit 229
Bar for tow-starting/tow‐ ing 231
Bass 146
Battery replacement, vehicle battery 227
Battery replacement, vehicle remote control 32
Battery, vehicle 227
Before entering the car wash 233
Belts, safety belts 50
Beverage holder, cu‐ pholder 115
Blinds, sun protection 44
Bluetooth audio 169
Bluetooth connection, activat‐ ing/deactivating 177
BMW Assist 195
BMW EfficientDynamics, refer to Saving fuel 124
BMW homepage 6
BMW Internet page 6
BMW Maintenance Sys‐ tem 219
BMW Search 197
Bottle holder, refer to Cu‐ pholder 115
Brake assistant 86
Brake discs, breaking in 120 Seite 252252
Online Edition for Part no. 01 40 2 606 190 - 12 10 500Everything from A to Z
Page 256 of 262
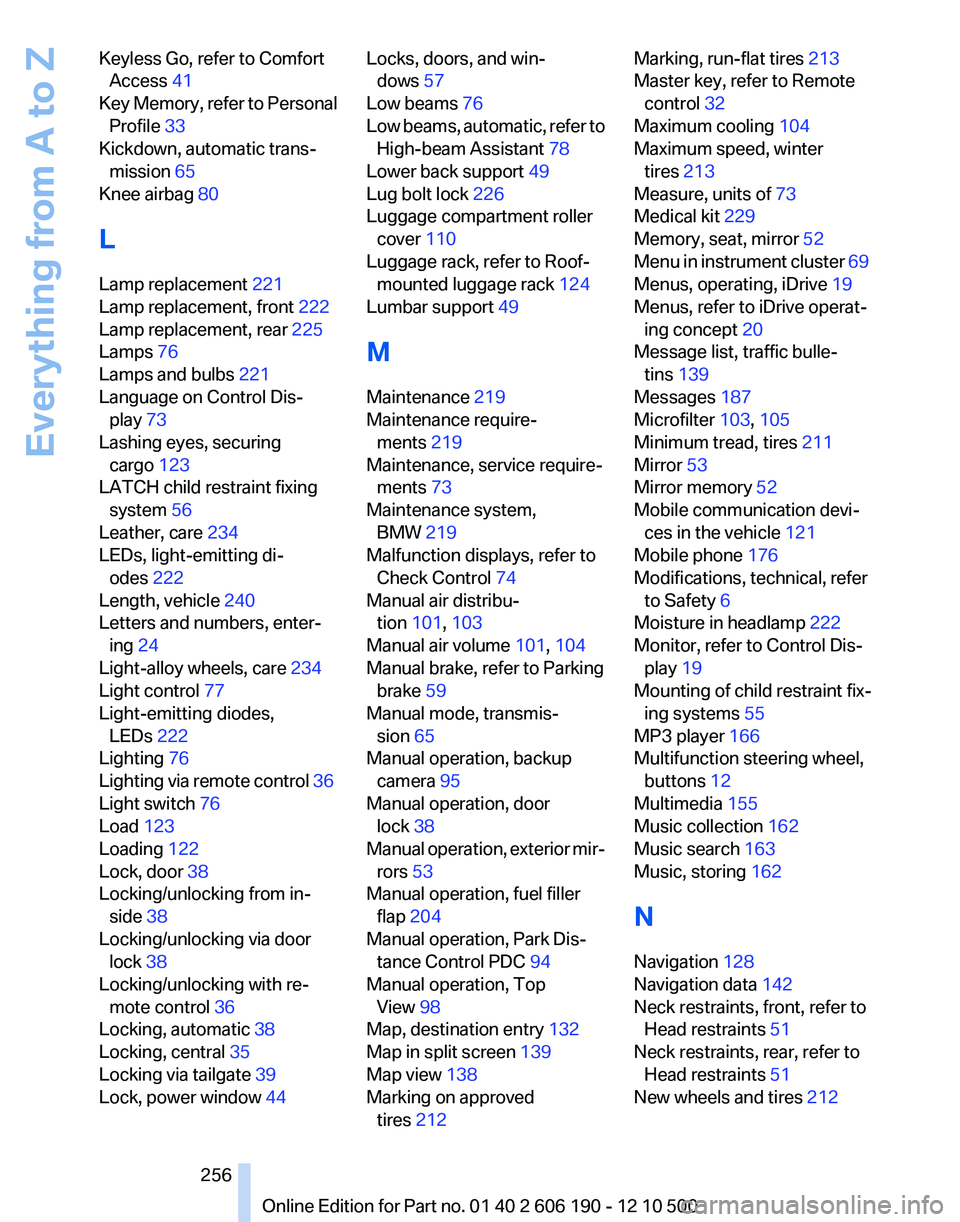
Keyless Go, refer to ComfortAccess 41
Key Memory, refer to Personal Profile 33
Kickdown, automatic trans‐ mission 65
Knee airbag 80
L
Lamp replacement 221
Lamp replacement, front 222
Lamp replacement, rear 225
Lamps 76
Lamps and bulbs 221
Language on Control Dis‐ play 73
Lashing eyes, securing cargo 123
LATCH child restraint fixing system 56
Leather, care 234
LEDs, light-emitting di‐ odes 222
Length, vehicle 240
Letters and numbers, enter‐ ing 24
Light-alloy wheels, care 234
Light control 77
Light-emitting diodes, LEDs 222
Lighting 76
Lighting via remote control 36
Light switch 76
Load 123
Loading 122
Lock, door 38
Locking/unlocking from in‐ side 38
Locking/unlocking via door lock 38
Locking/unlocking with re‐ mote control 36
Locking, automatic 38
Locking, central 35
Locking via tailgate 39
Lock, power window 44 Locks, doors, and win‐
dows 57
Low beams 76
Low beams, automatic, refer to High-beam Assistant 78
Lower back support 49
Lug bolt lock 226
Luggage compartment roller cover 110
Luggage rack, refer to Roof- mounted luggage rack 124
Lumbar support 49
M
Maintenance 219
Maintenance require‐ ments 219
Maintenance, service require‐ ments 73
Maintenance system, BMW 219
Malfunction displays, refer to Check Control 74
Manual air distribu‐ tion 101, 103
Manual air volume 101, 104
Manual brake, refer to Parking brake 59
Manual mode, transmis‐ sion 65
Manual operation, backup camera 95
Manual operation, door lock 38
Manual operation, exterior mir‐ rors 53
Manual operation, fuel filler flap 204
Manual operation, Park Dis‐ tance Control PDC 94
Manual operation, Top View 98
Map, destination entry 132
Map in split screen 139
Map view 138
Marking on approved tires 212 Marking, run-flat tires 213
Master key, refer to Remote control 32
Maximum cooling 104
Maximum speed, winter tires 213
Measure, units of 73
Medical kit 229
Memory, seat, mirror 52
Menu in instrument cluster 69
Menus, operating, iDrive 19
Menus, refer to iDrive operat‐ ing concept 20
Message list, traffic bulle‐ tins 139
Messages 187
Microfilter 103, 105
Minimum tread, tires 211
Mirror 53
Mirror memory 52
Mobile communication devi‐ ces in the vehicle 121
Mobile phone 176
Modifications, technical, refer to Safety 6
Moisture in headlamp 222
Monitor, refer to Control Dis‐ play 19
Mounting of child restraint fix‐ ing systems 55
MP3 player 166
Multifunction steering wheel, buttons 12
Multimedia 155
Music collection 162
Music search 163
Music, storing 162
N
Navigation 128
Navigation data 142
Neck restraints, front, refer to Head restraints 51
Neck restraints, rear, refer to Head restraints 51
New wheels and tires 212 Seite 256256
Online Edition for Part no. 01 40 2 606 190 - 12 10 500Everything from A to Z