seat adjustment BMW X3 XDRIVE 30I 2010 E83 Owner's Manual
[x] Cancel search | Manufacturer: BMW, Model Year: 2010, Model line: X3 XDRIVE 30I, Model: BMW X3 XDRIVE 30I 2010 E83Pages: 144, PDF Size: 4.54 MB
Page 21 of 144
Reference
At a glance
Controls
Driving tips
Mobility
19
>Active PDC Park Distance Control is acous-
tically indicated by a signal tone when you
shift into reverse or move the selector lever
into position R, refer to page50.
>Different confirmation signals to confirm
arming/disarming of alarm system, refer to
page25.
>After an outside temperature warning has
been issued, the computer display returns
to the previous setting, refer to page48.
>Acoustic warning if the ignition key remains
in the ignition lock after the driver's door has
been opened, refer to page19.
Examples of Key Memory functions
>Locking the vehicle after starting to drive,
refer to page21.
>Automatic adjustment of the driver's seat
and exterior mirror position for each person
when unlocking the vehicle, refer to
page31.
>Setting units of measure for instrument
cluster displays of time, outside tempera-
ture, distance driven, and fuel consumption,
refer to page48.
Central locking system
The concept
The central locking system is ready for opera-
tion whenever the driver's door is closed.
The system locks or unlocks:
>doors
>liftgate
>fuel filler door
Operating from outside
>via the remote control
>via the driver's door lock
The interior lamps and courtesy lamps
* are
switched on and off with the remote control.
The alarm system
* is also armed or disarmed.For additional details on the alarm system, refer
to page25.
You can set an acoustic signal to remind
you if the ignition key is still in the ignition
lock after you open the driver's door.<
Operating from inside
Via the central locking system button, refer to
page21.
When the system is locked from inside, the fuel
filler door remains unlocked.
In the event of an accident of sufficient severity,
the central locking system unlocks automati-
cally. In addition, the hazard warning flashers
and interior lamps switch on.
Opening and closing:
Using the remote control
Persons or animals left unattended in a
parked vehicle can lock the doors from
the inside. For this reason, bring the remote
control with you whenever you leave the vehicle
so that you will always be able to unlock the
vehicle from outside.<
Unlocking
1.Press the button.
The driver's door and fuel filler door are
unlocked.
2.Press the button again.
All remaining doors and the liftgate are
unlocked.
Convenience opening mode
Press and hold the button.
The windows and panorama glass sunroof
* are
opened, the exterior mirrors are folded open
*.
If you wish, you can have this special fea-
ture activated/deactivated.<
Engaging locks
Press the button.
Hazard warning flashers flash once.
Page 29 of 144
Reference
At a glance
Controls
Driving tips
Mobility
27
Adjustments
Sitting safely
The ideal sitting position can make a vital con-
tribution to relaxed driving that is as fatigue-free
as possible. Together with safety belts, head
restraints, and airbags, sitting position plays an
important role in an accident. Compliance with
the following instructions is important; failure to
do so could impair the protective function of the
safety systems.
For additional information on transporting chil-
dren safely, refer to page35.
Airbags
Always maintain an adequate distance
between yourself and the airbags. Always
hold the steering wheel by its rim with hands at
the 9 o'clock and 3 o'clock positions, to mini-
mize the risk of injuries to your hands and arms
in the event of airbag deployment.
No one and nothing is to come between the air-
bags and the seat occupant.
Do not use the cover of the front airbag on the
front passenger side as a storage area. Make
sure that the passenger sits correctly, e.g. does
not rest his feet or legs on the instrument clus-
ter. Otherwise, a triggering of the front airbag
could result in leg injuries. Make sure that pas-
sengers do not lean their heads against side or
head airbags. Otherwise, a triggering of the air-
bag could result in injuries.<
Even if you adhere to all the instructions, inju-
ries resulting from contact with airbags cannot
be entirely ruled out, depending on the circum-
stances. The ignition and inflation noise may
provoke a mild – usually temporary – hearing
loss in extremely sensitive individuals.
For airbag locations and additional information
on airbags, refer to page57.
Head restraint
A correctly adjusted head restraint reduces the
risk of damage to the cervical vertebrae in acci-
dents.
Adjust the head restraint so that its mid-
dle lies approximately at the height of
your ears. Otherwise, there is an increased risk
of injury in the event of an accident.<
Head restraints, refer to page29.
Safety belts
Make sure the safety belts are worn in all occu-
pied seats every time you drive. Although air-
bags enhance safety by providing added pro-
tection, they are not a substitute for safety
belts.
Your vehicle has five seats that are each
equipped with a safety belt.
Never allow more than one person to
wear a single safety belt. Infants and chil-
dren must not ride on a lap. Make sure that the
belt in the lap area sits low against the hips
and does not press against the abdomen. The
safety belt must never rest against the throat,
rub against sharp edges, pass over hard or frag-
ile objects or be pinched. Fasten the safety belt
around your body snugly, making sure that it is
pulled taut across your lap and shoulder and
that it is not twisted; otherwise, the belt can
slide over the hips in the event of a frontal colli-
sion and injure your abdomen. Avoid wearing
clothing that prevents the belt from fitting prop-
erly and pull the shoulder belt upward periodi-
cally to readjust the tension across your lap in
order to avoid a reduction in the restraining
action of the safety belt.
If the middle safety belt is used, the larger part
of the backrest must be locked in position, refer
to page76; otherwise, the middle safety belt
cannot exert any restraining action.<
Safety belts, refer to page32.
Page 30 of 144
Adjustments
28
Seats
Note before adjusting
Never try to adjust your seat while operat-
ing the vehicle. The seat could respond
with unexpected movement, and the ensuing
loss of vehicle control could lead to an accident.
On the passenger seat as well, do not incline
the backrest too far to the rear while the vehicle
is being driven; otherwise, there is a danger in
the event of an accident of sliding under the
safety belt, eliminating the protection normally
provided by the belt.<
Also follow the instructions regarding the
height of head restraints on page29 and
regarding safety belt damage on page33.
Adjusting manually
To ensure that the safety systems con-
tinue to provide optimized protection,
follow the adjustment instructions above.<
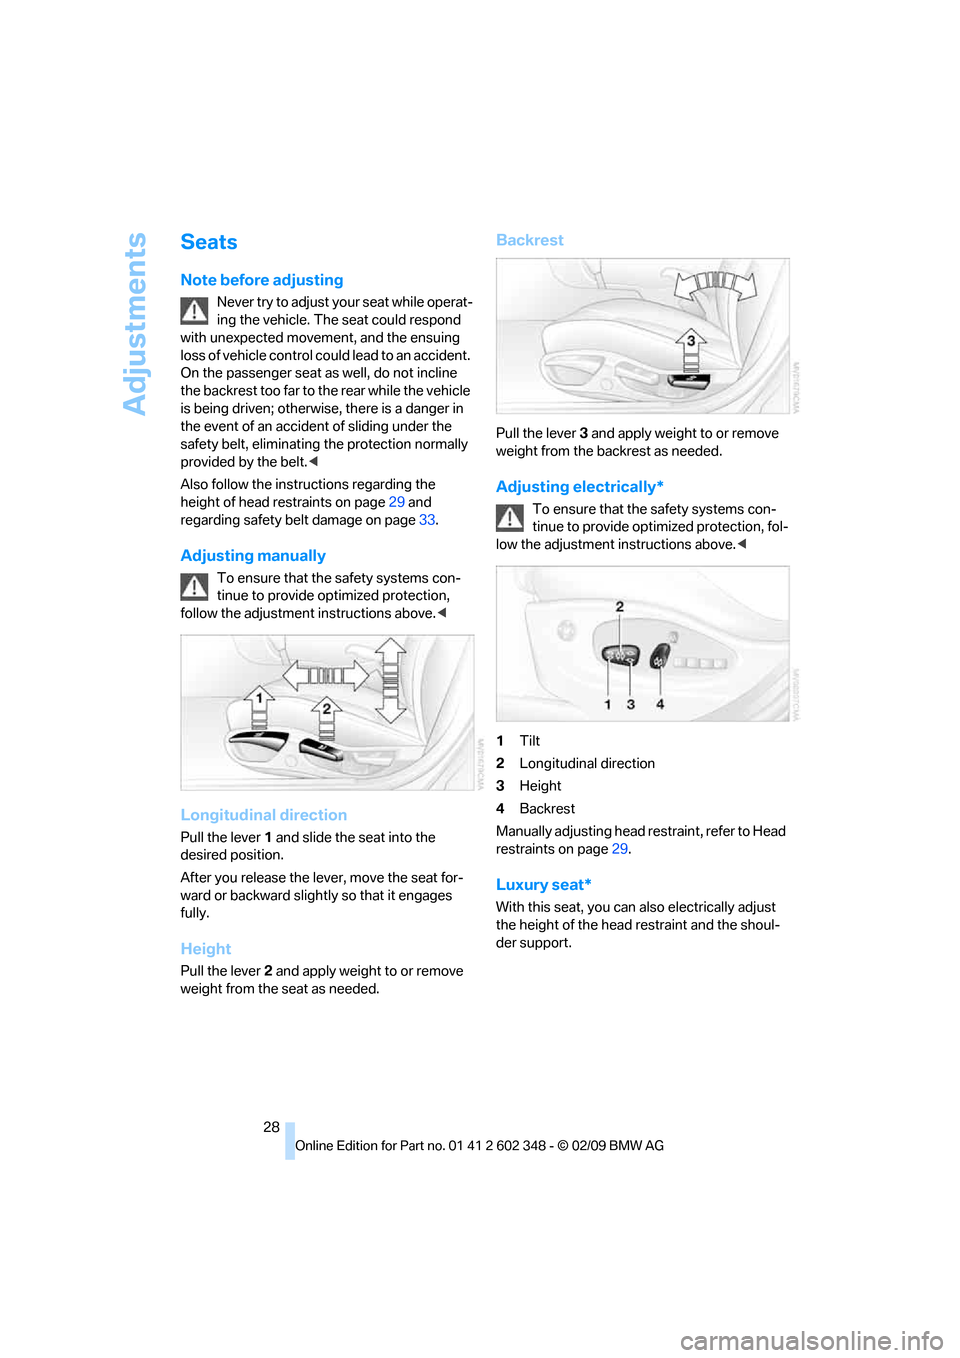
Longitudinal direction
Pull the lever 1 and slide the seat into the
desired position.
After you release the lever, move the seat for-
ward or backward slightly so that it engages
fully.
Height
Pull the lever 2 and apply weight to or remove
weight from the seat as needed.
Backrest
Pull the lever 3 and apply weight to or remove
weight from the backrest as needed.
Adjusting electrically*
To ensure that the safety systems con-
tinue to provide optimized protection, fol-
low the adjustment instructions above.<
1Tilt
2Longitudinal direction
3Height
4Backrest
Manually adjusting head restraint, refer to Head
restraints on page29.
Luxury seat*
With this seat, you can also electrically adjust
the height of the head restraint and the shoul-
der support.
Page 32 of 144
Adjustments
30 Do not use seat or head-restraint covers
which could impair the operability of the
active head restraint. Otherwise, the protective
function of the active head restraint is not
ensured and its potential to reduce injuries in a
rear-end collision cannot be fully utilized.
Have the active head restraints reset after being
triggered in a rear-end collision. Have work on
your vehicle done only by a BMW Sports Activ-
ity Vehicle Center or a workshop that works
according to BMW repair procedures with cor-
respondingly trained personnel. Otherwise, this
restraint device will not function.<
Please contact a BMW Sports Activity
Vehicle Center if the front head restraints
are to be removed and installed.<
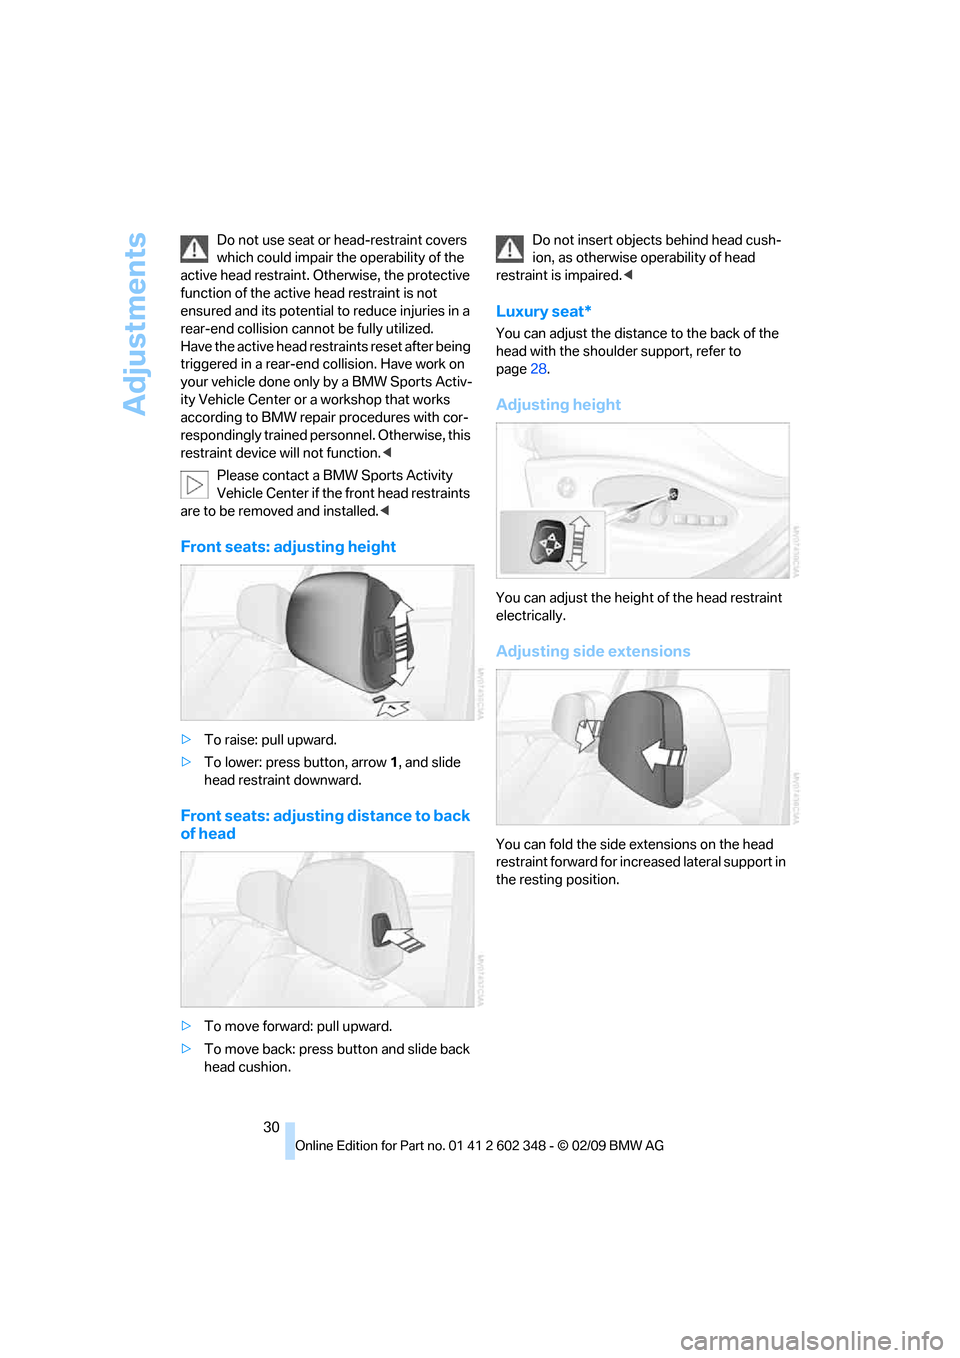
Front seats: adjusting height
>To raise: pull upward.
>To lower: press button, arrow 1, and slide
head restraint downward.
Front seats: adjusting distance to back
of head
>To move forward: pull upward.
>To move back: press button and slide back
head cushion.Do not insert objects behind head cush-
ion, as otherwise operability of head
restraint is impaired.<
Luxury seat*
You can adjust the distance to the back of the
head with the shoulder support, refer to
page28.
Adjusting height
You can adjust the height of the head restraint
electrically.
Adjusting side extensions
You can fold the side extensions on the head
restraint forward for increased lateral support in
the resting position.
Page 33 of 144
Reference
At a glance
Controls
Driving tips
Mobility
31
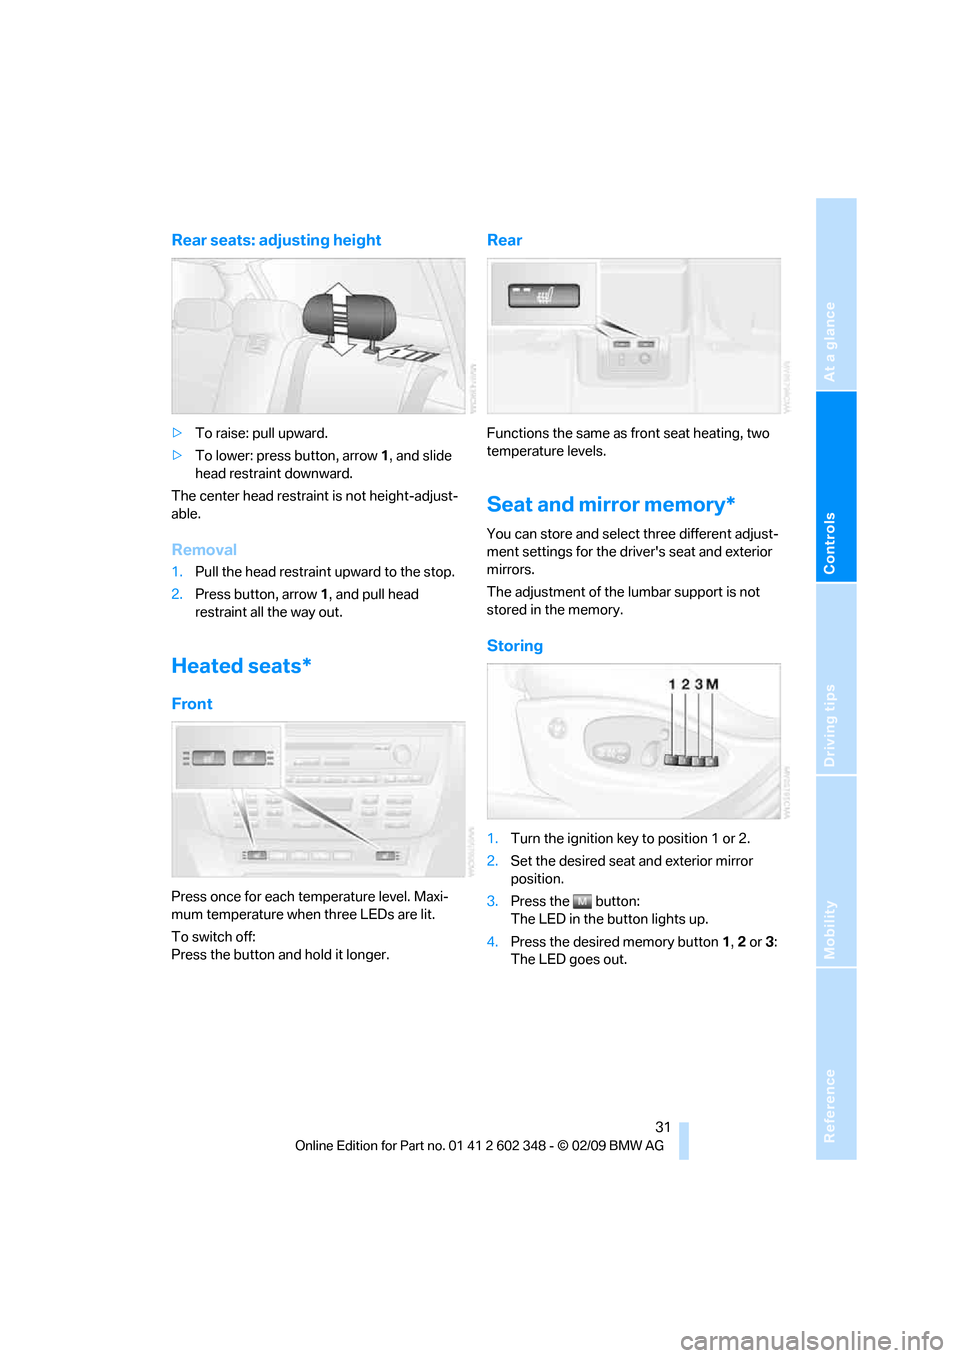
Rear seats: adjusting height
>To raise: pull upward.
>To lower: press button, arrow 1, and slide
head restraint downward.
The center head restraint is not height-adjust-
able.
Removal
1.Pull the head restraint upward to the stop.
2.Press button, arrow 1, and pull head
restraint all the way out.
Heated seats*
Front
Press once for each temperature level. Maxi-
mum temperature when three LEDs are lit.
To switch off:
Press the button and hold it longer.
Rear
Functions the same as front seat heating, two
temperature levels.
Seat and mirror memory*
You can store and select three different adjust-
ment settings for the driver's seat and exterior
mirrors.
The adjustment of the lumbar support is not
stored in the memory.
Storing
1.Turn the ignition key to position 1 or 2.
2.Set the desired seat and exterior mirror
position.
3.Press the button:
The LED in the button lights up.
4.Press the desired memory button 1, 2 or3:
The LED goes out.
Page 34 of 144
Adjustments
32
Requesting a stored setting
Do not request a position from the mem-
ory while the vehicle is moving; otherwise,
there is a risk of accident from unexpected seat
movement.<
Convenience mode
1.Open the driver's door after unlocking or
turn the ignition key to position 1.
2.Briefly press the desired memory button 1,
2 or3.
The adjustment procedure is canceled when
you press one of the seat adjustment buttons or
use one of the memory buttons.
Safety feature
1.Close the driver's door and turn the ignition
key to position 0 or 2.
2.Press the desired memory button 1, 2 or3
and maintain pressure until the adjustment
process has been completed.
If the button has been pressed inadvert-
ently:
Press the button again, the LED goes out.
You can have your vehicle programmed
to automatically recall your own individual
stored adjustment settings for the seat and
exterior mirror position whenever you use your
personal remote control to unlock the vehicle.<
If you make use of this setting, be sure
that the footwell behind the driver's seat
is unobstructed before unlocking the vehicle.
If you fail to do so, any persons, animals or
objects behind the seat could be injured or
damaged by a rearward movement of the
seat.<
Safety belts
To ensure that the safety systems con-
tinue to provide optimum protection,
please follow the instructions on page27.<
Make sure the safety belts are worn in all occu-
pied seats every time you drive. Although air-
bags enhance safety by providing added pro-tection, they are not a substitute for safety
belts.
Fastening
Make sure you hear the latch plate engage in
the belt buckle.
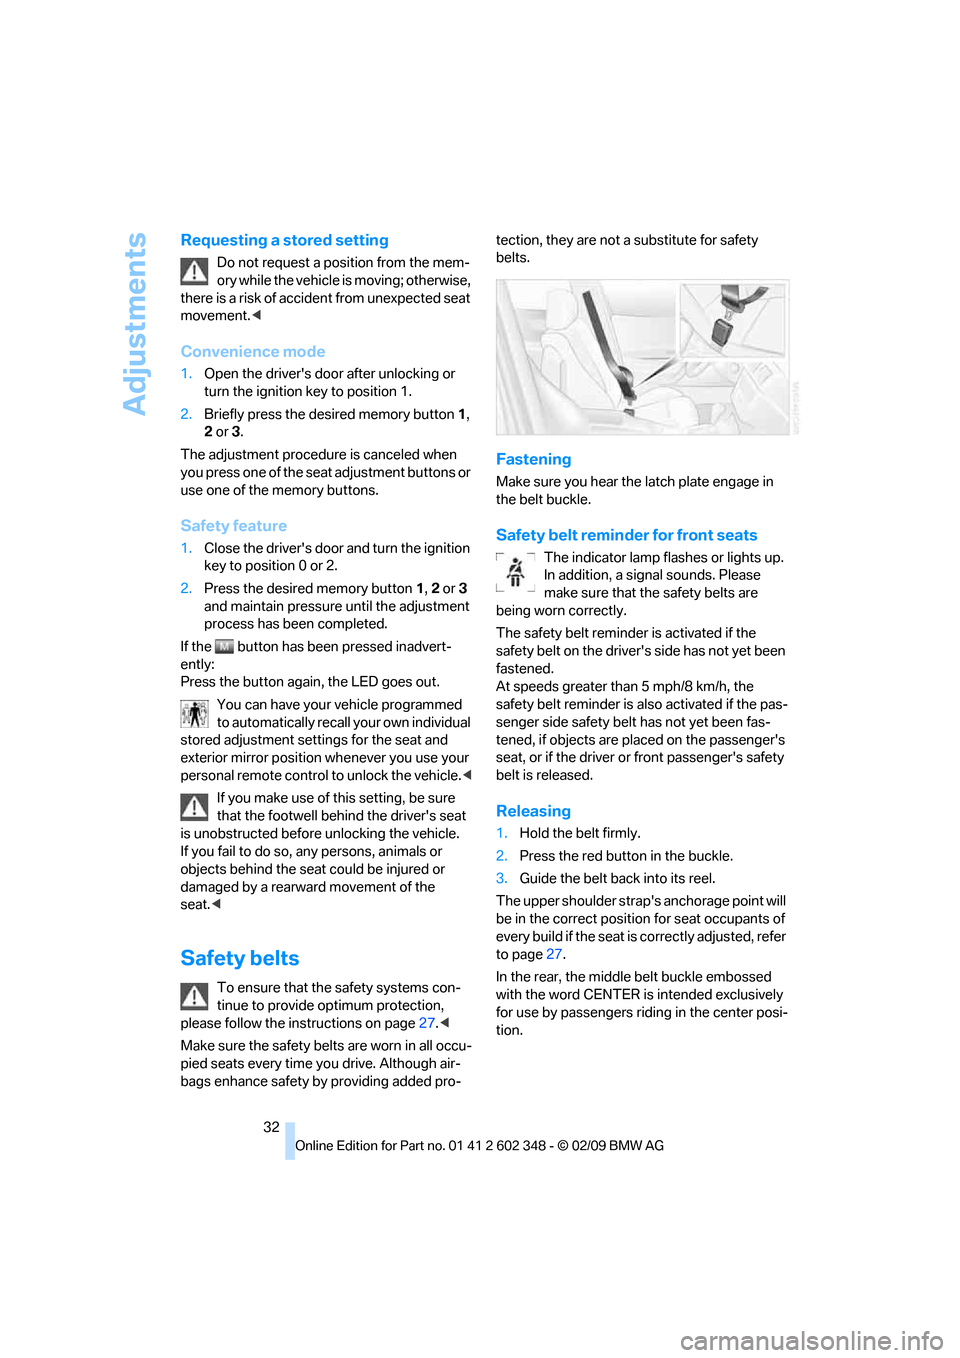
Safety belt reminder for front seats
The indicator lamp flashes or lights up.
In addition, a signal sounds. Please
make sure that the safety belts are
being worn correctly.
The safety belt reminder is activated if the
safety belt on the driver's side has not yet been
fastened.
At speeds greater than 5 mph/8 km/h, the
safety belt reminder is also activated if the pas-
senger side safety belt has not yet been fas-
tened, if objects are placed on the passenger's
seat, or if the driver or front passenger's safety
belt is released.
Releasing
1.Hold the belt firmly.
2.Press the red button in the buckle.
3.Guide the belt back into its reel.
The upper shoulder strap's anchorage point will
be in the correct position for seat occupants of
every build if the seat is correctly adjusted, refer
to page27.
In the rear, the middle belt buckle embossed
with the word CENTER is intended exclusively
for use by passengers riding in the center posi-
tion.
Page 35 of 144
Reference
At a glance
Controls
Driving tips
Mobility
33
Damage to safety belts
When strained by an accident or when
damaged: have the safety belt system,
including the belt tensioners, replaced and have
belt anchorage points inspected. Have this
work done only by your BMW Sports Activity
Vehicle Center or by a workshop that works
according to BMW repair procedures with cor-
respondingly trained personnel. Otherwise,
there can be no guarantee that the safety
devices will function properly.<
Mirrors
Exterior mirrors
The passenger side mirror is more curved
than the driver's mirror. Objects in the
mirrors are closer than they appear. Do not esti-
mate the distance to following traffic based on
the view in the mirrors; otherwise, there is an
increased risk of accident.<
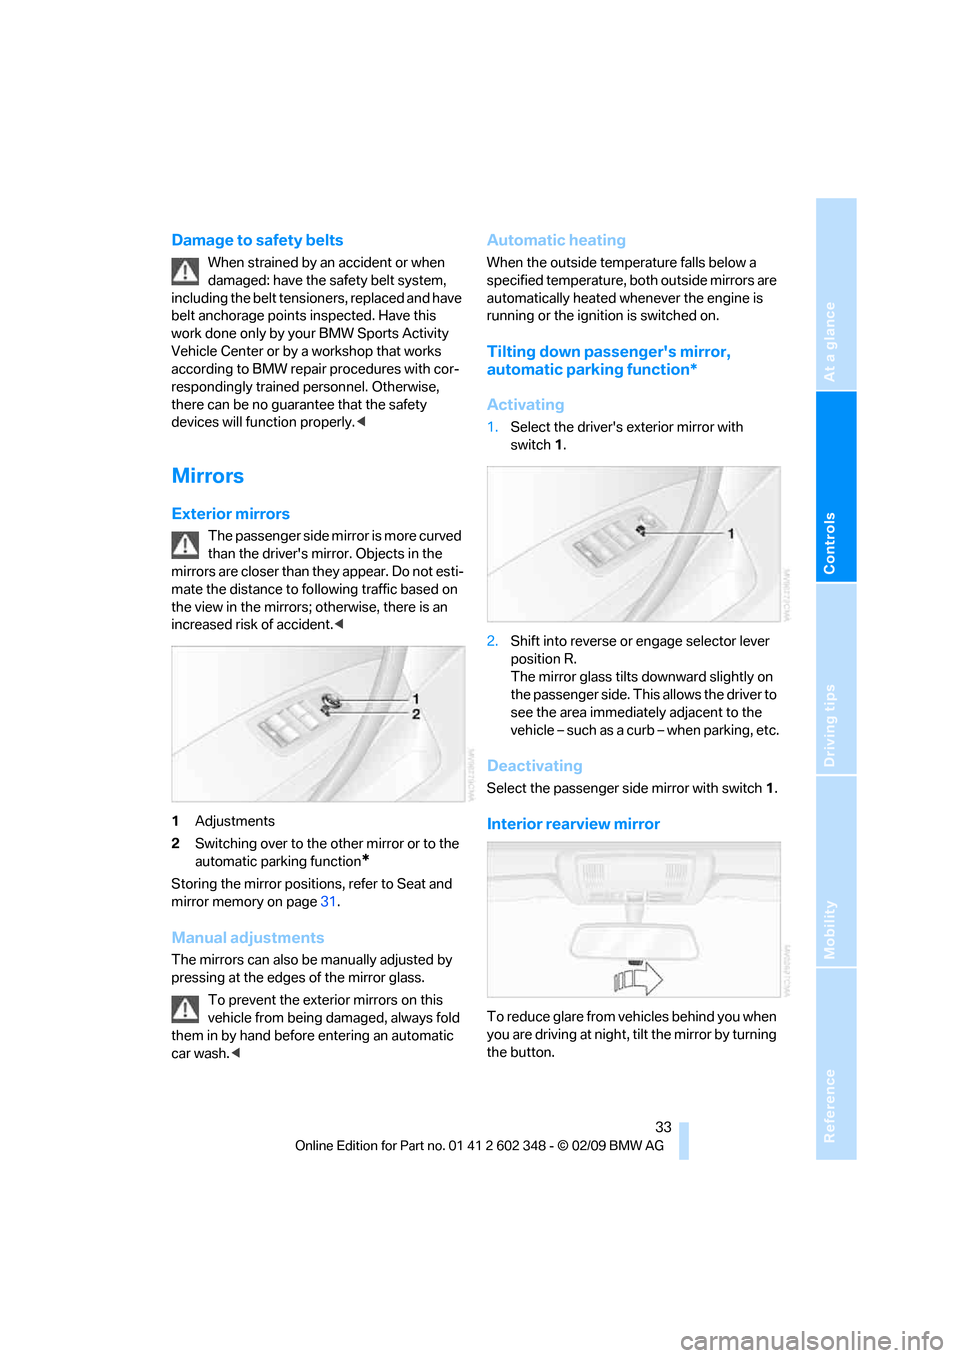
1Adjustments
2Switching over to the other mirror or to the
automatic parking function
*
Storing the mirror positions, refer to Seat and
mirror memory on page31.
Manual adjustments
The mirrors can also be manually adjusted by
pressing at the edges of the mirror glass.
To prevent the exterior mirrors on this
vehicle from being damaged, always fold
them in by hand before entering an automatic
car wash.<
Automatic heating
When the outside temperature falls below a
specified temperature, both outside mirrors are
automatically heated whenever the engine is
running or the ignition is switched on.
Tilting down passenger's mirror,
automatic parking function*
Activating
1.Select the driver's exterior mirror with
switch 1.
2.Shift into reverse or engage selector lever
position R.
The mirror glass tilts downward slightly on
the passenger side. This allows the driver to
see the area immediately adjacent to the
vehicle – such as a curb – when parking, etc.
Deactivating
Select the passenger side mirror with switch1.
Interior rearview mirror
T o re duce glar e fr om ve hicle s be hind y ou when
you are driving at night, tilt the mirror by turning
the button.
Page 36 of 144
Adjustments
34
Interior and exterior mirror,
automatically dimming*
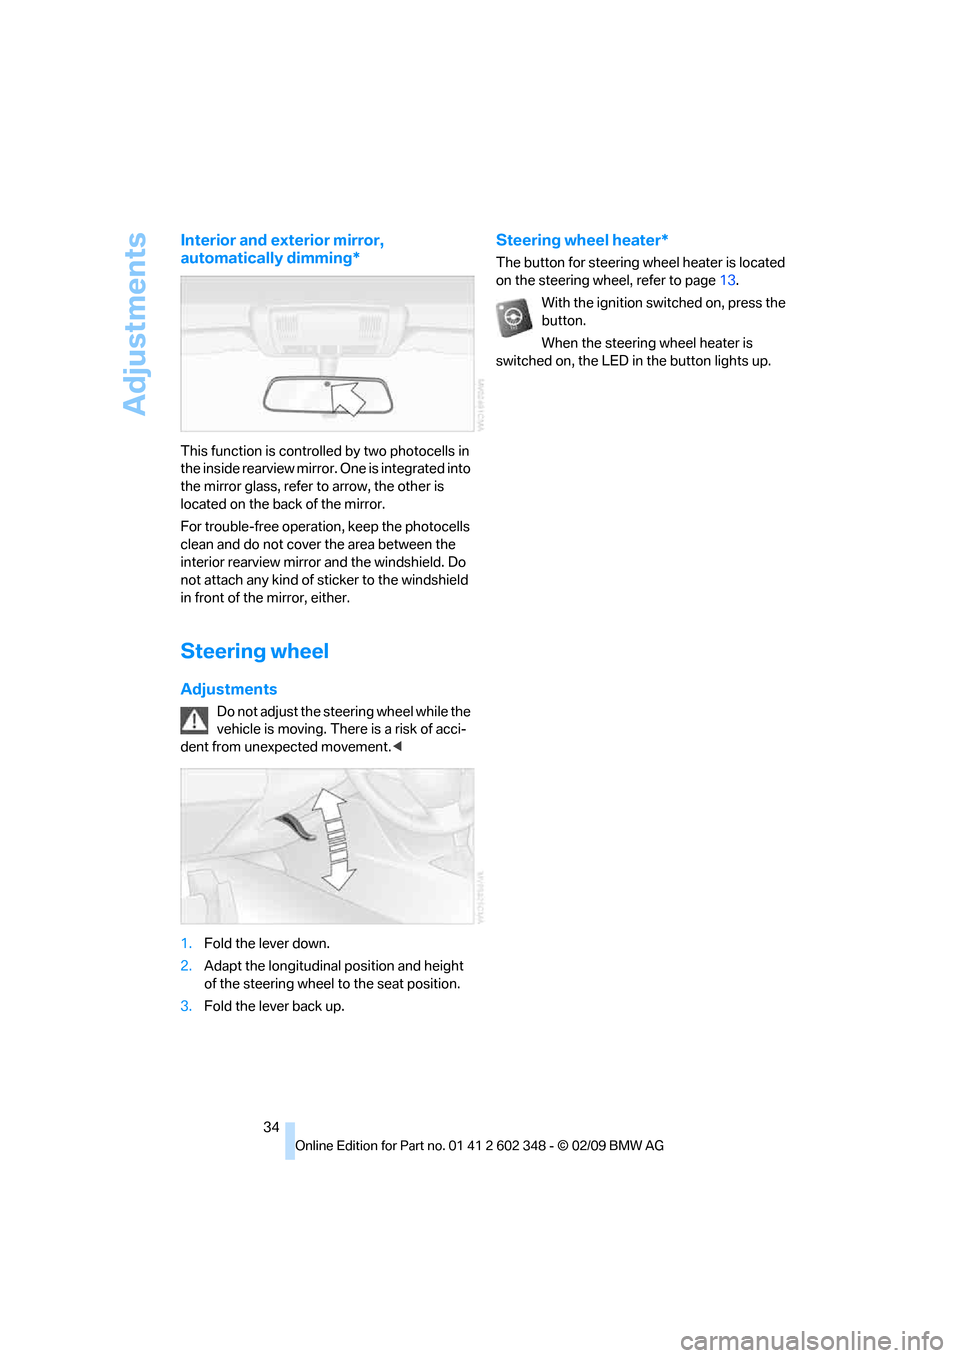
This function is controlled by two photocells in
the inside rearview mirror. One is integrated into
the mirror glass, refer to arrow, the other is
located on the back of the mirror.
For trouble-free operation, keep the photocells
clean and do not cover the area between the
interior rearview mirror and the windshield. Do
not attach any kind of sticker to the windshield
in front of the mirror, either.
Steering wheel
Adjustments
Do not adjust the steering wheel while the
vehicle is moving. There is a risk of acci-
dent from unexpected movement.<
1.Fold the lever down.
2.Adapt the longitudinal position and height
of the steering wheel to the seat position.
3.Fold the lever back up.
Steering wheel heater*
The button for steering wheel heater is located
on the steering wheel, refer to page13.
With the ignition switched on, press the
button.
When the steering wheel heater is
switched on, the LED in the button lights up.
Page 136 of 144
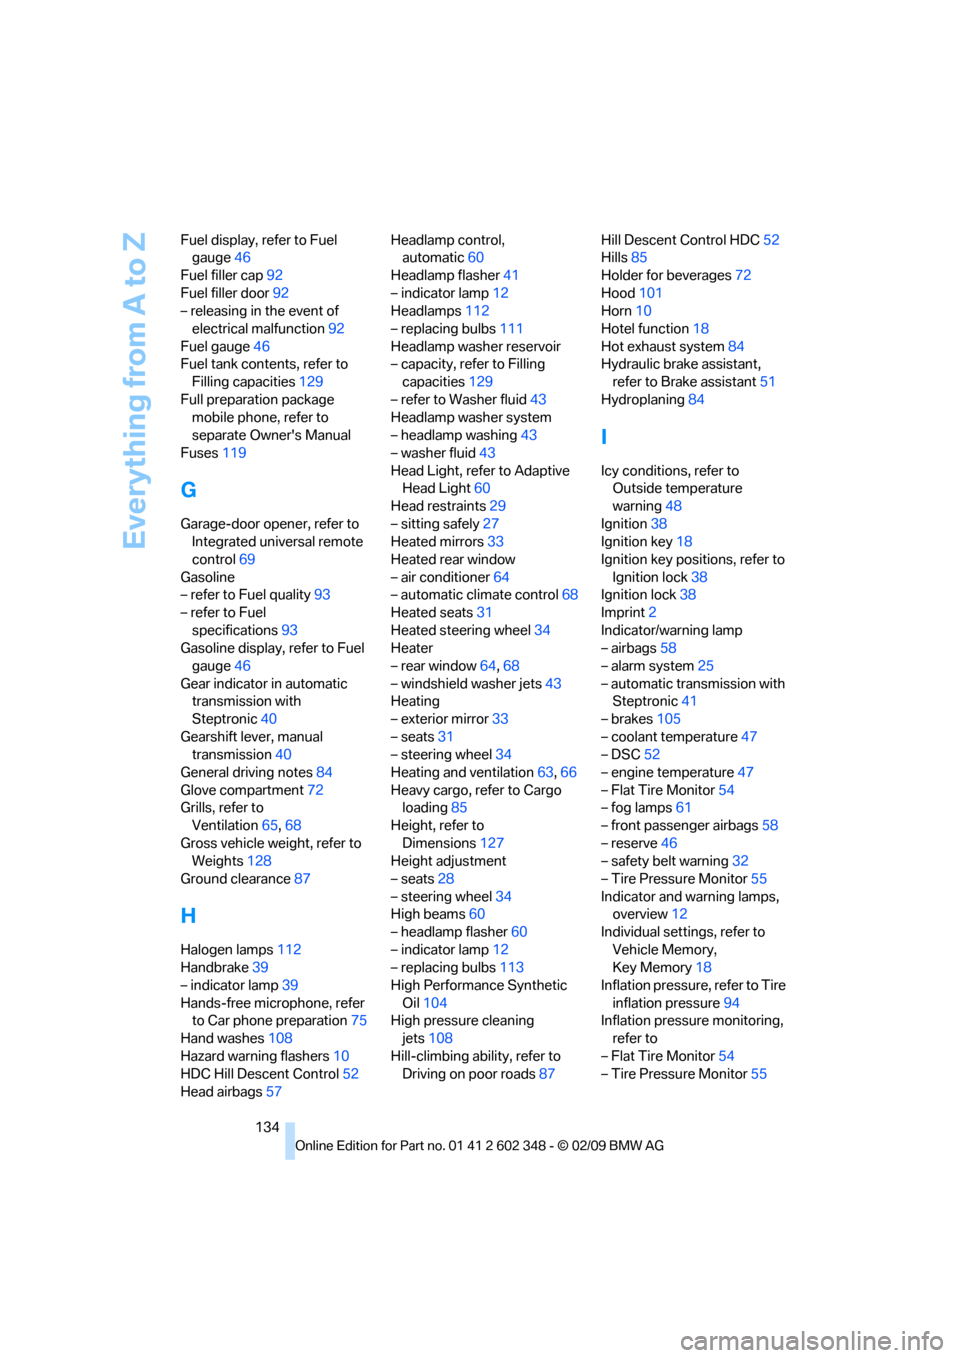
Everything from A to Z
134 Fuel display, refer to Fuel
gauge46
Fuel filler cap92
Fuel filler door92
– releasing in the event of
electrical malfunction92
Fuel gauge46
Fuel tank contents, refer to
Filling capacities129
Full preparation package
mobile phone, refer to
separate Owner's Manual
Fuses119
G
Garage-door opener, refer to
Integrated universal remote
control69
Gasoline
– refer to Fuel quality93
– refer to Fuel
specifications93
Gasoline display, refer to Fuel
gauge46
Gear indicator in automatic
transmission with
Steptronic40
Gearshift lever, manual
transmission40
General driving notes84
Glove compartment72
Grills, refer to
Ventilation65,68
Gross vehicle weight, refer to
Weights128
Ground clearance87
H
Halogen lamps112
Handbrake39
– indicator lamp39
Hands-free microphone, refer
to Car phone preparation75
Hand washes108
Hazard warning flashers10
HDC Hill Descent Control52
Head airbags57Headlamp control,
automatic60
Headlamp flasher41
– indicator lamp12
Headlamps112
– replacing bulbs111
Headlamp washer reservoir
– capacity, refer to Filling
capacities129
– refer to Washer fluid43
Headlamp washer system
– headlamp washing43
– washer fluid43
Head Light, refer to Adaptive
Head Light60
Head restraints29
– sitting safely27
Heated mirrors33
Heated rear window
– air conditioner64
– automatic climate control68
Heated seats31
Heated steering wheel34
Heater
– rear window64,68
– windshield washer jets43
Heating
– exterior mirror33
– seats31
– steering wheel34
Heating and ventilation63,66
Heavy cargo, refer to Cargo
loading85
Height, refer to
Dimensions127
Height adjustment
– seats28
– steering wheel34
High beams60
– headlamp flasher60
– indicator lamp12
– replacing bulbs113
High Performance Synthetic
Oil104
High pressure cleaning
jets108
Hill-climbing ability, refer to
Driving on poor roads87Hill Descent Control HDC52
Hills85
Holder for beverages72
Hood101
Horn10
Hotel function18
Hot exhaust system84
Hydraulic brake assistant,
refer to Brake assistant51
Hydroplaning84
I
Icy conditions, refer to
Outside temperature
warning48
Ignition38
Ignition key18
Ignition key positions, refer to
Ignition lock38
Ignition lock38
Imprint2
Indicator/warning lamp
– airbags58
– alarm system25
– automatic transmission with
Steptronic41
– brakes105
– coolant temperature47
– DSC52
– engine temperature47
– Flat Tire Monitor54
– fog lamps61
– front passenger airbags58
– reserve46
– safety belt warning32
– Tire Pressure Monitor55
Indicator and warning lamps,
overview12
Individual settings, refer to
Vehicle Memory,
Key Memory18
Inflation pressure, refer to Tire
inflation pressure94
Inflation pressure monitoring,
refer to
– Flat Tire Monitor54
– Tire Pressure Monitor55
Page 138 of 144
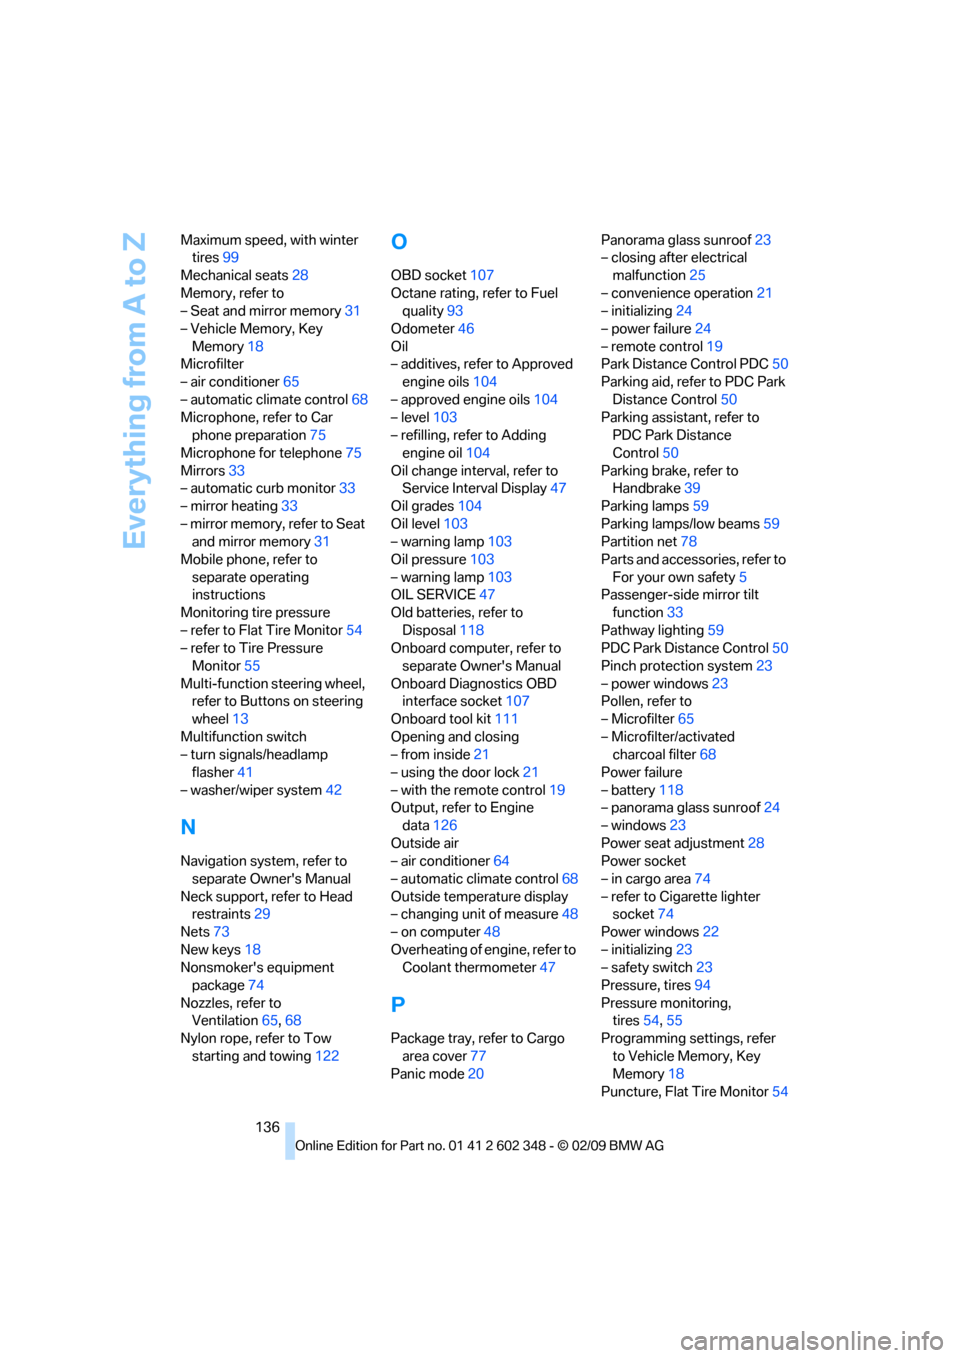
Everything from A to Z
136 Maximum speed, with winter
tires99
Mechanical seats28
Memory, refer to
– Seat and mirror memory31
– Vehicle Memory, Key
Memory18
Microfilter
– air conditioner65
– automatic climate control68
Microphone, refer to Car
phone preparation75
Microphone for telephone75
Mirrors33
– automatic curb monitor33
– mirror heating33
– mirror memory, refer to Seat
and mirror memory31
Mobile phone, refer to
separate operating
instructions
Monitoring tire pressure
– refer to Flat Tire Monitor54
– refer to Tire Pressure
Monitor55
Multi-function steering wheel,
refer to Buttons on steering
wheel13
Multifunction switch
– turn signals/headlamp
flasher41
– washer/wiper system42
N
Navigation system, refer to
separate Owner's Manual
Neck support, refer to Head
restraints29
Nets73
New keys18
Nonsmoker's equipment
package74
Nozzles, refer to
Ventilation65,68
Nylon rope, refer to Tow
starting and towing122
O
OBD socket107
Octane rating, refer to Fuel
quality93
Odometer46
Oil
– additives, refer to Approved
engine oils104
– approved engine oils104
– level103
– refilling, refer to Adding
engine oil104
Oil change interval, refer to
Service Interval Display47
Oil grades104
Oil level103
– warning lamp103
Oil pressure103
– warning lamp103
OIL SERVICE47
Old batteries, refer to
Disposal118
Onboard computer, refer to
separate Owner's Manual
Onboard Diagnostics OBD
interface socket107
Onboard tool kit111
Opening and closing
– from inside21
– using the door lock21
– with the remote control19
Output, refer to Engine
data126
Outside air
– air conditioner64
– automatic climate control68
Outside temperature display
– changing unit of measure48
– on computer48
Overheating of engine, refer to
Coolant thermometer47
P
Package tray, refer to Cargo
area cover77
Panic mode20Panorama glass sunroof23
– closing after electrical
malfunction25
– convenience operation21
– initializing24
– power failure24
– remote control19
Park Distance Control PDC50
Parking aid, refer to PDC Park
Distance Control50
Parking assistant, refer to
PDC Park Distance
Control50
Parking brake, refer to
Handbrake39
Parking lamps59
Parking lamps/low beams59
Partition net78
Parts and accessories, refer to
For your own safety5
Passenger-side mirror tilt
function33
Pathway lighting59
PDC Park Distance Control50
Pinch protection system23
– power windows23
Pollen, refer to
– Microfilter65
– Microfilter/activated
charcoal filter68
Power failure
– battery118
– panorama glass sunroof24
– windows23
Power seat adjustment28
Power socket
– in cargo area74
– refer to Cigarette lighter
socket74
Power windows22
– initializing23
– safety switch23
Pressure, tires94
Pressure monitoring,
tires54,55
Programming settings, refer
to Vehicle Memory, Key
Memory18
Puncture, Flat Tire Monitor54