change language BMW X5 2011 E70 Owner's Manual
[x] Cancel search | Manufacturer: BMW, Model Year: 2011, Model line: X5, Model: BMW X5 2011 E70Pages: 312, PDF Size: 8.91 MB
Page 25 of 312
At a glance
23Reference
Controls
Driving tips
Communications
Navigation
Entertainment
Mobility
Running functions directly with short
commands
With short commands you can carry out certain
functions directly, regardless of which menu
item is selected, refer to page285.
Example: selecting the track of a CD
1.Switch on Entertainment sound output if
necessary.
2.Press the button on the steering wheel.
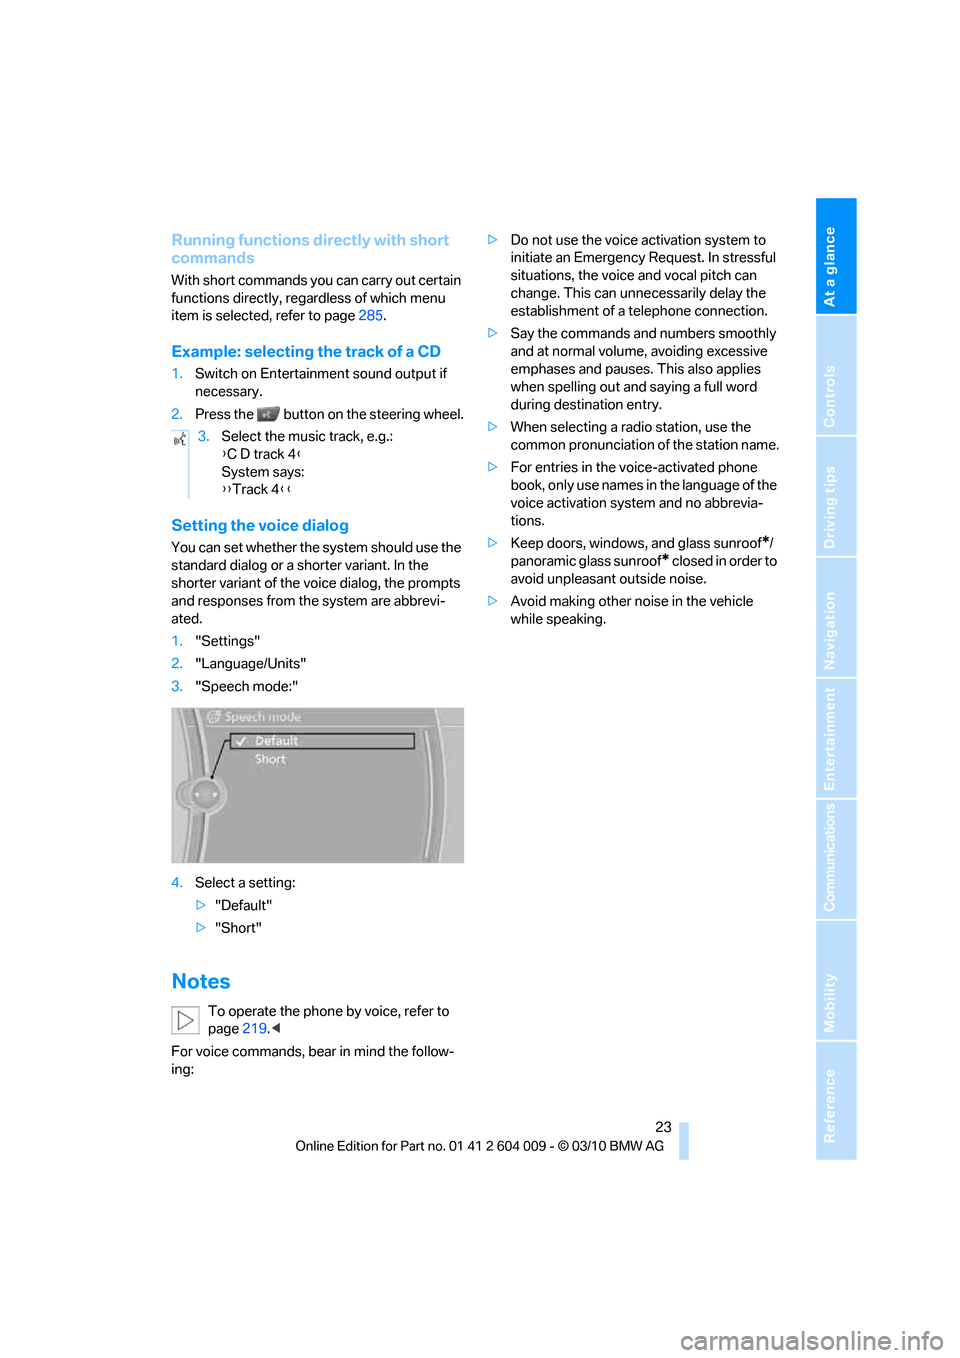
Setting the voice dialog
You can set whether the system should use the
standard dialog or a shorter variant. In the
shorter variant of the voice dialog, the prompts
and responses from the system are abbrevi-
ated.
1."Settings"
2."Language/Units"
3."Speech mode:"
4.Select a setting:
>"Default"
>"Short"
Notes
To operate the phone by voice, refer to
page219.<
For voice commands, bear in mind the follow-
ing:>Do not use the voice activation system to
initiate an Emergency Request. In stressful
situations, the voice and vocal pitch can
change. This can unnecessarily delay the
establishment of a telephone connection.
>Say the commands and numbers smoothly
and at normal volume, avoiding excessive
emphases and pauses. This also applies
when spelling out and saying a full word
during destination entry.
>When selecting a radio station, use the
common pronunciation of the station name.
>For entries in the voice-activated phone
book, only use names in the language of the
voice activation system and no abbrevia-
tions.
>Keep doors, windows, and glass sunroof
*/
panoramic glass sunroof
* closed in order to
avoid unpleasant outside noise.
>Avoid making other noise in the vehicle
while speaking. 3.Select the music track, e.g.:
{C D track 4}
System says:
{{Track 4}}
Page 88 of 312
Controls Overview
86 3."Format:"
4.Select the desired format.
The date format is stored.
Brightness of Control Display
The brightness is automatically adapted to the
ambient lighting conditions. However, you can
change the basic setting.
1."Settings"
2."Control display"
3."Brightness"
4.Turn the controller until the desired setting
is selected.
5.Press the controller.
The setting is stored for the remote control cur-
rently in use. In bright conditions, for example,
the brightness control may not be clearly visi-
ble.
Setting the units of measure
You can change the units of measure for con-
sumption, distances, temperature and pres-
sure.1."Settings"
2."Language/Units"
3.Select the desired menu item.
4.Select the desired unit.
The settings are stored for the remote control
currently in use.
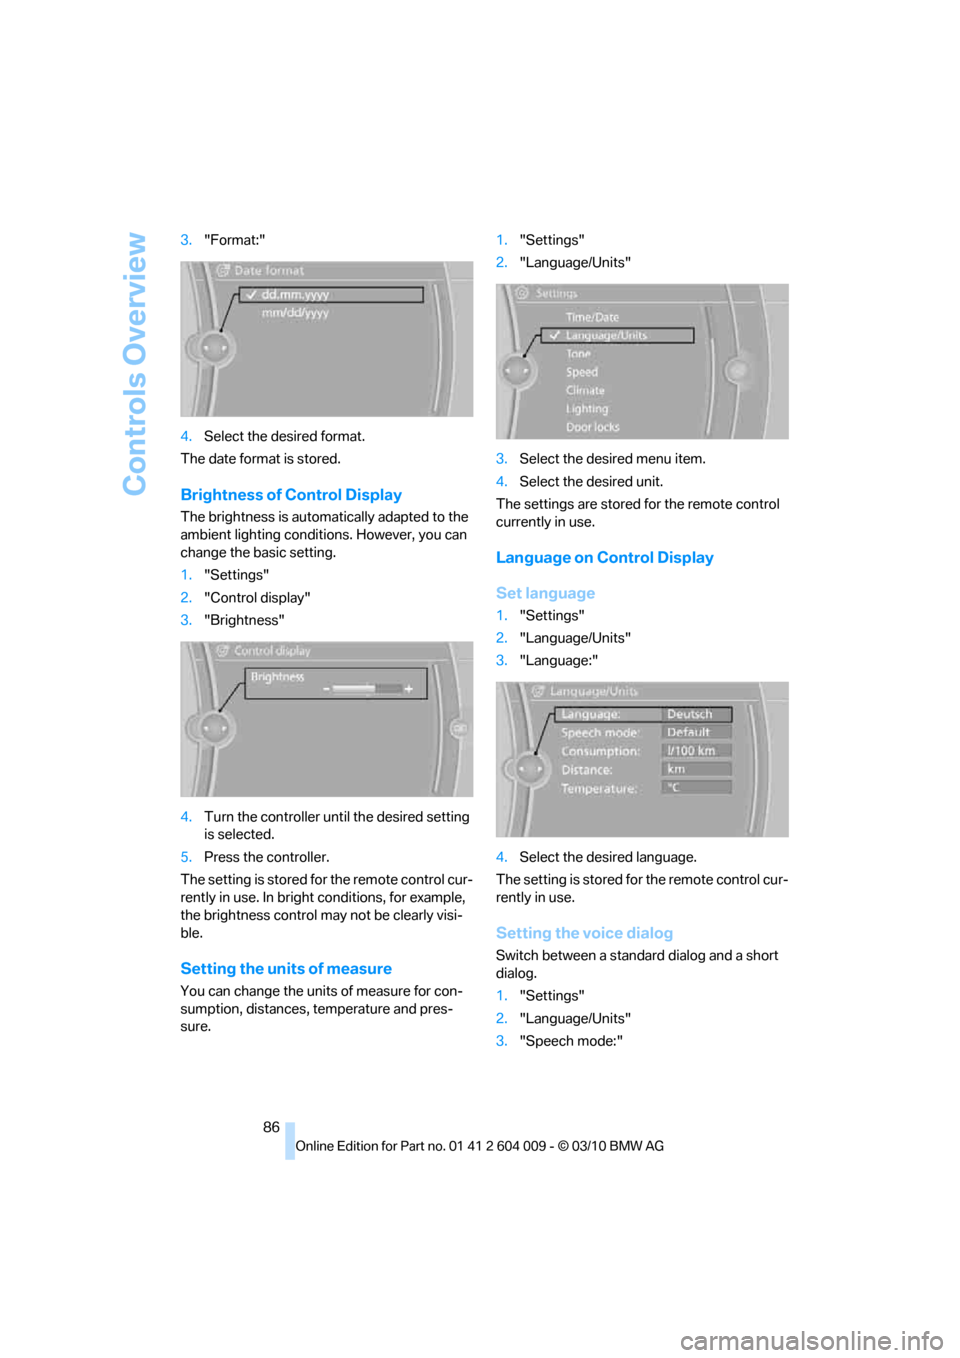
Language on Control Display
Set language
1."Settings"
2."Language/Units"
3."Language:"
4.Select the desired language.
The setting is stored for the remote control cur-
rently in use.
Setting the voice dialog
Switch between a standard dialog and a short
dialog.
1."Settings"
2."Language/Units"
3."Speech mode:"
Page 128 of 312
Practical interior accessories
126 The display indicates the cardinal or intercardi-
nal direction in which you are currently driving.
Operating principle
You can run various functions by pressing the
adjustment button with a pointed object, e.g. a
ball-point pen etc. The following setting options
are displayed consecutively, depending on how
long the adjustment button is pressed:>Press briefly: switch display on/off
>3 to 6 seconds: set compass zone
>6 to 9 seconds: calibrate compass
>9 to 12 seconds: set left/right-hand drive
vehicle
>12 to 15 seconds: setting language
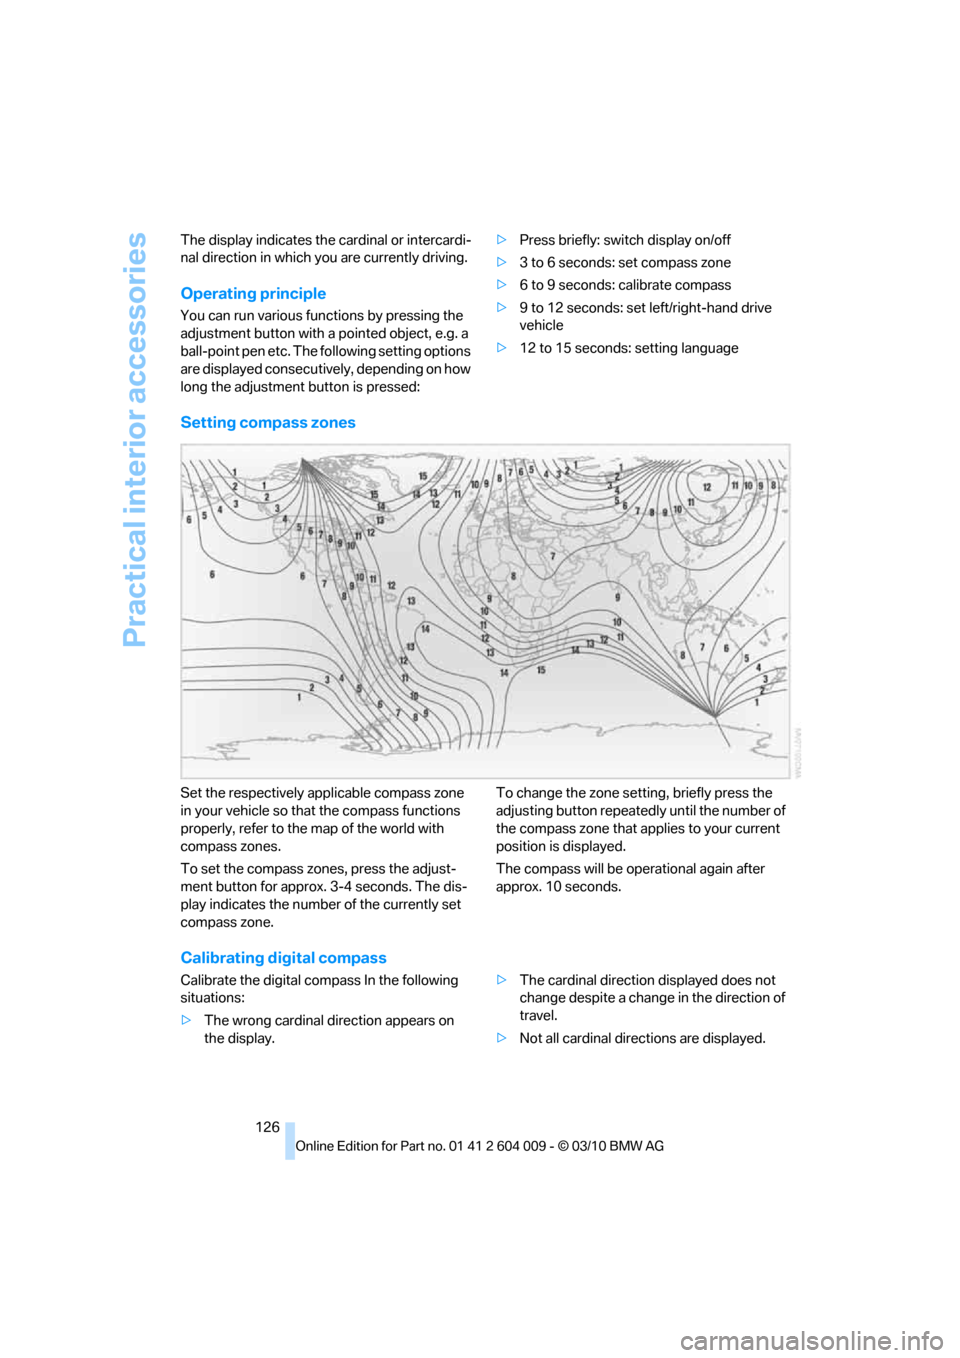
Setting compass zones
Set the respectively applicable compass zone
in your vehicle so that the compass functions
properly, refer to the map of the world with
compass zones.
To set the compass zones, press the adjust-
ment button for approx. 3-4 seconds. The dis-
play indicates the number of the currently set
compass zone.To change the zone setting, briefly press the
adjusting button repeatedly until the number of
the compass zone that applies to your current
position is displayed.
The compass will be operational again after
approx. 10 seconds.
Calibrating digital compass
Calibrate the digital compass In the following
situations:
>The wrong cardinal direction appears on
the display.>The cardinal direction displayed does not
change despite a change in the direction of
travel.
>Not all cardinal directions are displayed.
Page 129 of 312
Controls
127Reference
At a glance
Driving tips
Communications
Navigation
Entertainment
Mobility
Procedure
1.Make sure that there are no large metal
objects or overhead power lines in the vicin-
ity of your vehicle and that you have enough
space to drive in a circle.
2.Enter the currently applicable compass
zone.
3.Press the adjustment button for approx. 6-
7 seconds to display C. Then drive in a
complete circle at least once at a maximum
speed of 4 mph/7 km/h.
If the calibration is successful, display C is
replaced with the points of the compass.
Setting right/left-hand drive vehicle
Your digital compass is already set to right or
left-hand drive vehicle to match your vehicle at
the factory.
Setting language
You can set the language of the display:
Press the adjustment button for approx. 12-
13 seconds. Briefly press the adjustment but-
ton again to change between English "E" and
German "O".
The setting is automatically stored after approx.
10 seconds.
Roller sun blinds for rear side
windows*
Pull the loop of the roller sun blind and hook
onto bracket.
Do not open the window with the roller
blind raised, as otherwise there is a dan-
ger of damage, and therefore a danger of inju-
ries at higher speeds.<
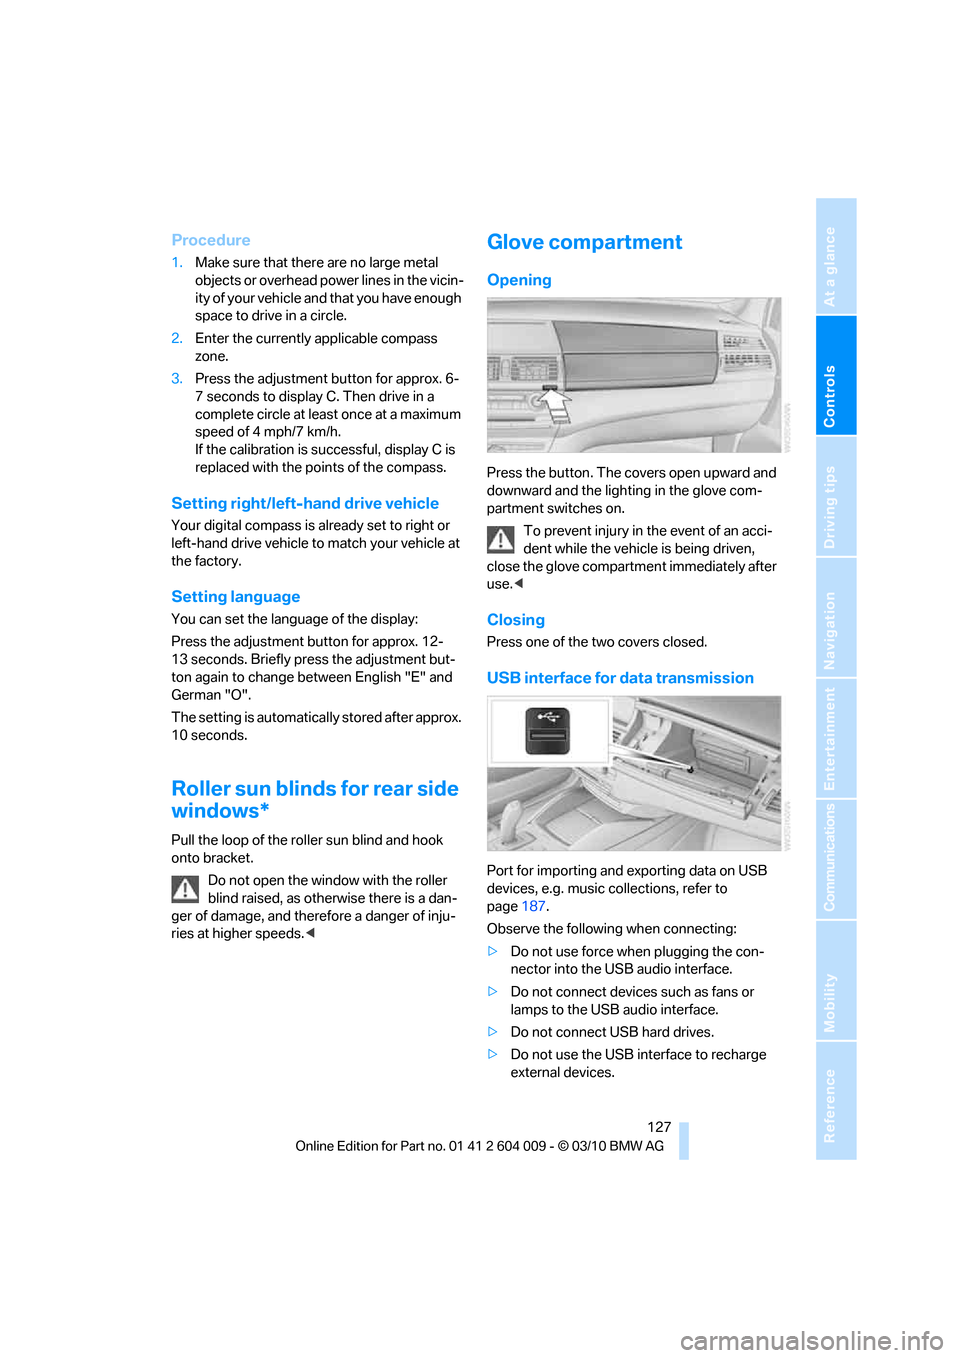
Glove compartment
Opening
Press the button. The covers open upward and
downward and the lighting in the glove com-
partment switches on.
To prevent injury in the event of an acci-
dent while the vehicle is being driven,
close the glove compartment immediately after
use.<
Closing
Press one of the two covers closed.
USB interface for data transmission
Port for importing and exporting data on USB
devices, e.g. music collections, refer to
page187.
Observe the following when connecting:
>Do not use force when plugging the con-
nector into the USB audio interface.
>Do not connect devices such as fans or
lamps to the USB audio interface.
>Do not connect USB hard drives.
>Do not use the USB interface to recharge
external devices.
Page 157 of 312
Navigation
Driving tips
155Reference
At a glance
Controls
Communications
Entertainment
Mobility
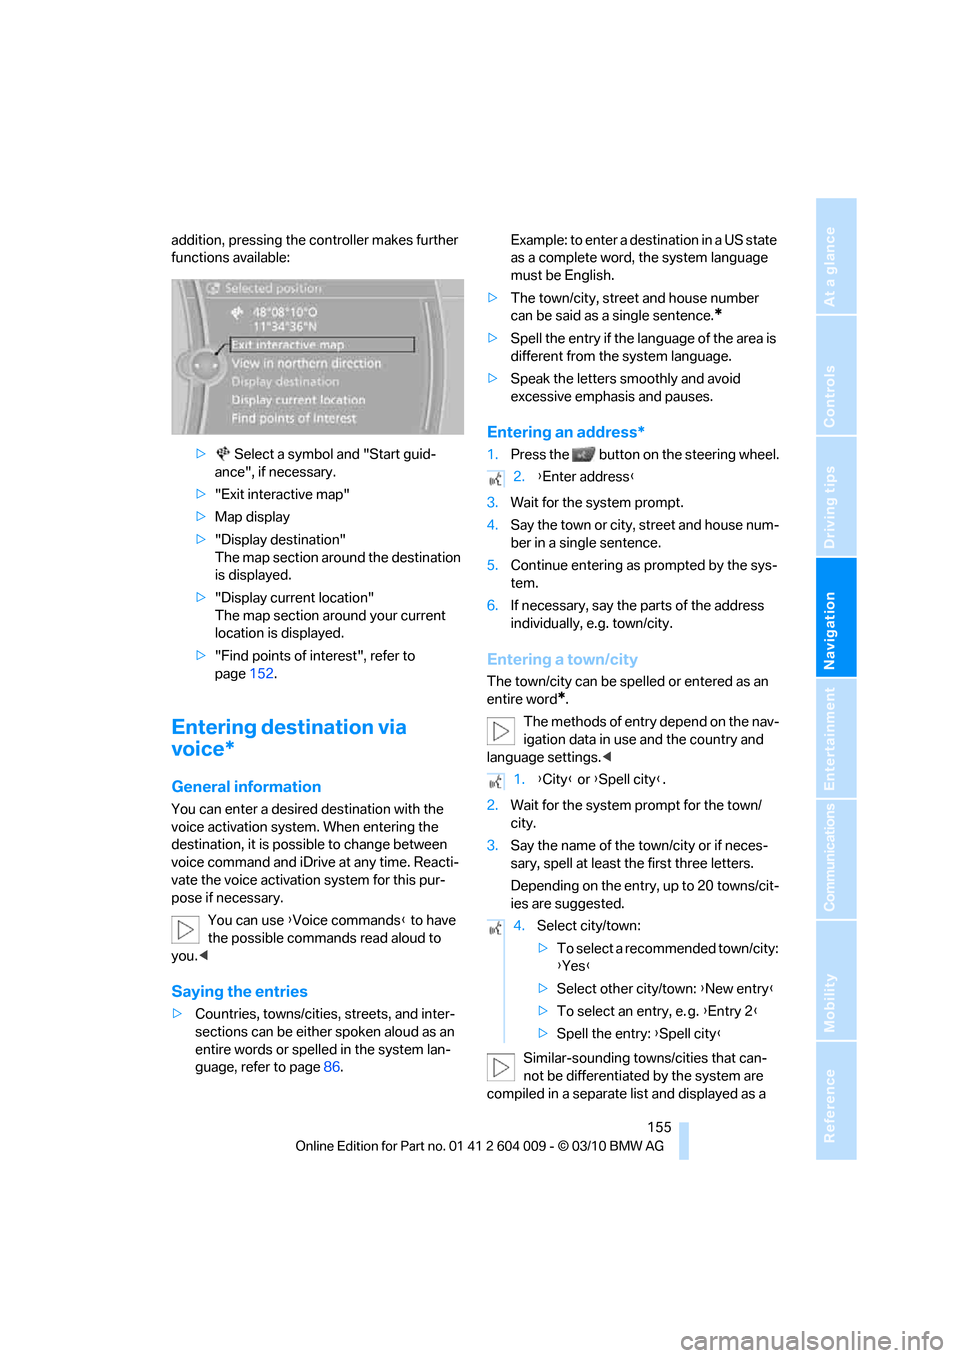
addition, pressing the controller makes further
functions available:
> Select a symbol and "Start guid-
ance", if necessary.
>"Exit interactive map"
>Map display
>"Display destination"
The map section around the destination
is displayed.
>"Display current location"
The map section around your current
location is displayed.
>"Find points of interest", refer to
page152.
Entering destination via
voice*
General information
You can enter a desired destination with the
voice activation system. When entering the
destination, it is possible to change between
voice command and iDrive at any time. Reacti-
vate the voice activation system for this pur-
pose if necessary.
You can use {Voice commands} to have
the possible commands read aloud to
you.<
Saying the entries
>Countries, towns/cities, streets, and inter-
sections can be either spoken aloud as an
entire words or spelled in the system lan-
guage, refer to page86.Example: to enter a destination in a US state
as a complete word, the system language
must be English.
>The town/city, street and house number
can be said as a single sentence.
*
>Spell the entry if the language of the area is
different from the system language.
>Speak the letters smoothly and avoid
excessive emphasis and pauses.
Entering an address*
1.Press the button on the steering wheel.
3.Wait for the system prompt.
4.Say the town or city, street and house num-
ber in a single sentence.
5.Continue entering as prompted by the sys-
tem.
6.If necessary, say the parts of the address
individually, e.g. town/city.
Entering a town/city
The town/city can be spelled or entered as an
entire word
*.
The methods of entry depend on the nav-
igation data in use and the country and
language settings.<
2.Wait for the system prompt for the town/
city.
3.Say the name of the town/city or if neces-
sary, spell at least the first three letters.
Depending on the entry, up to 20 towns/cit-
ies are suggested.
Similar-sounding towns/cities that can-
not be differentiated by the system are
compiled in a separate list and displayed as a
2.{Enter address}
1.{City} or {Spell city}.
4.Select city/town:
>To select a recommended town/city:
{Yes}
>Select other city/town: {New entry}
>To select an entry, e. g. {Entry 2}
>Spell the entry: {Spell city}
Page 184 of 312
CD/DVD player and CD/DVD changer
182 In fast forward/reverse: the speed increases
every time the controller is pressed. To stop,
start playback.
DVD menu
1.If necessary, turn the controller to open the
video menu.
2. "DVD menu"
The DVD menu is displayed. The display
depends on the contents of the DVD.
>To select menu items: move and press the
controller.
>To change to the Video menu: turn the con-
troller and select "Back".
Settings for DVD/VCD
For some DVDs, settings can only be made via
the DVD menu; refer also to the information on
your DVD.
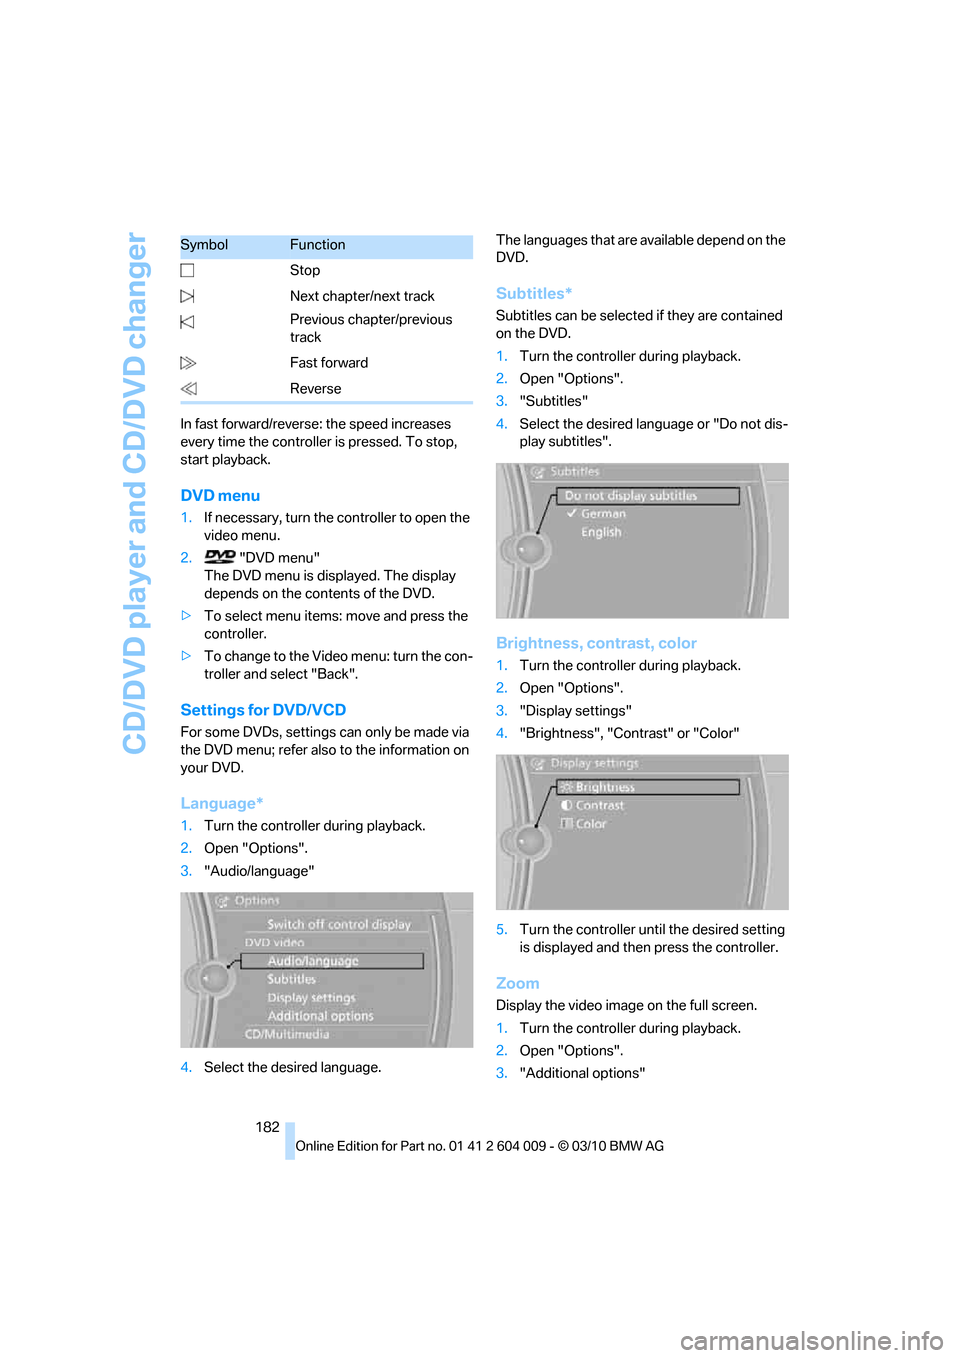
Language*
1.Turn the controller during playback.
2.Open "Options".
3."Audio/language"
4.Select the desired language.The languages that are available depend on the
DVD.
Subtitles*
Subtitles can be selected if they are contained
on the DVD.
1.Turn the controller during playback.
2.Open "Options".
3."Subtitles"
4.Select the desired language or "Do not dis-
play subtitles".
Brightness, contrast, color
1.Turn the controller during playback.
2.Open "Options".
3."Display settings"
4."Brightness", "Contrast" or "Color"
5.Turn the controller until the desired setting
is displayed and then press the controller.
Zoom
Display the video image on the full screen.
1.Turn the controller during playback.
2.Open "Options".
3."Additional options" Stop
Next chapter/next track
Previous chapter/previous
track
Fast forward
Reverse
SymbolFunction
Page 187 of 312
Navigation
Entertainment
Driving tips
185Reference
At a glance
Controls
Communications
Mobility
Selecting the language*
The languages that are available depend on the
DVD.
1."CD/Multimedia"
2."CD/DVD"
3.Select the desired DVD.
4.Open "Options".
5."Audio/language"
6.Select the desired language.
Notes
BMW CD/DVD players and changers are
officially designated Class 1 laser prod-
ucts. Do not operate if the cover is damaged,
otherwise severe eye damage can result.
Do not use self-recorded CDs/DVDs with labels
applied as these can become detached during
playback due to heat buildup and can cause
irreparable damage to the device.
Only use round CDs/DVDs with a standard
diameter of 4.7 inch/12 cm and do not play
CDs/DVDs with an adapter, e.g. CD singles, as
otherwise the CDs or the adapter may jam and
no longer eject properly.
Do not use a combined CD/DVD, e.g. DVD
Plus,
otherwise the CD/DVD may jam and no longer
eject properly.<
General malfunctions
BMW CD/DVD changers and players have been
optimized for performance in vehicles. In some
instances they may be more sensitive to faulty
CDs/DVDs than stationary devices would be.
If a CD/DVD cannot be played, first check
whether it has been inserted correctly.
Humidity
High levels of humidity can lead to condensa-
tion on the CD/DVD or the laser's scan lens and
temporarily prevent playback.
Malfunctions with individual CDs/DVDs
If malfunctions occur only with particular CDs/
DVDs, this can be due to one of the following
causes:
Self-recorded CDs/DVDs
Possible reasons for malfunctions with self-
recorded CDs/DVDs are, e.g., inconsistent
data-creation or recording processes, or poor
quality or old age of the CD/DVD blank.
Only label CDs/DVDs on the upper side with a
pen intended for this purpose.
Damage
Avoid fingerprints, dust, scratches and mois-
ture.
Store CDs/DVDs in a sleeve.
Do not subject CDs/DVDs to temperatures
above 1227/506, nor to high humidity levels
or direct sunlight.
CDs/DVDs with copy protection
CDs/DVDs are often provided with a copy pro-
tection feature by the manufacturer. This can
m e a n t h a t s o m e C D s / D V D s c a n n o t b e p l a y e d o r
can only be played to a limited extent.
MACROVISION
This product contains copyrighted technology
that is based on multiple registered U.S. pat-
ents and the intellectual property of the Macro-
vision Corporation and other manufacturers.
Use of this copyrighted material must be
approved by Macrovision. Unless otherwise
agreed with Macrovision, media with this pro-
tection may only be used for private purposes.
The copying of this technology is strictly forbid-
den.
DTS Digital Surround™
Manufactured under license under U.S.
Patent Numbers: 5,451,942;
5,956,674; 5,974,380; 5,978,762; 6,487,535 &
and other patents granted and registered in the
USA and worldwide. DTS and the logo are reg-
istered trademarks & DTS Digital Surround and
Page 200 of 312
DVD system in rear
198 >Press the arrow buttons:
To switch between windows.
>Press the button:
To activate the menu item.
The transmission time of the remote control is
limited in accordance with legal guidelines. A
function can be repeated by pressing or turning
the appropriate button or knob.
Changing batteries
1.Press the detent and remove the cover.
2.Change the batteries. The type and installa-
tion position are marked on the bottom of
the battery compartment.
3.Close the cover.
Return old batteries to a recycling center
or to your BMW Sports Activity Vehicle
Center.<
Setting the language of the
DVD system
1.Select a CD/DVD track.
2.Press the button.
3.Select "Tone".
4.Press the button.
5.Switch to the top window.
6.Select "Language".
7.Press the button.
8.Select the desired language.
9.Press the button.
Sound output via speakers
In addition to the headphones, you can also play
the sound via the vehicle speakers.
1."CD/Multimedia"
2."External devices"
3."AUX rear"
Switching DVD system on/off
Press the button on the CD-/DVD player or
under the desired screen.
The DVD system switches on automatically
when a CD or DVD is inserted.
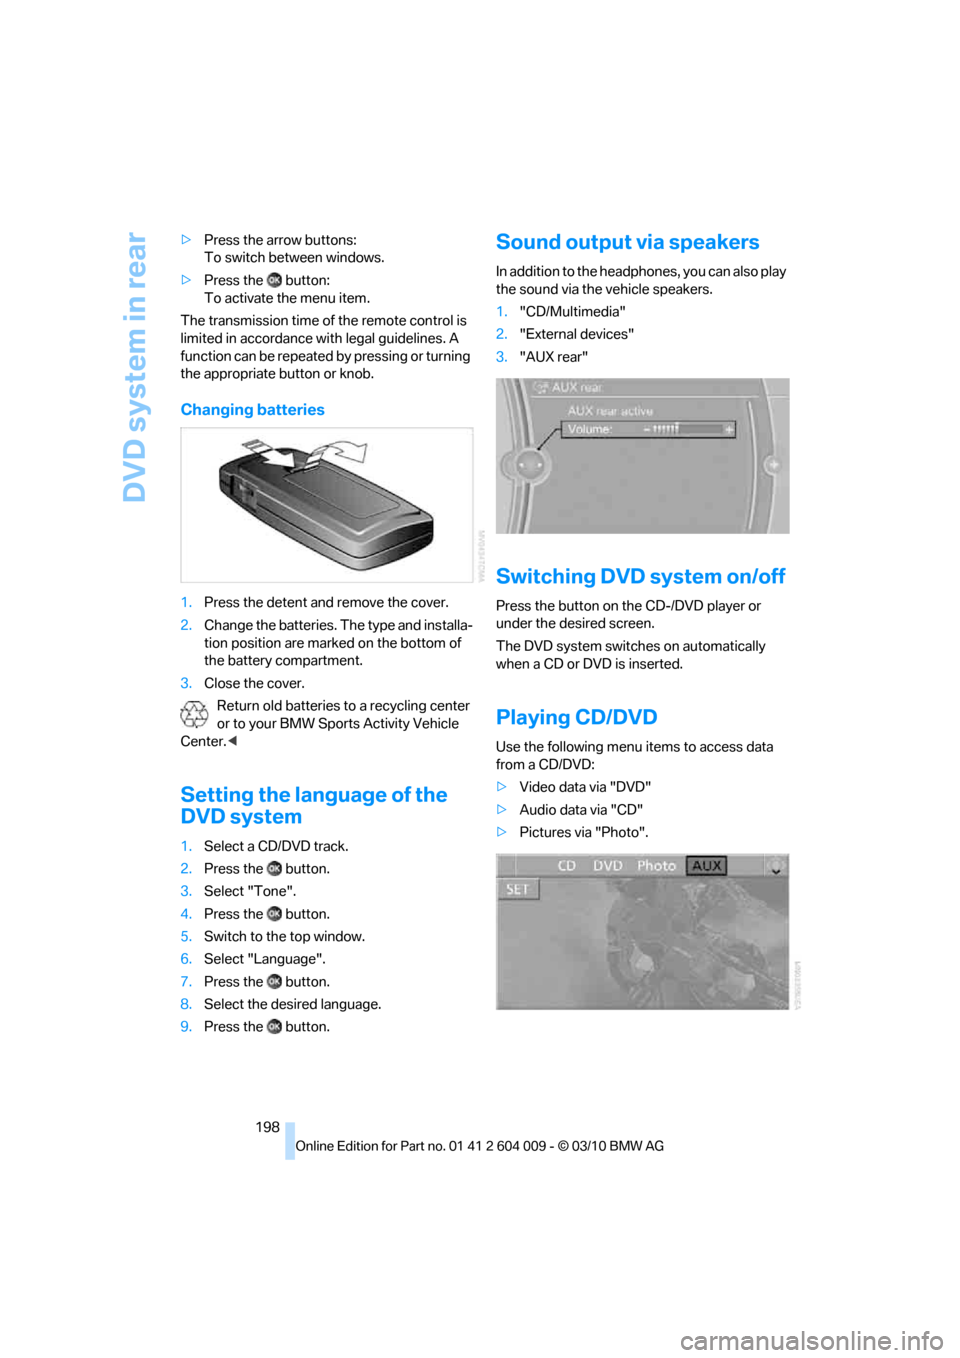
Playing CD/DVD
Use the following menu items to access data
from a CD/DVD:
>Video data via "DVD"
>Audio data via "CD"
>Pictures via "Photo".
Page 202 of 312
DVD system in rear
200 Or:
Press the button on the remote control to
exit the DVD control.
Fast forward/reverse
Forward/reverse with DVD control
1.Press the button on the remote con-
trol during playback.
2.Select the symbol.
3.Press the button.
4.Press the button several times to
increase the fast forward/reverse speed.
The DVD playback will be distorted.
To cancel fast forward/reverse:
1.Select the symbol.
2.Press the button.
Or:
Press the button on the CD/DVD player.
The DVD will start play at the point selected.
Forward/reverse with remote control
Press and hold the button until you reach
the desired point.
Or:
1.During playback, turn the thumbwheel.
Fast forward/reverse is interrupted.
2.Continue to turn the thumbwheel.
The speed is increased.
3.Press the button on the CD/DVD player.
Fast forward/reverse is interrupted. The
DVD will start play at the point selected.
Skipping chapter
You can change to the next or previous chapter
during playback.
1.Press the button on the remote con-
trol during playback.
2.Select the symbol.
3.Press the button repeatedly, continuing
until you reach the desired chapter.Or:
Press the button on the left or right on the
remote control repeatedly until you reach the
desired chapter.
Freeze frame
1.Press the button on the remote con-
trol during playback.
2.Select the symbol.
3.Press the button.
To continue playback:
1.Select the or symbol.
2.Press the button.
As an alternative, you can also stop and con-
tinue playback with the button on the CD/
DVD player.
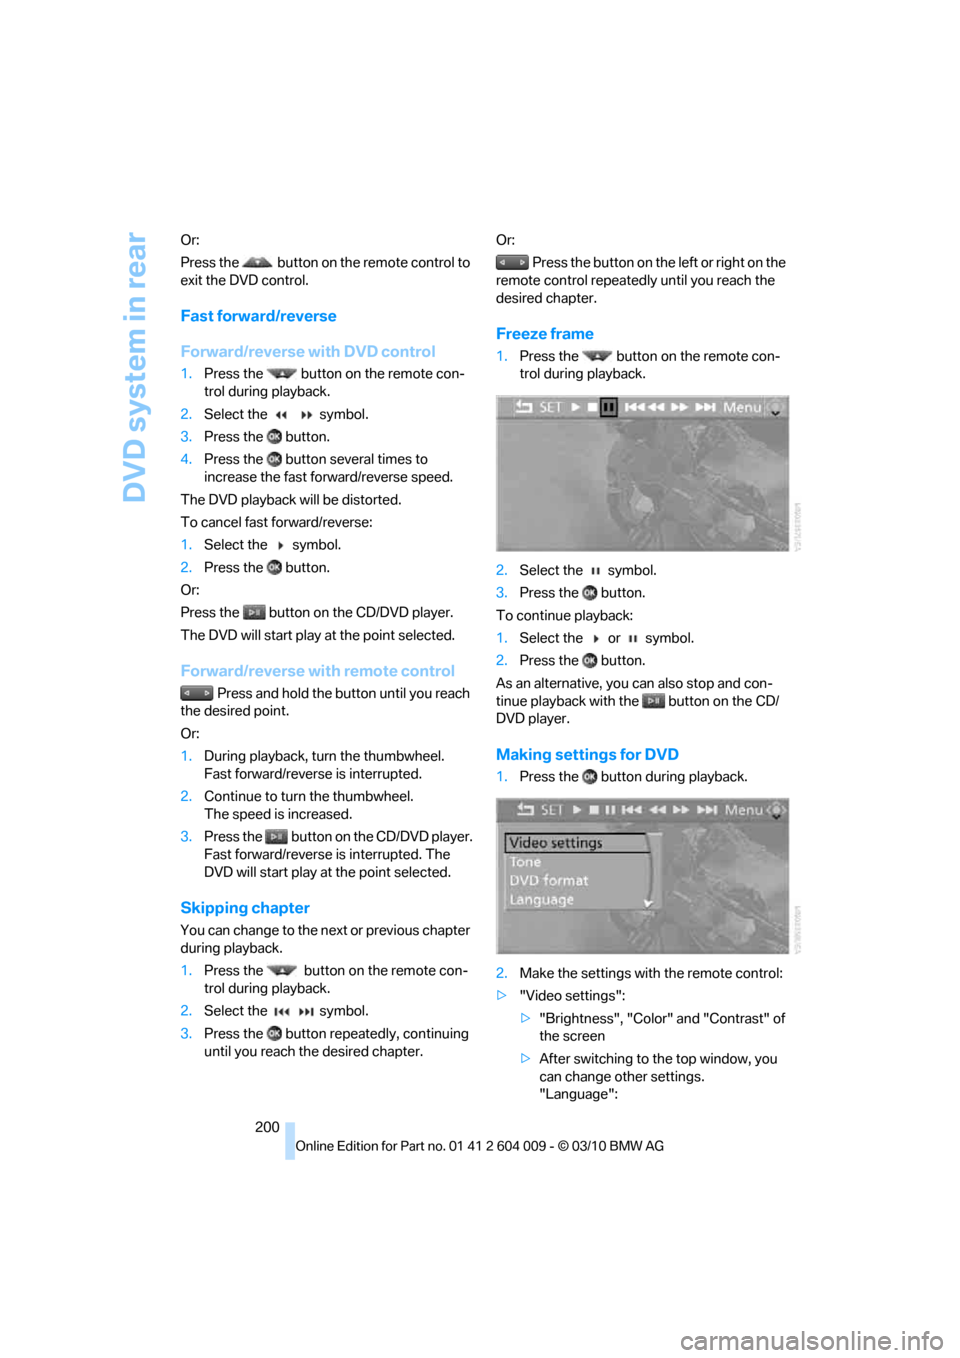
Making settings for DVD
1.Press the button during playback.
2.Make the settings with the remote control:
>"Video settings":
>"Brightness", "Color" and "Contrast" of
the screen
>After switching to the top window, you
can change other settings.
"Language":
Page 207 of 312
Navigation
Entertainment
Driving tips
205Reference
At a glance
Controls
Communications
Mobility
Displaying images
1.Use the buttons or the thumbwheel of the
remote control to select an image.
2.Press the button.
3.Displaying images:
>Scroll using the menu navigation but-
tons of the remote control
>Show slide show:
Turn the thumbwheel to adjust how long
each image is displayed.
Stop slide show:
Select "Stop"
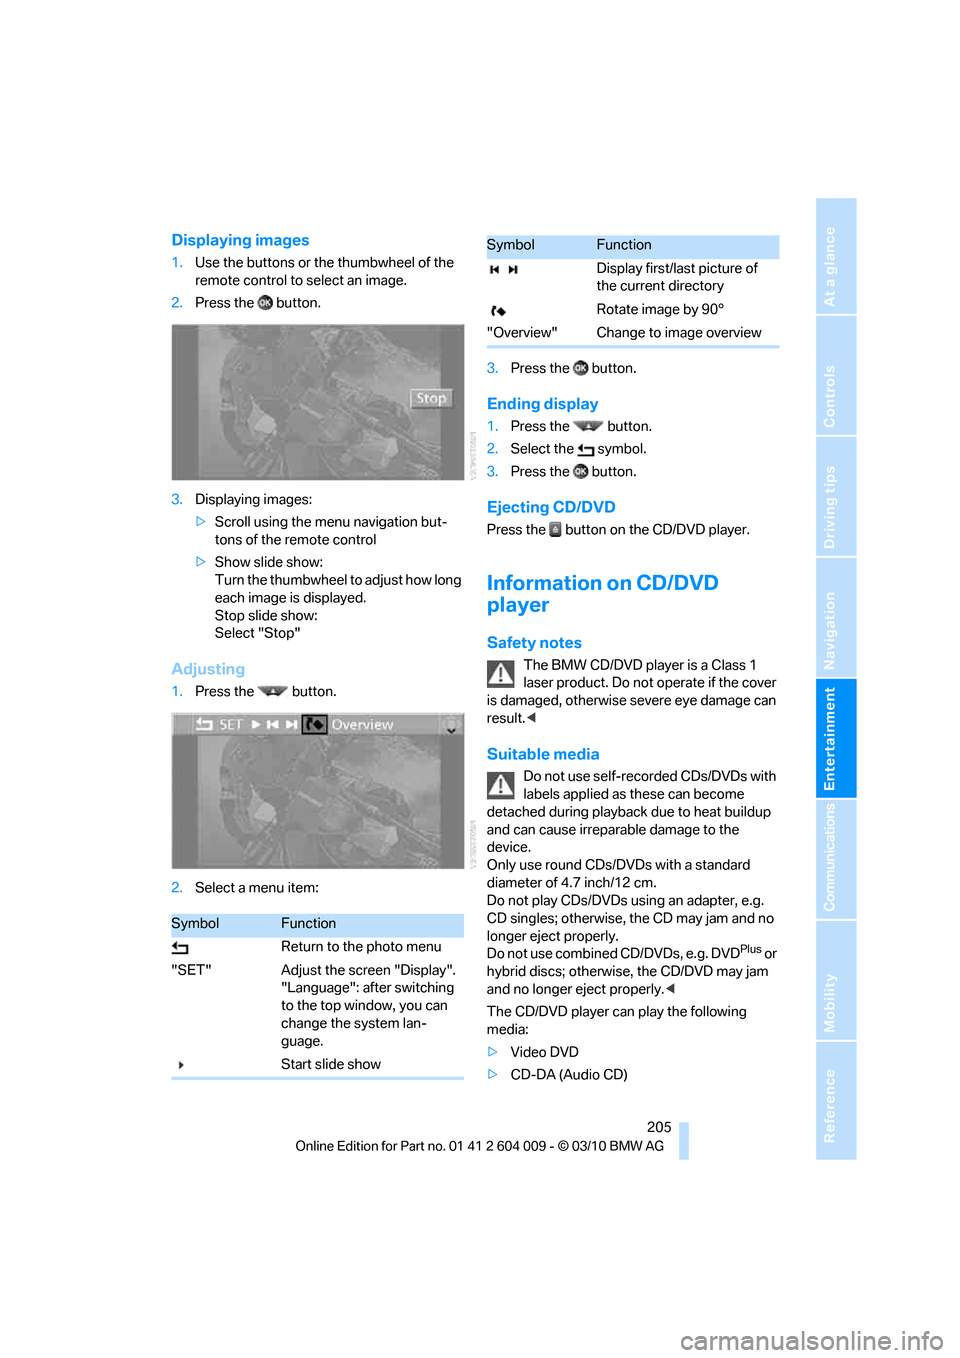
Adjusting
1.Press the button.
2.Select a menu item:3.Press the button.
Ending display
1.Press the button.
2.Select the symbol.
3.Press the button.
Ejecting CD/DVD
Press the button on the CD/DVD player.
Information on CD/DVD
player
Safety notes
The BMW CD/DVD player is a Class 1
laser product. Do not operate if the cover
is damaged, otherwise severe eye damage can
result.<
Suitable media
Do not use self-recorded CDs/DVDs with
labels applied as these can become
detached during playback due to heat buildup
and can cause irreparable damage to the
device.
Only use round CDs/DVDs with a standard
diameter of 4.7 inch/12 cm.
Do not play CDs/DVDs using an adapter, e.g.
CD singles; otherwise, the CD may jam and no
longer eject properly.
Do not use combined CD/DVDs, e.g. DVD
Plus or
hybrid discs; otherwise, the CD/DVD may jam
and no longer eject properly.<
The CD/DVD player can play the following
media:
>Video DVD
>CD-DA (Audio CD)
SymbolFunction
Return to the photo menu
"SET" Adjust the screen "Display".
"Language": after switching
to the top window, you can
change the system lan-
guage.
Start slide show
Display first/last picture of
the current directory
Rotate image by 90°
"Overview" Change to image overview
SymbolFunction