navigation update BMW X5 2011 E70 Owner's Manual
[x] Cancel search | Manufacturer: BMW, Model Year: 2011, Model line: X5, Model: BMW X5 2011 E70Pages: 312, PDF Size: 8.91 MB
Page 150 of 312

Navigation system
148
Navigation system
General information
The navigation system can determine the pre-
cise position of the vehicle, with the aid of satel-
lites and vehicle sensors, and can reliably guide
you to every entered destination.
Enter data only with the vehicle station-
ary, and always give priority to the appli-
cable traffic regulations in the event of any con-
tradiction between traffic and road conditions
and the instructions issued by the navigation
system. Failure to take to this precaution can
place you in violation of the law and put vehicle
occupants and other road users in danger.<
Navigation data
General information
Navigation data are stored in the vehicle and
can be updated.
Navigation data and authorization codes are
available from your BMW Sports Activity Vehi-
cle Center.
Updating the data can take several hours,
depending on the volume of data.
>The data are updated as you drive.
>The update is resumed automatically when
a trip is continued after an interruption.
>The basic navigation is available during the
trip.
>The data are stored in the vehicle.
>After the updating process is complete, the
system restarts.
>The medium with the navigation data can
be removed after the update.
Updating the navigation data
Inserting navigation DVD
1.Insert the navigation DVD into the DVD
player with the label facing up.
2.Follow the instructions on the Control Dis-
play.
3.Enter the authorization code of the naviga-
tion DVD and change the DVD if needed.
Removing navigation DVD
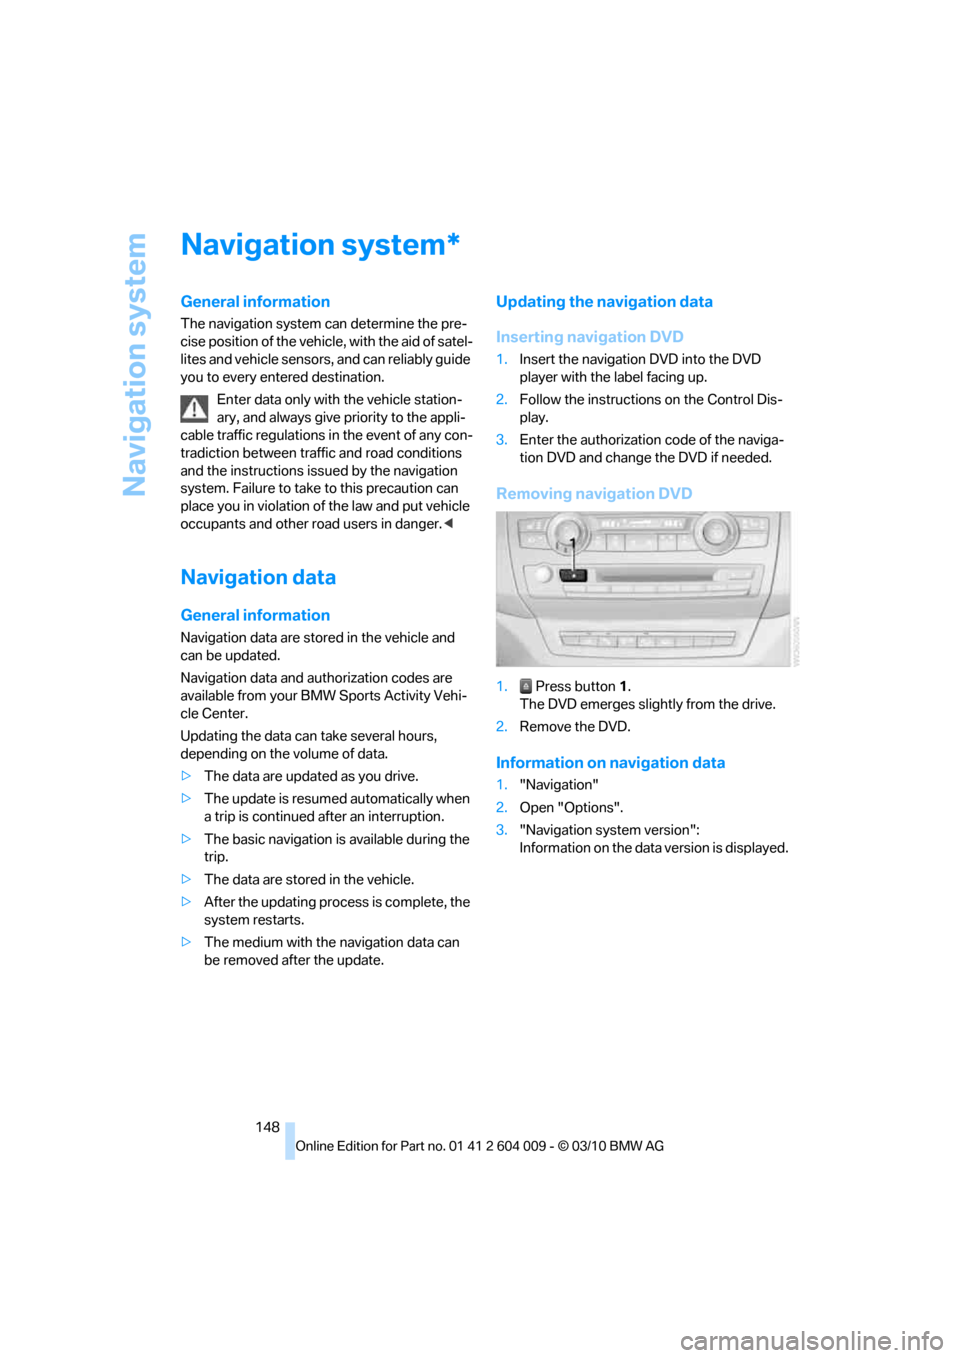
1. Press button1.
The DVD emerges slightly from the drive.
2.Remove the DVD.
Information on navigation data
1."Navigation"
2.Open "Options".
3."Navigation system version":
Information on the data version is displayed.
*
Page 163 of 312

Navigation
Driving tips
161Reference
At a glance
Controls
Communications
Entertainment
Mobility
Viewing the map
1.Select the symbol.
2.Select a setting:
>"View facing north"
>"View in dir. of travel"
>"Perspective view"
>"Arrow display"
3.Press the controller.
Changing map scale
Select "Interactive map".
>Moving map: move the controller in the cor-
responding direction.
>Shifting map diagonally: move the control-
ler in the corresponding direction and turn
the controller.
Changing scale
1.Select the symbol.
2.Turn the controller to change the scale.
Automatic scaling of the map
In the map display facing north, turn the control-
ler in any direction until AUTO is displayed as
the map scale.
The map shows the entire range from your loca-
tion to the destination.
Settings for the map display
The map appears on the Control Display.
1.Open "Options".
2."Settings"
3.Set the optimum map view.
>"Day/night mode"
Select and create the necessary settings
depending on the light conditions. If
"Traffic conditions/gray map" is acti-
vated, this setting is disregarded.
>"Satellite images"
Depending on availability and resolution, satellite images
* are displayed at scales
of 1 mile to 600 miles/2 km to 1,000 km .
>"Perspective view in 3D"
Displays a spatial view. Prominent land-
marks contained in the navigation data
are displayed on the map in 3D.
>"Traffic conditions/gray map"
The map is optimized to display traffic
information. Symbols for the special
destinations are no longer displayed.
Map view for the split screen display
The map view for the split screen can be
selected separately from the main screen.
1.Open "Options".
2."Split screen"
The split screen is switched on.
3.Move the controller to the right repeatedly
until the split screen content is selected.
4.Select the map view:
>"Arrow display"
>"Map facing north"
>"Map direction of travel"
>"Map view with perspective"
>"Exit ramp view"
Changing scale
1.Move the controller to the right until the
split screen is selected.
2.Turn the controller.
Traffic information*
You can display the traffic bulletins from radio
stations that broadcast the TMC (Traffic Mes-
sage Channel) of a traffic information service.
This information from the traffic information
service is continuously updated on the basis of
measurement data from traffic control centers
and information on traffic congestion.
During destination guidance, traffic bulletins
that are relevant to areas along the route are
automatically displayed and taken into account
Page 273 of 312

Mobility
271Reference
At a glance
Controls
Driving tips
Communications
Navigation
Entertainment
tion. In the same way, individual settings are lost
and must be updated again:
>Seat, mirror and steering wheel memory
The positions must be stored again, refer to
page44.
>Time and Date
The values must be updated again, refer to
pages85, 85.
>Radio
Radio stations must be stored again, refer
to page171.
>Navigation system
You must wait until the system becomes
functional again, refer to page165.
>Glass sunroof/panoramic glass sunroof
It may only be possible to raise the glass
sunroof/panoramic glass sunroof. The sys-
tem must be initialized, refer to page41.
>Digital compass
The system must be calibrated, refer to
page126.
>Active steering
The system automatically initializes for a
short time as you drive. During this time, the
system is deactivated, refer to page106.
>xDrive
The system automatically initializes as you
drive. During this time, indicator lamps light
up. If the lamps do not disappear during the
current trip, have the system checked.
Before removing the vehicle from stor-
age, consult your BMW Sports Activity
Vehicle Center.<
Fuses
Never attempt to repair a blown fuse and
do not replace a defective fuse with a sub-
stitute of another color or amperage rating, as
this could lead to a circuit overload, ultimately
resulting in a fire in the vehicle.<
A pair of plastic tweezers and instructions for
fuse allocation is stored with the fuses in the
cargo area.Spare fuses can be obtained from your BMW
Sports Activity Vehicle.
In interior
The fuses are located in the front passenger
footwell on the underside of the instrument
cluster.
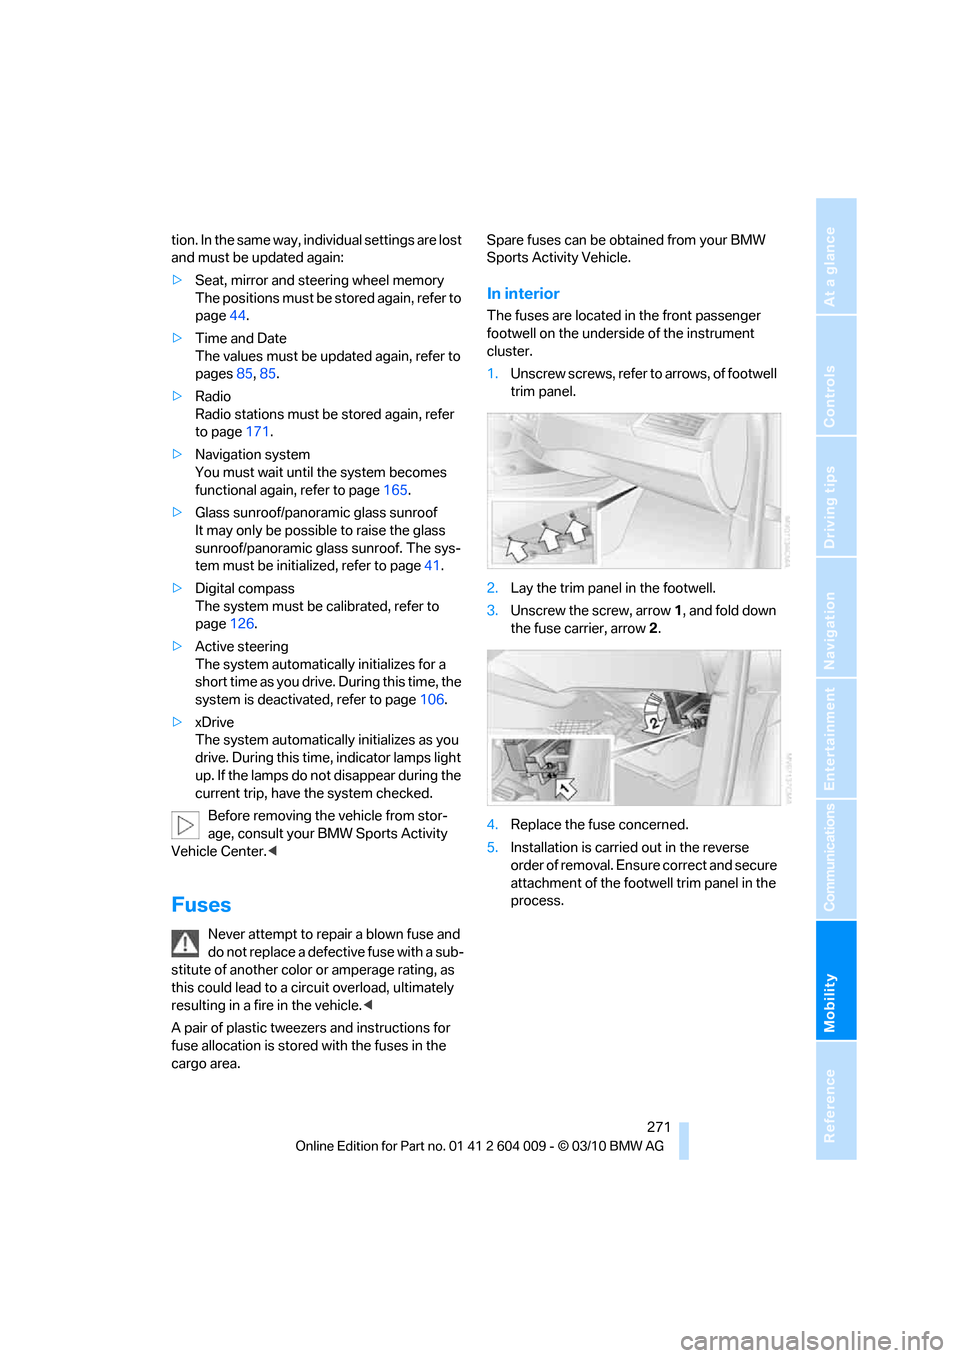
1.Unscrew screws, refer to arrows, of footwell
trim panel.
2.Lay the trim panel in the footwell.
3.Unscrew the screw, arrow1, and fold down
the fuse carrier, arrow2.
4.Replace the fuse concerned.
5.Installation is carried out in the reverse
order of removal. Ensure correct and secure
attachment of the footwell trim panel in the
process.